It is the hope today that the wind will die down and the clouds will clear, allowing us to go after the elusive comet C/2017 T2 PANSTARRS which will be next to M81 and M82 and should nicely fit in the Tak FS102.
I took a set of darks for the Tak whilst waiting for darkness, then I started to image M101, however very quickly it clouded over and shut the dome.
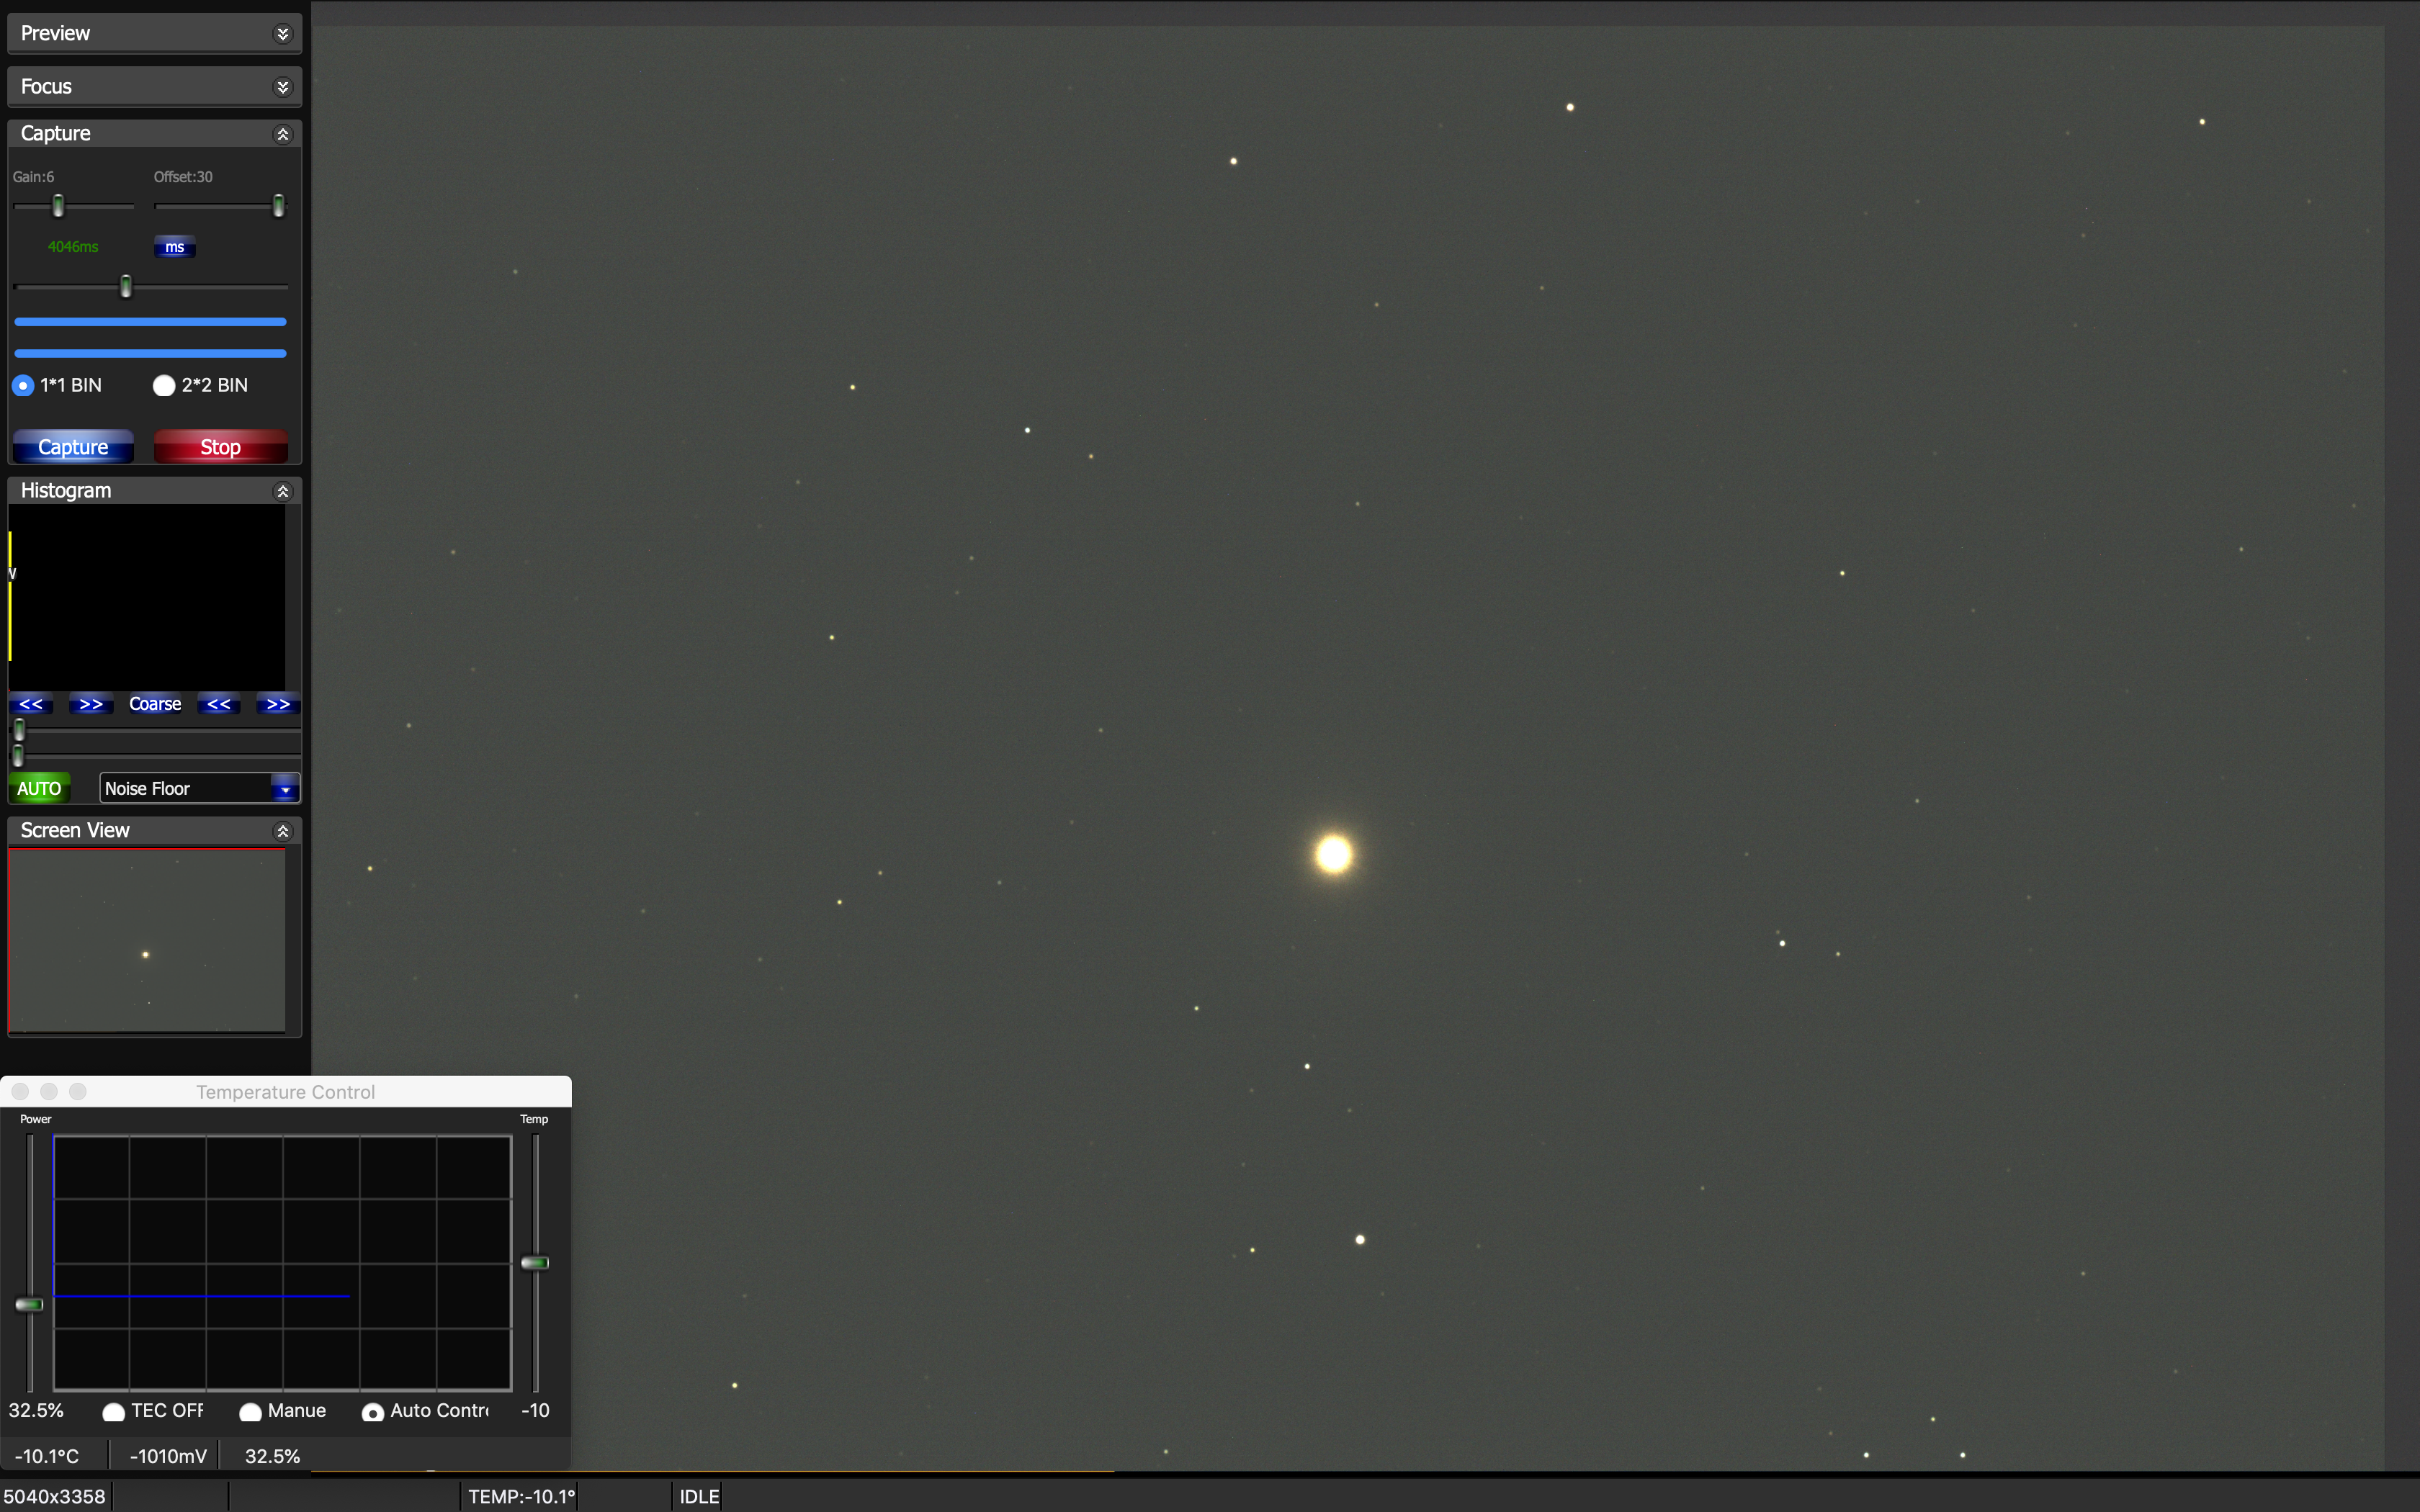
A gusty night, tried M101 but after a few frames it was cloudy. Used the Tak FS102 taking 5 minutes unguided as M101 was at the meridian. Gain 7 and Offset 30 which worked well but this is a faint galaxy.
I was joined by Bob remotely and also tried to get Venus alongside Mercury as they were close together, in the Esprit 120ED on the travel setup and Bob tried through the Tak in IMT3. However I could not locate in the Esprit on the travel setup due to cloud then the roof of the neighbours house. Bob on the other hand could fit either Mercury or Venus in but not both due to the rotation of the camera. It is currently sat at 118 degrees whereas the OS is set to 187. Once both cameras have been cleaned we will set these along with the Esprit on the Paramount MEII to the same field rotation.
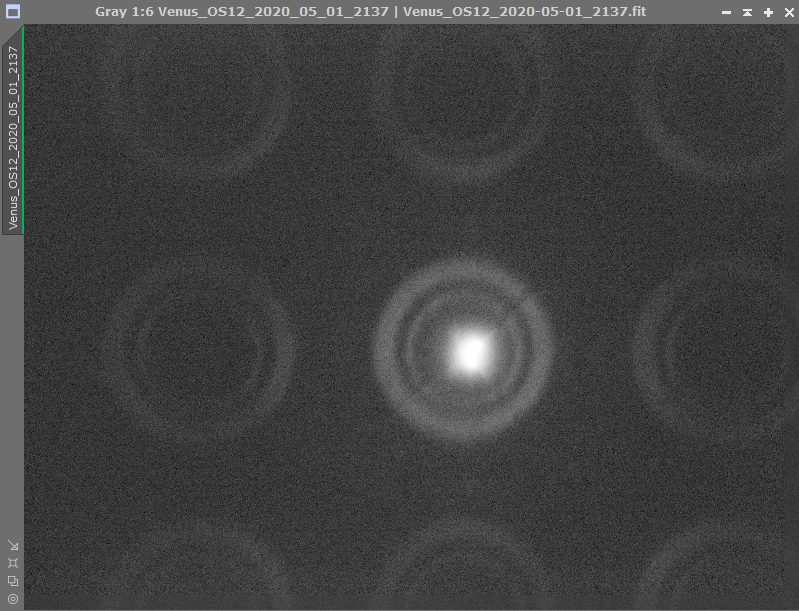
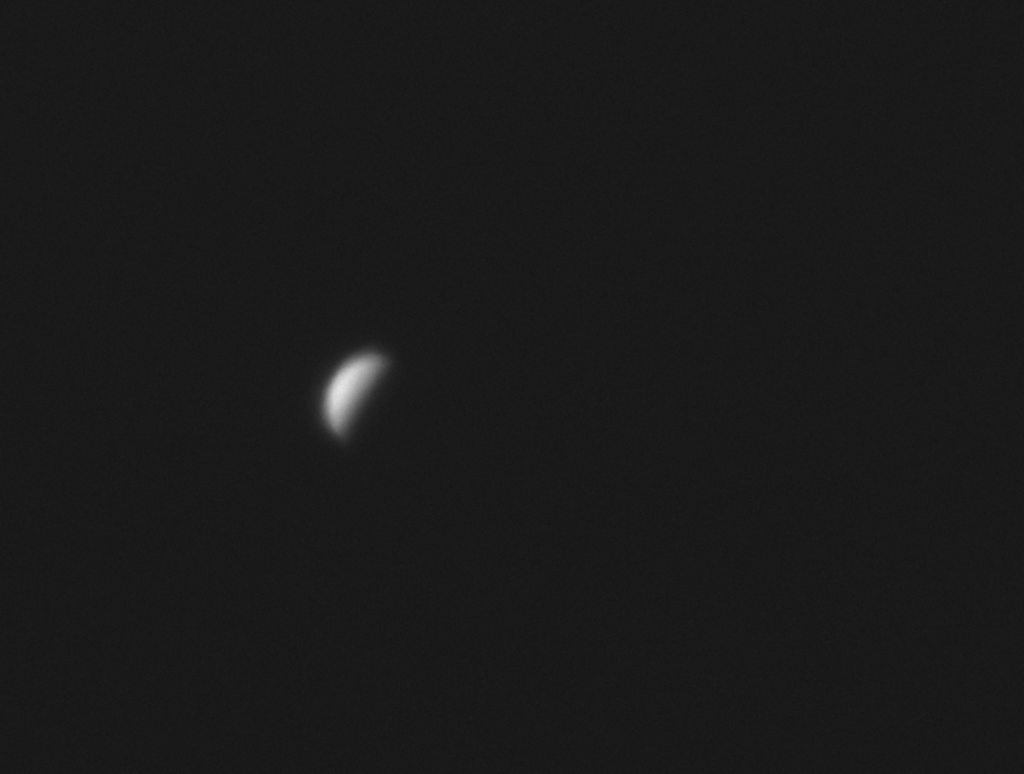
On opening the dome I slewed to Venus hoping to catch it before it disappeared below the horizon. I took a 1s Frame and Focus image just to confirm it was in the centre of the FoV and was puzzled by the resulting image.
At first I thought the 12″ was still covered so called Dave to check. He didn’t think the cover was in place as the last thing he’d done was to take some Flats. Dave confirmed that the cover was not in place but reported that I might be trying to view Venus through the trellis on the fence so I abandoned Venus and slewed to NGC3628 in Leo as it had just crossed the Meridian and I wanted to try and setup a profile to use my Tak FS-102 as a guide scope for Dave’s OS12″.
Previous attempts at guiding the OS with the QHY5 and MiniGuideScope combination had proved worse than imaging with the mount unguided.
Although I suspected we knew the root cause we hadn’t our research 🙁 which soon became apparent. I found a couple of rules of thumb, the first stated that ‘image scale in arc-seconds x 400 = max exposure time is seconds when guiding with a separate guide scope’.
For the ZWO ASI1600MM (3.8um pixel size) on the OS 12″ (2500mm fl)
((3.8/2500) x 206.265) x 400 = 125s
We can do better than that unguided.
The second ‘rule of thumb’ I found stated that the ‘Guide to Main train pixel ratio should not exceed 10:1.
Unfortunately the QHY5 MiniGuideScope to OS12″ ratio is close to 17.8:1, not good.
The QHY5 + MiniGuideScope scale is (3.75/130) x 206.265 = 5.95 arc-sec / pixel.
The OS 12″ + ZWO ASI1600MM scale is (3.8/2500) x 206.265 = 0.31 arc-sec/pixel.
The Tak FS-102 with the QHY168C scale is (3.75/820) x 206.265 = 0.94 arc-sec/pixel
So if we try the OS 12″ with the Tak as the guide scope the ratio is closer to 2.8:1 which sounds like a better proposition.
Camera -23°C, focus point 74534, temperature 15.81℃
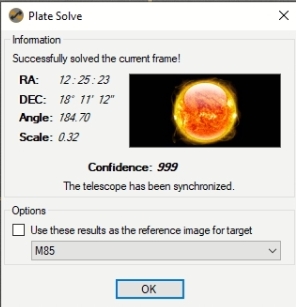
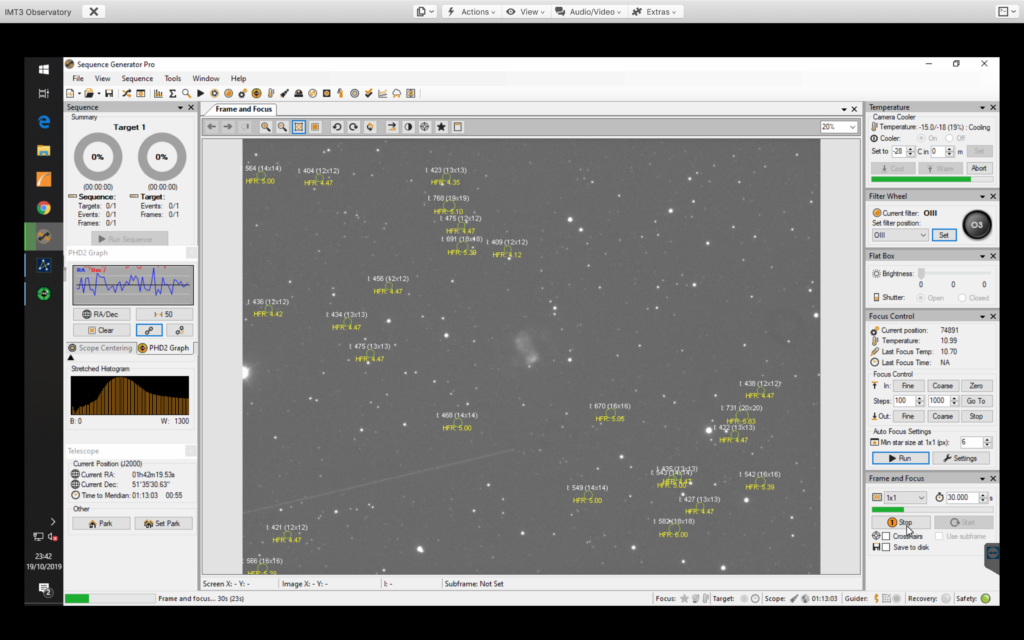
Frame & Focus / Plate Solved / Centred
21:38 Autofocus Run – Failed.
21:50 Integrating M85 Event 1 Frame 1 for 300 seconds Lost guide Star
22:13 Switch Guider to SW Lodestar
Integrating M85 Event 1 frame 1 for 300 seconds. Aborted run as M85 approaching the meridian and guiding graph was not looking good. Guider not calibrated.
Meridian flip to Chertan in Leo, Tak FS-102 now on top of configuration, Esprit below the OS 12″ so will be the better to guide with the QHY5 MiniGuideScope attached to the FS-102.
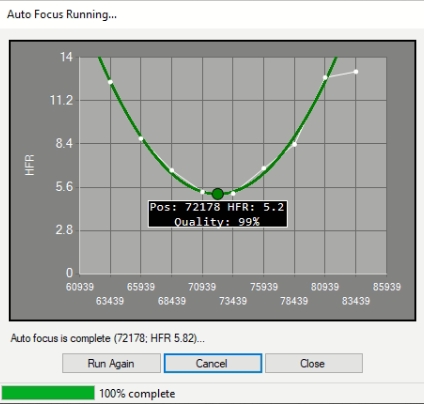
22:51 Slewed to a star field near Chertan for Auto Focus run. Start focuser position 72885, final focuser position 72178 ….. nice graph.
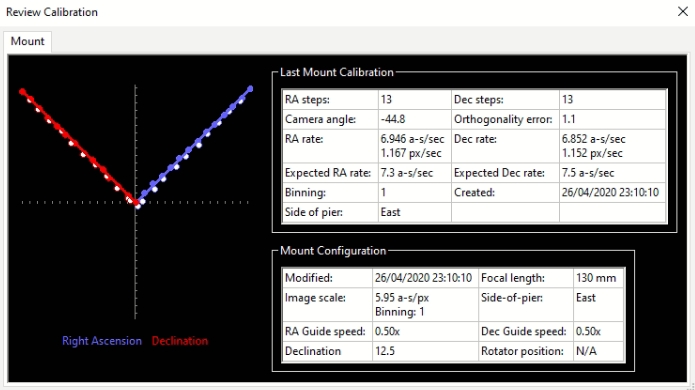
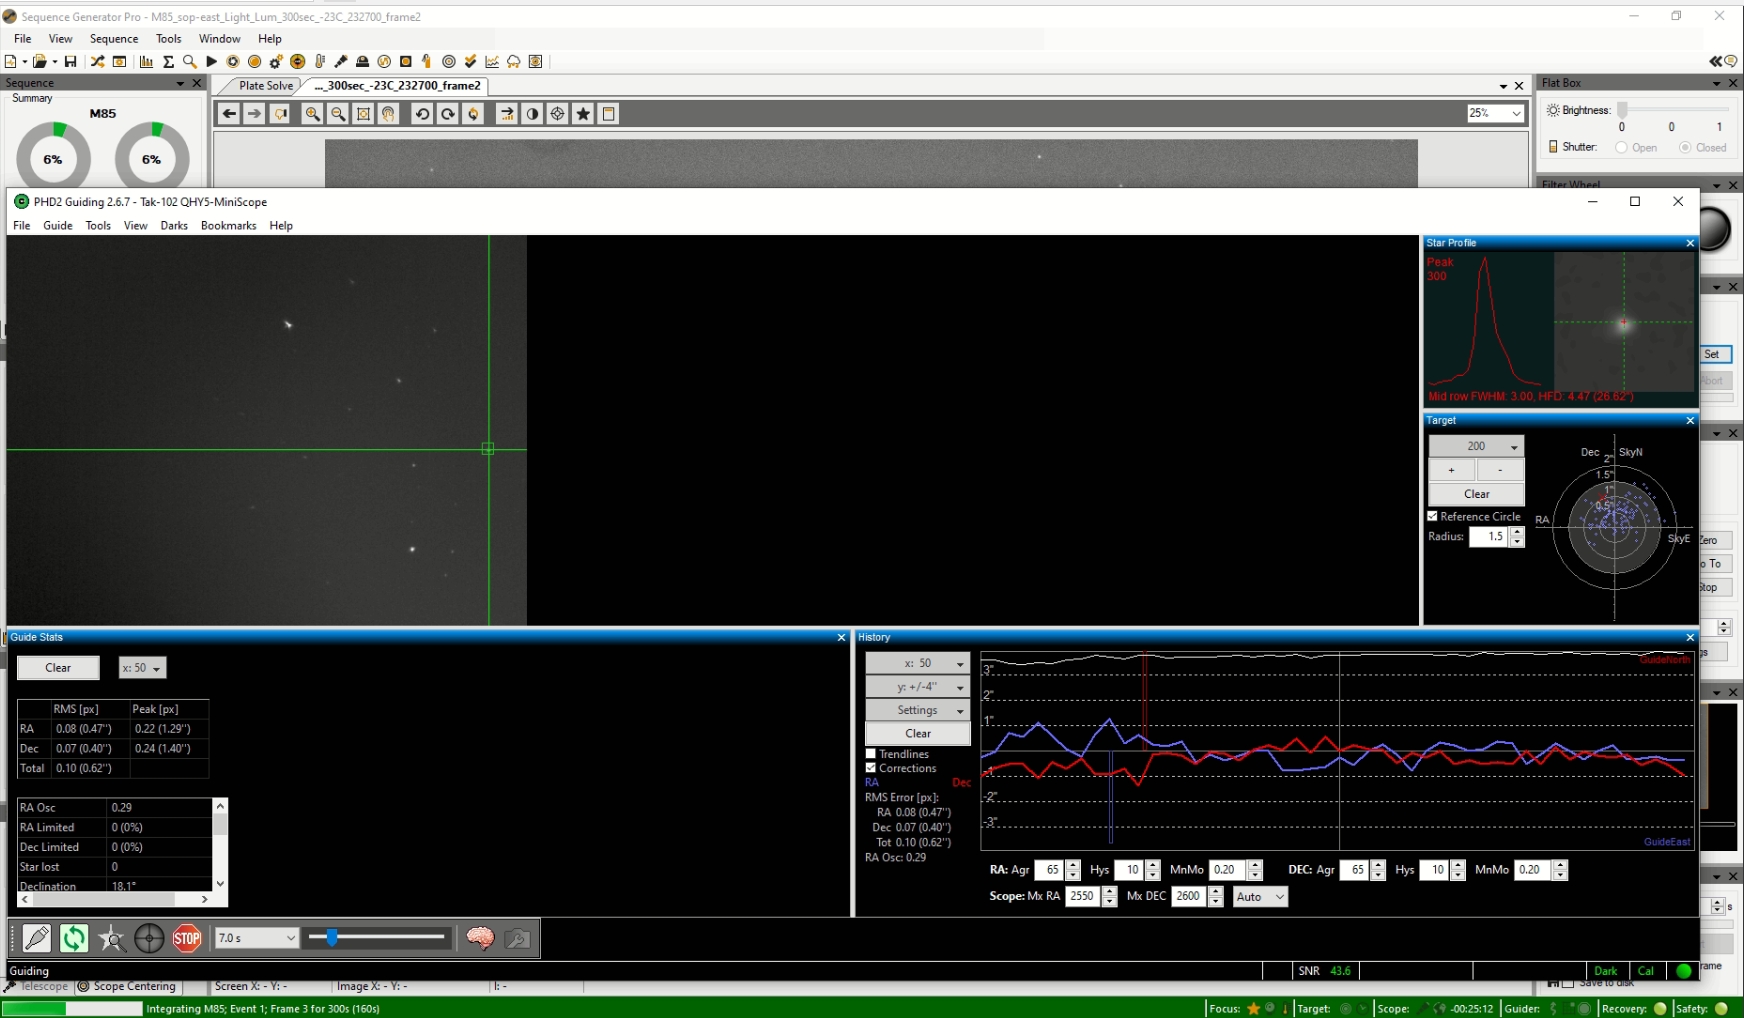
22:56 Calibrated QHY5 MiniGuideScope guider
23:08 Calibration suceeded, guiding.
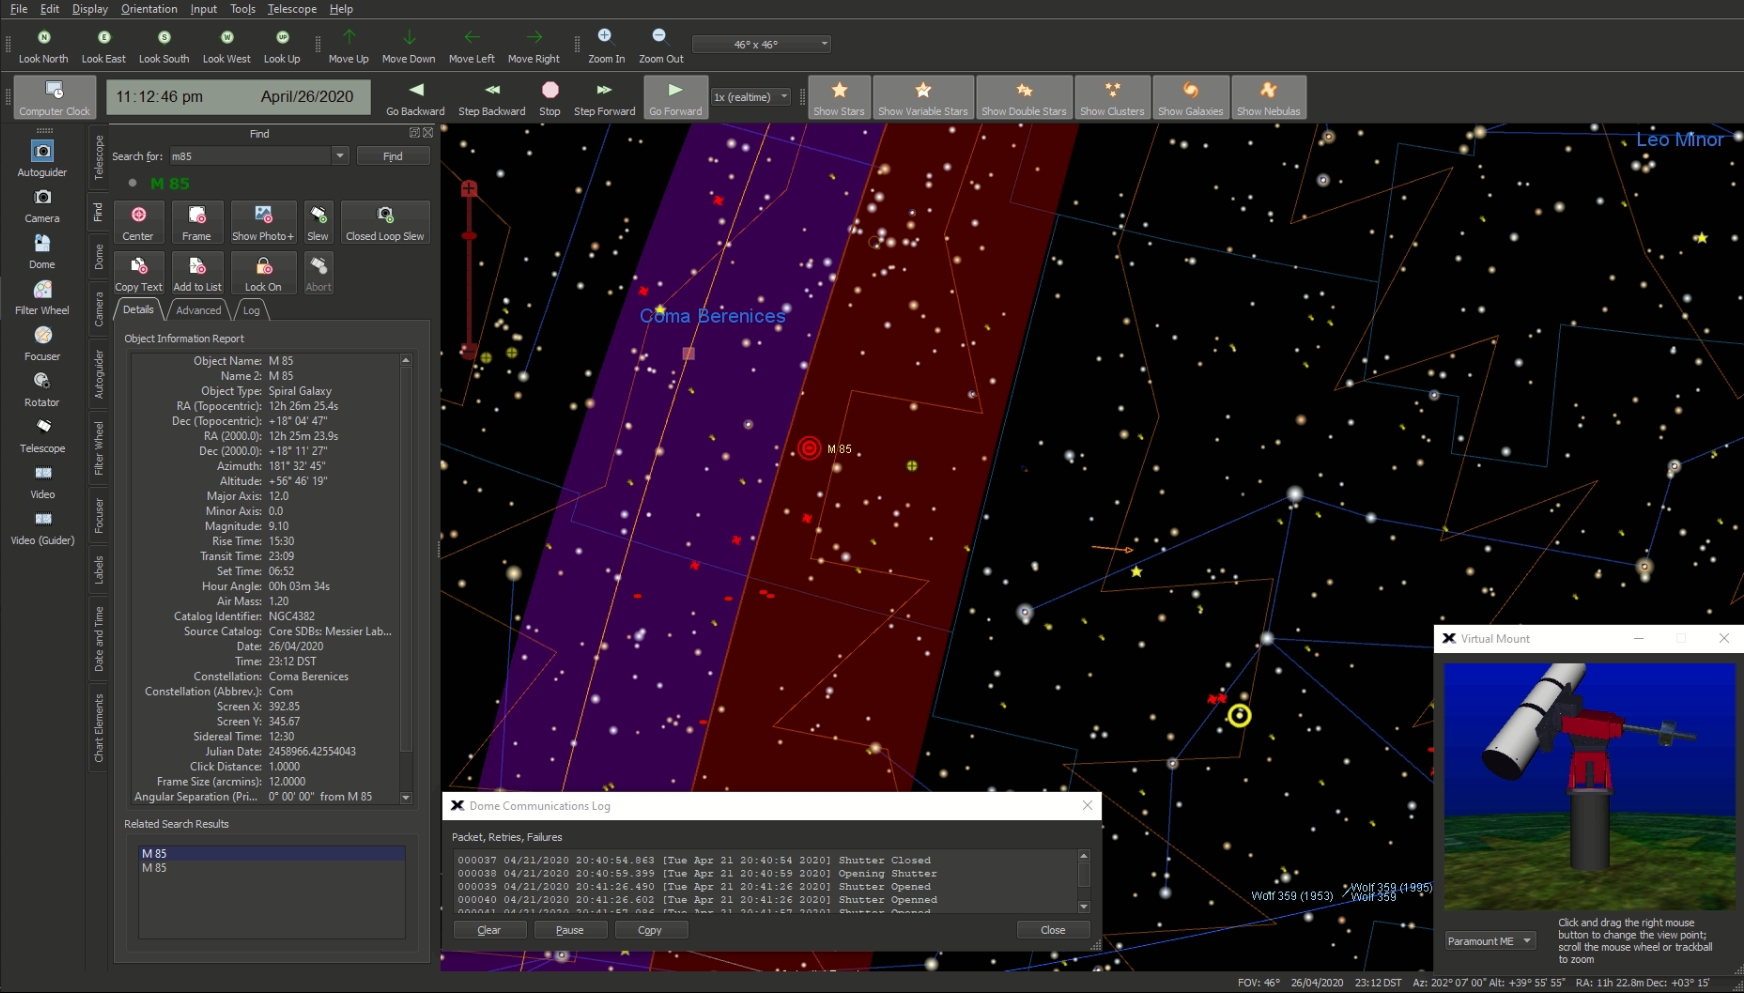
Stoped guider and slewed to M85 which had just crossed the meridian.
Frame & Focus / Plate Solved / Centred
23:21 Integrating M85 Event 1 Frame 1
23:44 Telescope connection lost due to poor communication
23:48 SGPro reported USB error – lost FLI Focuser. FLI connects Ok in The Sky X.
Fix is to click on the spanner in SGPro for the Focuser and Rescan, Focuser now reconnects.
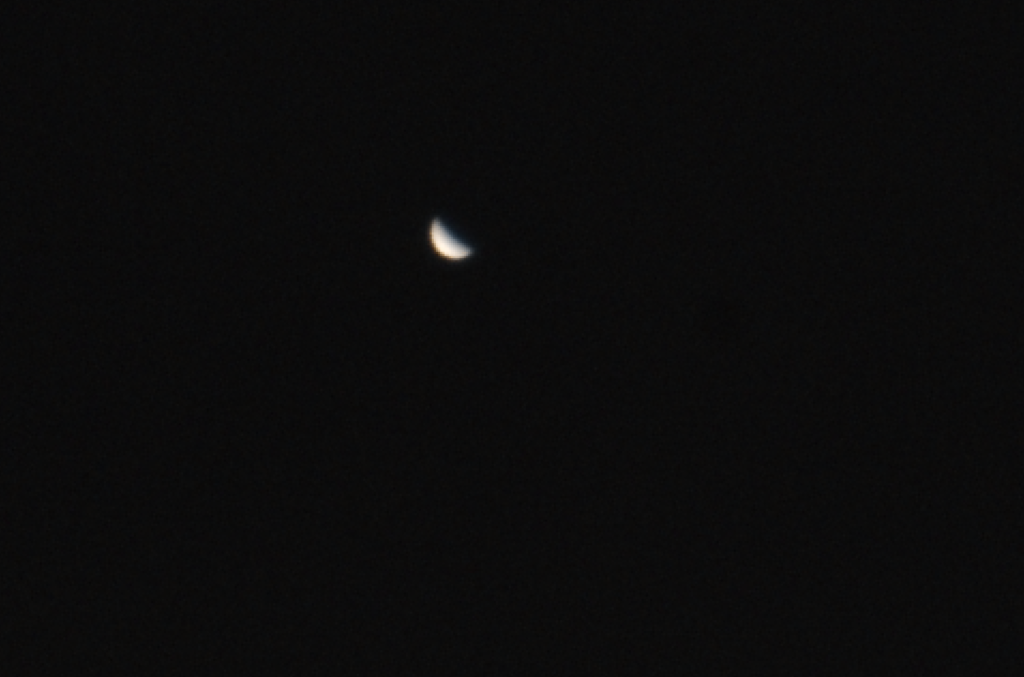
So early on as always I opened the dome to cool down. Tonight Bob, Gingergeek and I want to image Venus in the Pleiades. Even before it got dark and as I slewed the telescopes to Venus, it was visible straight away so I took a quick image, 0.001s from both the 12″ and Bob’s FS102.
Venus 0.001s exposure from the OS 12″ during daytimeVenus 0.001s exposure from the Tak FS102 during daytime
I then went off to watch TV with Helen whilst Gingergeek and Bob grabbed some more images of Venus.
Around 10pm I re-joined Bob and GingerGeek and we set about imaging Venus as it passed by M45 Pleiades in the Tak FS 102. We then went on to perform autofocus on the Tak followed buy setting up the autofocus on the Esprit 120ED
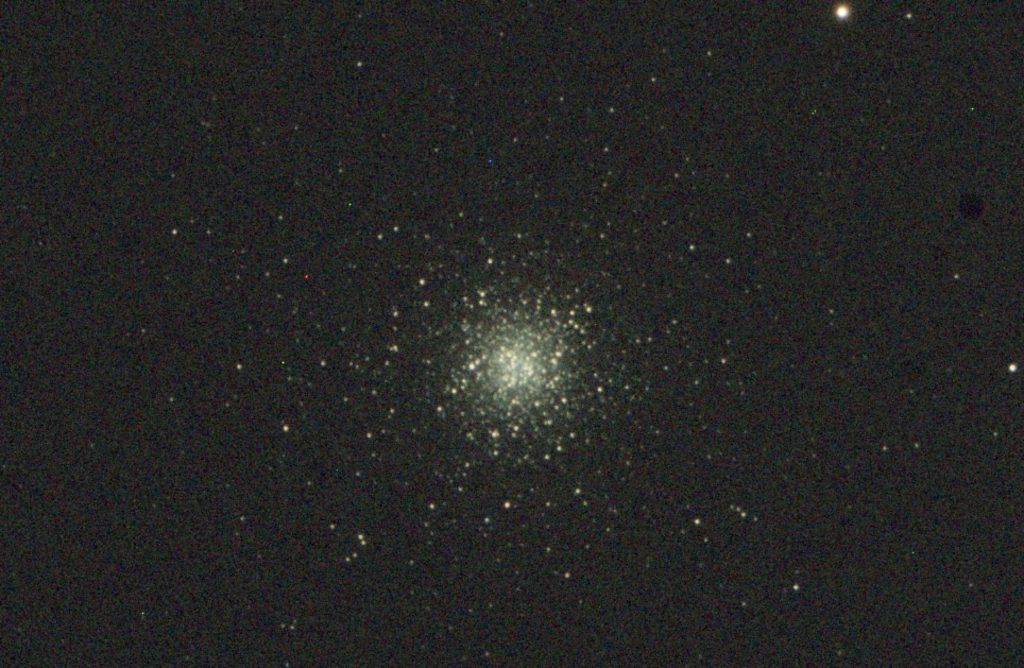
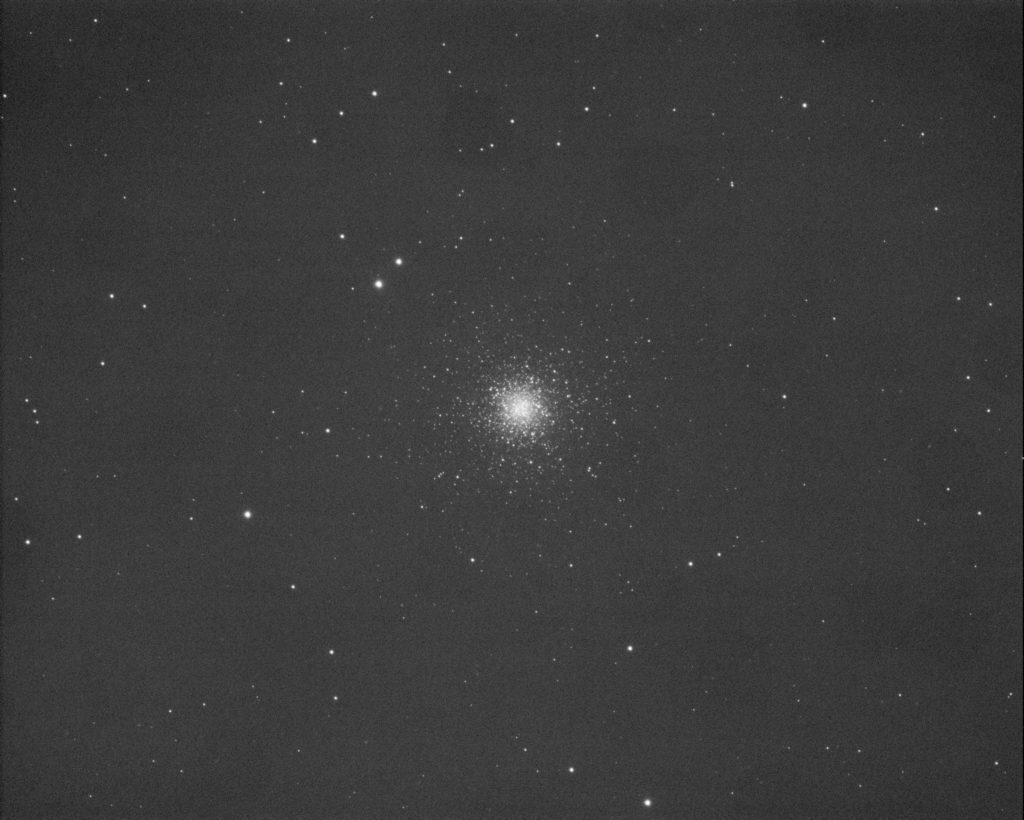
Before the clouds decided to put a stop to play, we took some images of M53 the globular cluster on the Esprit around 00:10am using the Luminance filter.
Quick stack and stretch of M53 from Skywatcher Esprit 120 ED
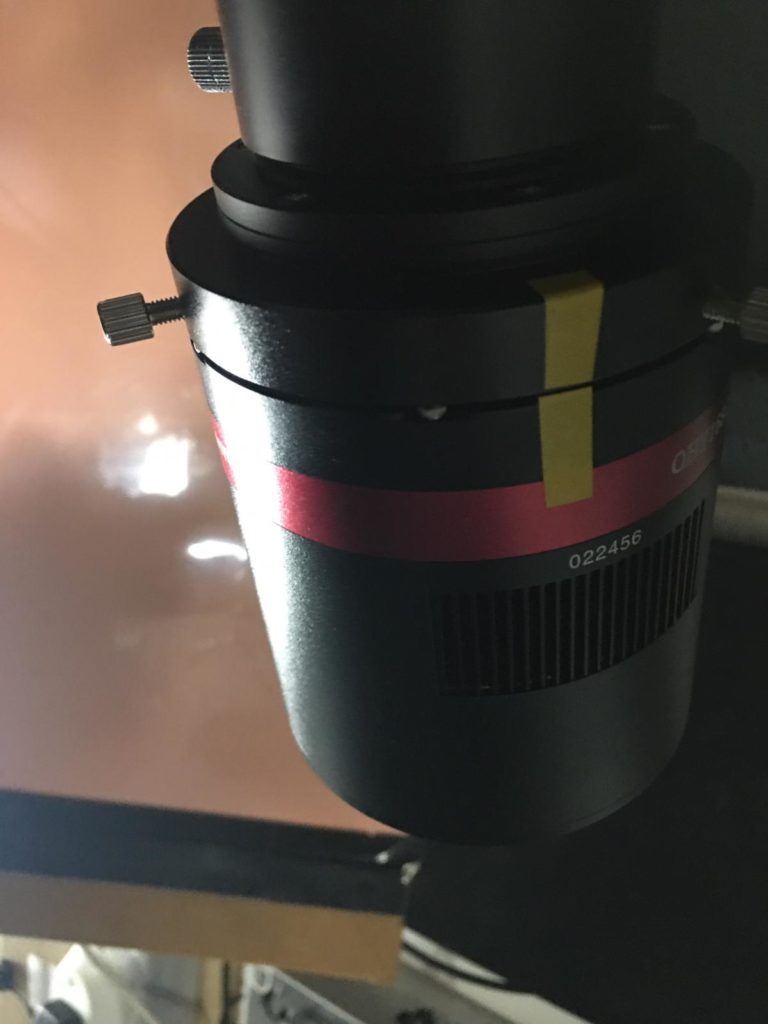
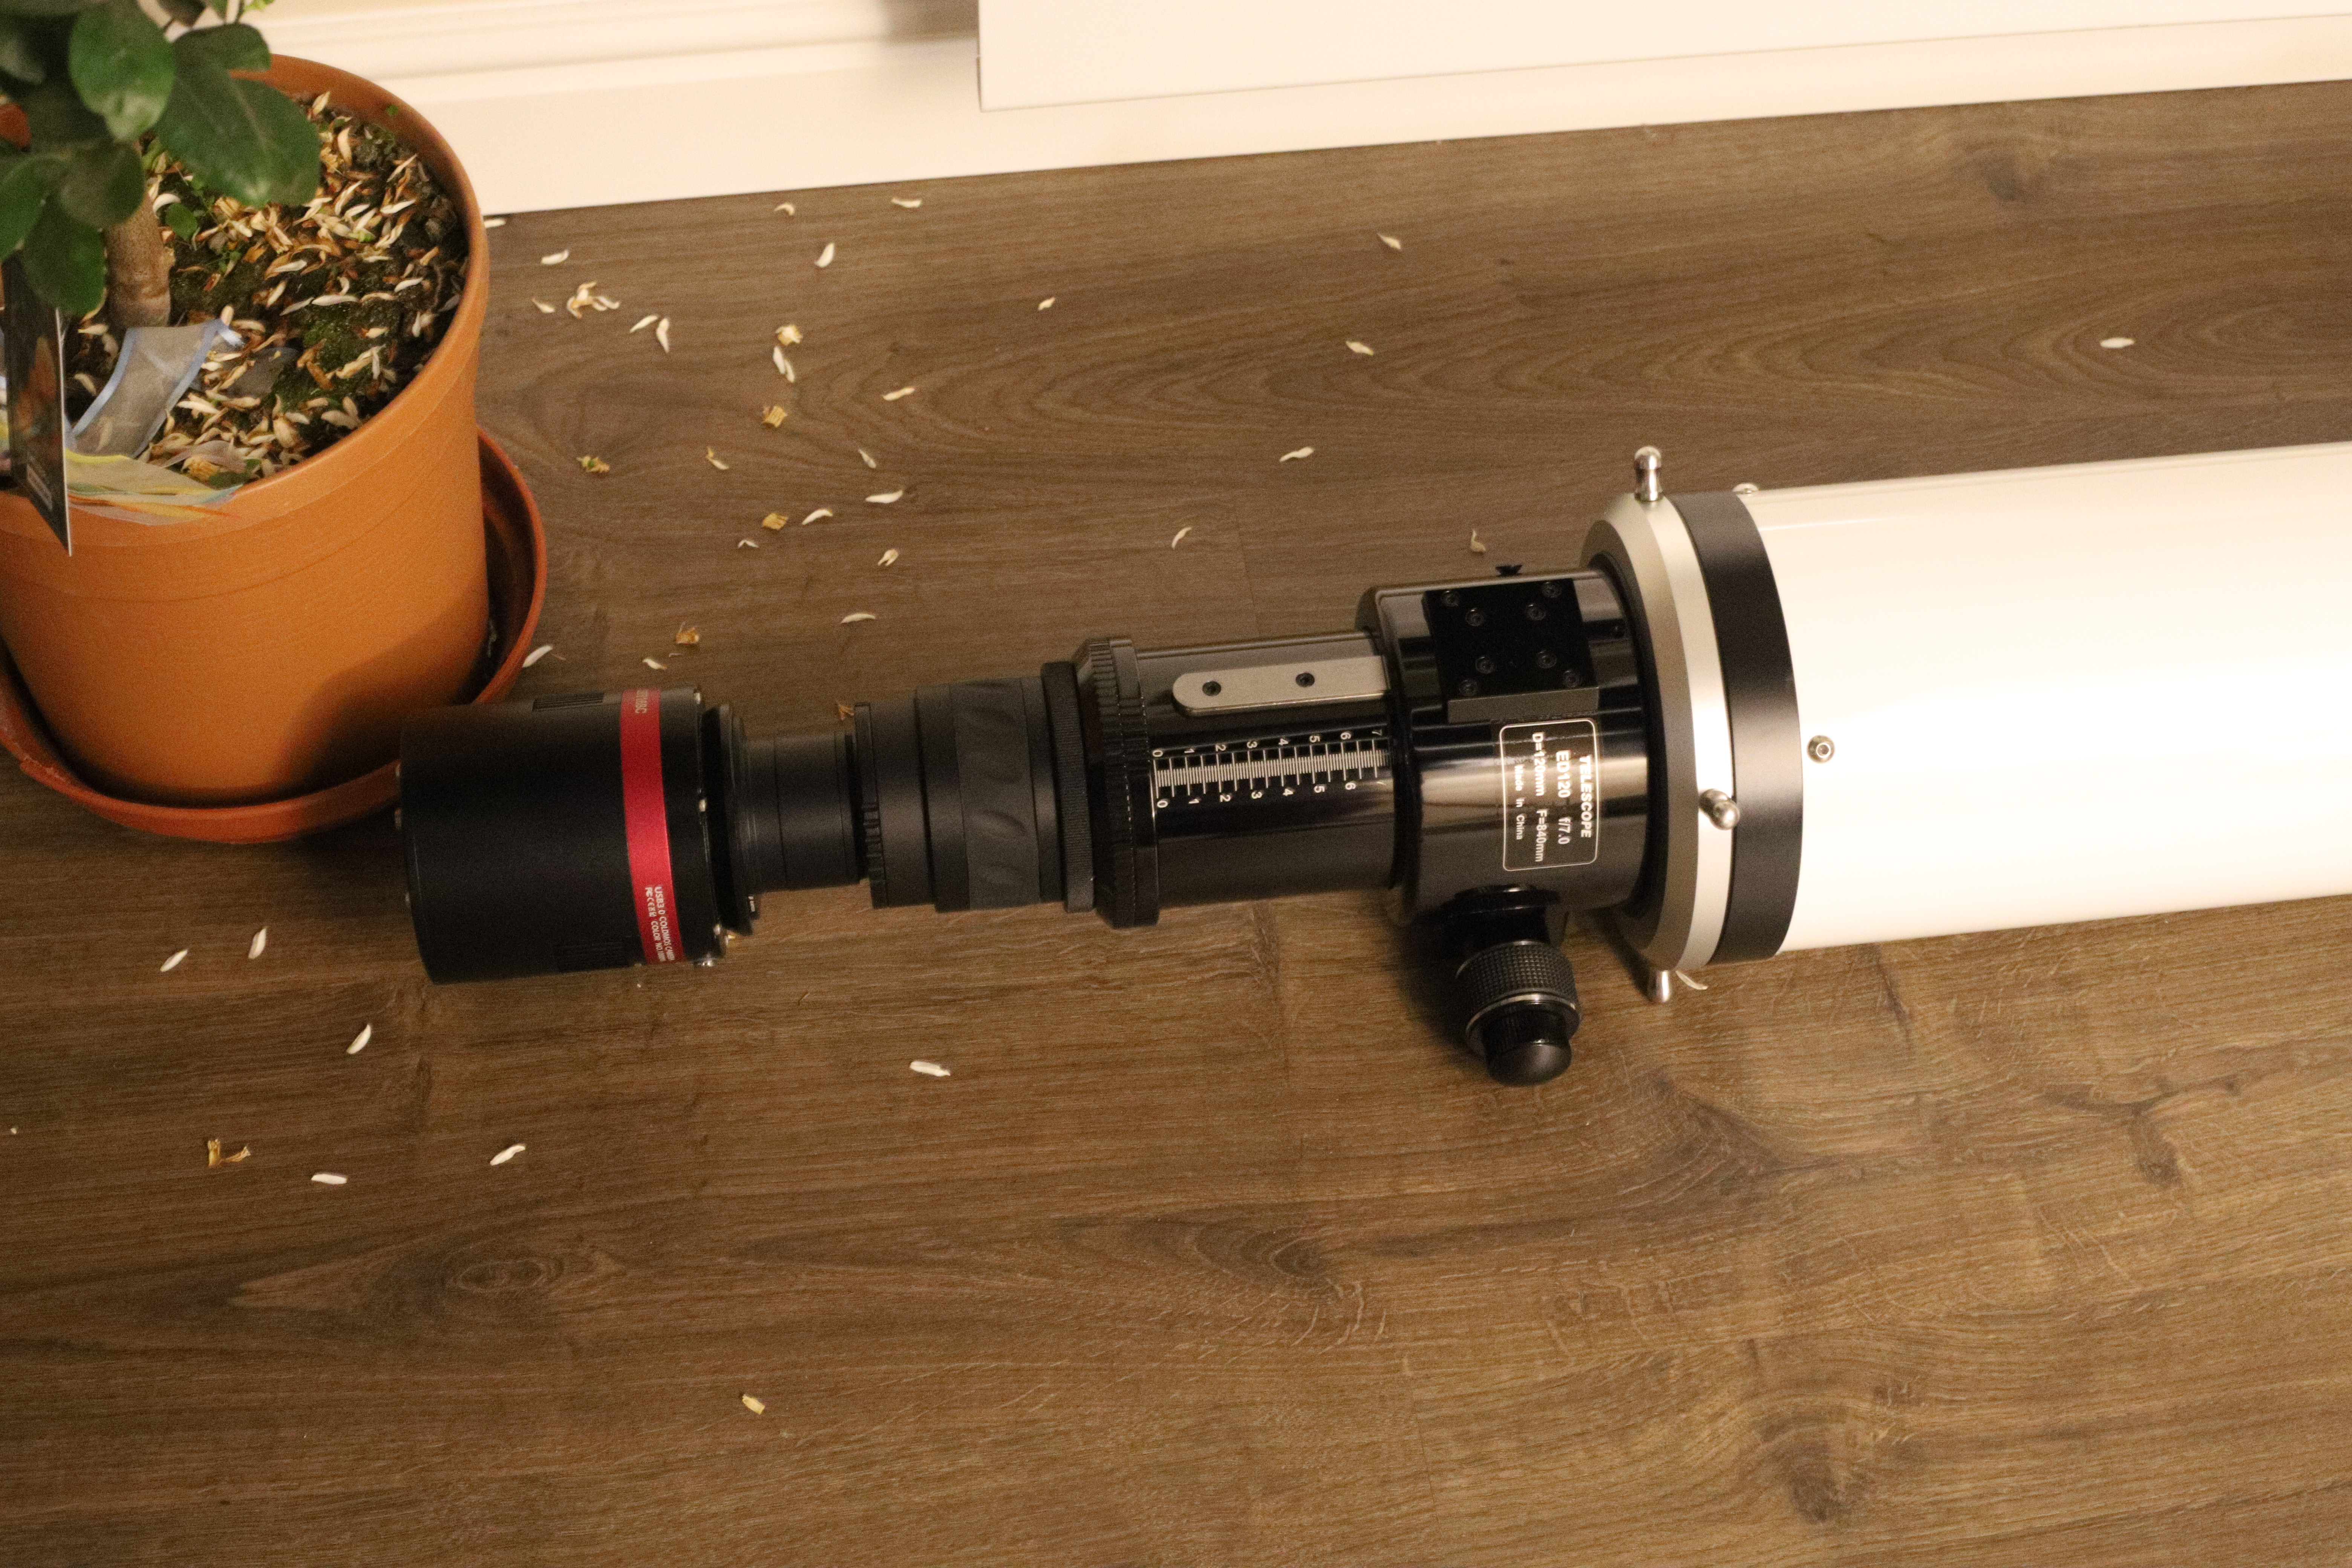
Bob had noticed a lot of dirt on or near the sensor on the QHY168C camera that forms part of the imaging train on the Tak FS102. Today I took the camera off for a little spring clean.
The first thing was to mark the rotation angle of the camera so that it goes back on exactly. 21 degrees is the rotation angle as measured through an actual image.
Taping up position angle on QHY camera
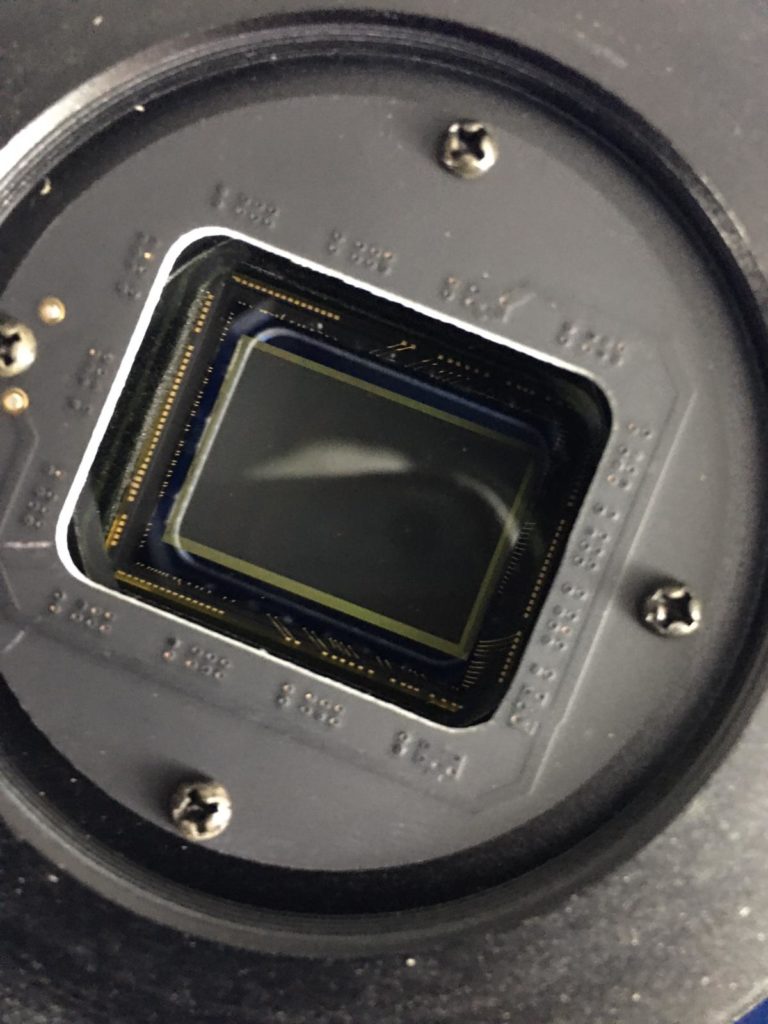
Next I took the camera off loosing the 3 screws holding it in position and then took a look at the CMOS chop glass cover for dirt.
Inspecting QHY168C for dirt on glass cover
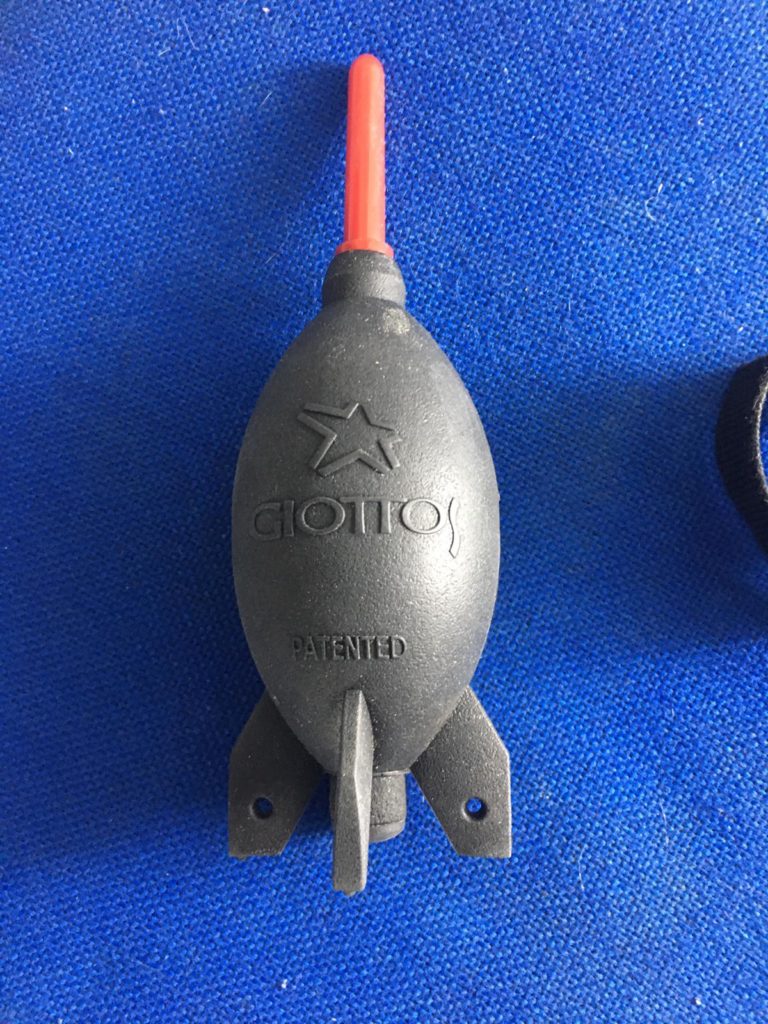
There was really only a couple of pieces of dirt on the cover so I removed them with the blower.
Rocket blower
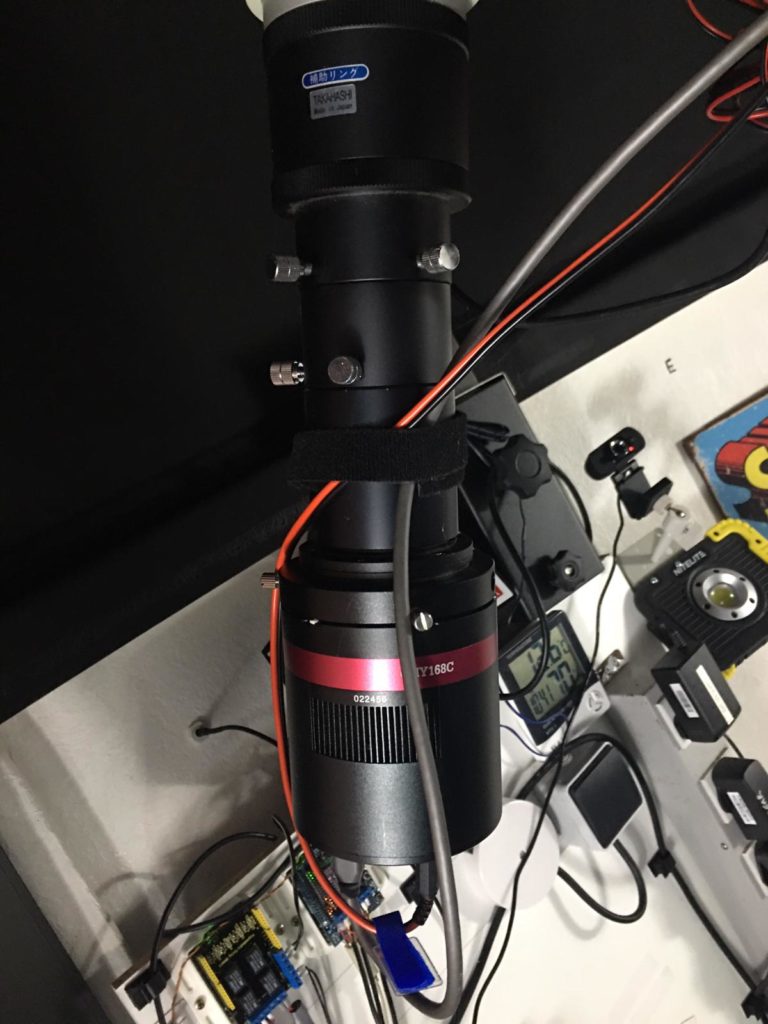
Next I took off the extension tube with which has the glass UV lens inside. At this point I forgot to mark up the position angle when I took the extension tube off. So when I reattached I look at the image train photo to adjust. Hopefully it will be very close and will only require minor adjustment.
Tak FS102 QHY168C imaging train
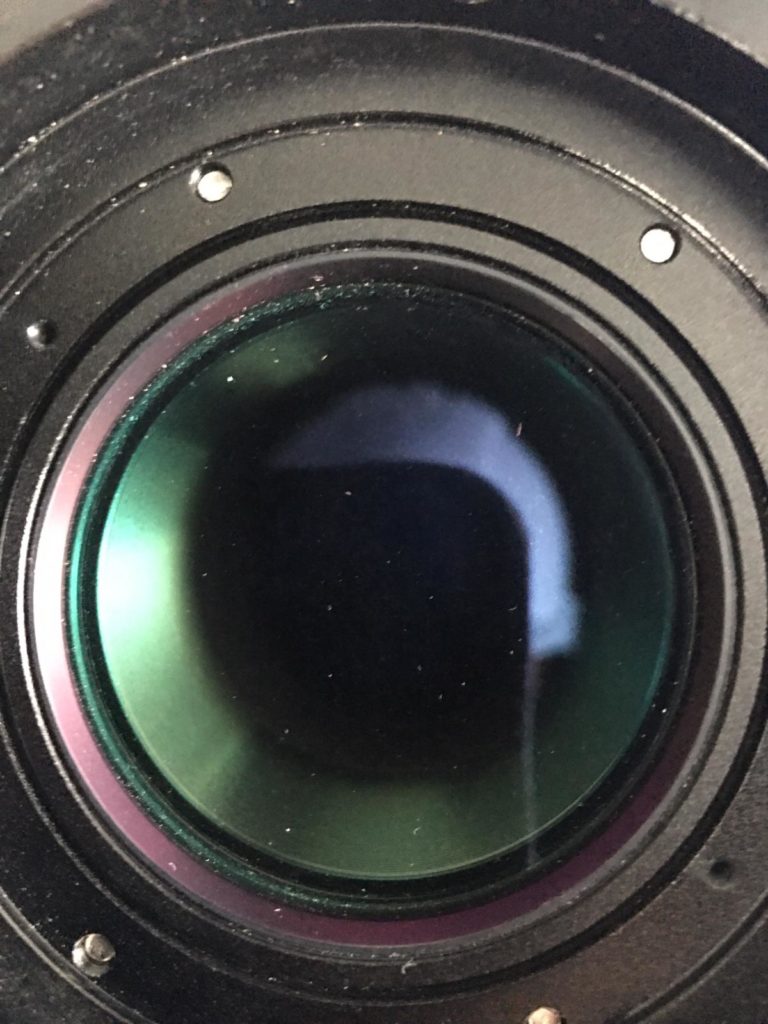
Looking at the UV filter it was instantly visible that there was plenty of dirt and dirt on the glass lens, however it transpired to be on the inside of the lens toward the OTA. O removed the filter to clean with the rocket blower.
UV glass filter dirt and dust
I then reattached the filter, the camera and reset the angle. I followed up by feeling for any play in the Tak OTA bracket that piggy backs it on the OS12″ OTA. I could not feel any. I was checking due to a shift on the FoV when Bob was recently imaging. Again the next time out we will need to readjust.
After nearly a month of not imaging from IMT due to a holiday in Tenerife, a week in New York with work and then Manchester and London along with a run of poor weather it was clear on a Saturday night! Another evening commissioning the observatory was needed, so tonight we will again further refine the polar alignment since the last major modification and distribution of weight where we changed the adjustment plate for Bob’s Tank FS 102 OTA. Again we plan to drift align with PHD.
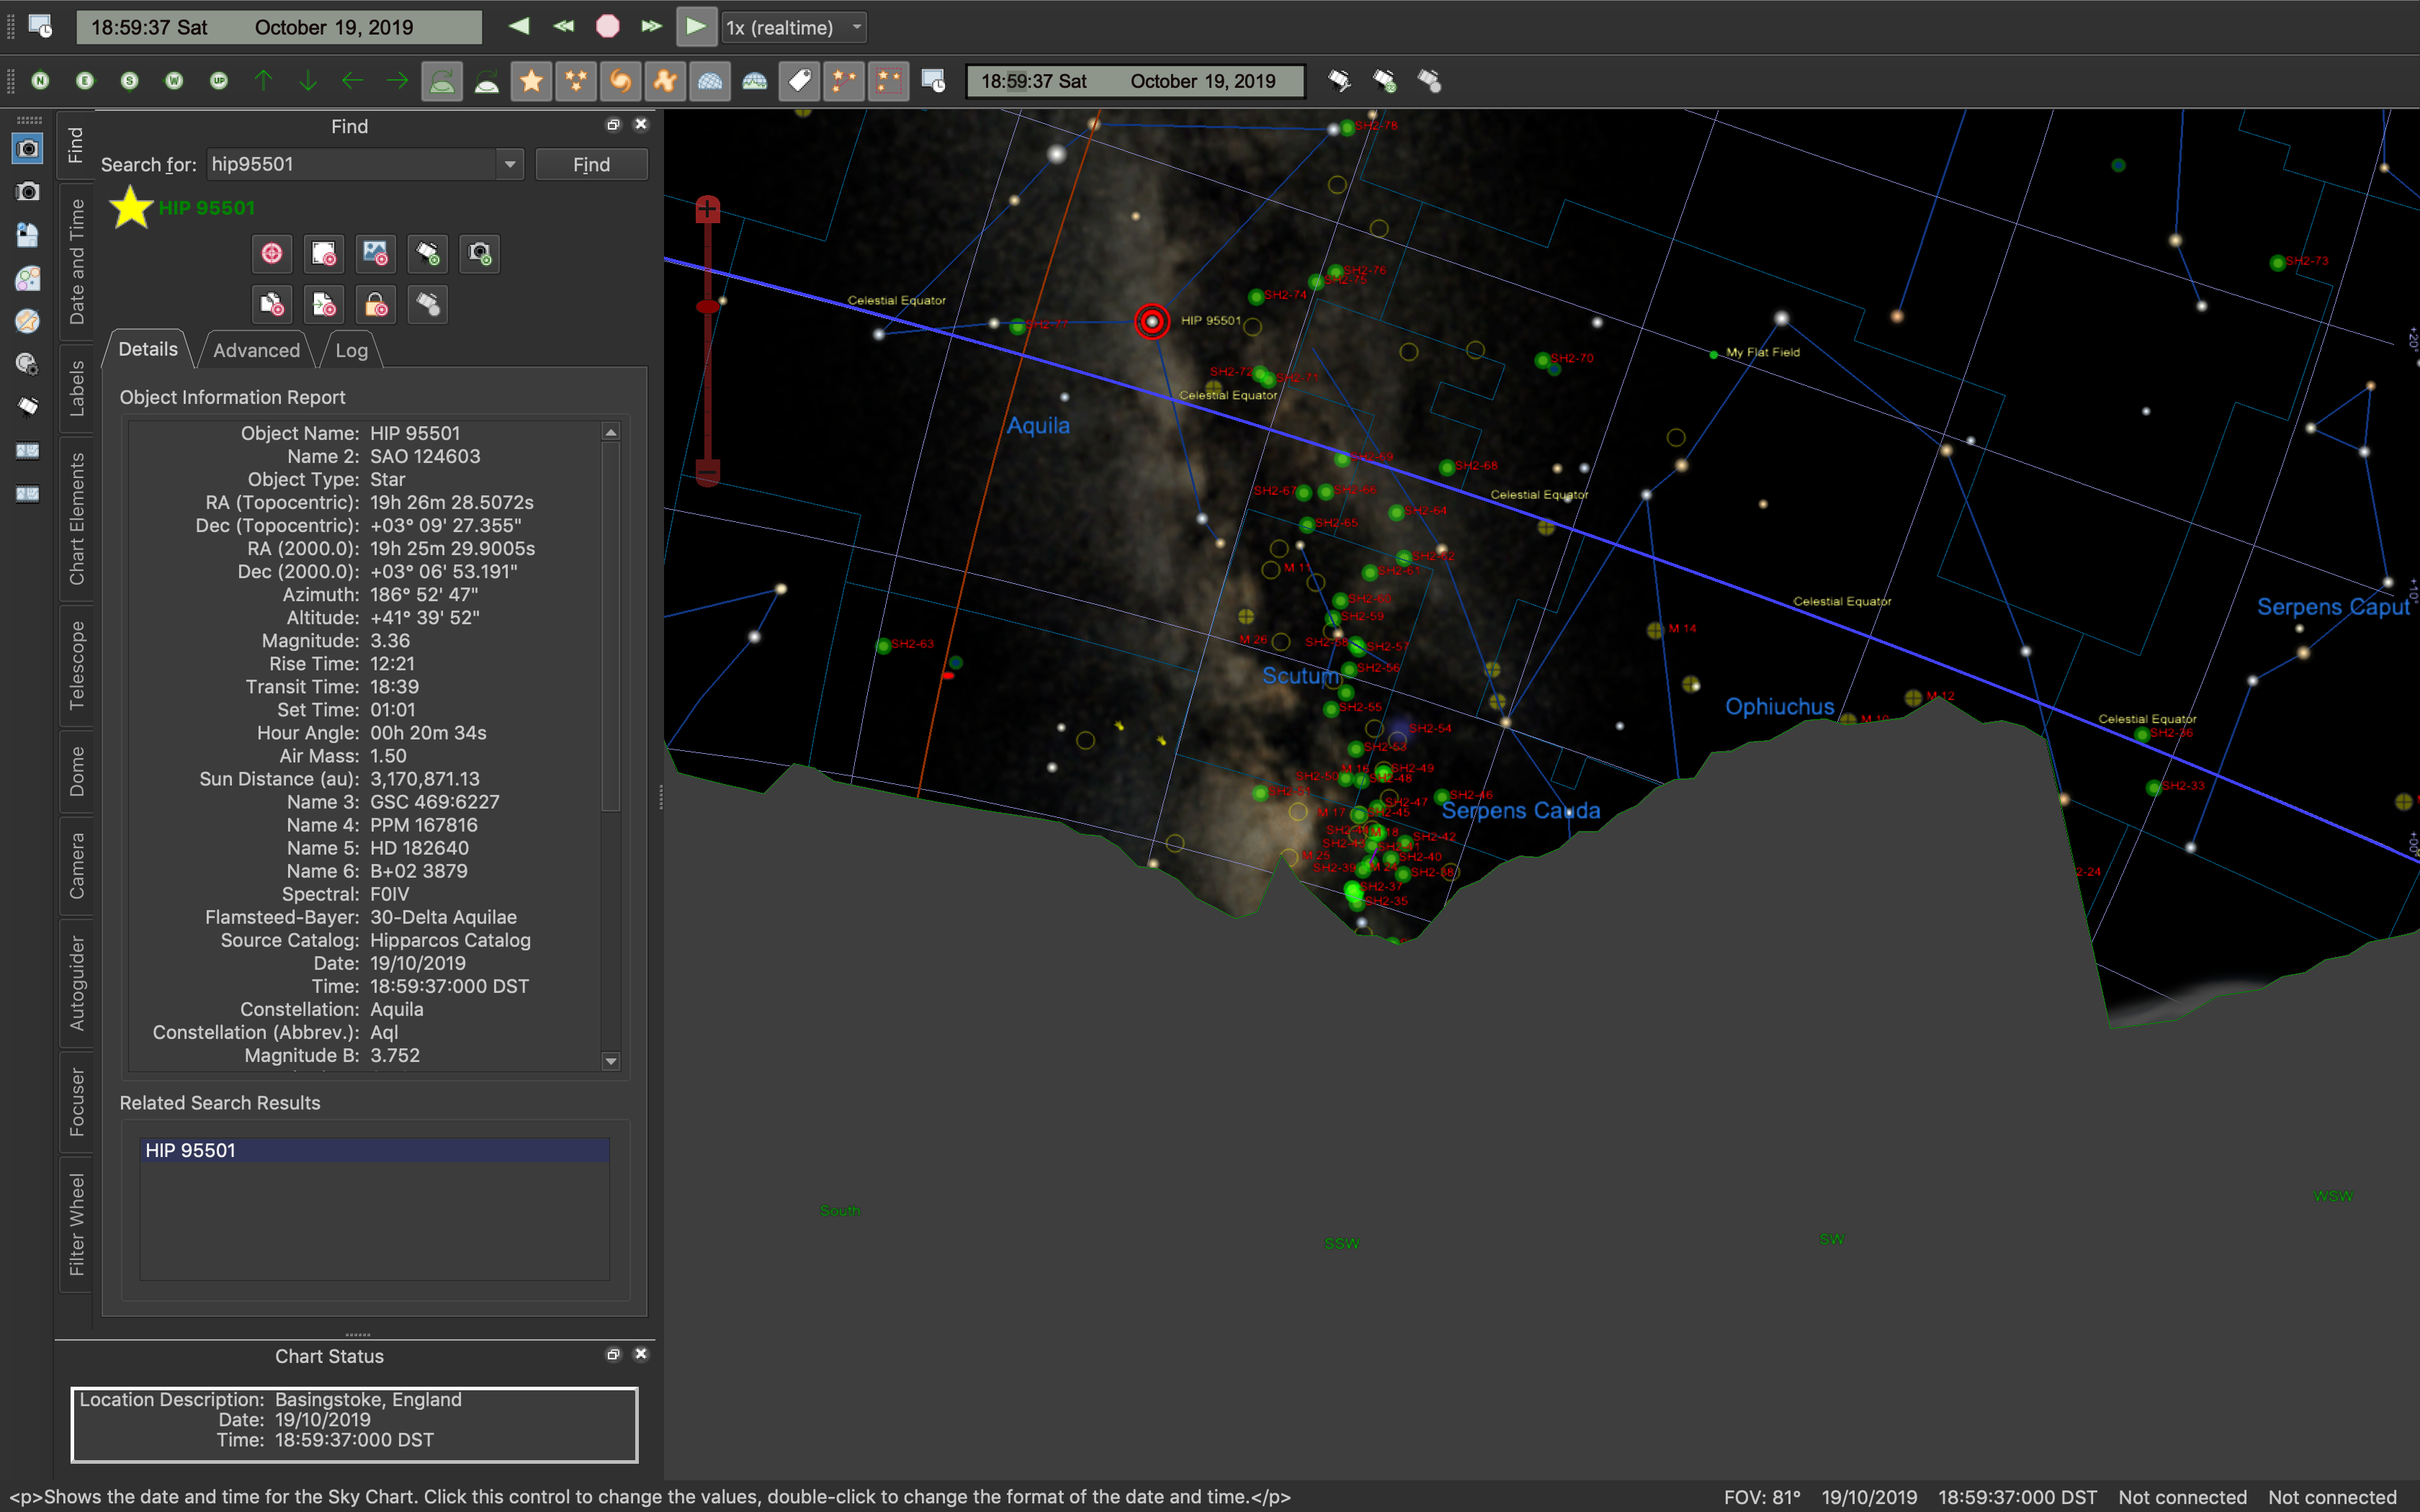
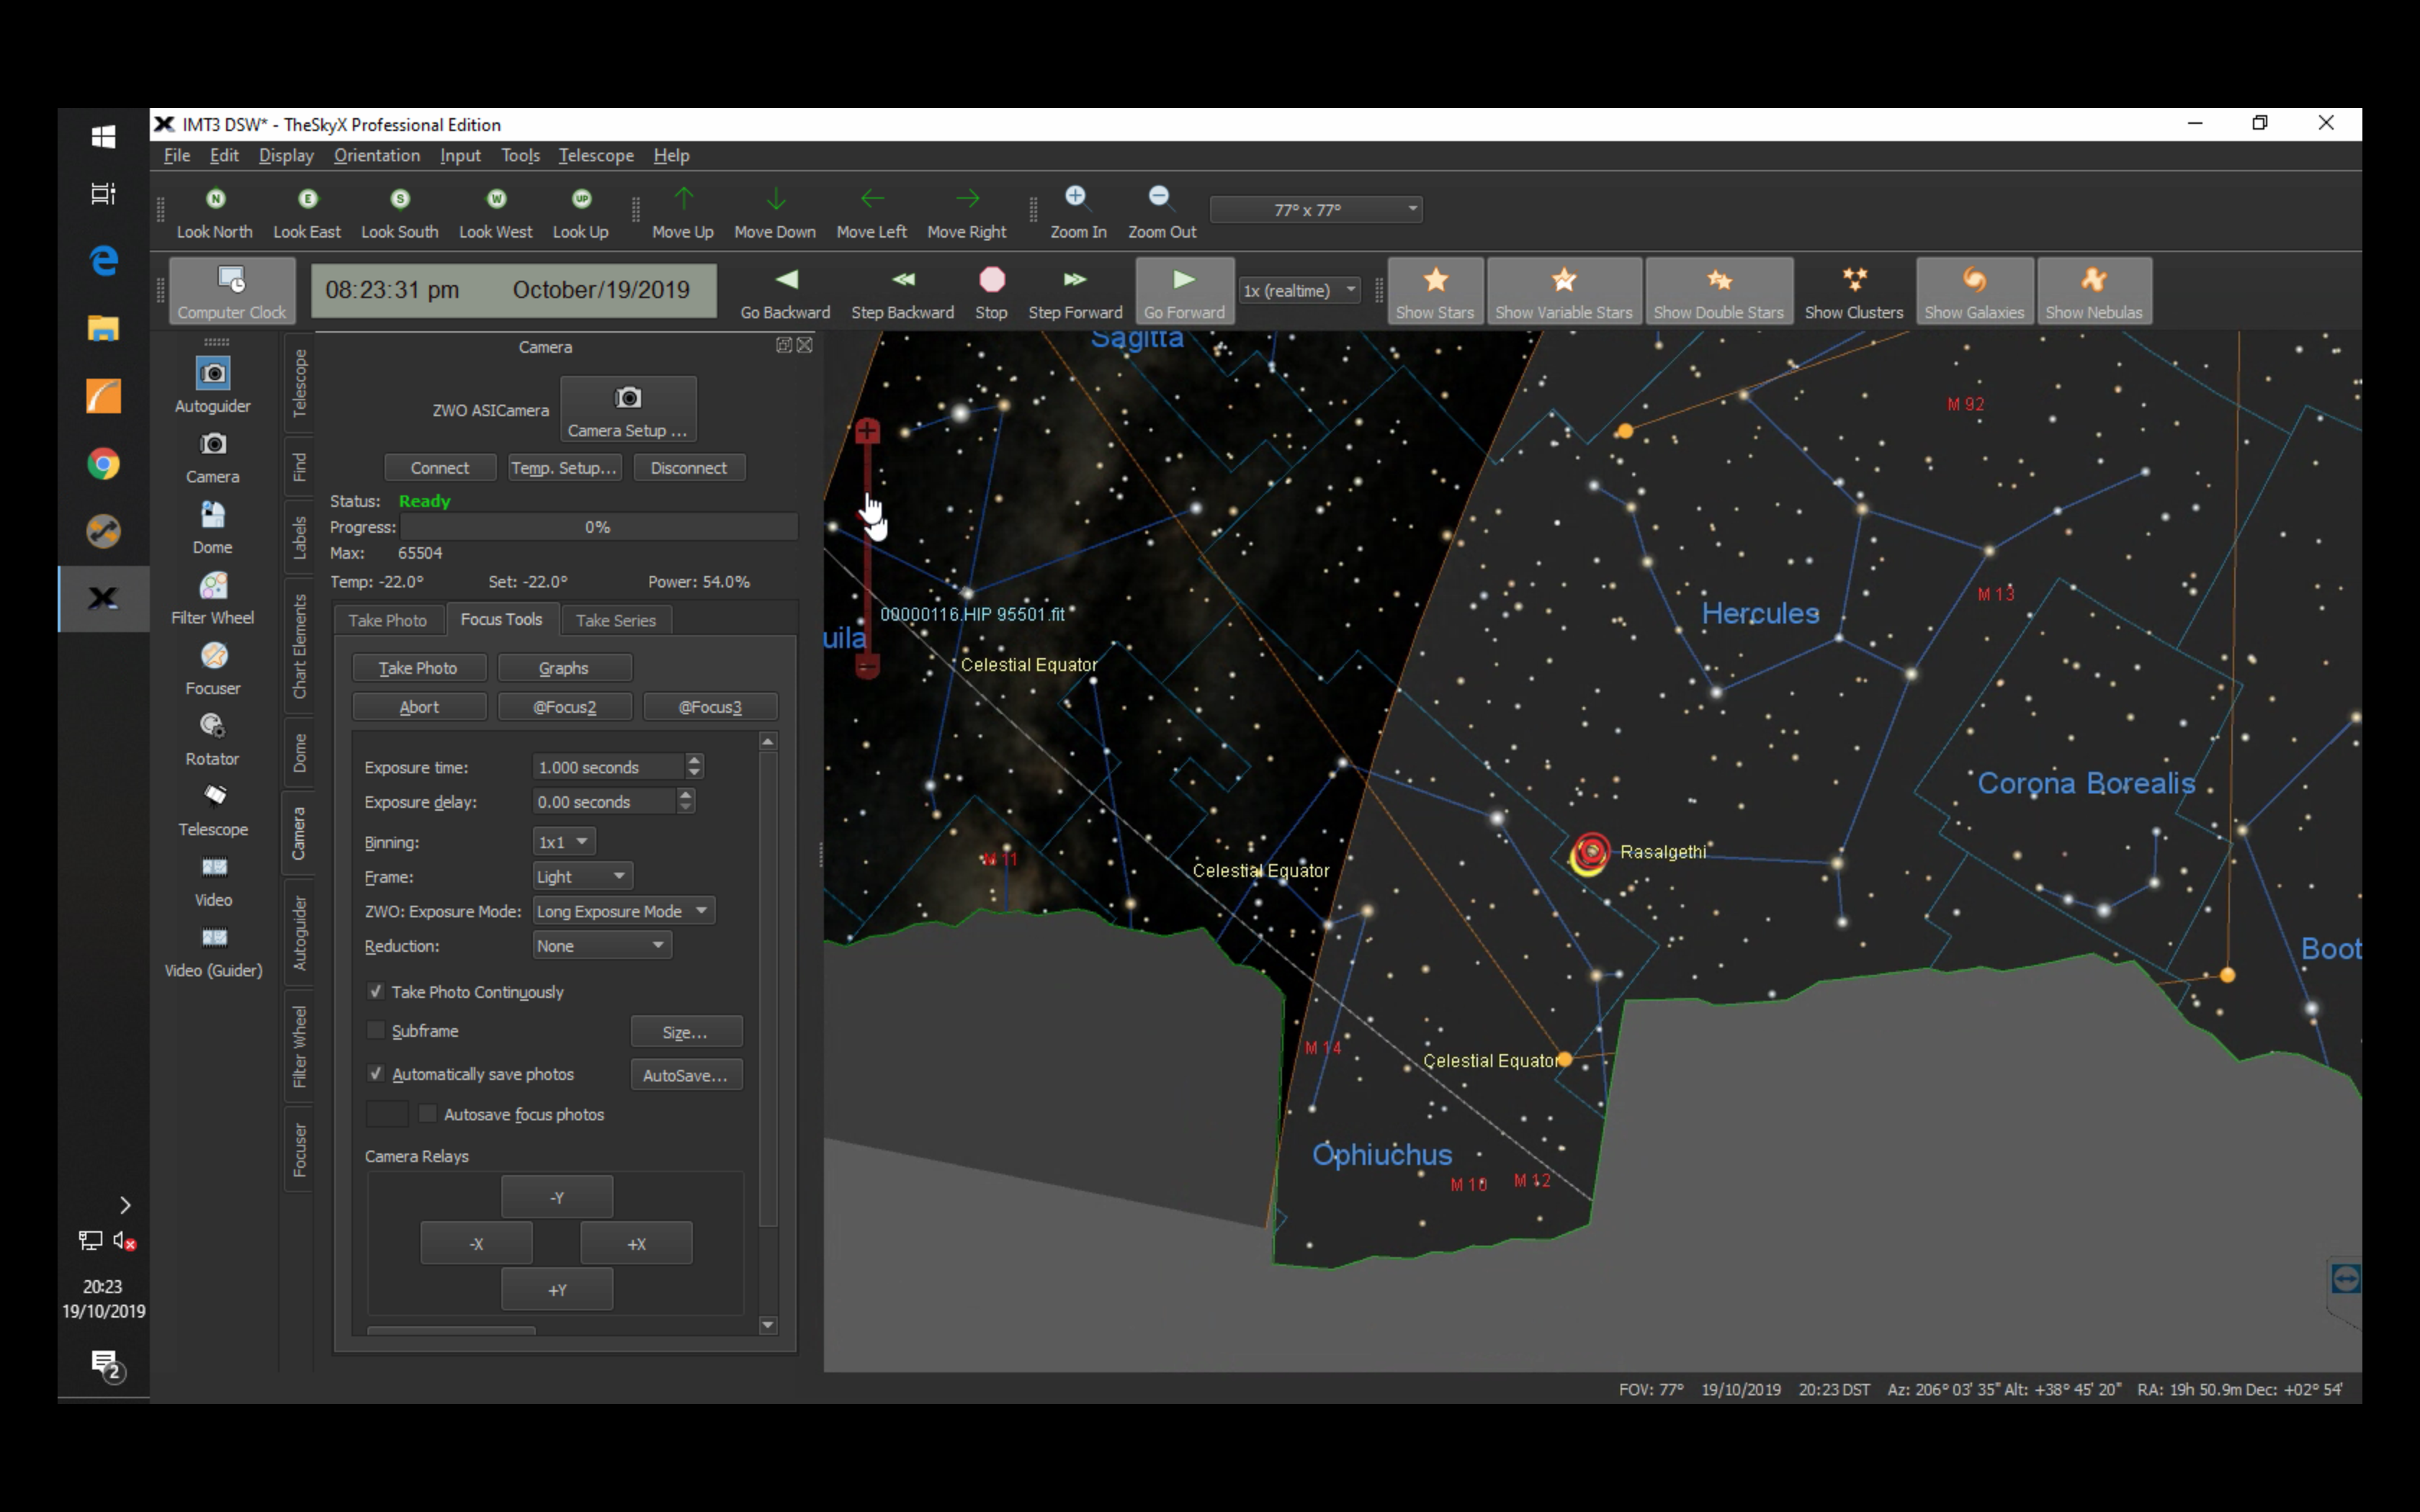
First thing is to find a star near the celestial equator near the Meridian so that it would display the most movement and thus magnify the error of miss polar alignment. I should be able to find HP 95501 @8pm.
Star to drift align for Azimuth
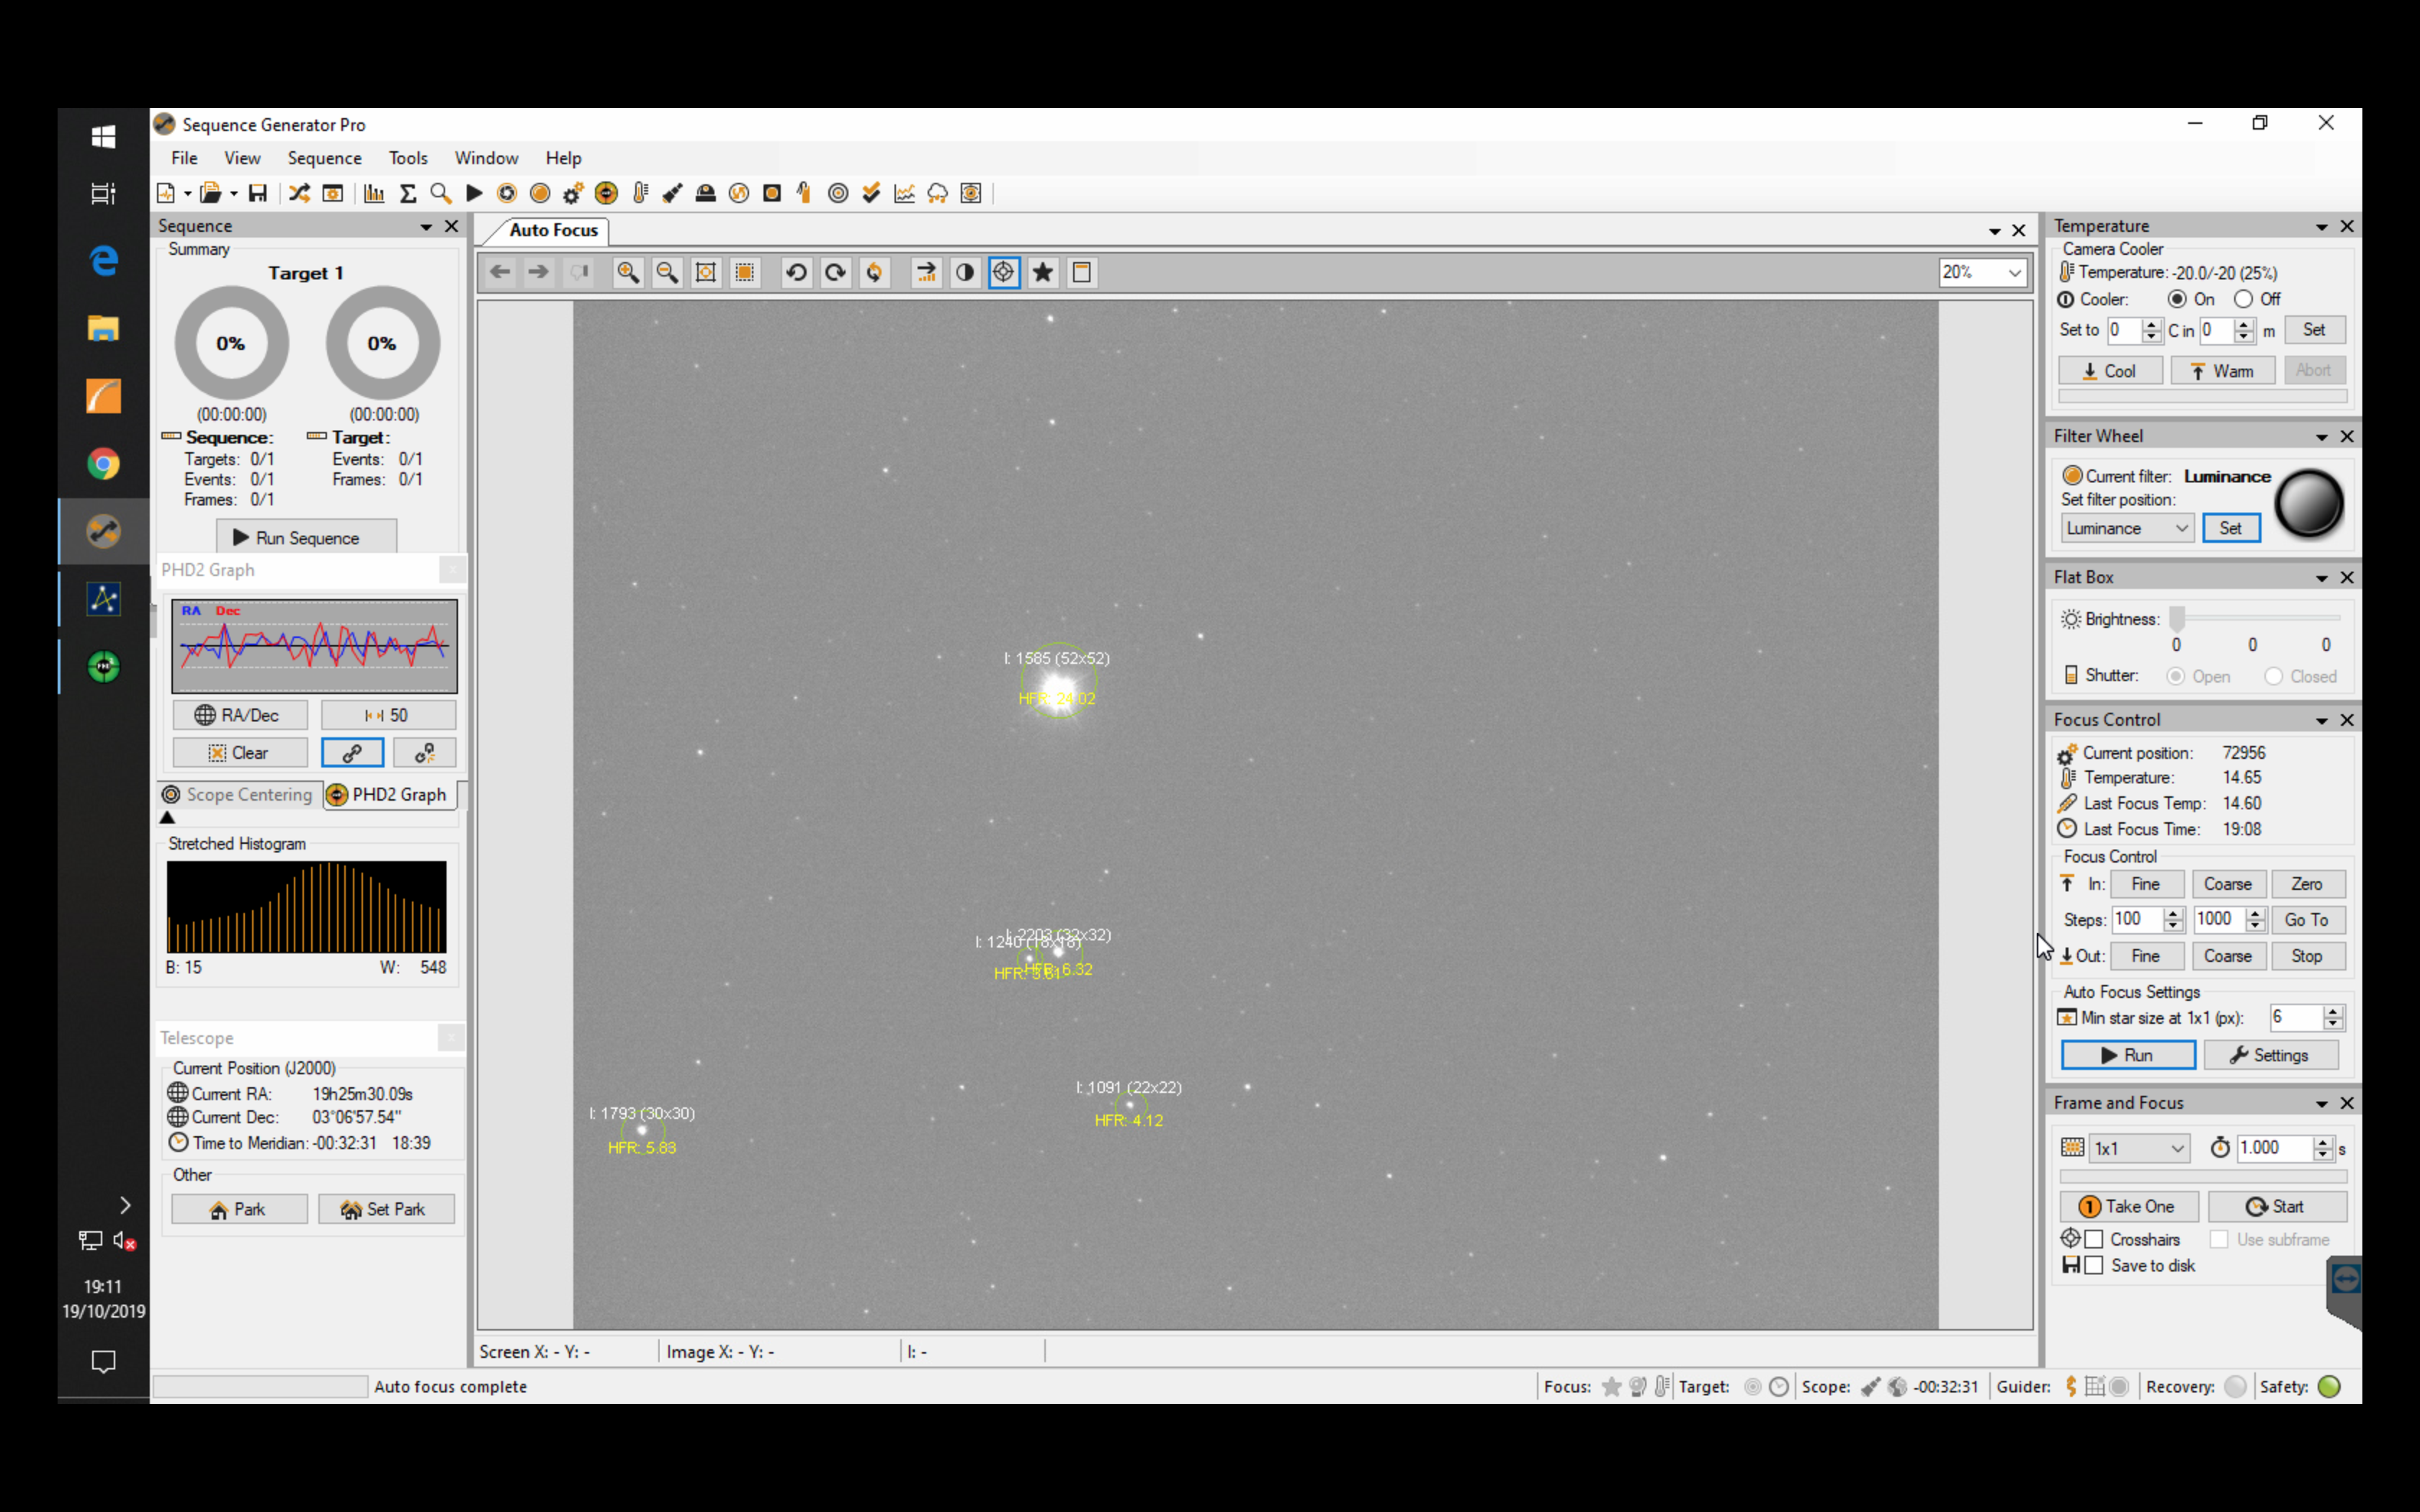
Next I performed an autofocus using the Luminance filter. HIP 95501 is the star to choose for drift aligning the first part, a 1 second image within Frame and Focus in SGPro showed it just off centre which was fine.
Star to guide on
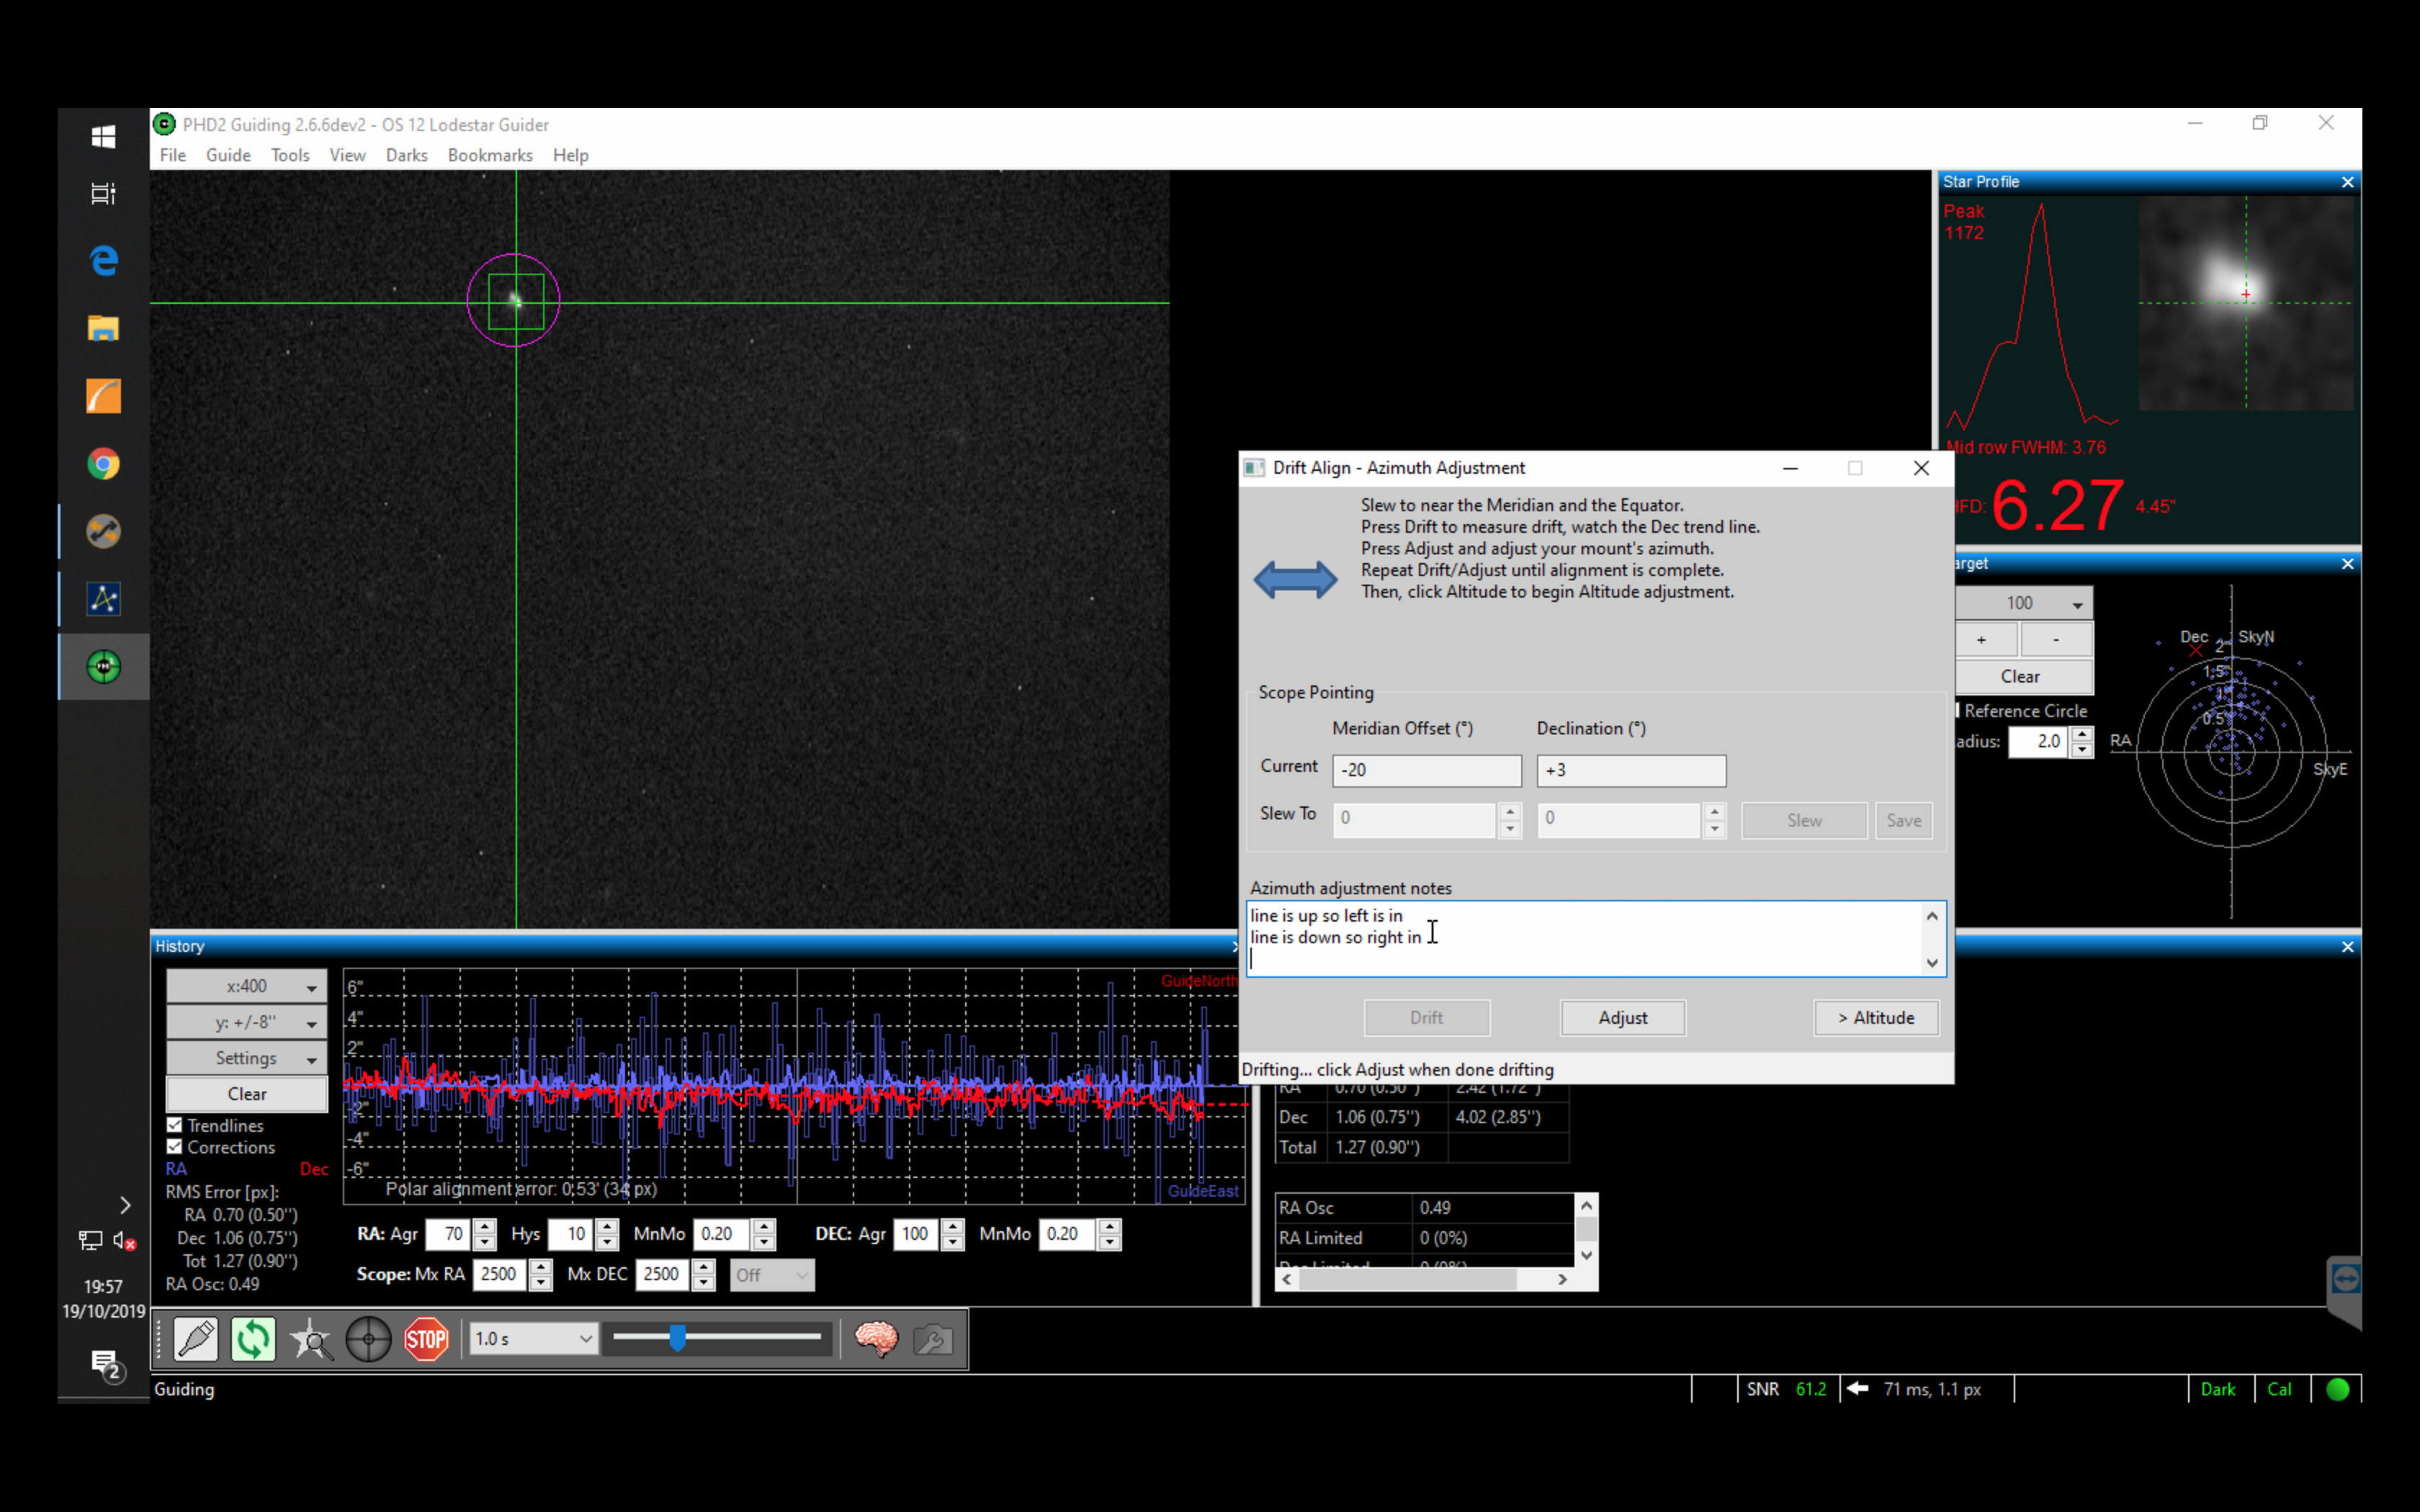
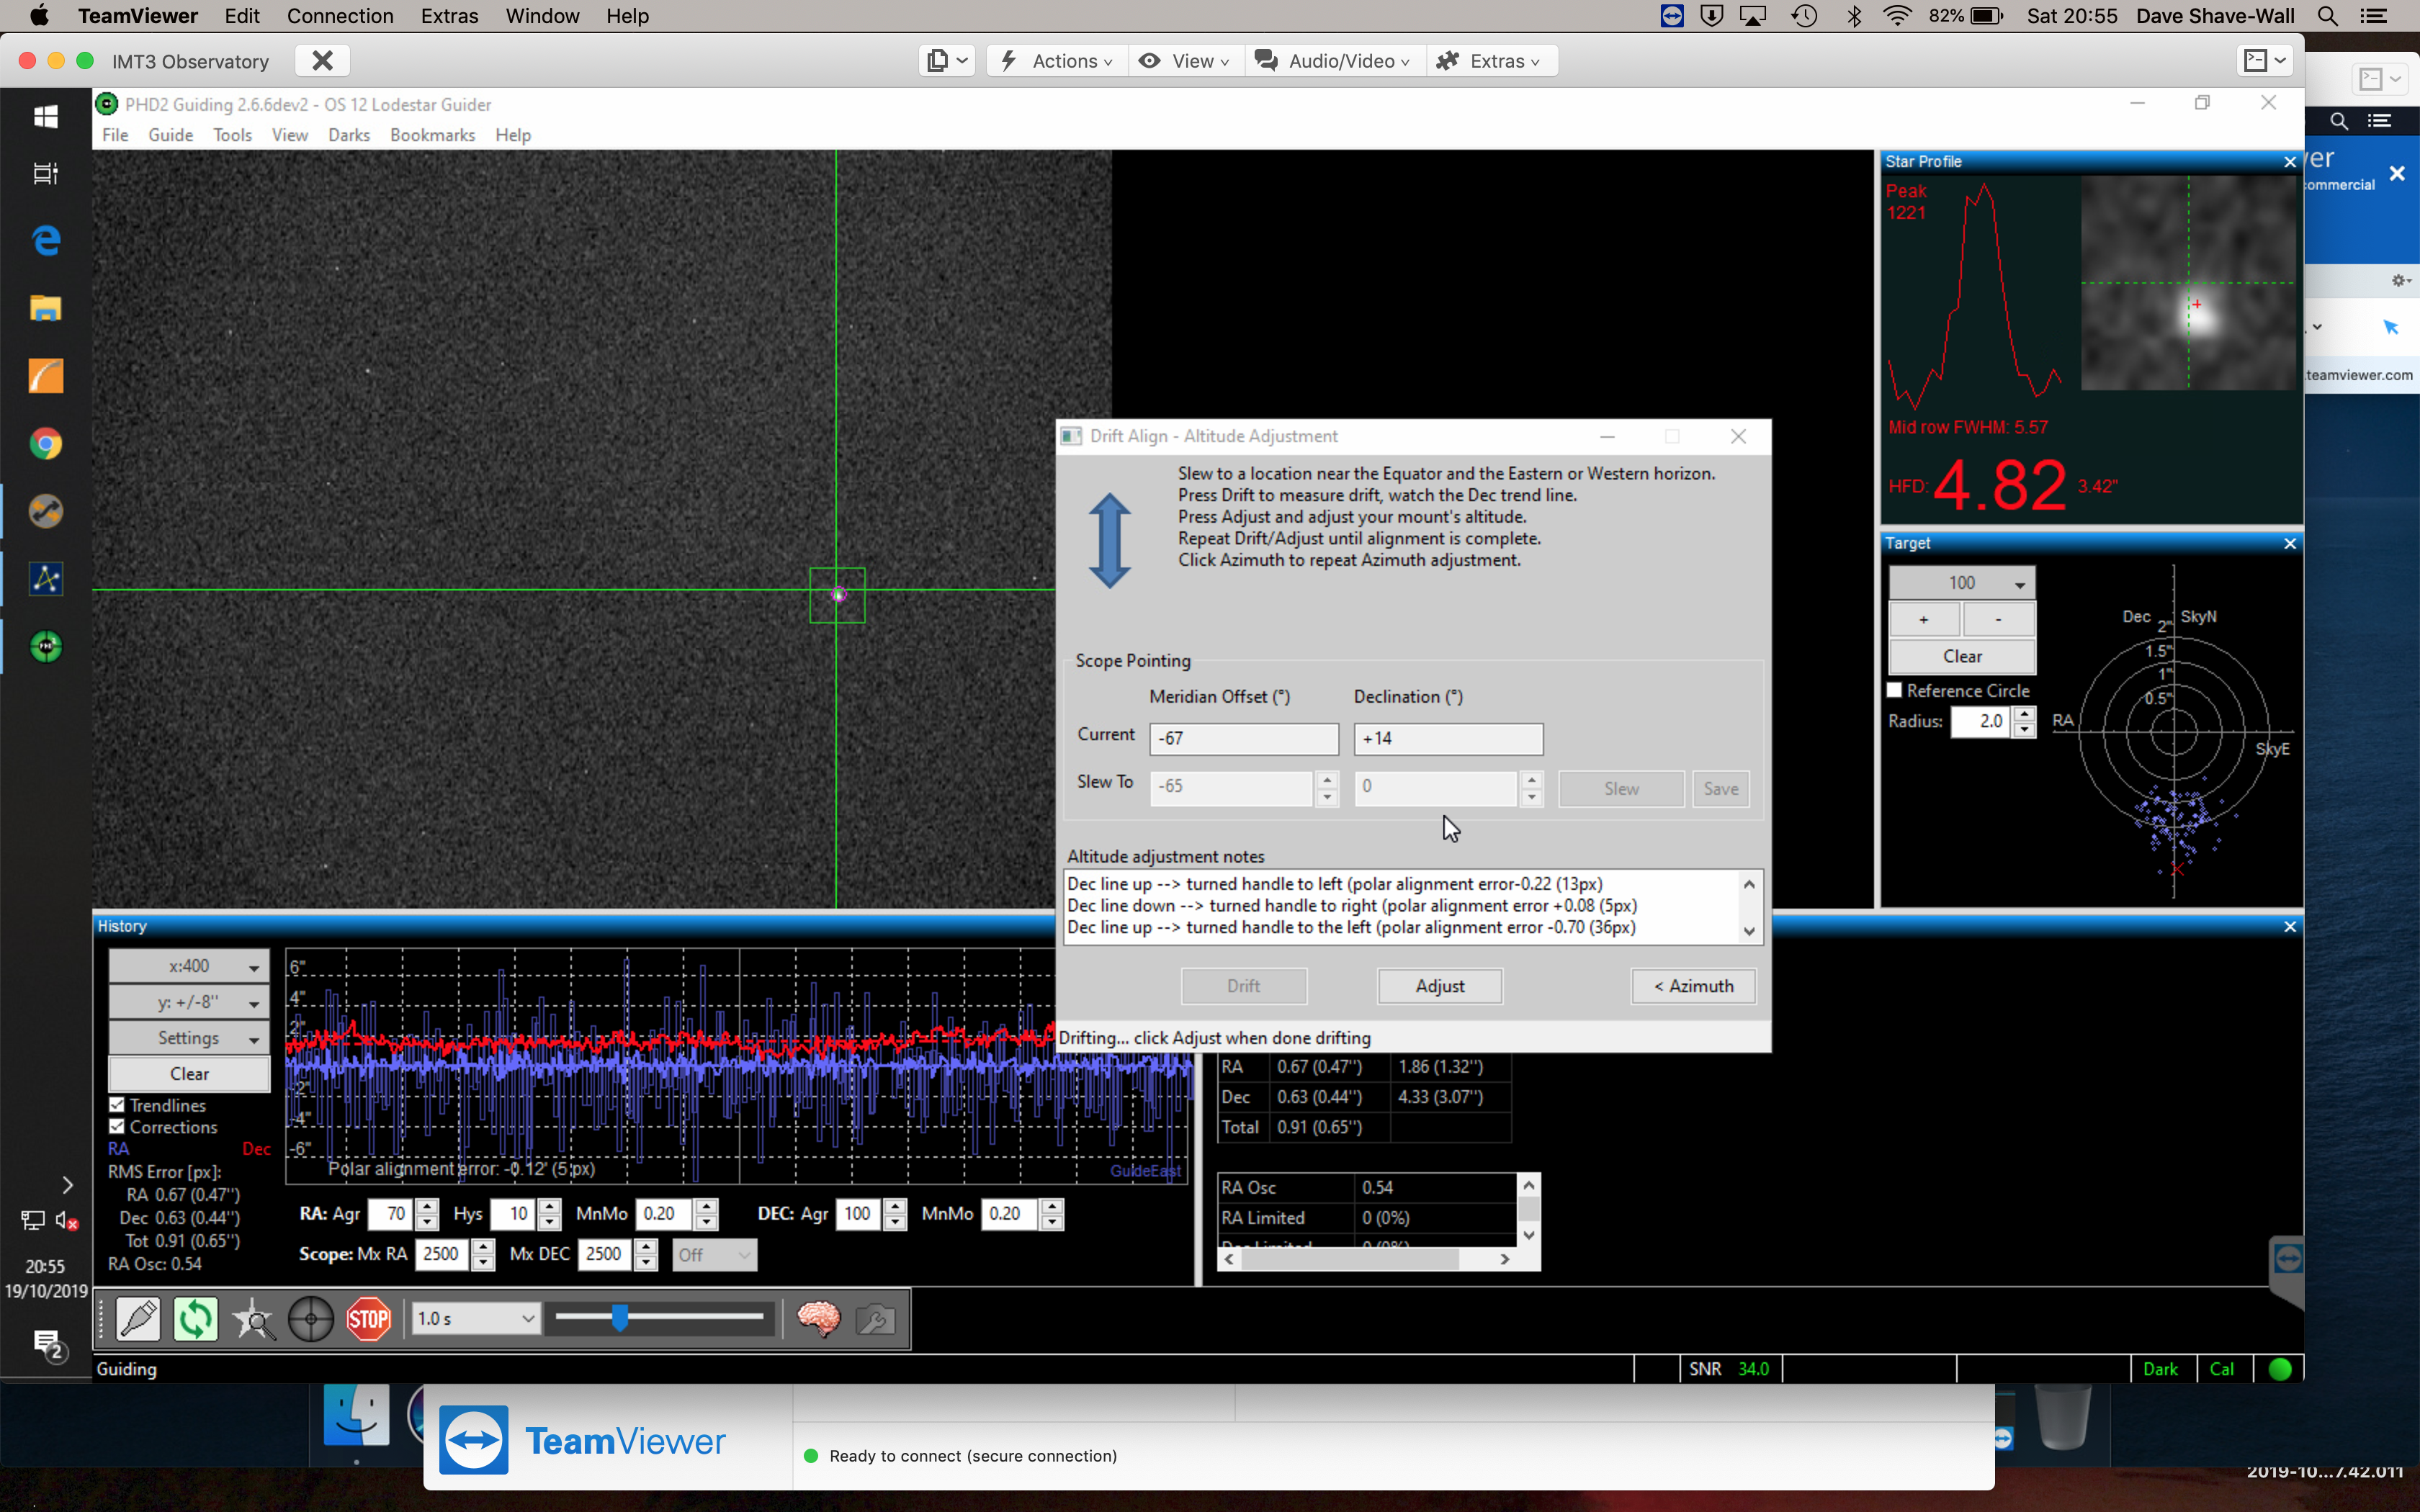
Next I moved the star to place in the Lodestar FoV. Now I can measure the azimuth polar error, ALWAYS ignoring the RA line. Looking at the Dec line I could see I was out by 2.43′ and 39px. I adjusted the thruster knobs on the MEII to move the star to the outset edge of the purple circle showing the error, in this case the right thrust in and left thrust out. I then drifted again and make sure the purple circle gets smaller and the DEC line a much shallower angle.
After first adjustment 0.53′ and 34px out
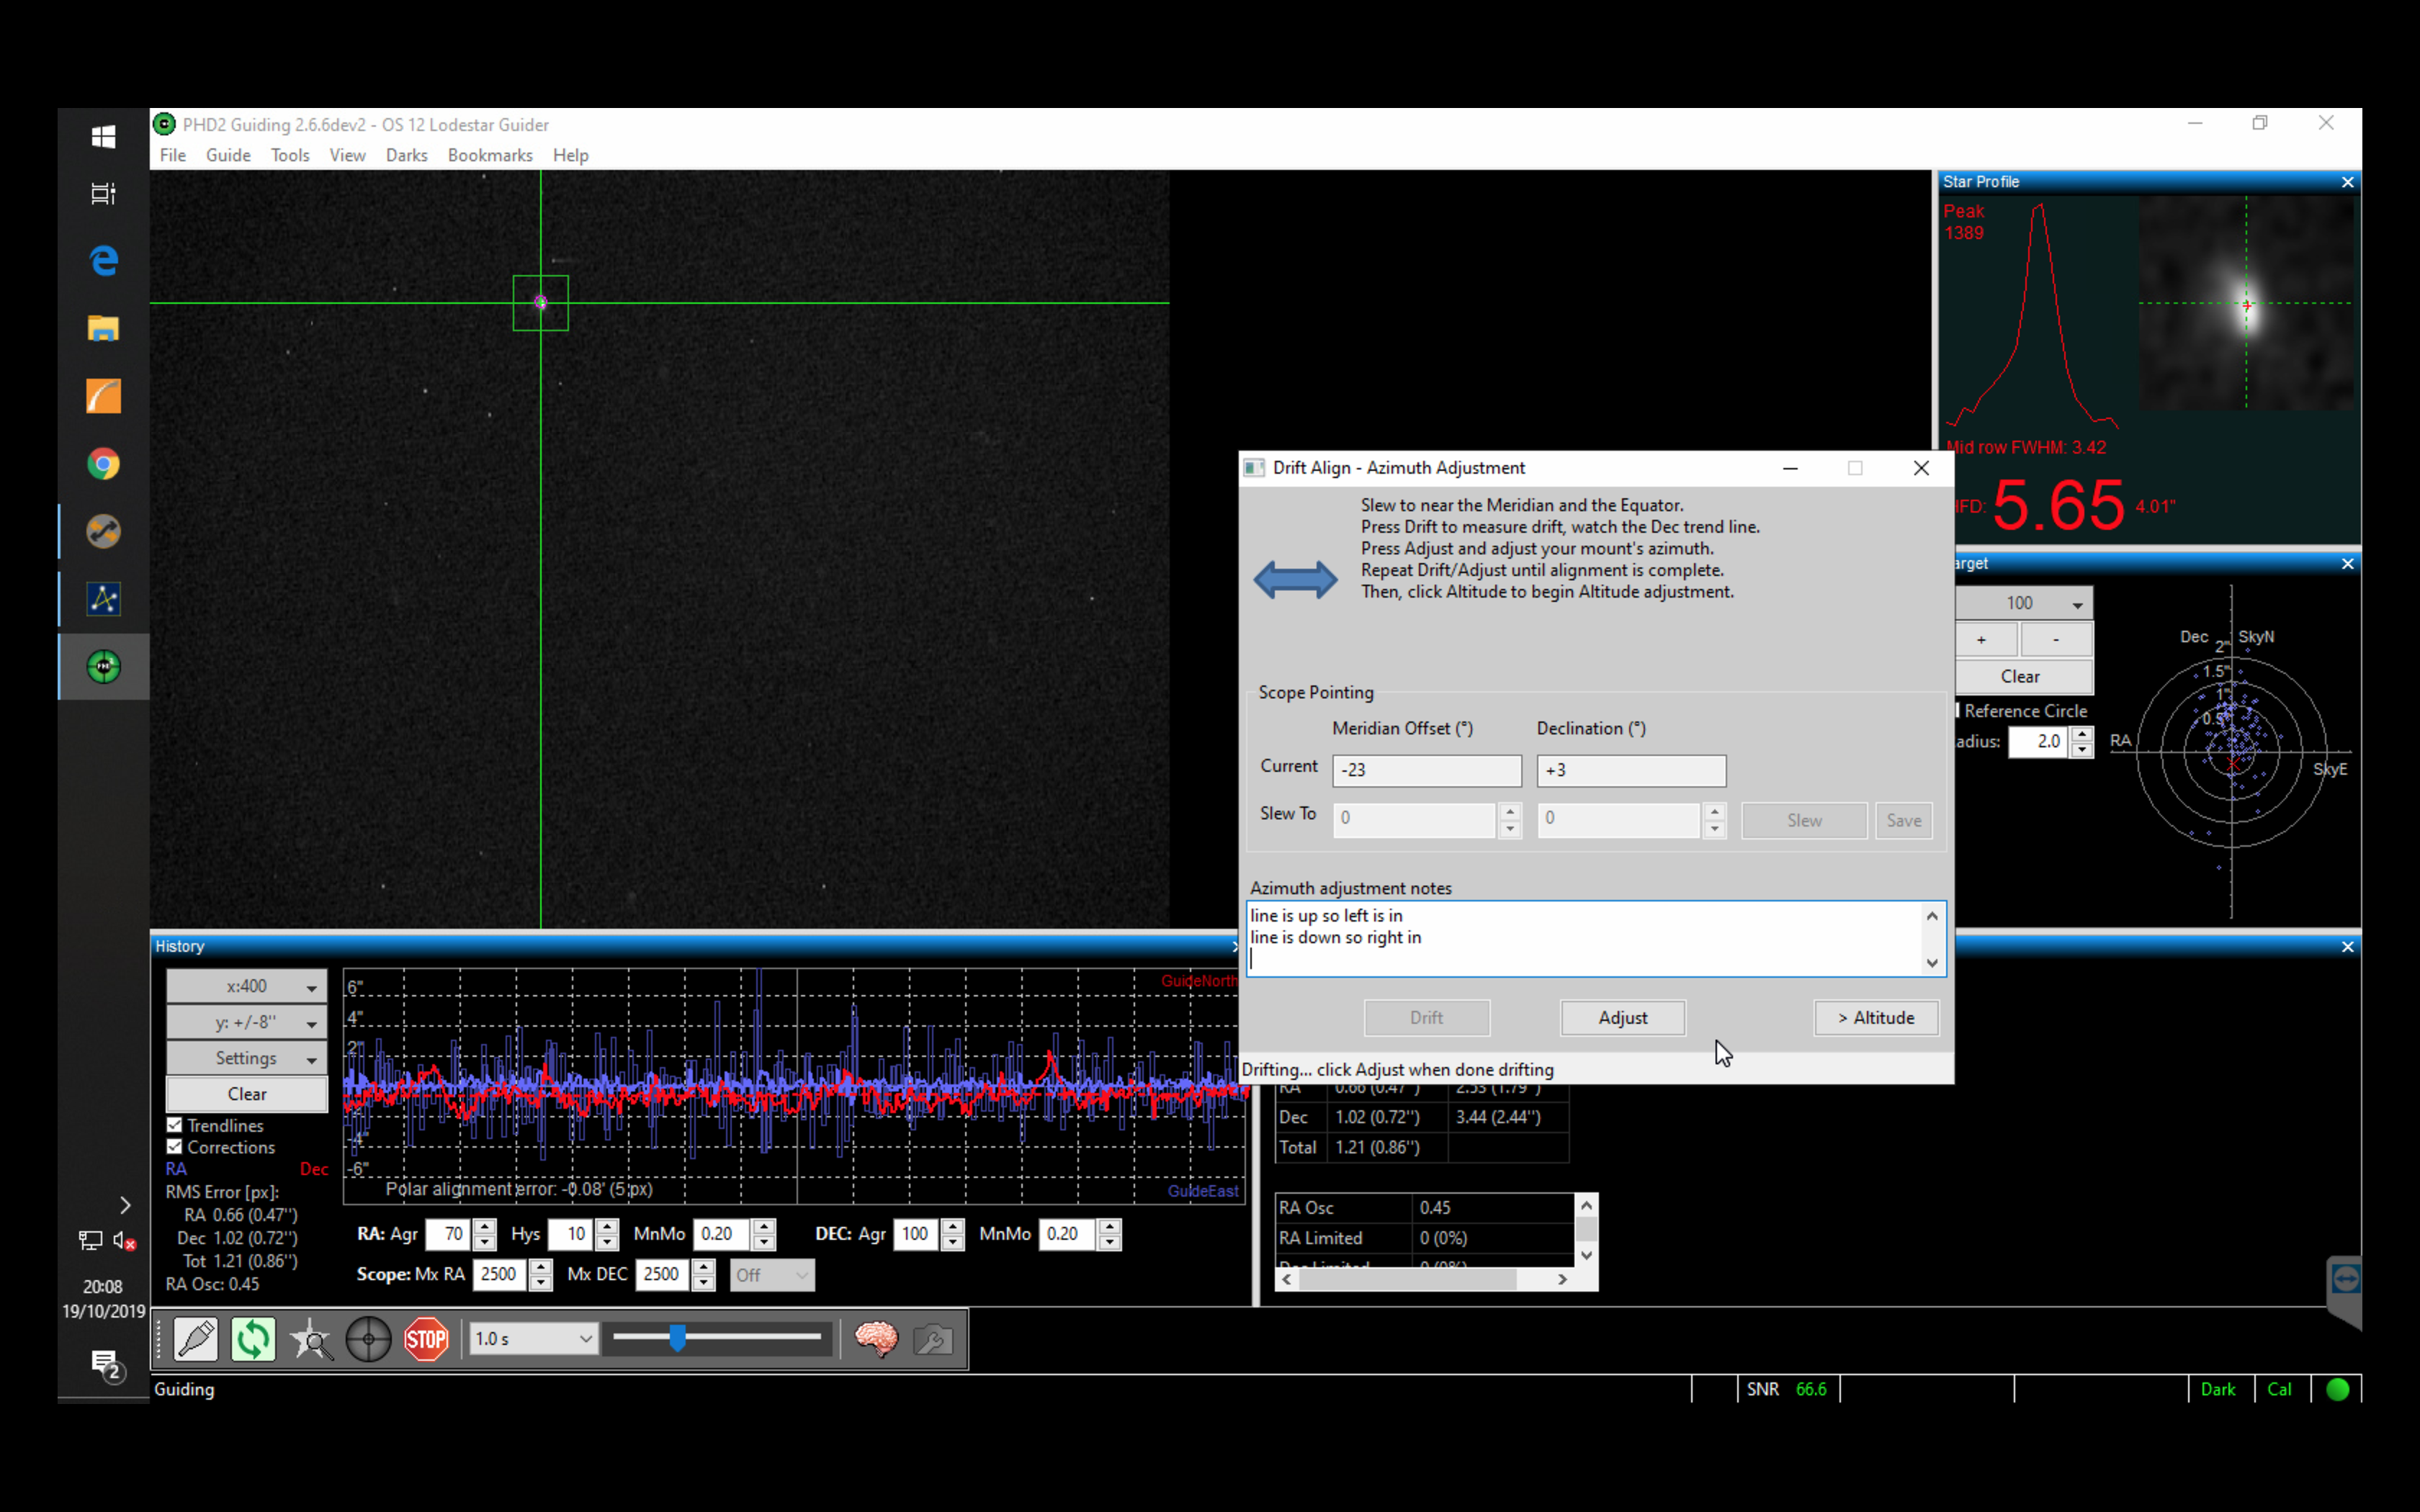
I adjusted again and got the azimuth error down to a respectable 0.08′ 5px error.
Azimuth error 0.08′ 5px
The graph on PHD2 should started to look fairly flat, and so I then attempted to fix the polar error for altitude. I selected a star in the West and near the celestial equator such as Rasalgethi in Hercules.
Rasalgethi used for Altitude adjustment
I watched the DEC line only and ignored the RA, the DEC line this time reflecting the error in altitude. Then I adjusted the mount using the altitude adjustment spanner moving the star again to the outside of the purple circle and then retested, finally getting the error down to a suitably small number after only 1 turn of 0.12′ 5px error.
Altitude adjusted to 0.12′ 5px error
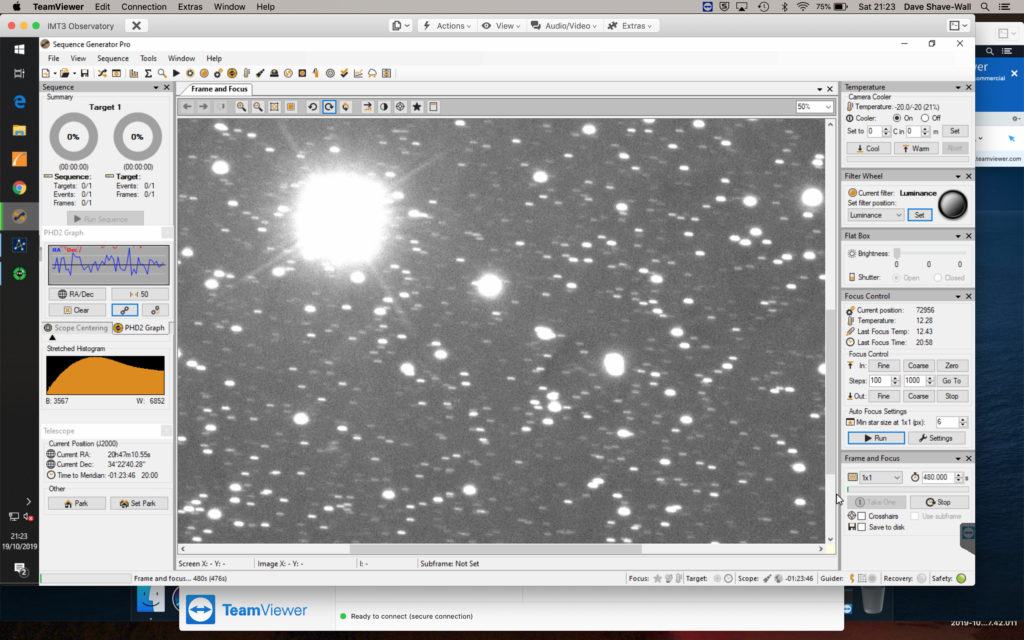
Unfortunately at the extreme West I could only expose unguided for 1min on the 12″ at 2.5m focal length, the stars otherwise looked trailed.
Trailed stars at extreme due West
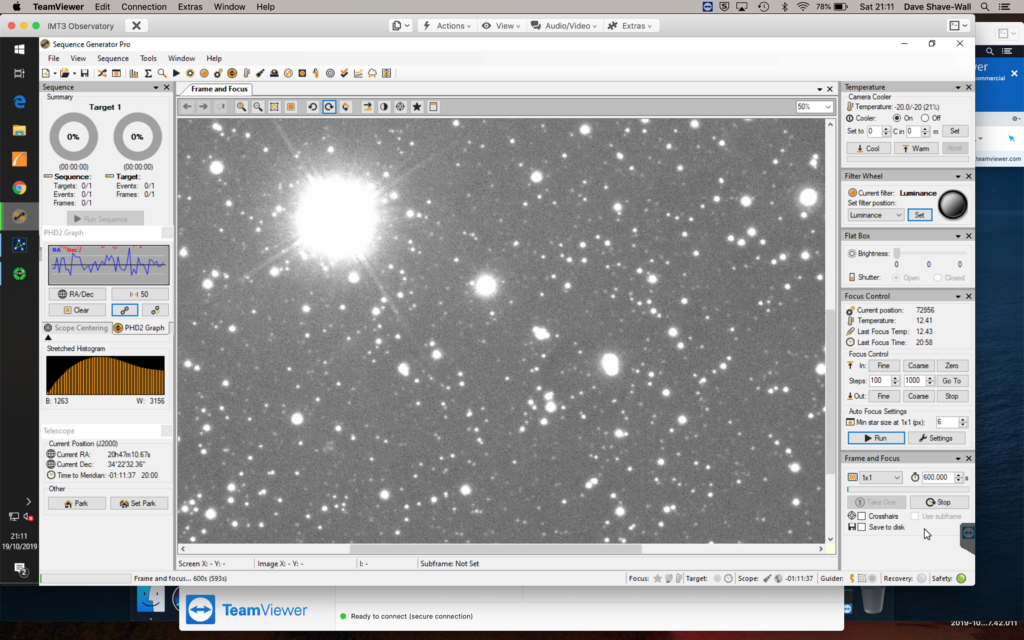
I then went to near the meridian and a 4 min exposure produced nice sound stars.
4 minute exposure near Meridian
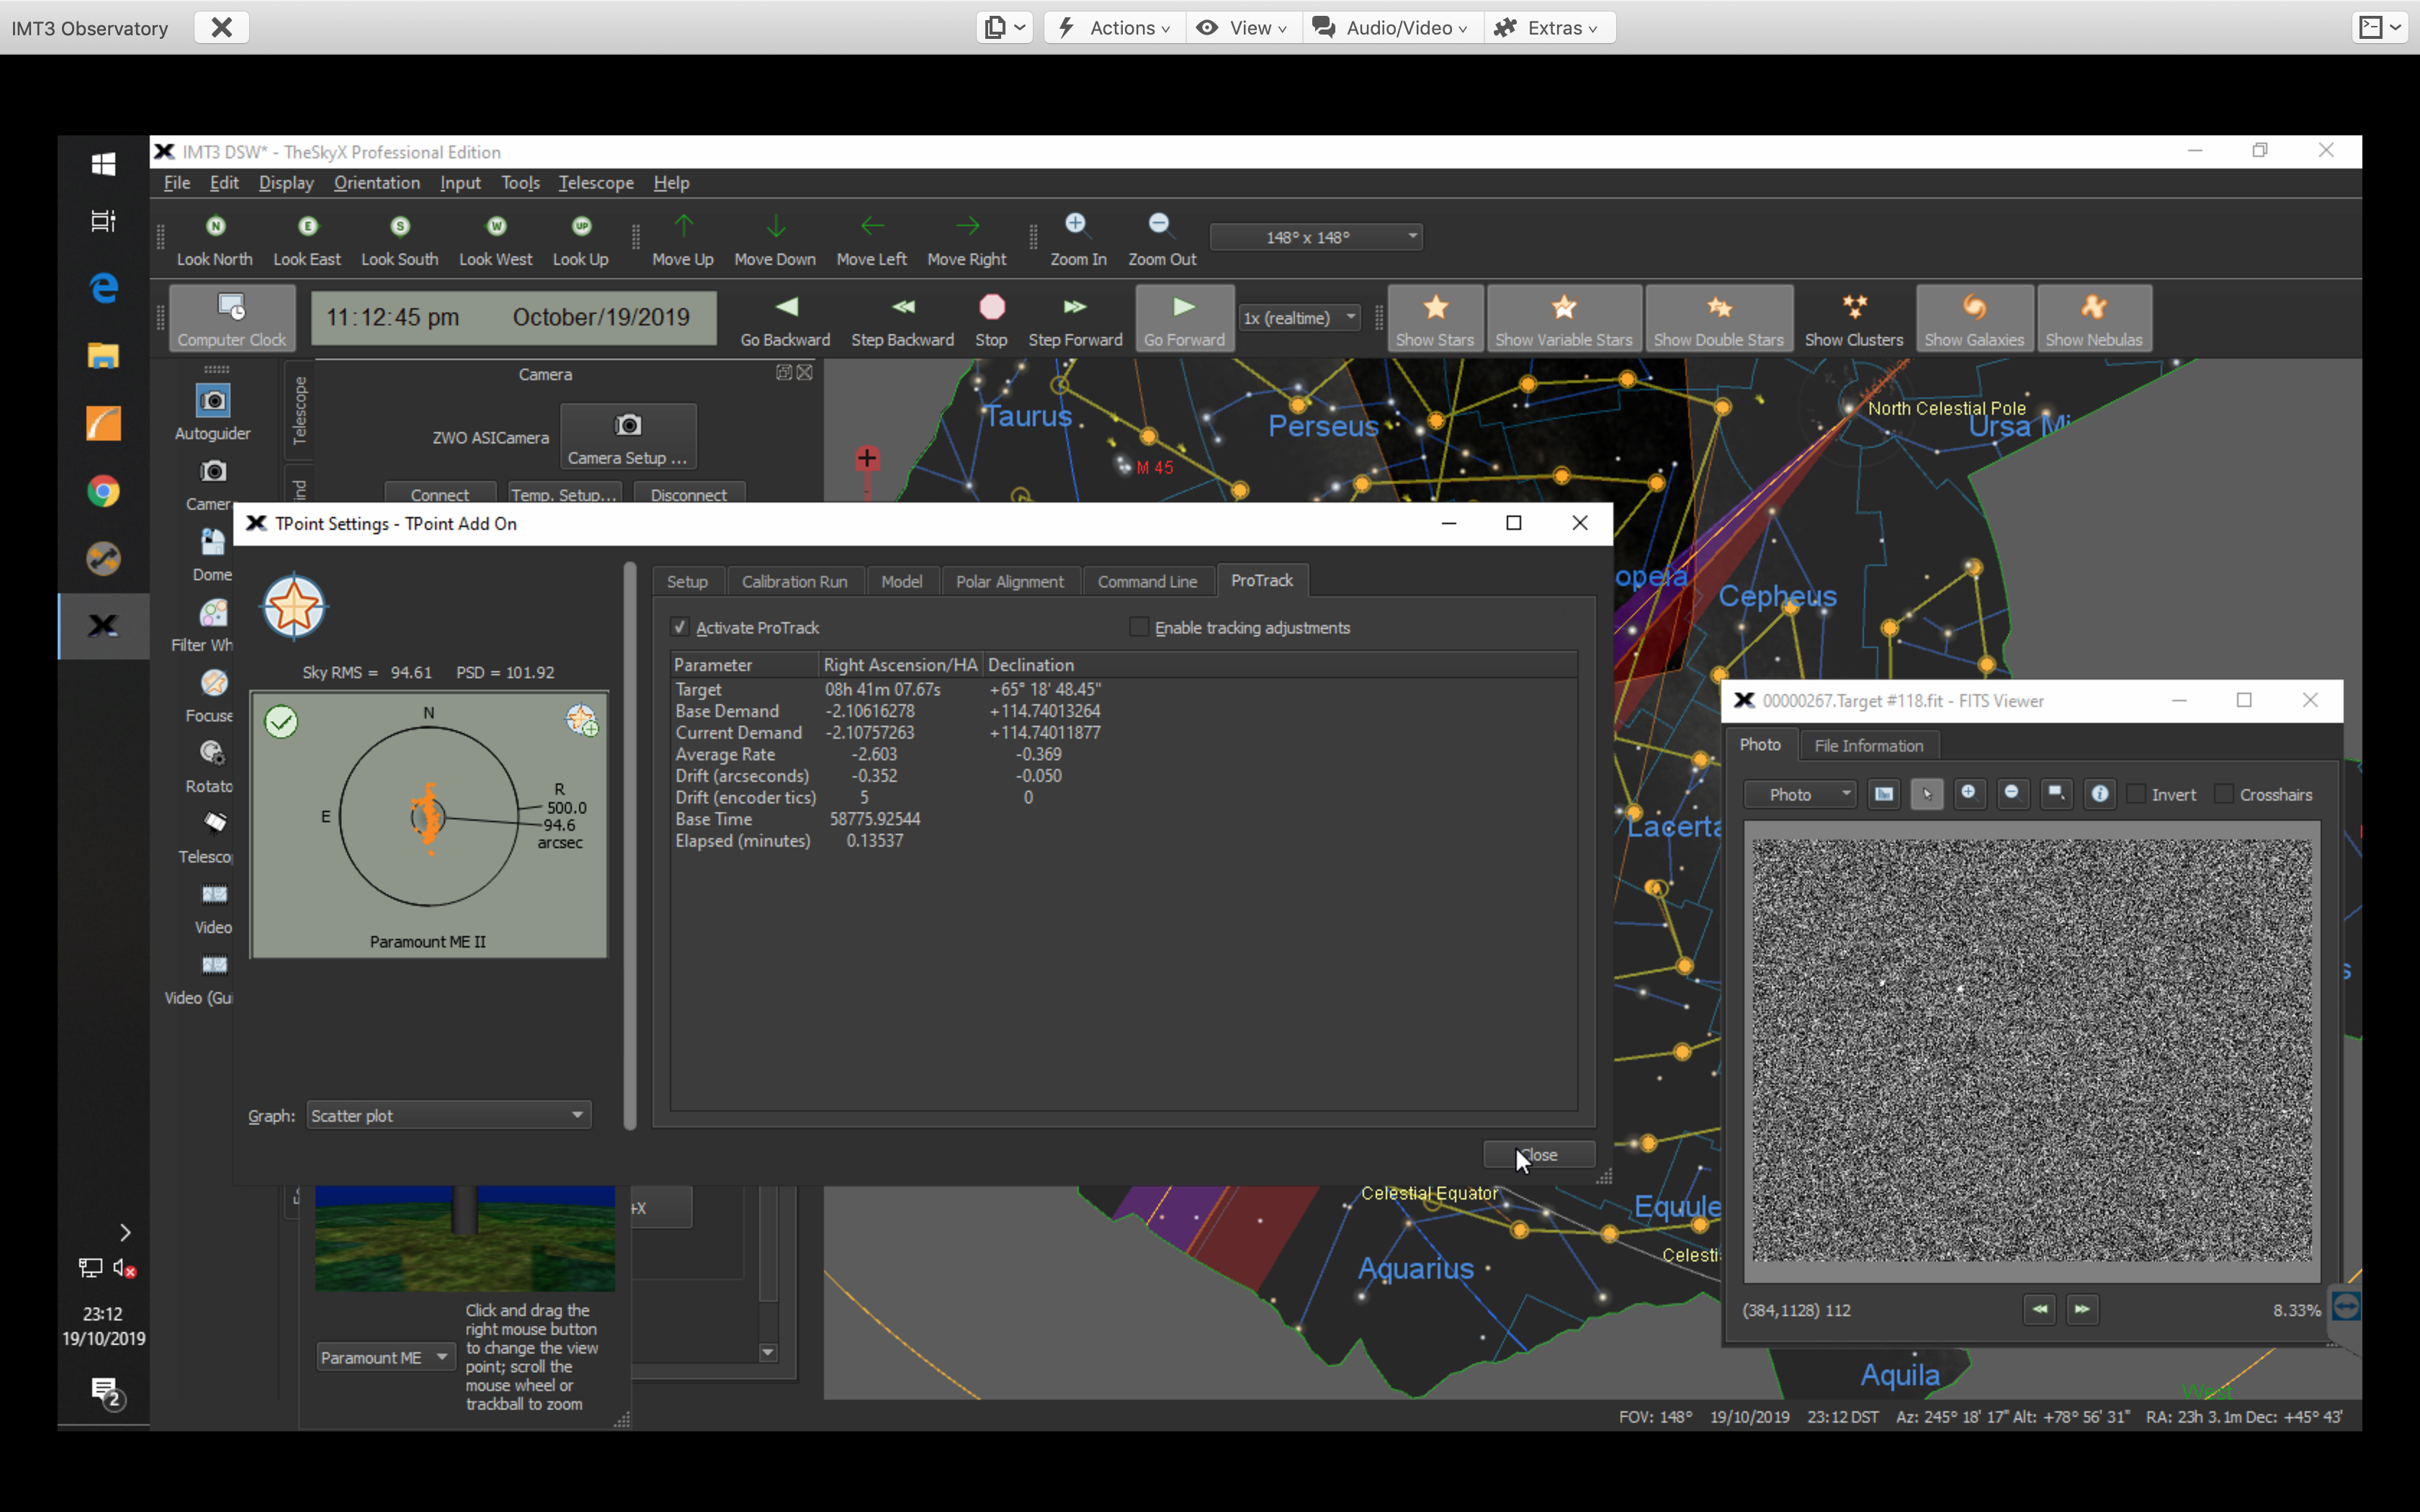
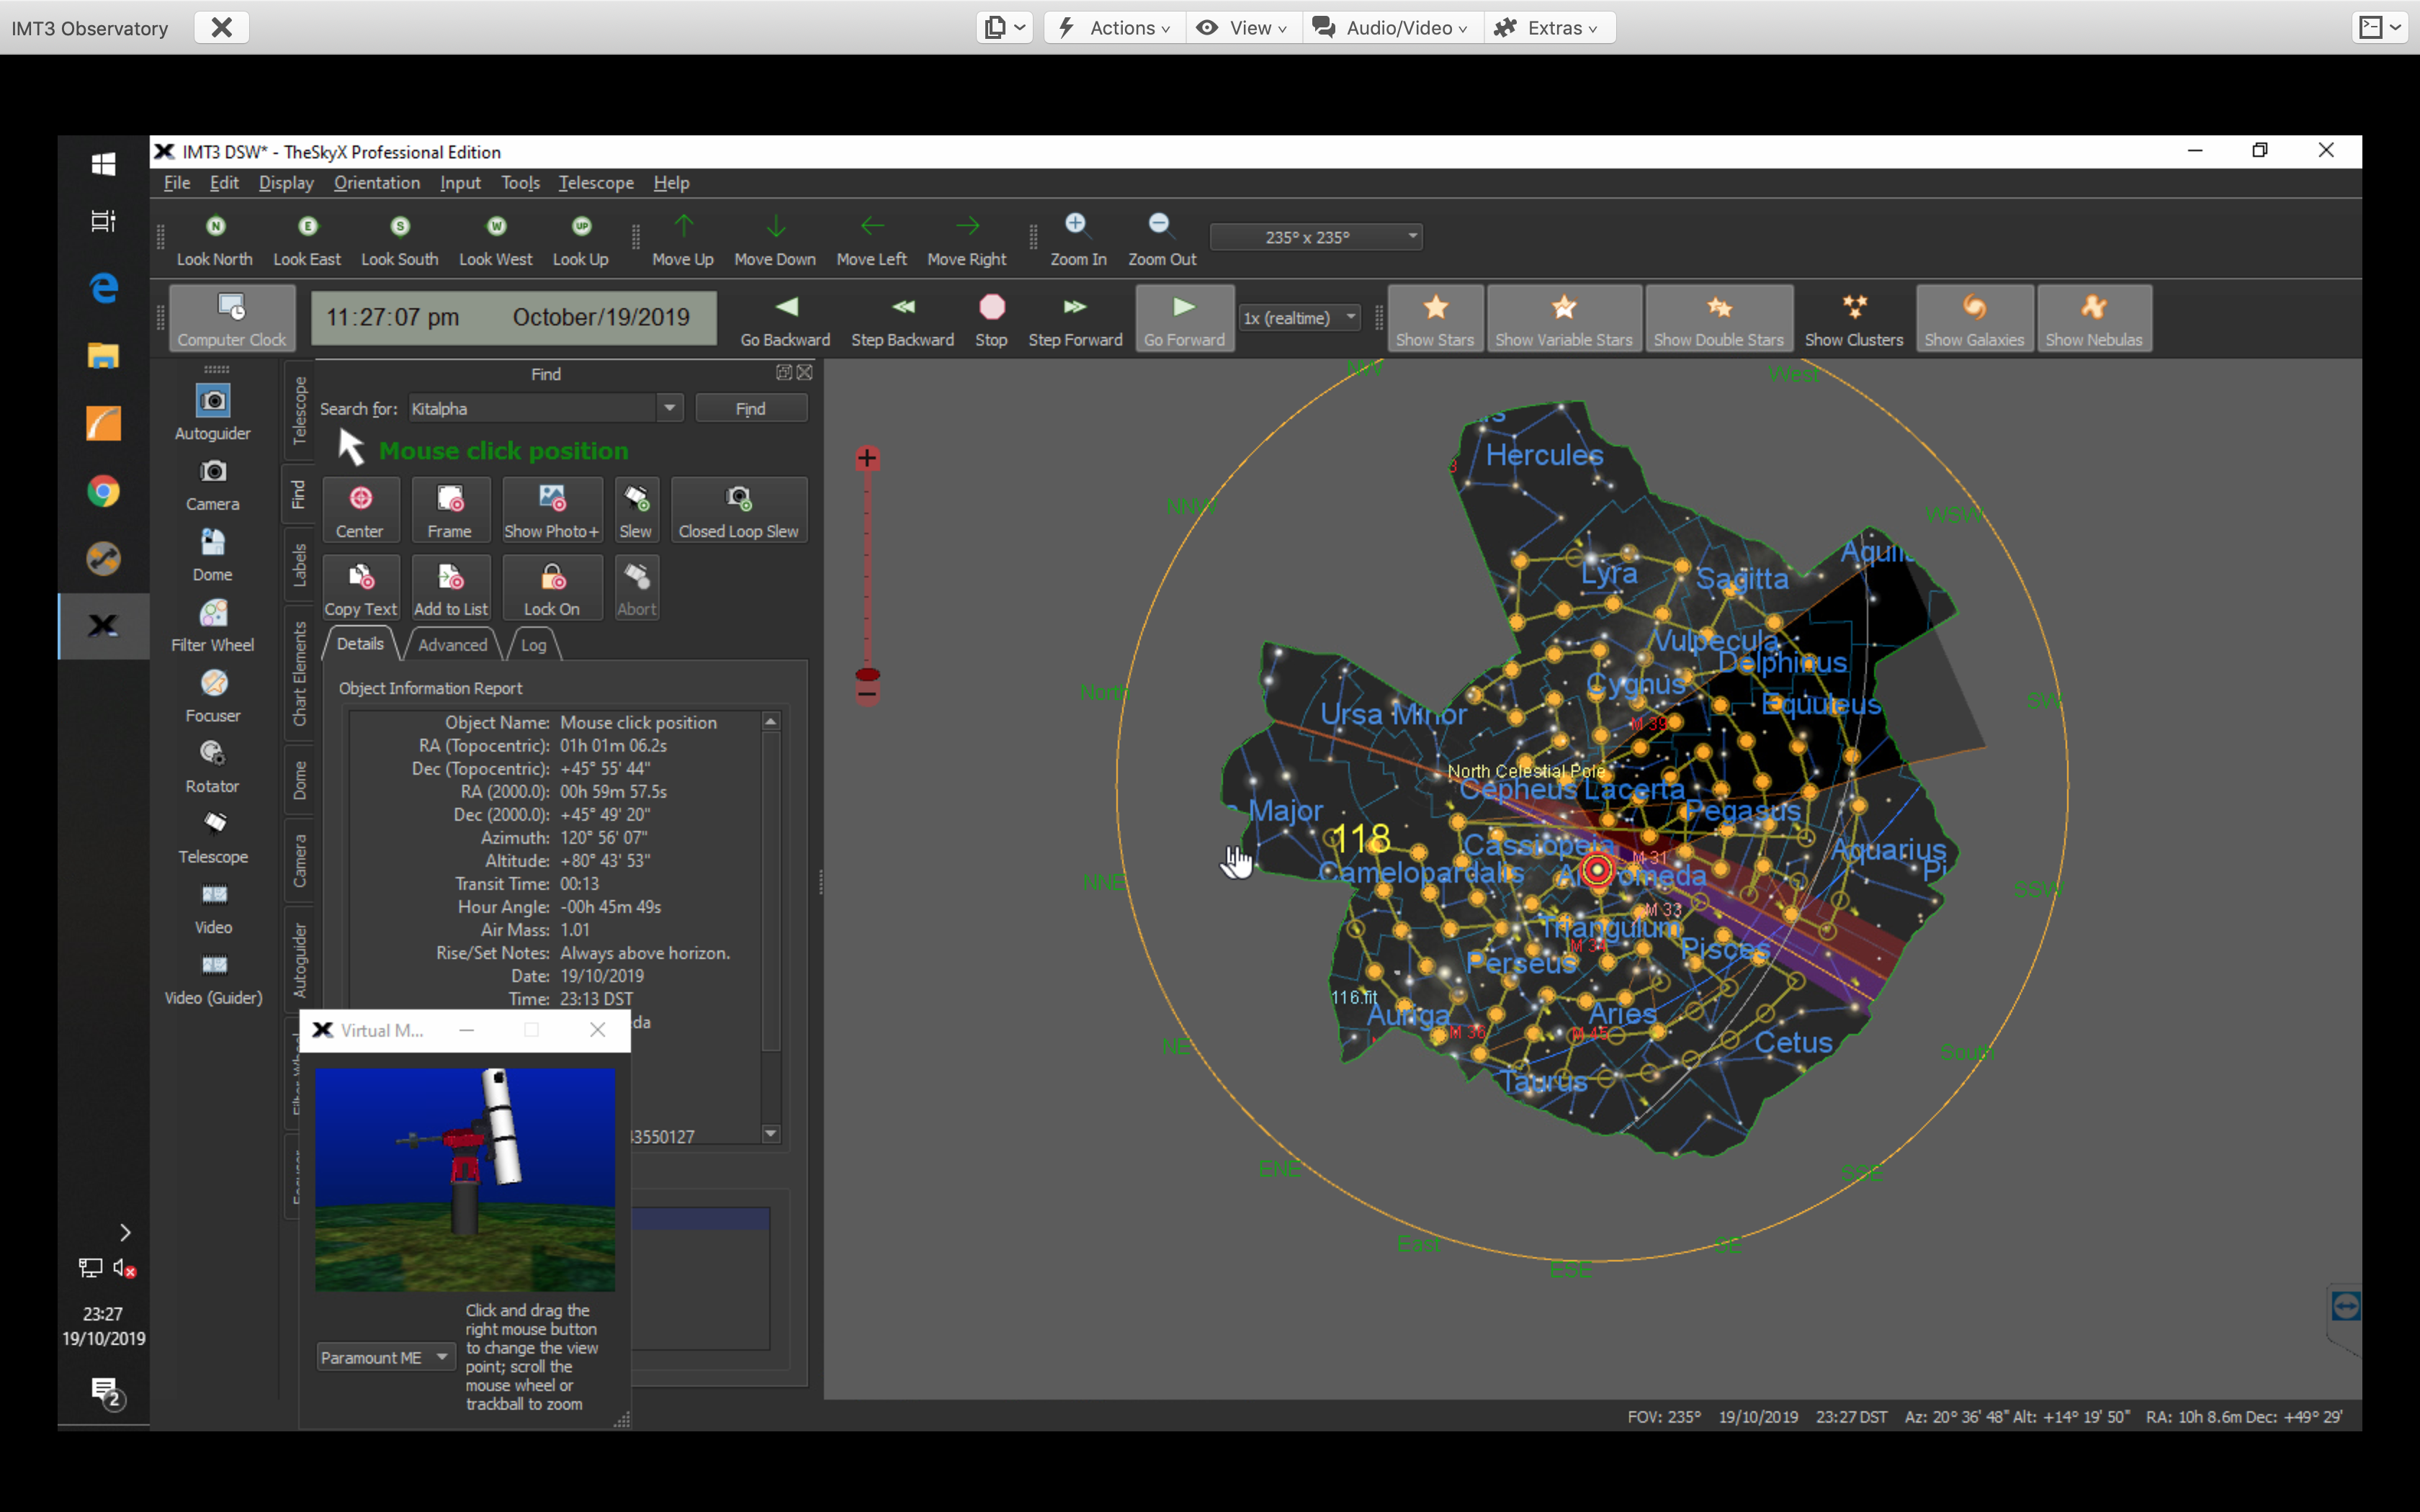
I then went on to do an automated TPoint run, but the problem seemed to be that a large number of samples could not be solved. The resulting TPoint model of 118 samples of which only 90 were usable, was worse than the 60 point model I had before. I will therefore redo the TPoint model the next time it is clear.
TPoint model not as great at 60 points I did before
The whole 118 model took approximately 1.5 hours to complete which is so much better than a manual model.
Completed model 118 points
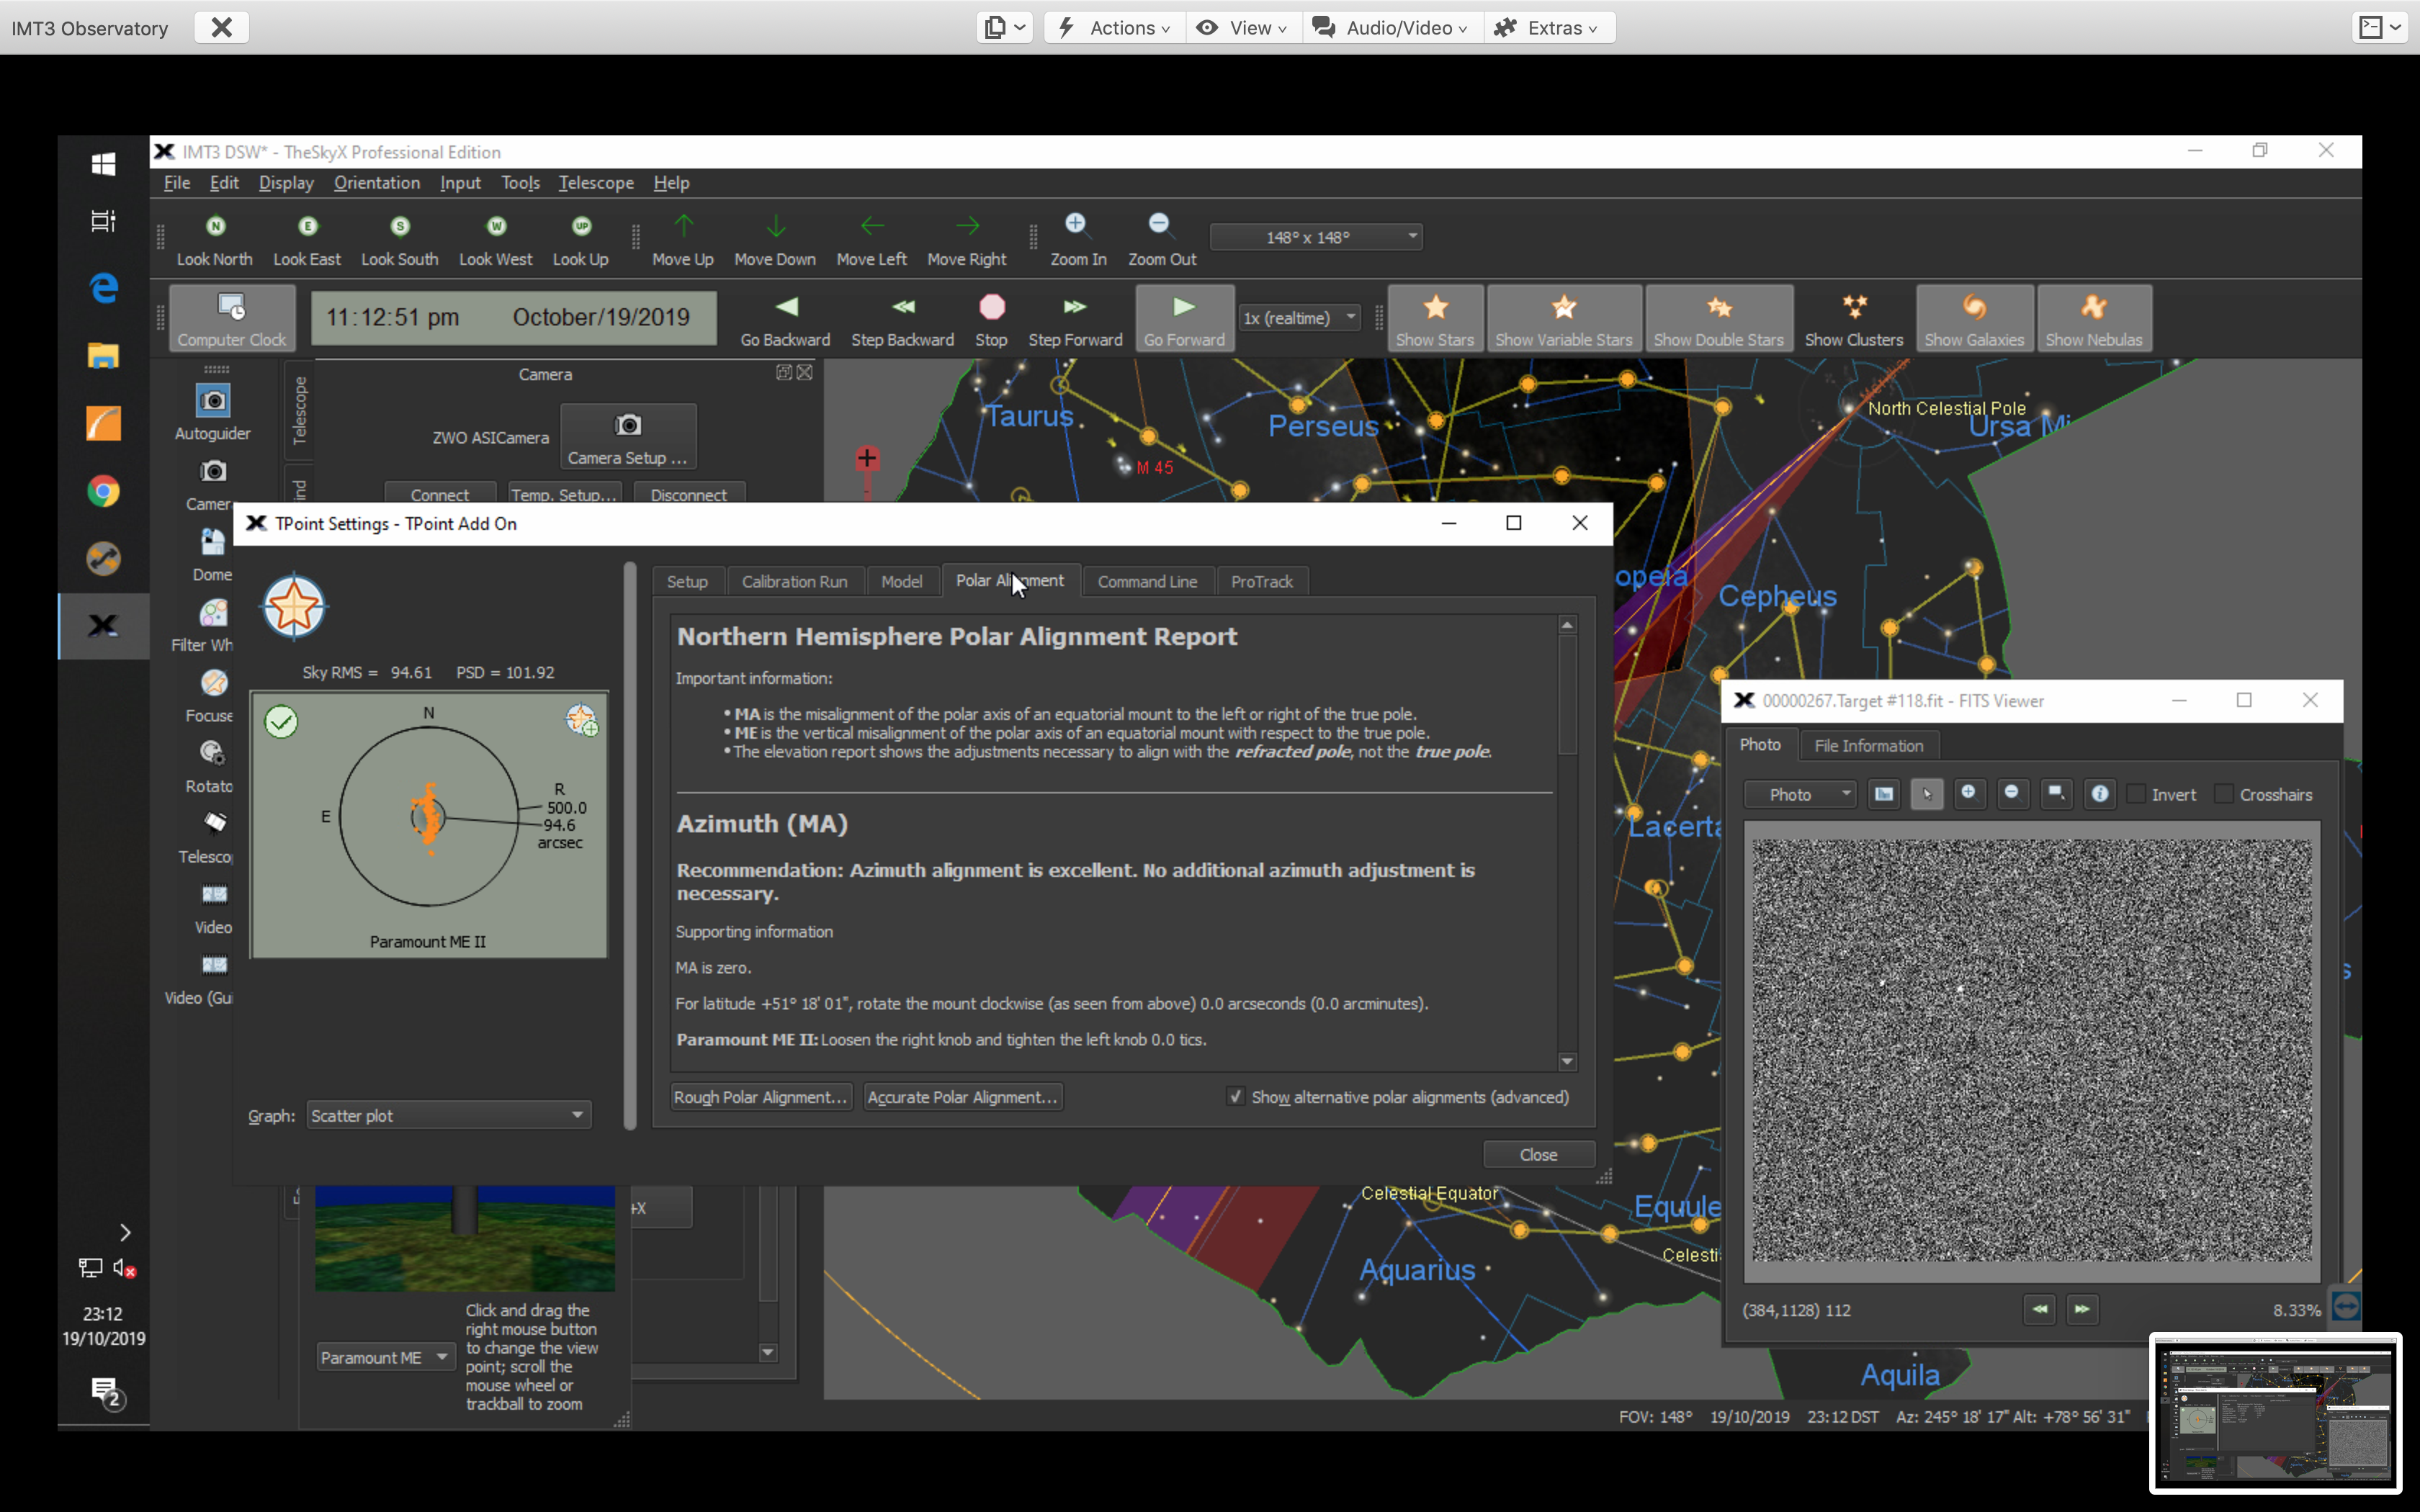
The good thing is the TPoint model told me the polar alignment is excellent!
Polar Alignment is excellent 🙂
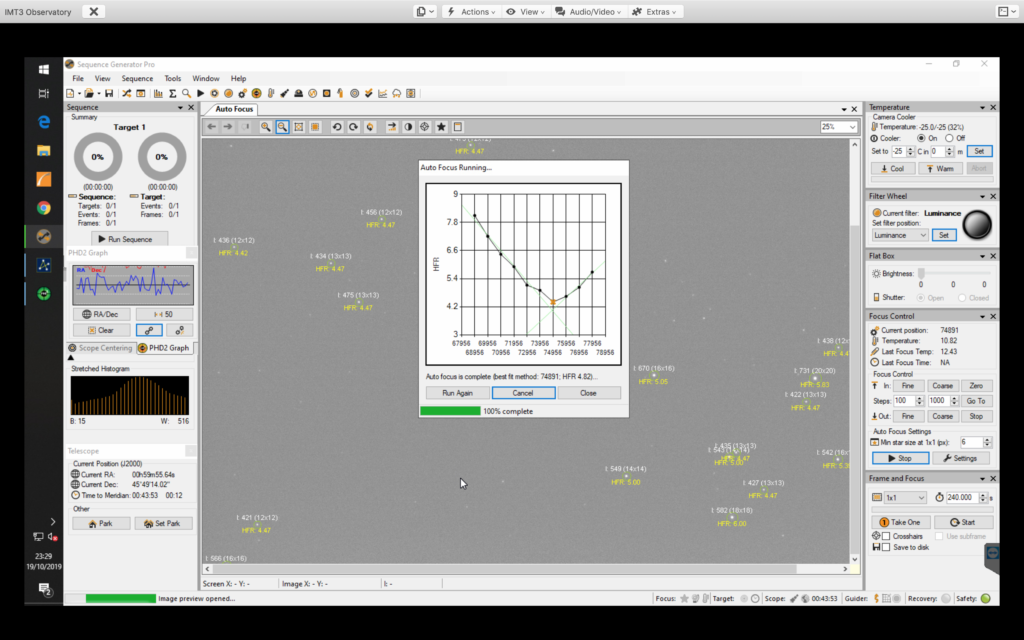
It is now @23:30 so I went on to start imaging. First I needed to perform a focus run on Luminance which I did.
Good focus on luminance
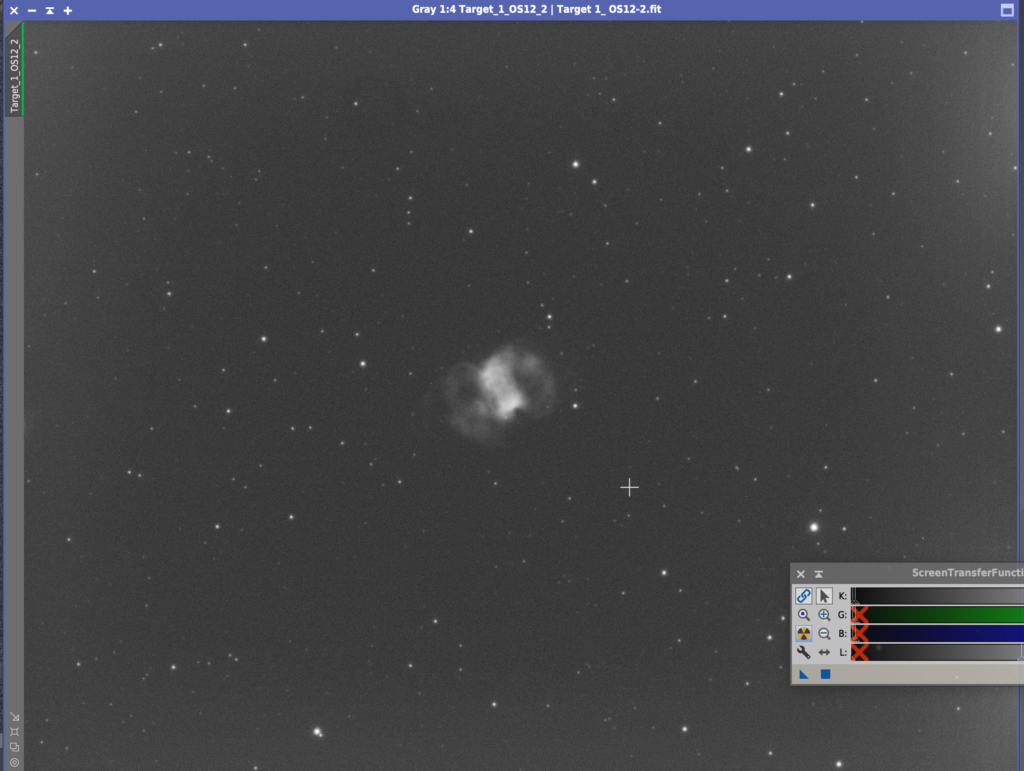
I then slewed to M76 to start my image run, a 30s exposure showed stars in focus and little dumbbell prominent in OIII.
Focused stars and M76 centred
This time round I decided to set the Gain to 139 and the Offset accordingly to 21. I also decided on a 10min exposure rather than 20mins front the last set.
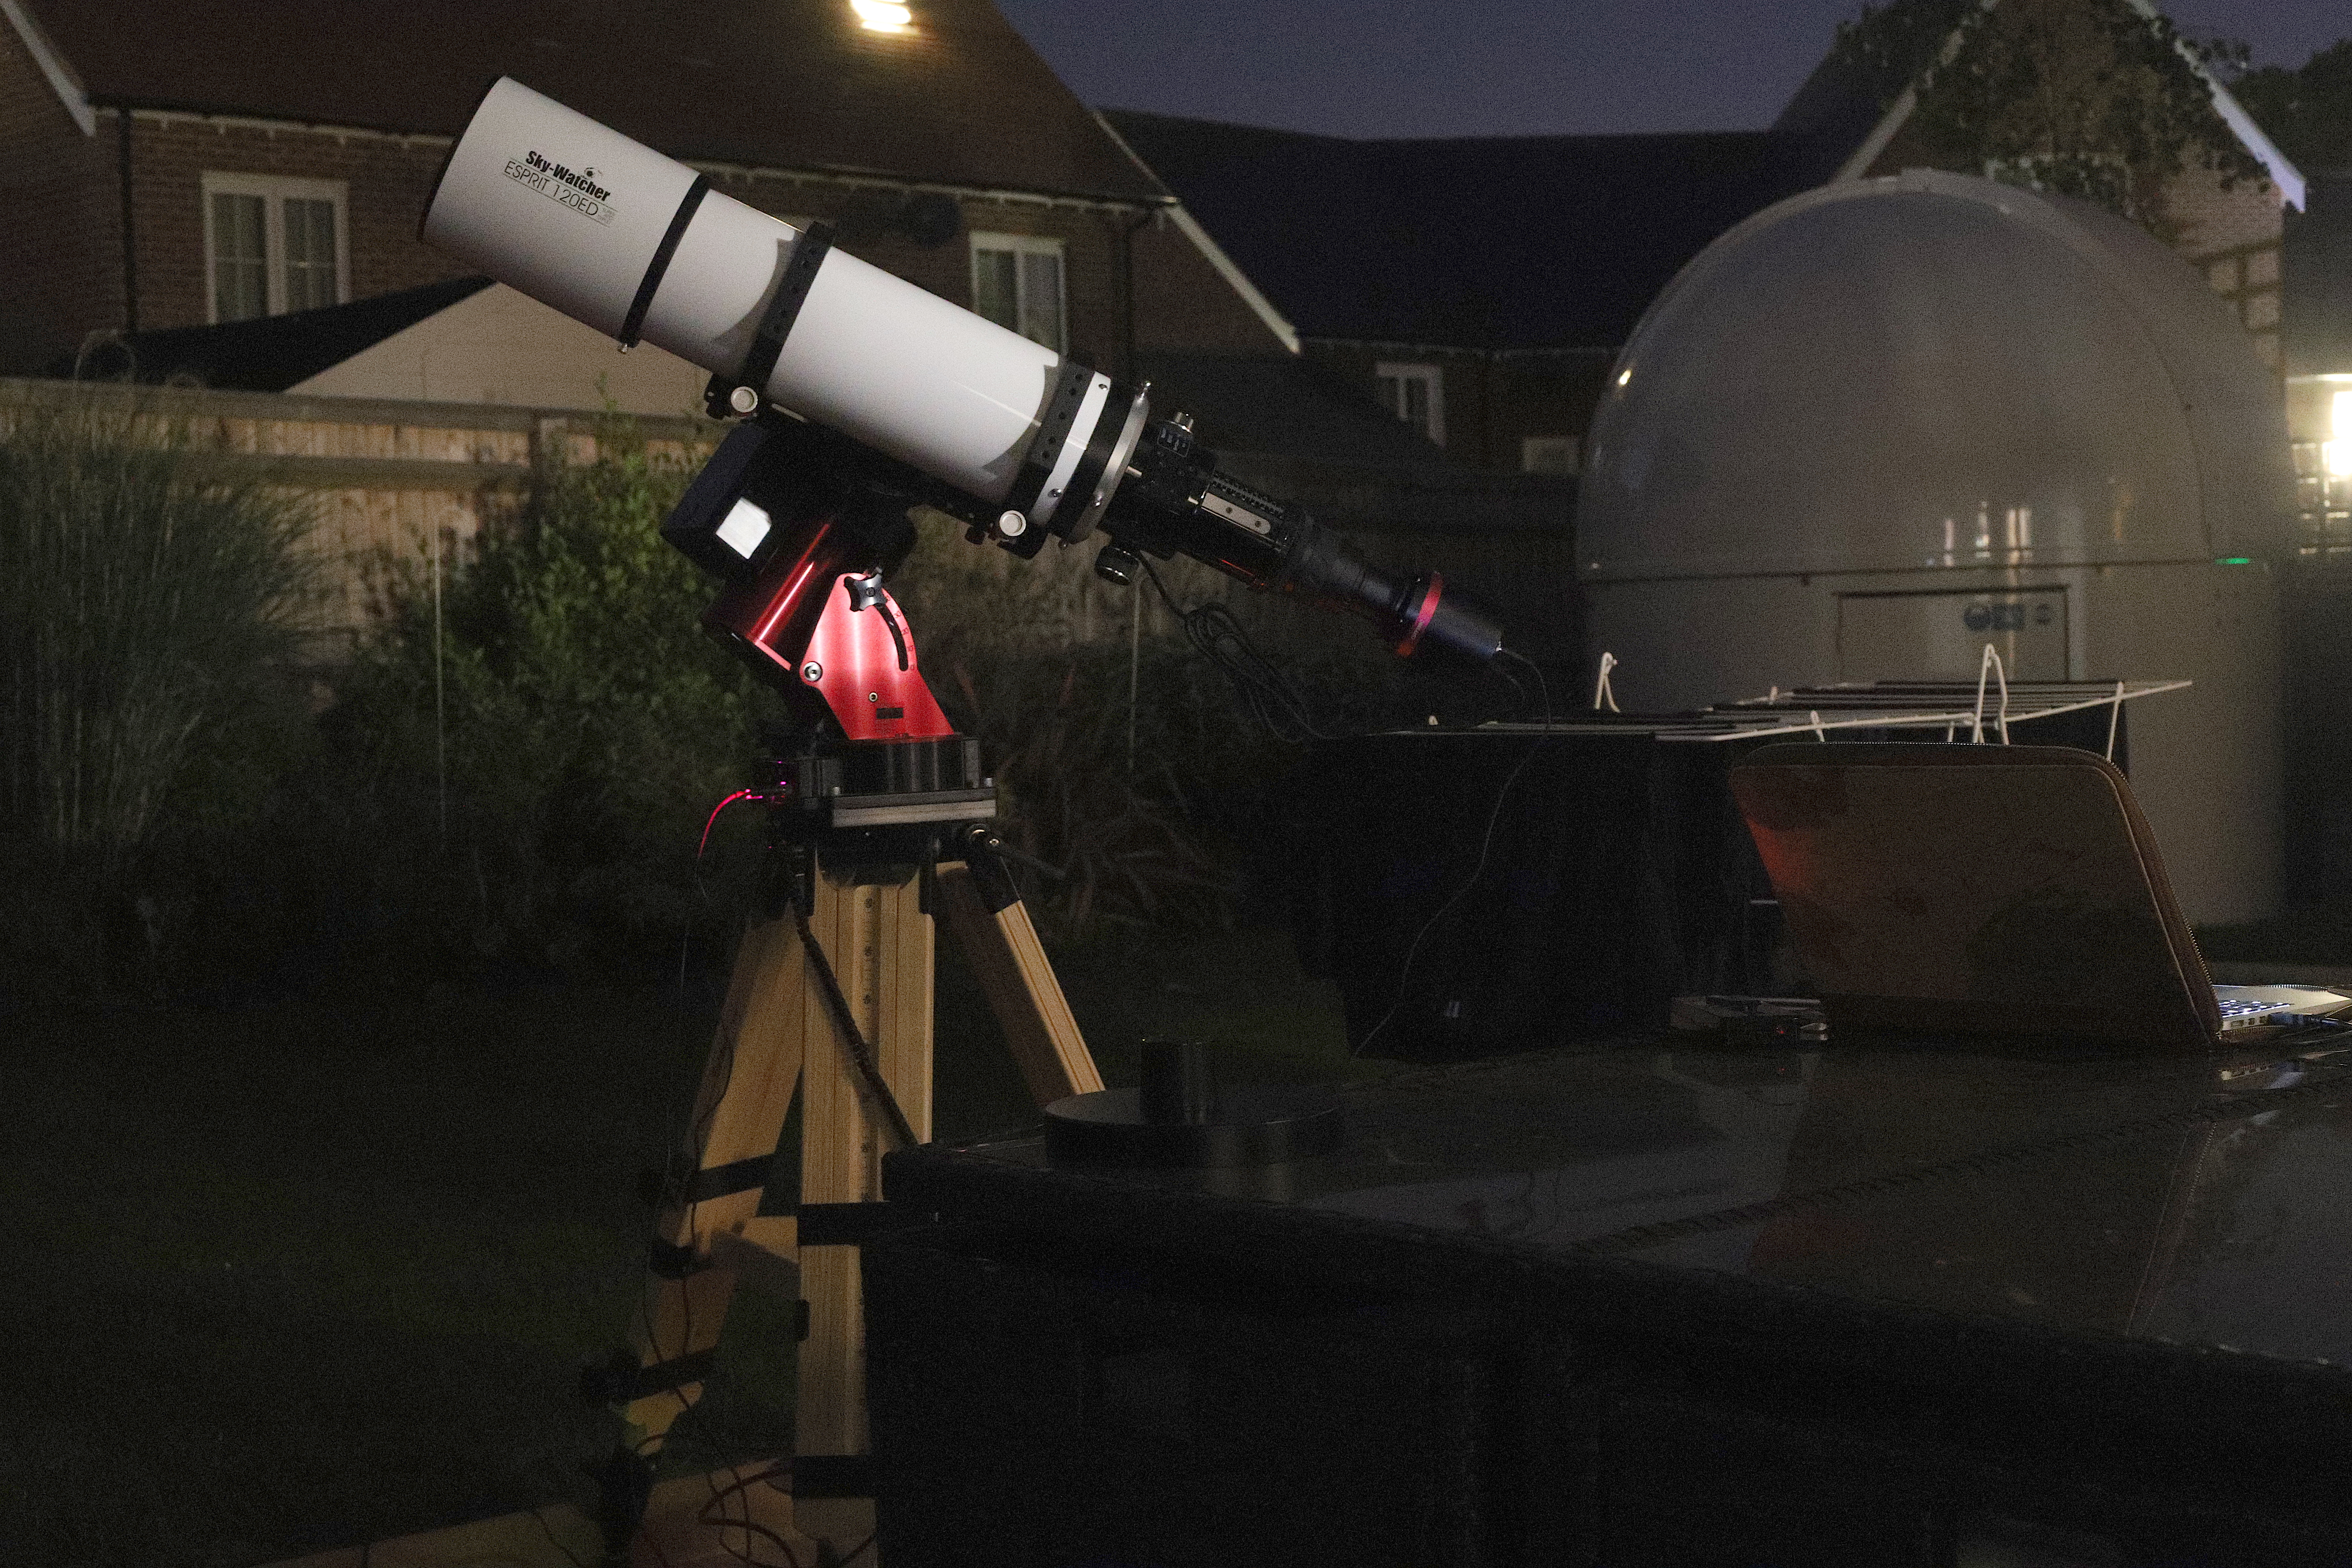
Tonight Bob will be learning how to control the observatory and using the Tak FS102 to trying imaging. Meanwhile I will be setting up my new Paramount MyT on its Berlebach tripod and with a new Sky-Watcher Esprit 120 mounted on top. The business end has my new QHY168C, yes I purchased a 2nd one, they are that good.
Travel setup and IMT3 dome
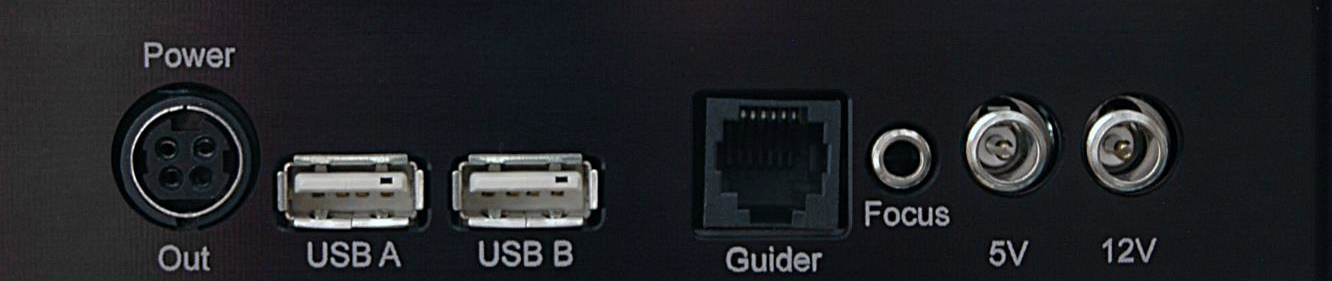
Whilst Bob played, I setup the travel kit on the new patio. I realised I could connect the camera through the USB on the MyT to one cable that won’t get snagged. I will however need to connect a power for the camera as that is currently trailing. There is a power connector on the back of the mount but I believe it is only rated to 1amp. There is however another power out which is rated at 7.5 amps so I will buy a Tycoon KPPX-4P 4 pin couple of connectors and makeup a cable so I can plug into that directly.
Connectors on the MyT mount
So I connected to TheSkyX with the mount and slewed to Arcturus. I could not connect the QHY camera to TheSkyX as I seem to be missing a driver. I will take a further look tomorrow to see if there is one. Instead I used the EzCap software they provide and connected the camera to that.
I focused manually as I have not motor focus to keep things simple, and soon had stars in view. I then did a manual spiral search until I found Arcturus and then synced on it. I could then slew around the sky with ease.
For polar alignment I have ordered (my friend GingerGeek has ordered) a PoleMaster mounting plate that I can use, this will make it easy to align. Tonight I just plonked the mount down without any polar alignment, thus anything more than 10 seconds produced trailing.
I tested cooling the camera, slewing and parking, although I need to see the park position 180 degrees from the current position to allow the scope rings to be in the right place for removing the OTA.
The scope and the mount and the camera make a great travel setup, each component is not too heavy to move by itself, the connection and setup is fairly straightforwards and I really do look forward to testing this out in October in Tenerife. I do need to test running from a car battery to see how long things last. I have my car battery I use for astronomy on charge and will test next time.
The connection of the camera to the flattener is a push fit and is missing the luminance filter. I will order the right adapters from Modern Astronomy so that I can fit later.
So I still have a few things to make, buy, test and do before October but good progress tonight on the travel setup front.
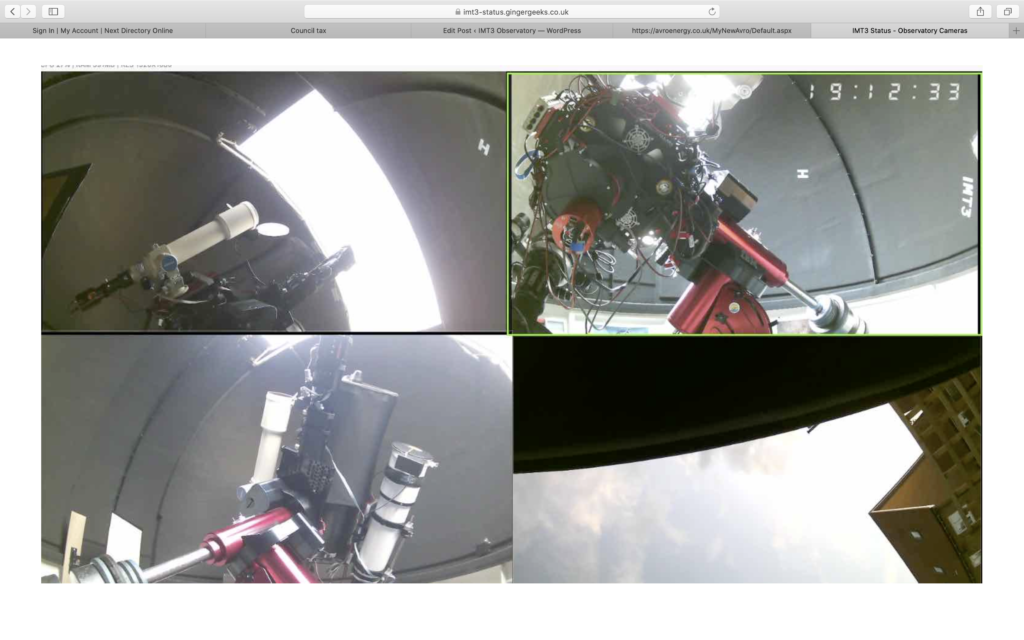
Meanwhile Bob has been making good progress with the Tak FS 102 in the IMT3. Imaging Arcturus and testing lengths of exposure on different objects such as M13. Some pieces of the sky Bob was imaging at 5 minutes unguided and others such as M13 only 3 minutes. I need to look at why this is given I now think the polar alignment from last night is excellent.
Imaging through IMT3
I reset the FoV indicator for the Tak FS102 in relation to the main 12″ scope. I need to find a way of slewing to given object for the offset scopes. I also need to be shown how you use SGPro to slew too, rather than using TheSkyX, so a slew, plate solve and then final adjustment.