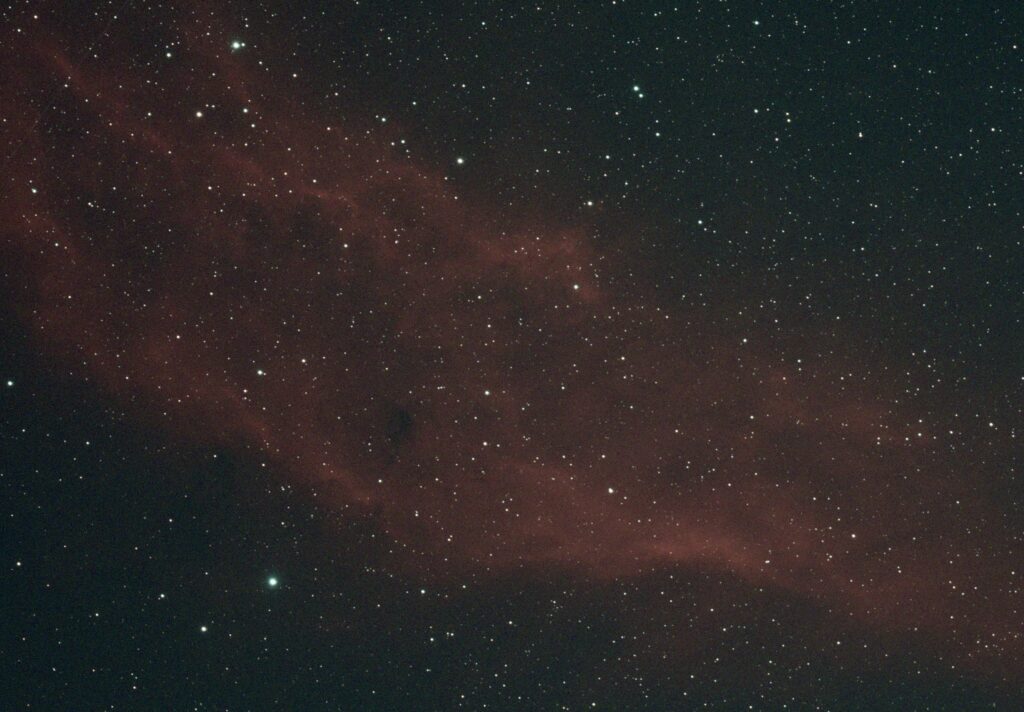
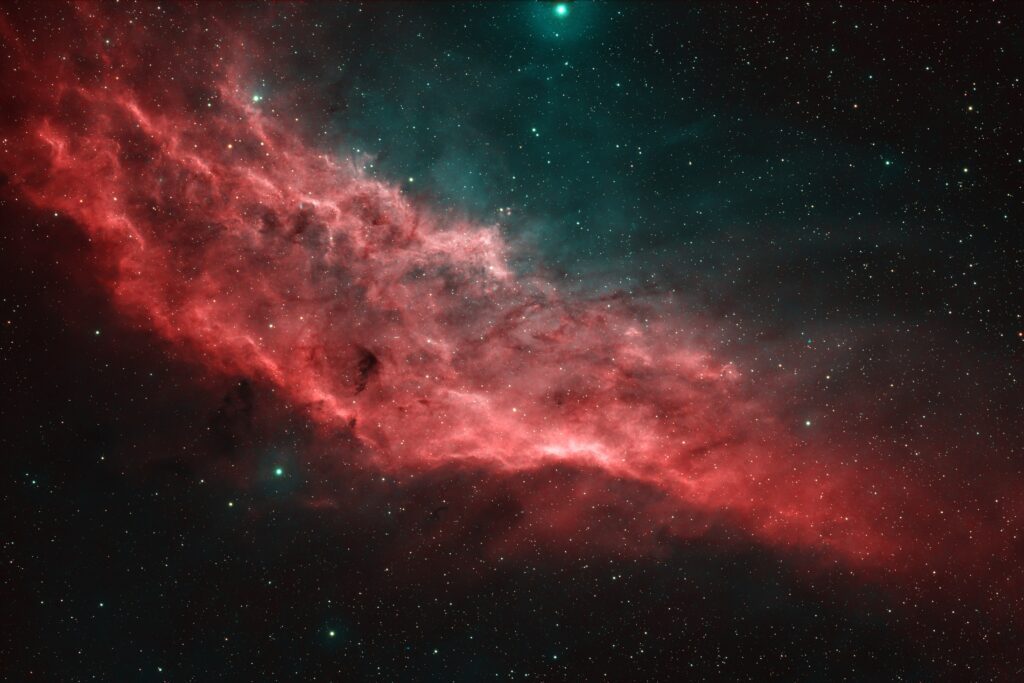
After 2 nights of cloud tonight, night 4, it is lovely and clear. I am suffering from a cold, however I have setup and been imaging since 7:45pm. I have started with the 100 Esprit and placed the new Askar C1 (Ha +OIII) filter in place. I slewed to the California nebula and rotated the camera to fit the object diagonally across the chip as it is larger than my field of view. I plan on taking 2 hours with the C1 filter before I switch to the C2 (SII + OII) filter
Above is a single exposure of 300s
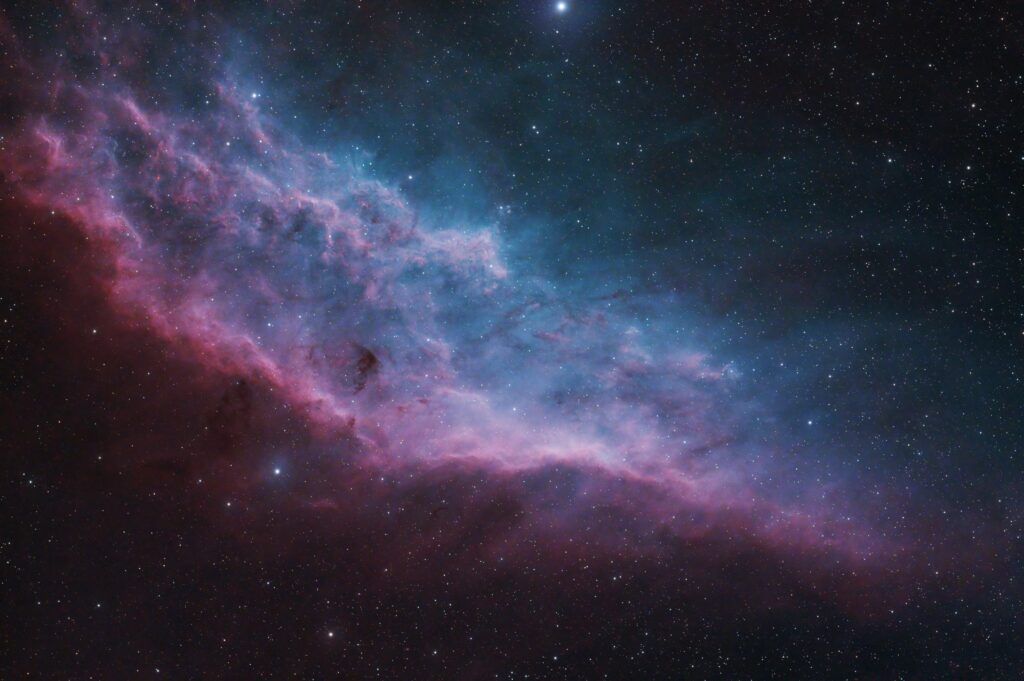
I managed to complete the imaging run then I tried to process but not with much luck. Fortunately I have a good set of friends who can process narrowband images and here is what they did!
This image above from Tim Powell
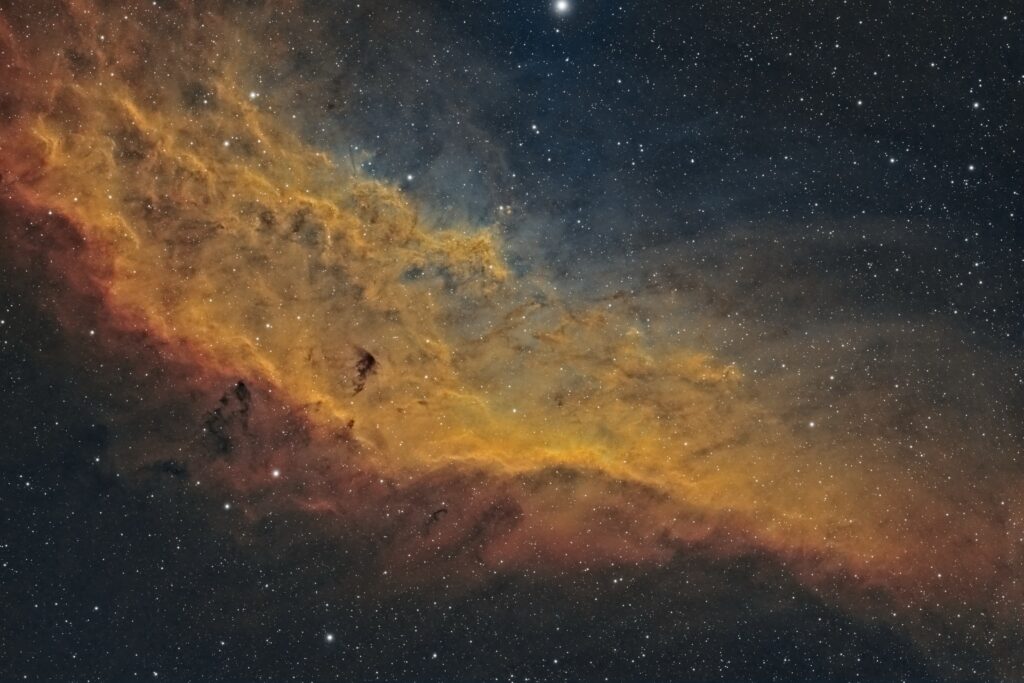
This image above from Dave Boddington
This image above also from Dave Boddington
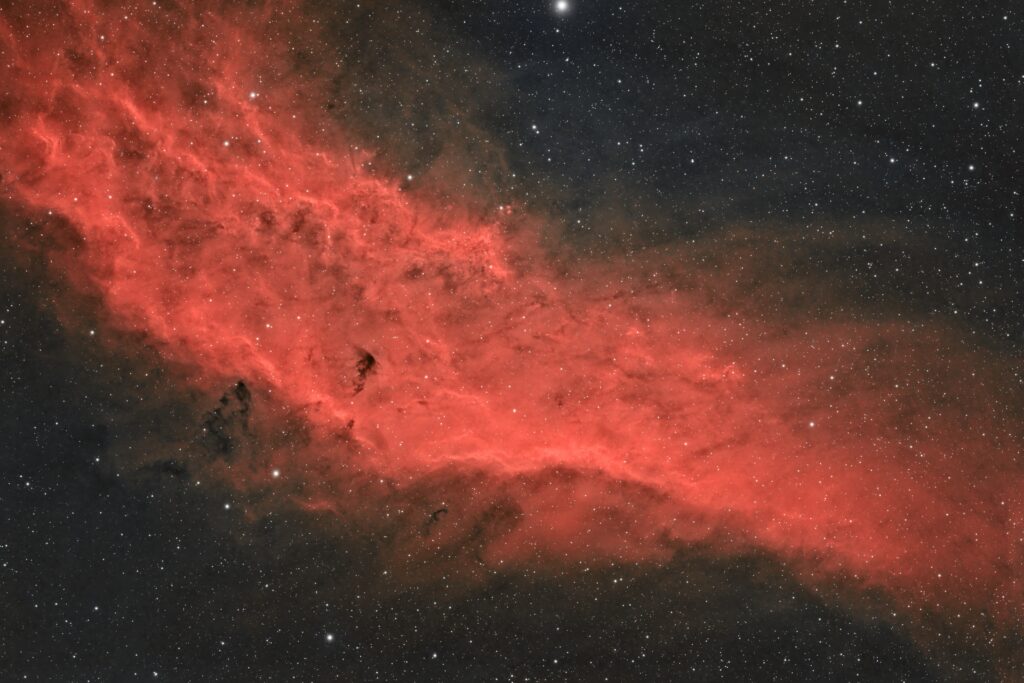
This image above from Nigel Davison
This image above also from Nigel Davison
They are all great and I am so happy with what my friends have done with my data
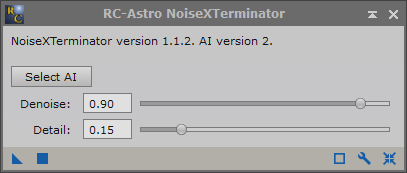
Two plugins I have recently been using are the NoiseXTerminator and BlurXTerminator written by Russell Croman and available from the RC-Astro website.
The new BlurXTerminator plugin is priced at $99.95 although you will get a $10 discount if you already own other RC Astro products and provide the license key at purchase time. Before purchasing it is suggested that you should first check the web site that your hardware and OS meet the requirements to function and download the trial version to test.
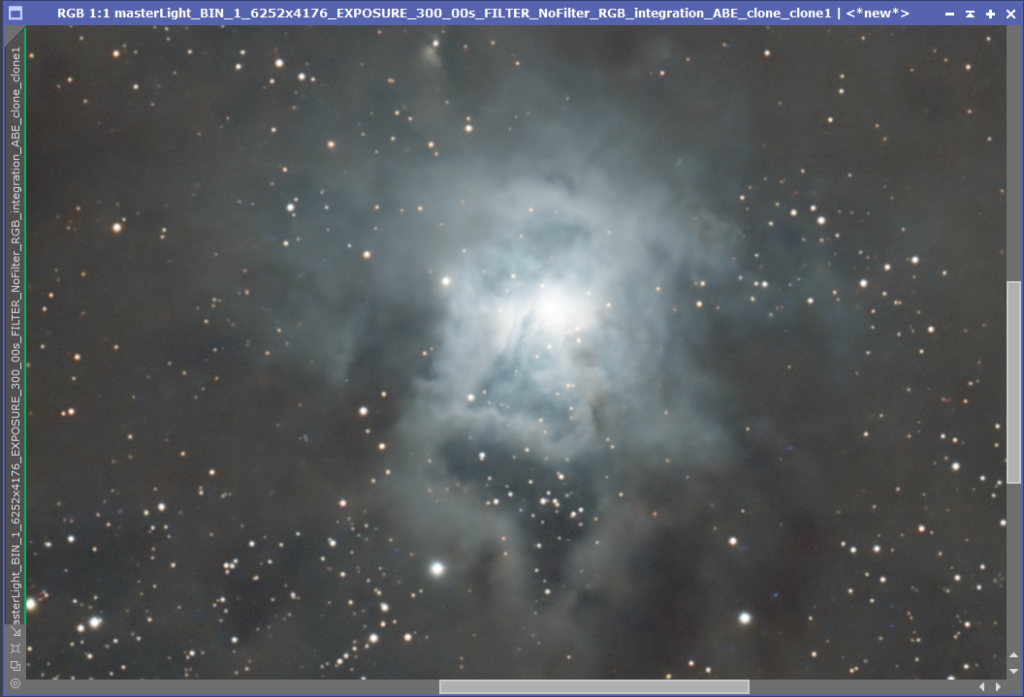
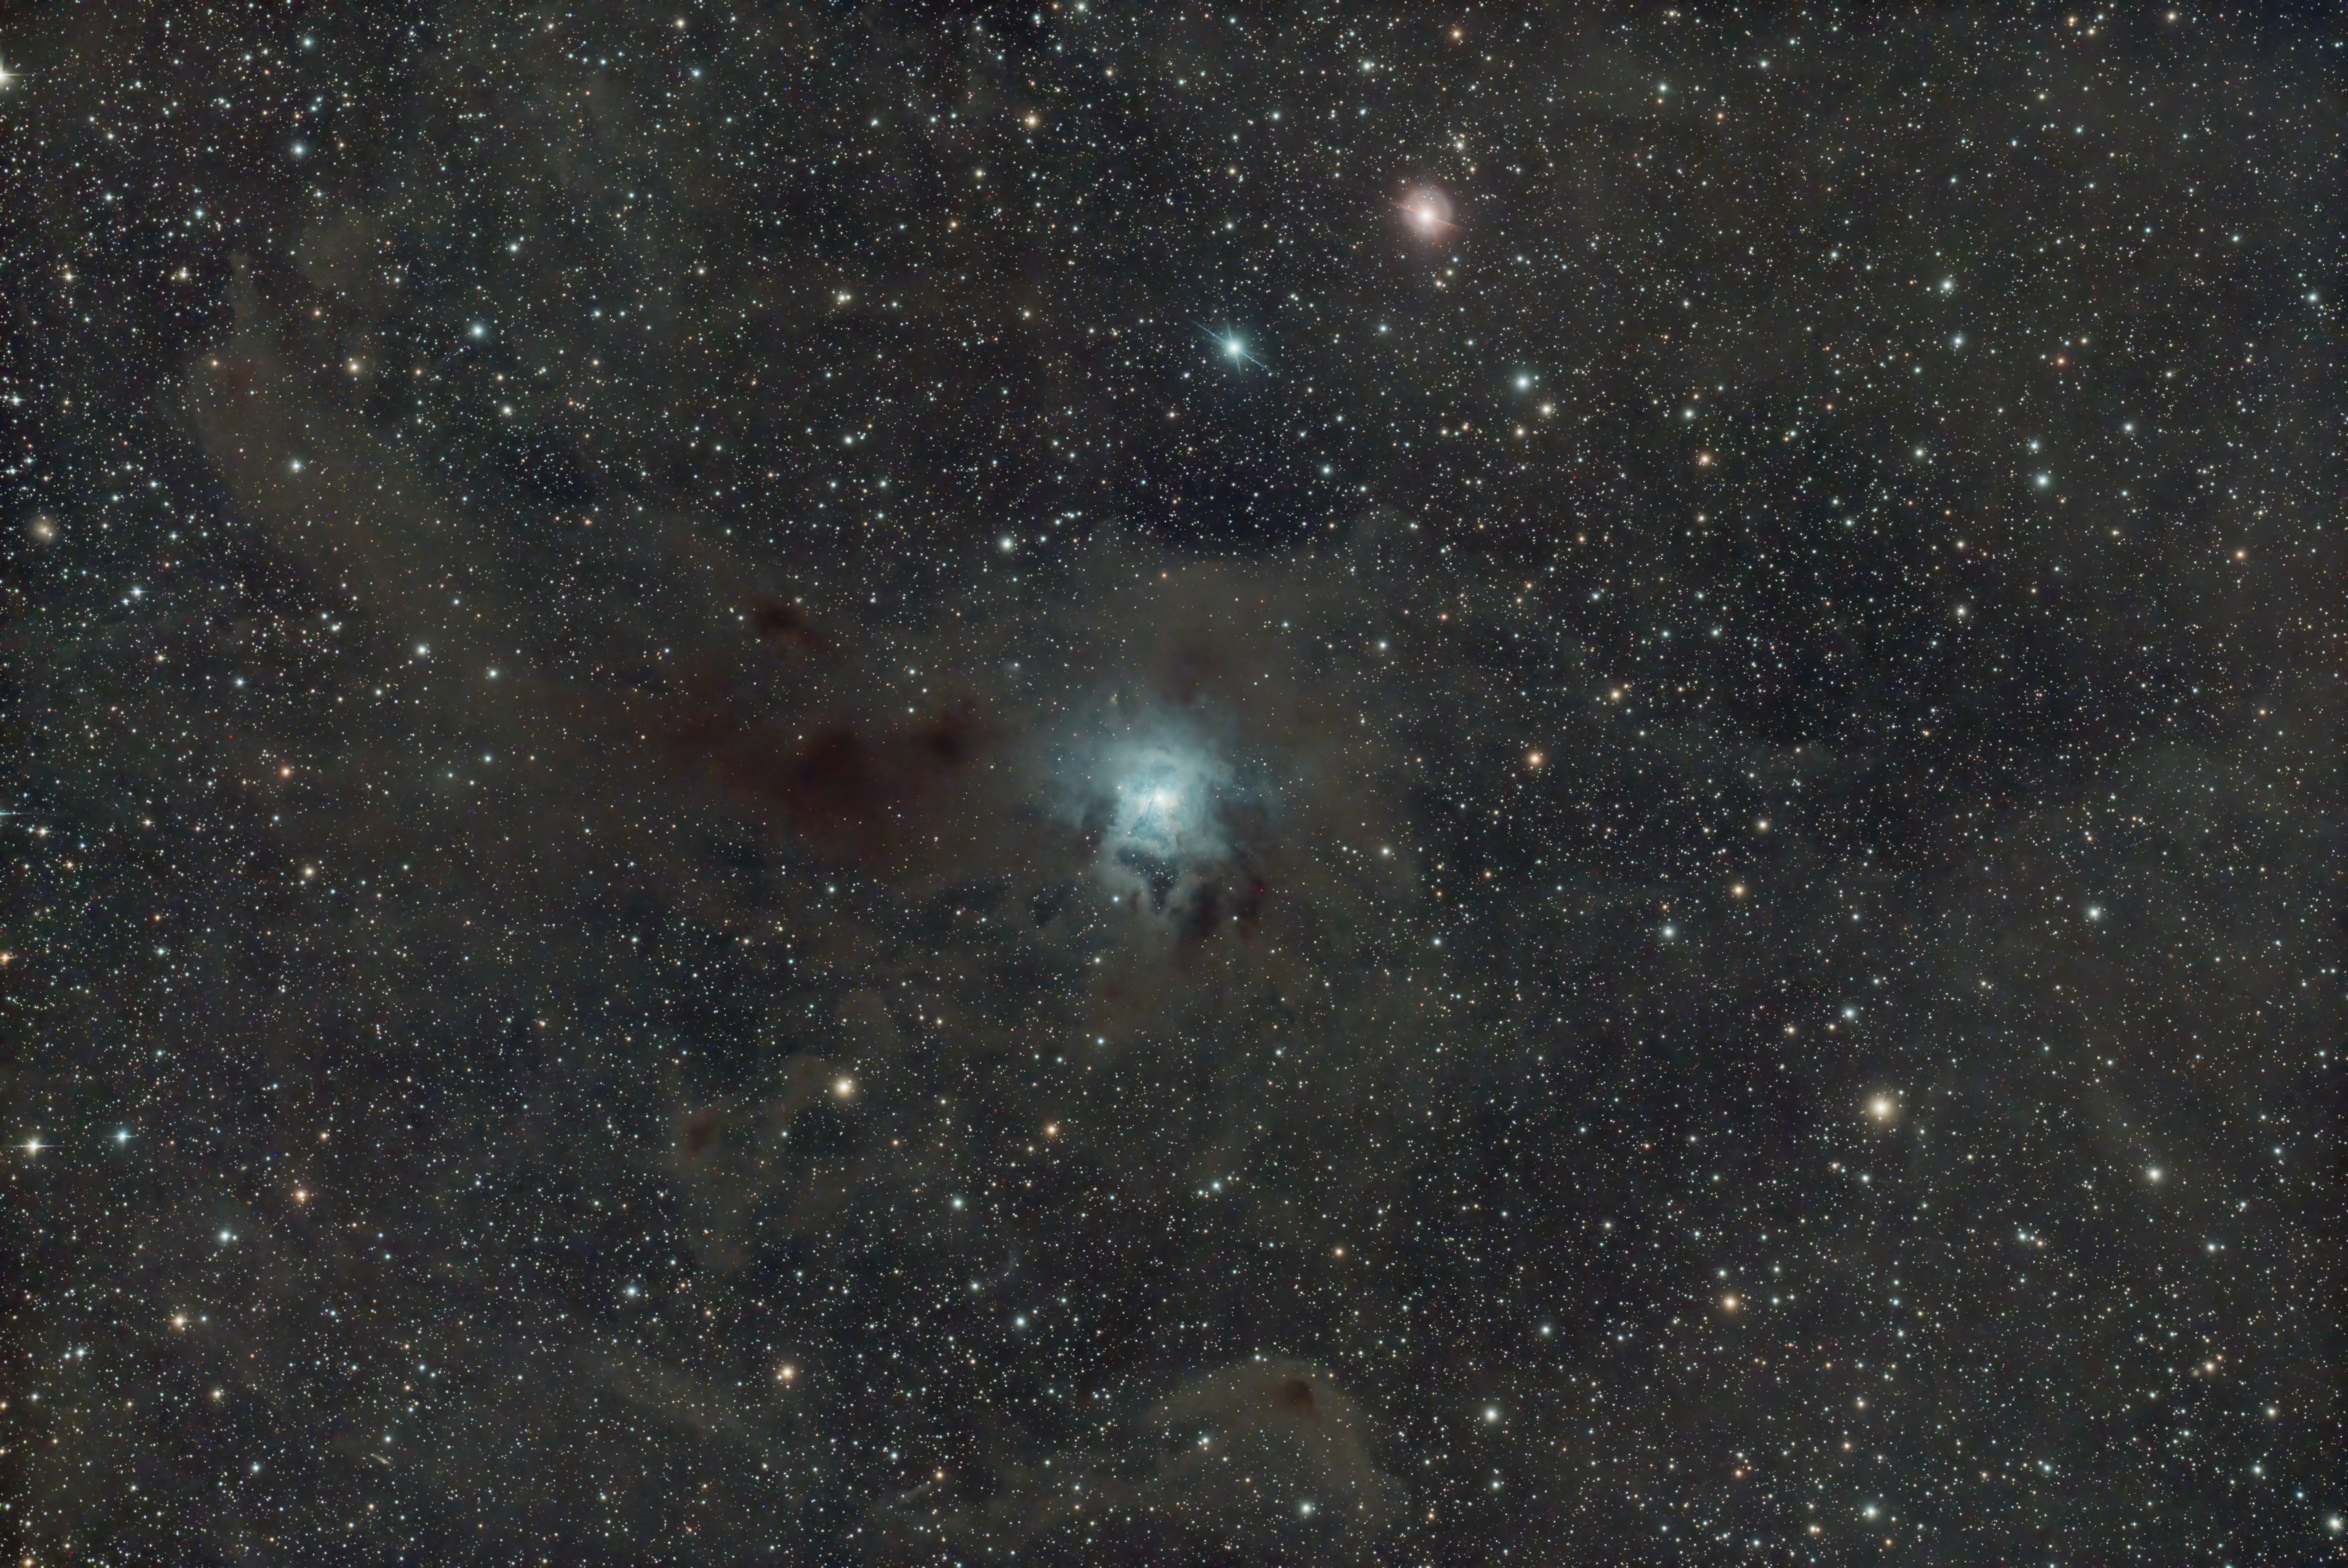
The data used was 60*300seconds (5 hours) frames at -20℃ of the Iris Nebula (NGC7023) captured at the IMT3 dark site using a NEQ6 mount, Takahashi FSQ85, Tak Flattener, QHY OAG and QHY268C CMOS camera.
NoiseXTerminator
Recommended Usage
Taken directly from the web site :
NoiseXTerminator can be used at any point in your processing flow. The PixInsight version can handle both linear and nonlinear (stretched) images.
Using NoiseXTerminator on images that have already been heavily processed, particularly with other noise reduction/sharpening software, can produce less than optimal results.
If processing a linear (unstretched) image in PixInsight:
Make sure PixInsight is configured to use 24-bit STF lookup tables. Otherwise you might see what looks like posterization in your image, when it is really just limitations of the lower-precision default lookup tables.
In PixInsight, you can create a preview containing a representative sample of your image, including bright and dark regions, important detail, etc. Select this preview and run NoiseXTerminator on it to allow rapid adjustment of the parameters.
Before & After Comparison
It’s clear that the noise reduction plugin has done a great job although it would have been better had I collected more data to increase the SNR in the first place !
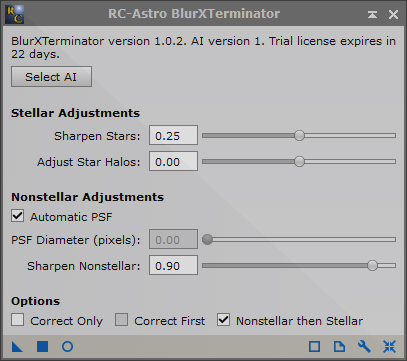
BlurXTerminator
Recently released in December 2022, I thought I would give this plugin a try as I’m rubbish at all the deconvolution/sharpening attempts and I tend to make my images poorer rather than better !
The web page states the following – BlurXTerminator can additionally correct for other aberrations present in an image in limited amounts. Among those currently comprehended for most instruments are:
Guiding errors
Astigmatism
Primary and secondary coma
Chromatic aberration (color fringing)
Varying star diameter (FWHM) and halos in each color channel
Before & After Comparison
The central part of image before BlurXterminatorThe central part of the image after BlurXterminator
Again we can see that the RC Astro BlurXterminator has done a good job at sharpening the detail in the dust cloud.
Thoughts
Investing in these two plugins should be considered as money well spent especially when it can save you time in the processing pipeline. The minimally processed image (DBE, SCNR) of NGC7023 (Iris Nebula) where hot pixels and other artifacts still exist but is shown to demonstrate the power of Noise and BlurXterminator :
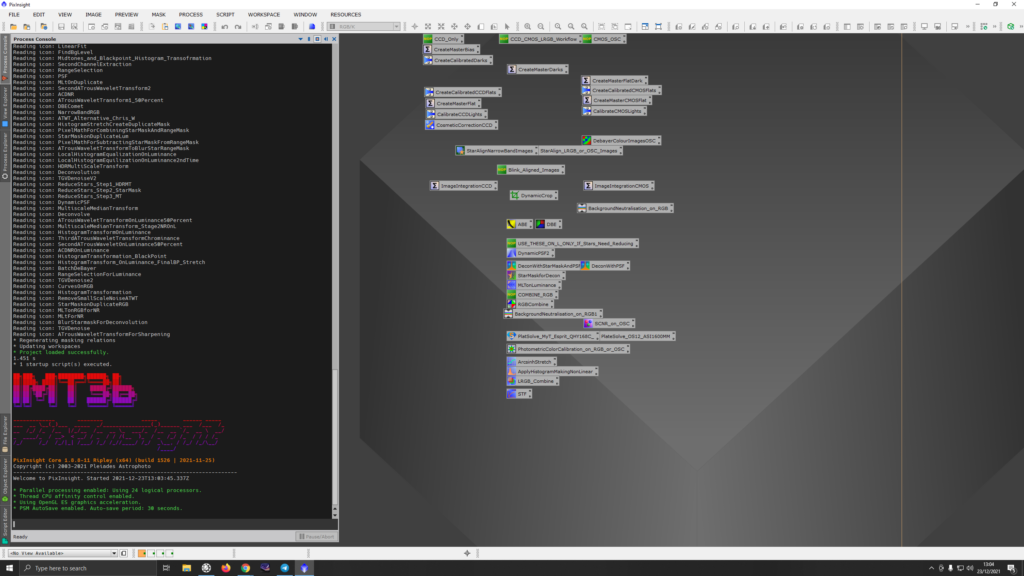
So whilst Dave was processing our M45 QHY268C data, he mentioned how it is frustrating that he has to reload his process icons for his workflow every single time.
After finishing the communications/process diagram for IMT I decided to have a quick look if it was possible. Watching PixInsight startup I noticed access to a few files – banner and startup.scp. For me these were located in the C:\Program Files\PixInsight\etc\startup directory.
Looking through the documentation it seemed possible to add statements to the file which was possible once I had modified it as Administrator.
Method 1 – Load Process Icons
This will load just the process icons into the current workspace on startup. Add the line below to the bottom of C:\Program Files\PixInsight\etc\startup\startup.scp :
open "C:\Users\gingergeek\Pixinsight\Pixinsight DSW Process Icons V10.1.6.xpsm"
Save the file and restart pixinsight.
Method 2 – Load An Empty Project With Process Icons
Another method (preferred) is to create a new project (Empty-process-icons.pxiproject), load in the process icons. Save the project and then change the properties to make it read-only so you can’t accidentally overwrite it later on.
Add the line below to the bottom of C:\Program Files\PixInsight\etc\startup\startup.scp :
open "C:\Users\gingergeek\Pixinsight\Empty-process-icons.pxiproject"
Save the file and restart pixinsight.
I also modified the banner file (in the same directory as startup.scp) so it would show the IMT3b designation. I generator the ASCII art from one of the many online sites, if I can remember which one I will link it here.
Our new PixInsight default project with process icons
Thoughts
The downside to both these methods is that if PixInsight is upgraded/reinstalled then you will lose the settings – not a disaster to be honest as they are easy to put back into place.
I thought I ought to document this so that I remember this is now the new normal for making a flat master for my CMOS camera, the ZWO ASI1600MM. The problem I found again after not processing images for some time, was that the normal way of processing without Flat Darks produces a master flat with embossed, so raised doughnuts across the image.
Batchpreprocessing – > Darks tab -> Optimization Threshold -> move from 3 to 10 – > this removes the dark entirely and also removes the amp glow but introduces loads of noise so clearly not right at all. So I contacted my friend Dave Boddington who is a bit of an expert on this topic and he gave me some good advice that has of course worked.
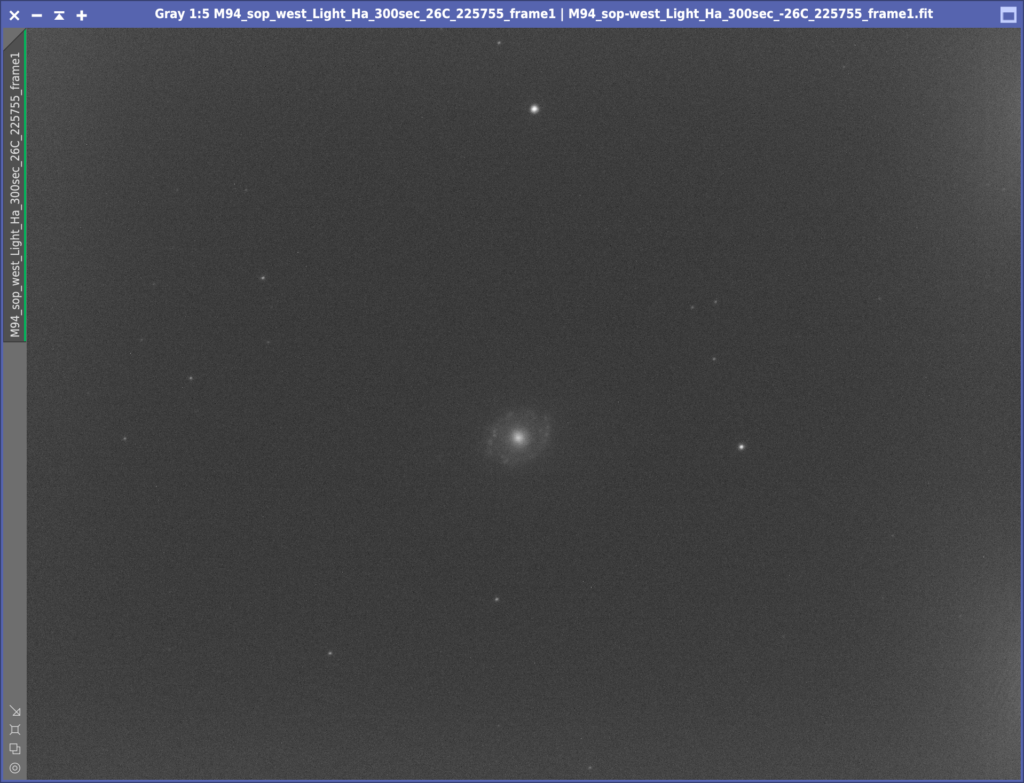
So first let’s detail what I am calibrating. On the 20th April 2020 I took a set go Ha frames of M84, these were 300s exposure and with a Gain of 193 and I believe an Offset of 21, however we had some changes over the previous week so driver the Offset is no longer stored in the FITS header. It was when we were using the ZWO native driver. The temperature of the cooler was set to -26℃. I have 8 of these frames.
M94 300s light
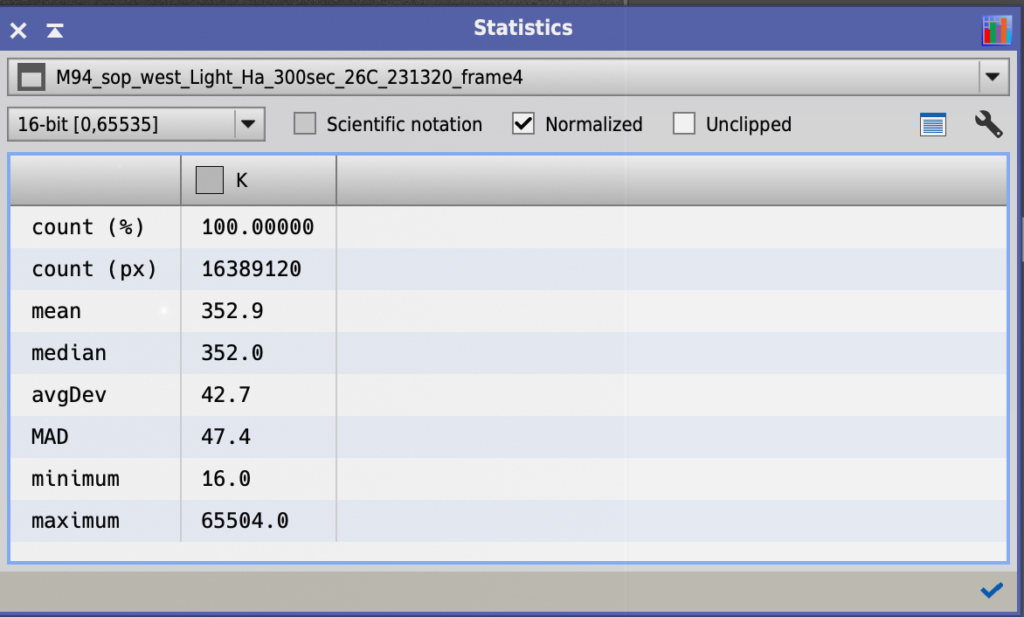
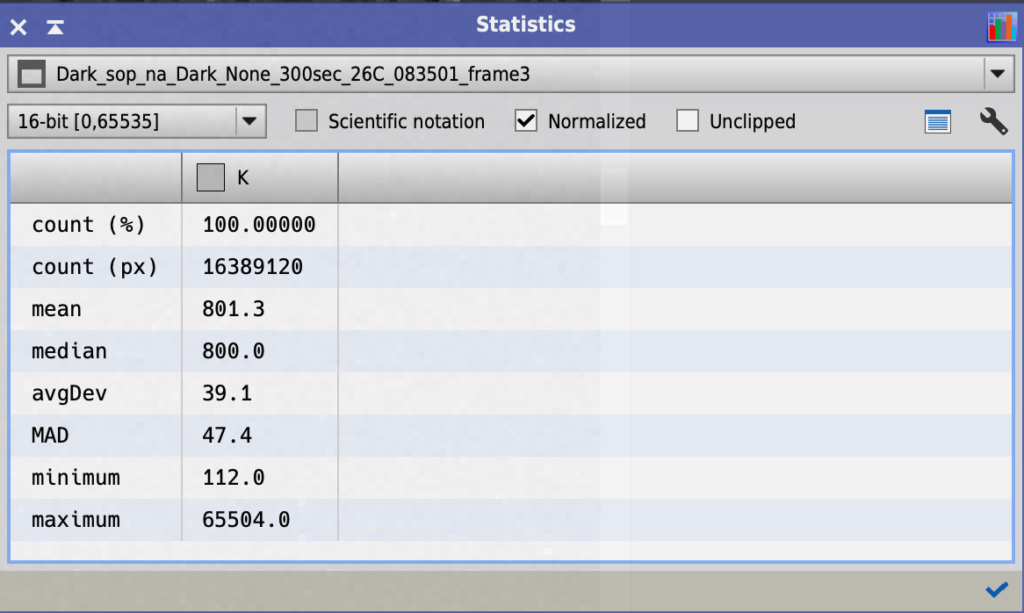
I also have a set of 10 darks at the same settings. However when using the Statistics tool Dave noticed the Mean of the image was 800 and the Mean of the Ha frame was 353. This is in a 16 bit notation. The camera however is a 12 bit camera and this means the Mean for the dark is 50 and the Mean for the Ha is 22, so a difference of 28 in 12 bit and 447 in 16 bit. I will come back to this later.
Mean of Ha 300s lightMean of Dark 300s
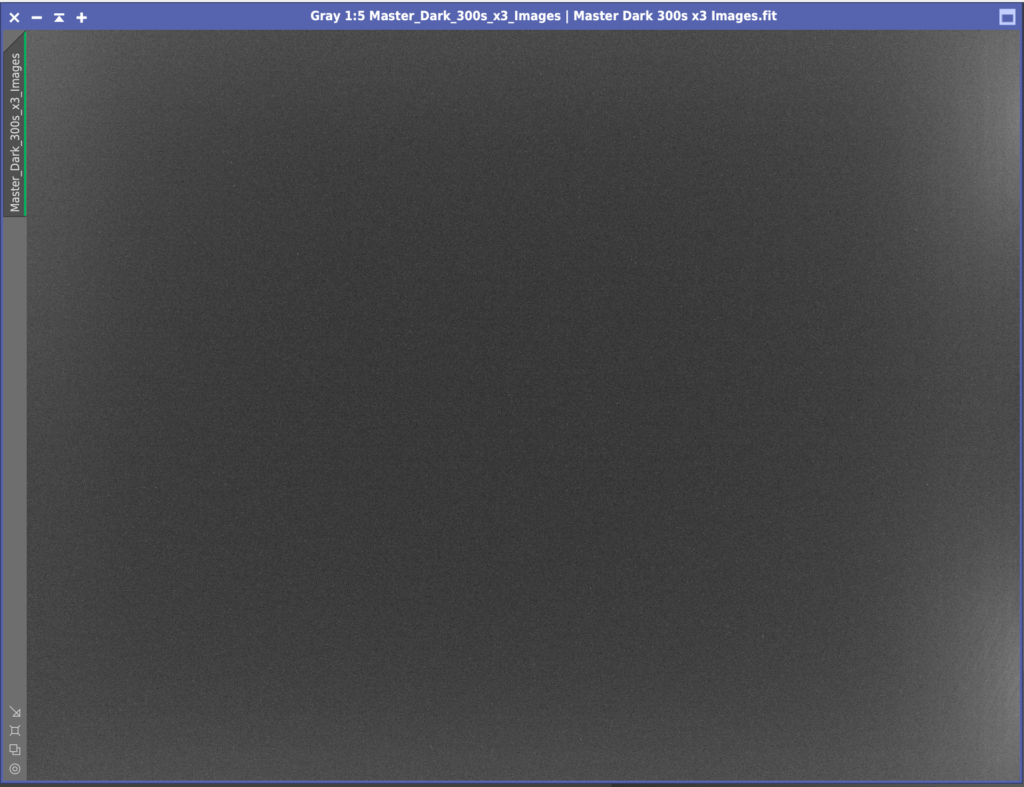
First I created a Master Dark for the Ha frames using the normal ImageIntegration settings. I did not calibrate darks with Bias as you do not need bias with a CMOS cooled camera. Next I created a Master Flat Dark for the Flat frames using the same ImageIntegration settings.
Single 300s Dark with hot pixels and amp glow
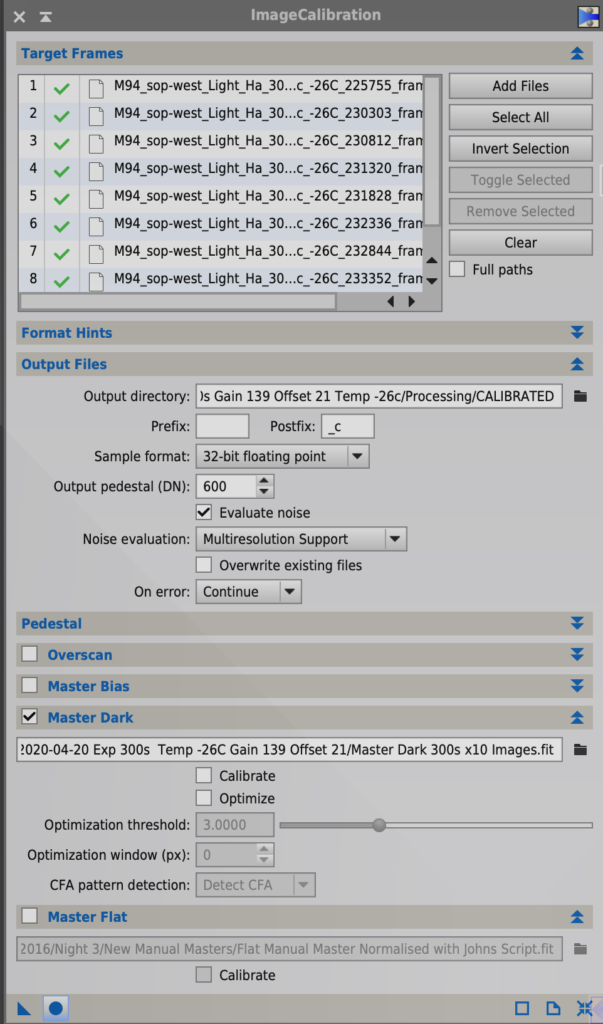
Then I found the Ha images did not need to have the flats applied so I skipped that step for the narrowband images. Next I Calibrated the Ha lights with ImageCalibration and because of that discrepancy above which looks like it was induced by having the Offset for the darks set to 12 and the Offset for the lights set to 21 I added 600 as suggested by Dave Boddington to the Output Pedestal in the Output files section of ImageCalibration. I made sure Evaluate Noise was ticked and that both Calibrate and Optimise were unticked in the Master Dark section. Master Bias was unticked and so was Master Flat for the narrow band images as mentioned.
Calibrating Ha lights with Master Dark
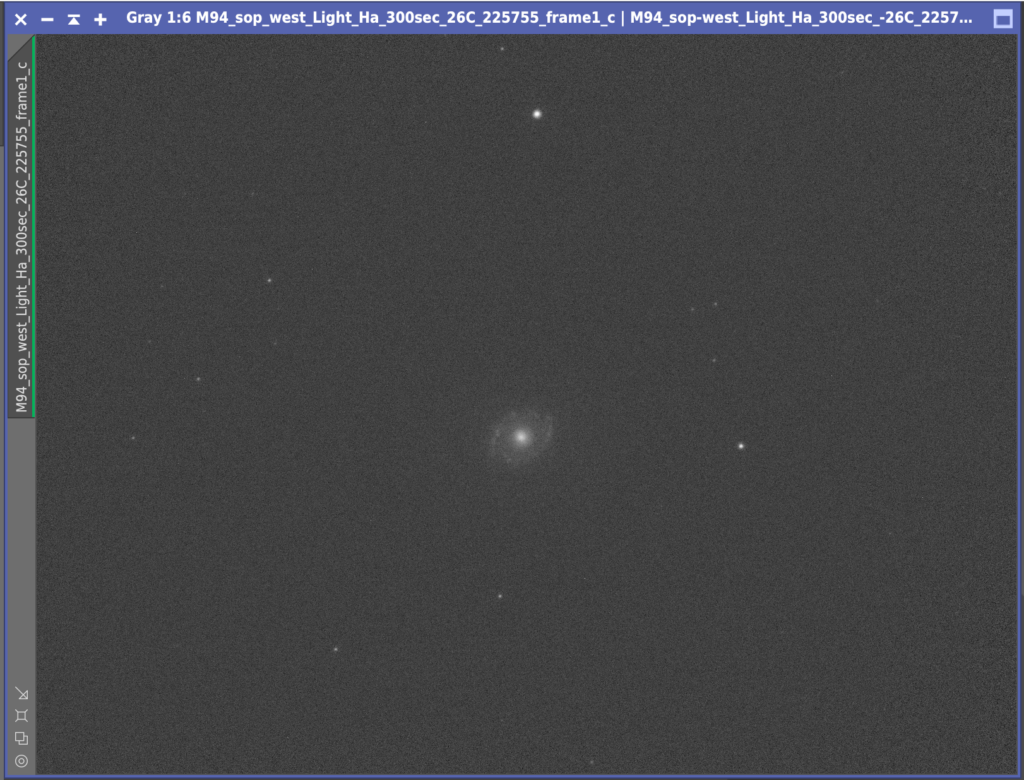
This created a clean set of calibrated Ha lights that did not require flats to be applied.
Calibrated 300s Ha light with Master Dark
Next I had some issues in Star Aligning the frames. The error I received was ‘Unable to find an initial set of putative star pair matches’, due to the frames being very sparsely filled with stars and the background being quite light compared to the stars. A quick look on the PI forum showed increasing the Noise Reduction in the Star Detection section from 0 to 4 sorted the issue, with all but 1 frame being aligned. I was then down to 7 x 300s Ha lights. The final frame was very light due to cloud.
7 x 300s Ha Calibrated with Darks, Aligned and stacked
I then integrated these 7 frames together. I had a challenge with trying to get the hot pixels in a few areas to disappear using Cosmetic Correction and pixel rejection during stacking so I will remove these after by hand before combining into the larger set
hot pixels not removed
So in essence what I have learnt is that I need to have really clean filters and camera glass. That all the doughnuts are on the those surfaces and not anywhere else. That the flats must be between 22k and 26k for the CMOS cameras, although this has some tolerance either way. That I need to set the camera to the right Gain, Offset and Temp as the lights and that I need the right flats for the right lights!