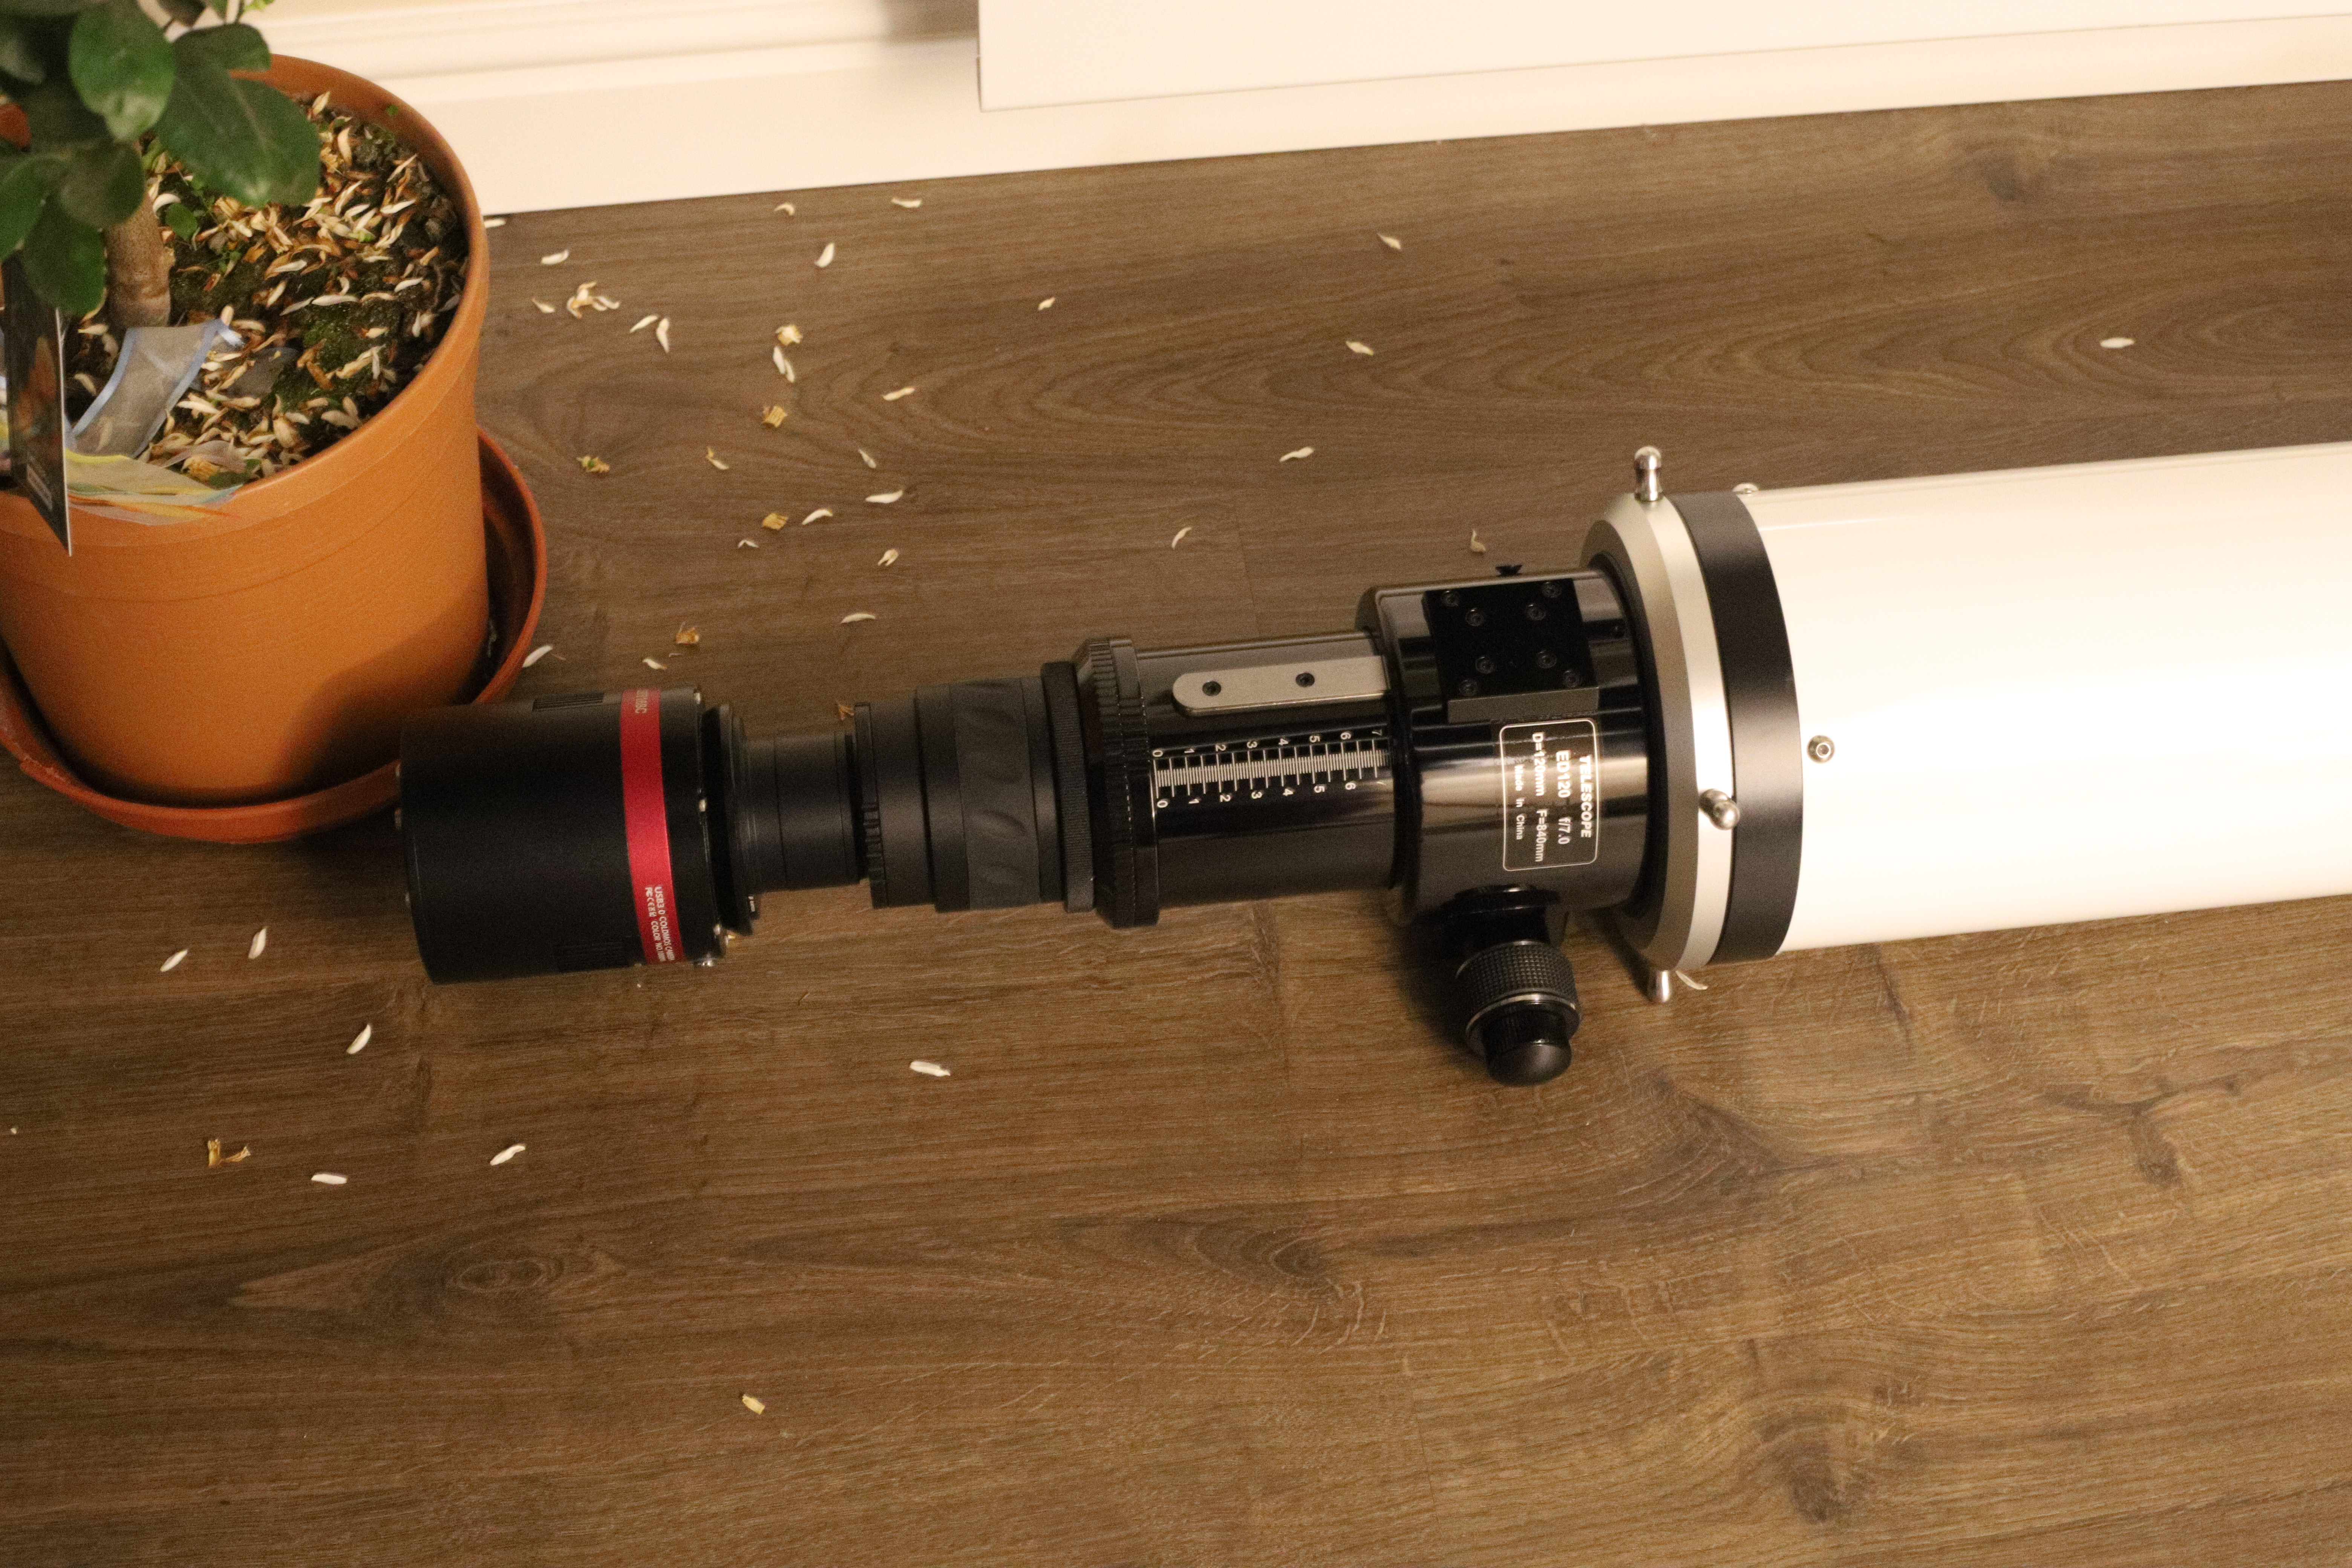
My current setup for OSC on the Takahashi FSQ-85 uses the QHY-OAG-M and the various QHY metal spacers which you screw through the OAG onto the CAA that fronts the QHY286C.
However, I’ve never liked the screw adapter approach for this sensor as unnecessary back focus is wasted due to the weird CAA to QHY286C not being a screw thread. The lack of an IR cut window on the QHY268C sensor means I need to sit an additional filter in the QHY 020055 M48 (F) adapter, in order to change the filter I would have to take the imaging train apart to remove it !!!
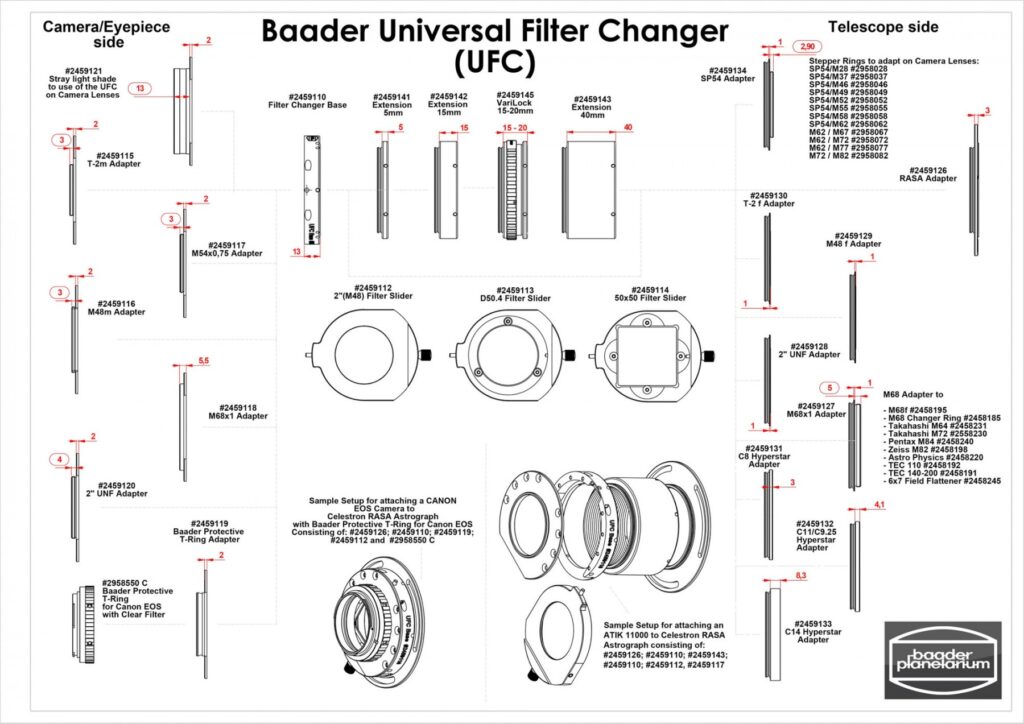
Baader Universal Filter Changer
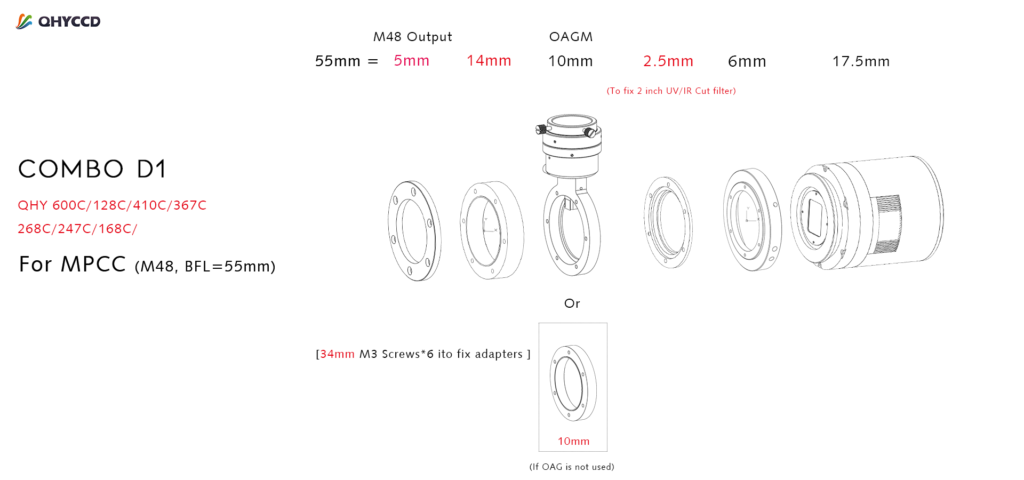
Enter the Baader Universal Filter Changer (UFC) , the chart below details the core base changer alongside the adapters required to match to most common setups.
You can purchase additional sliders than can hold 50mm, unmounted and threaded 2 inch (M48) filter. The slider is magnetic so it will not dislodge during slews or during scope assembly or disassembly.
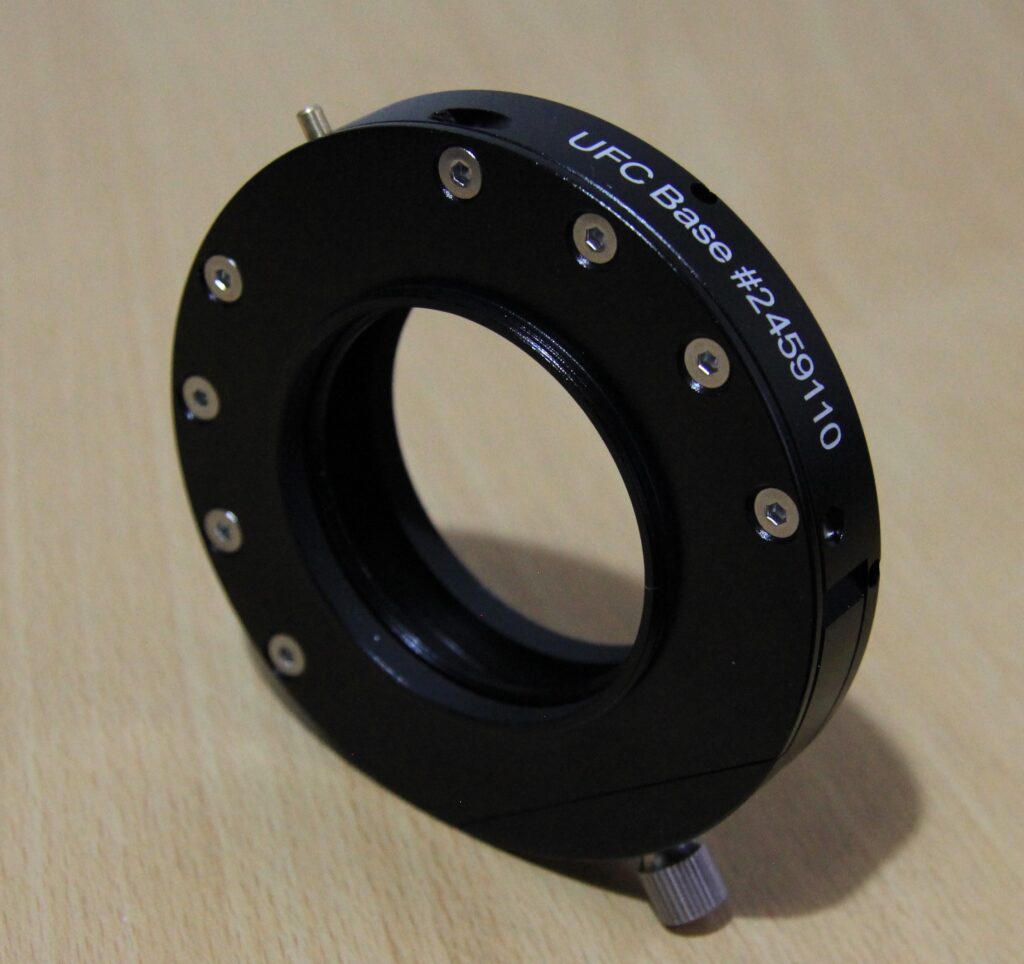
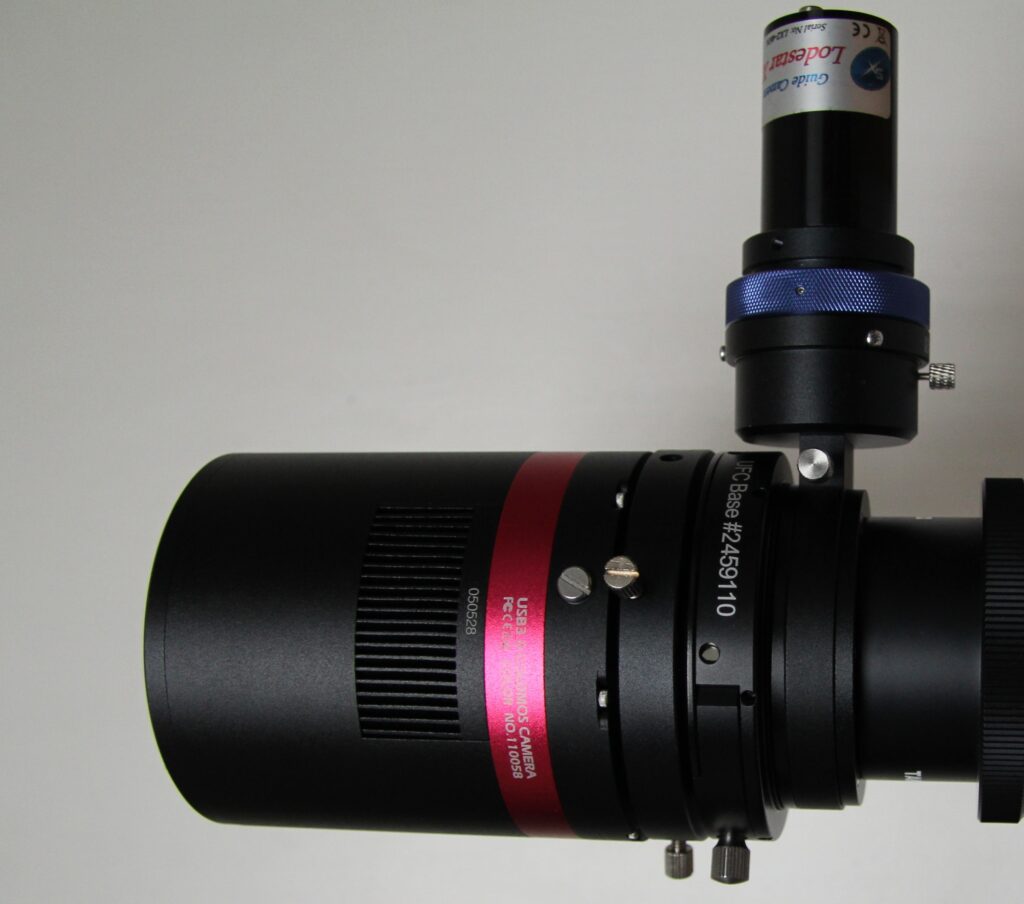
The 4 assembled components of the Baader UFC
Proposed Set-up
The Takahashi Flattener (TKA37582) has a metal back focus distance of ~56.2 mm so I need to get close to that but being under that distance is better than being over as I can add additional spacers if needed. The effect of adding a 2mm thick 2-inch filter decreases the optical backfocus by 0.6mm (2mm/3) so I will need to add 0.6mm spacing to account for the filter effect which results in a total distance of ~56.7mm.
Order
Component
Thickness (mm)
1
QHYCCD QHY268C CMOS
17.5
2
QHYCCD CAA M54(f) (#020002)
6
3
Baader UFC M54(m) camera side adapter (#2459117)
2
4
Baader UFC base (#2459110)
13
5
Baader UFC SP54(m) telescope side adapter (#2459134)
1
6
QHYCCD OAG-M M54(f) (#020079) adapter
3
7
M54 Metal Spacer
0.5
8
QHYCCD OAG-M
10
9
QHYCCD Metal Spacer
0.4
10
QHYCCD OAG-M M54(f) adapter
3
11
M54 Metal Spacer
0.3
12
Baader M54 x 0,75 Inverter Ring
0
Total
56.7mm
New Imaging Train
I should now be able to change filters much easily albeit at an additional cost but the flexibility should be worth it. Of course I will need to test the star shapes in the field to make sure that I have the correct back focus and add extra distance if needed.
Vendors
The majority of the Baader UFC components were purchased from FLO (First Light Optics) and the remaining adapter (#2459134) from Tring Astronomy. Delivery and communication by both vendors was great, shame about the Royal Mail industrial action messing deliveries about during the Christmas holiday.
Thanks
My gratitude to Stuart1971 from StargazersLounge who helped me with suggestions to try to sort out the QHY268C noise banding issues.
As it was a work night and Dave was working I was imaging from the back garden and not the dark site. I started late in the evening and had issues sorting out the autofocus in NINA which meant I was even later than I had planned.
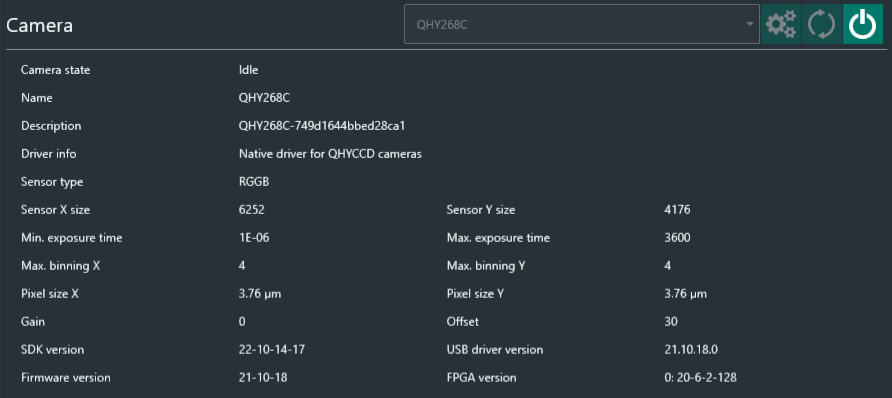
Using the OptoLong L-Pro filter and the native camera driver (not ASCOM) :
QHY268C Nina Native Mode
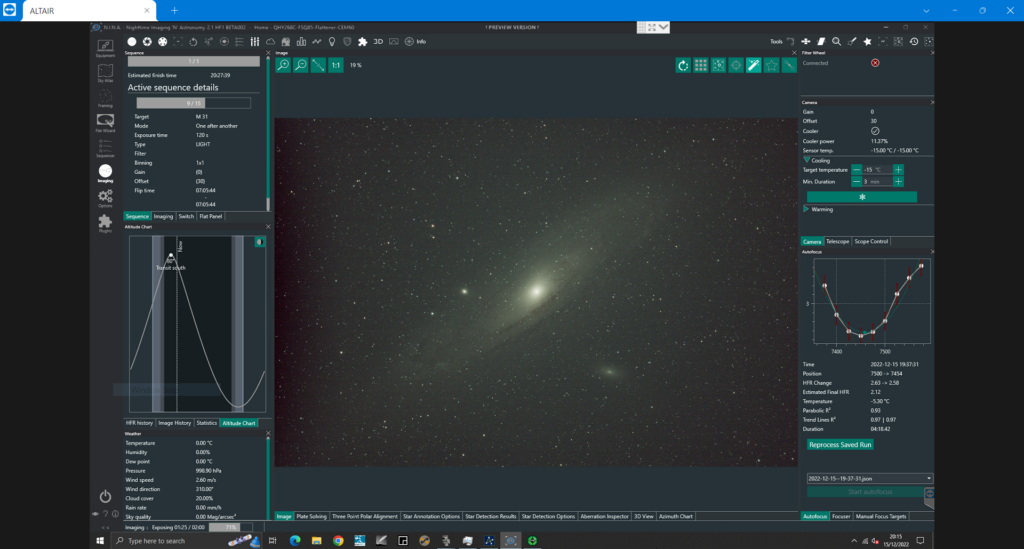
The target was decided by Dave as M31 (Andromeda Galaxy), I decided on 120 second exposures at -15℃, gain 0 and offset 30 (Photographic Mode). I finally started to capture data at 19:55 when M31 had already transited 45 minutes earlier.
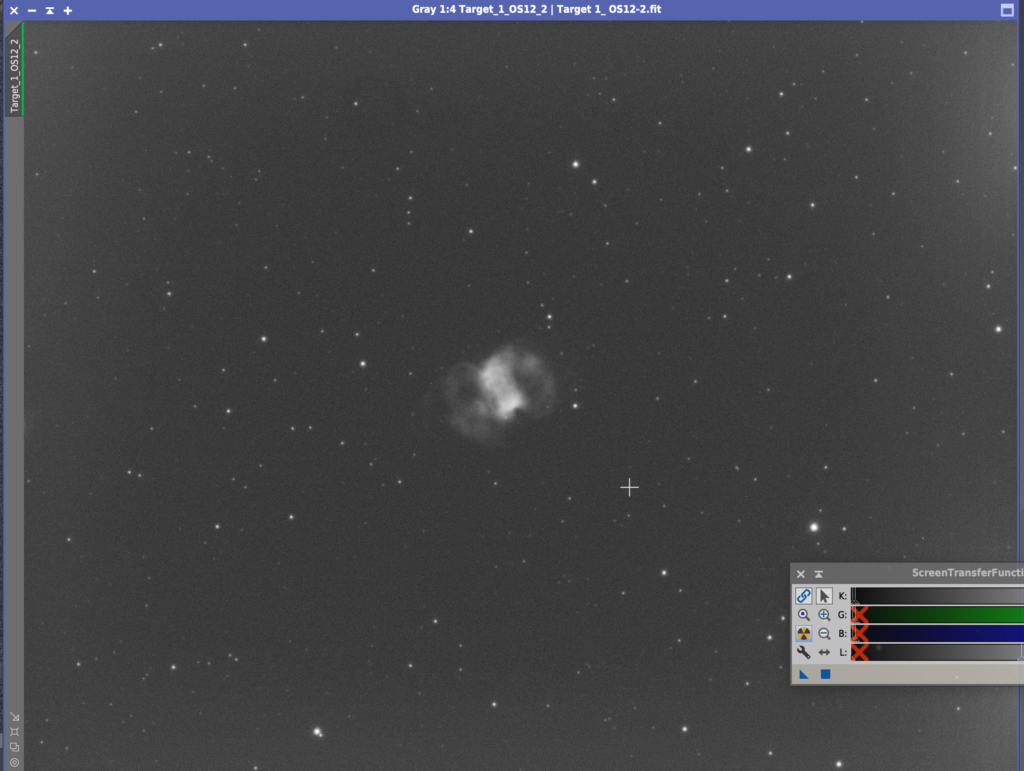
M31 single sub (stretched) via NINA Imaging Session
I believe the dark shadow to the left is the QHY OAG prism, I may have to reduce it’s depth in the light path or rotate it 45 degrees so it sits on the long horizontal axis.
Once M31 had reached approximately 50 degrees altitude and was starting to set in the West my guiding started going awry especially in RA. I put this done to either balance issues or cable snagging so that’s something I need to look at in the future.
After shutting down earlier than I thought due to the guiding issue and the pending rising Moon I decided to do my darks, flats and dark flats. However my Pegasus Flatmaster refused to connect to NINA so I decided to fix and complete this task on a different day.
I only managed to capture 62 subs which totals just over 2 hours. I was hoping to get at least 6 hrs for a single session and something approaching > 12 hours which means I will need several more nights to capture my required amount of data for M31.
Not a great first outing but given I hadn’t imaged in ages this was expected. I can honestly say that although a OSC coupled with the new harmonic mounts such as the ZWO AM5/Pegasus Nyx are very convenient as part of a lightweight holiday travel setup. OSC also is easier processing but still I can say I’m not a total fan due to the loss of high frequency data, high HFR focus issues and in the case of the QHY268C the noise banding issue which although appears to be removed by darks etc still is unnerving.
Update (17/12/2022)
Have resolved my Flatmaster 120 panel issues but I feel I’m better off with a fully controllable fixed panel instead of a manual panel so I will look into that.
My Darks, Flats and Dark Flats are now done (25 of each) all performed at -15℃ to match this session temperatures but there is still not enough actual data to start processing.
I’ve taken the plunge and dipped my toe into the CMOS world. Since I didn’t have any OSC experience I chatted with DSW (has a QHY186c) and decided on the QHY286C. This I purchased from Bern at ModernAstronomy who has always provided excellent service.
The issue with APS-C sensors when coupled with the Takahashi FSQ85 is that the edges start to show signs of star elongation, I already see this on my Atik460. This can be corrected with the FSQ-85 flattener (ordered from FirstLightOptics) which has the effect of slightly increasing the focal length but also reduces the back focus from the native 197.5mm to 56mm.
Effective Focal Length
455mm (f/5.4)
Image Circle Diameter
44mm
Metal Back Focus
56mm
FSQ-85 EDX with Flattener 1.01x
This means that I can’t use my existing Atik OAG->Atik EFW2 and Atik460 because it’s total distance is 59mm (22mm+24mm+13mm) so it’s out by 2mm even once you include the filter effect on the back focus. Note – This is also true for my Starlight Xpress configuration.
I do not understand why Atik could not have got to within the 55-56mm range by shaving off a mm here and there 🙁 I may need to replace all Atik gear when I convert to mono CMOS or replace the OAG with a guide scope.
So onto the QHY268C, the OSC CMOS unfortunately has a CAA tilt adapter instead of a direct thread connection. This wastes 11mm of precious back focus giving a total distance of 23.5mm whereas the recently released QHY286M CMOS has a 12.5mm back focus !!!!
Also the QHY268C does not have an IR/UV cut filter in place so you need to buy an additional filter and holder and add that to the cost and factor in the adapter and distance needed …. I’m starting to regret this purchase more and more !
Source – QHYCCD.com
Back to the Takahashi Flattener (TKA37852), the back focus is 56.2mm but we add on the filter thickness as it changes the light path (2mm/3=0.66mm) so ~57mm (56.9mm), the imaging train is as follows :
Adapter
Distance (mm)
Accumulated Distance (mm)
Connector
OU031
2
2
M54(M) -> M54(M)
QHY 020770
4
6
M54(F)
QHY Spacers
14.4
20.4
screw
QHY OAG-M
10
30.4
screw
QHY 020055
2.5
32.9
screw
inc filter
0.6
33.5
–
QHY CAA adapter
6
39.5
screw
QHY268C CMOS
17.5
57
screw
FSQ85 Flattener to QHY268C imaging train
The combined weight is 1365g so I may need to adjust the balance of the scope a little as it heavier than my Atik460/EFW2/OAG setup at 1080g.
Completed – Imaging train ready for first light
I may have to adjust the spacers a little but I won’t know until I have received a 2-inch Optolong L-Pro light pollution filter which is currently on back order from FLO.
Transmission chart for Optolong L-Pro
QHY268M
The recently released mono version of the QHY268 looks like it has a proper screw face plate with a more acceptable back focus of 12.5mm. This is more reasonable and would allow me to couple a filter wheel and OAG as well not requiring a IR/UV cut filter.
Like SyedT on StarGazersLounge I could go back to using a guide scope and ditch the OAG and then the imaging train could incorporate a rotator :
I was thinking of a rotator for the remote Esprit120 which has a generous back focus of 76mm so I should have no problems there but that will be another adventure for the future !
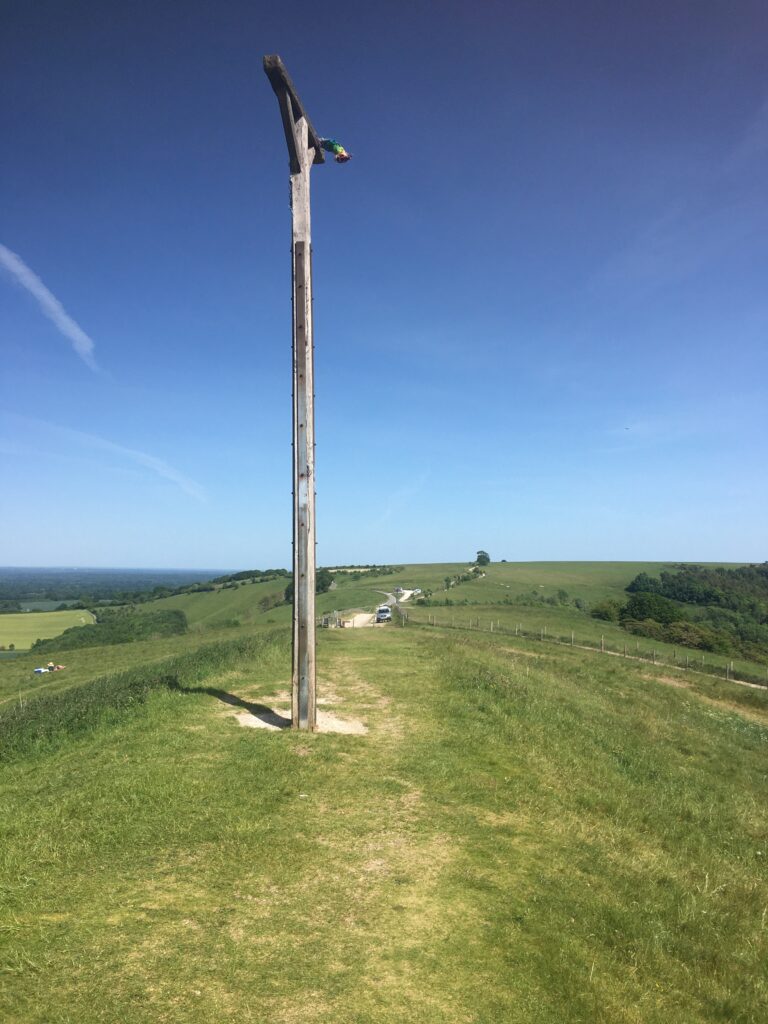
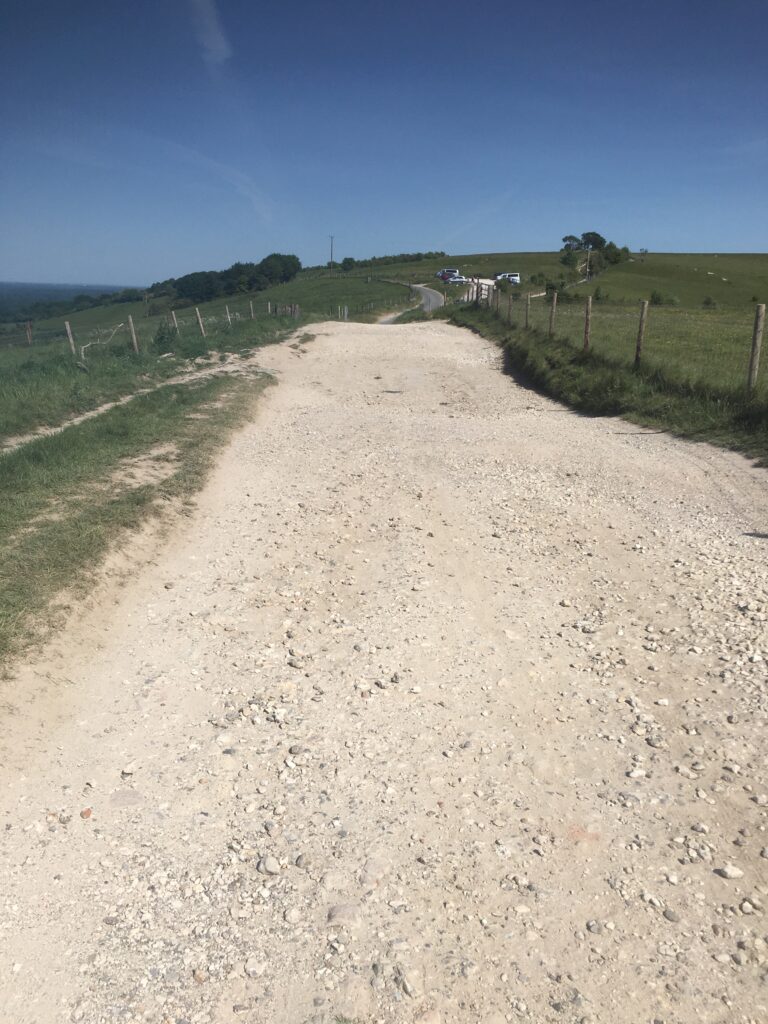
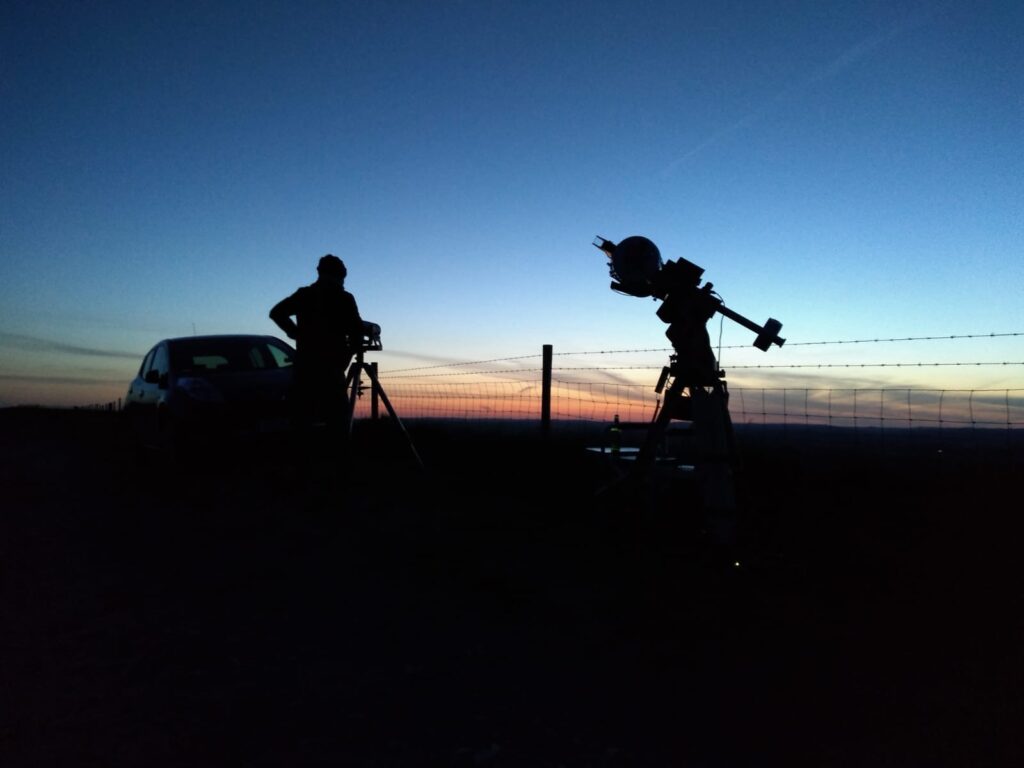
Another visit to Combe Gibbet tonight with another astronomer, GingerGeek. After forcing him to leave the comfort and safety of his own home, where his girlfriend gives him tea, coffee and beer and with the luxury of mains electricity, he joined me at the very dark, very blustery sight near 1,000 ft up in the North Downs of Berkshire, formally Hampshire, they moved the line!
We left at 7:30pm and after the 50min trip arrived at the long road up to and past the Gibbet, which is really not much of a road at all.
Not a road, looking down the bottom part of the track
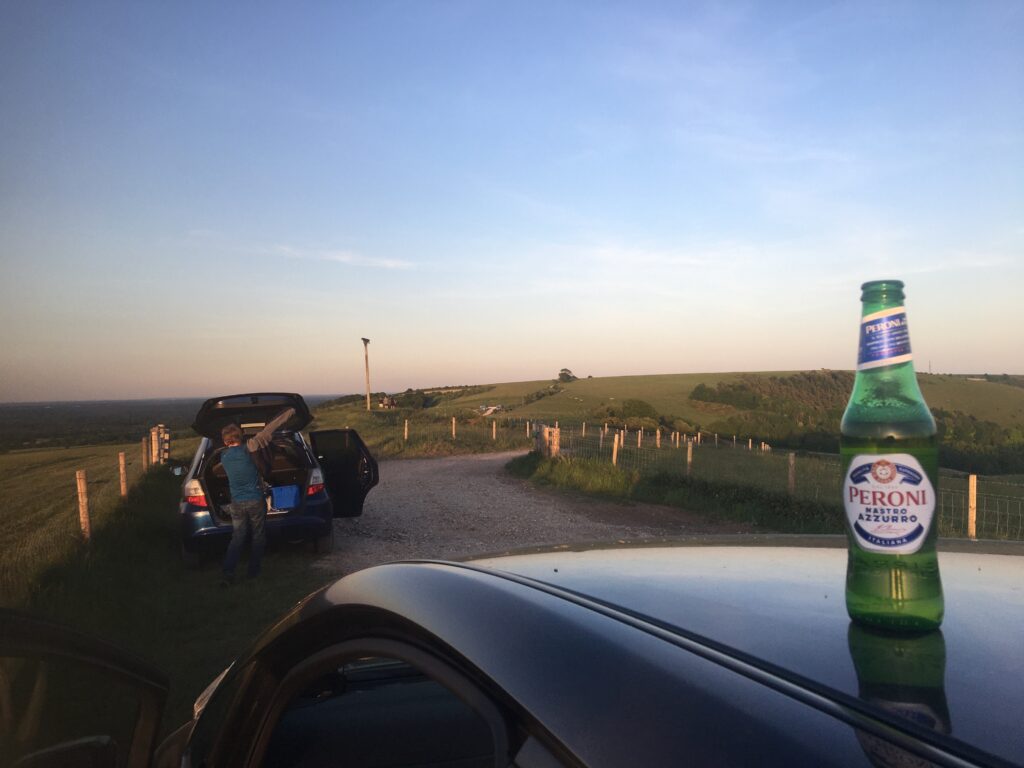
We drove carefully to the top, both parked our cars and set about setting up for the evening. GingerGeek had his Tak FSQ85 on his CEM 60 iOptron mount whilst I setup my usual array of large 4″ binoculars and at first the Mak 180 on the Paramount MyT. Later I would swap to the Esprit 120ED. To celebrate the outing, little geek had brought some beer 🙂
Beer O’Clock!
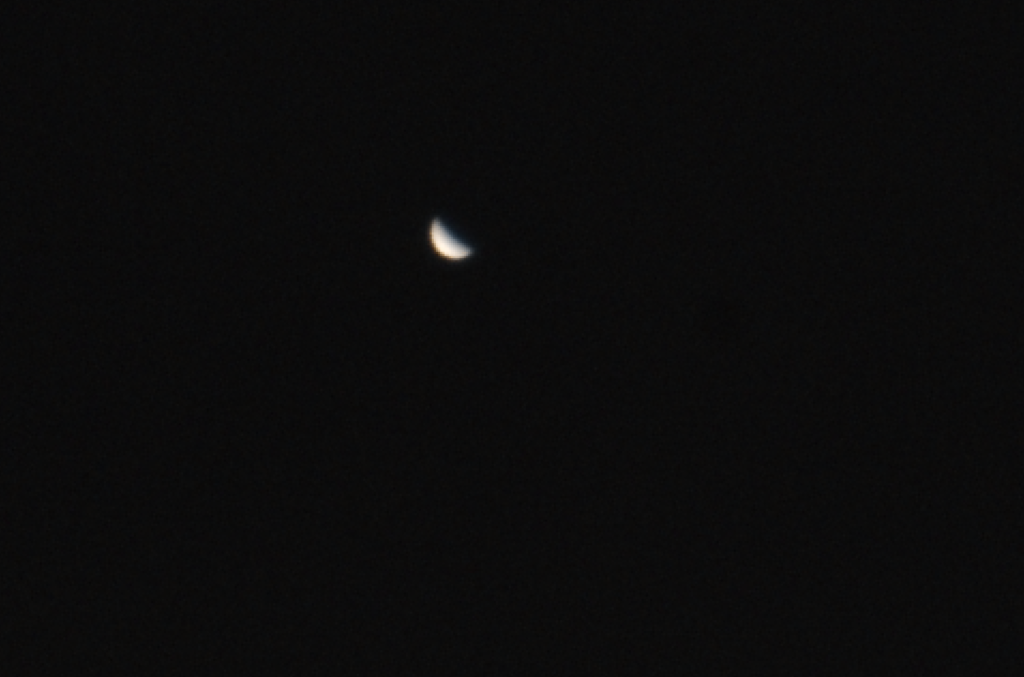
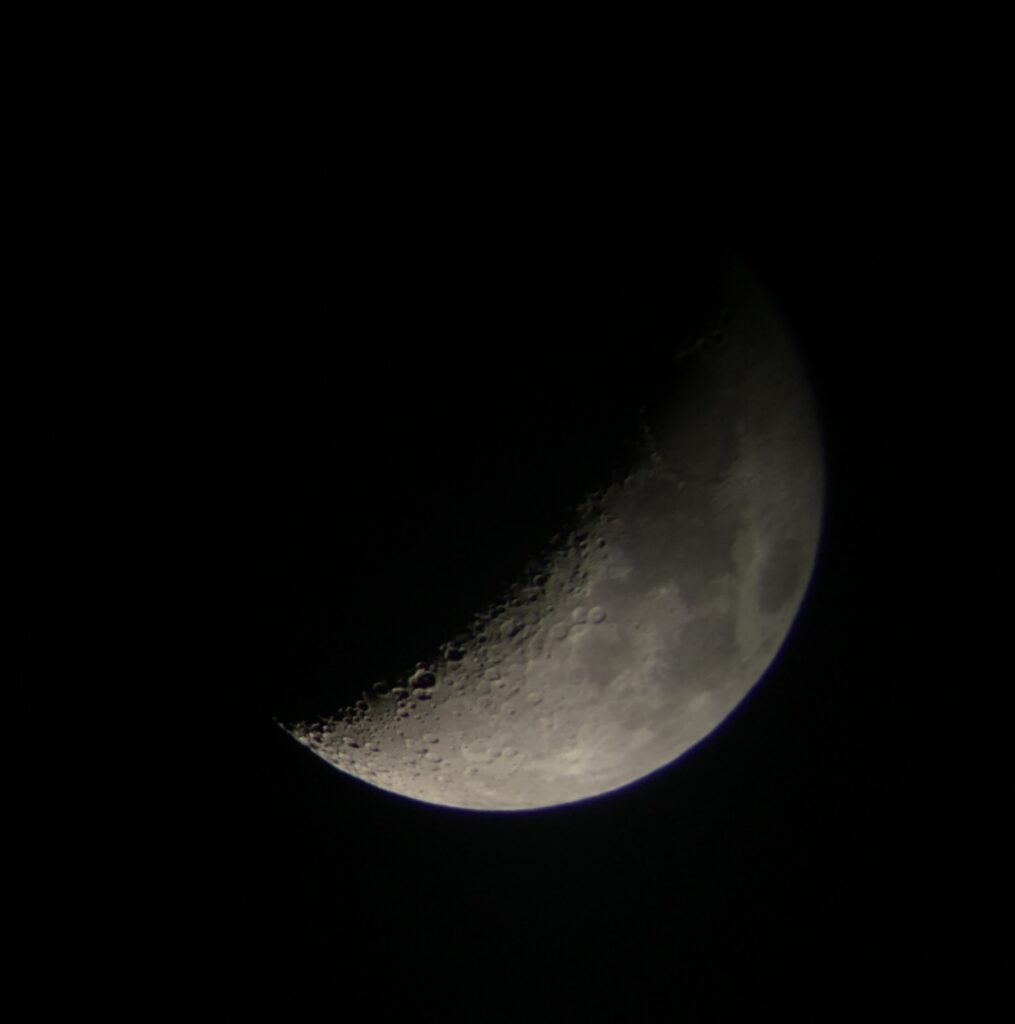
The Sun soon started to set, the day trippers hung around to watch the sunset and then were gone. I started looking at the Moon through the Altair Astro binoculars which is just a wonderful sight. A Camera cannot capture the experience of seeing the Moon with its Earthshine and in full as the FoV is 1 degree in the binoculars was a wonderful framing.
Moon through binos taken afocal with iPhone 6sPlus
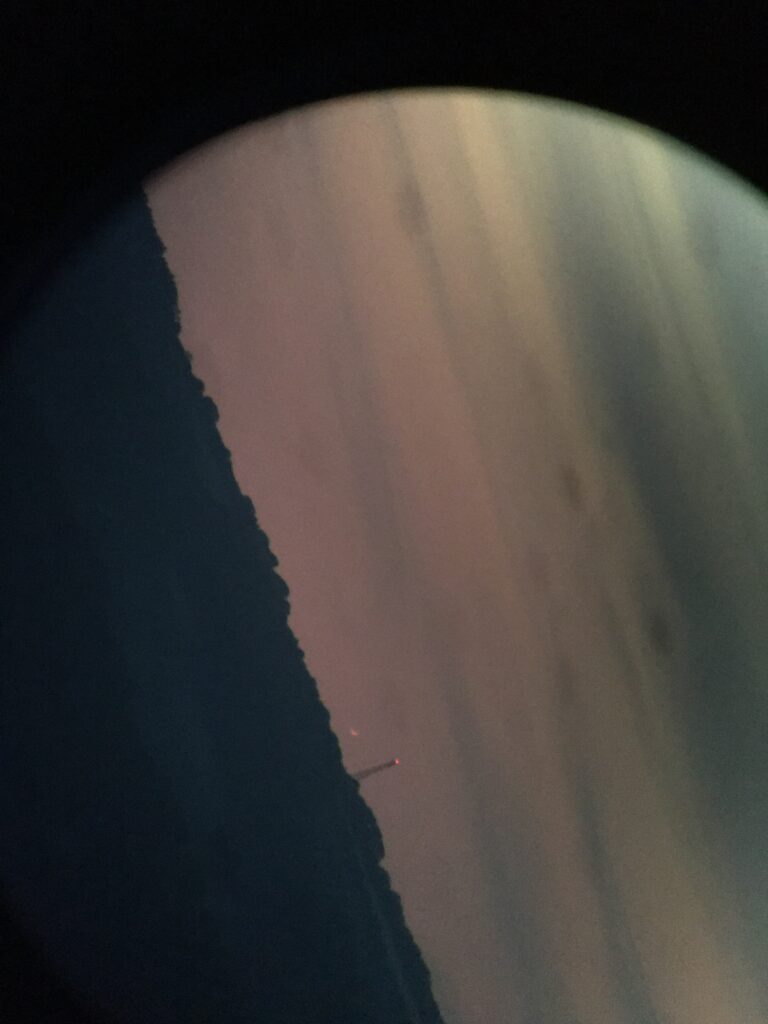
Next up was Venus before it sets, it is amazing just how bright it still is given its phase. I found in the binoculars eventually as it was hidden behind that cloud band in the distance. I then tried to get it in the Mak180, when a few new things happened. Firstly I could not slew to it as I had yet to polar align, so I had to place the scope in the right place. At the focal length of the Mak180, some 2.7m it is difficult to find something faint behind cloud just by pointing. I eventually gave up. I then noticed my laptop power had diminished by nearly 30% over about 20-25 minutes, this was due to Firecapture just hogging the USB bus capturing 100’s fps. So I was going to start the night short on juice! So I turned Firecapture off whilst I went to find Mercury in the binoculars.
Venus through 4″ binos taken afocal with iPhone 6sPlus
Mercury was a challenge, so much so I could not find it, I put that down to that not well placed cloud band. Meanwhile I pointed the Mak180 at the Moon to have a look, but by the time I had finished I the laptop was done to 53% !!!! Not so good.
So it was time to chat to GingerGeek (GG) before I put the Esprit 120 on the mount. GG was having lots of problems setting up. Firstly he had swapped the rings on the mount for the Tak that day and was struggling to balance the scope. It was so bad the scope kept dropping nose first then camera first and then either way depending on its orientation. Eventually, after much cursing, actually a lot of cursing, GG settled for the imbalance and continued to setup, unfortunately not before he knocked his beer over in his boot of the car ? fortunately I did not laugh too much ??
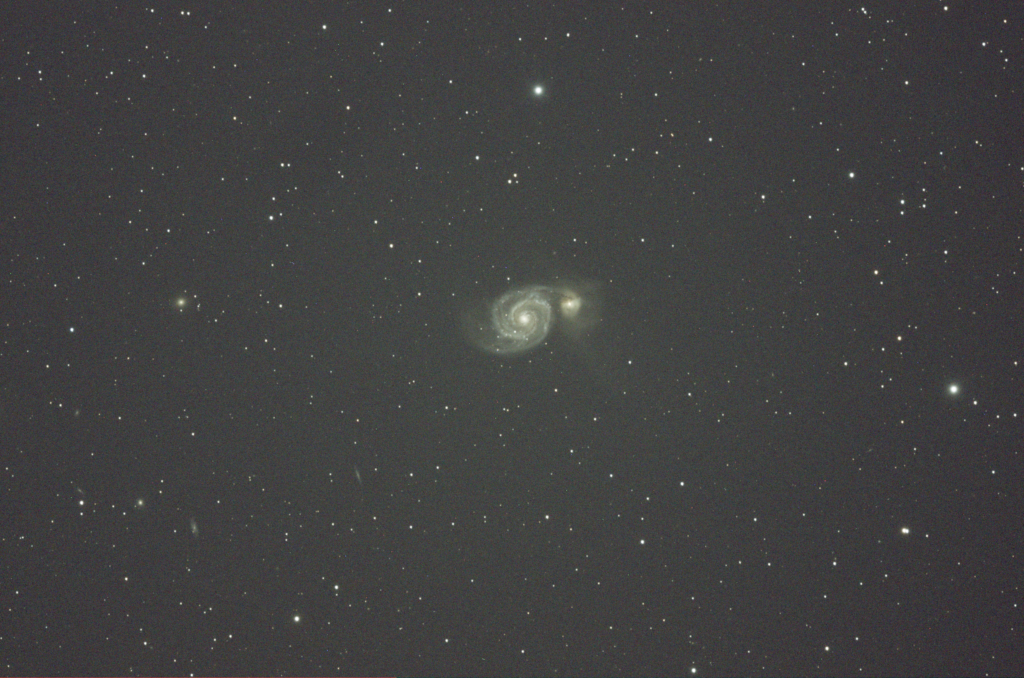
I went back to my setup, placed the Esprit on the mount and then set about getting focus with Ezcap, the software that comes with the ZWO camera. I do find the software very straight forwards and does what it says on the tin as it were. I then slewed to one of the open clusters I wanted to image and realised it resided in the North and that the twilight was still very much apparent so not suitable for imaging. Instead I settled for M51 high up as to the West was the Moon.
M51 300s Image uncalibrated
It is a lovely image at 5 minutes, I could see instantly at least 4 other galaxies and the colour of the main Messier galaxy was very pleasing. I look forward to processing the resulting subs. I set the timer for 1 hour (12x300secs) and went back off for veggie soup, cheese rolls, brownies and coffee that GG had kindly brought along.
crop of uncalibrated 300s M51
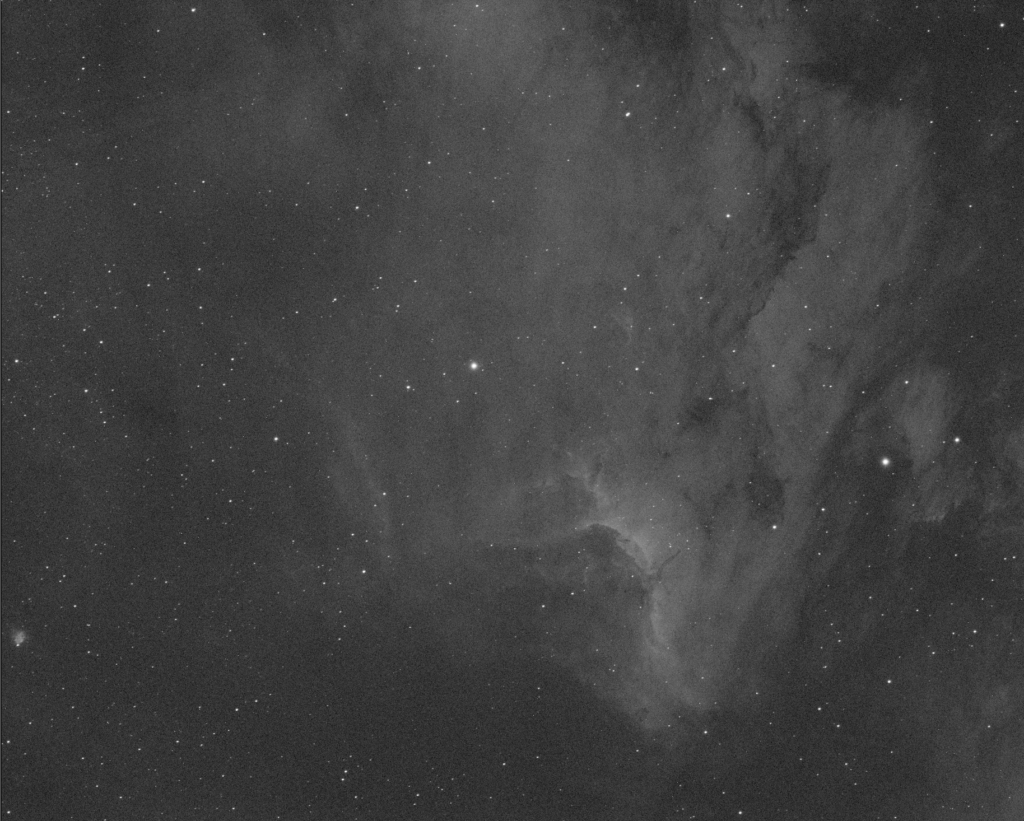
GG at this point was having issues focusing for his 5 minutes shot of the Pelican in Ha, he had made some other changes to the software before heading up the hill too which was confounding him. After some more time he finally had focus and started to image. However whilst a few of the images were okay, the resulting imbalance and gusts of wind made it difficult to keep pin sharp images. It should also be notes at this point that GG and I were running from the same car battery, although GG was only running the camera from it, the mount was running from his Lithium battery.
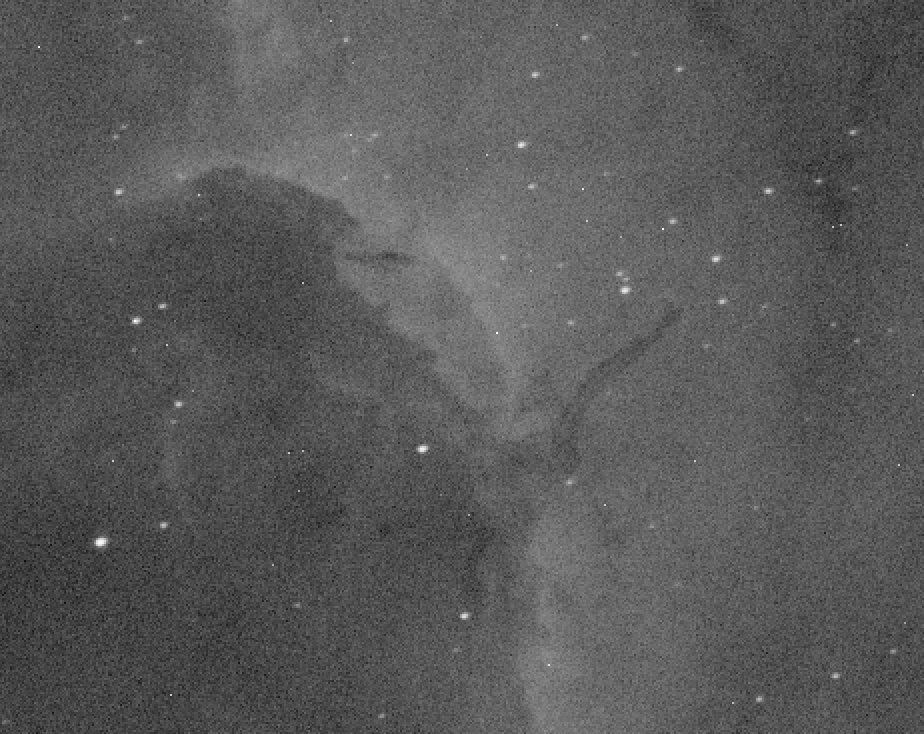
Stunning Pelican Nebula – 300s Ha uncalibrated
At just before 1am the inverter connected to the spare car battery turned off due to loading and power. Everything stopped for both of us ??? however GGs mount kept running due to the Lithium battery. I closed down my setup and allowed GG to reset his camera and reconnect, he then went on to start imaging, however the resulting image had moved significantly and GG decided to give up. So we spend the next 40 minutes packing up. Whilst this was going on we looked at Saturn and Jupiter through the binoculars which was a wonderful sight. Now for the 50 minute drive home to unload the car just before dawn, although by 2am it was clearly getting lighter.
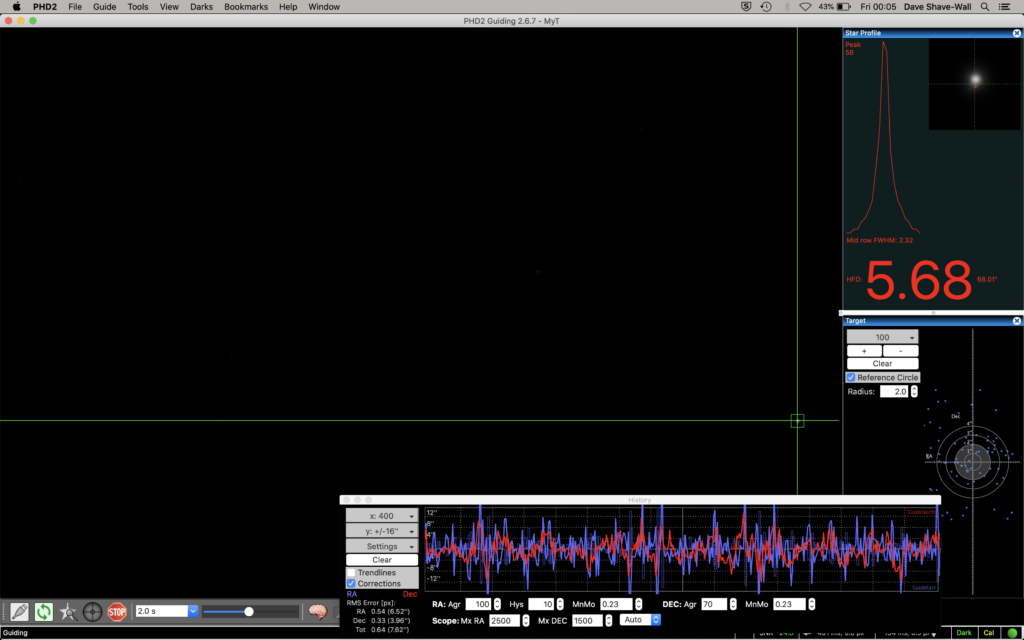
Guiding graph on Esprit 120 Paramount MyT last night, all over the place with wind
The SQM for the site last night was 20.91 although the Moon was very bright. The site is also very dusty, and my laptop was covered in the morning. Another incident was that I inadvertently unscrewed the cover from the guider as I transferred from one scope to another and the glass cover fell out, I now have dust and dirt on the sensor to clean. It is not a great design by ZWO for the ASI290MC as it really needs a locking grub screw to top that happening or a reverse thread.
Herbig-Haro object at the end of the long feature can just be seen.
GGs image has set us on a little project to image the HH 555 bipolar jet at the end of the major turn of gas in the Pelican Nebula. We will attempt over the next few nights to get an image from both the Esprit 120 ED Pro from the IMT3 dome in Ha and also from the OS 12″ to see what it looks like compared to the Tak FSQ85. Another good social distancing astronomy session ? goodnight.
It is the hope today that the wind will die down and the clouds will clear, allowing us to go after the elusive comet C/2017 T2 PANSTARRS which will be next to M81 and M82 and should nicely fit in the Tak FS102.
I took a set of darks for the Tak whilst waiting for darkness, then I started to image M101, however very quickly it clouded over and shut the dome.
A gusty night, tried M101 but after a few frames it was cloudy. Used the Tak FS102 taking 5 minutes unguided as M101 was at the meridian. Gain 7 and Offset 30 which worked well but this is a faint galaxy.
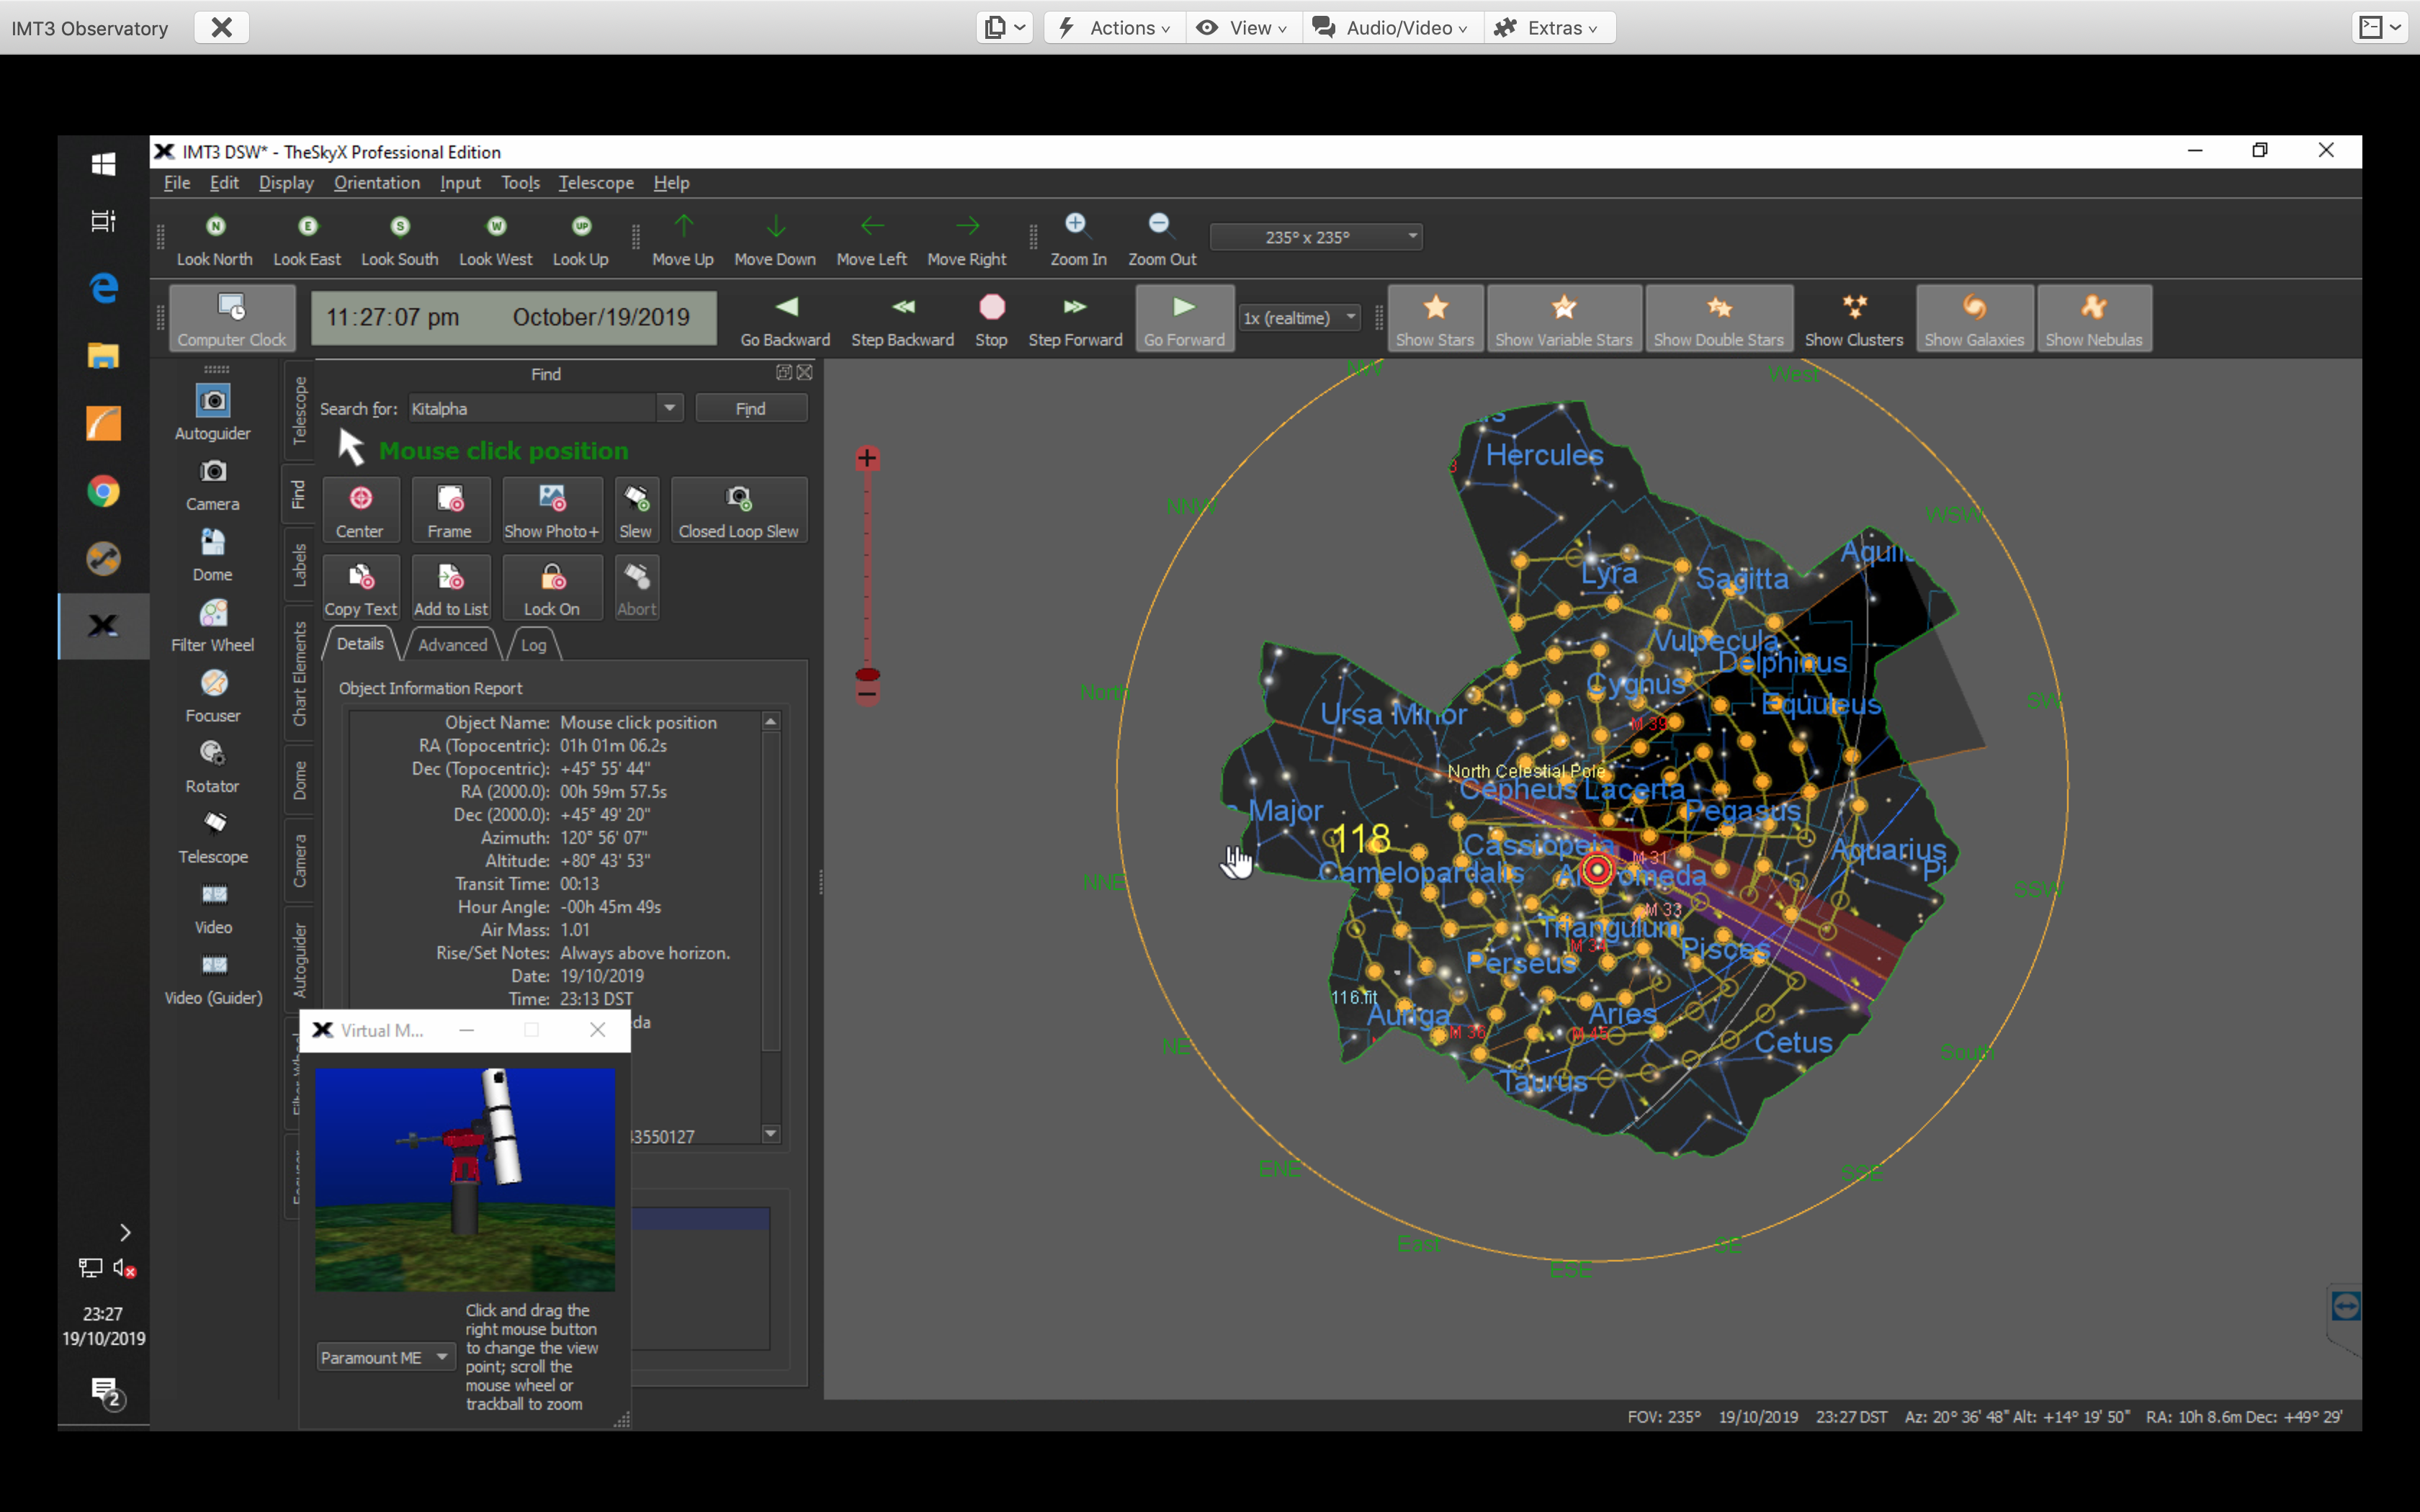
I was joined by Bob remotely and also tried to get Venus alongside Mercury as they were close together, in the Esprit 120ED on the travel setup and Bob tried through the Tak in IMT3. However I could not locate in the Esprit on the travel setup due to cloud then the roof of the neighbours house. Bob on the other hand could fit either Mercury or Venus in but not both due to the rotation of the camera. It is currently sat at 118 degrees whereas the OS is set to 187. Once both cameras have been cleaned we will set these along with the Esprit on the Paramount MEII to the same field rotation.
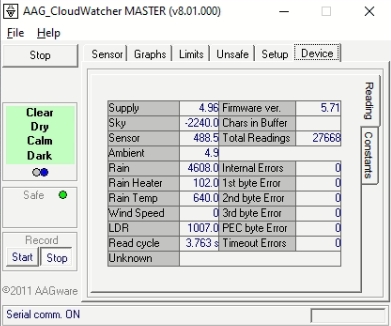
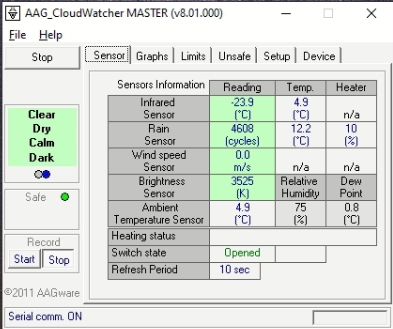
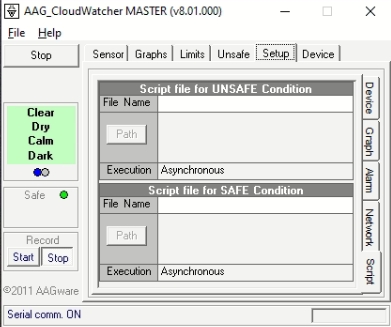
Our TOSA Manual needs updating now that we have replaced the HiTechAstro Deluxe Cloud Sensor with the Lunático AAG CloudWatcher cloud detector.
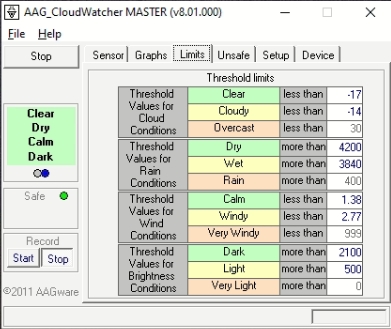
New Screens to get familiar with:
.
.
.
.
.
.
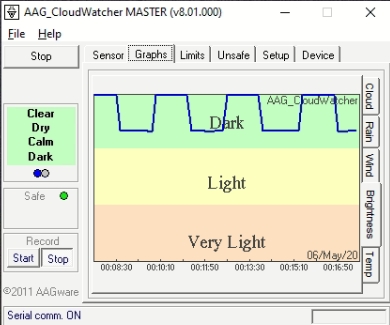
Initially I was unable to open the shutter of the dome. Thinking I’d forgotten to reset the HiTechAstro relay I soon realised I had to figure out why the AAG_Cloudwatcher software was reporting Unsafe. GingerGeek spotted that the Brightness level looked like a sawtooth and should settle after a few minutes, which it appeared to do and the dome shutter opened successfully.
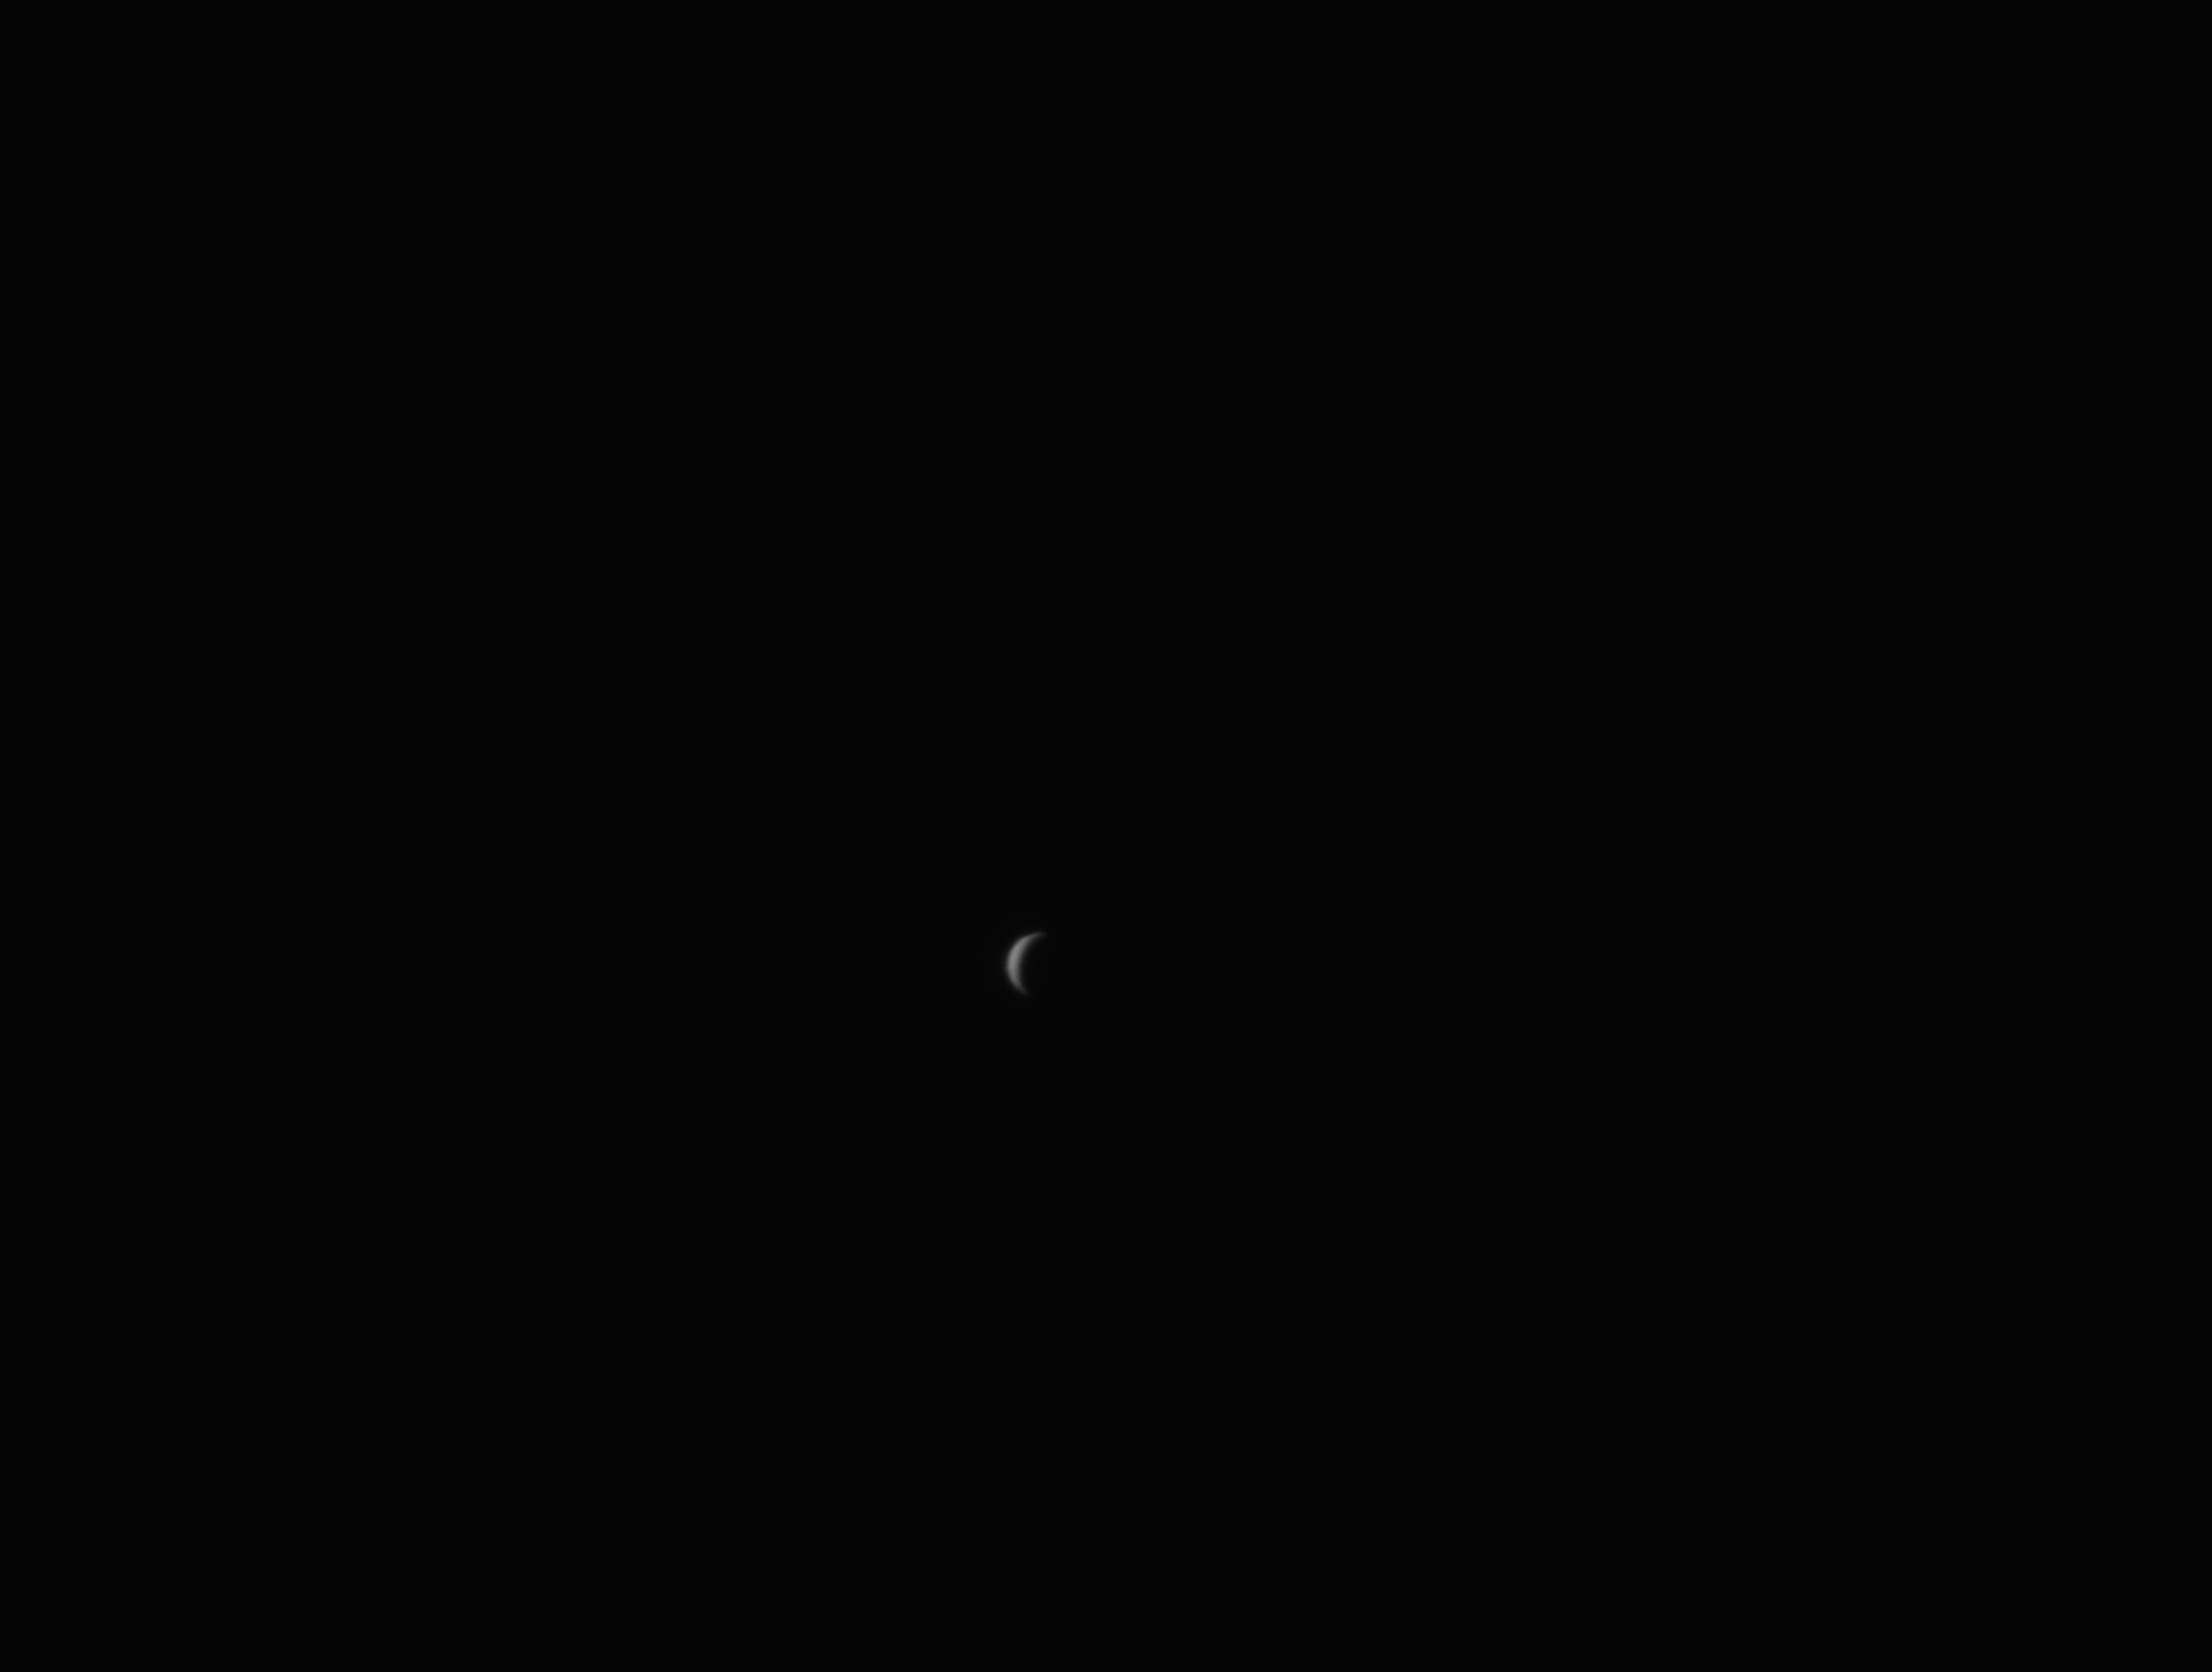
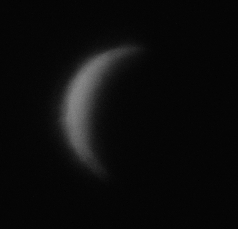
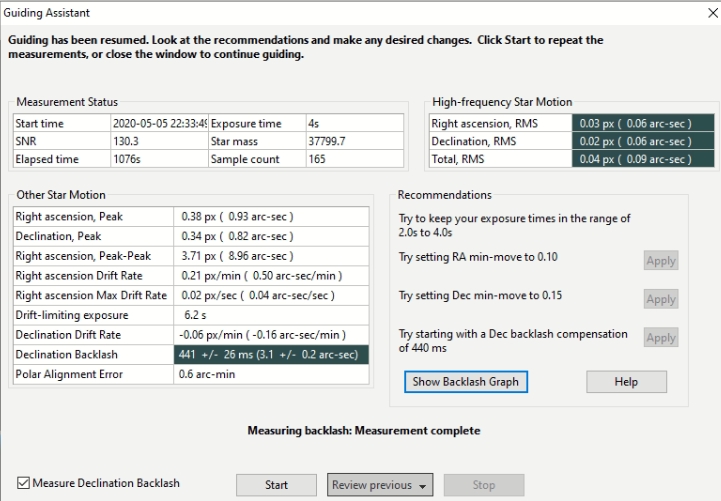
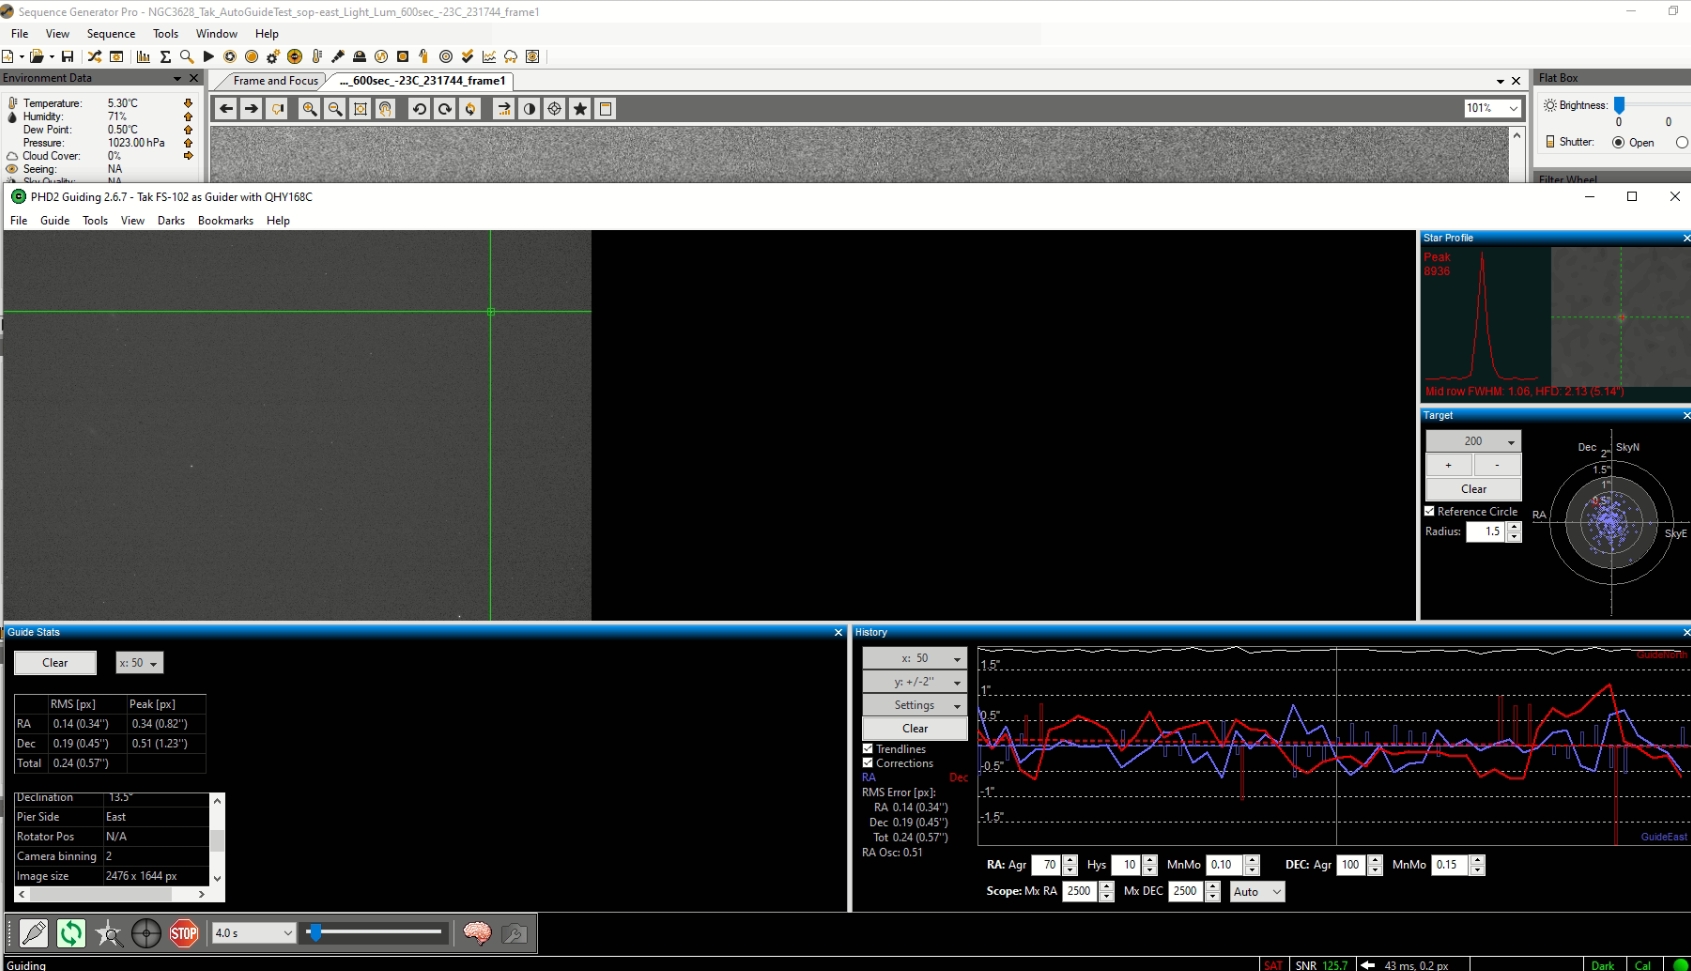
Following on from my previous observing session on 1st May when clouds interrupted play just as I was completing a Guiding Assistant run in PHD2, I started tonight’s session with a quick look at Venus before it set below our horizon and then had another go at running the Guiding Assistant in PHD2 for the OS 12″ / Tak FS-102 combination, with the Tak as the guider for the Officina Stellare.
Venus in Ha (because it’s so bright).
Crop
As the Tak has an Alnitak Flip Flat attached to it I added it to the profile I’ve created for the OS12 and Tak combination so that the panel can be opened to allow light through to the camera 🙂
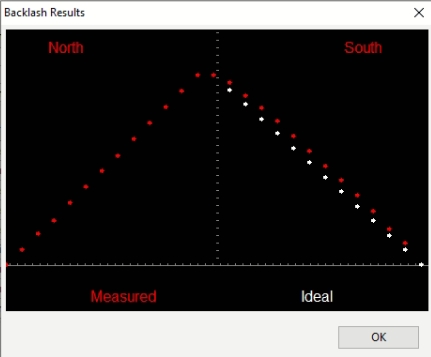
Guiding Assistant completed successfully and values applied for RA MnMo, Dec MnMo and Dec Backlash compensation.
.
Y scale = 2, Target Radius = 1.5
Sequence running for 2, 5, 7, 10, 12 and 15minutes.
2, 5,& 7 minutes exposures ok but trailing beginning to show at 10 minutes, quite evident at 12 minutes and very evident at 15 minutes.
Added 8 and 9 minutes to sequence, but both of these show signs of stars trailing.
Started a sequence of 24 x 5 minute exposures.
Aborted at frame 20 as the NGC3628 was now below the horizon.
The image has drifted and NGC 3628 has not remained fixed in the frame, so we still have issues with guiding as that is almost certainly the source of the drift.
02:22 Slew to M5, just off centre.
Slew to HIP 74975 to centre and focus.
De-selected guider.
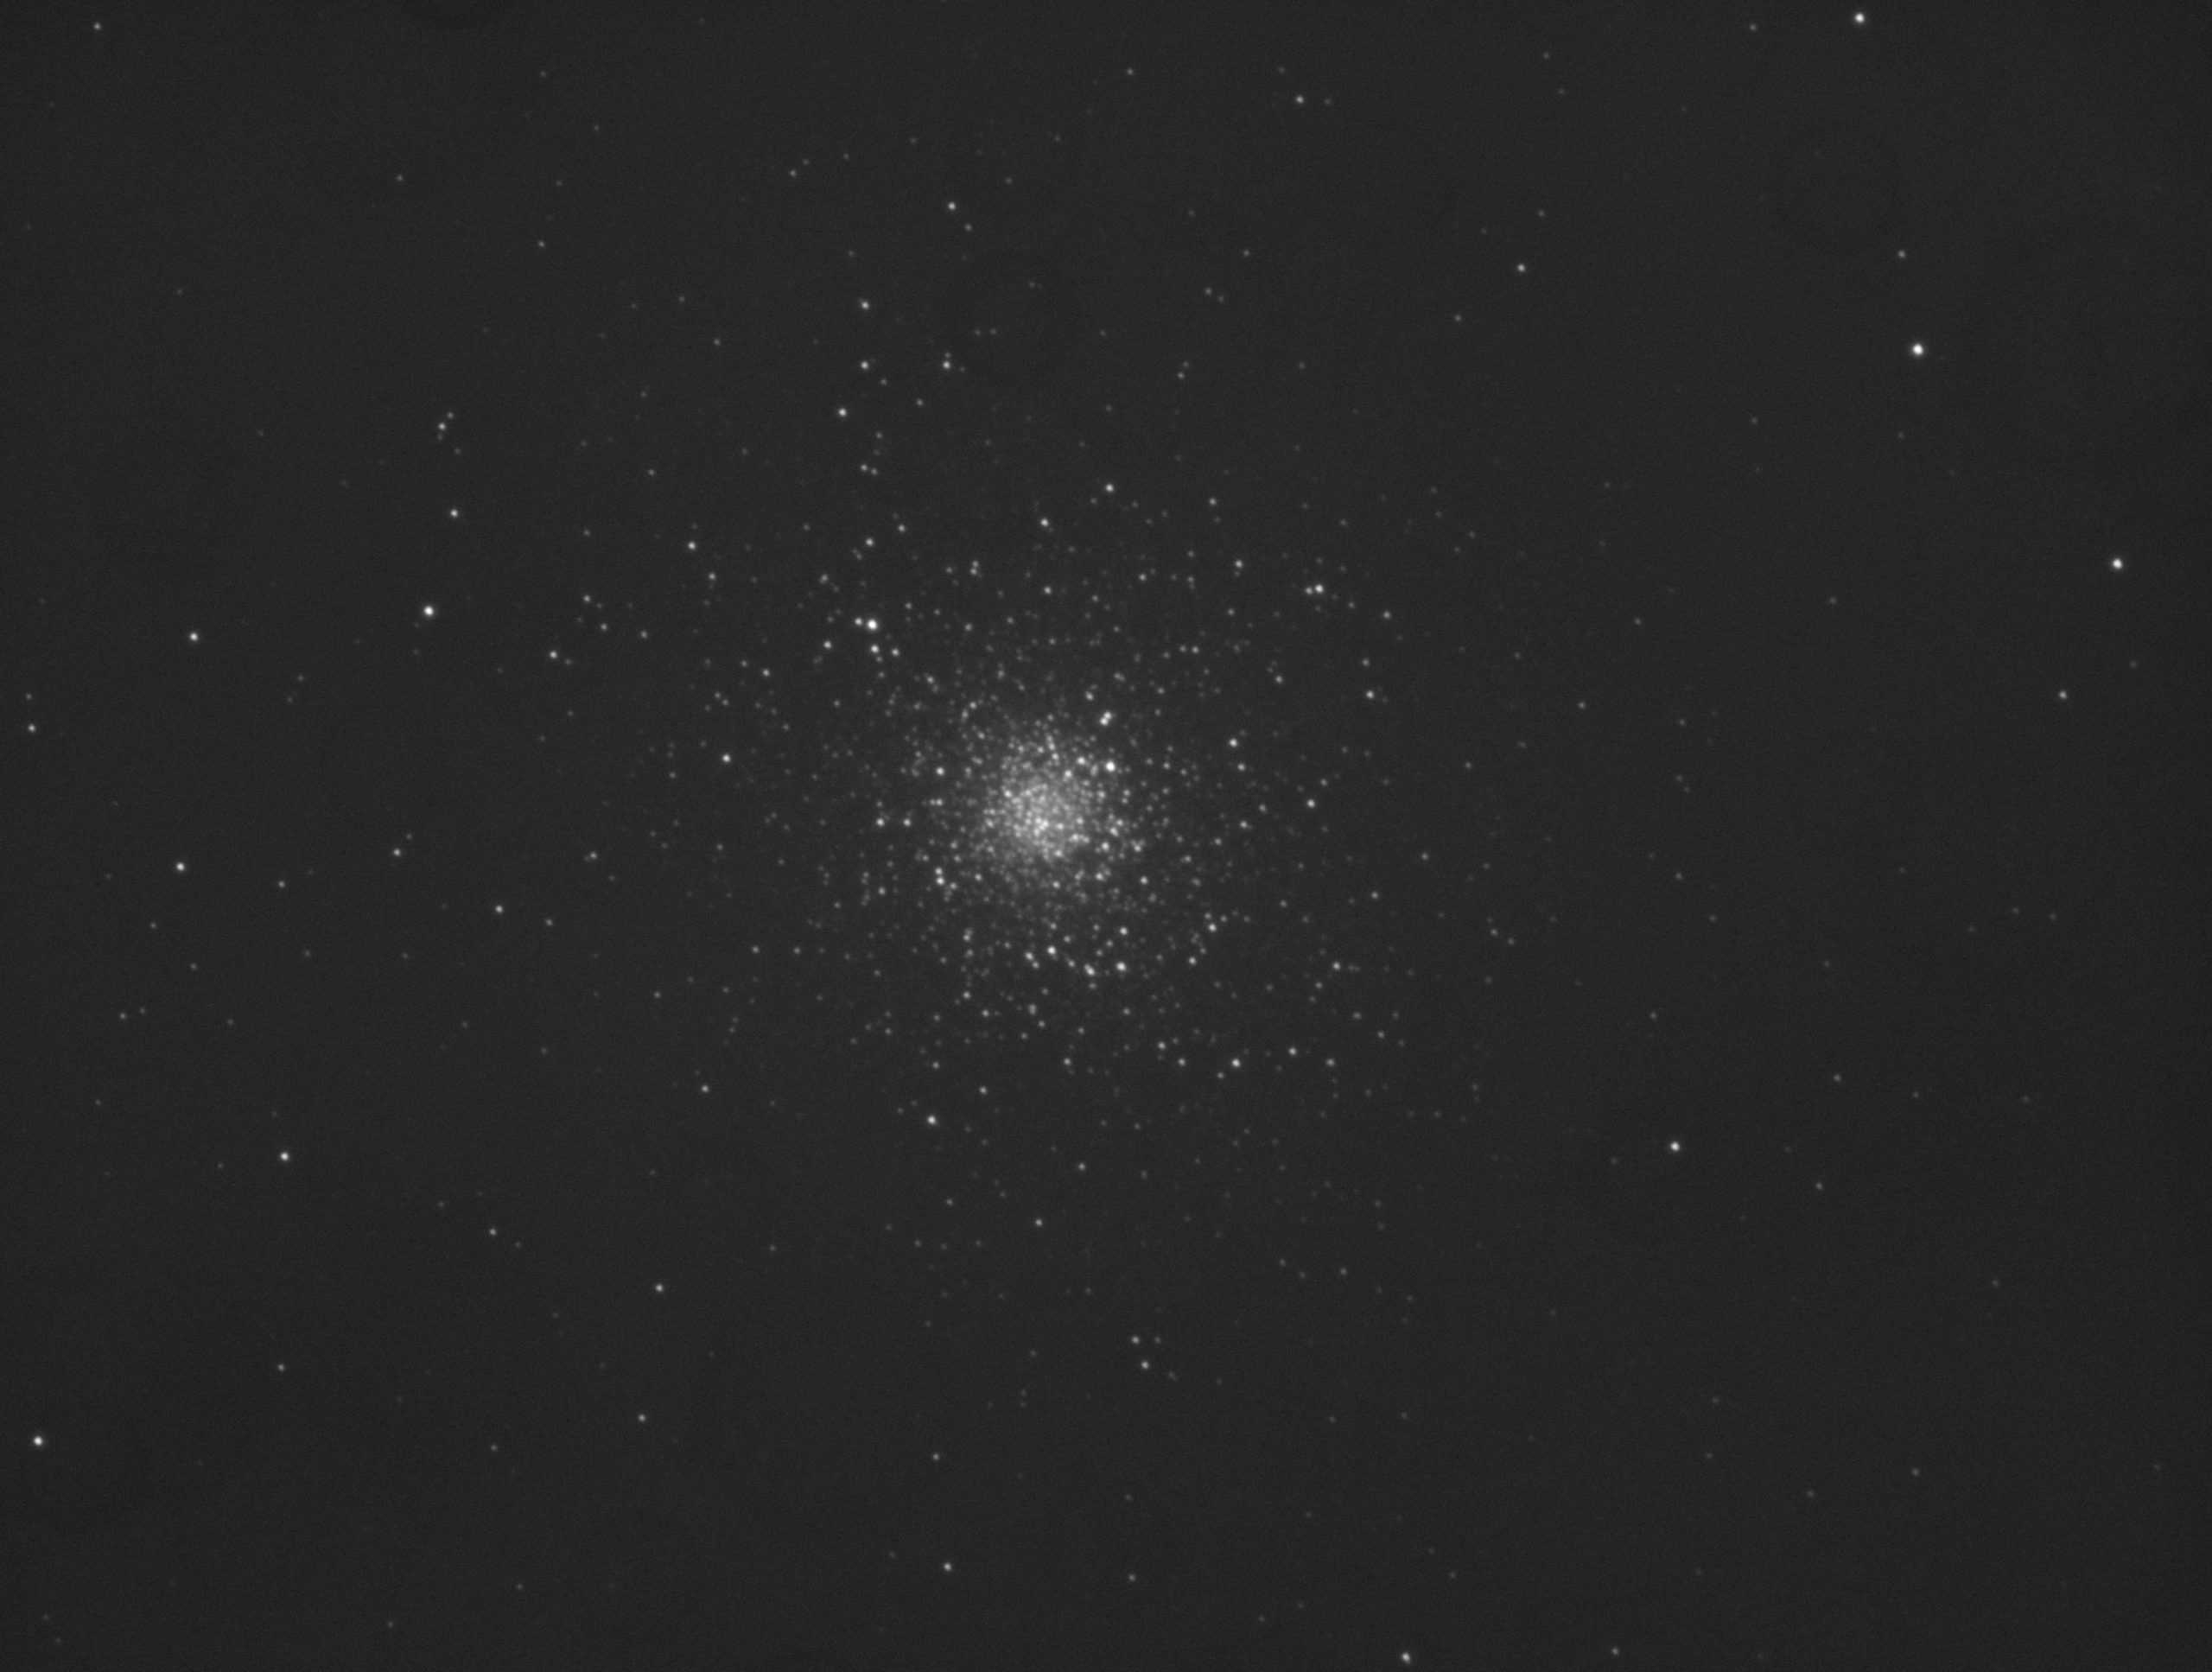
02:57 Slewed to M5 and started a sequence of 24 x Lum and 8 x R,G,B 120s frames.
Sample Luminance frame:
04:08 SQM graph has started to droop. Was 18.2 before 4am, now down to 18
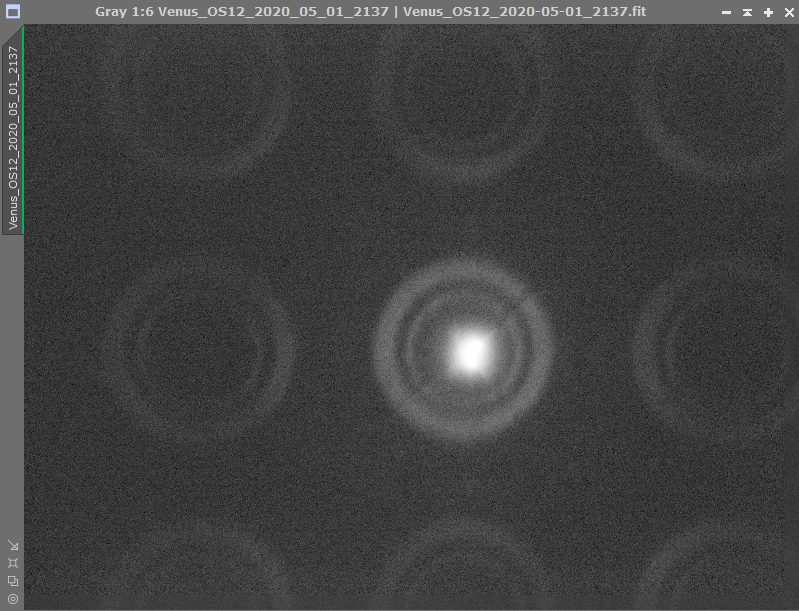
On opening the dome I slewed to Venus hoping to catch it before it disappeared below the horizon. I took a 1s Frame and Focus image just to confirm it was in the centre of the FoV and was puzzled by the resulting image.
At first I thought the 12″ was still covered so called Dave to check. He didn’t think the cover was in place as the last thing he’d done was to take some Flats. Dave confirmed that the cover was not in place but reported that I might be trying to view Venus through the trellis on the fence so I abandoned Venus and slewed to NGC3628 in Leo as it had just crossed the Meridian and I wanted to try and setup a profile to use my Tak FS-102 as a guide scope for Dave’s OS12″.
Previous attempts at guiding the OS with the QHY5 and MiniGuideScope combination had proved worse than imaging with the mount unguided.
Although I suspected we knew the root cause we hadn’t our research 🙁 which soon became apparent. I found a couple of rules of thumb, the first stated that ‘image scale in arc-seconds x 400 = max exposure time is seconds when guiding with a separate guide scope’.
For the ZWO ASI1600MM (3.8um pixel size) on the OS 12″ (2500mm fl)
((3.8/2500) x 206.265) x 400 = 125s
We can do better than that unguided.
The second ‘rule of thumb’ I found stated that the ‘Guide to Main train pixel ratio should not exceed 10:1.
Unfortunately the QHY5 MiniGuideScope to OS12″ ratio is close to 17.8:1, not good.
The QHY5 + MiniGuideScope scale is (3.75/130) x 206.265 = 5.95 arc-sec / pixel.
The OS 12″ + ZWO ASI1600MM scale is (3.8/2500) x 206.265 = 0.31 arc-sec/pixel.
The Tak FS-102 with the QHY168C scale is (3.75/820) x 206.265 = 0.94 arc-sec/pixel
So if we try the OS 12″ with the Tak as the guide scope the ratio is closer to 2.8:1 which sounds like a better proposition.
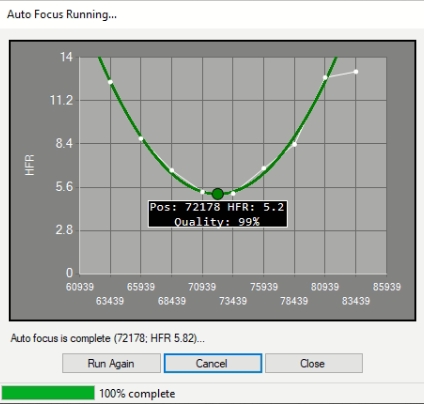
Camera -23°C, focus point 74534, temperature 15.81℃
Frame & Focus / Plate Solved / Centred
21:38 Autofocus Run – Failed.
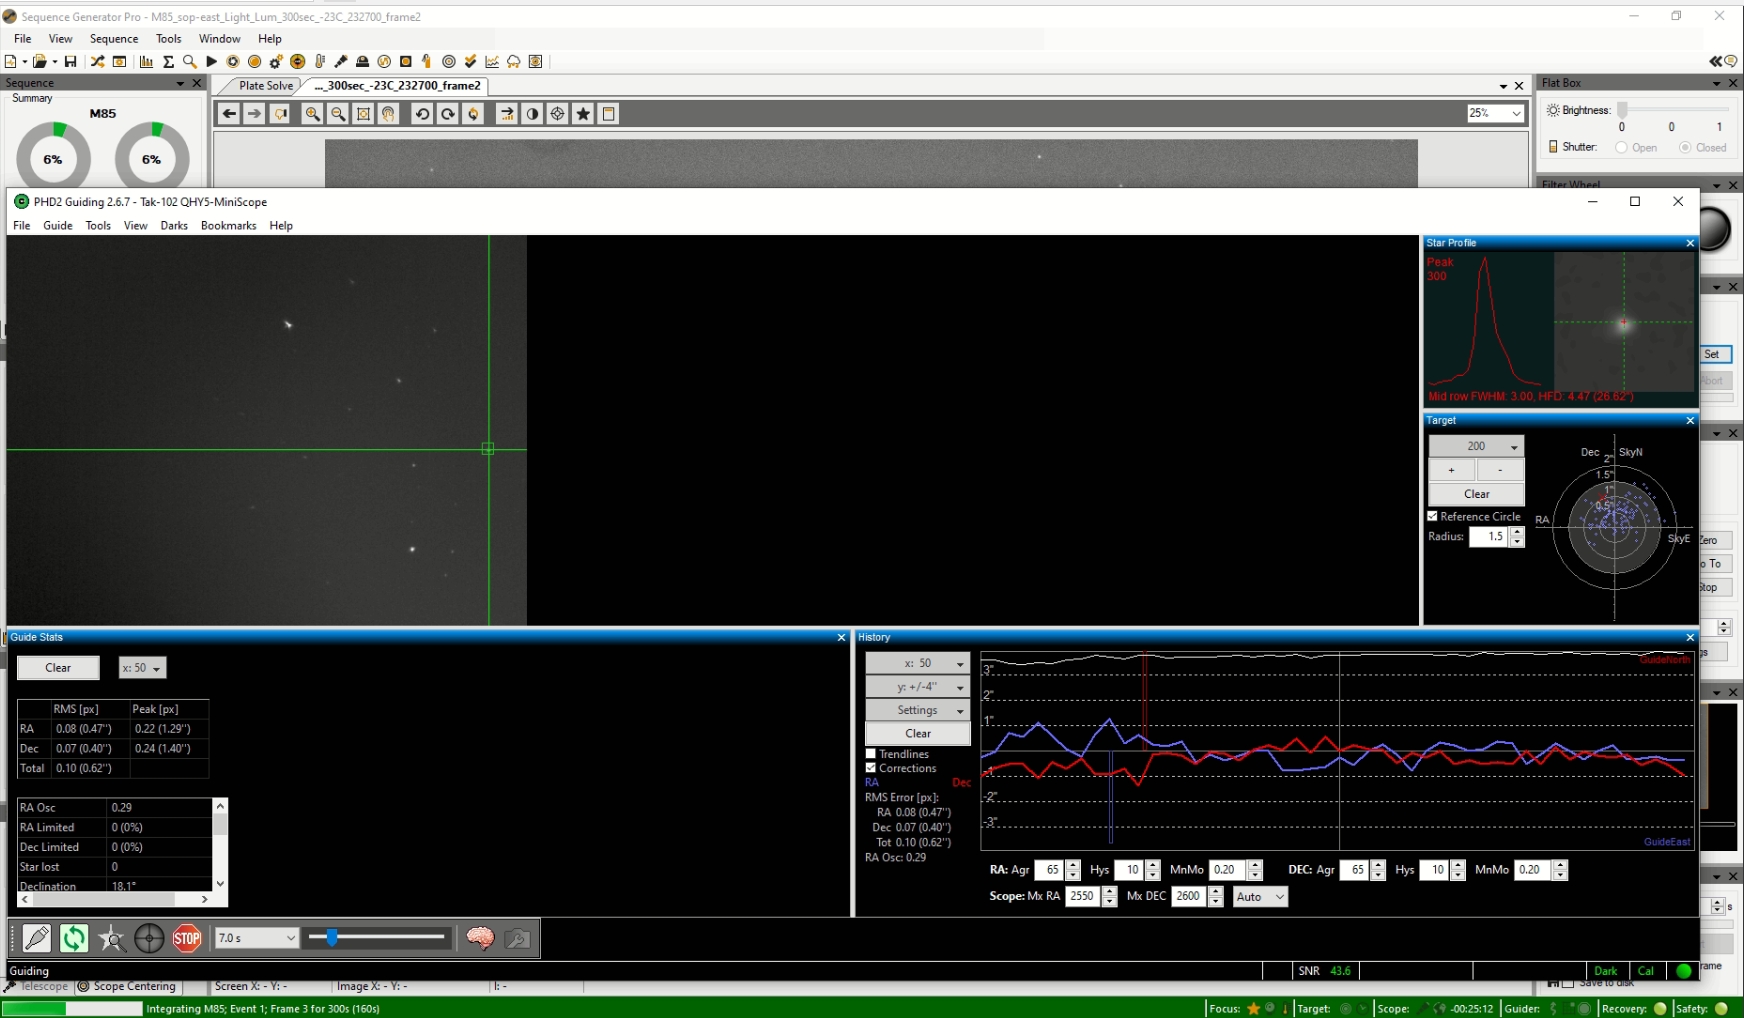
21:50 Integrating M85 Event 1 Frame 1 for 300 seconds Lost guide Star
22:13 Switch Guider to SW Lodestar
Integrating M85 Event 1 frame 1 for 300 seconds. Aborted run as M85 approaching the meridian and guiding graph was not looking good. Guider not calibrated.
Meridian flip to Chertan in Leo, Tak FS-102 now on top of configuration, Esprit below the OS 12″ so will be the better to guide with the QHY5 MiniGuideScope attached to the FS-102.
22:51 Slewed to a star field near Chertan for Auto Focus run. Start focuser position 72885, final focuser position 72178 ….. nice graph.
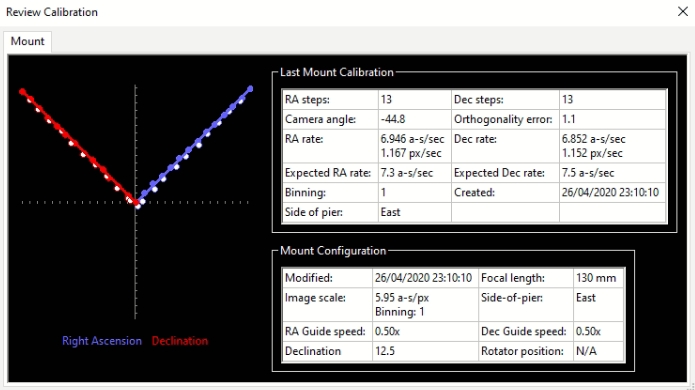
22:56 Calibrated QHY5 MiniGuideScope guider
23:08 Calibration suceeded, guiding.
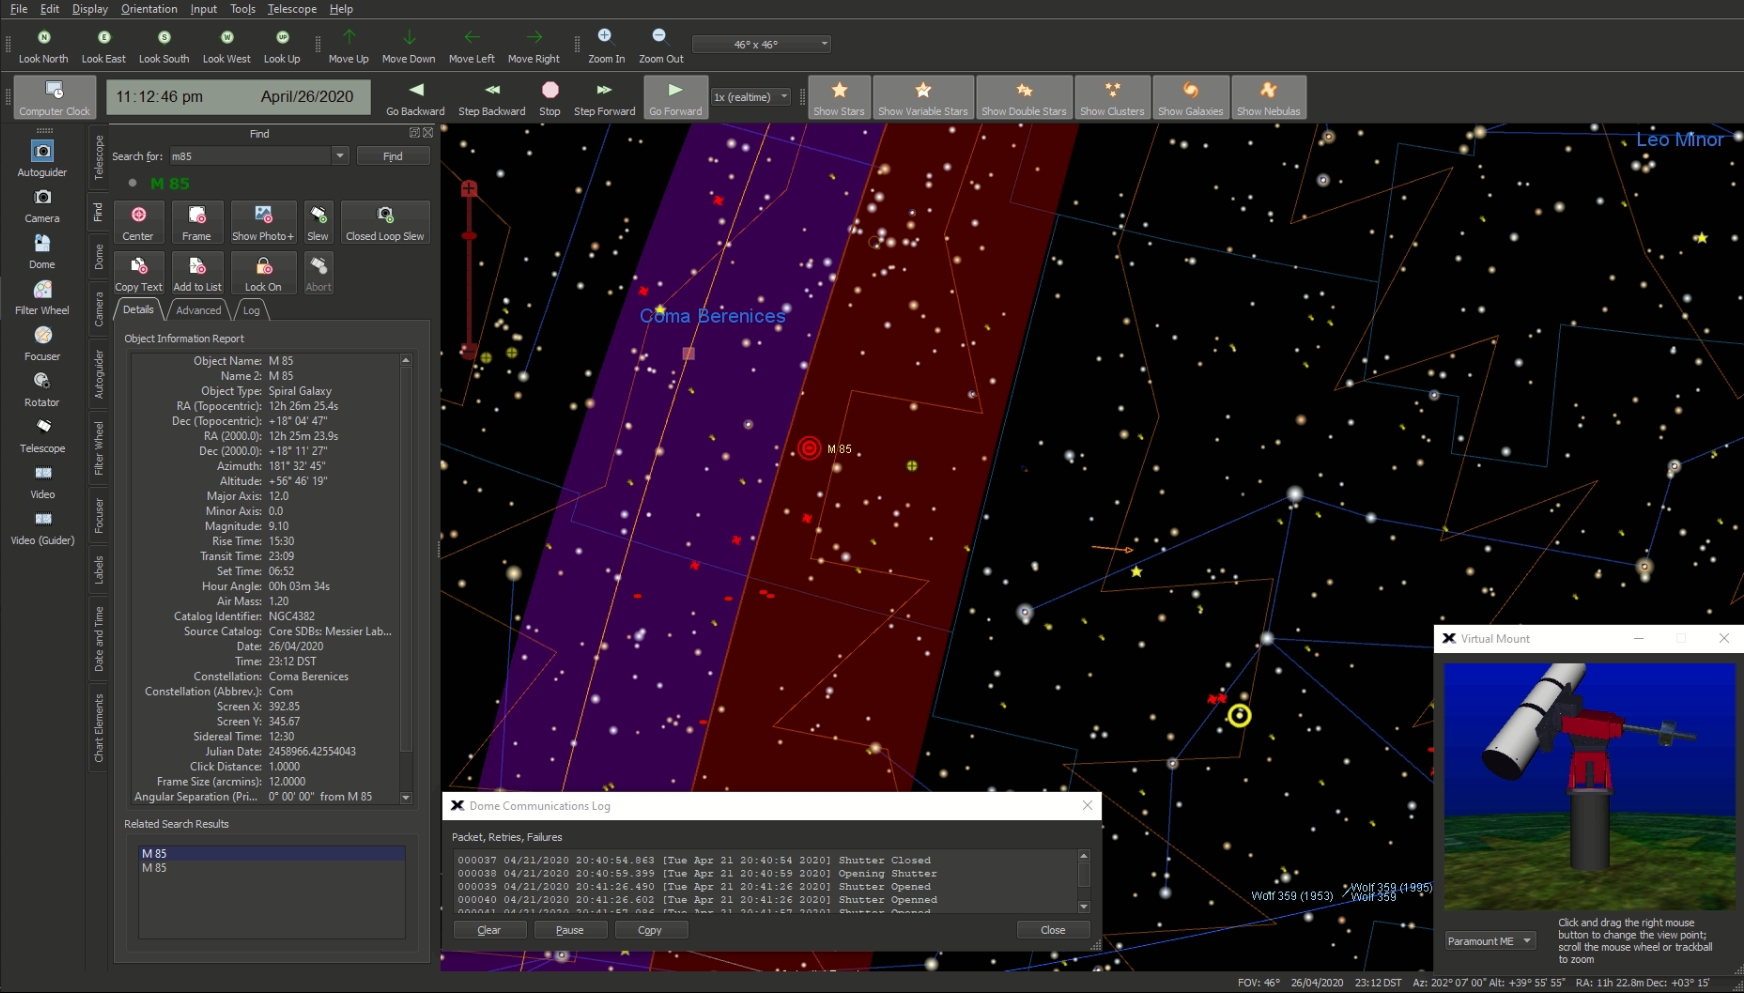
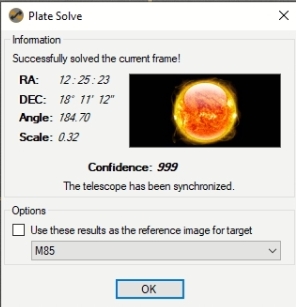
Stoped guider and slewed to M85 which had just crossed the meridian.
Frame & Focus / Plate Solved / Centred
23:21 Integrating M85 Event 1 Frame 1
23:44 Telescope connection lost due to poor communication
23:48 SGPro reported USB error – lost FLI Focuser. FLI connects Ok in The Sky X.
Fix is to click on the spanner in SGPro for the Focuser and Rescan, Focuser now reconnects.
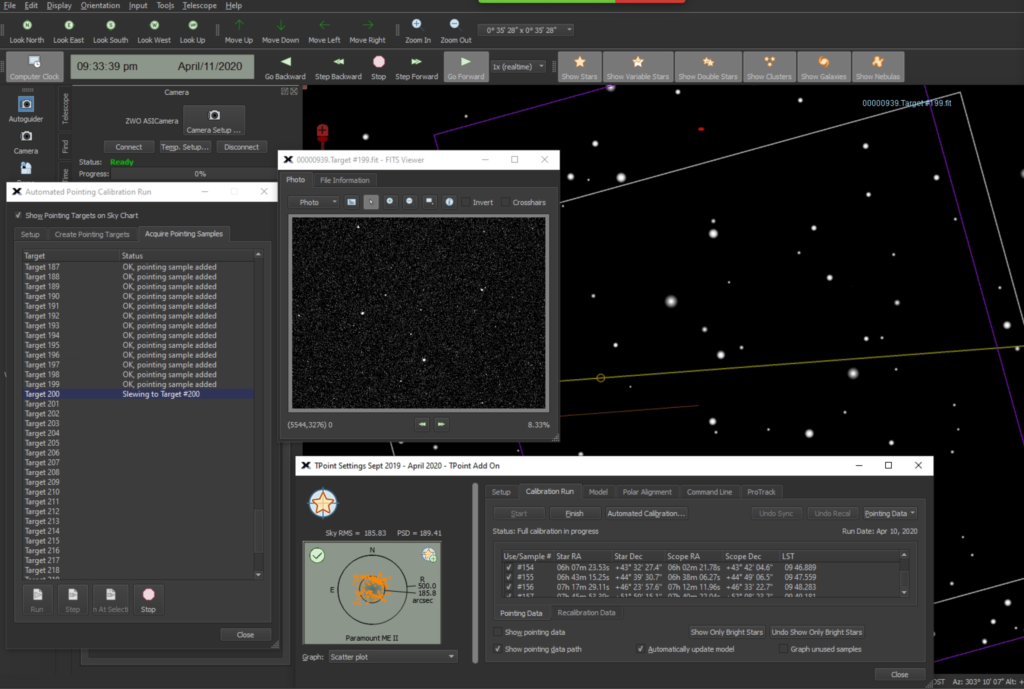
Started TPointing at Point 153, at 22:00 got to Point 231 which gave us 192 confirmed points.
Tpointing
Then went back and did the following points
Point 28 (DONE)
Point 50-55 (DONE)
Point 60 (DONE)
71-92 (DONE)
100-153
101-106 (DONE)
Failed – 107, 108, 112, 113, 130-132,134
Not tried – 100,109-110, 114-118
Completed – 111, 119-129,133,135-152
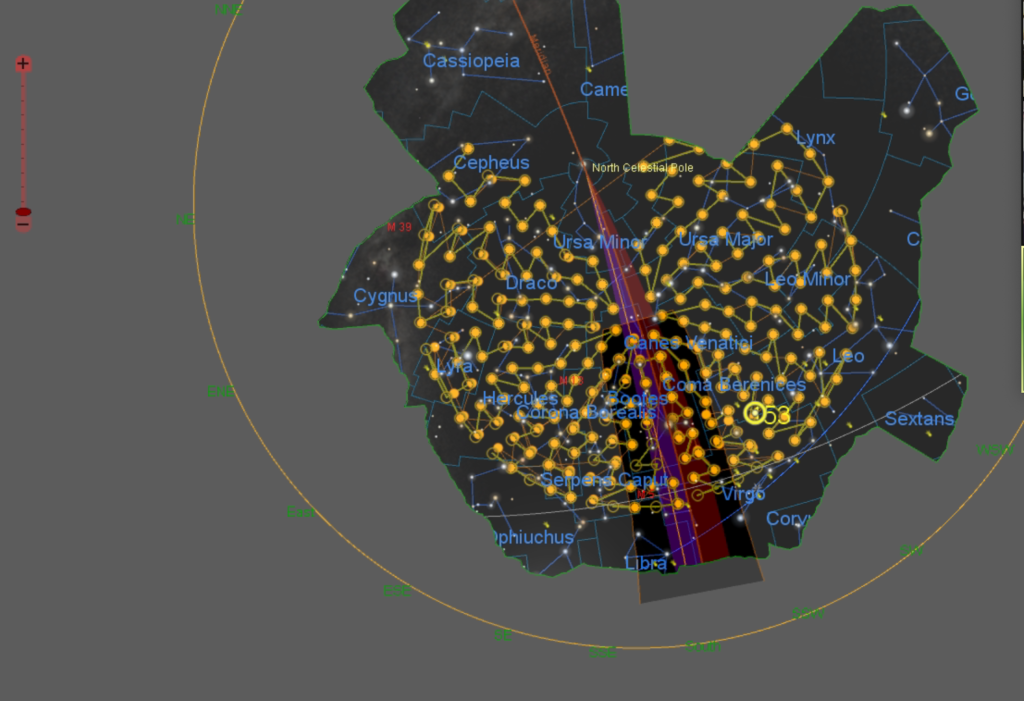
We had some cloud around 22:45 until 23:29
TPoint visual
Throughout this time I processed some Lunar images on the Windows laptop with AutoStakkert from the previous few nights of imaging through the Mak 180. I have noticed you cannot open anything larger than 4GB file size !!
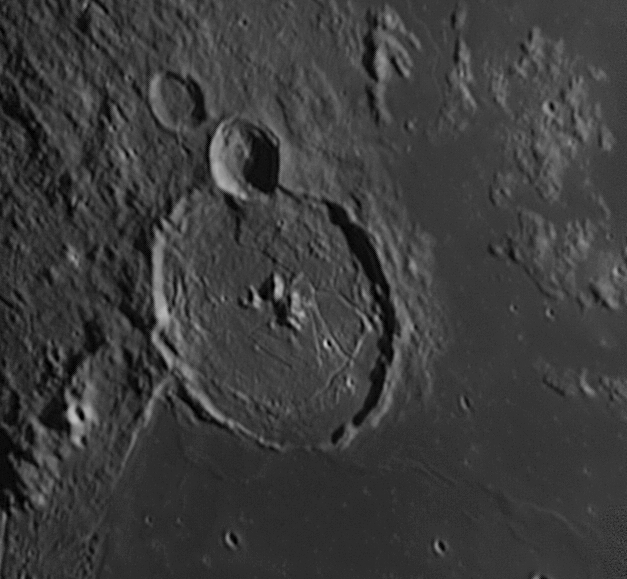
Gassendi crater
@1:52am TPoint finished
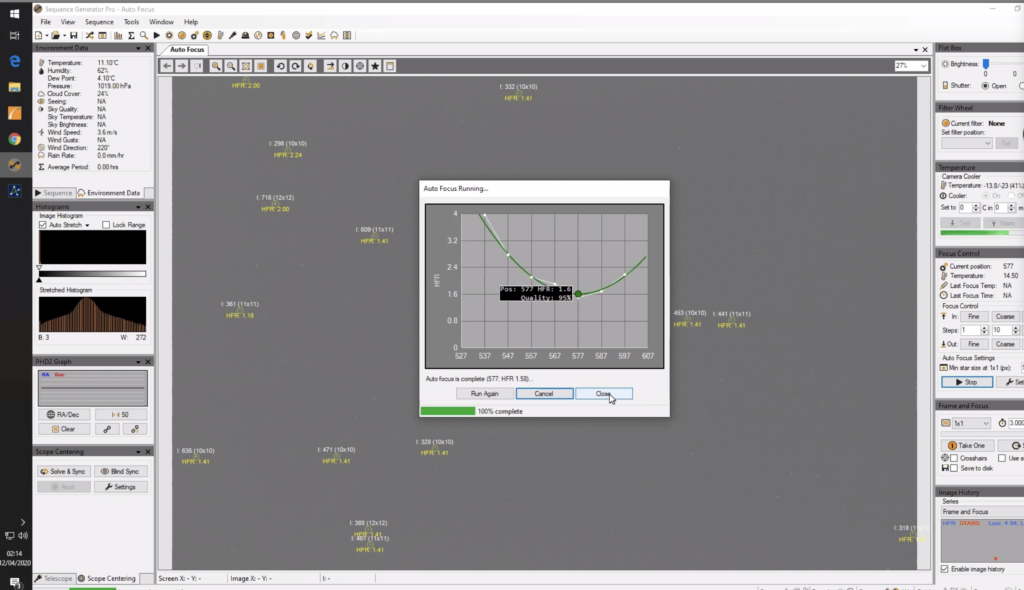
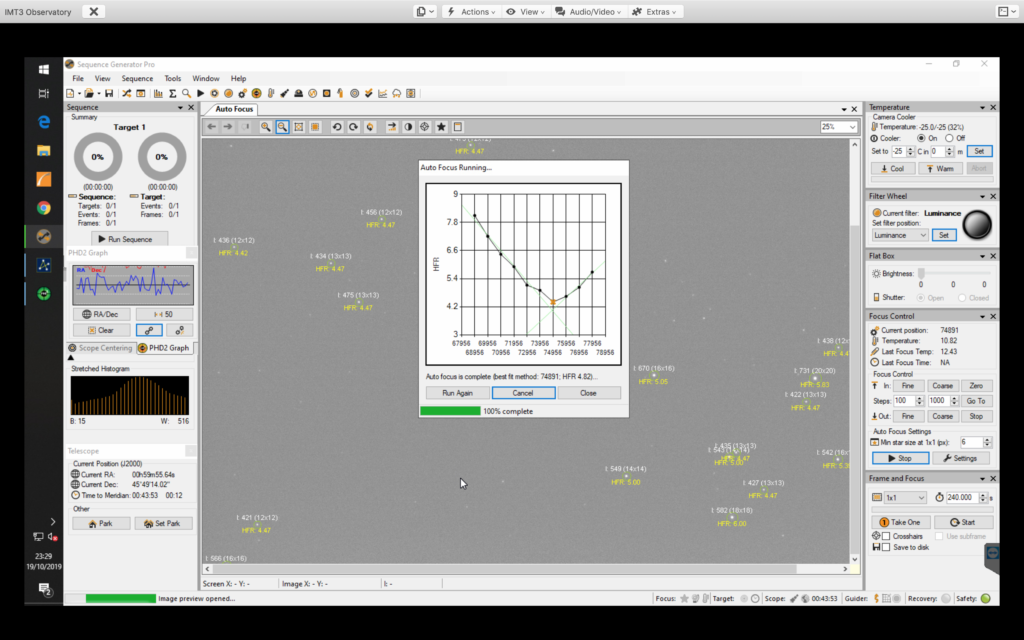
@2:09 GingerGeek took over to look at focuser positions and backlash and autofocus on the Takahashi FSQ102.
Autofocus
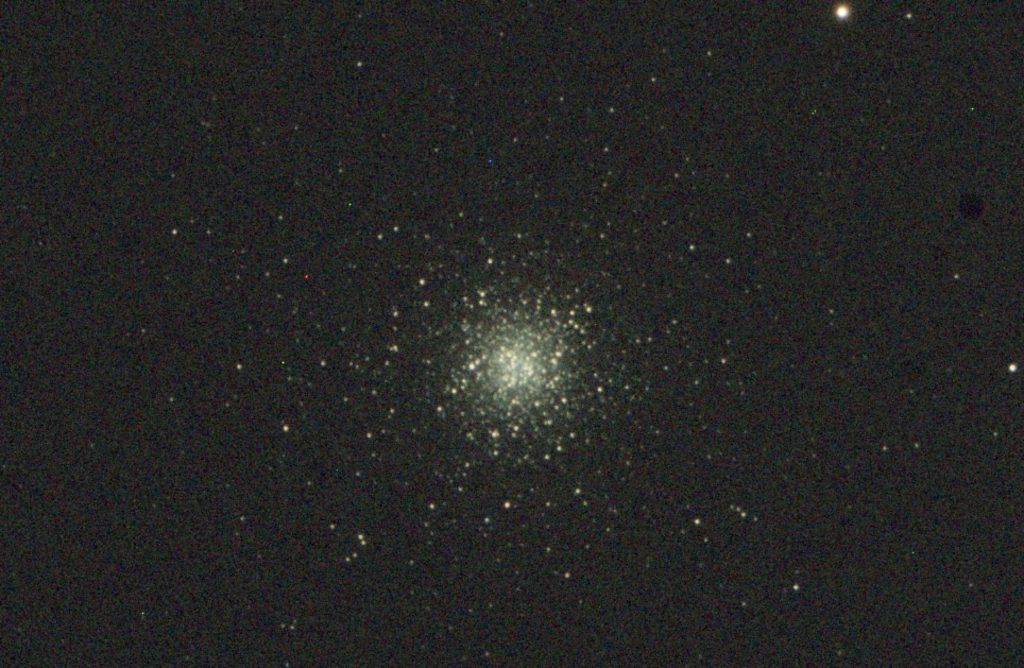
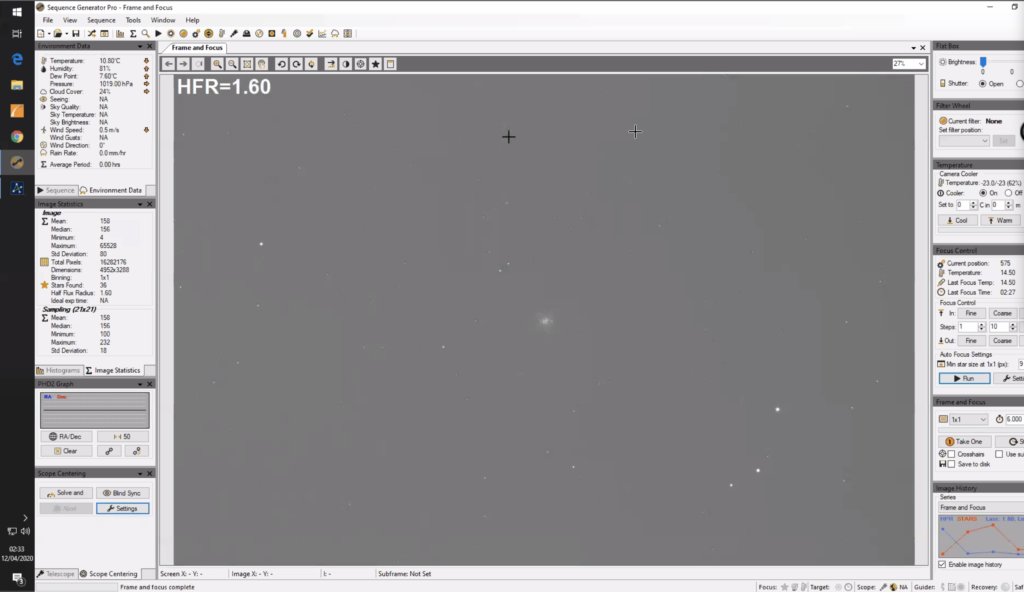
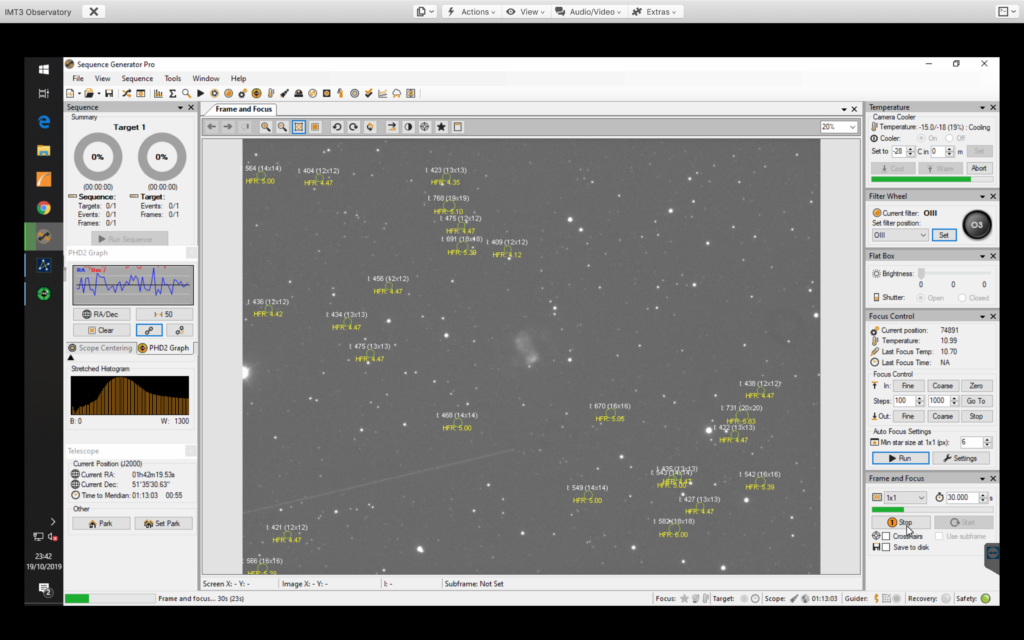
Then we started to image M53 on the Tak for RGB data to add to the Luminance data we already have from GingerGeek’s data on the Esprit 120ED.
M53 Frame and Focus test
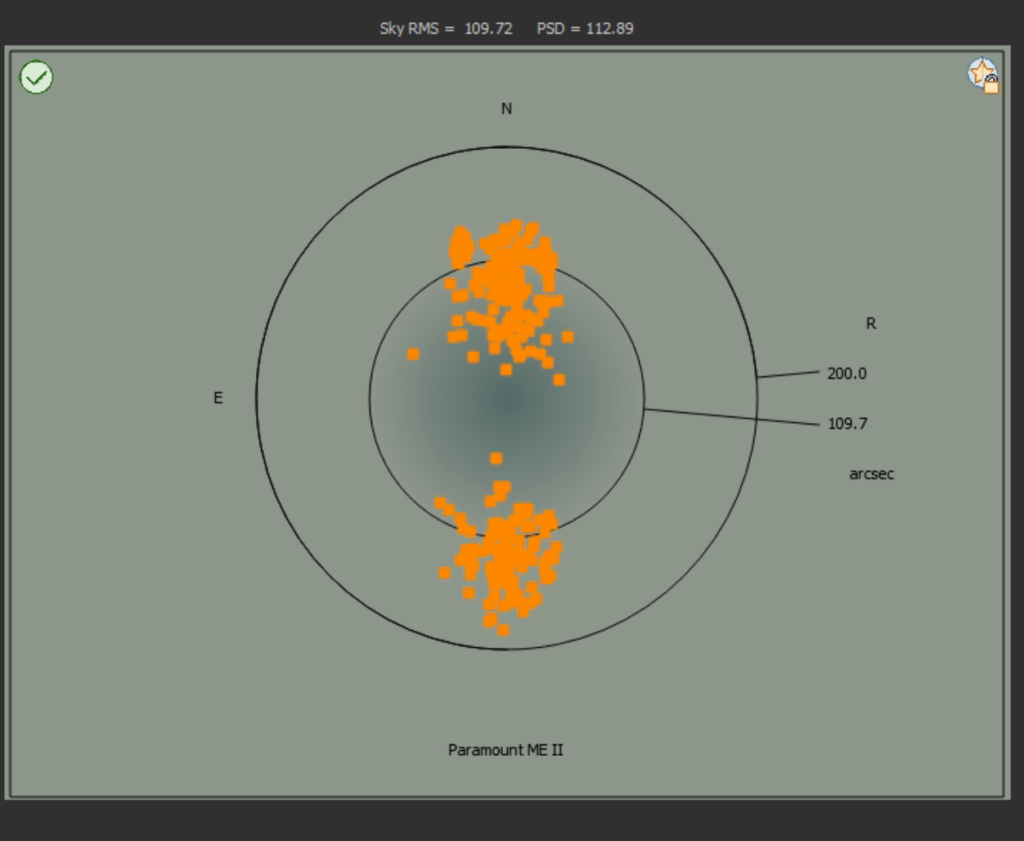
Tomorrow I will need to look at the TPoint model to refine it!
Addendum ……
So I took a look at the TPoint model and could not get it below 109 inner circle and 200 outer circle without removing a lot of points. So I posted question on the Bisque Sky X forum.
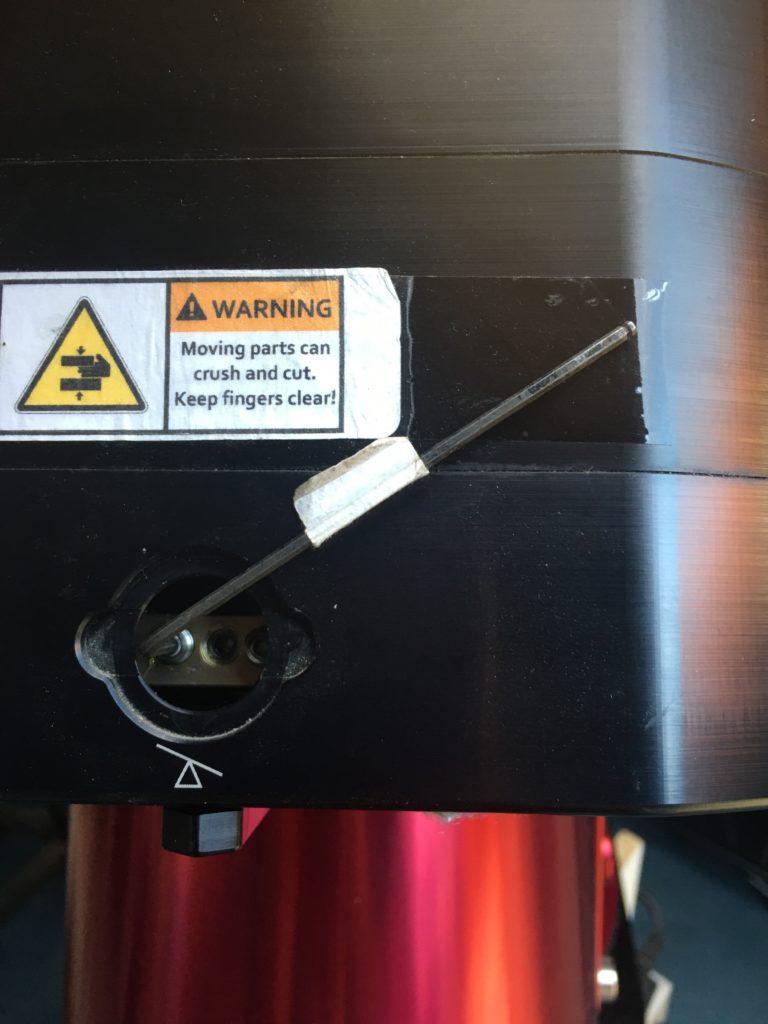
They came back and stated there is something loose in my imaging train or the mount. There is nothing wrong with my imaging train so instead I performed adjustments on the worm gear as they suggested. I will now need to re-TPoint to see if this makes a difference.
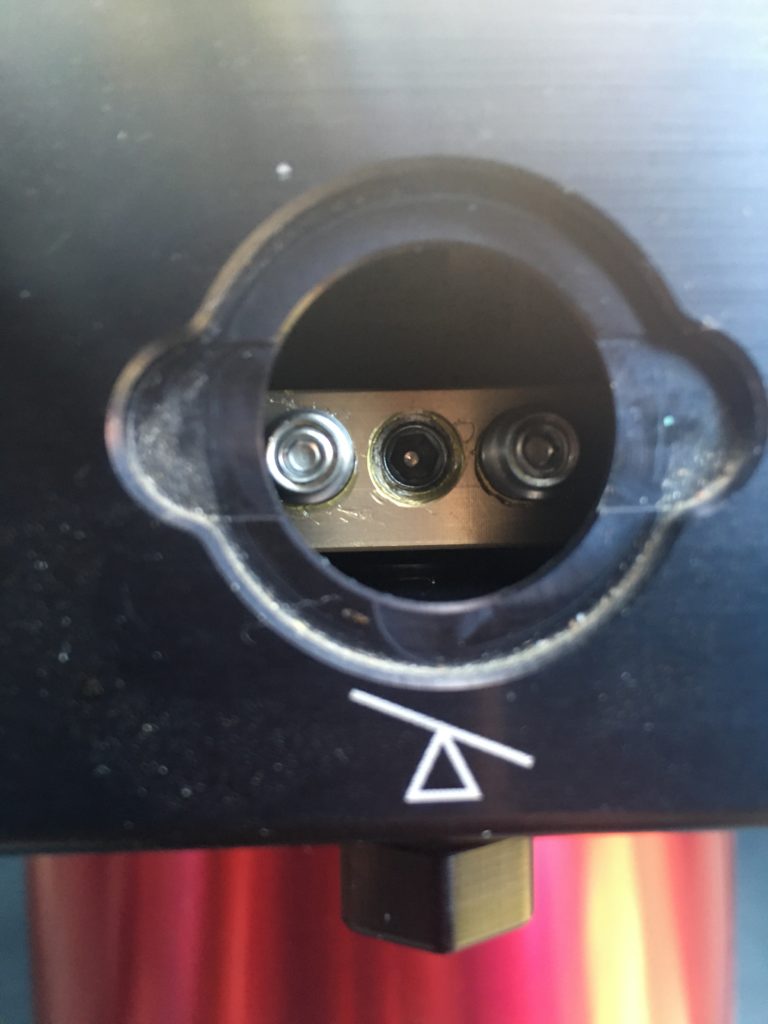
Worm adjustmentSpring screws left and right and Cam Stop screw in the middle
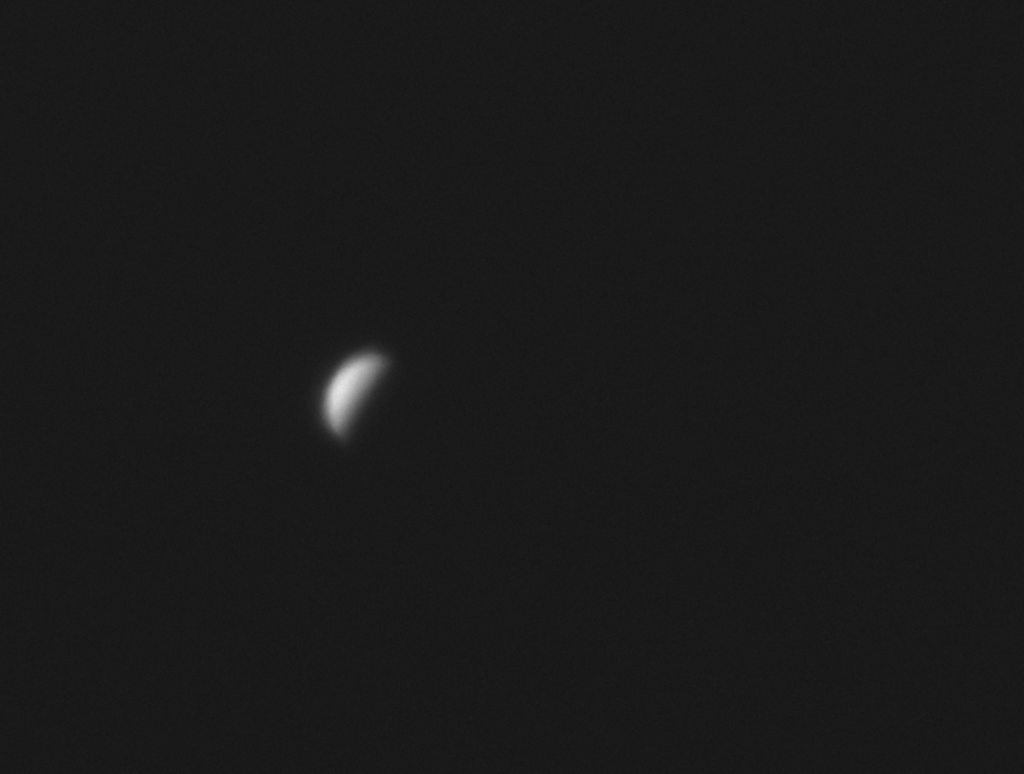
So early on as always I opened the dome to cool down. Tonight Bob, Gingergeek and I want to image Venus in the Pleiades. Even before it got dark and as I slewed the telescopes to Venus, it was visible straight away so I took a quick image, 0.001s from both the 12″ and Bob’s FS102.
Venus 0.001s exposure from the OS 12″ during daytimeVenus 0.001s exposure from the Tak FS102 during daytime
I then went off to watch TV with Helen whilst Gingergeek and Bob grabbed some more images of Venus.
Around 10pm I re-joined Bob and GingerGeek and we set about imaging Venus as it passed by M45 Pleiades in the Tak FS 102. We then went on to perform autofocus on the Tak followed buy setting up the autofocus on the Esprit 120ED
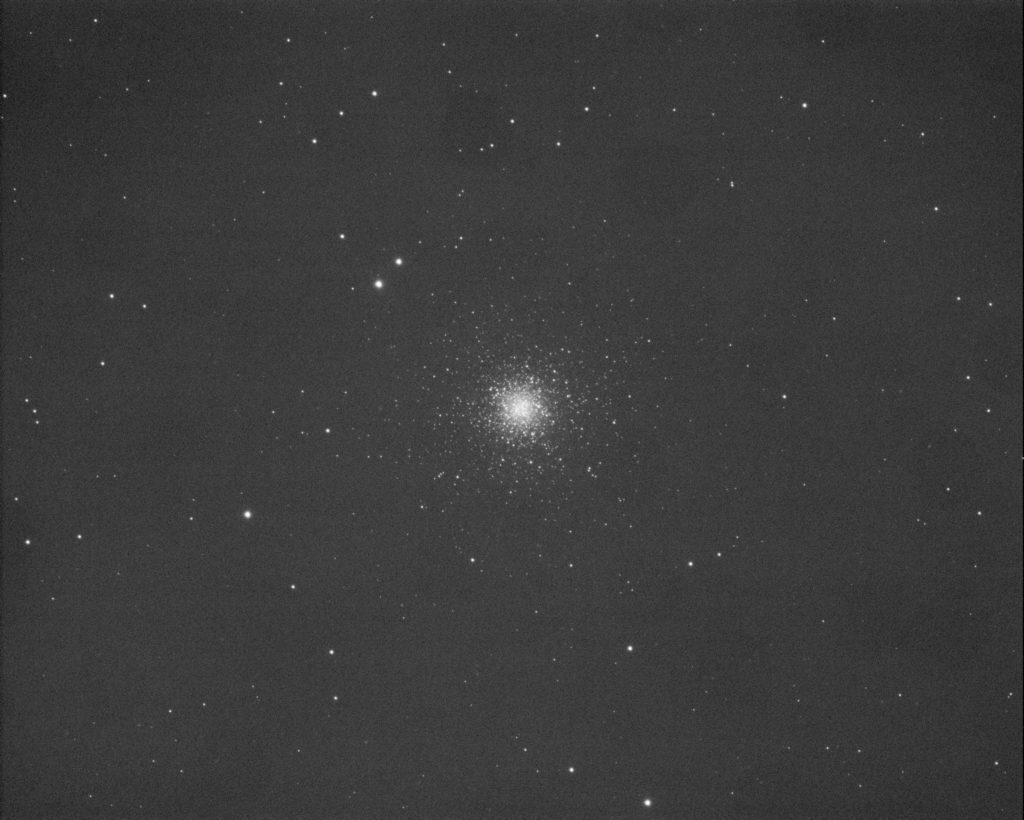
Before the clouds decided to put a stop to play, we took some images of M53 the globular cluster on the Esprit around 00:10am using the Luminance filter.
Quick stack and stretch of M53 from Skywatcher Esprit 120 ED
Bob had noticed a lot of dirt on or near the sensor on the QHY168C camera that forms part of the imaging train on the Tak FS102. Today I took the camera off for a little spring clean.
The first thing was to mark the rotation angle of the camera so that it goes back on exactly. 21 degrees is the rotation angle as measured through an actual image.
Taping up position angle on QHY camera
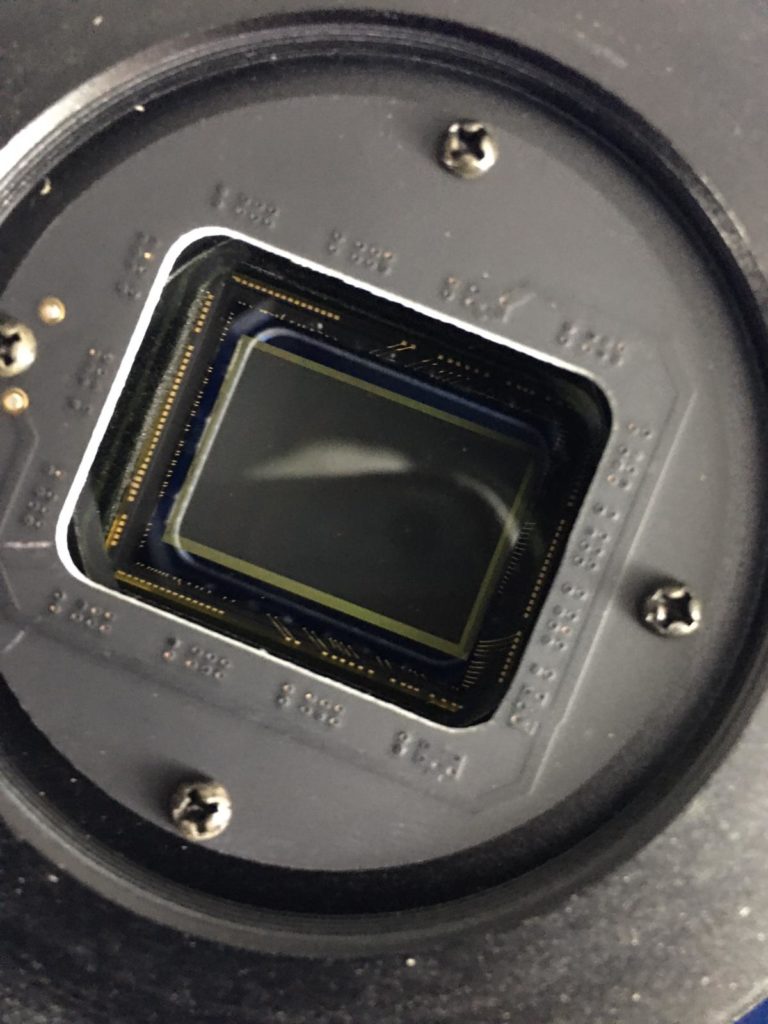
Next I took the camera off loosing the 3 screws holding it in position and then took a look at the CMOS chop glass cover for dirt.
Inspecting QHY168C for dirt on glass cover
There was really only a couple of pieces of dirt on the cover so I removed them with the blower.
Rocket blower
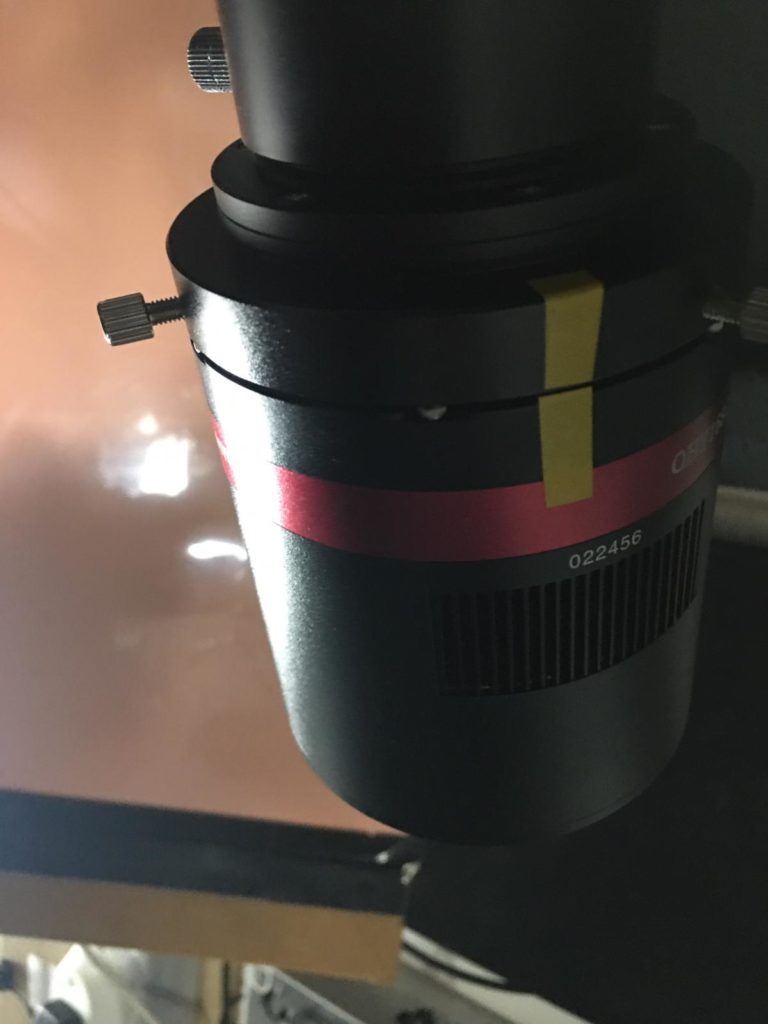
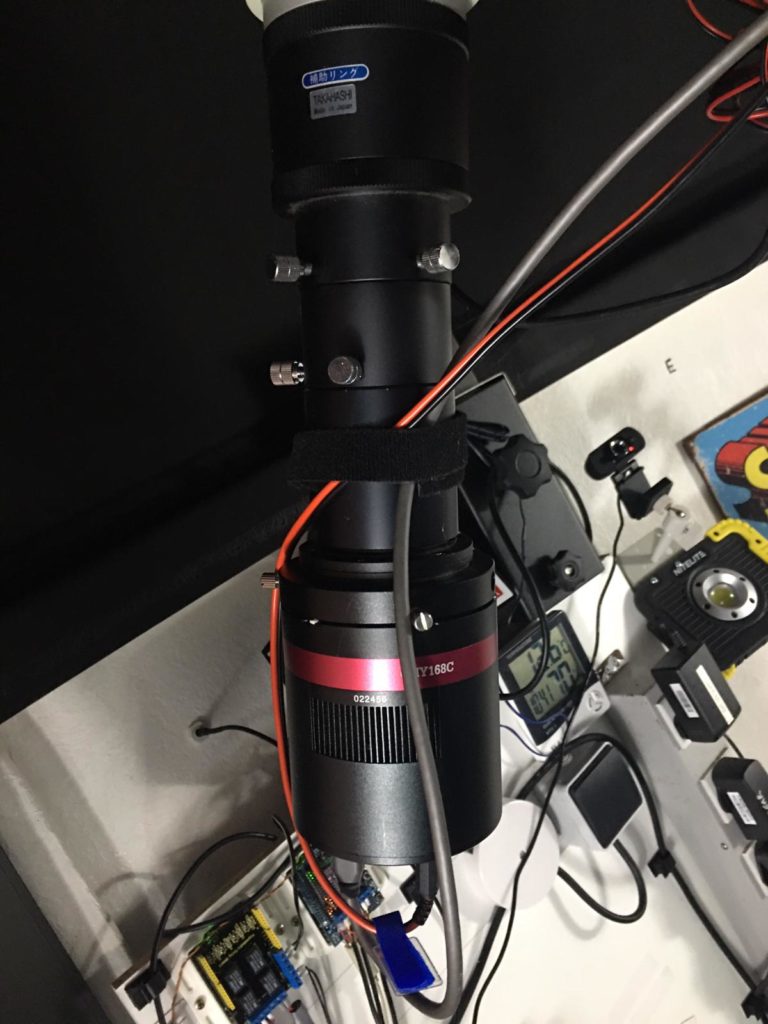
Next I took off the extension tube with which has the glass UV lens inside. At this point I forgot to mark up the position angle when I took the extension tube off. So when I reattached I look at the image train photo to adjust. Hopefully it will be very close and will only require minor adjustment.
Tak FS102 QHY168C imaging train
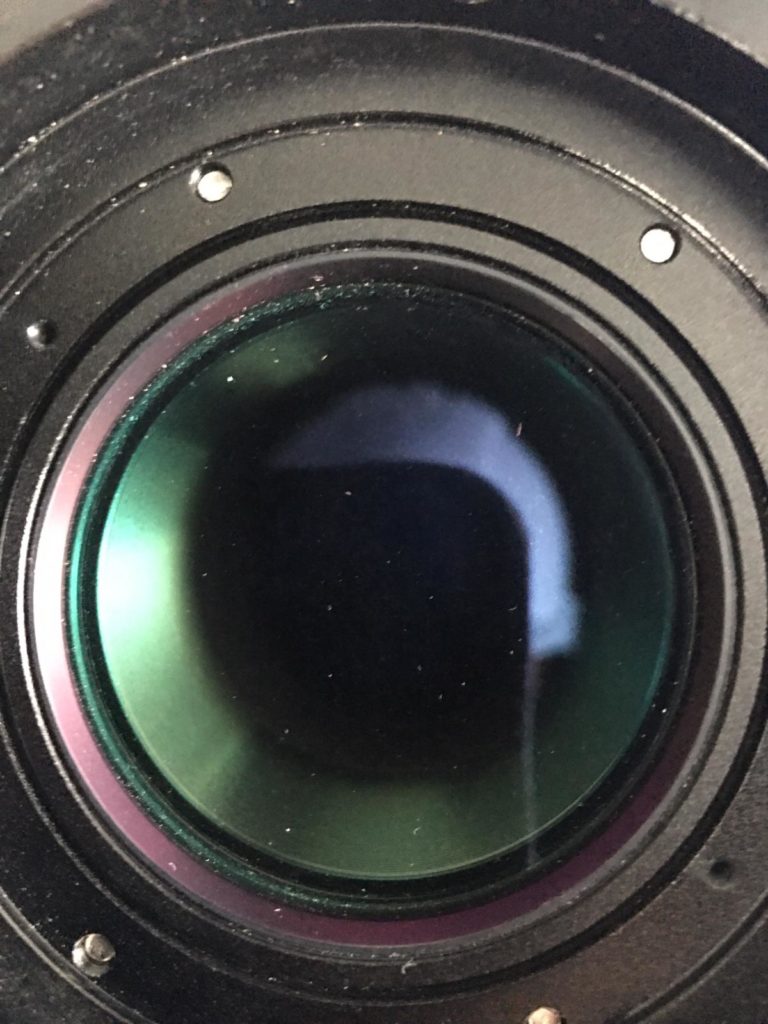
Looking at the UV filter it was instantly visible that there was plenty of dirt and dirt on the glass lens, however it transpired to be on the inside of the lens toward the OTA. O removed the filter to clean with the rocket blower.
UV glass filter dirt and dust
I then reattached the filter, the camera and reset the angle. I followed up by feeling for any play in the Tak OTA bracket that piggy backs it on the OS12″ OTA. I could not feel any. I was checking due to a shift on the FoV when Bob was recently imaging. Again the next time out we will need to readjust.
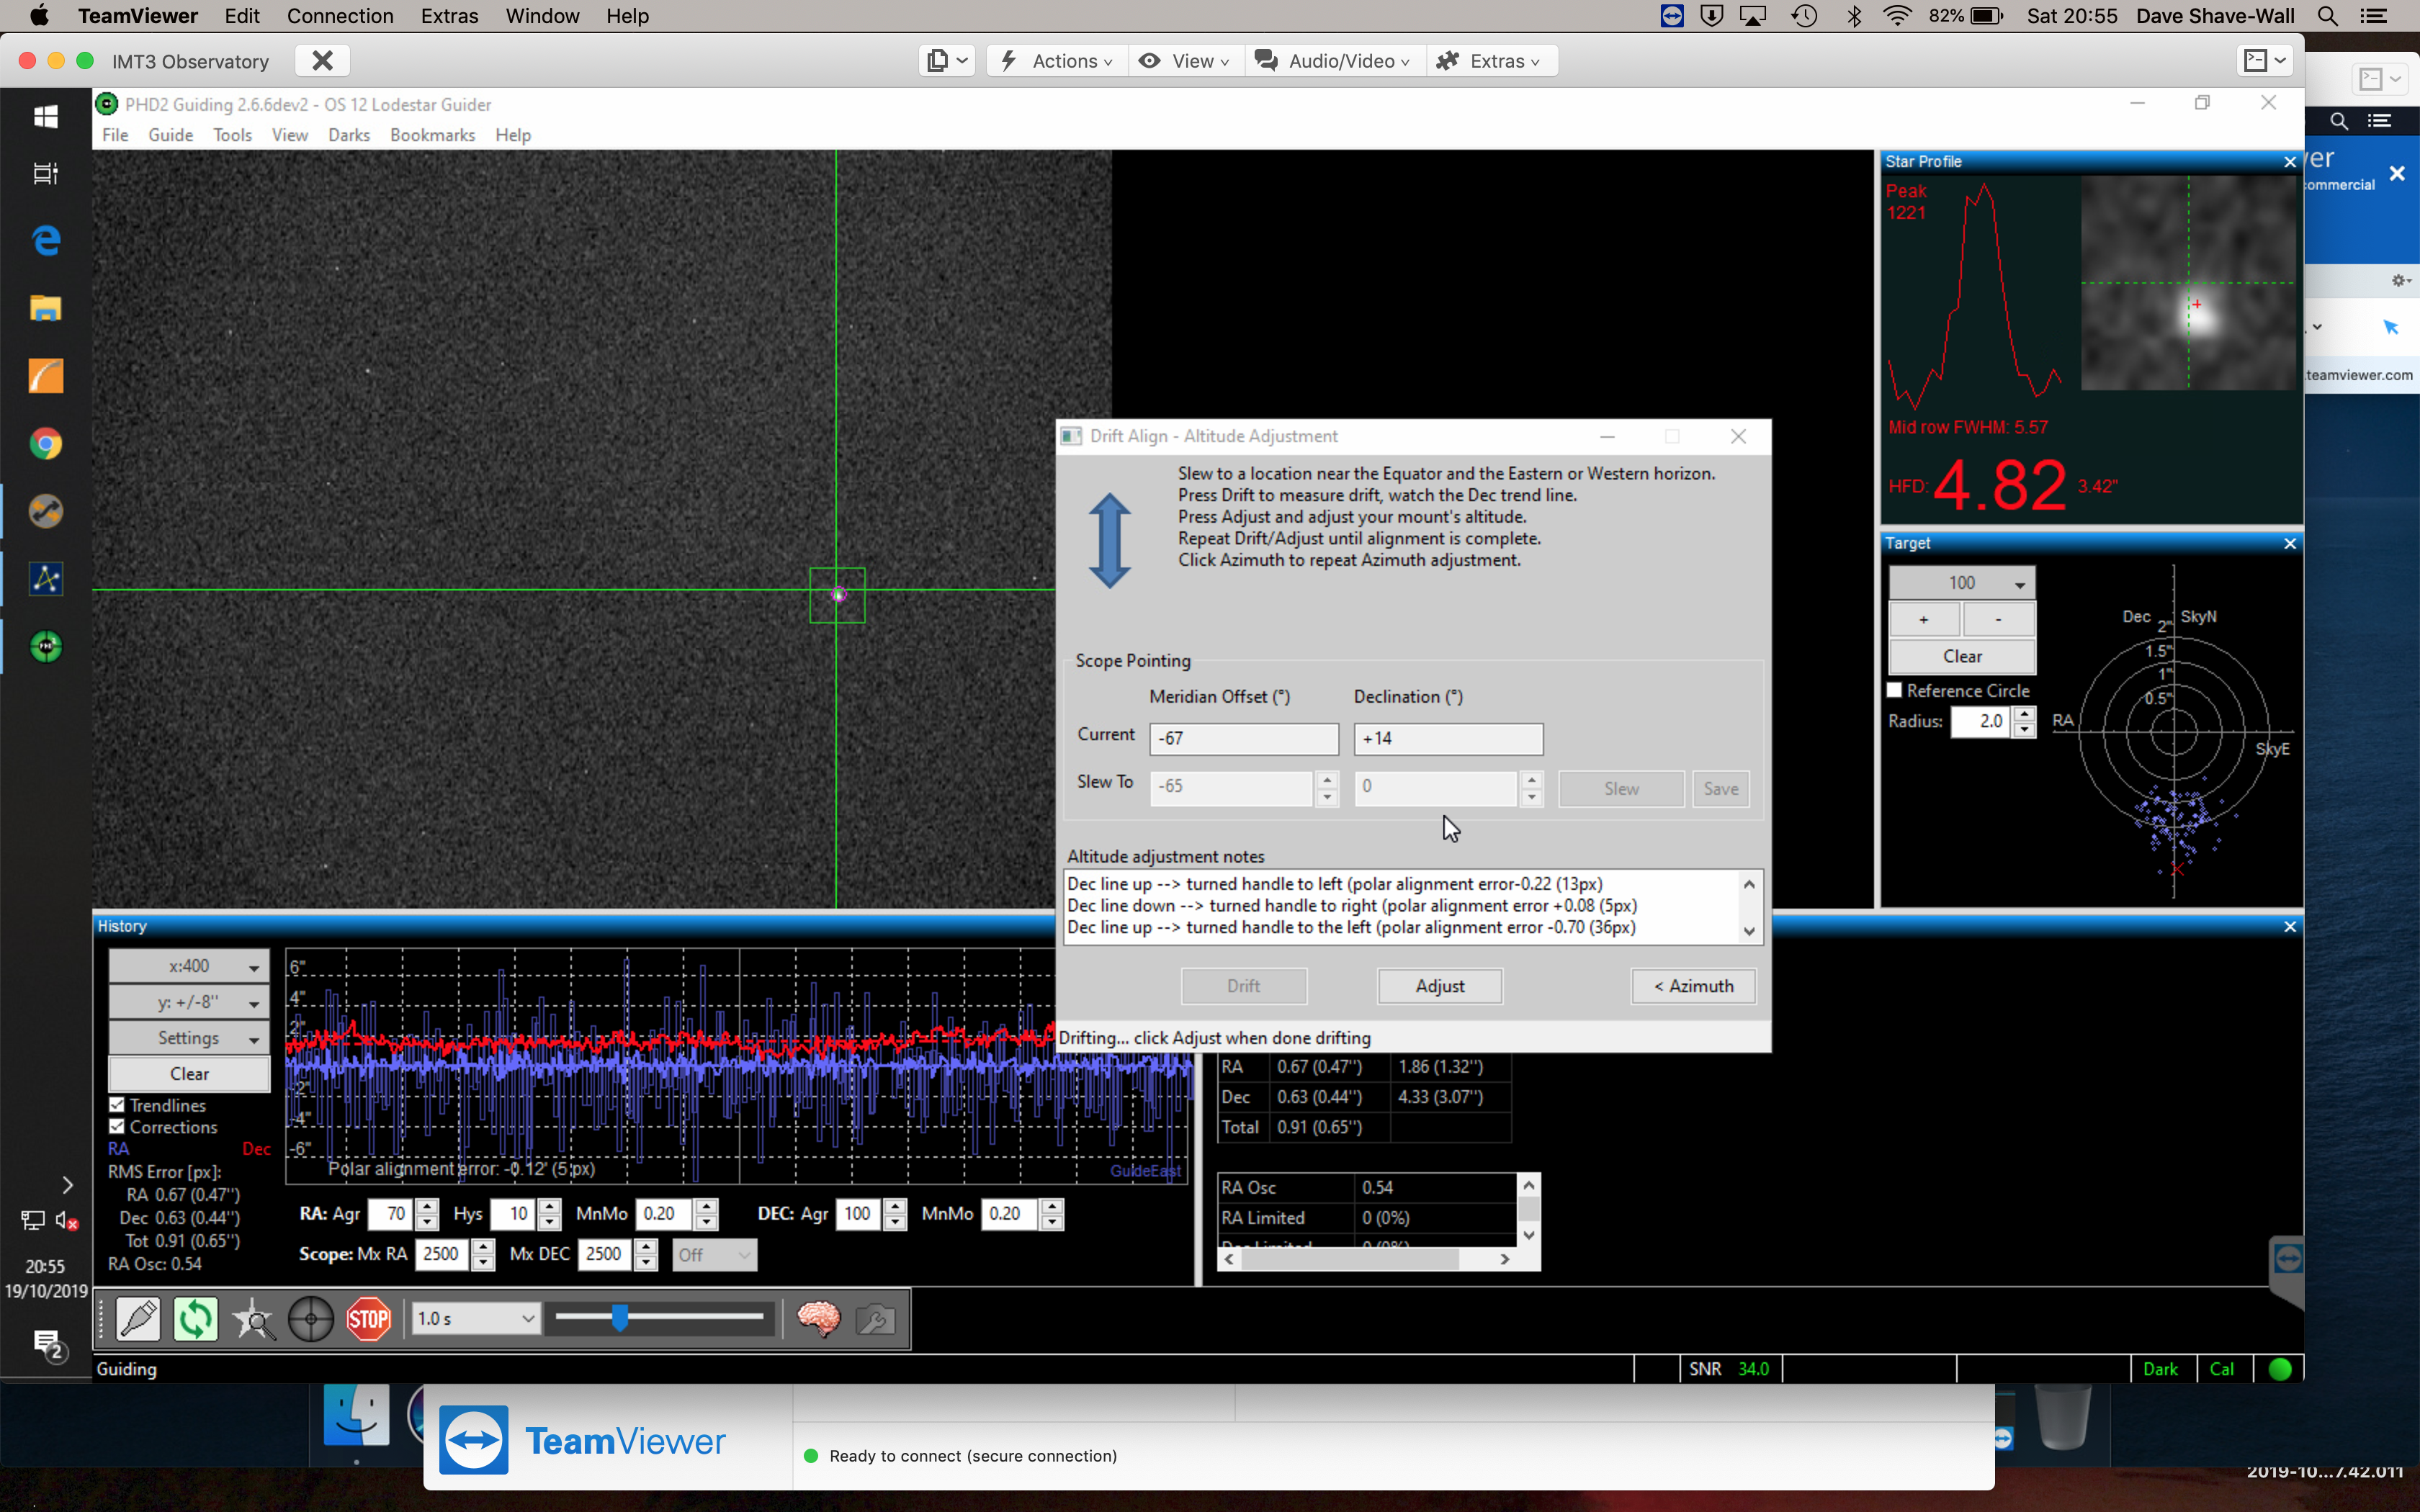
After nearly a month of not imaging from IMT due to a holiday in Tenerife, a week in New York with work and then Manchester and London along with a run of poor weather it was clear on a Saturday night! Another evening commissioning the observatory was needed, so tonight we will again further refine the polar alignment since the last major modification and distribution of weight where we changed the adjustment plate for Bob’s Tank FS 102 OTA. Again we plan to drift align with PHD.
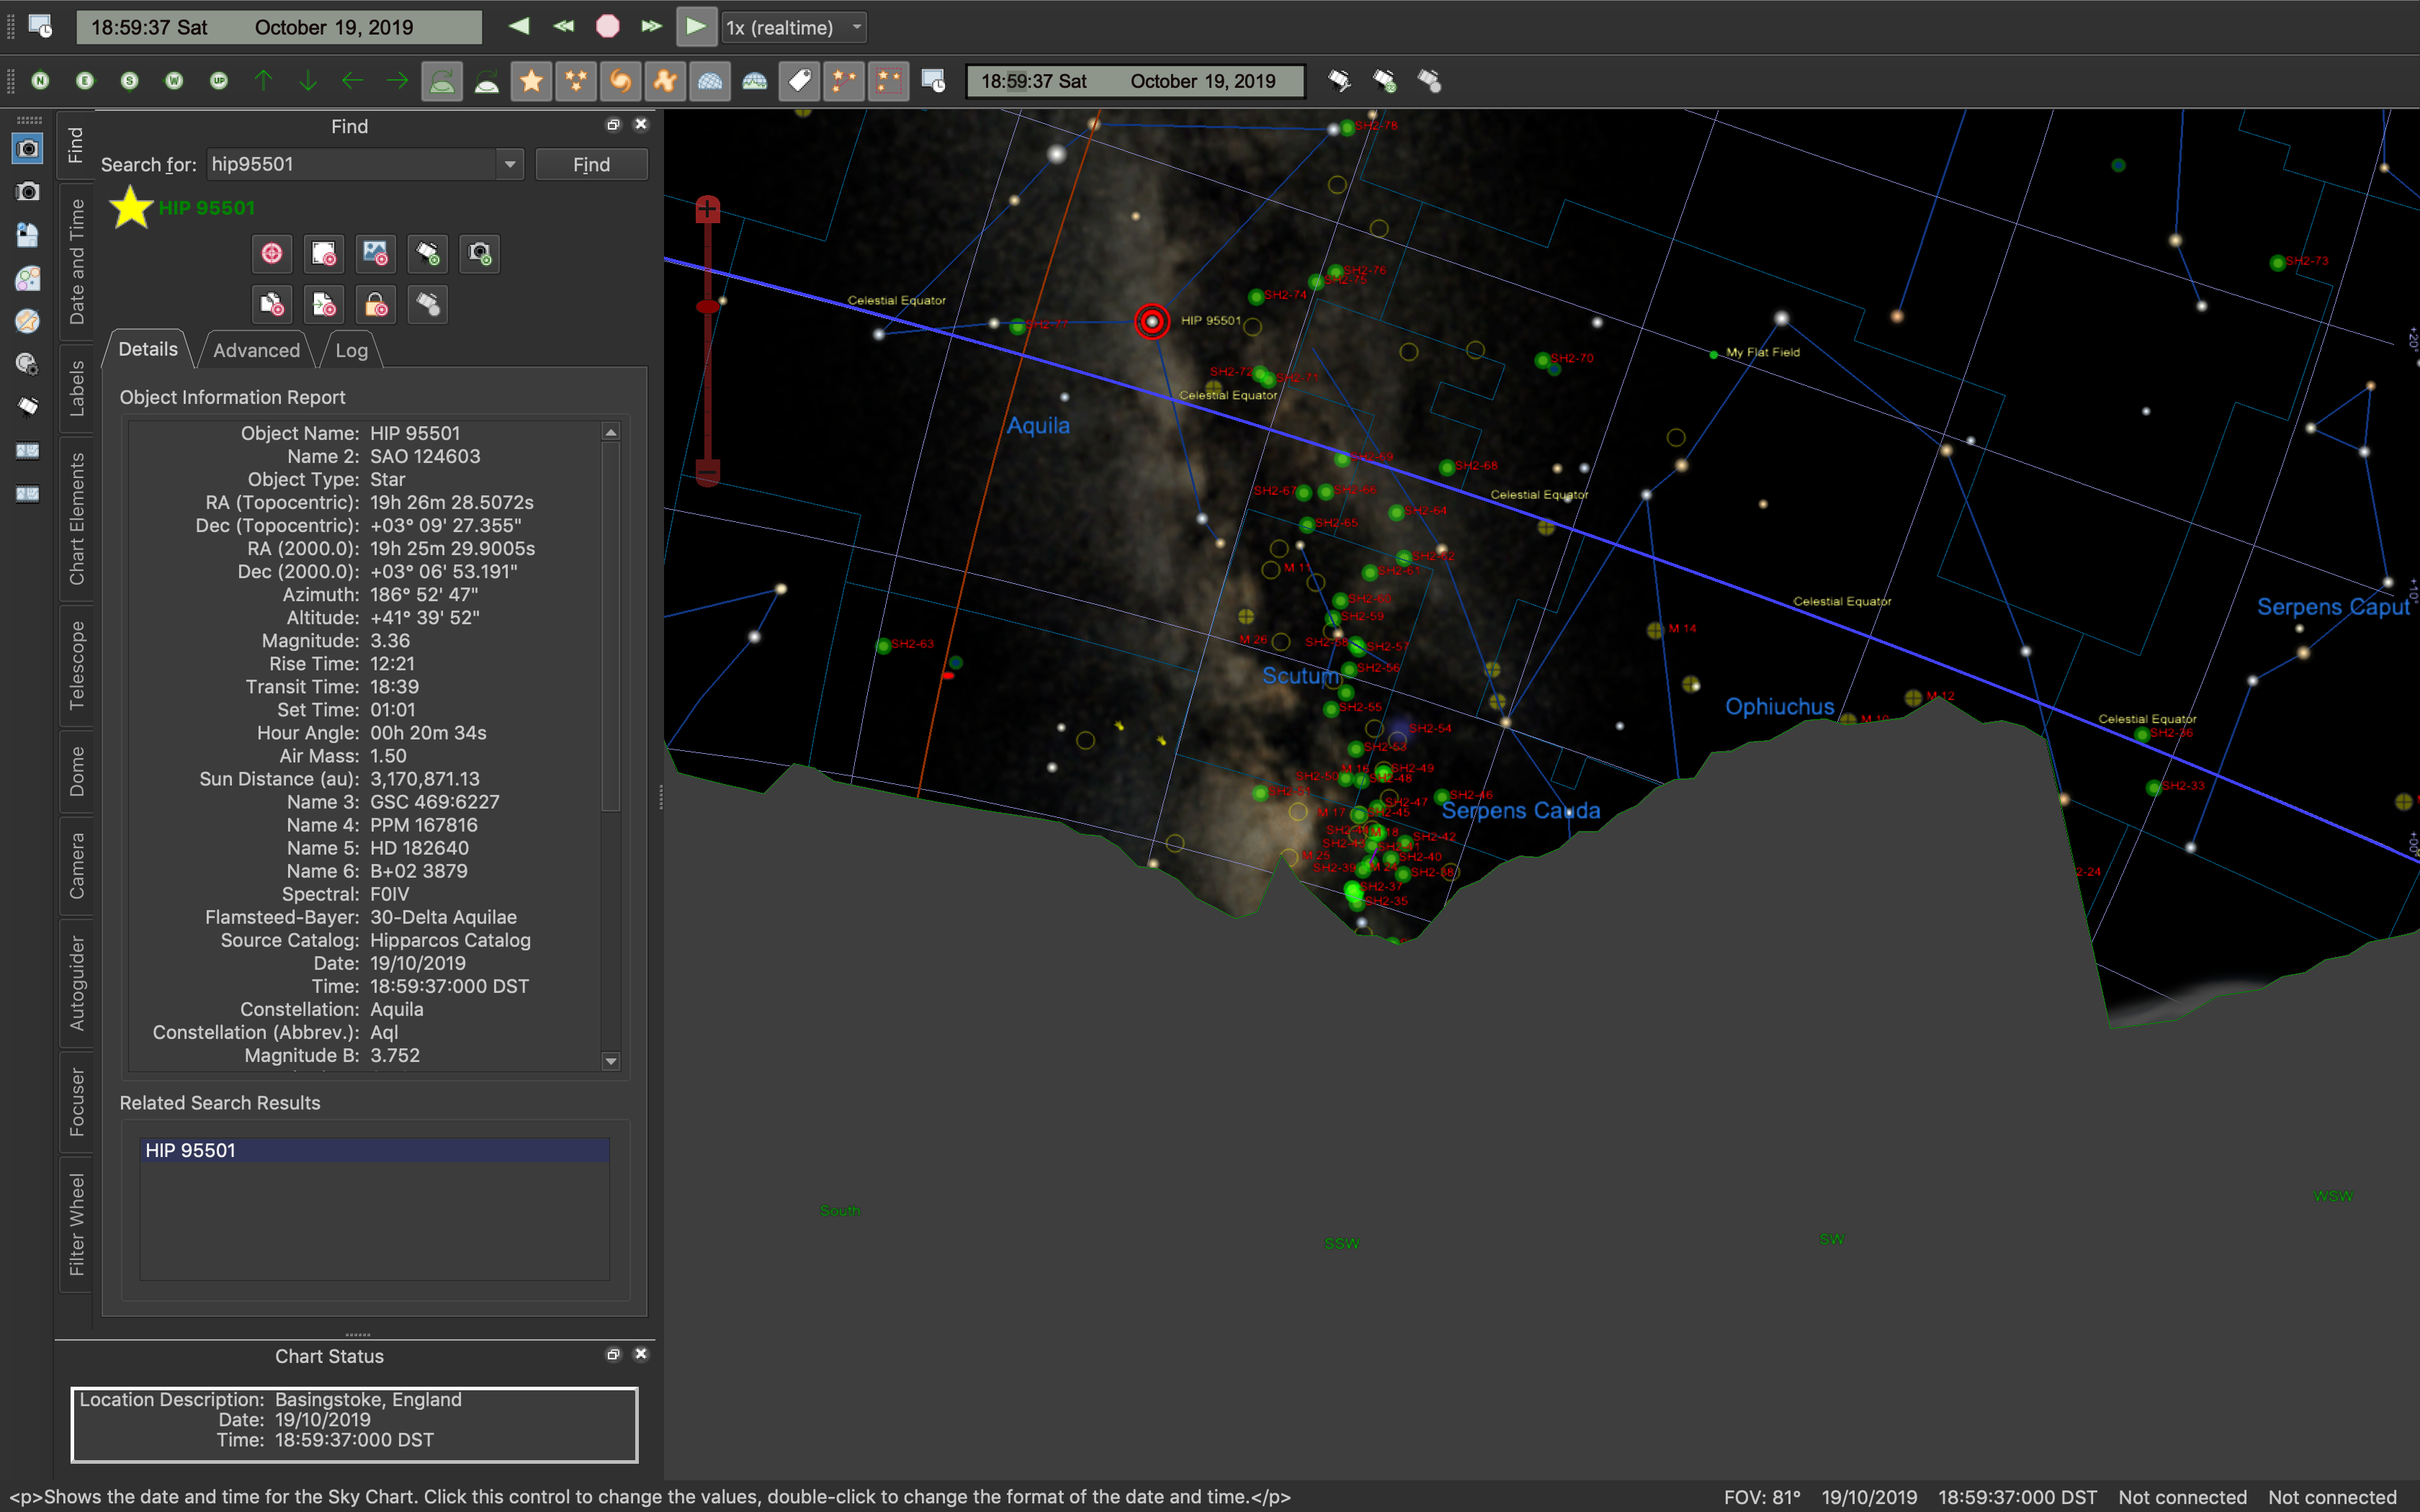
First thing is to find a star near the celestial equator near the Meridian so that it would display the most movement and thus magnify the error of miss polar alignment. I should be able to find HP 95501 @8pm.
Star to drift align for Azimuth
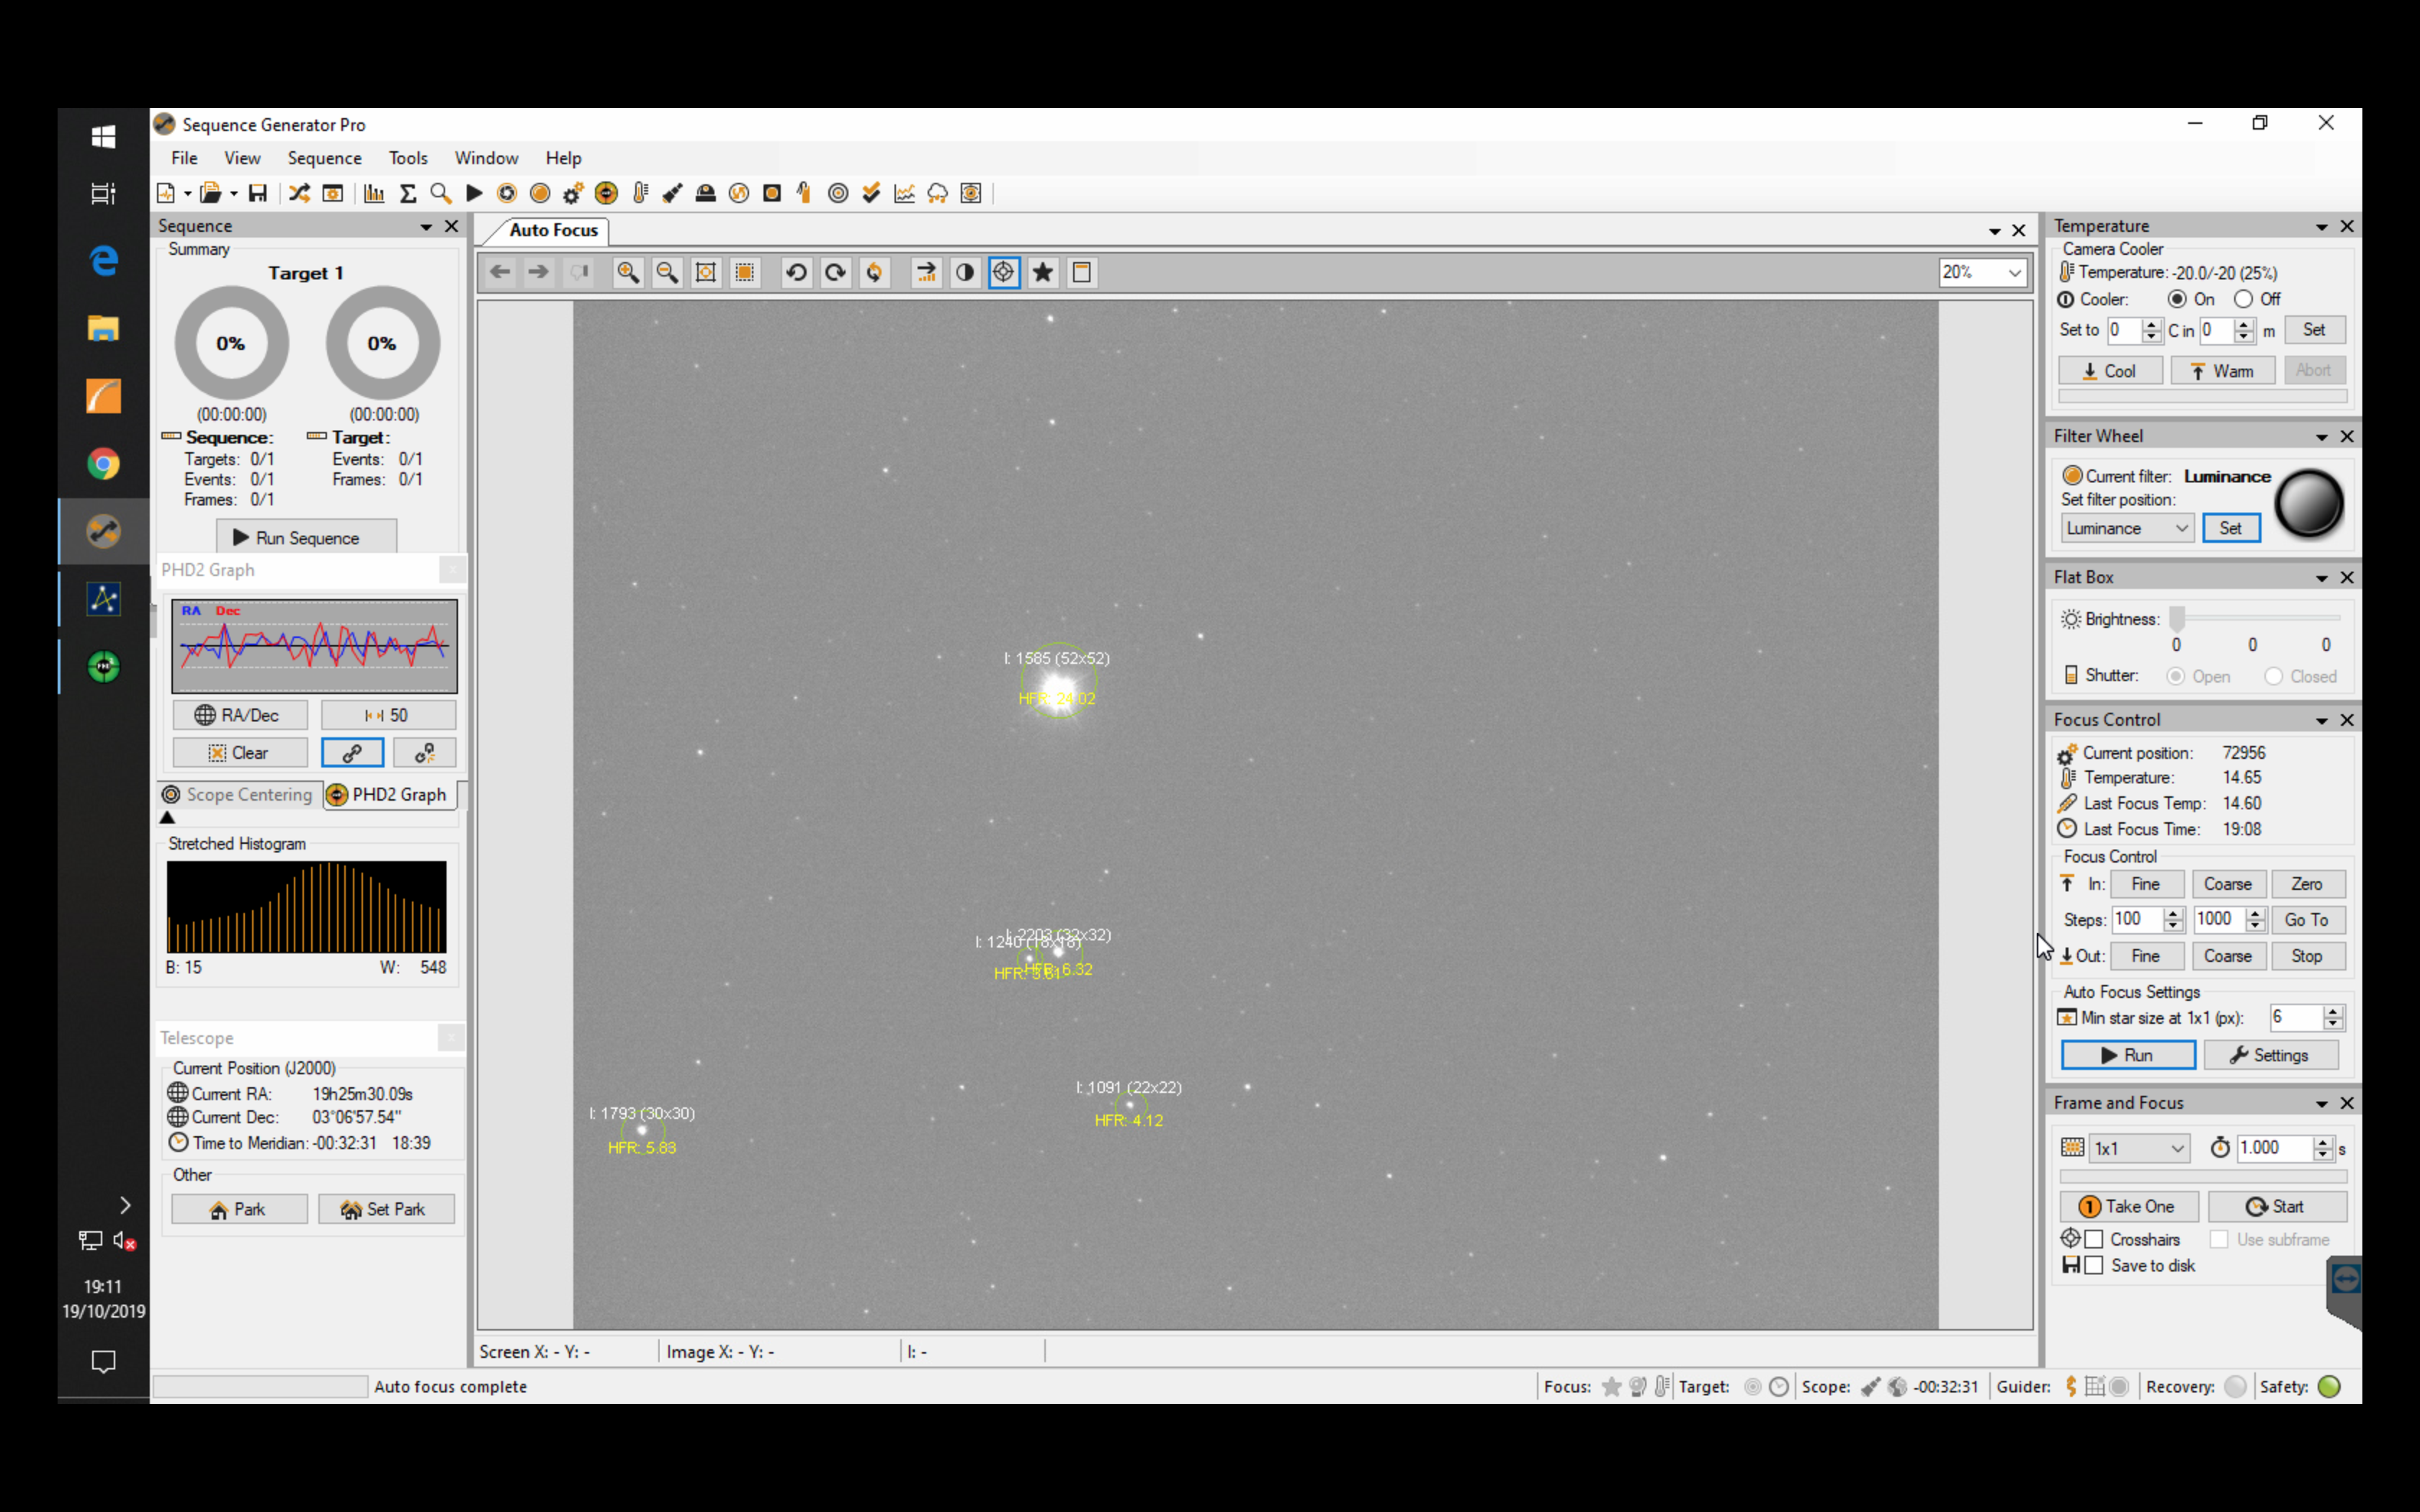
Next I performed an autofocus using the Luminance filter. HIP 95501 is the star to choose for drift aligning the first part, a 1 second image within Frame and Focus in SGPro showed it just off centre which was fine.
Star to guide on
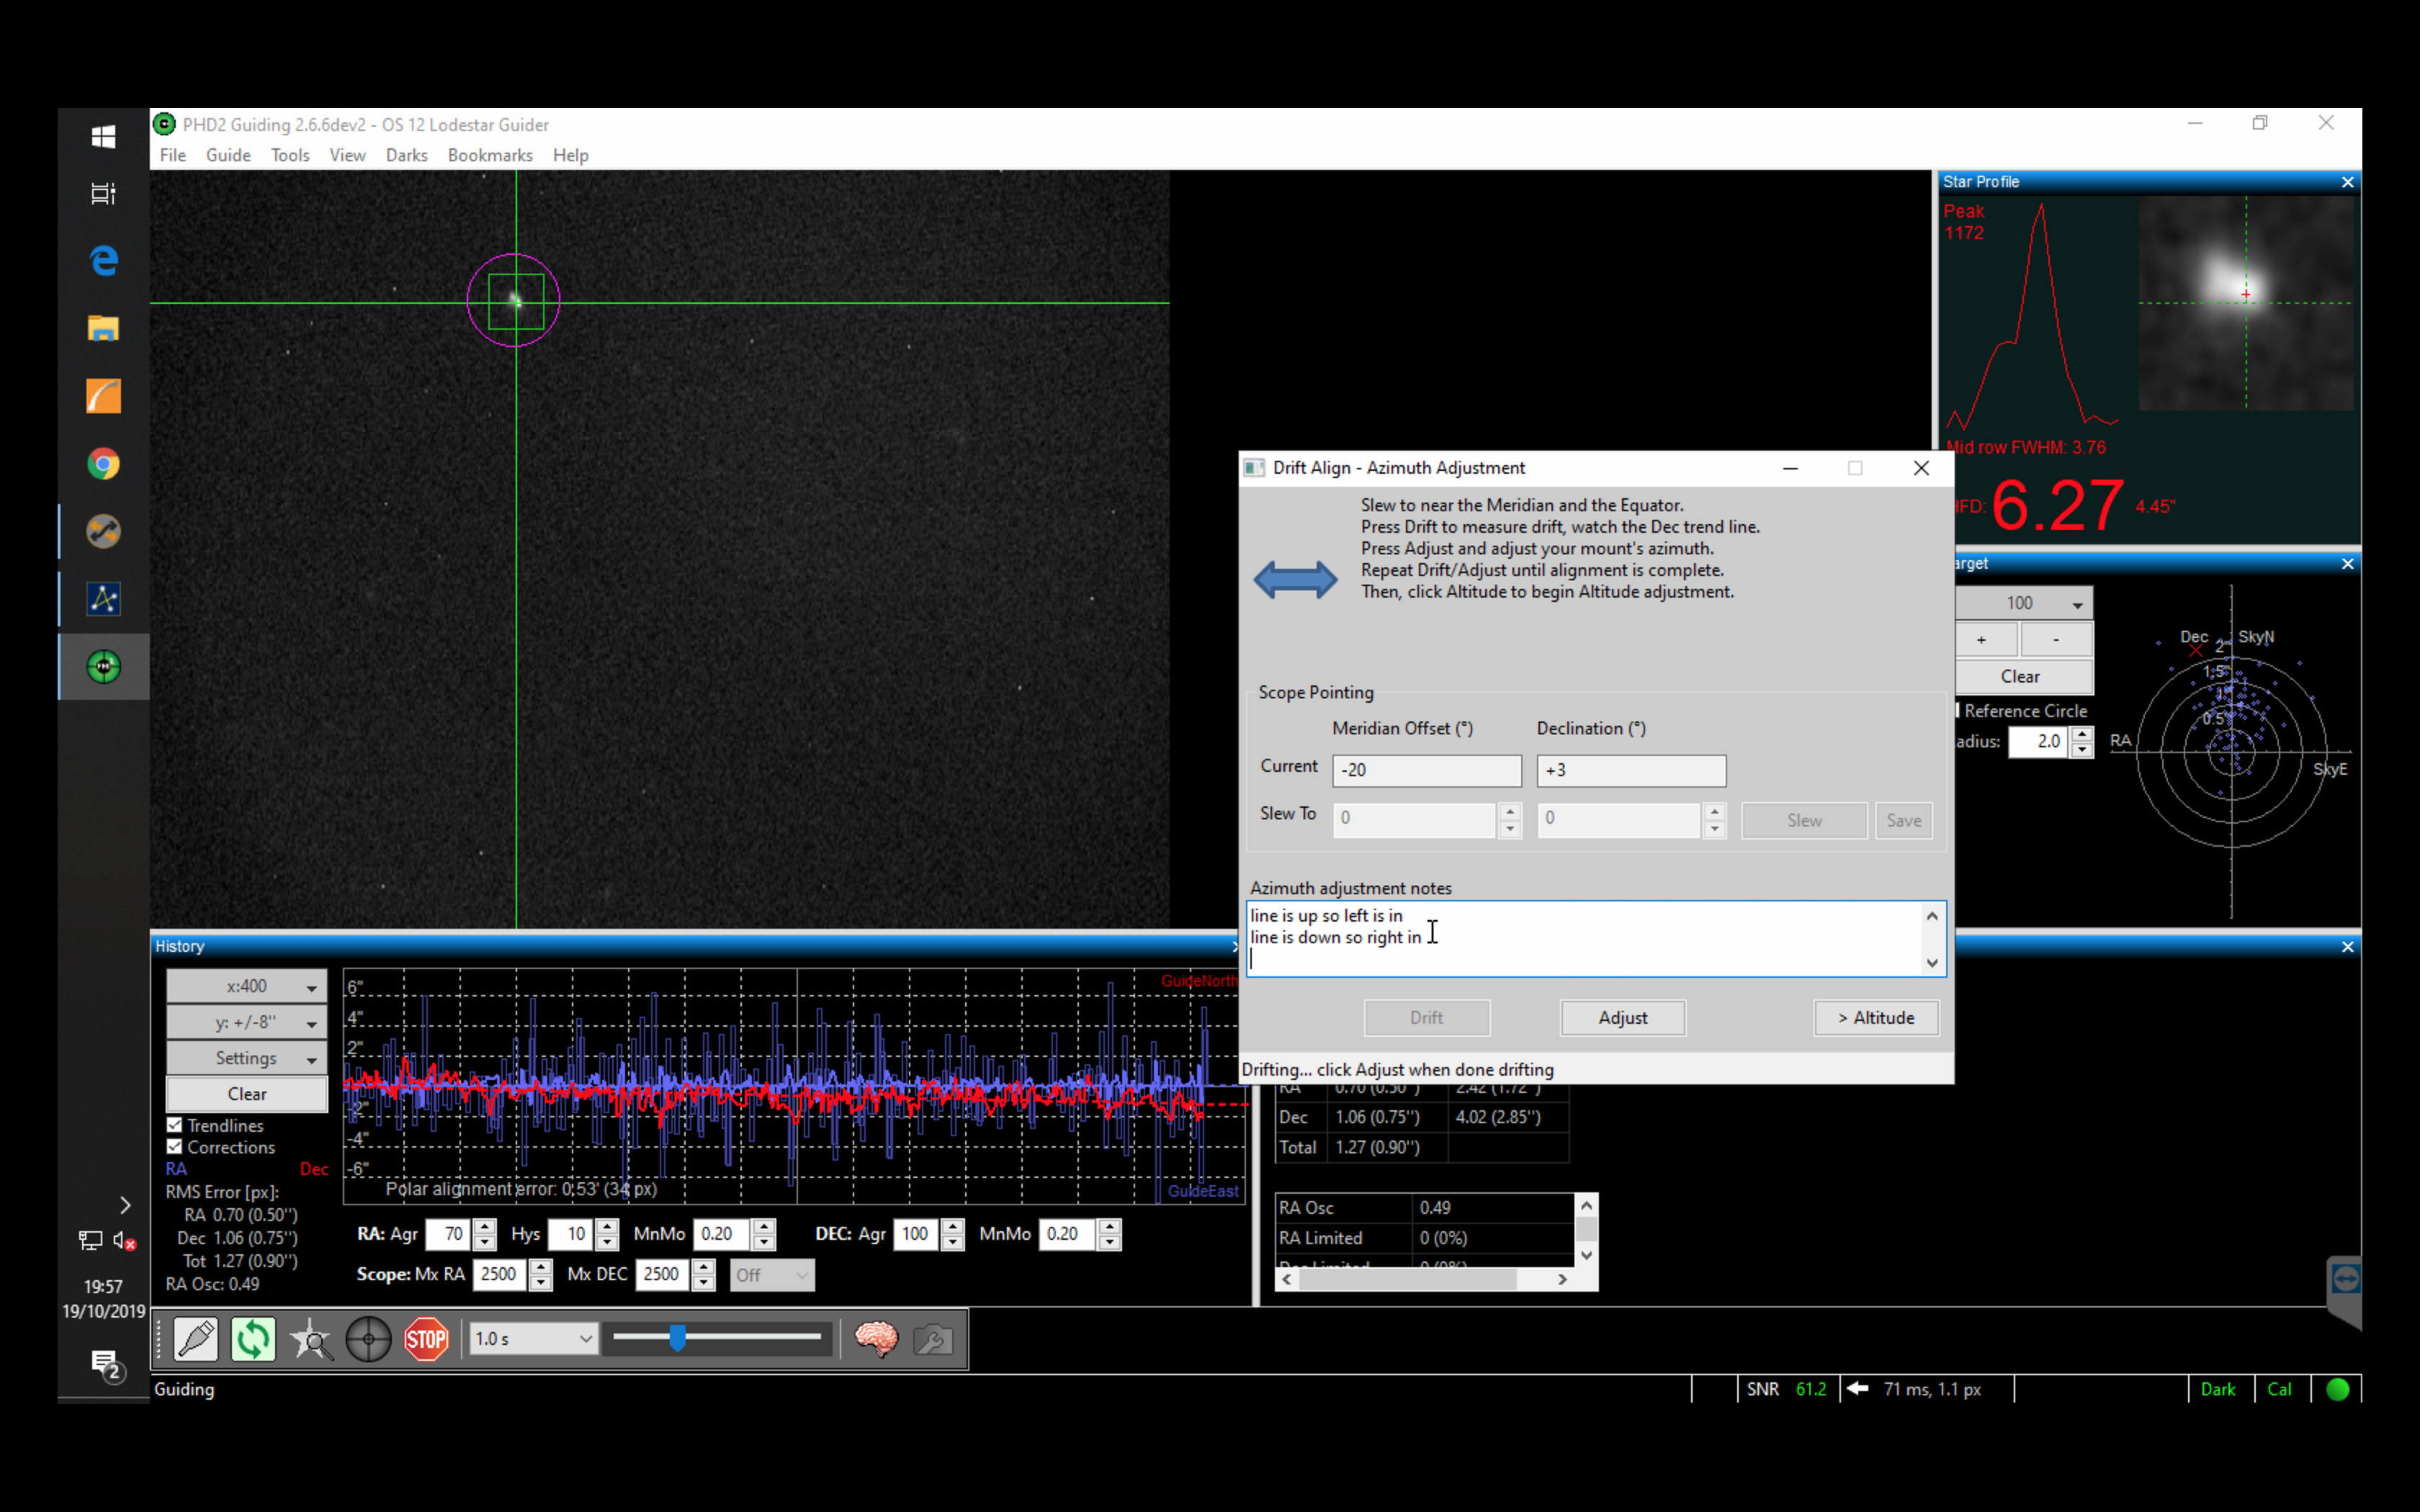
Next I moved the star to place in the Lodestar FoV. Now I can measure the azimuth polar error, ALWAYS ignoring the RA line. Looking at the Dec line I could see I was out by 2.43′ and 39px. I adjusted the thruster knobs on the MEII to move the star to the outset edge of the purple circle showing the error, in this case the right thrust in and left thrust out. I then drifted again and make sure the purple circle gets smaller and the DEC line a much shallower angle.
After first adjustment 0.53′ and 34px out
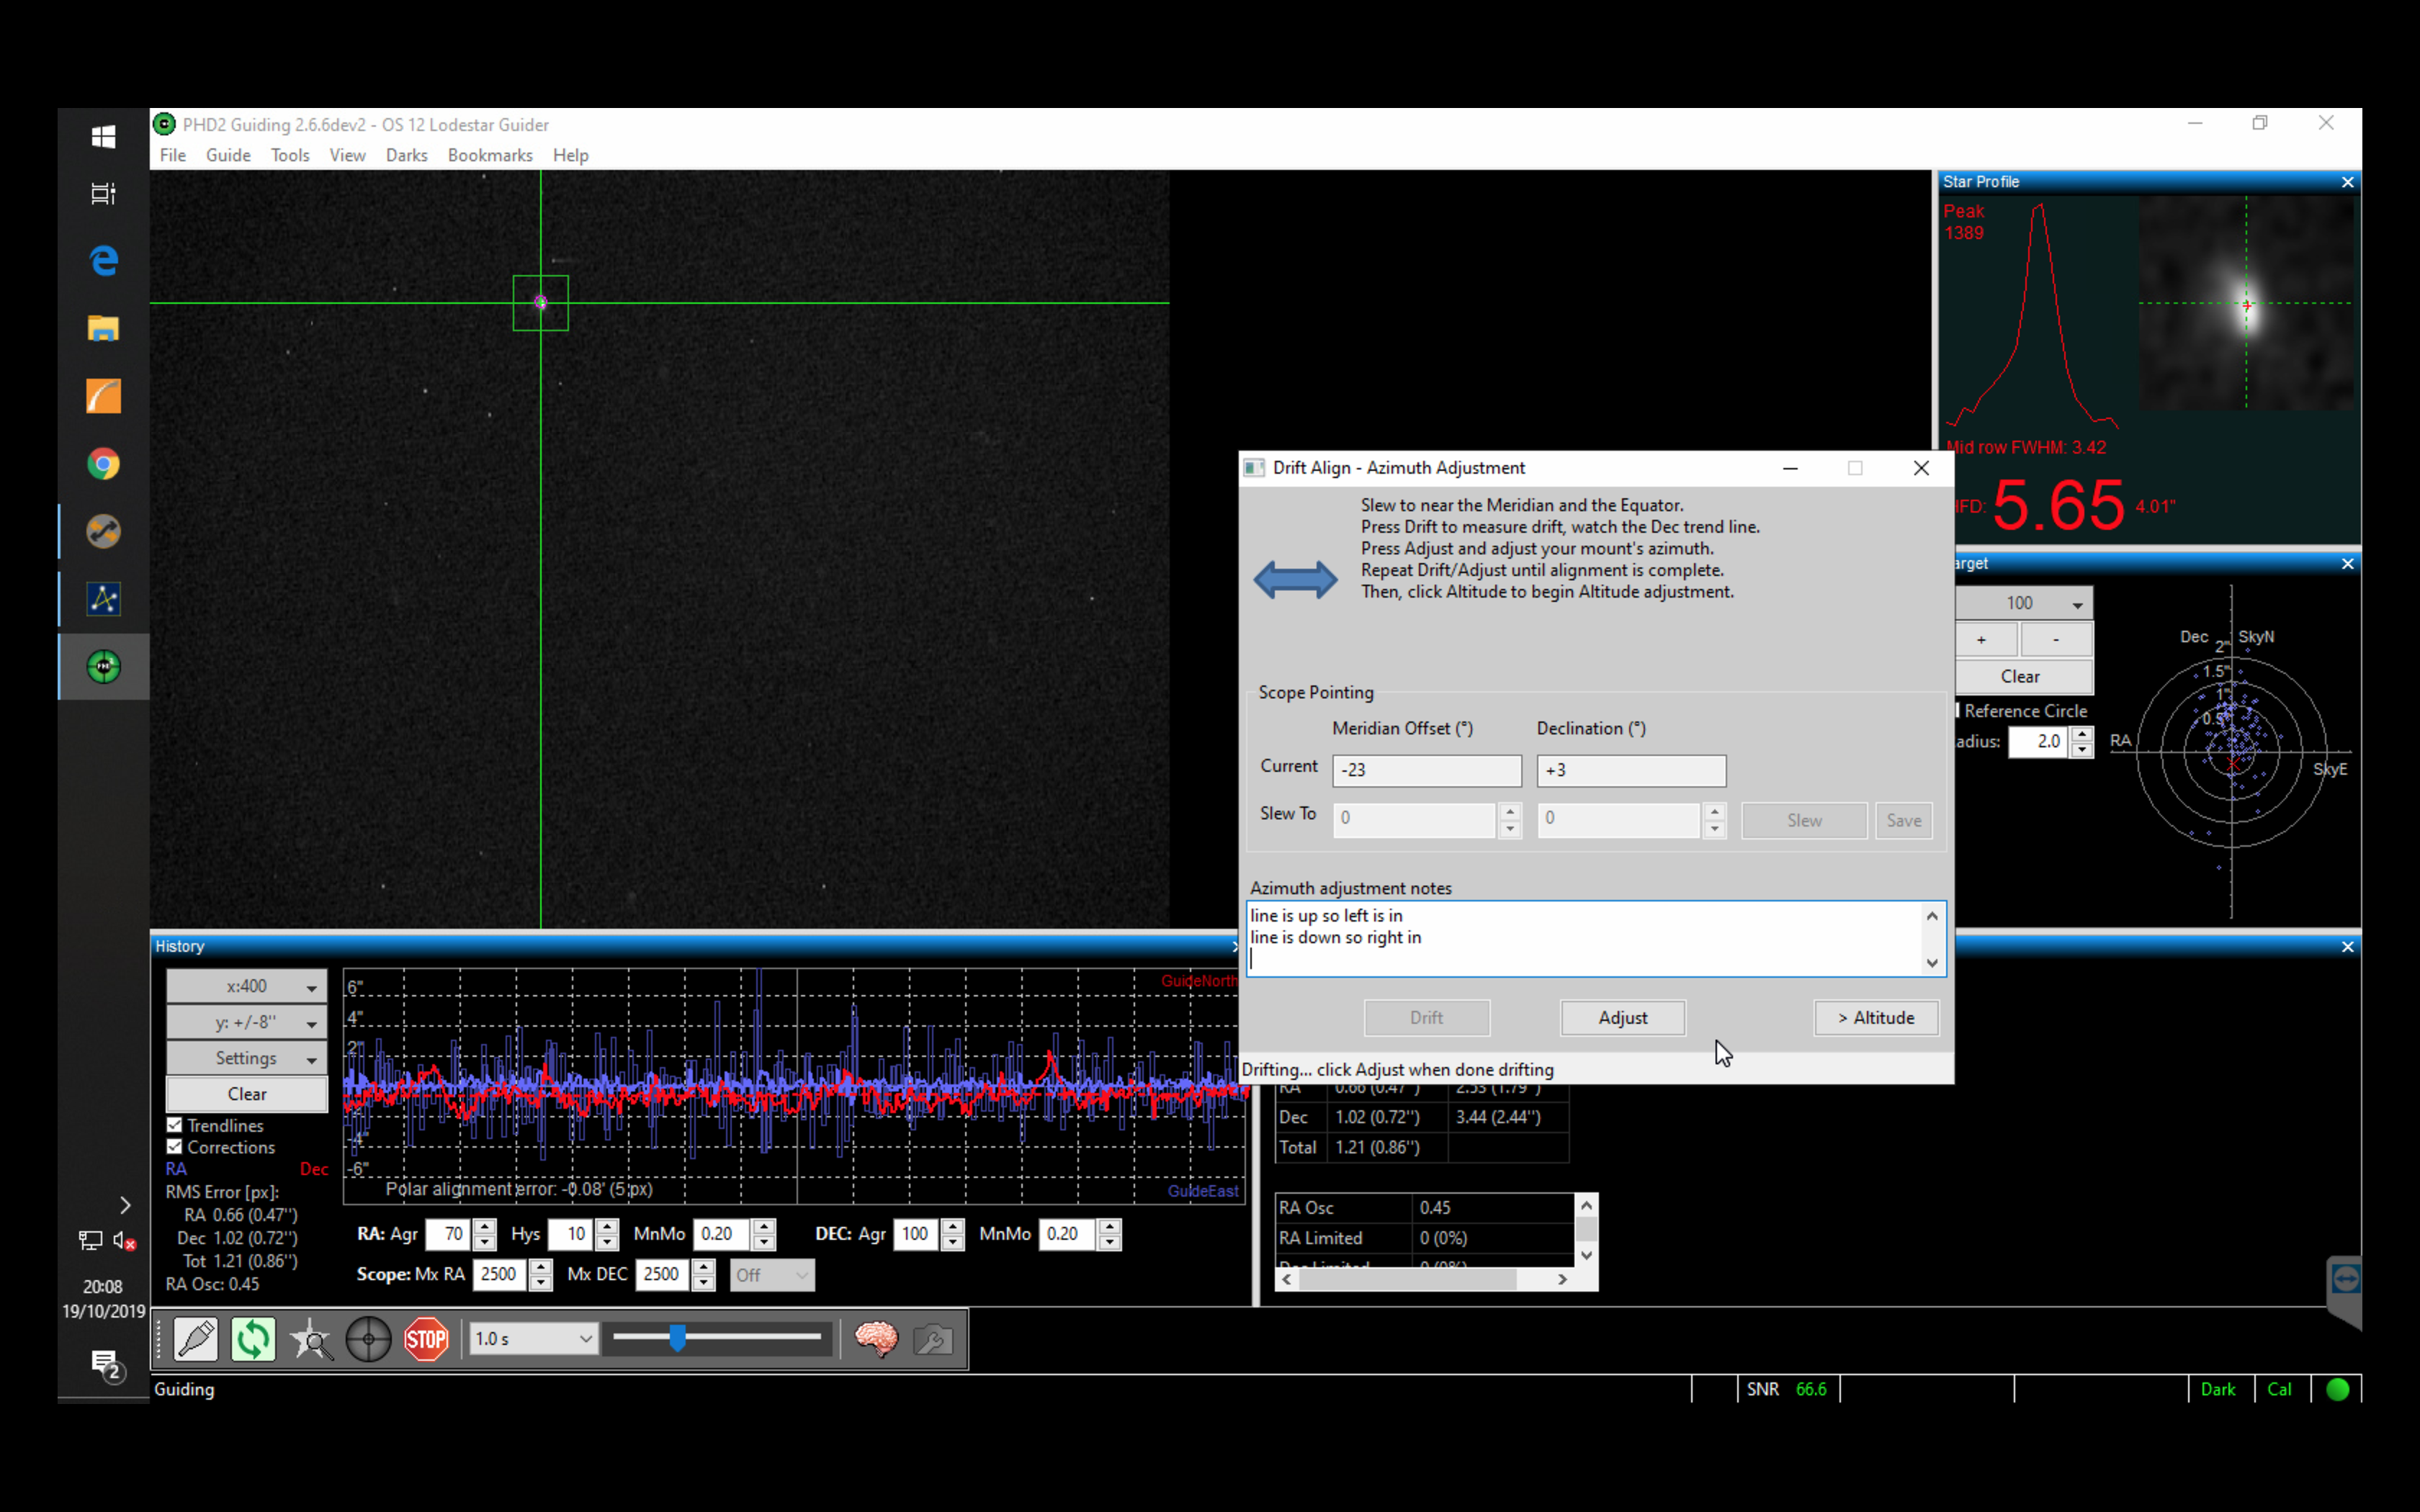
I adjusted again and got the azimuth error down to a respectable 0.08′ 5px error.
Azimuth error 0.08′ 5px
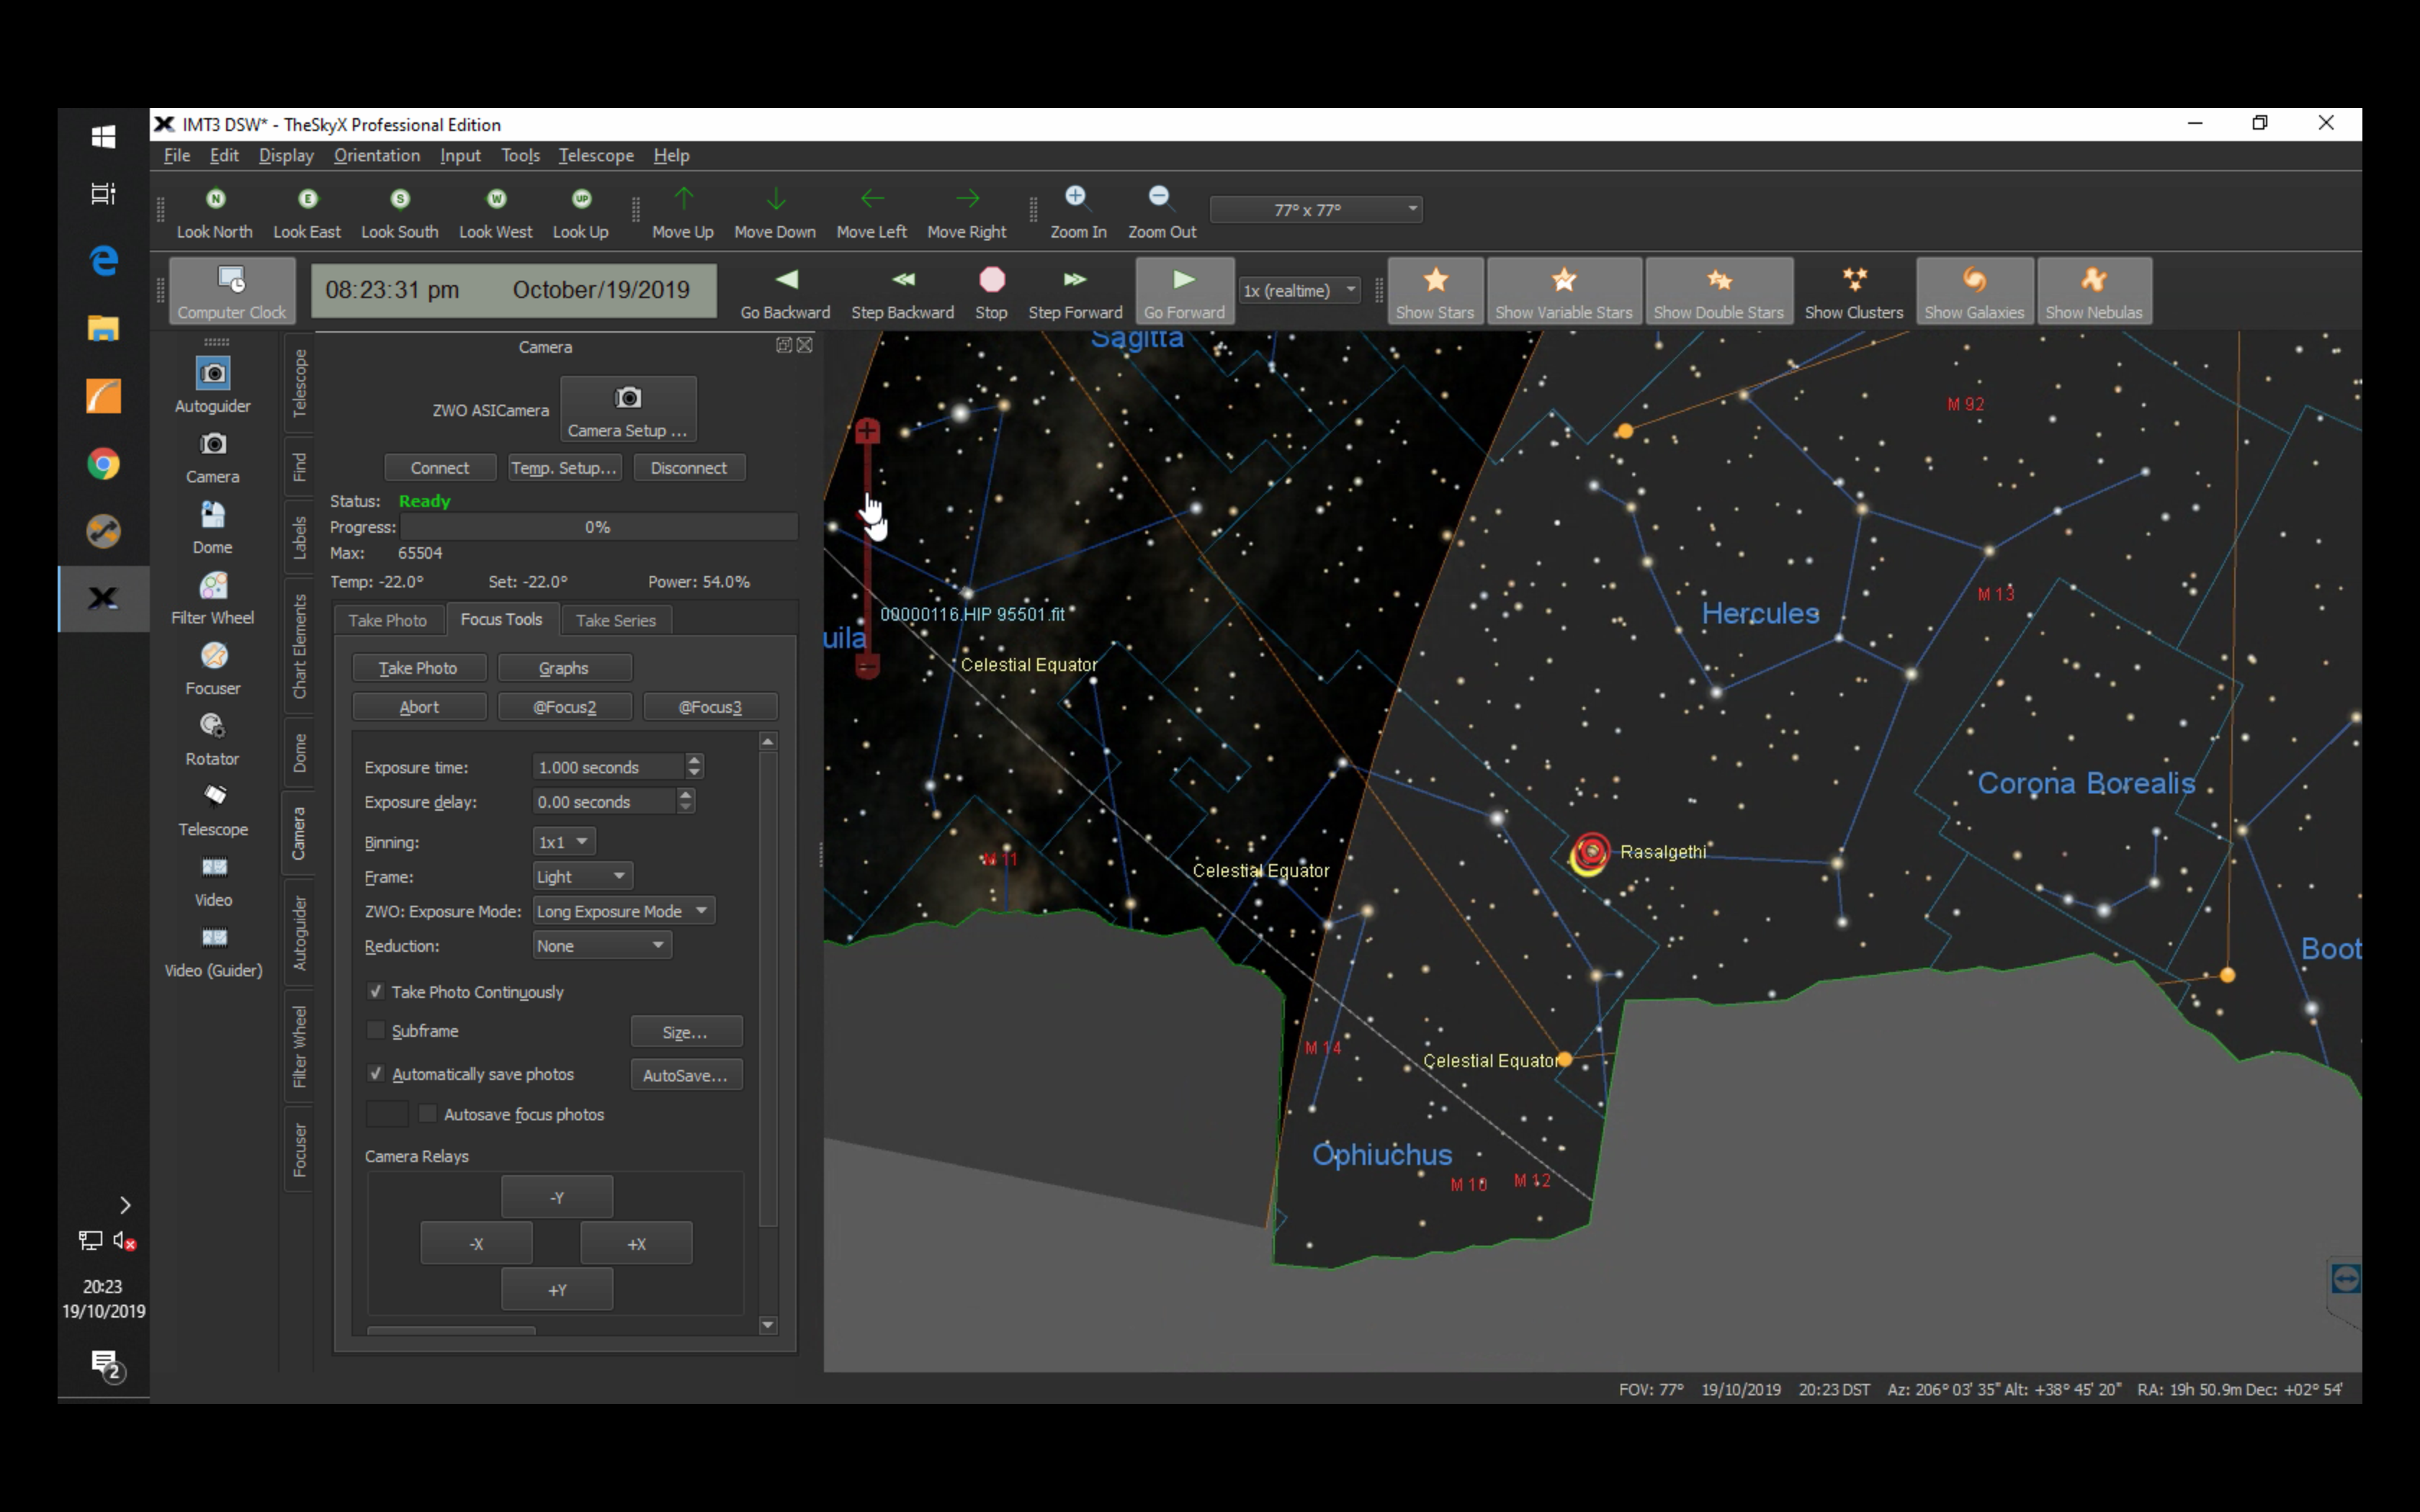
The graph on PHD2 should started to look fairly flat, and so I then attempted to fix the polar error for altitude. I selected a star in the West and near the celestial equator such as Rasalgethi in Hercules.
Rasalgethi used for Altitude adjustment
I watched the DEC line only and ignored the RA, the DEC line this time reflecting the error in altitude. Then I adjusted the mount using the altitude adjustment spanner moving the star again to the outside of the purple circle and then retested, finally getting the error down to a suitably small number after only 1 turn of 0.12′ 5px error.
Altitude adjusted to 0.12′ 5px error
Unfortunately at the extreme West I could only expose unguided for 1min on the 12″ at 2.5m focal length, the stars otherwise looked trailed.
Trailed stars at extreme due West
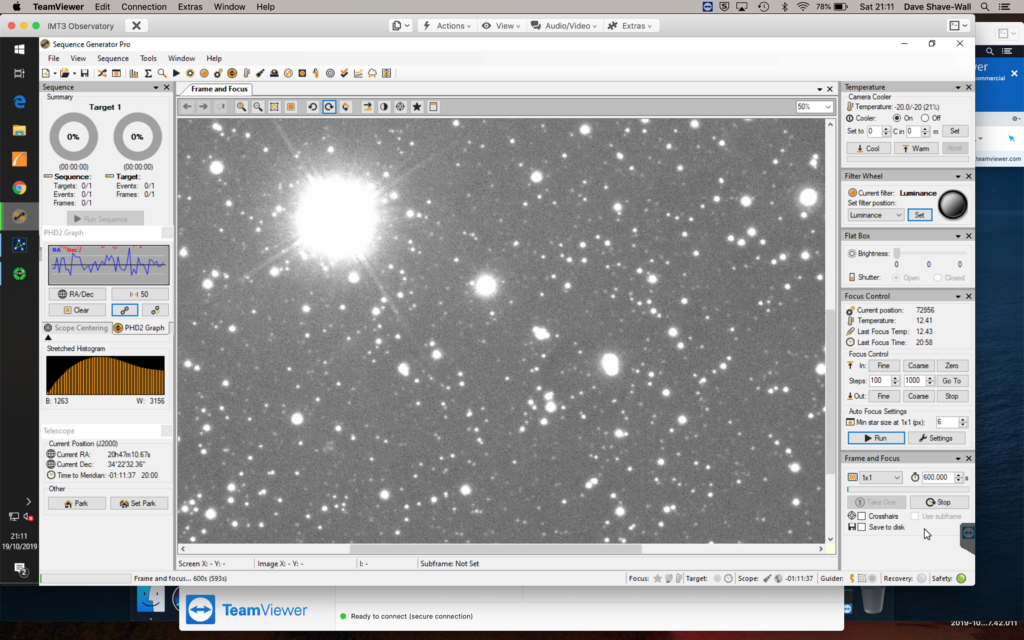
I then went to near the meridian and a 4 min exposure produced nice sound stars.
4 minute exposure near Meridian
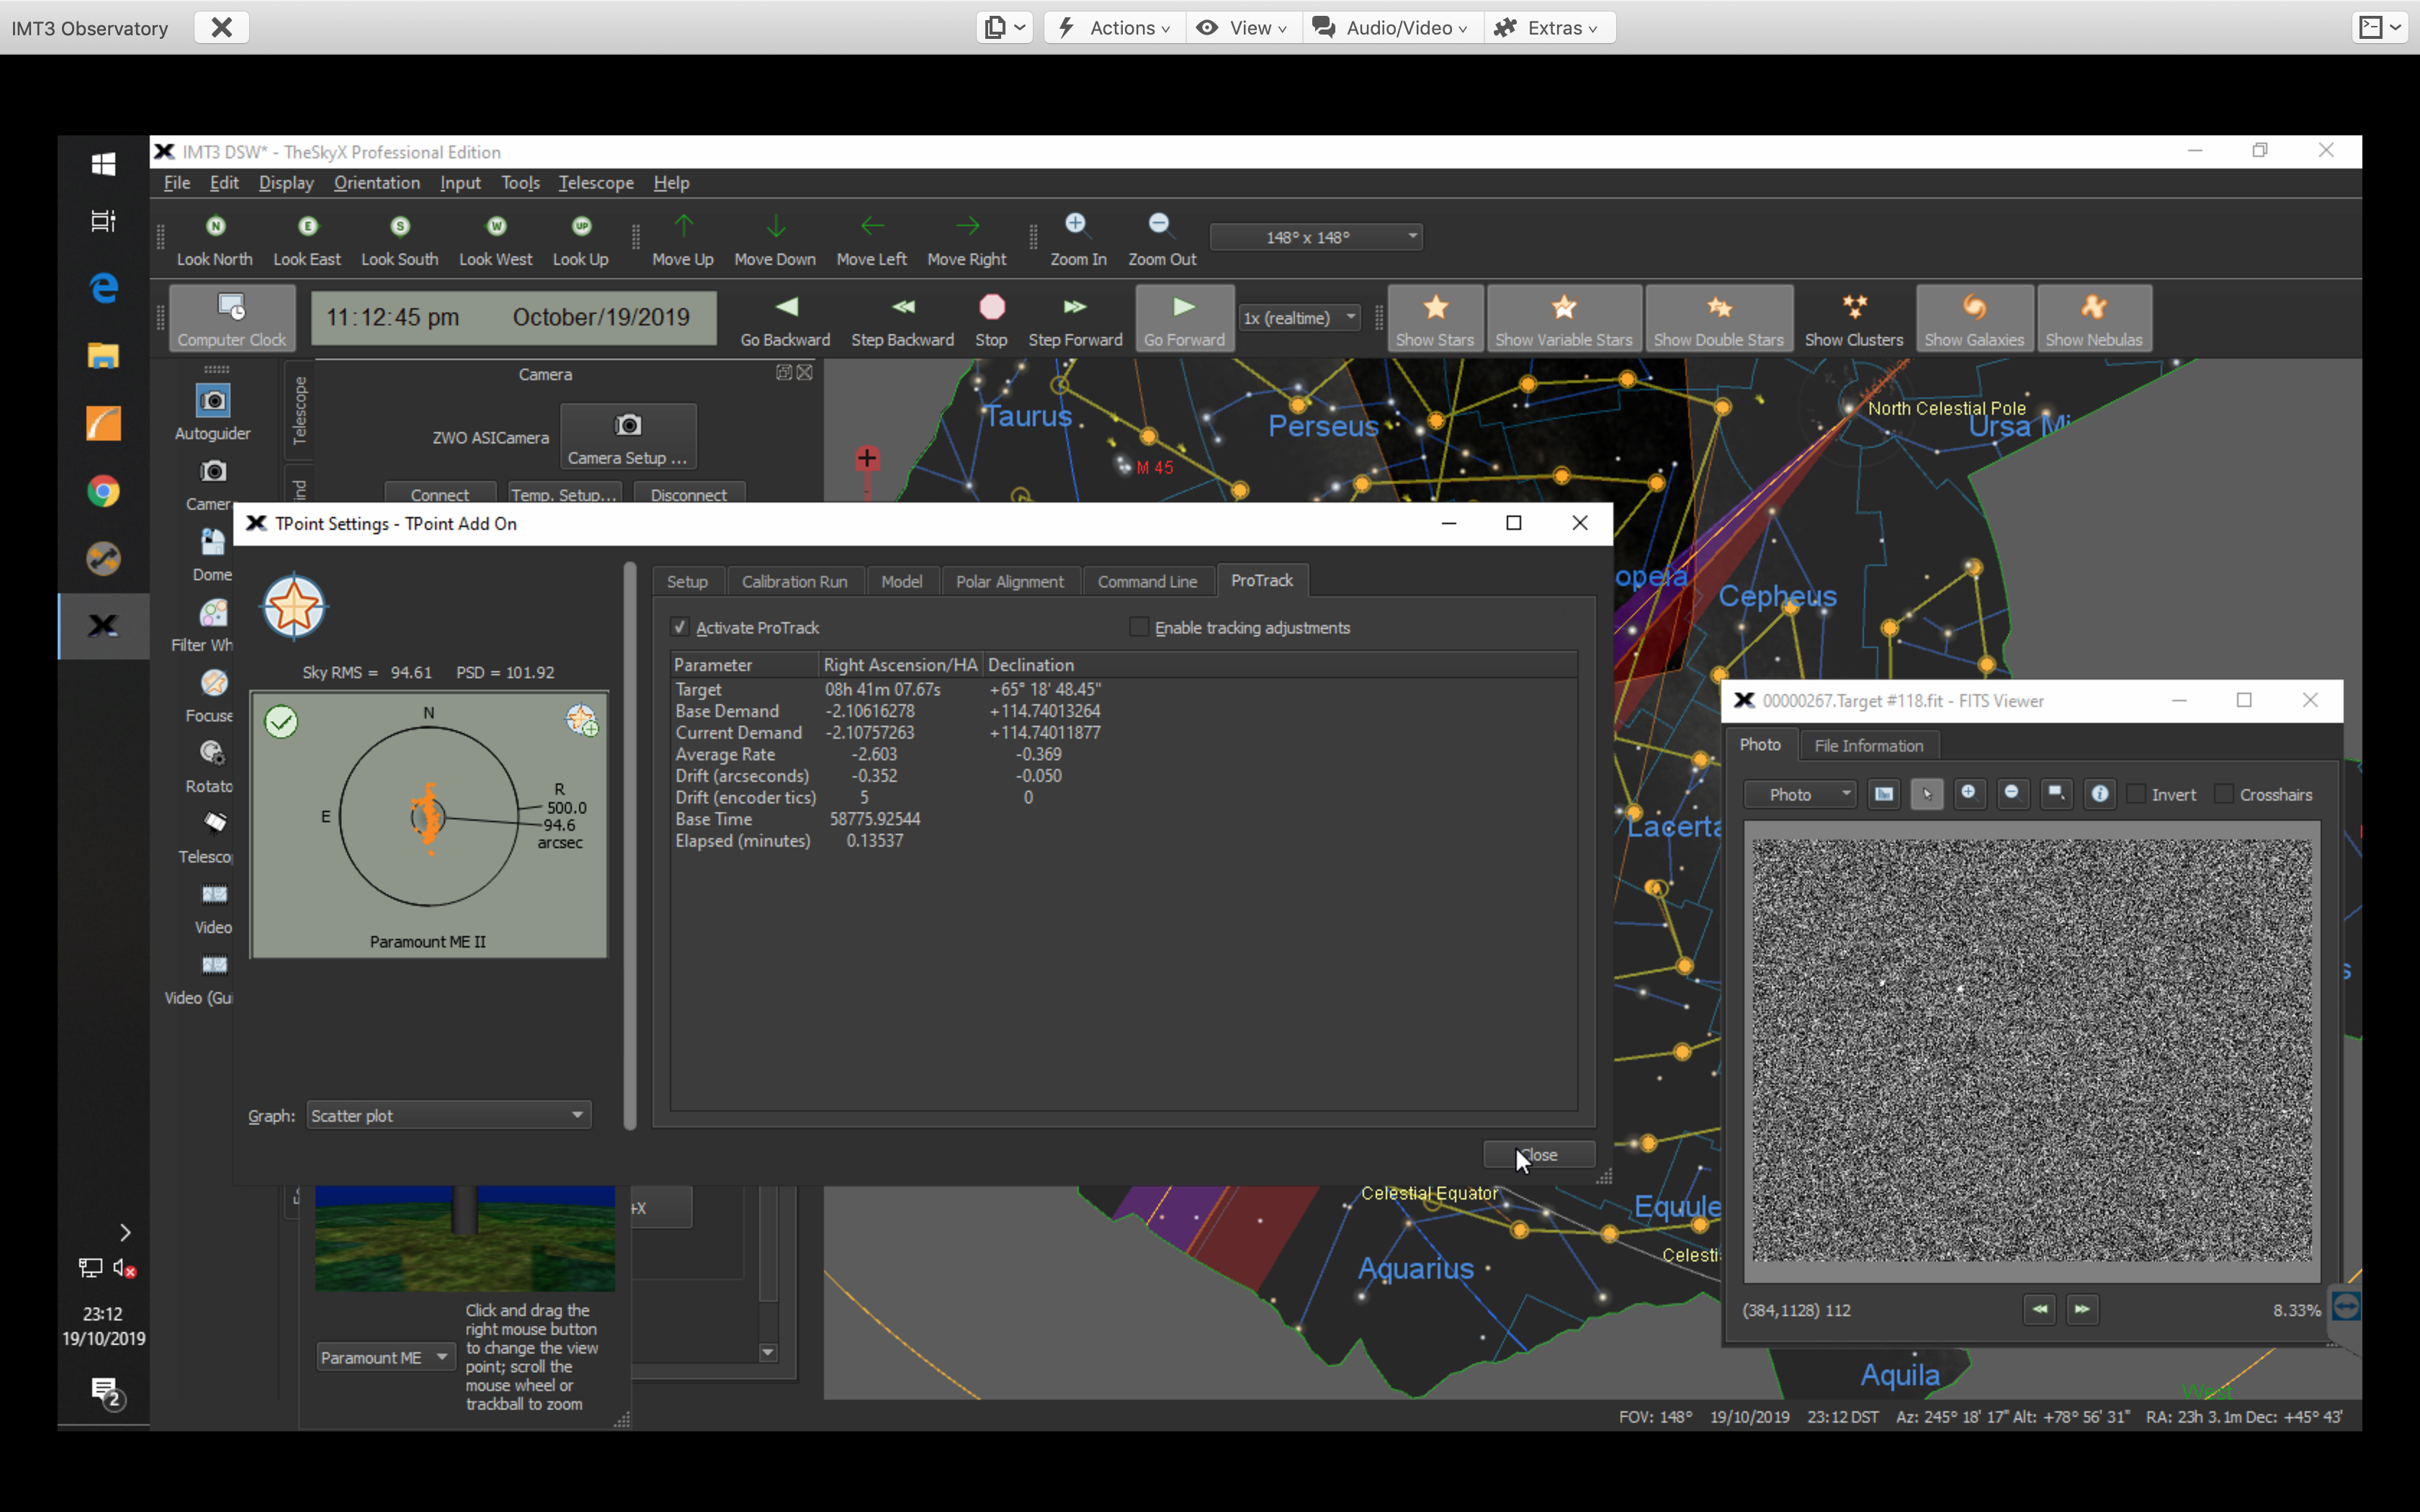
I then went on to do an automated TPoint run, but the problem seemed to be that a large number of samples could not be solved. The resulting TPoint model of 118 samples of which only 90 were usable, was worse than the 60 point model I had before. I will therefore redo the TPoint model the next time it is clear.
TPoint model not as great at 60 points I did before
The whole 118 model took approximately 1.5 hours to complete which is so much better than a manual model.
Completed model 118 points
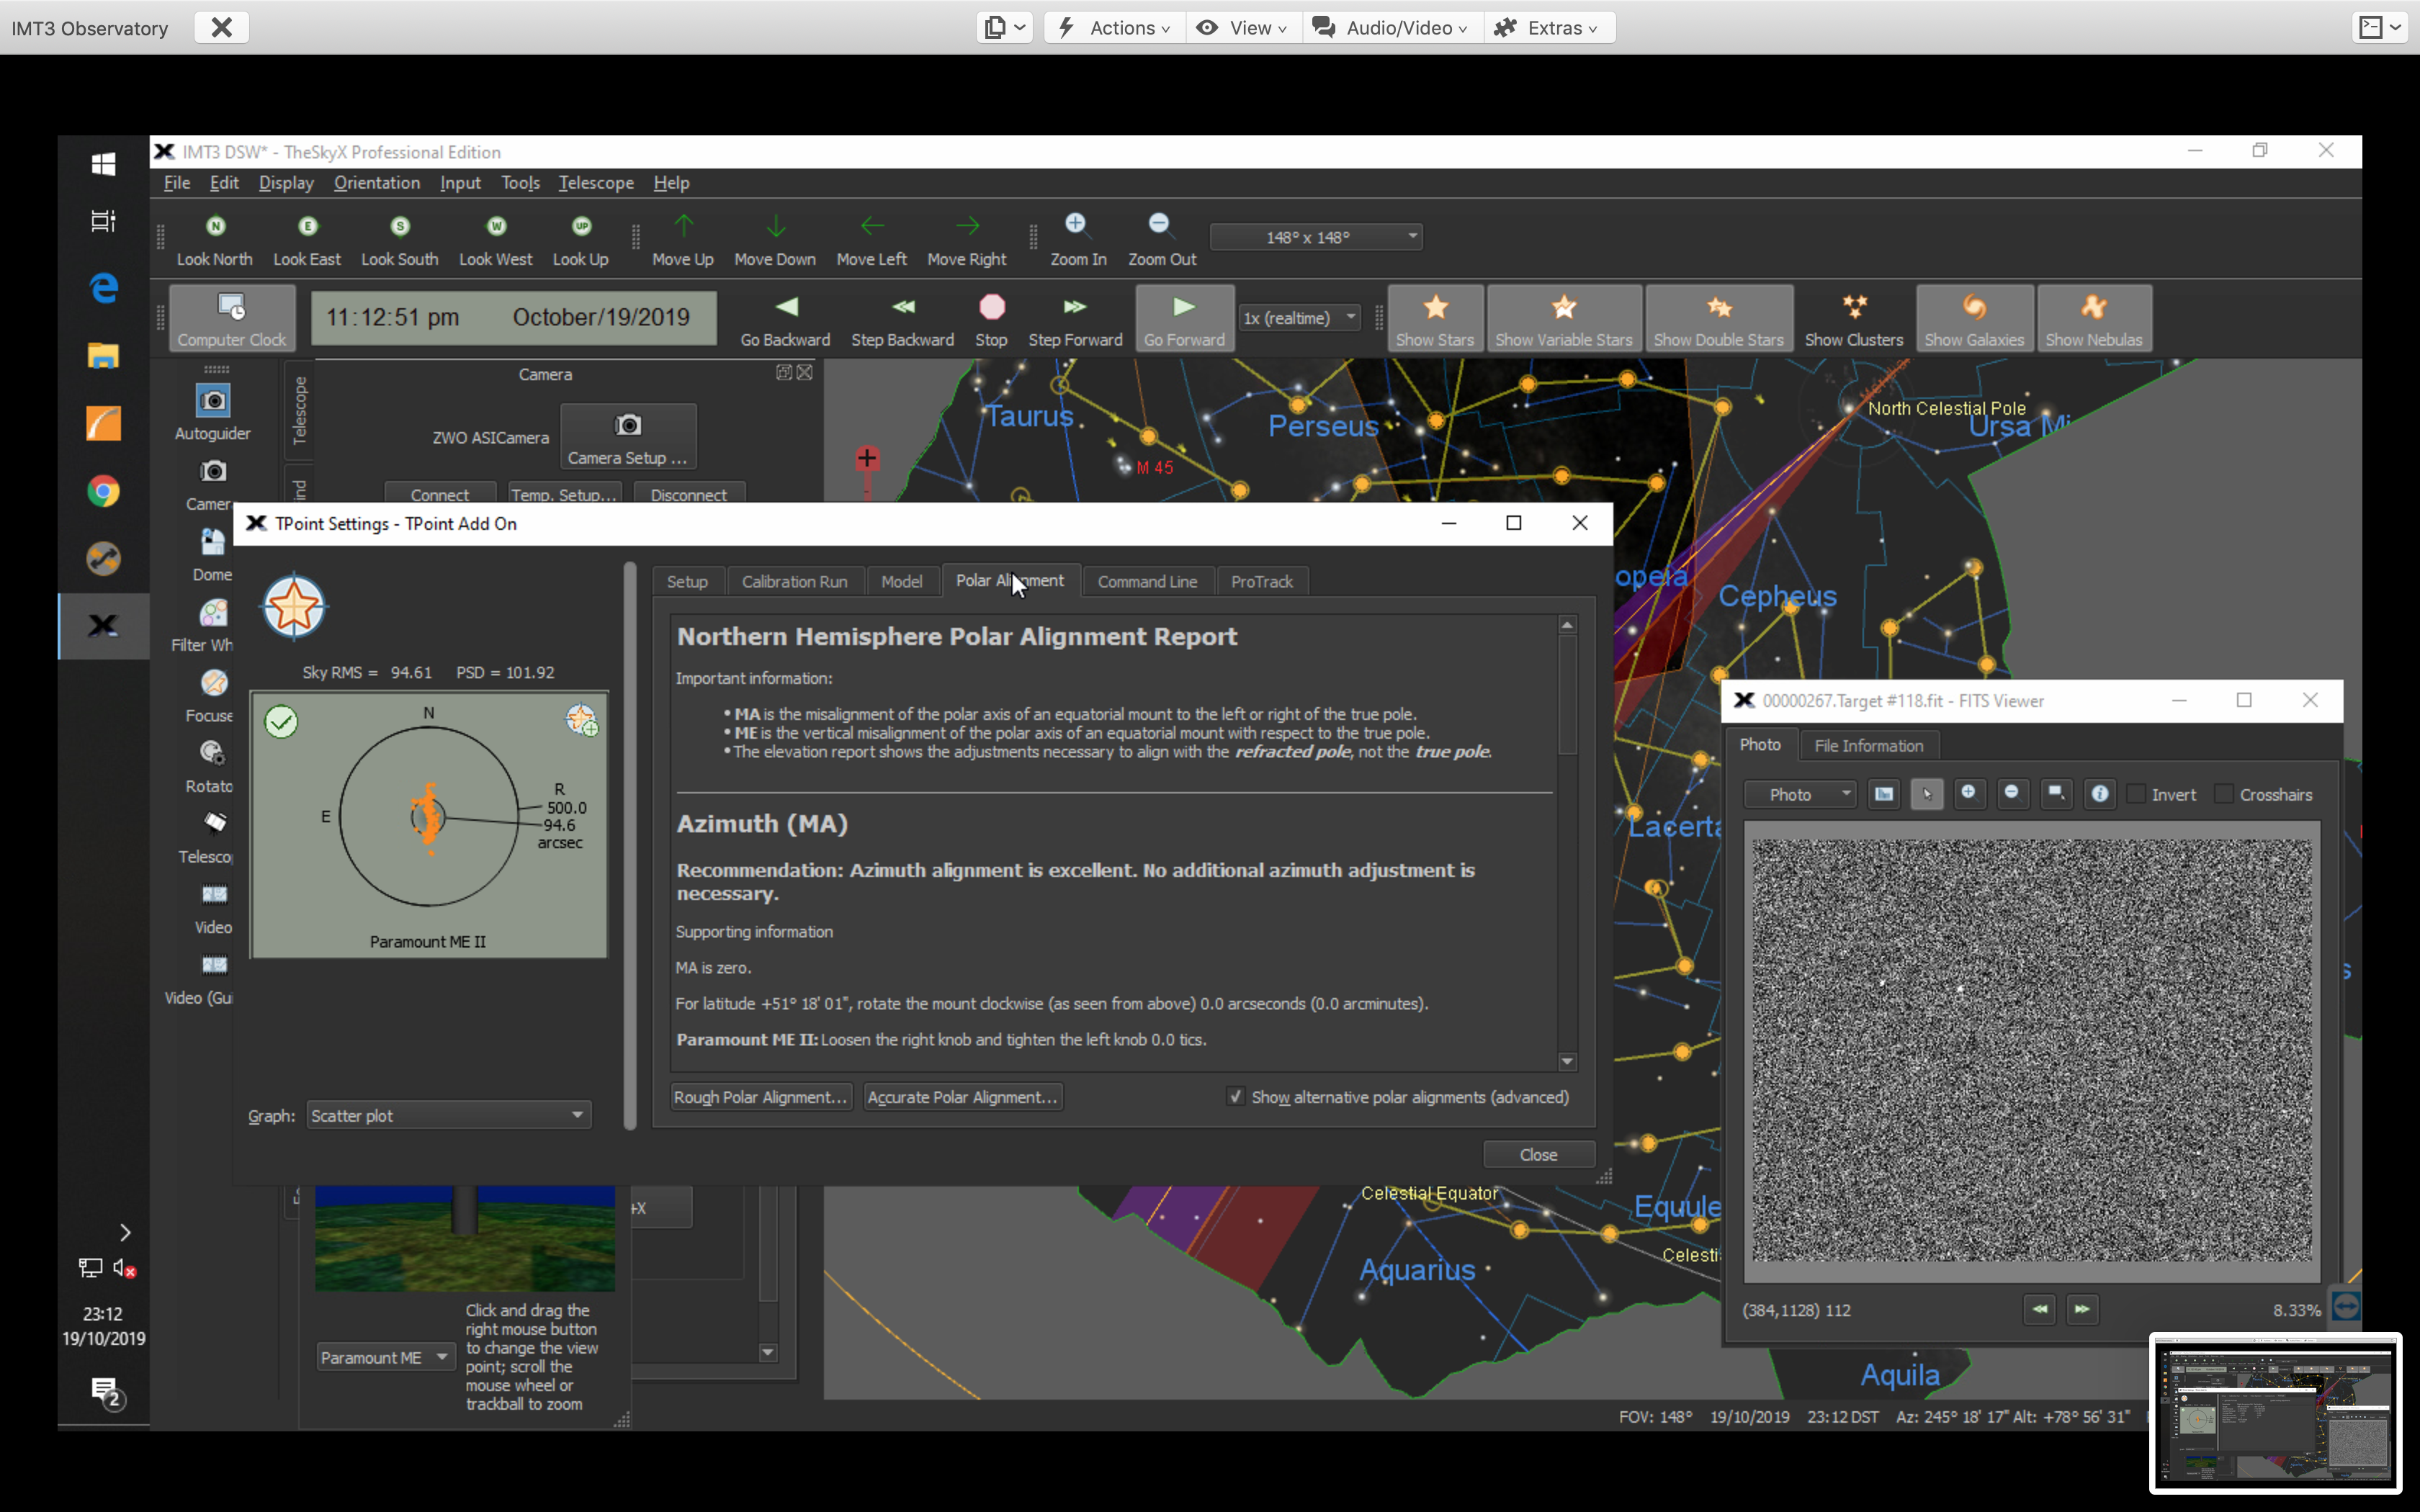
The good thing is the TPoint model told me the polar alignment is excellent!
Polar Alignment is excellent 🙂
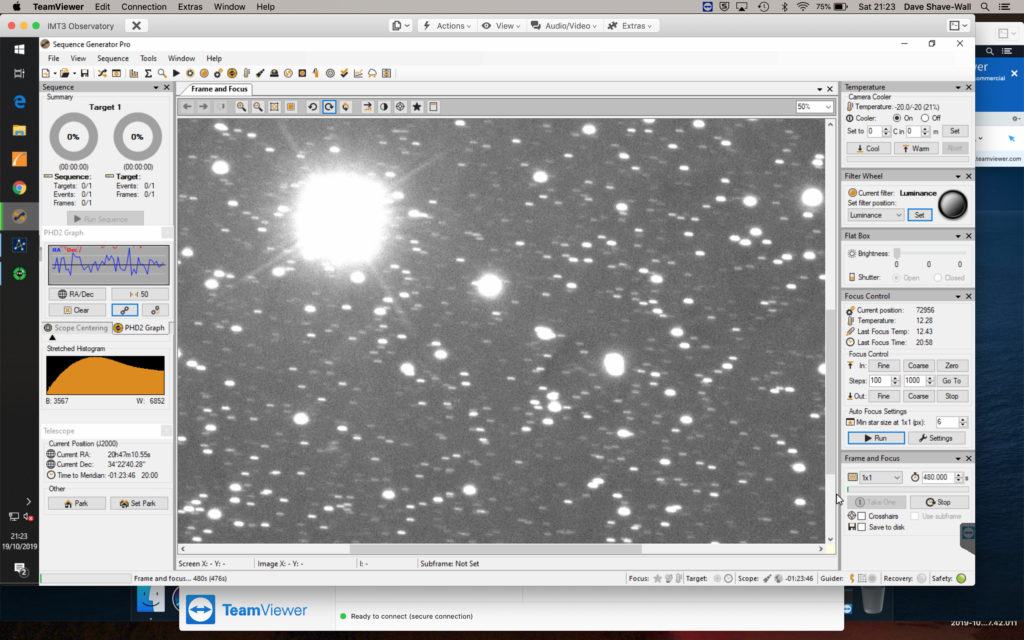
It is now @23:30 so I went on to start imaging. First I needed to perform a focus run on Luminance which I did.
Good focus on luminance
I then slewed to M76 to start my image run, a 30s exposure showed stars in focus and little dumbbell prominent in OIII.
Focused stars and M76 centred
This time round I decided to set the Gain to 139 and the Offset accordingly to 21. I also decided on a 10min exposure rather than 20mins front the last set.
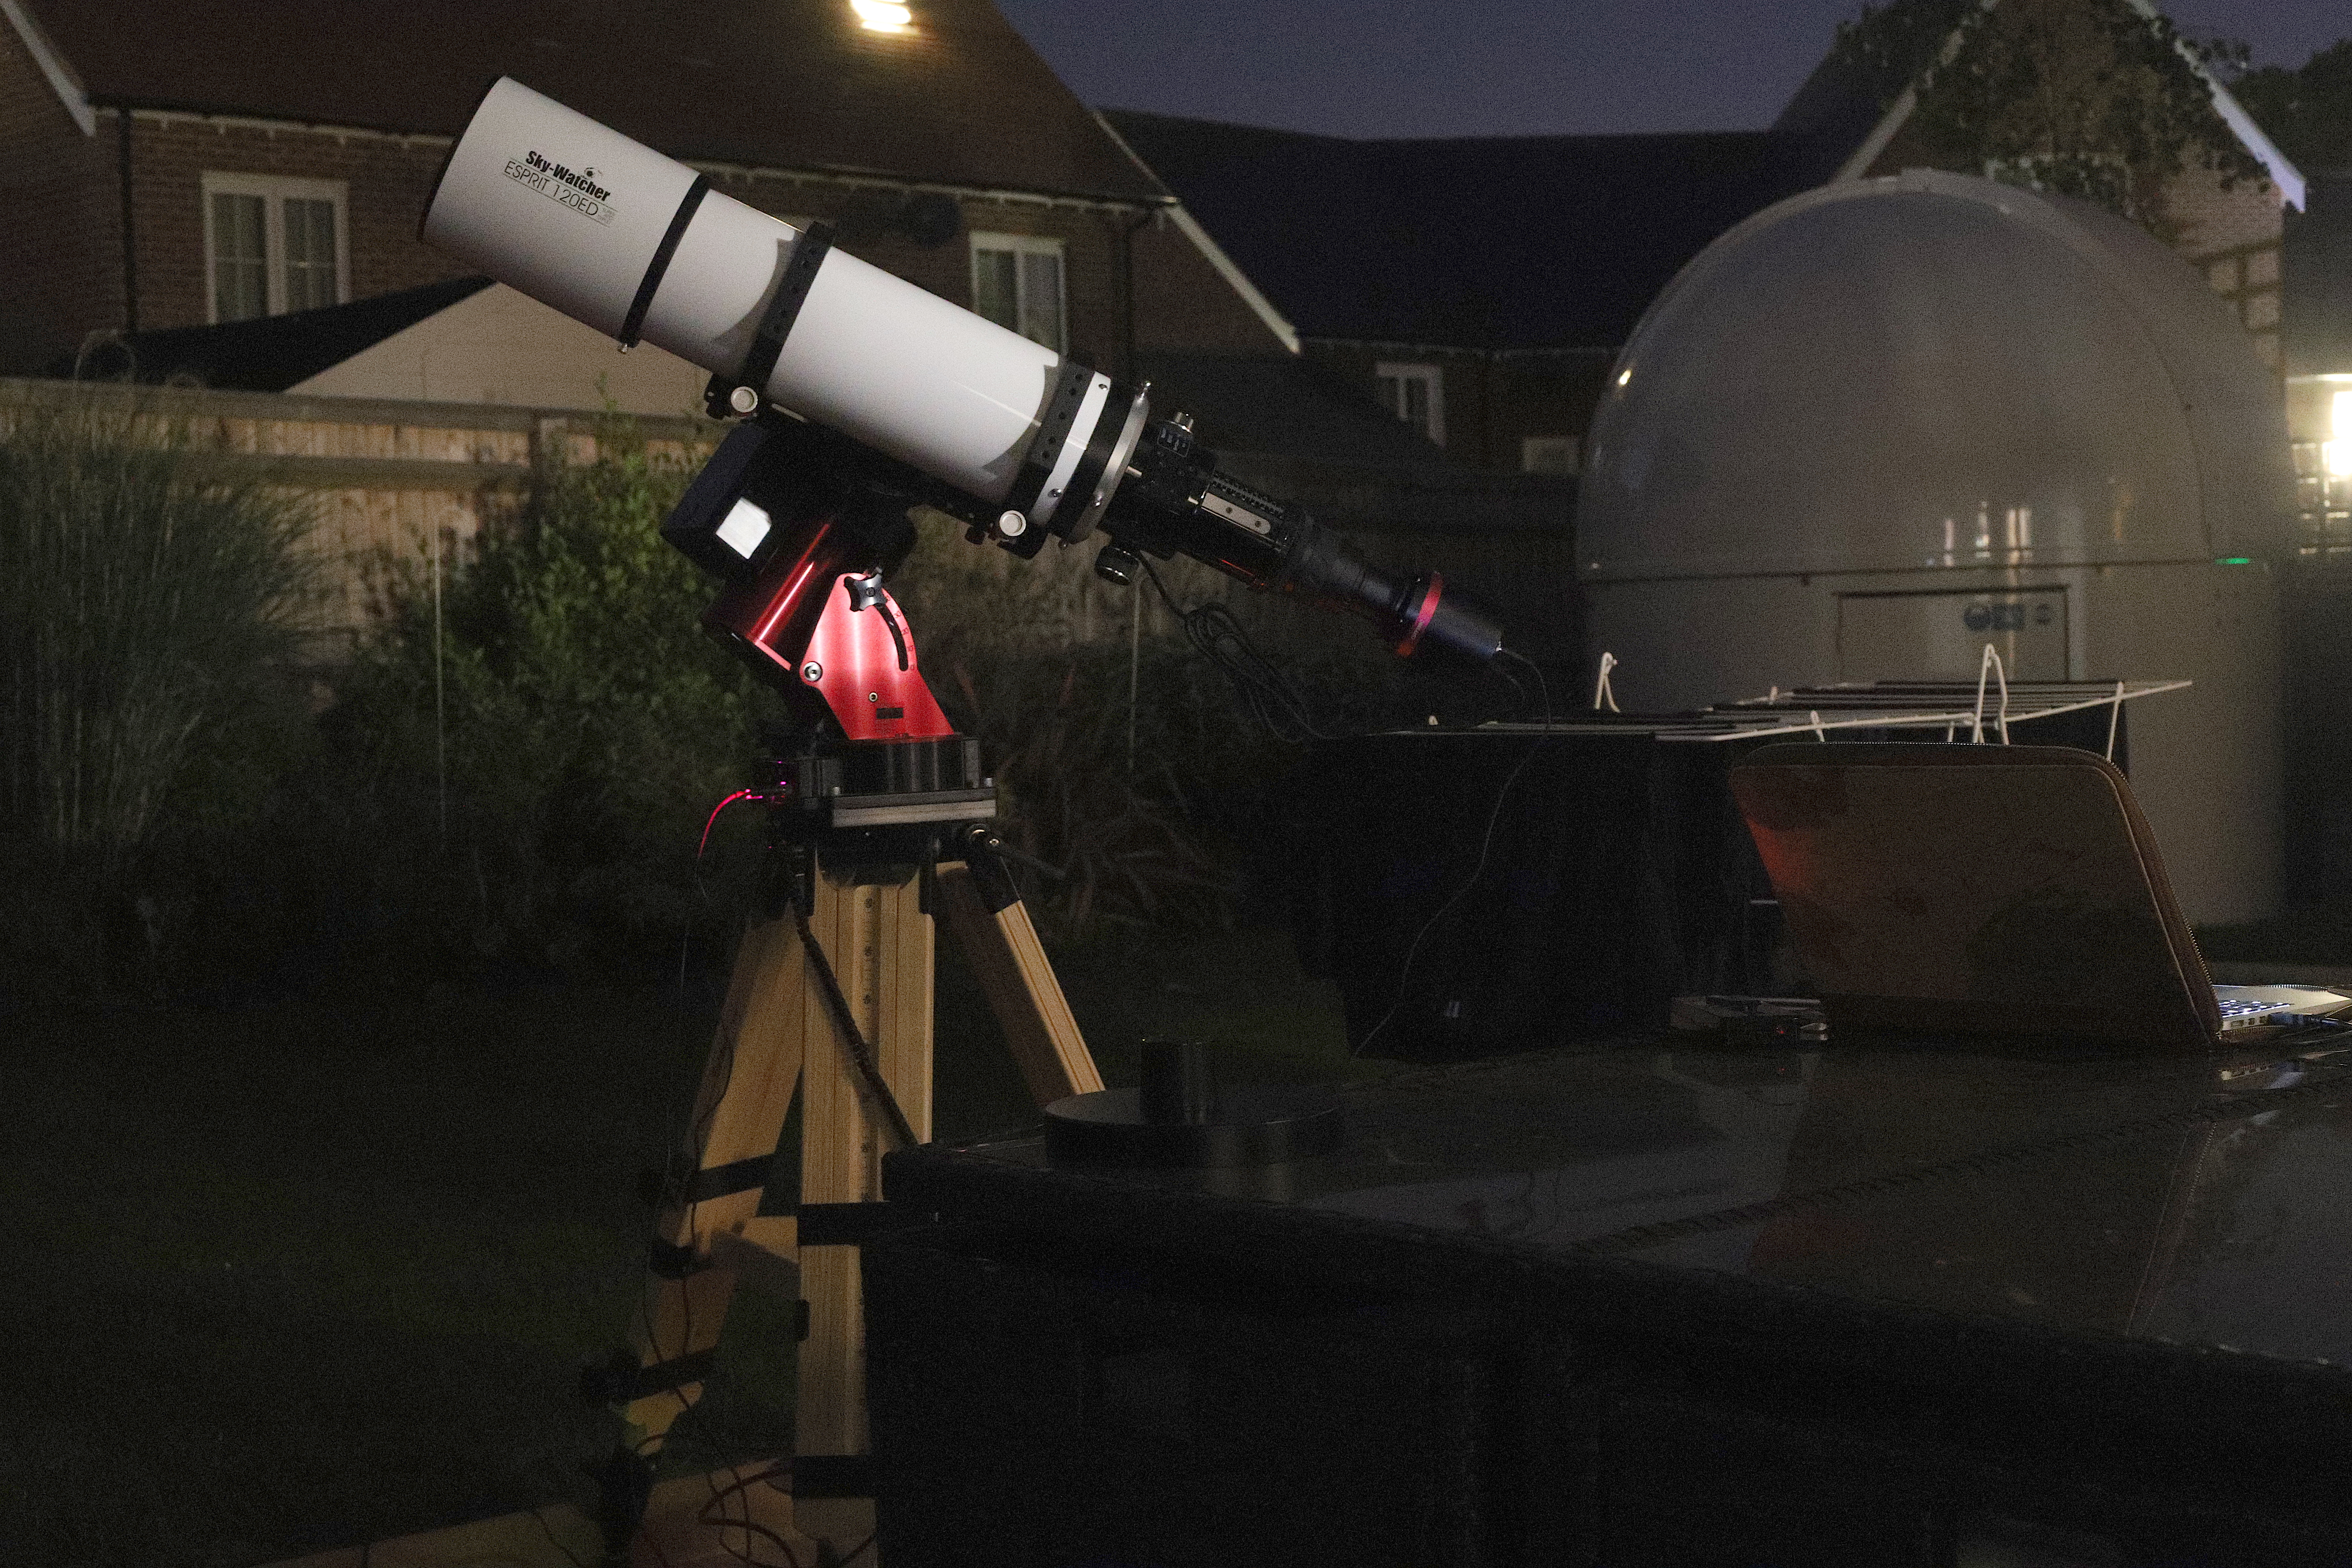
Tonight Bob will be learning how to control the observatory and using the Tak FS102 to trying imaging. Meanwhile I will be setting up my new Paramount MyT on its Berlebach tripod and with a new Sky-Watcher Esprit 120 mounted on top. The business end has my new QHY168C, yes I purchased a 2nd one, they are that good.
Travel setup and IMT3 dome
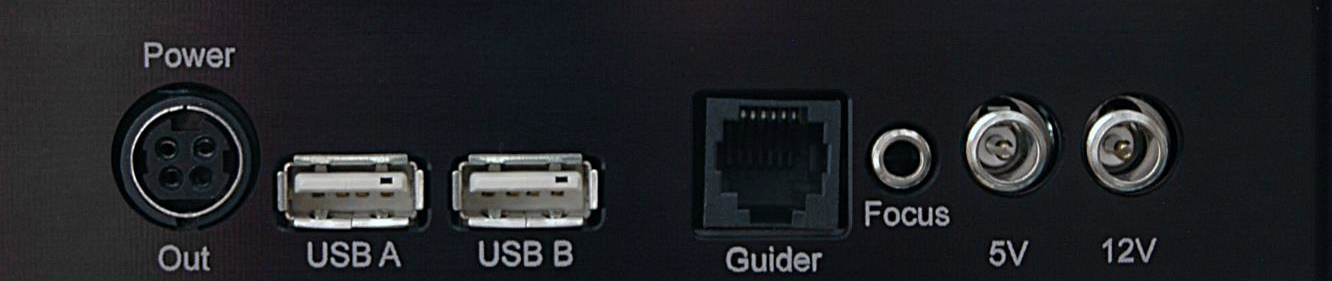
Whilst Bob played, I setup the travel kit on the new patio. I realised I could connect the camera through the USB on the MyT to one cable that won’t get snagged. I will however need to connect a power for the camera as that is currently trailing. There is a power connector on the back of the mount but I believe it is only rated to 1amp. There is however another power out which is rated at 7.5 amps so I will buy a Tycoon KPPX-4P 4 pin couple of connectors and makeup a cable so I can plug into that directly.
Connectors on the MyT mount
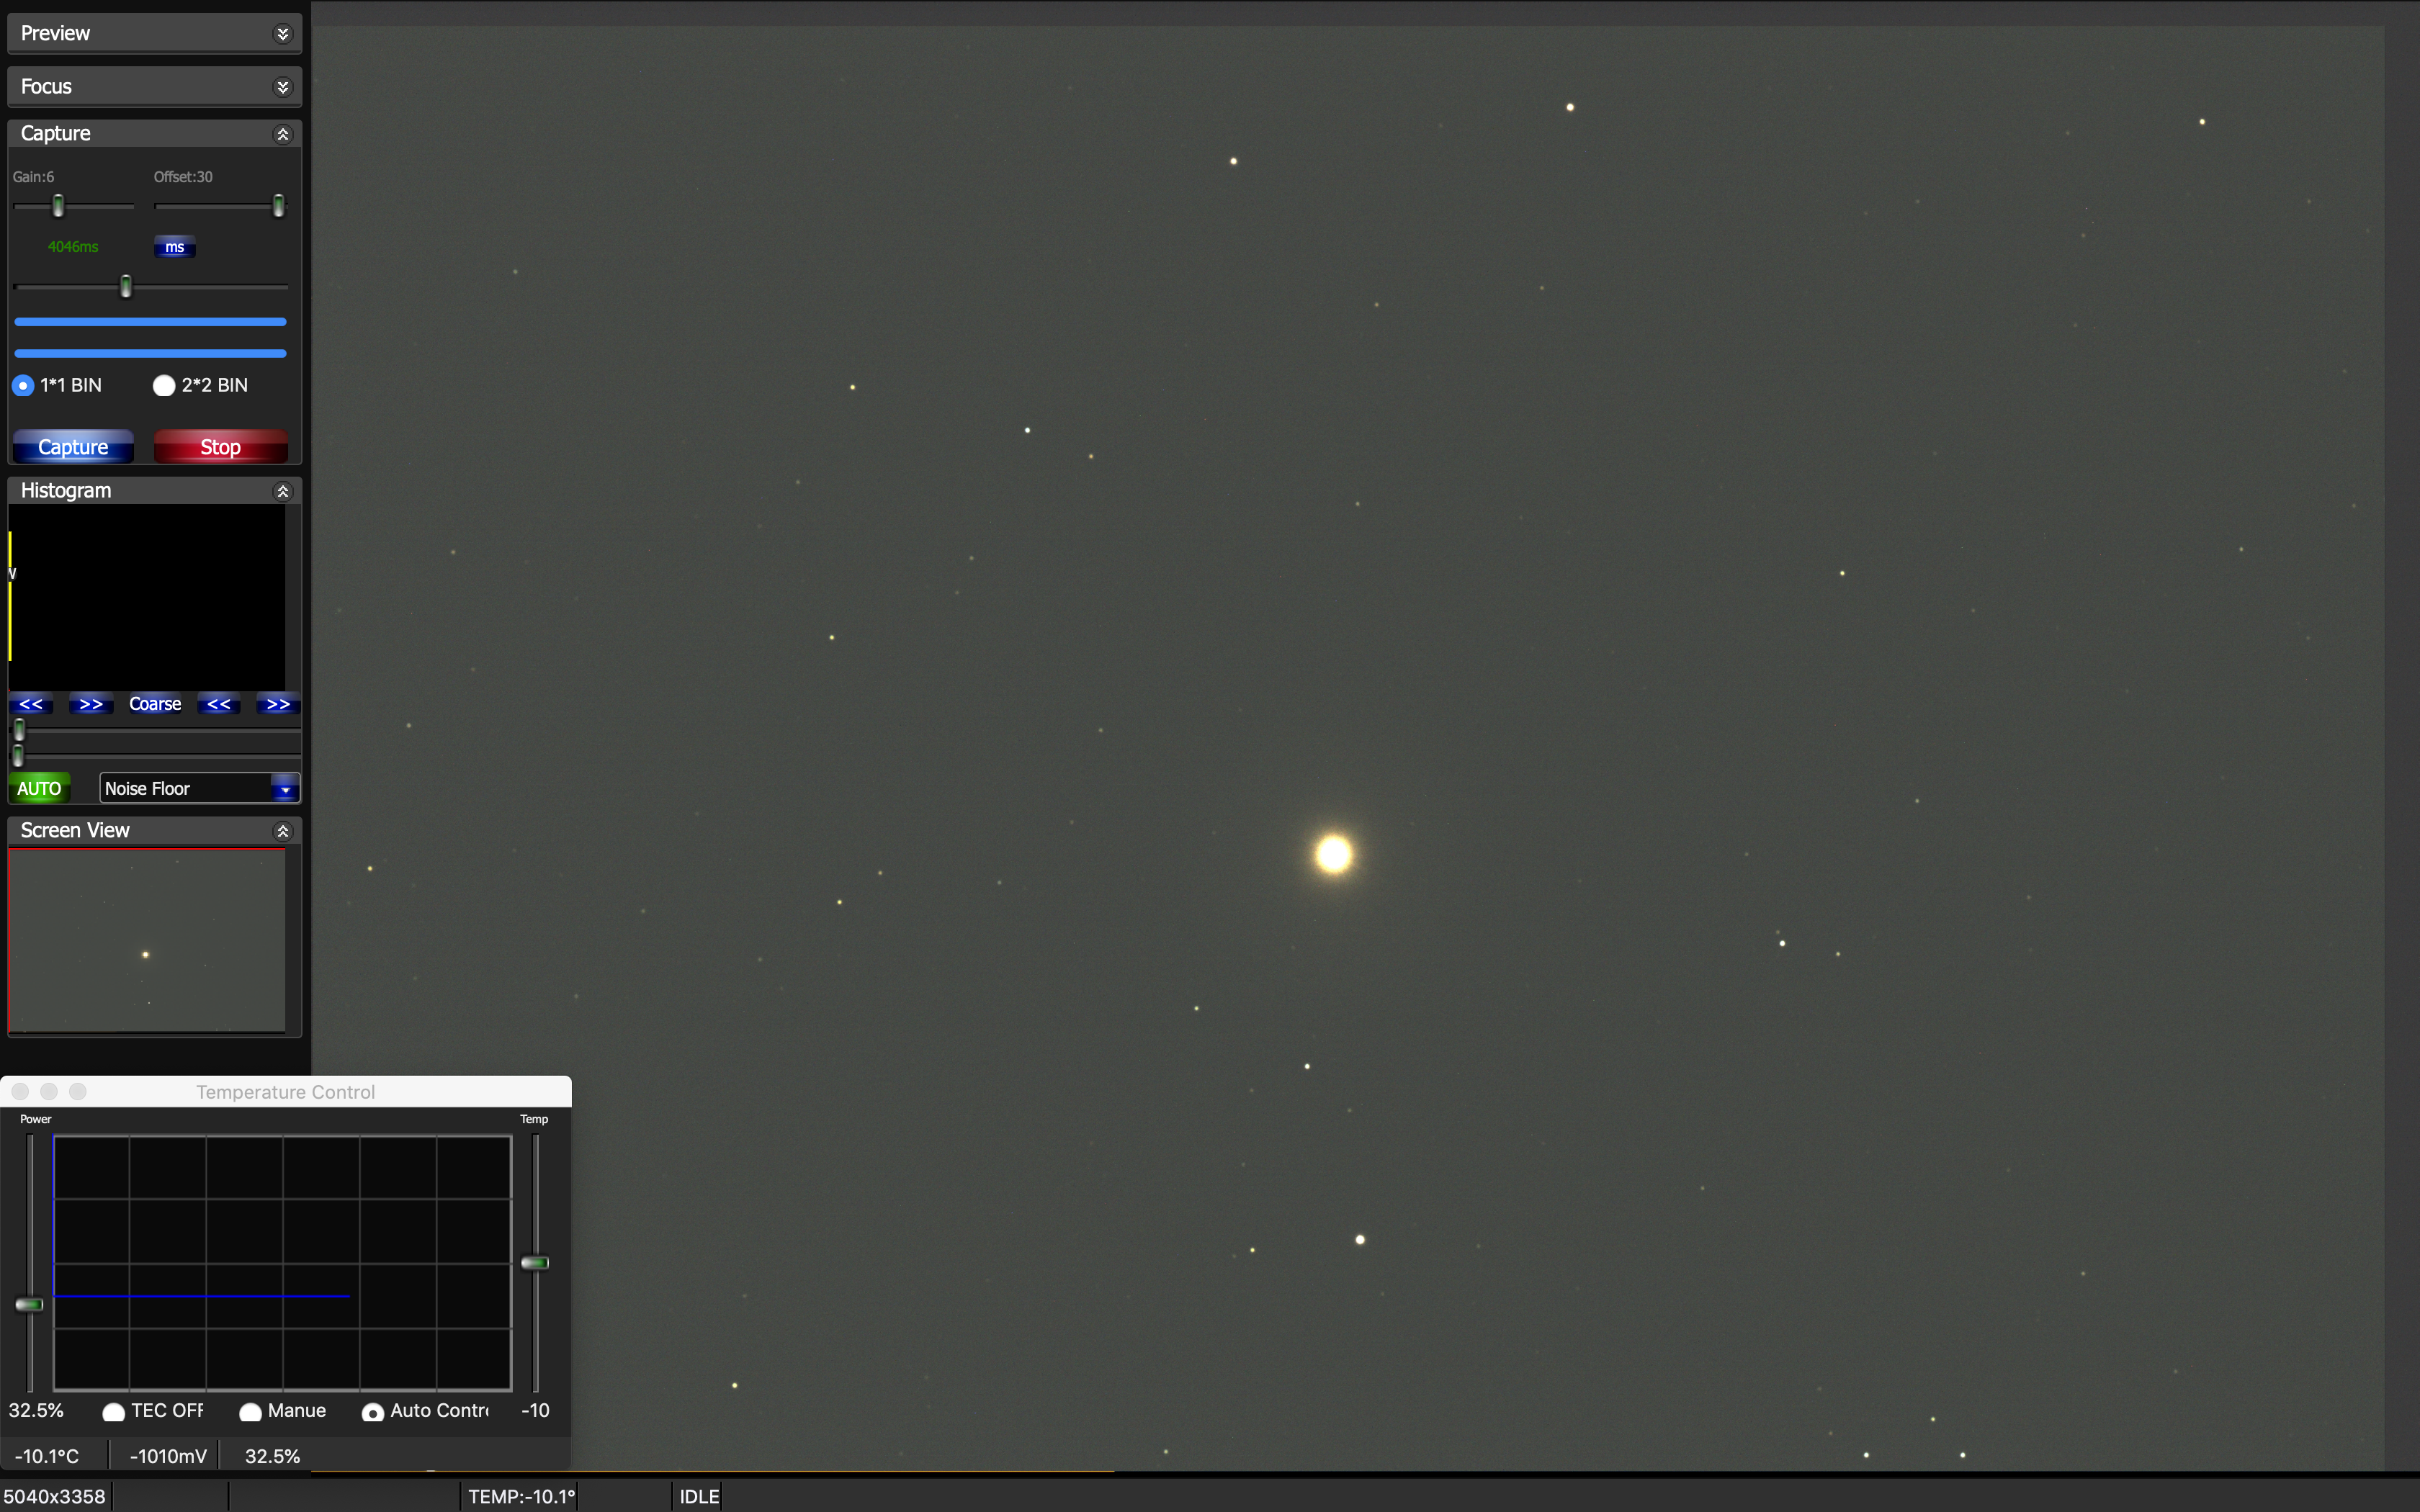
So I connected to TheSkyX with the mount and slewed to Arcturus. I could not connect the QHY camera to TheSkyX as I seem to be missing a driver. I will take a further look tomorrow to see if there is one. Instead I used the EzCap software they provide and connected the camera to that.
I focused manually as I have not motor focus to keep things simple, and soon had stars in view. I then did a manual spiral search until I found Arcturus and then synced on it. I could then slew around the sky with ease.
For polar alignment I have ordered (my friend GingerGeek has ordered) a PoleMaster mounting plate that I can use, this will make it easy to align. Tonight I just plonked the mount down without any polar alignment, thus anything more than 10 seconds produced trailing.
I tested cooling the camera, slewing and parking, although I need to see the park position 180 degrees from the current position to allow the scope rings to be in the right place for removing the OTA.
The scope and the mount and the camera make a great travel setup, each component is not too heavy to move by itself, the connection and setup is fairly straightforwards and I really do look forward to testing this out in October in Tenerife. I do need to test running from a car battery to see how long things last. I have my car battery I use for astronomy on charge and will test next time.
The connection of the camera to the flattener is a push fit and is missing the luminance filter. I will order the right adapters from Modern Astronomy so that I can fit later.
So I still have a few things to make, buy, test and do before October but good progress tonight on the travel setup front.
Meanwhile Bob has been making good progress with the Tak FS 102 in the IMT3. Imaging Arcturus and testing lengths of exposure on different objects such as M13. Some pieces of the sky Bob was imaging at 5 minutes unguided and others such as M13 only 3 minutes. I need to look at why this is given I now think the polar alignment from last night is excellent.
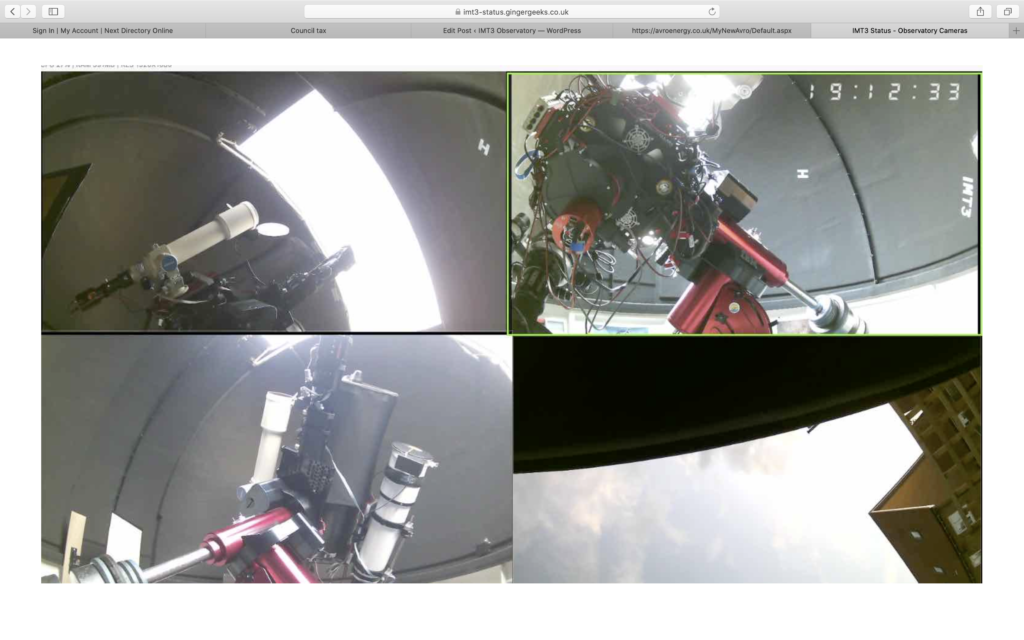
Imaging through IMT3
I reset the FoV indicator for the Tak FS102 in relation to the main 12″ scope. I need to find a way of slewing to given object for the offset scopes. I also need to be shown how you use SGPro to slew too, rather than using TheSkyX, so a slew, plate solve and then final adjustment.


 .
.