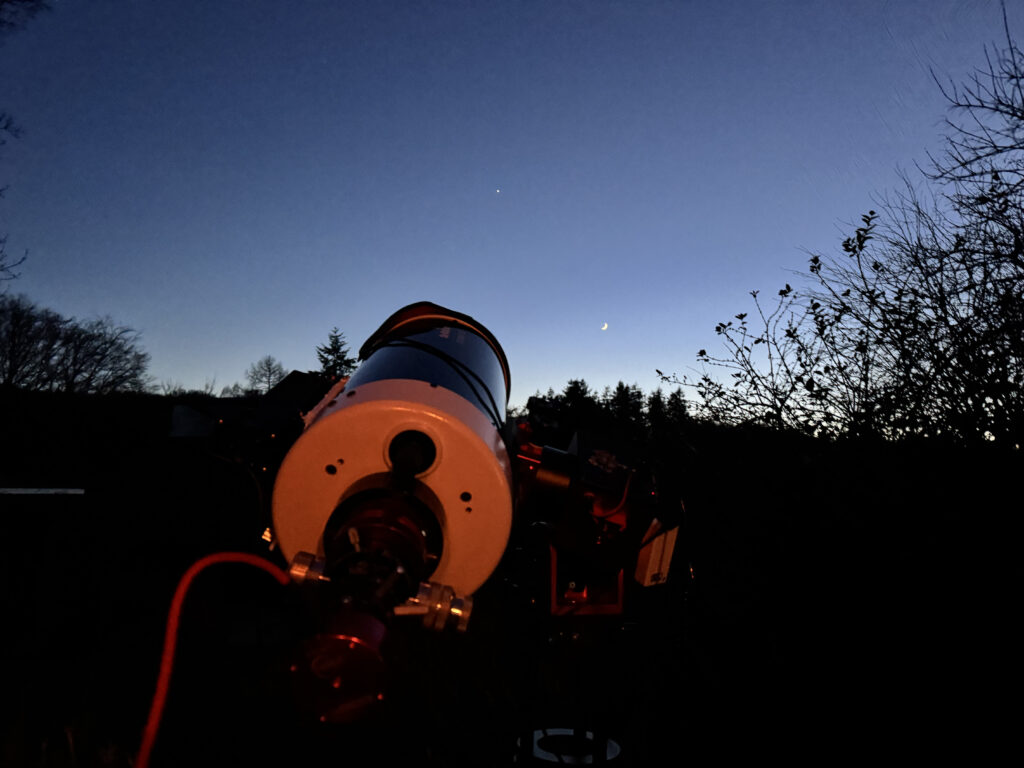
I then went on and imaged beautiful Venus as a half crescent.
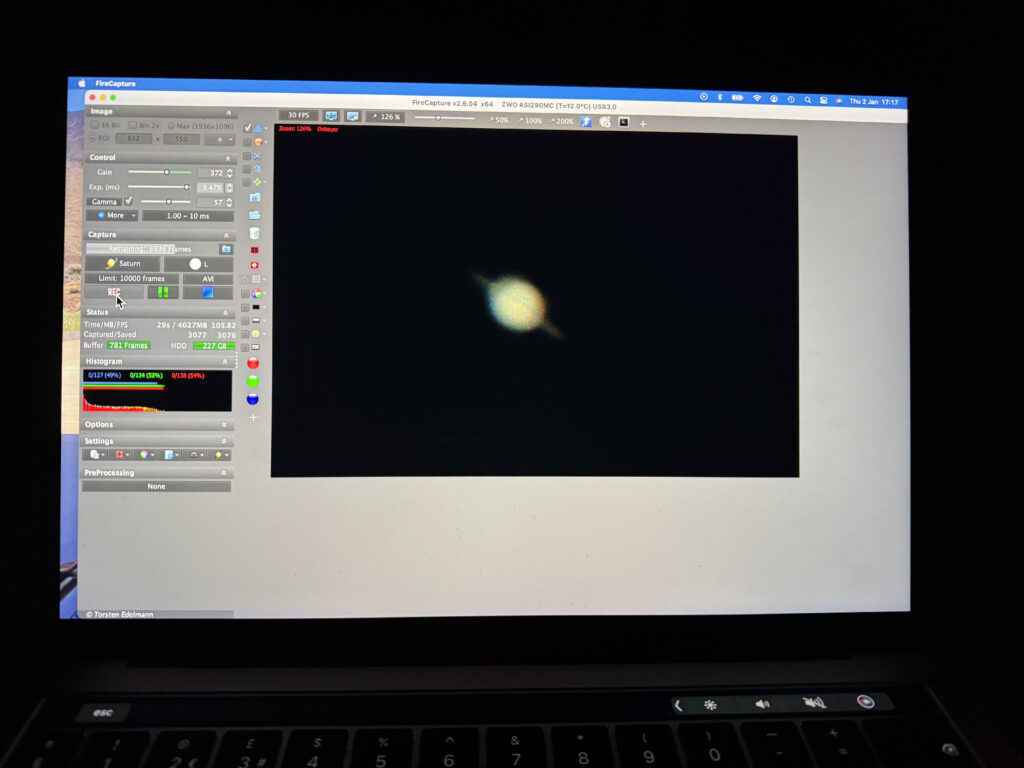
Next up was Saturn and the faint and vaguely tilted rings.
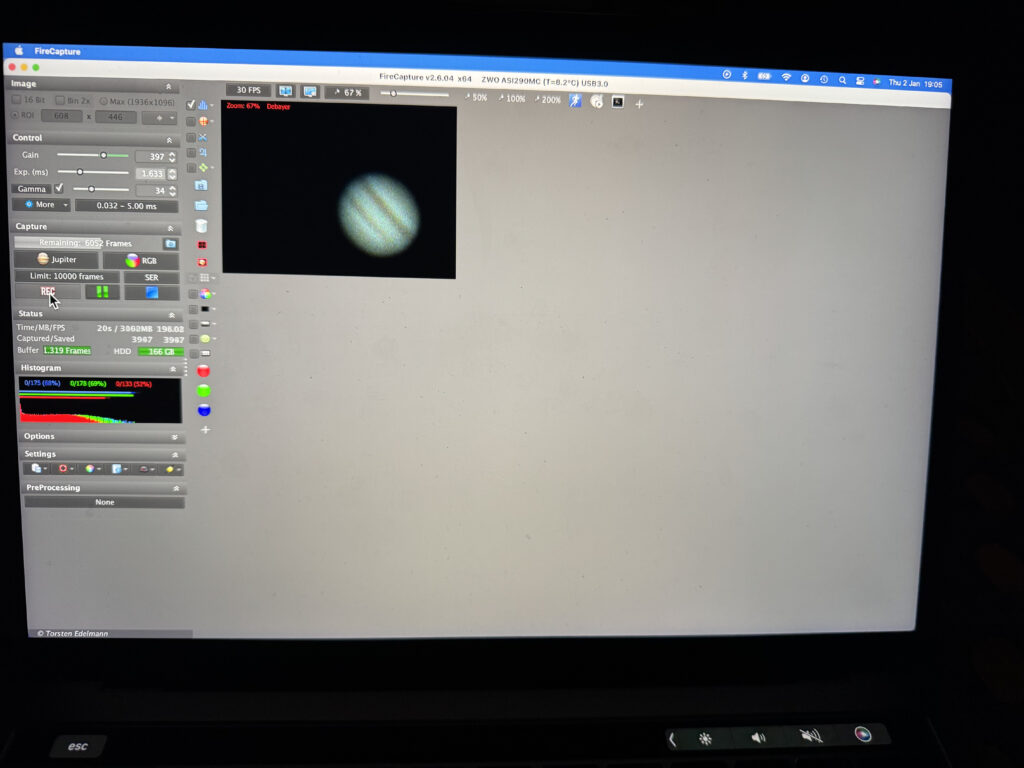
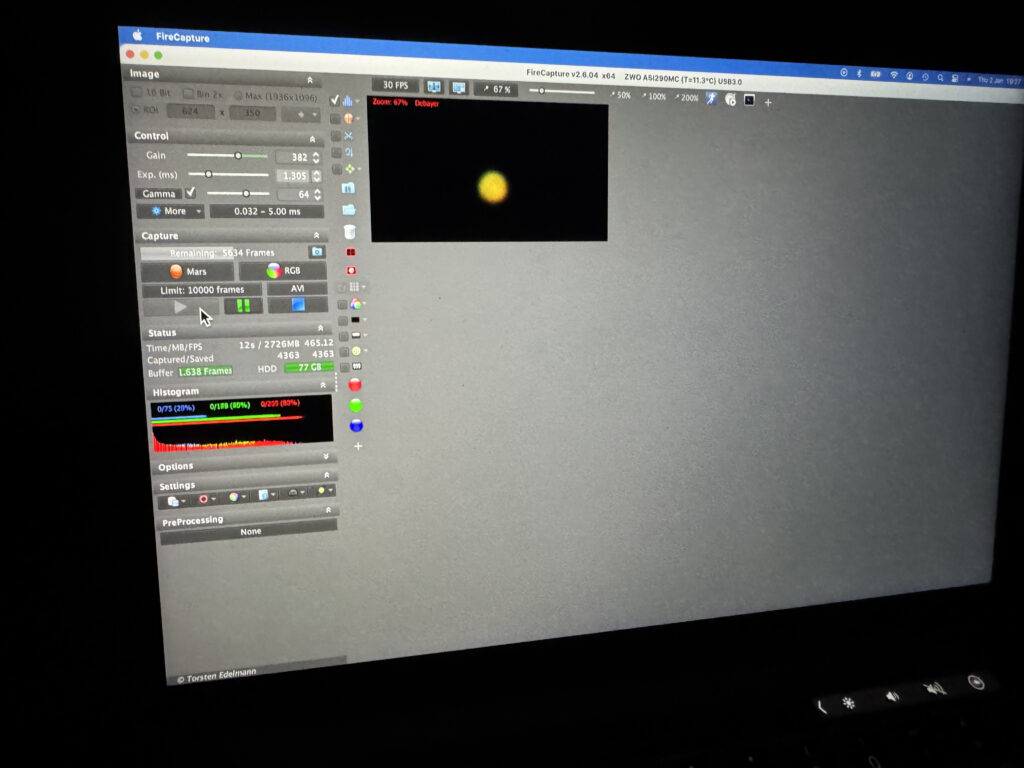
Then I moved onto Jupiter capturing the great red spot GRS in the process.
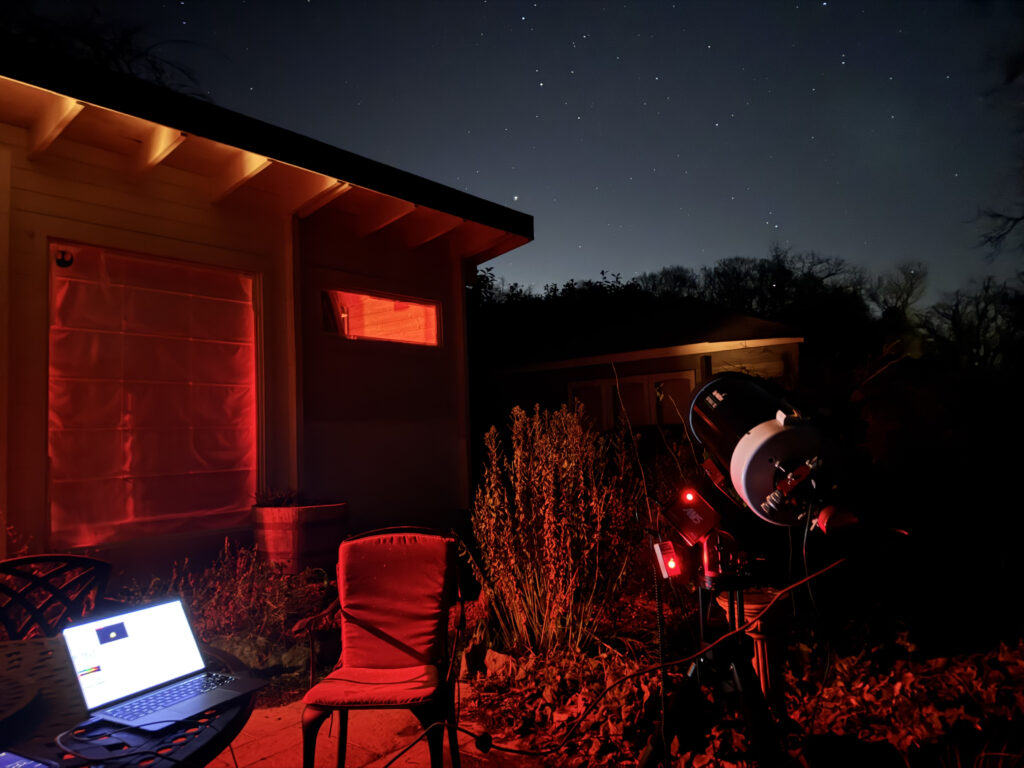
Last on my list and slightly low at this time of night was Mars.
I could see Syrtis Major even through the turbulent air.
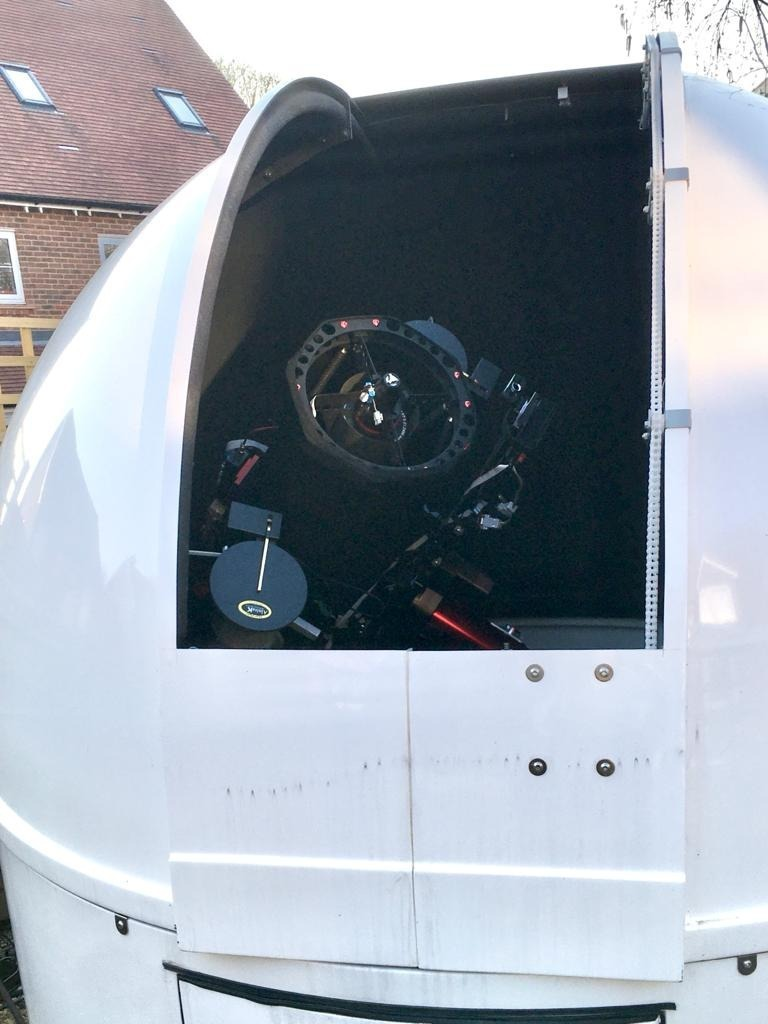
A good night even at this point. I then packed away the travel setup and the Mak180 and opened the dome. However, due to problems with the ASI1600MM camera cooler I did not really get anything done. I also had power problems with he noise creating in which last time I saw this was the PSU itself. I will investigate tomorrow and replace the PSU as needed. The ASI1600MM is beyond repair from a coping perspective. I’m not going to pay to have it fixed, instead I have decided to keep it as a guider with the APS-C chip which is much better than the tiny chips that come with the ZWO planetary cameras. It will work perfectly on the new ONAG On Axis Guider I have just purchased to replace my friends one he lent me.
Not entirely clear this Bank Holiday weekend, however good enough to test out the newly cleaned ASI1600MM with the new desiccant. I received the desiccant from Zoltan at Astronomy365 and cooked in the microwave for 2 mins on medium power before letting cool down and then placing in the camera. I managed to get most of the dust off the sensor, however it is very difficult.
At 00:15 I started to image M72 the globular cluster low down in Aquarius using LRGB 60s on Luminance and 300s on RGB. Note that I will need all new flats today due to the cleaning of the camera. I will leave the observatory running overnight and head off to bed.
Update from this morning, looks like the observatory run all night without a problem and however I believe the object went behind the trees in the distance that have grown after about 10 luminance frame 🙁 I took flats this morning and will take darks tonight.
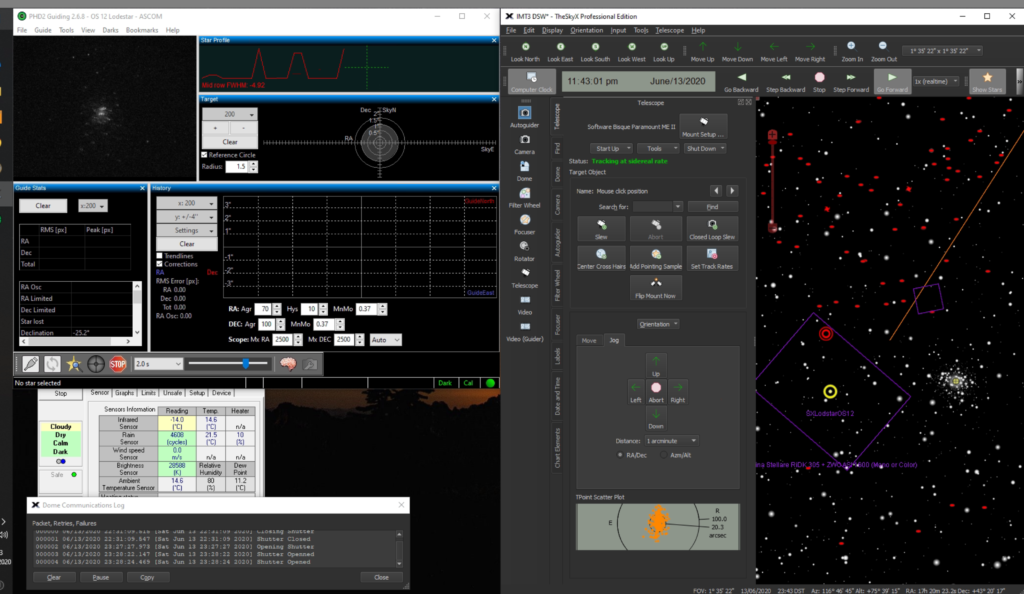
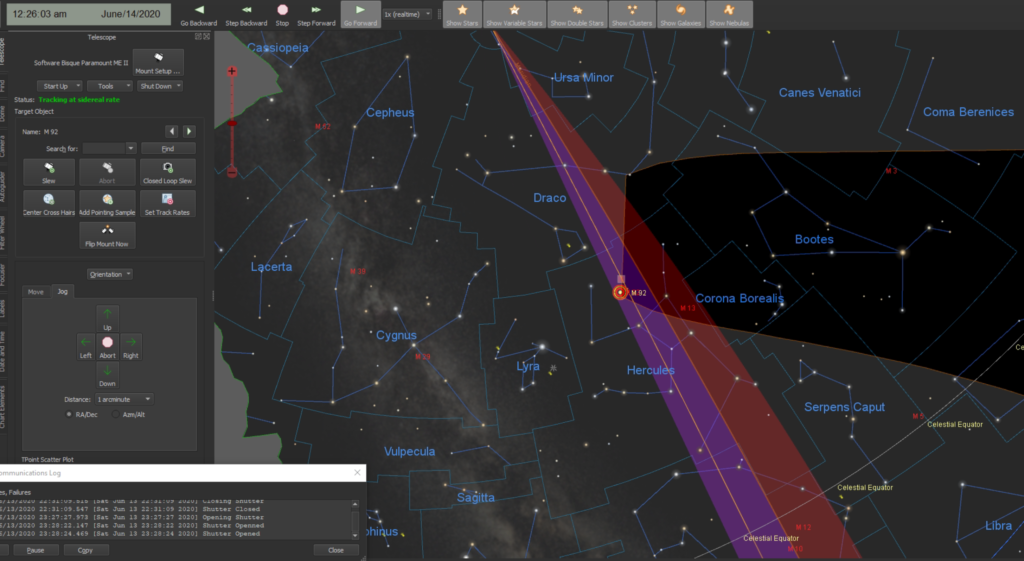
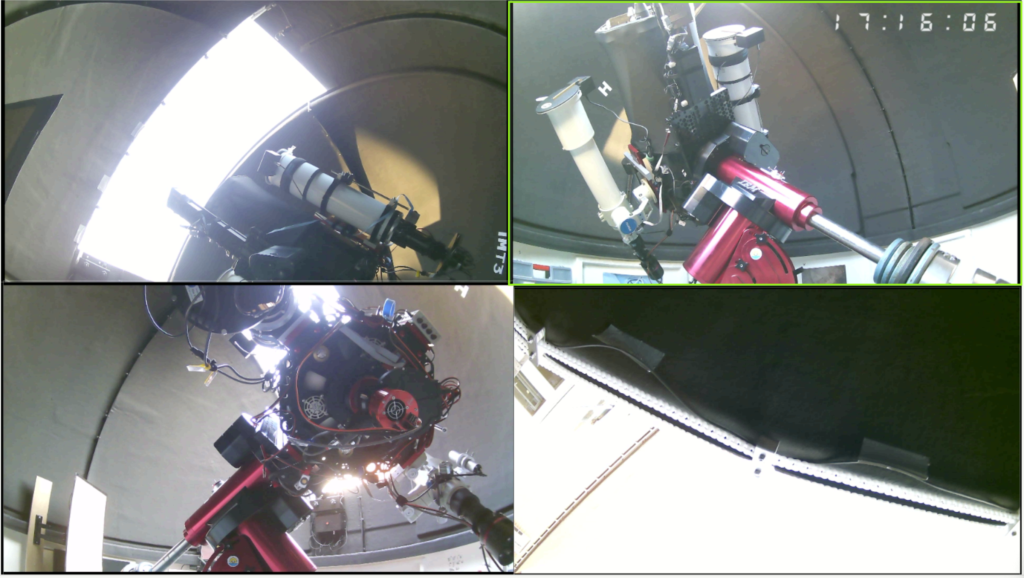
So I opened the dome late this evening as it was not due to be clear. However an opening in the cloud meant I could test guiding again on the 12″, especially whilst it was light in the late Spring weeks.
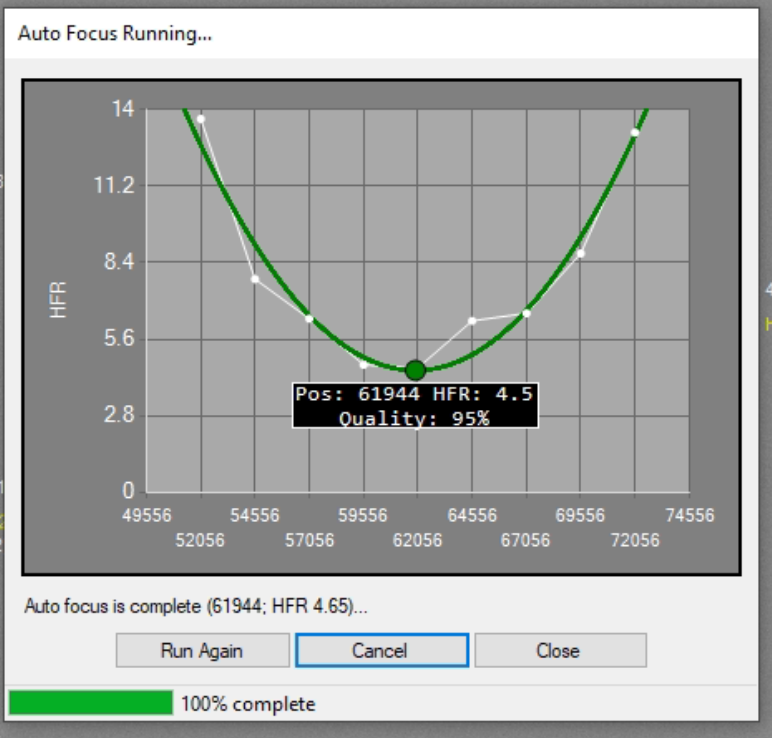
The first job was as always to focus which brought me to a reading of 61944 at 19.83℃.
Focus run
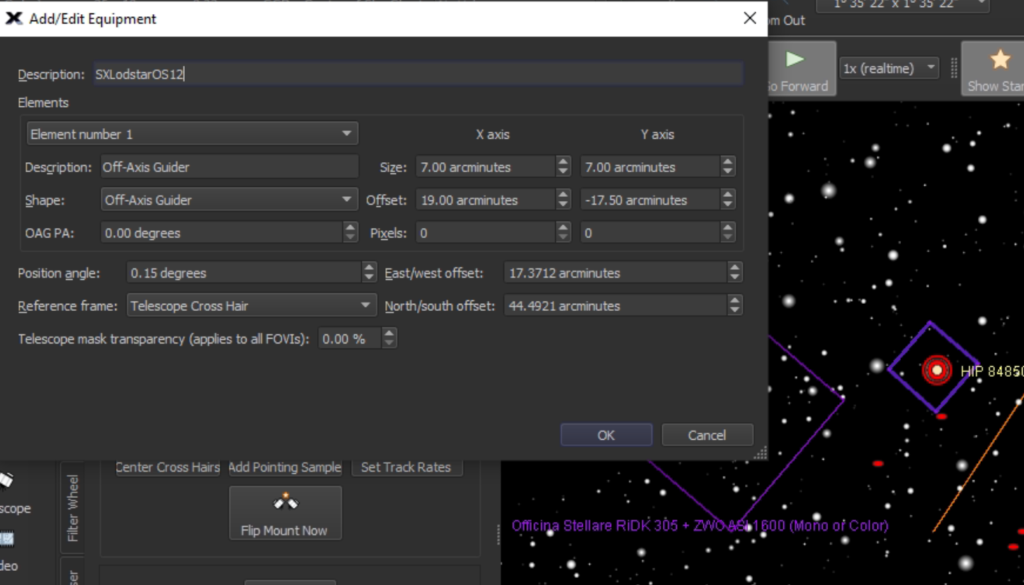
Another small job was to sort the guider FoV out. I went ahead and used M92 to align the guider.
Aligning guider FoV using M92
The final FoV settings are here for completness.
FoV for guider
Set AS1600 to Gain and Offset 10 due to cluster being very bright and I needed to set a standard of 60 seconds minimum exposure. Gain 139 and Offset 21 gas saturated unless I selected 15 seconds, Gain 75 and Offset 12 saturated at 30 seconds so hence 10 and 10 which came in about 58k ADU.
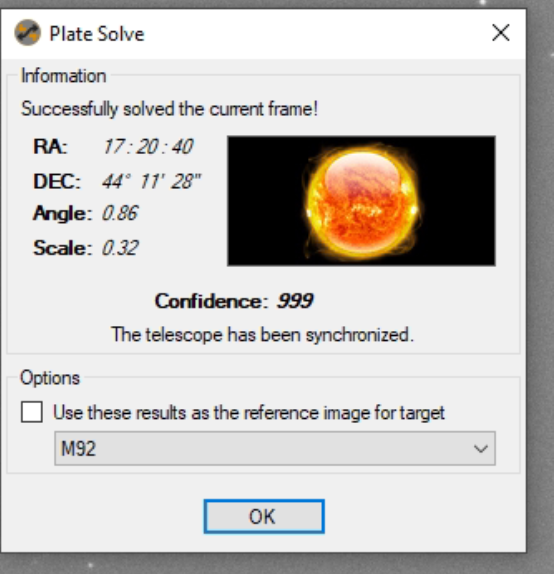
I then performed a slew to a nearby star so I could centre the scope, there platsolve completed successfully and I updated TSX and the FoV for the 12″ with the new angle.
Platesolve
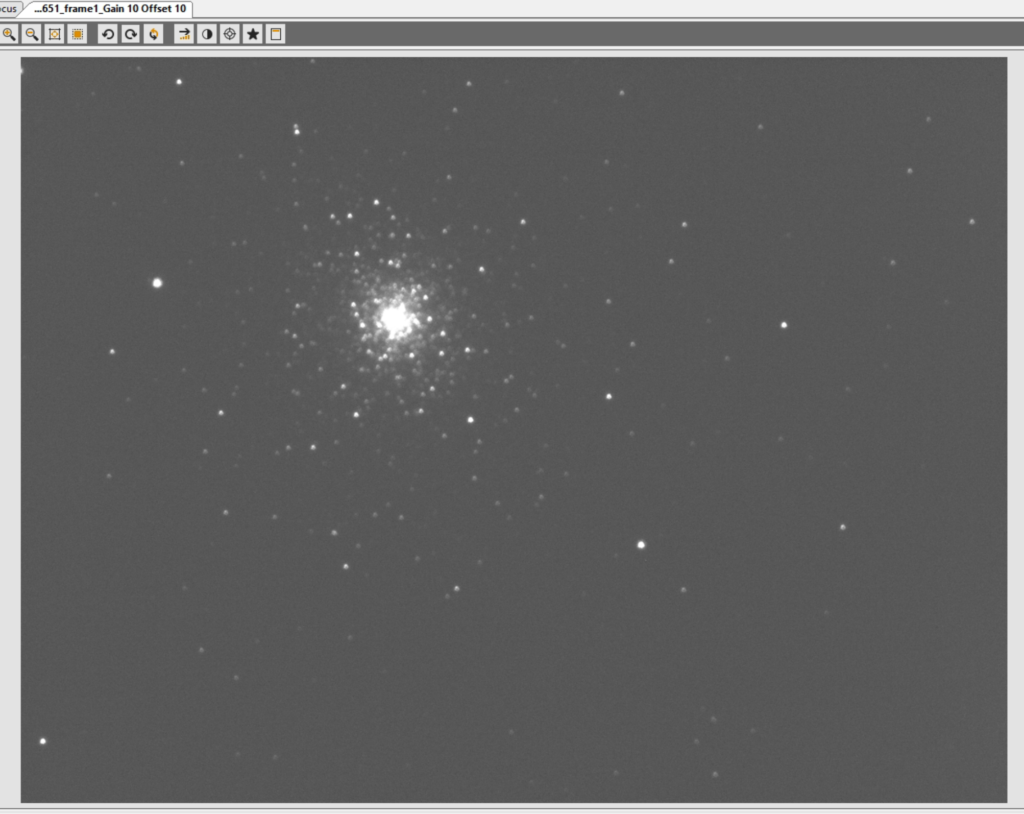
The first image of 60 seconds came down and was out of focus, I then realised changing the profile SGPro forgot the autofocus setting, so I had to stop the run, delete the images and set the original focus point then rerun.
M92 out of focusM92 in focus
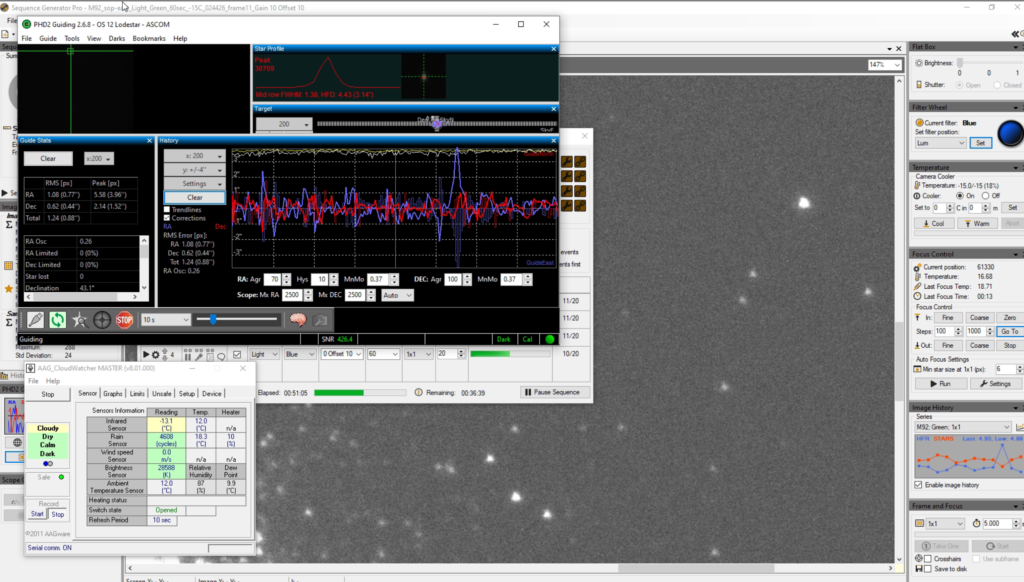
Next I ran a few images but then to my horror I had the same guiding issue, where the star moves being dragged up and down in a periodic way. I slewed elsewhere and tried again and the problem did not occur. I was near M92 and just East of the Meridian and quite high up. Not sure why that is a problem.
Near the Meridian
I could not resolve, I waited a while then performed a meridian flip and low and behold the problem went away, again not sure why. I still have this terrible noise coming from the RA motor/gear area. I decided to bite the bullet and take off various caps on the scope listening and looking inside. I decided it was not after all, the through the mount cabling but coming from the RA gear itself, so I looked for the MEII guide for removing the worm block and then followed the instructions to take off the RA cover.
RA gearing and belt noise
This gave me instant feedback on what the issue was, the belts driving the axis were making a noise. On looking through forums on Bisque.com I found a few people with similar issues and needing to grease the belts, they were told Lubriplate was a good grease. This is an American grease so I will find a similar here and then apply, I will ask Bob first for his suggestion.
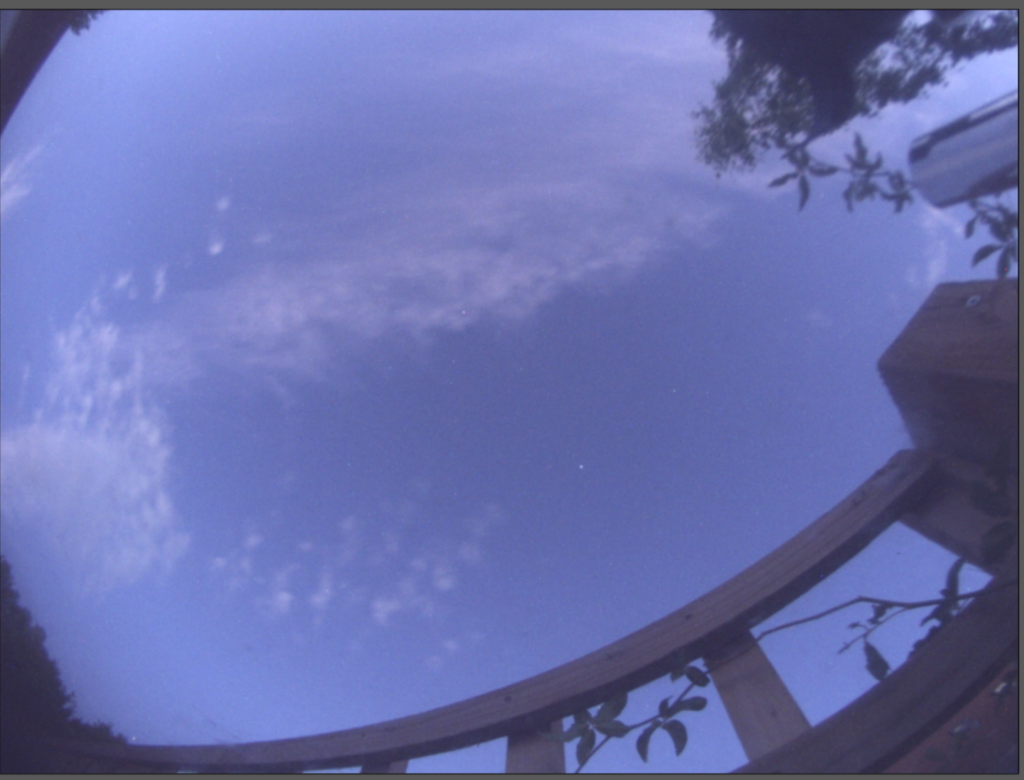
So the night wore on and the LRGB frames of M92 I thought I would take whilst testing guiding progressed. At one point the imaging stopped due to cloud. I just caught the dome before it closed to change the safety sensor due to cloud. When it cleared it never really cleared, with the sky temperature reading about -14℃.
Not very clear
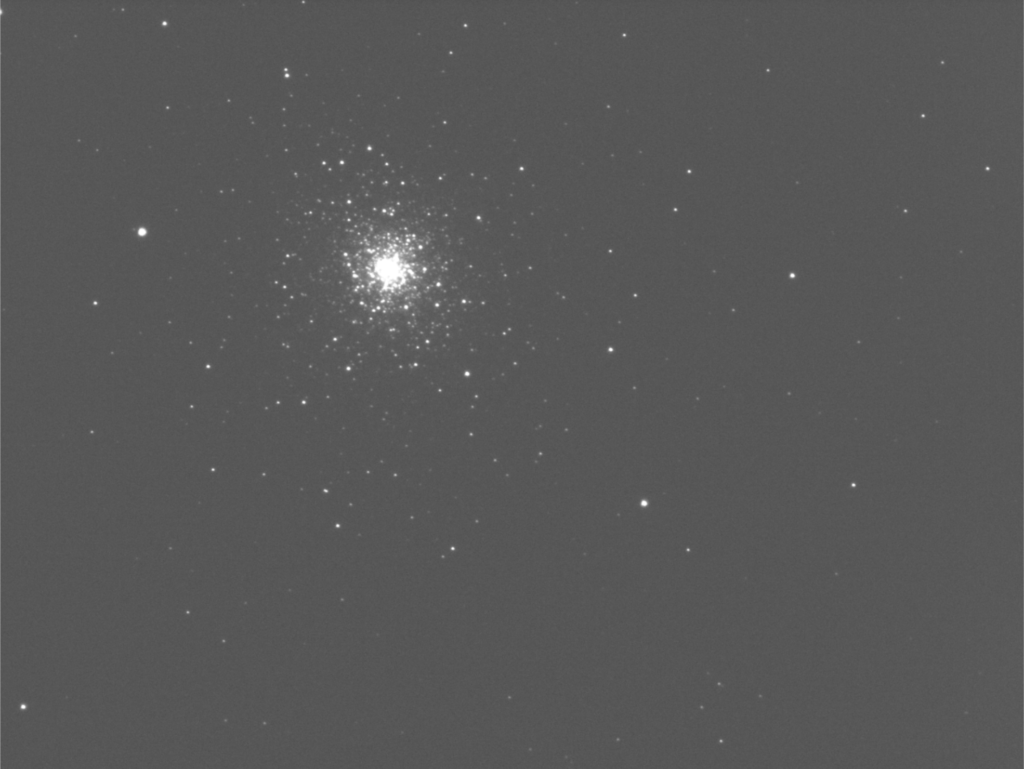
Nearing the end of the imaging session, I had caught about 15 frames of each of the filters.
Good guiding and imaging
The guider was behaving mostly with he odd funny jolt. By 3:30 am the sky was lightening very quickly.
3:30am and bright
By this time I had stopped guiding and imaging. I closed the dome, slewed the scope to the flat panel and proceeded to take a set of LRGB flats for Gain 10 Offset 0 and also Gain 139 and Offset 21 as request from the previous nights imaging.
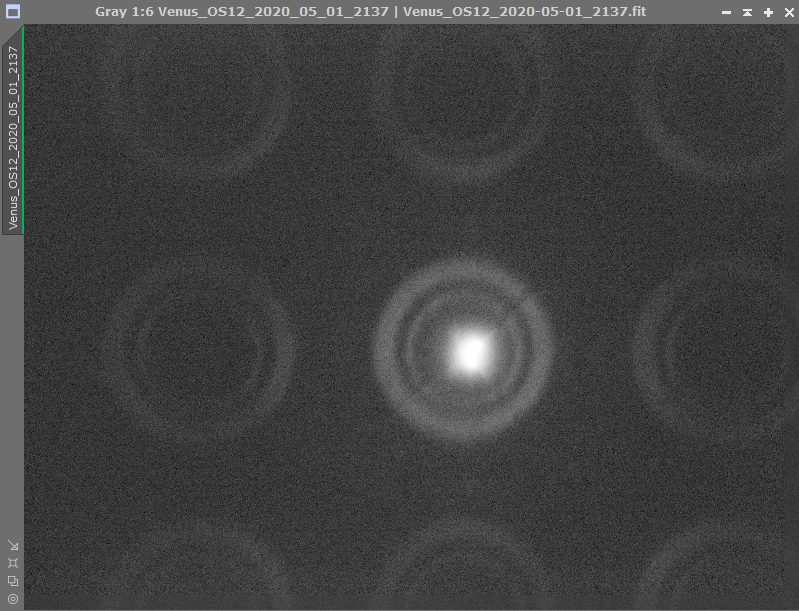
On opening the dome I slewed to Venus hoping to catch it before it disappeared below the horizon. I took a 1s Frame and Focus image just to confirm it was in the centre of the FoV and was puzzled by the resulting image.
At first I thought the 12″ was still covered so called Dave to check. He didn’t think the cover was in place as the last thing he’d done was to take some Flats. Dave confirmed that the cover was not in place but reported that I might be trying to view Venus through the trellis on the fence so I abandoned Venus and slewed to NGC3628 in Leo as it had just crossed the Meridian and I wanted to try and setup a profile to use my Tak FS-102 as a guide scope for Dave’s OS12″.
Previous attempts at guiding the OS with the QHY5 and MiniGuideScope combination had proved worse than imaging with the mount unguided.
Although I suspected we knew the root cause we hadn’t our research 🙁 which soon became apparent. I found a couple of rules of thumb, the first stated that ‘image scale in arc-seconds x 400 = max exposure time is seconds when guiding with a separate guide scope’.
For the ZWO ASI1600MM (3.8um pixel size) on the OS 12″ (2500mm fl)
((3.8/2500) x 206.265) x 400 = 125s
We can do better than that unguided.
The second ‘rule of thumb’ I found stated that the ‘Guide to Main train pixel ratio should not exceed 10:1.
Unfortunately the QHY5 MiniGuideScope to OS12″ ratio is close to 17.8:1, not good.
The QHY5 + MiniGuideScope scale is (3.75/130) x 206.265 = 5.95 arc-sec / pixel.
The OS 12″ + ZWO ASI1600MM scale is (3.8/2500) x 206.265 = 0.31 arc-sec/pixel.
The Tak FS-102 with the QHY168C scale is (3.75/820) x 206.265 = 0.94 arc-sec/pixel
So if we try the OS 12″ with the Tak as the guide scope the ratio is closer to 2.8:1 which sounds like a better proposition.
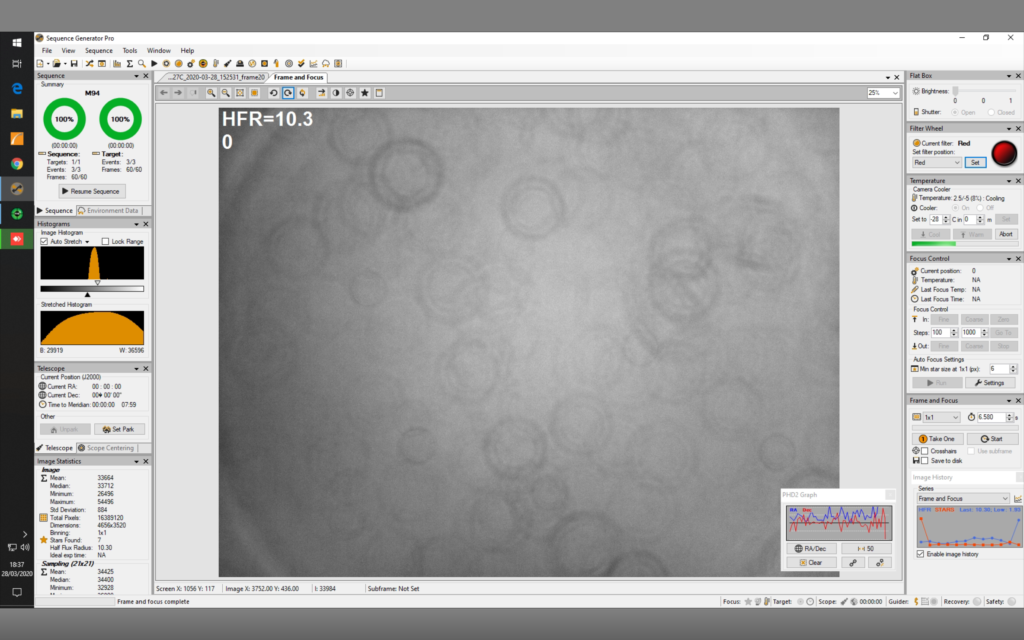
M94 and NGC 3395/3396 are the 2 targets for tonight, some luminance on M94 and RGB on NGC 3395/3396 if I get enough time. I always try to open the dome early to give at least 2-4 hours cooling before I use.
View from the bridge
When I was about to start with autofocus I tried to recenter back on the target but the mount respond and it transpired that the mount thought it was out of balance. I went to the dome and the mount was beeping proving it was out of balance. So I turned the mount off, manually moved the scopes pack to the park position and then turned the mount back on and all was well.
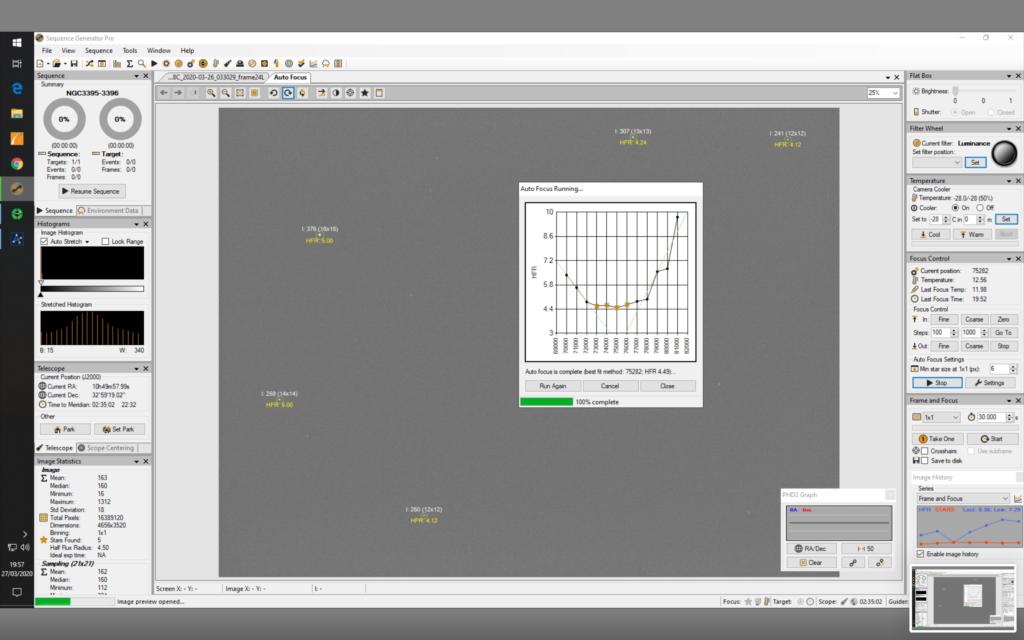
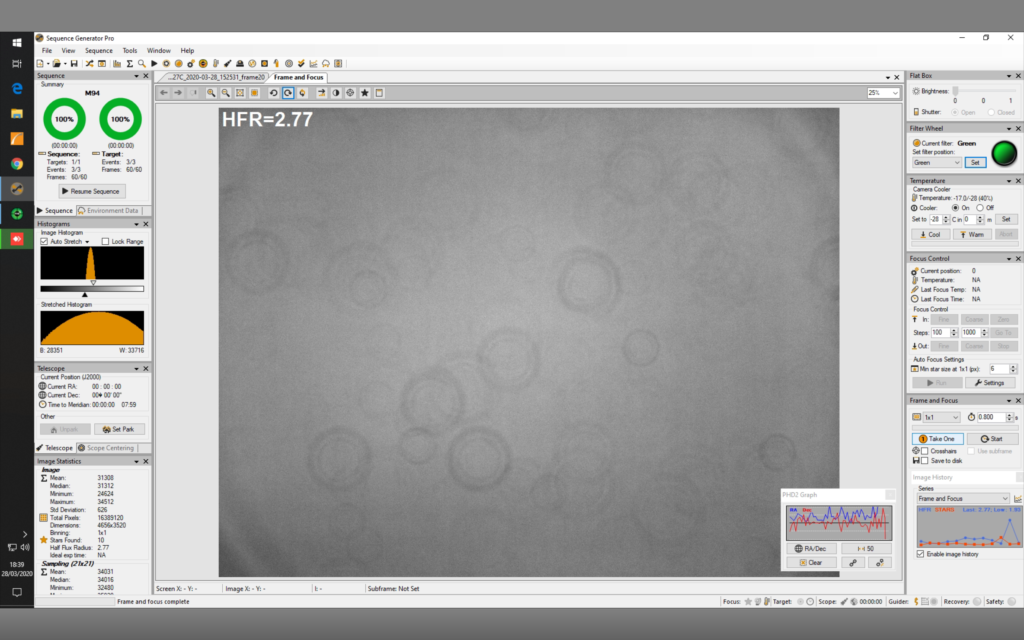
@19:57 I performed the autofocus for the night on Luminance which scammer in at a position of 75282 on the focuser.
1st AutoFocus run
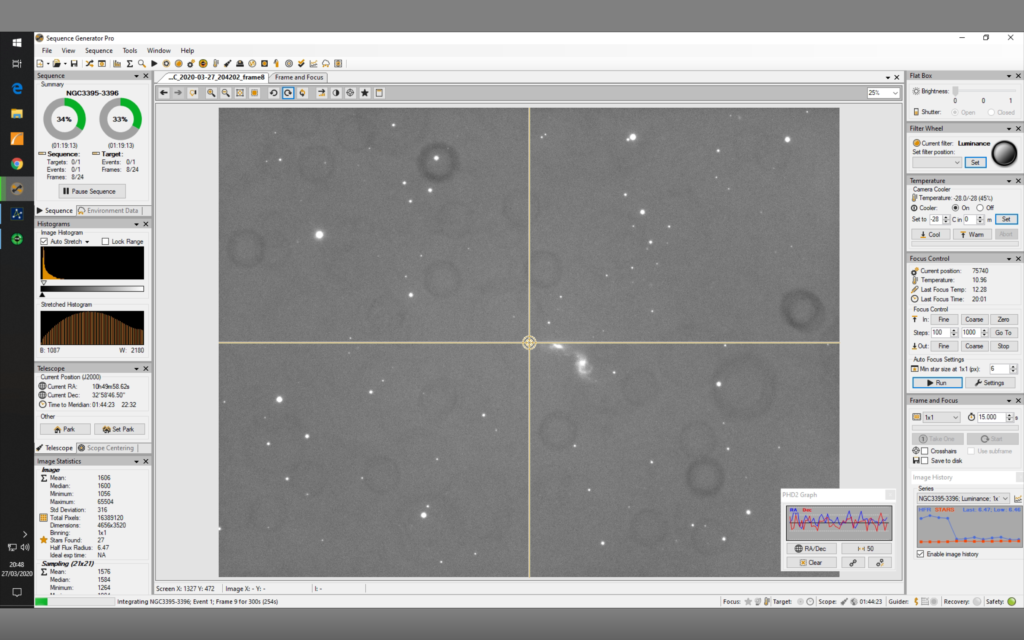
@20:10 I started an imaging run of 24 x NGC 3395/3396 with Luminance filter. Once done I planned on grabbing RGB frames before moving on to M94.
NGC 3395/3396 Luminance
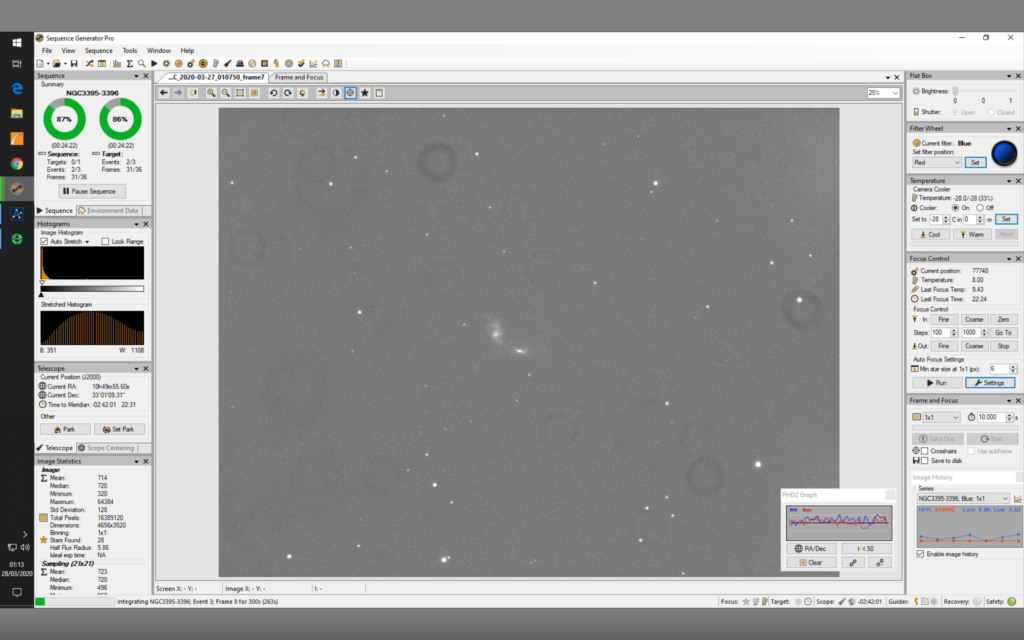
@22:32 I started on the RGB frames for NGC 3395/3396 after refocusing on the Red filter.
Single Blue frame for NGC 3395/3396
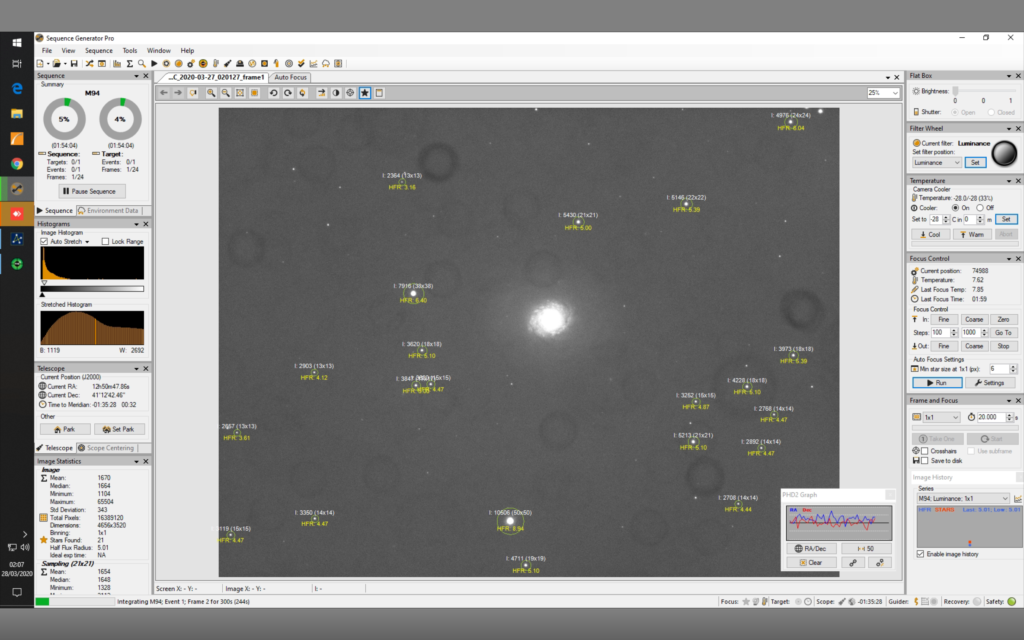
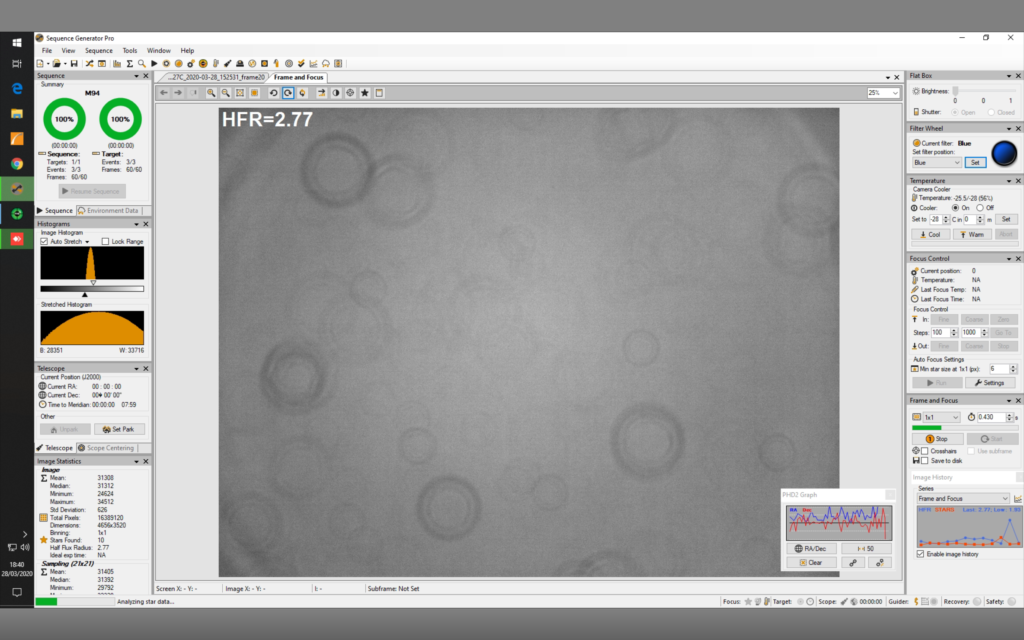
@1:40 I slewed to M94 and changed the filter to Luminance. I performed a refocus and shifted from 77895 to 75884 on Red filter by accident. So we (I had Bob on Zoom by this point) refocused on the Luminance and the new focus position was 74884. So the difference is 1000 for Luminance to Red. I also changed the step size for the focuser temperature compensation from 531 to 431 to see if the HFR is more stable.
A new autofocus on Luminance
I noticed tonight that PHD2 lost the Use Direct Guide check mark twice and thus complained about pulse guide not being supported. I had to stop guiding, disconnect the mount in PHD2 and go into the settings, check the Use Direct Guide and reconnect the mount and start guiding again. Something to look into possibly.
Quick frame and focus 20s of M94 Luminance
@02:07 I went to bed and left the scope gathering another 2 hours of Luminance data on M94.
Addendum …….
The following day I took the ZWO ASI1600MM CMOS Camera off the back of the 12″ and cleaned the sensor window. What I found was the dark dust doughnuts disappeared and the rest for the doughnuts were actually on the filters.
Before cleaning Flat from Luminance on ASI1600MMFlat from Red after cleaning sensor windowFlat from Green after cleaning sensor windowFlat from Blue after cleaning sensor window
Things to still resolve……..
Check out why WSX is loosing connection and shutting the dome
Fix Slew Here and Centre Here in SGPro that does not work
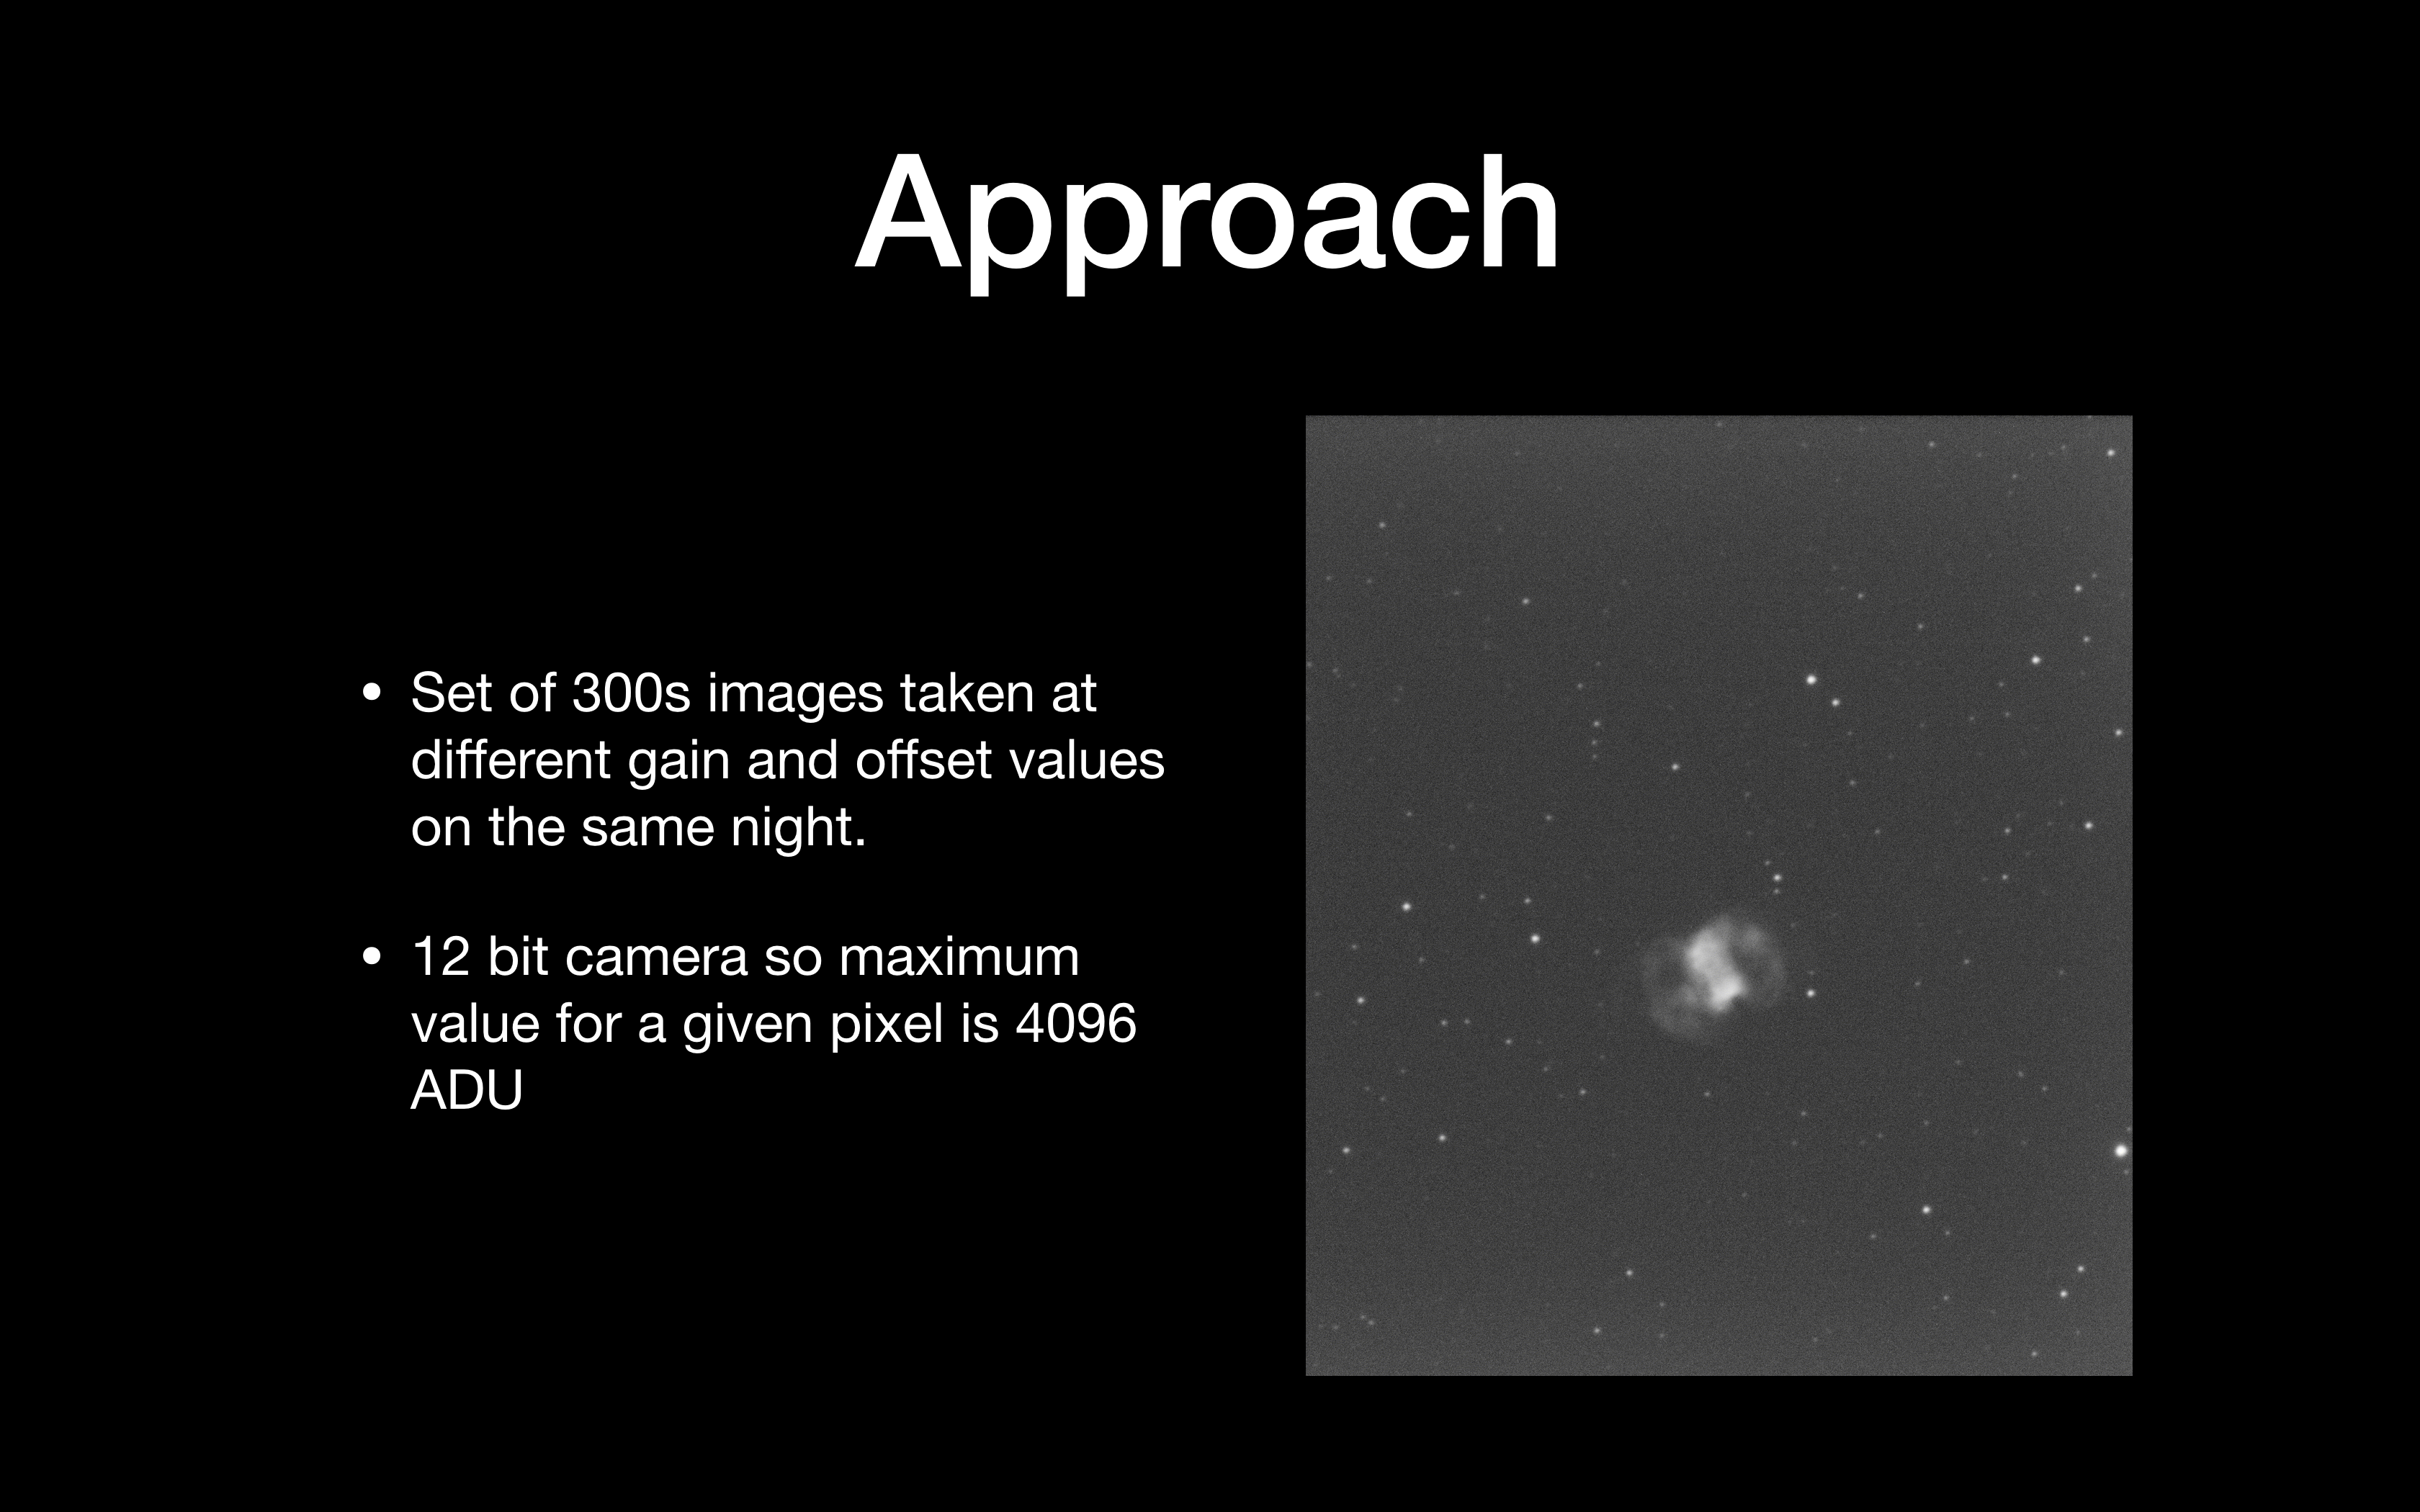
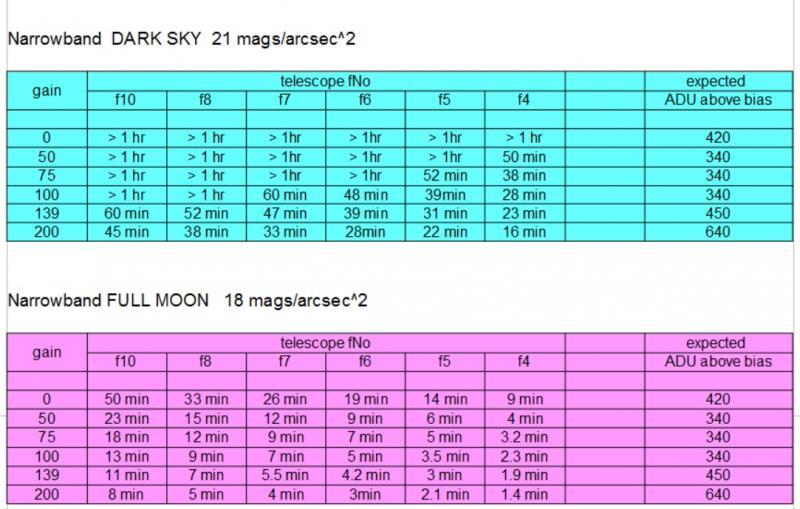
So the main approach here was to start testing the ZWO ASI1600mm on 5min images and decide which is the best Gain and Offset to use. As the object is a planetary nebula I have used my Astrodon 5nm OIII filter to bring out the faintest parts of the nebula. To be thorough, and this will take time, I plan on running the tests for all 7 filters I have.
I have done extensive reading on the topic of image analysis and hope to apply here what I have learnt. Given then camera is running 12 bit, I have a maximum pixel value of 4096 which represents saturation and then any further response is non-linear. Once I have completed 5min testing I will try for 10, 15 and 20 mins. I will then perform further testing by taking a sample set of 10 images to stack and see how that compares with similar total exposure times across the frames.
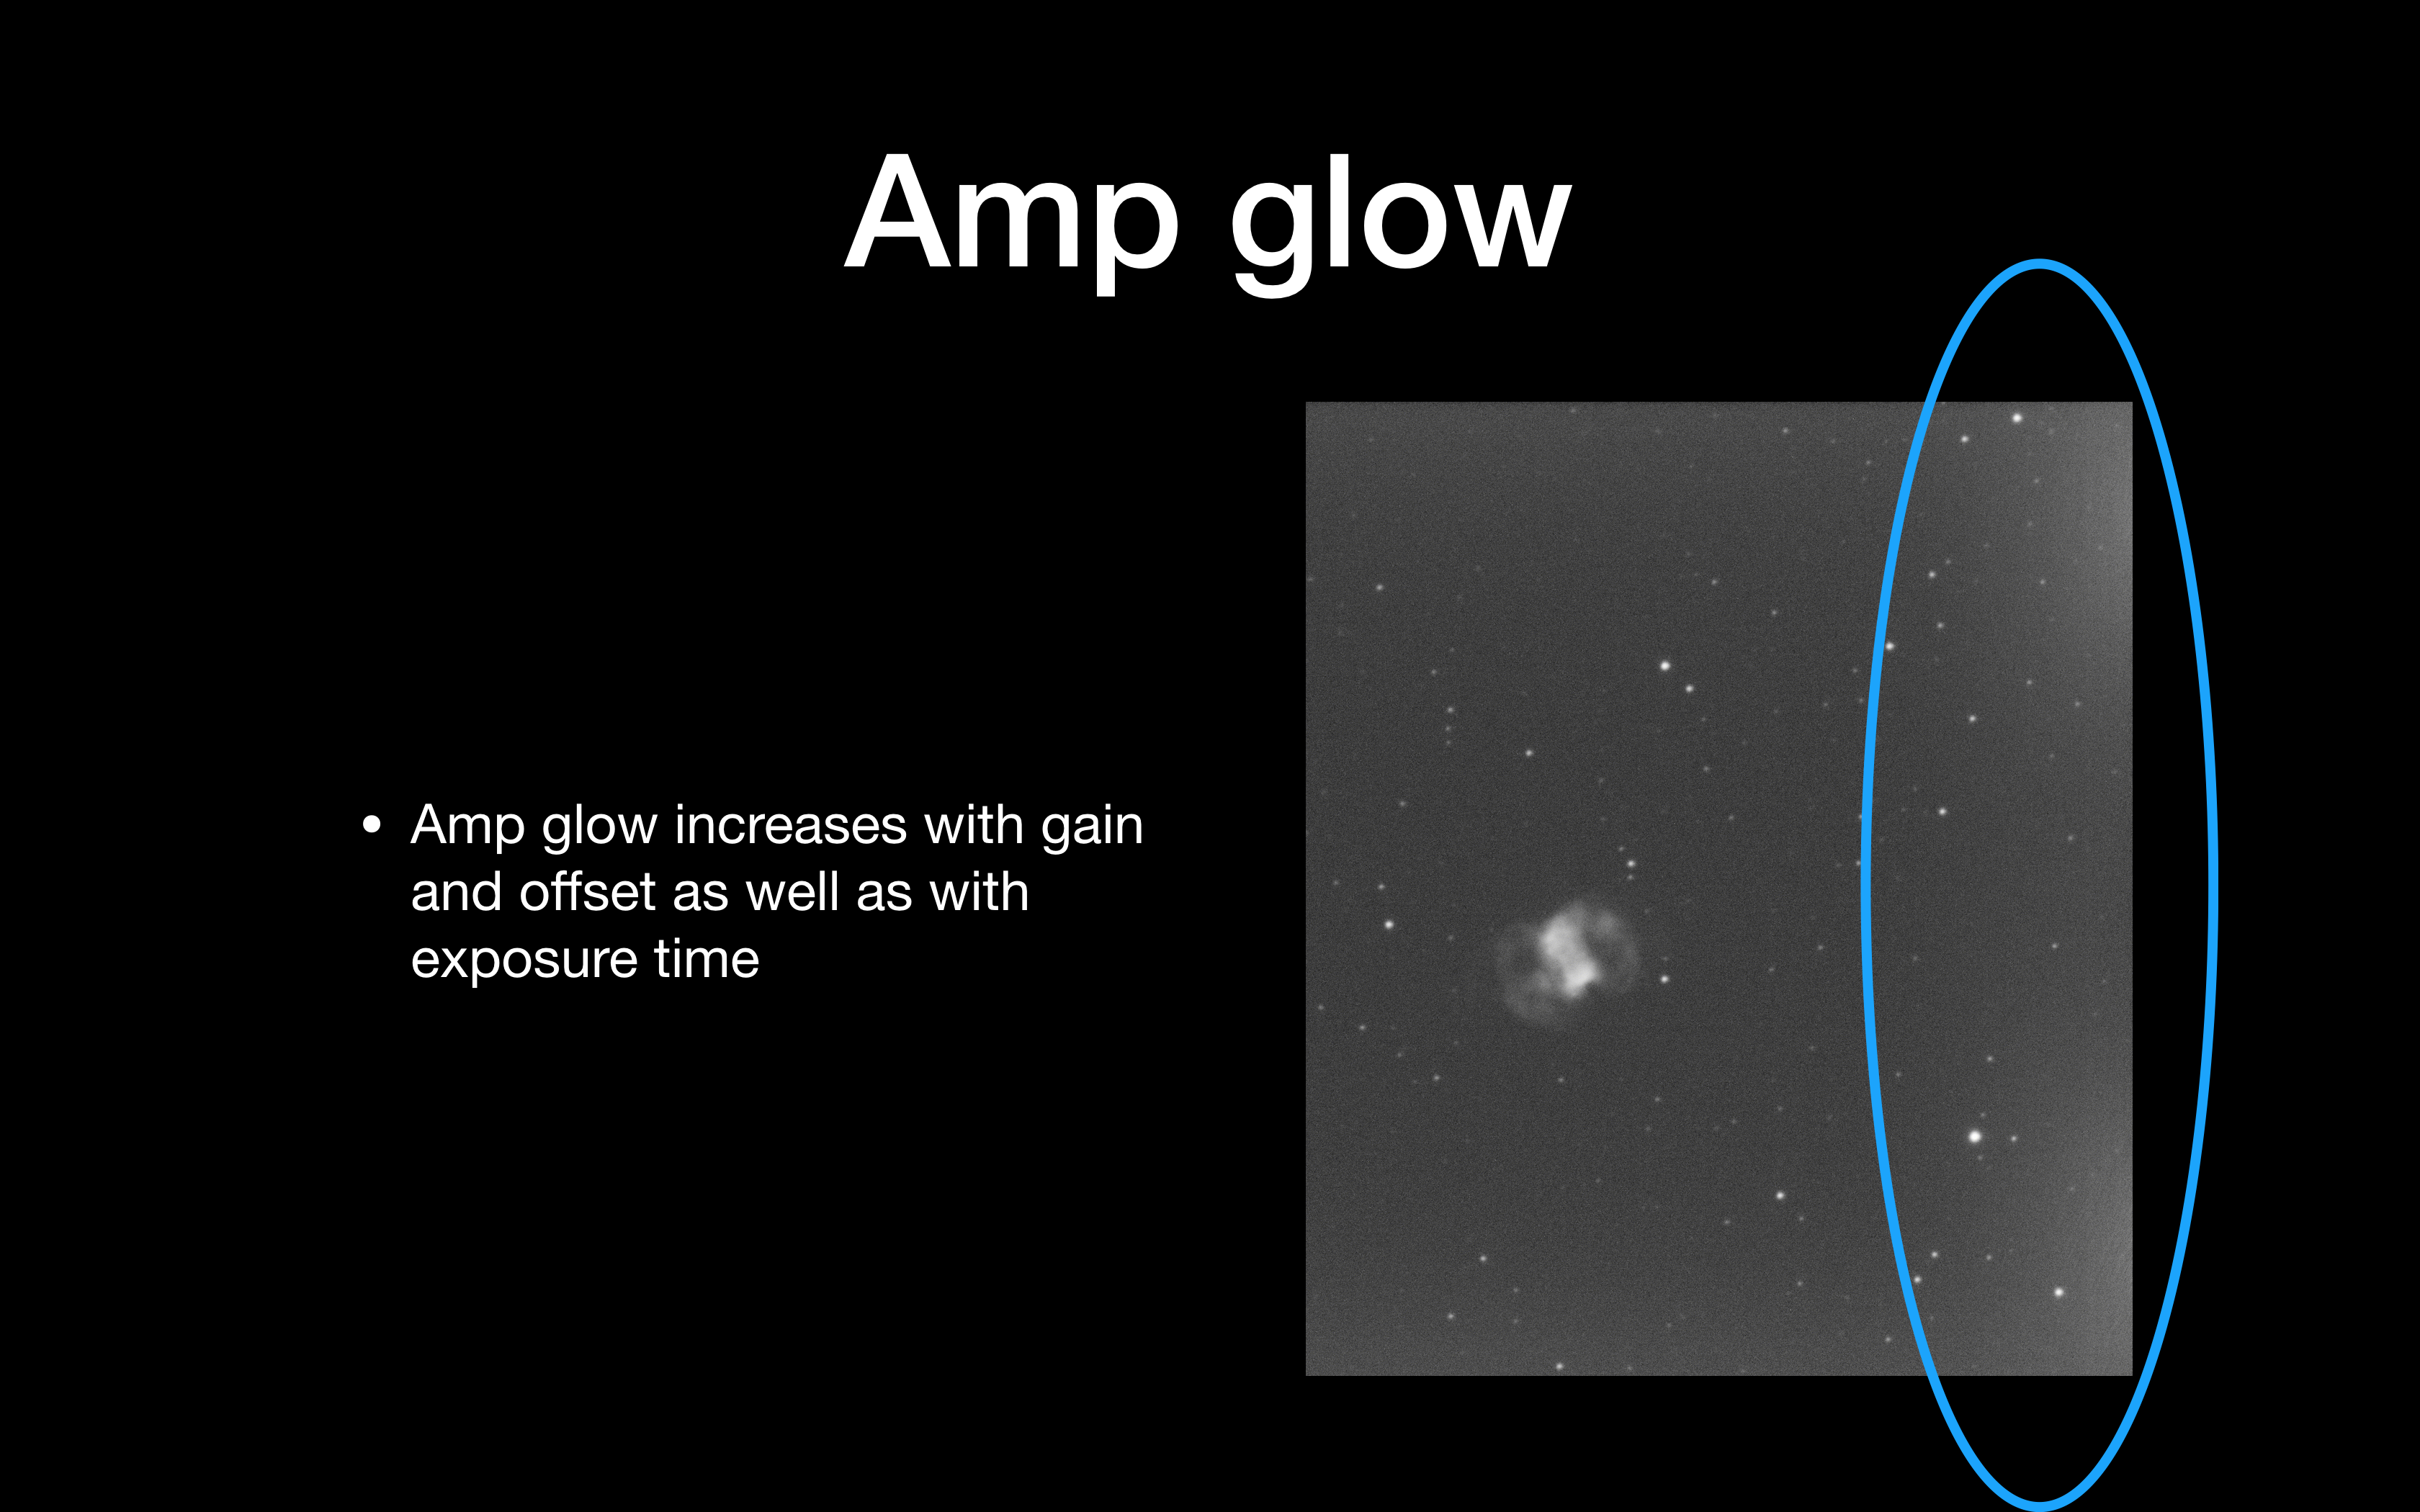
Amp glow is a particular problem with CMOS. Despite the ZWO site suggesting that amp glow is virtually removed in the Pro Cooled camera, it is clearly not, as can be seen in single 5 min subs. The good thing is a dark will remove it effectively. What I need to make sure is that the amount glow does not swamp the image so much that it overpowers the signal from the faint nebula.
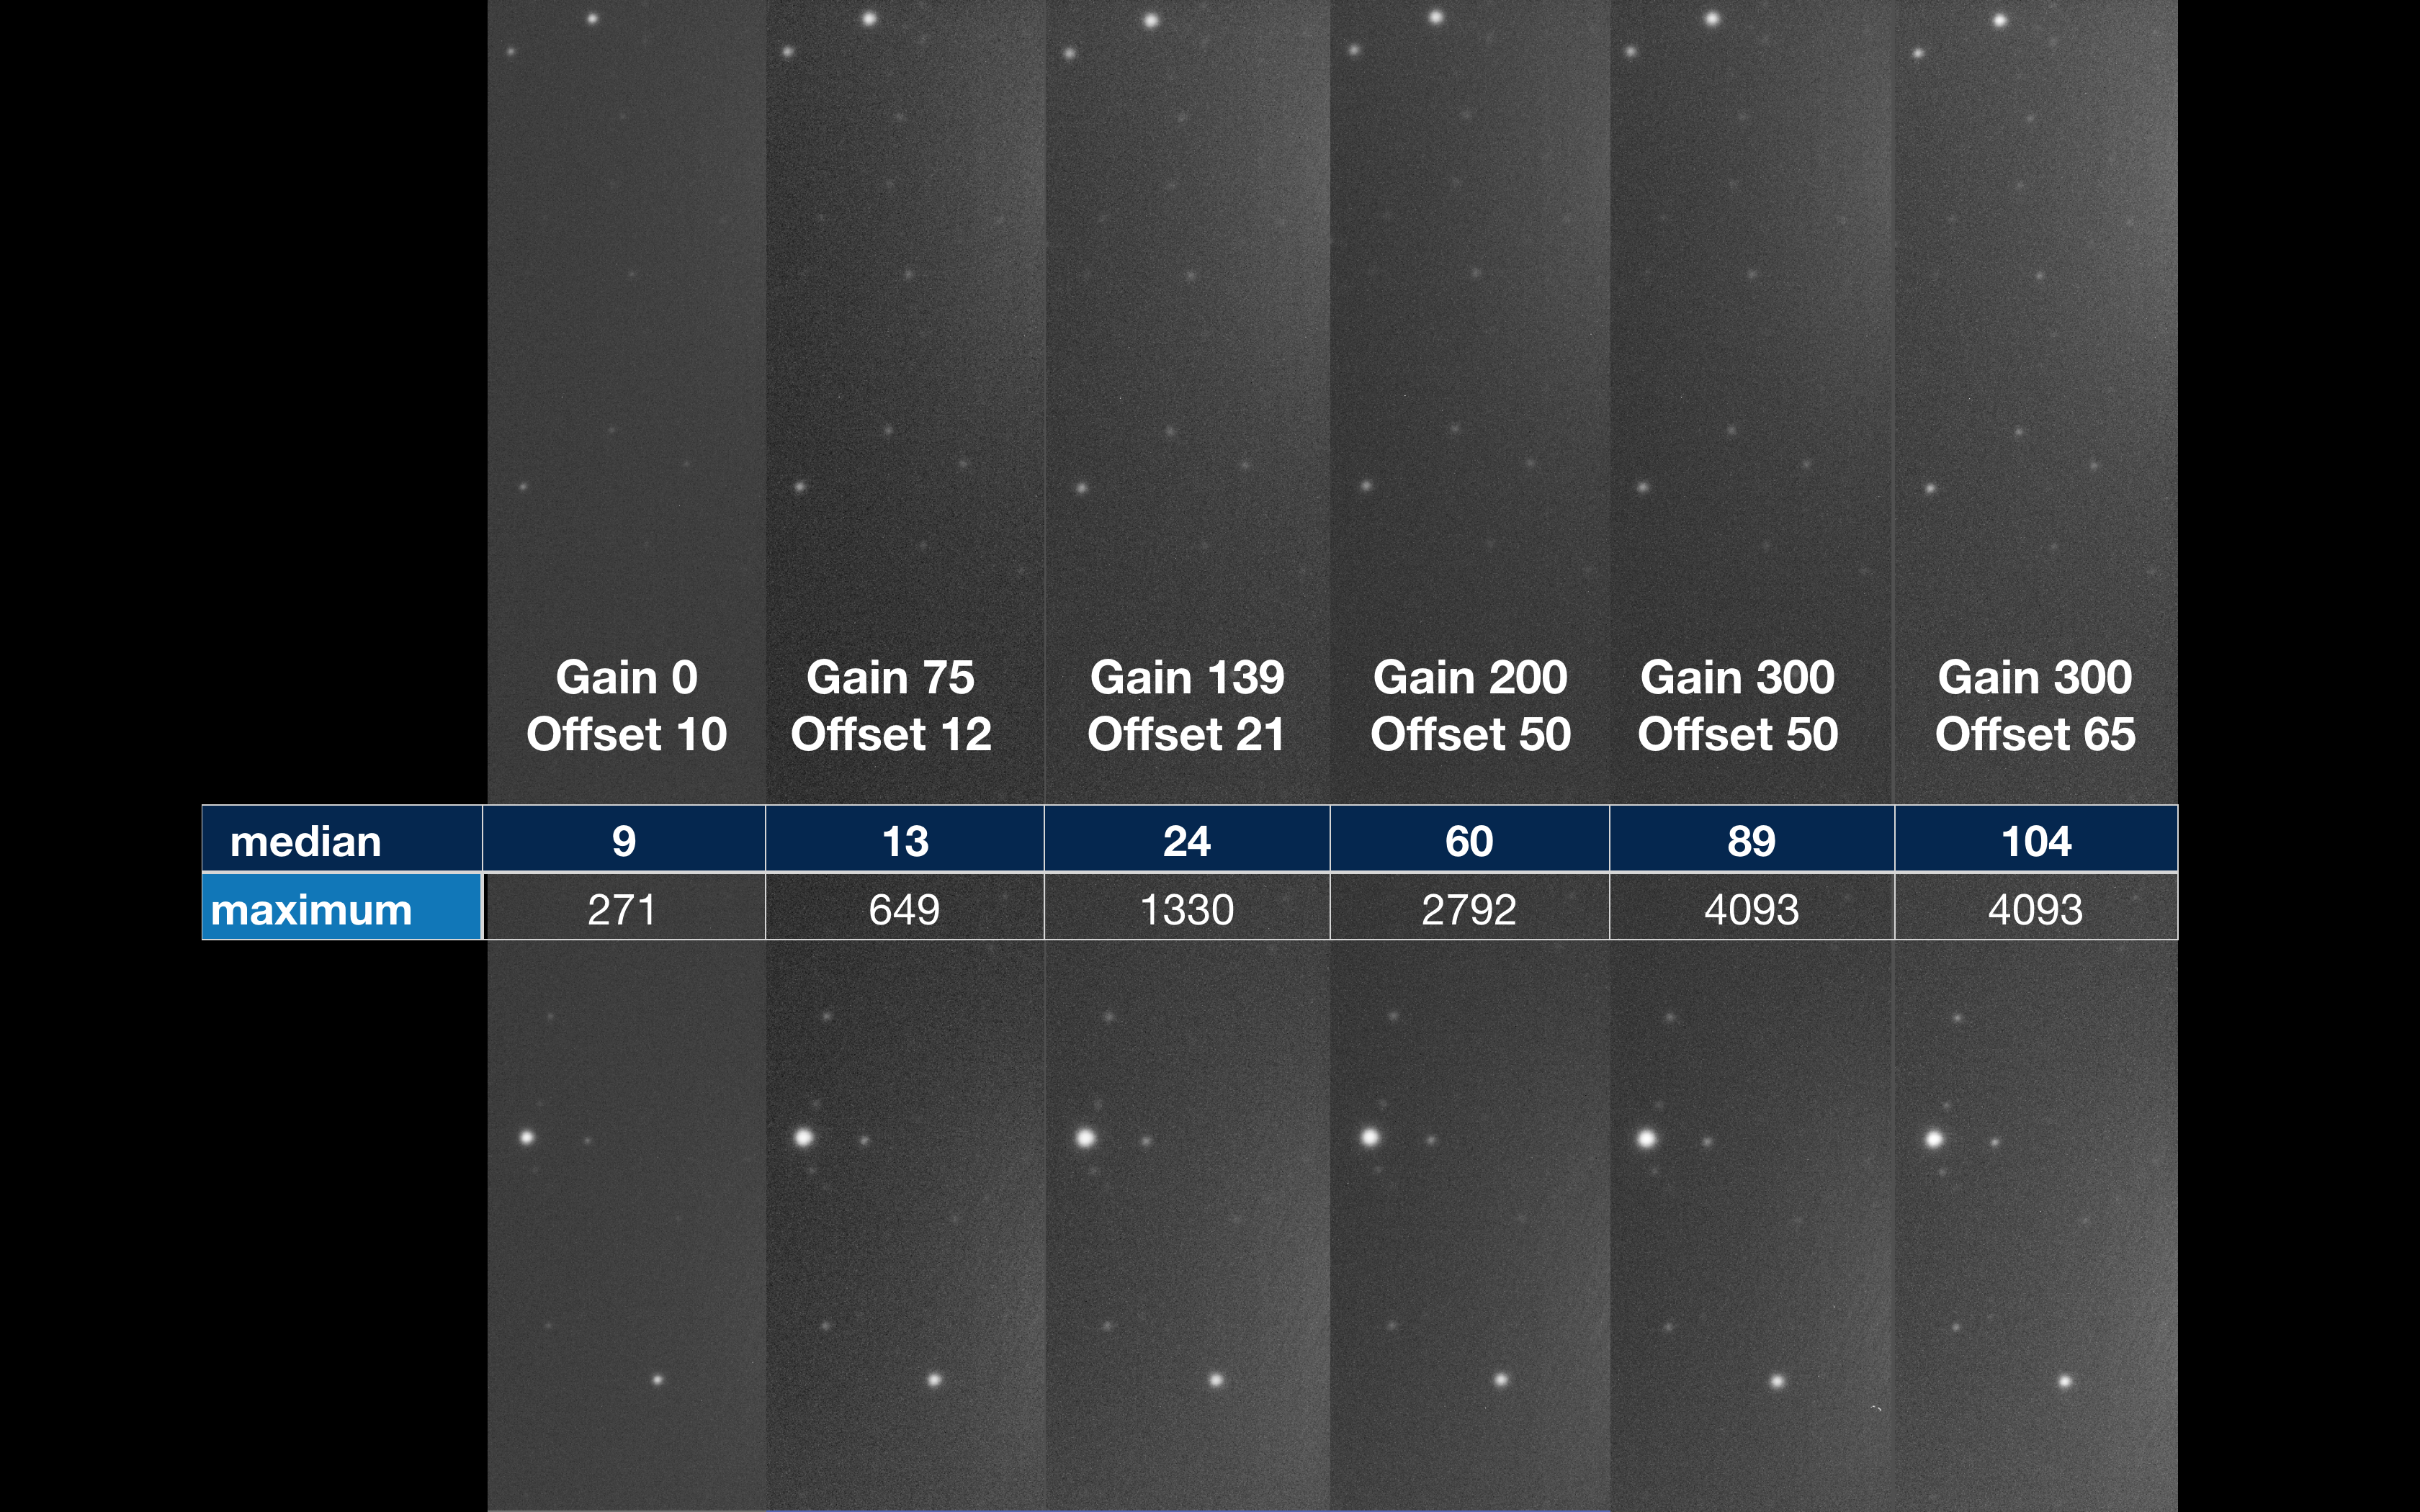
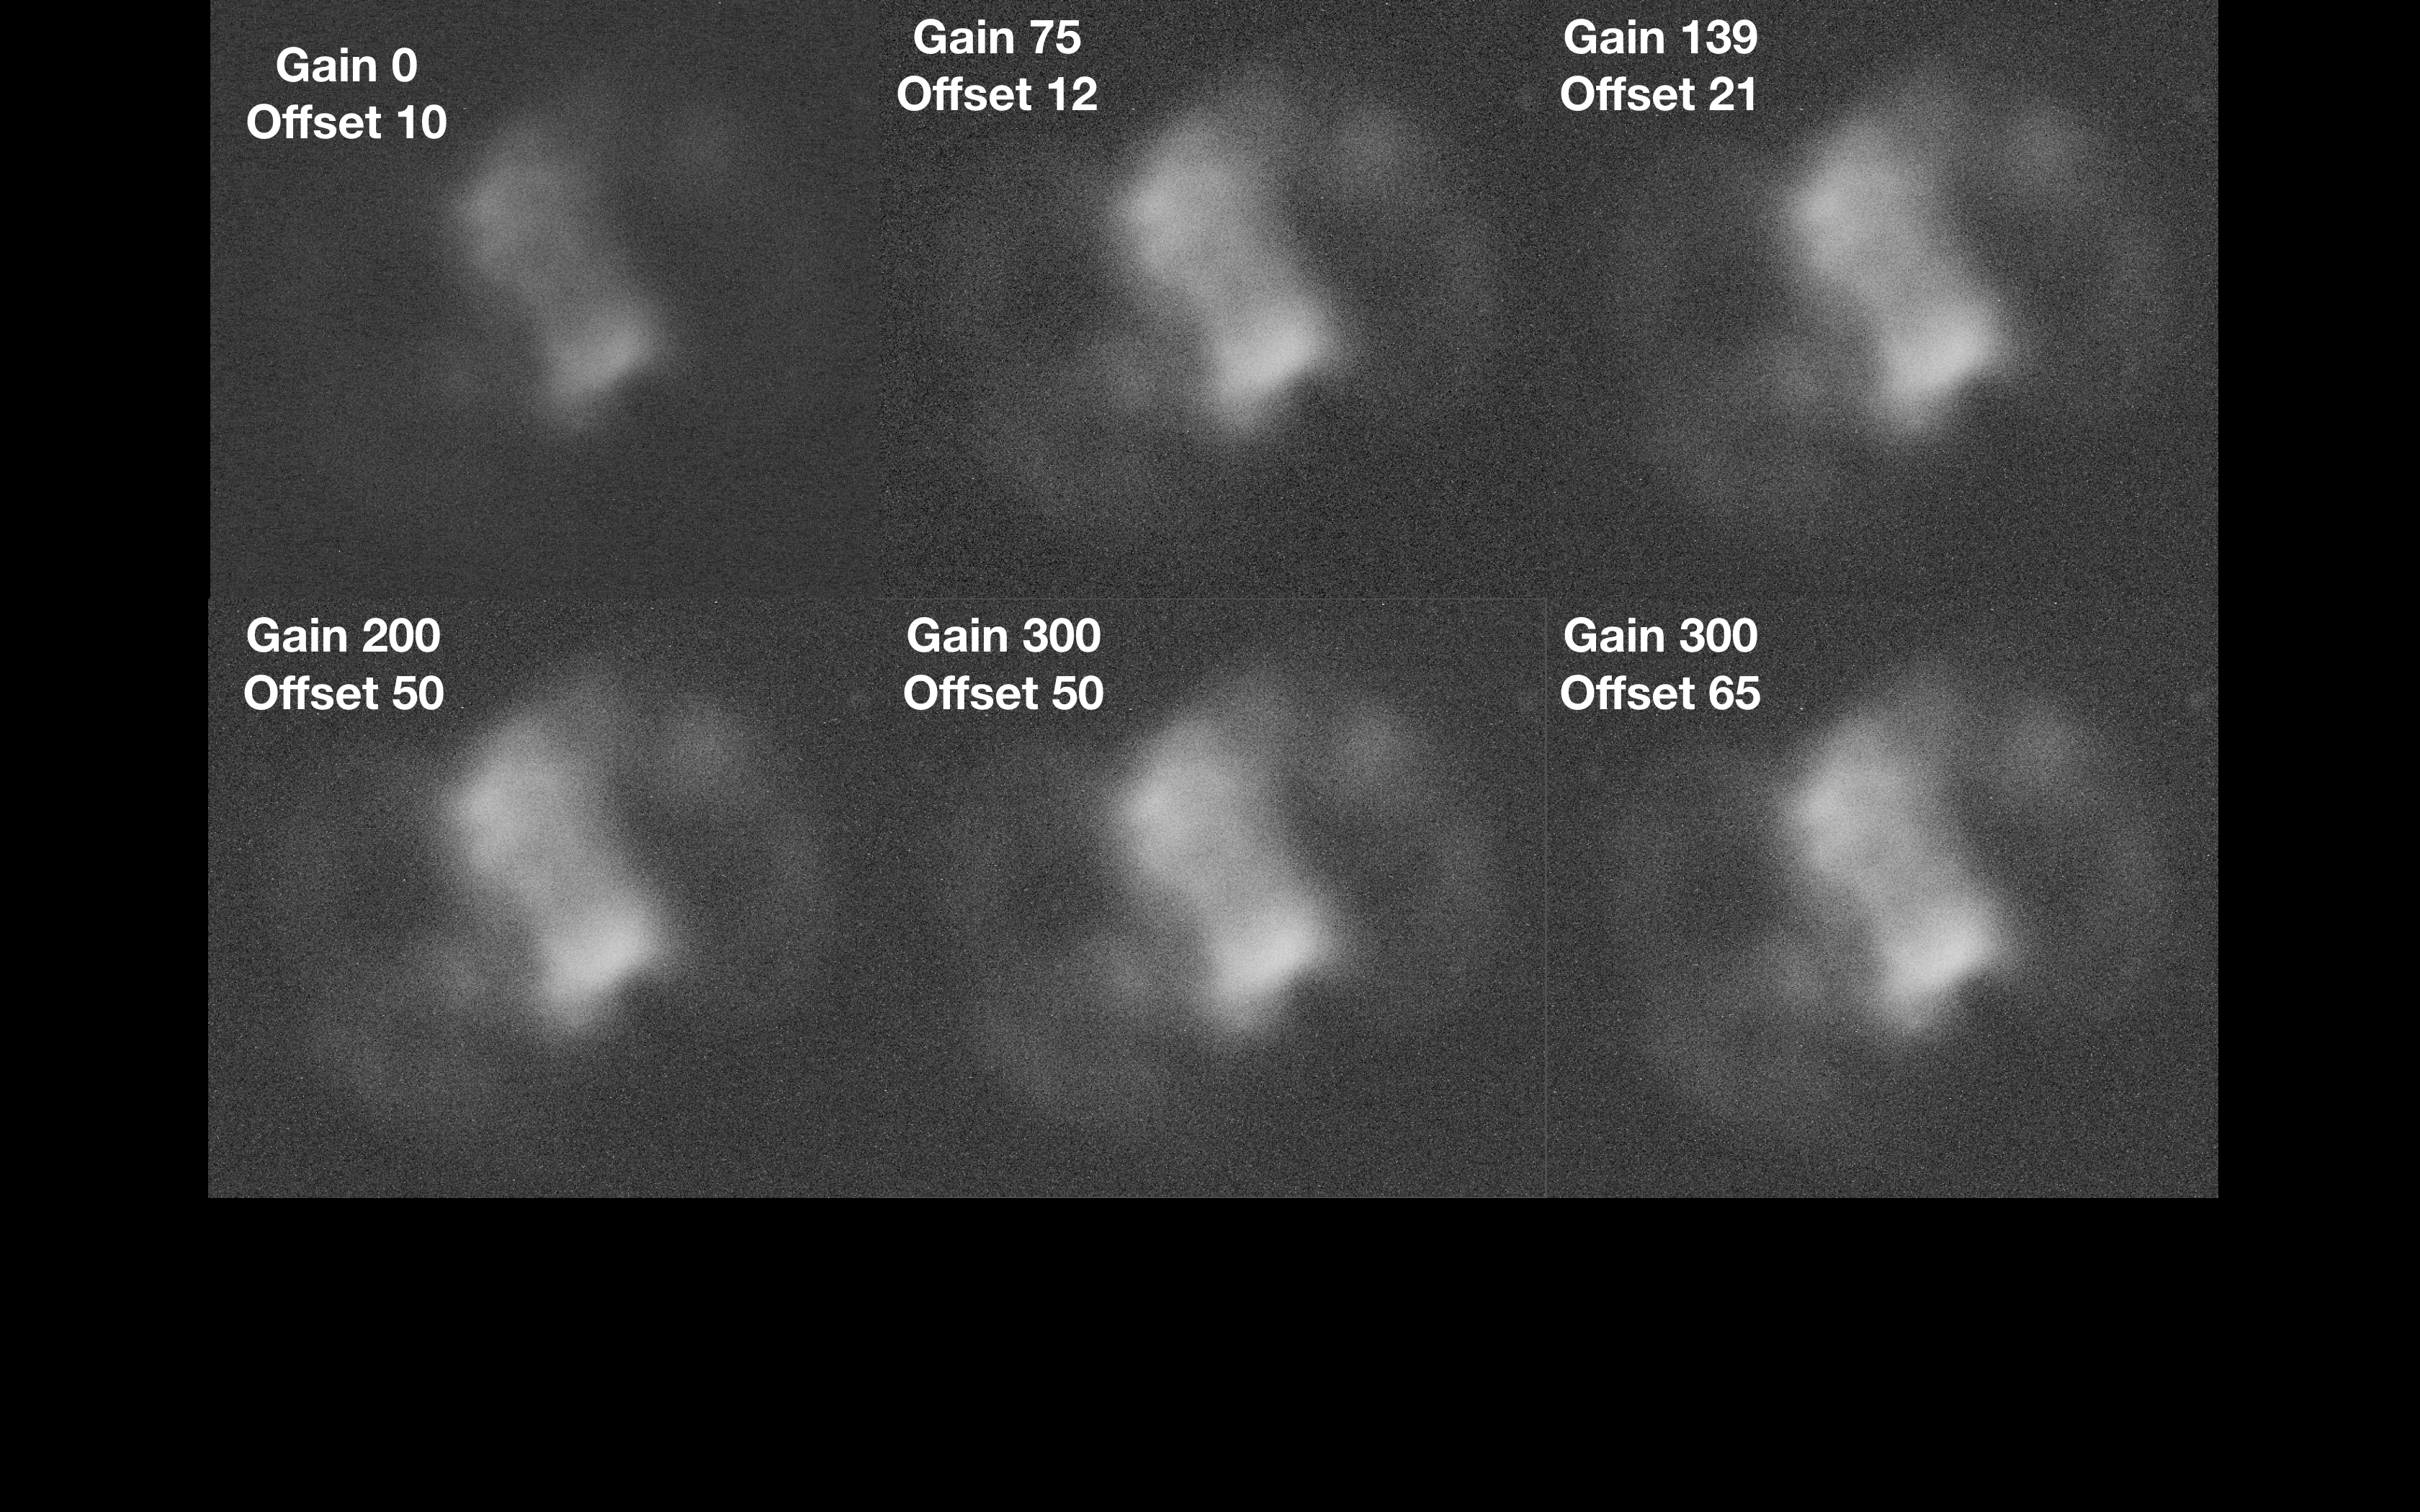
Increasing the gain and offset value from left to right you can see a marked increase in the amp glow. The image slices below are taken from the far right of each frame.
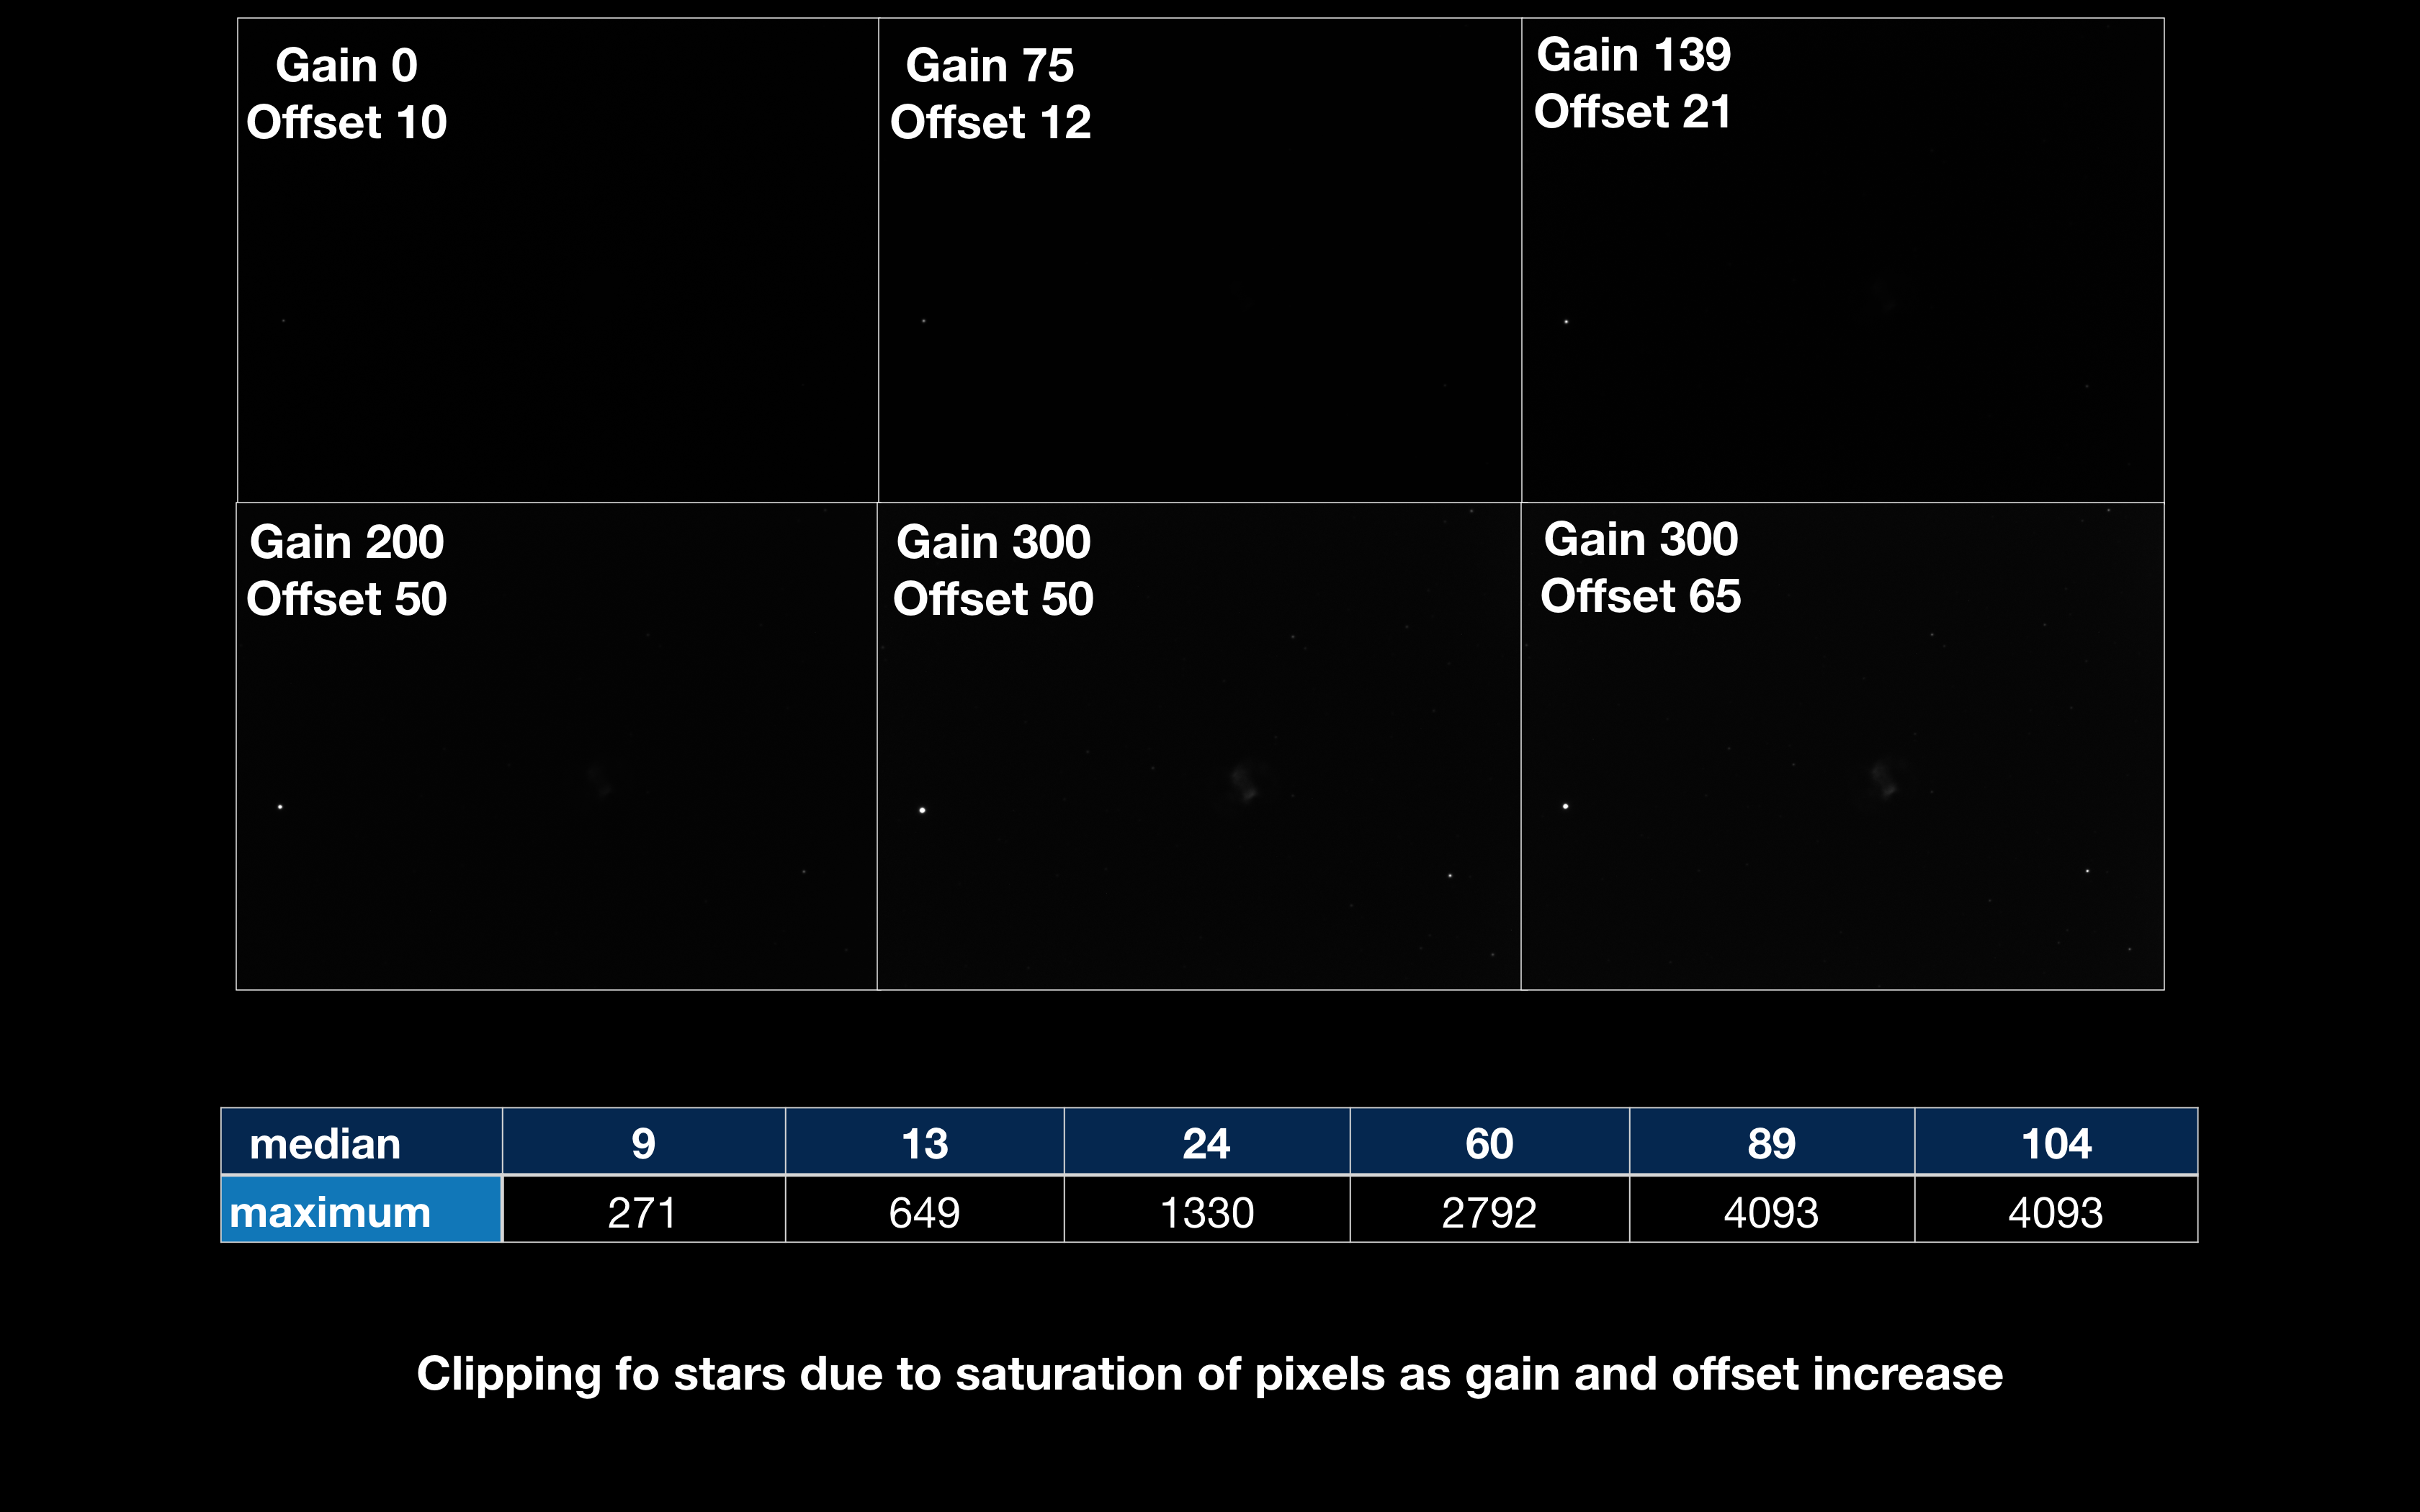
The offset figures in relation to the gain figures have been taken from my reading of various material. The median values are that of the background and the maximum values that of the stars. You can see on this 5min exposure that by the time I reached a gain of 300 one or more of the stars are saturated. In fact the brightest star in this slice is SAO 22510 which is mag 9.53.
Another way to visualise the saturation effect is looking at the raw unstretched image, whilst a star is visible in the image using gain 139 and 200, on close inspection within PI and looking at the values of the pixels of the star they are not saturated. However gain 300 is. The purpose of this is that an unstretched image is not the defect for telling if parts of the image are saturated as some texts describe, but one can see the increased brightening of the star by gain 300 to know it is a problem.
So whilst I have seen the clipping a a few stars at the highest gain I have tested, what about the planetary nebula itself? From the below stretched image one could assume that the brightest part of the nebula was fairly bright and heading towards saturation, but don’t be fooled! Also there is a noticeable increase in the background brightness as the gain increases.
Again as for the amp glow, the aim is to balance the ability to amplify the faintest parts of the nebula without swamping them with the background brightness.
Again here are the values of the settings for gain and offset against the central section of the image.
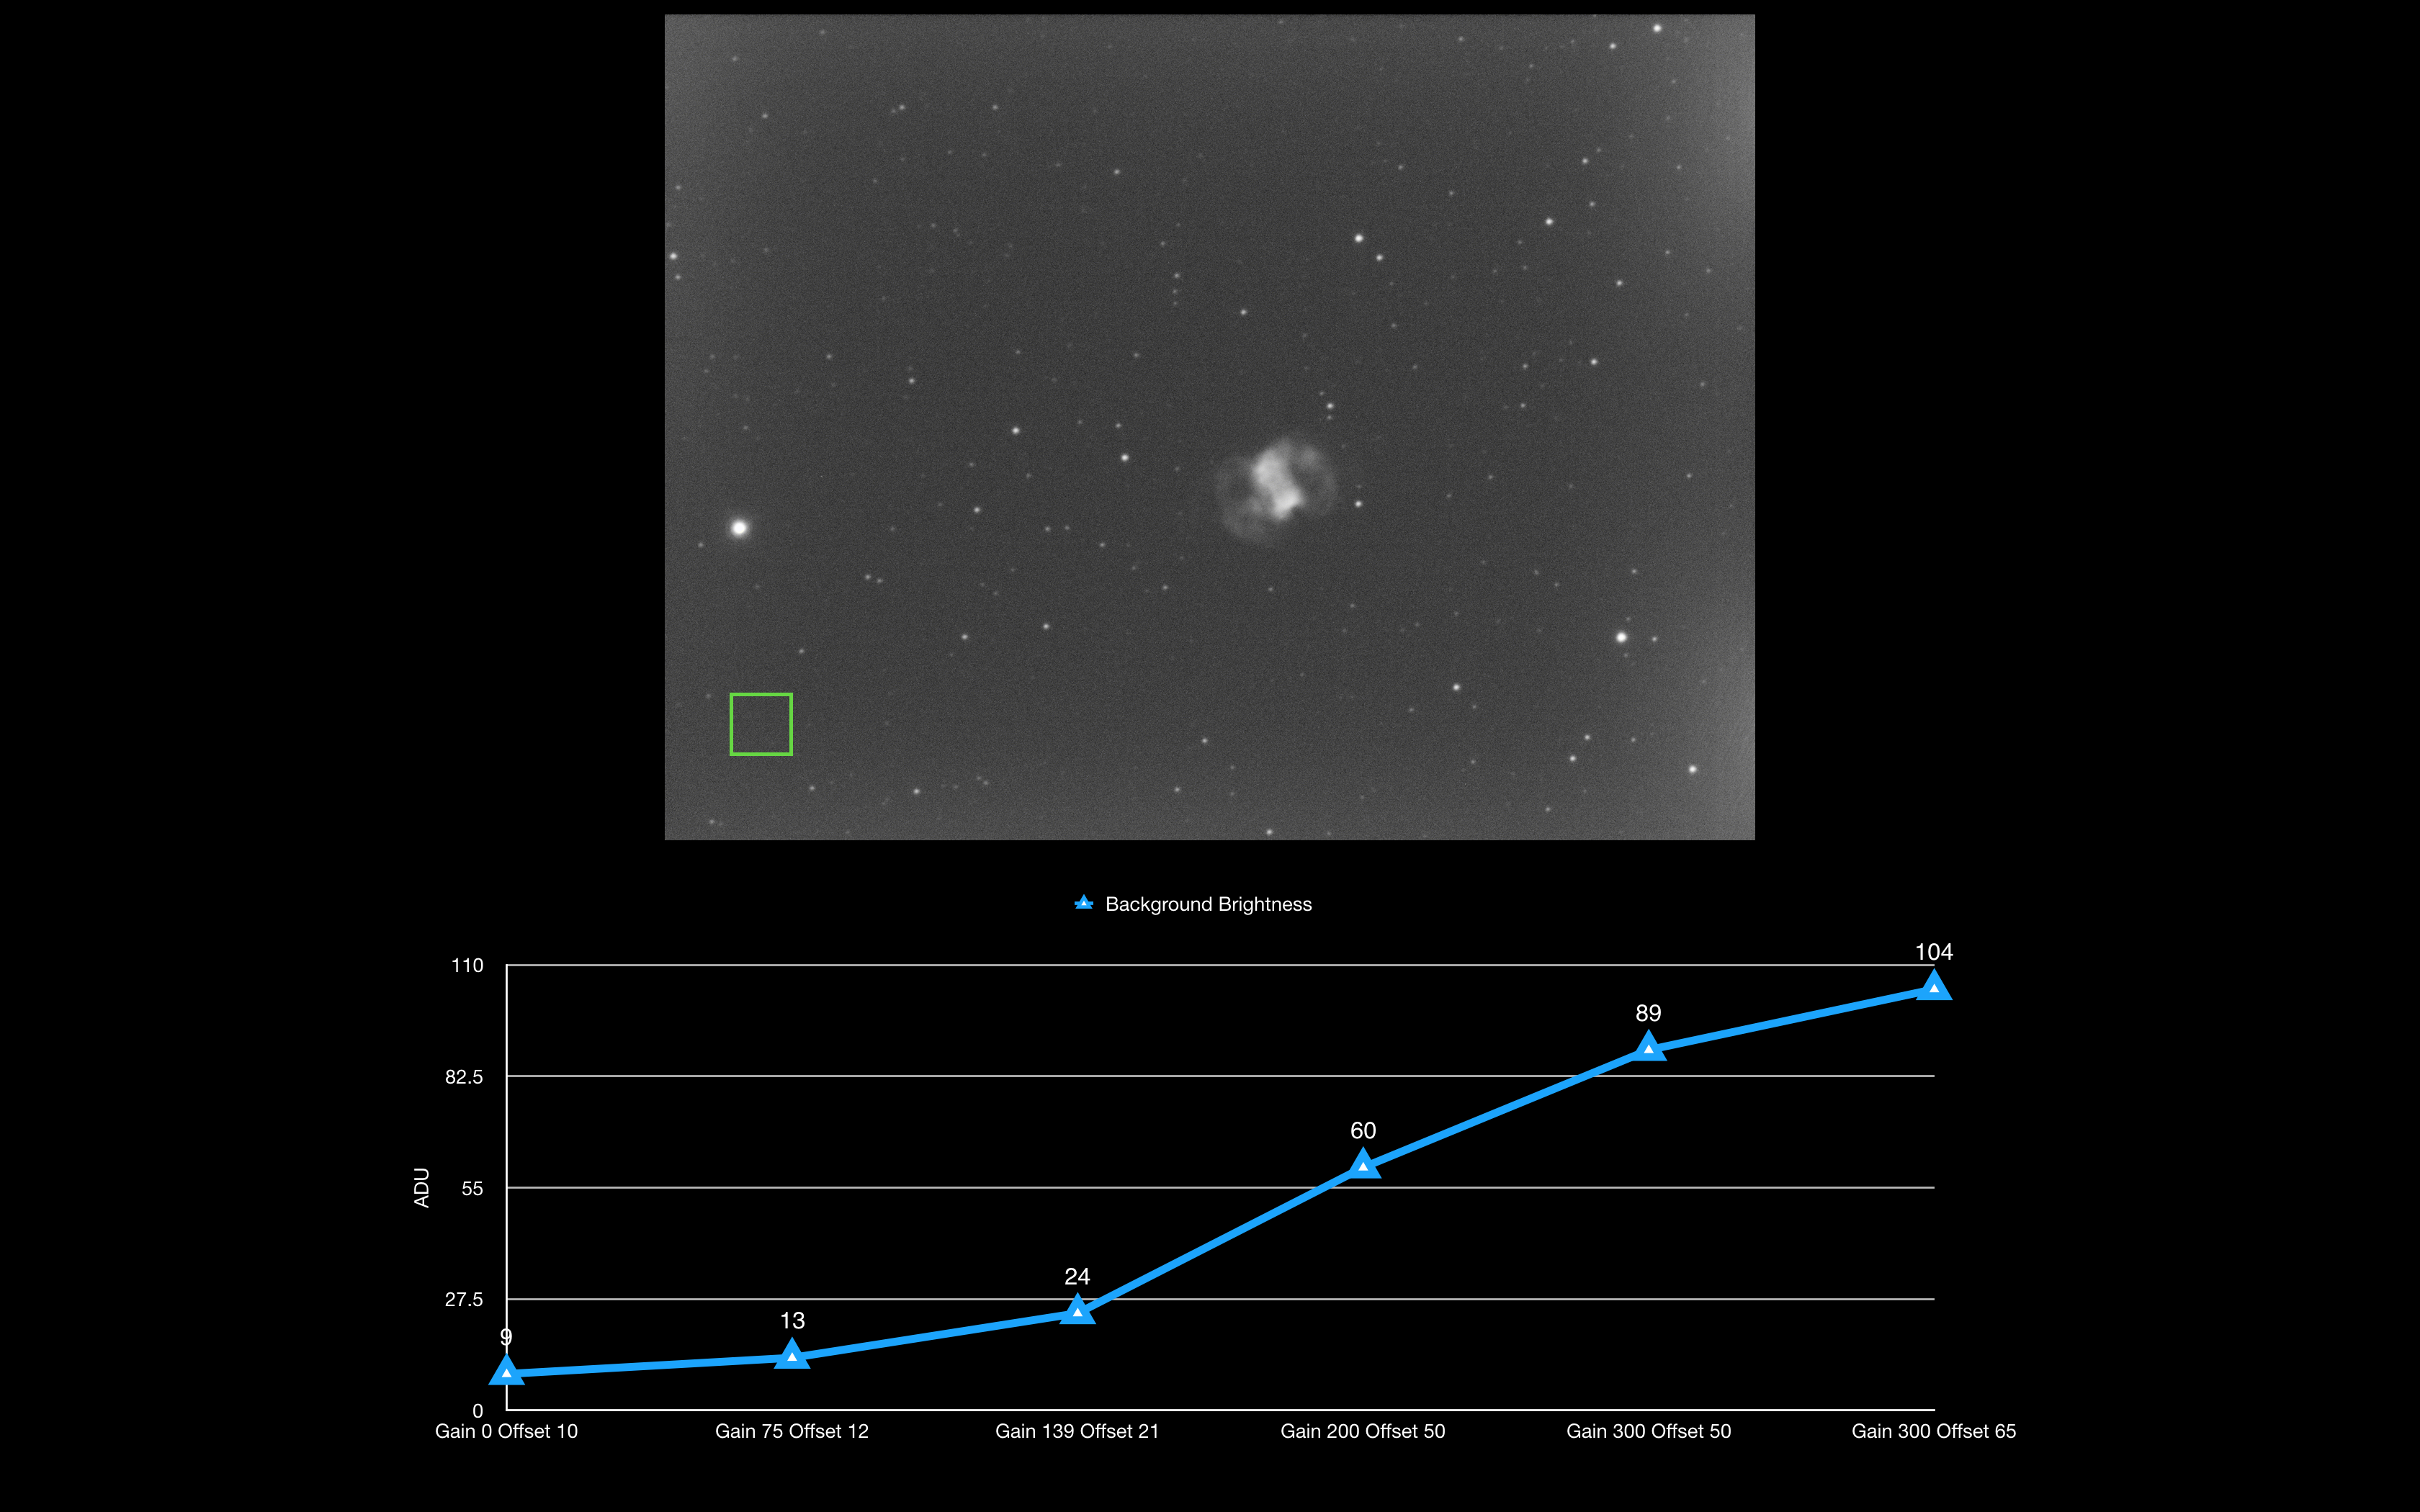
So how bright did the background get? The graph below shows a section of the background free from stars and charts the increase of brightness from a mean figure of 9 ADU with the gain set to 0 and a mean figure of 104 with the gain set to 300. So a large increase but but at least up until gain 200 not a problem, as we will see when we look at the faintest part of the nebula later.
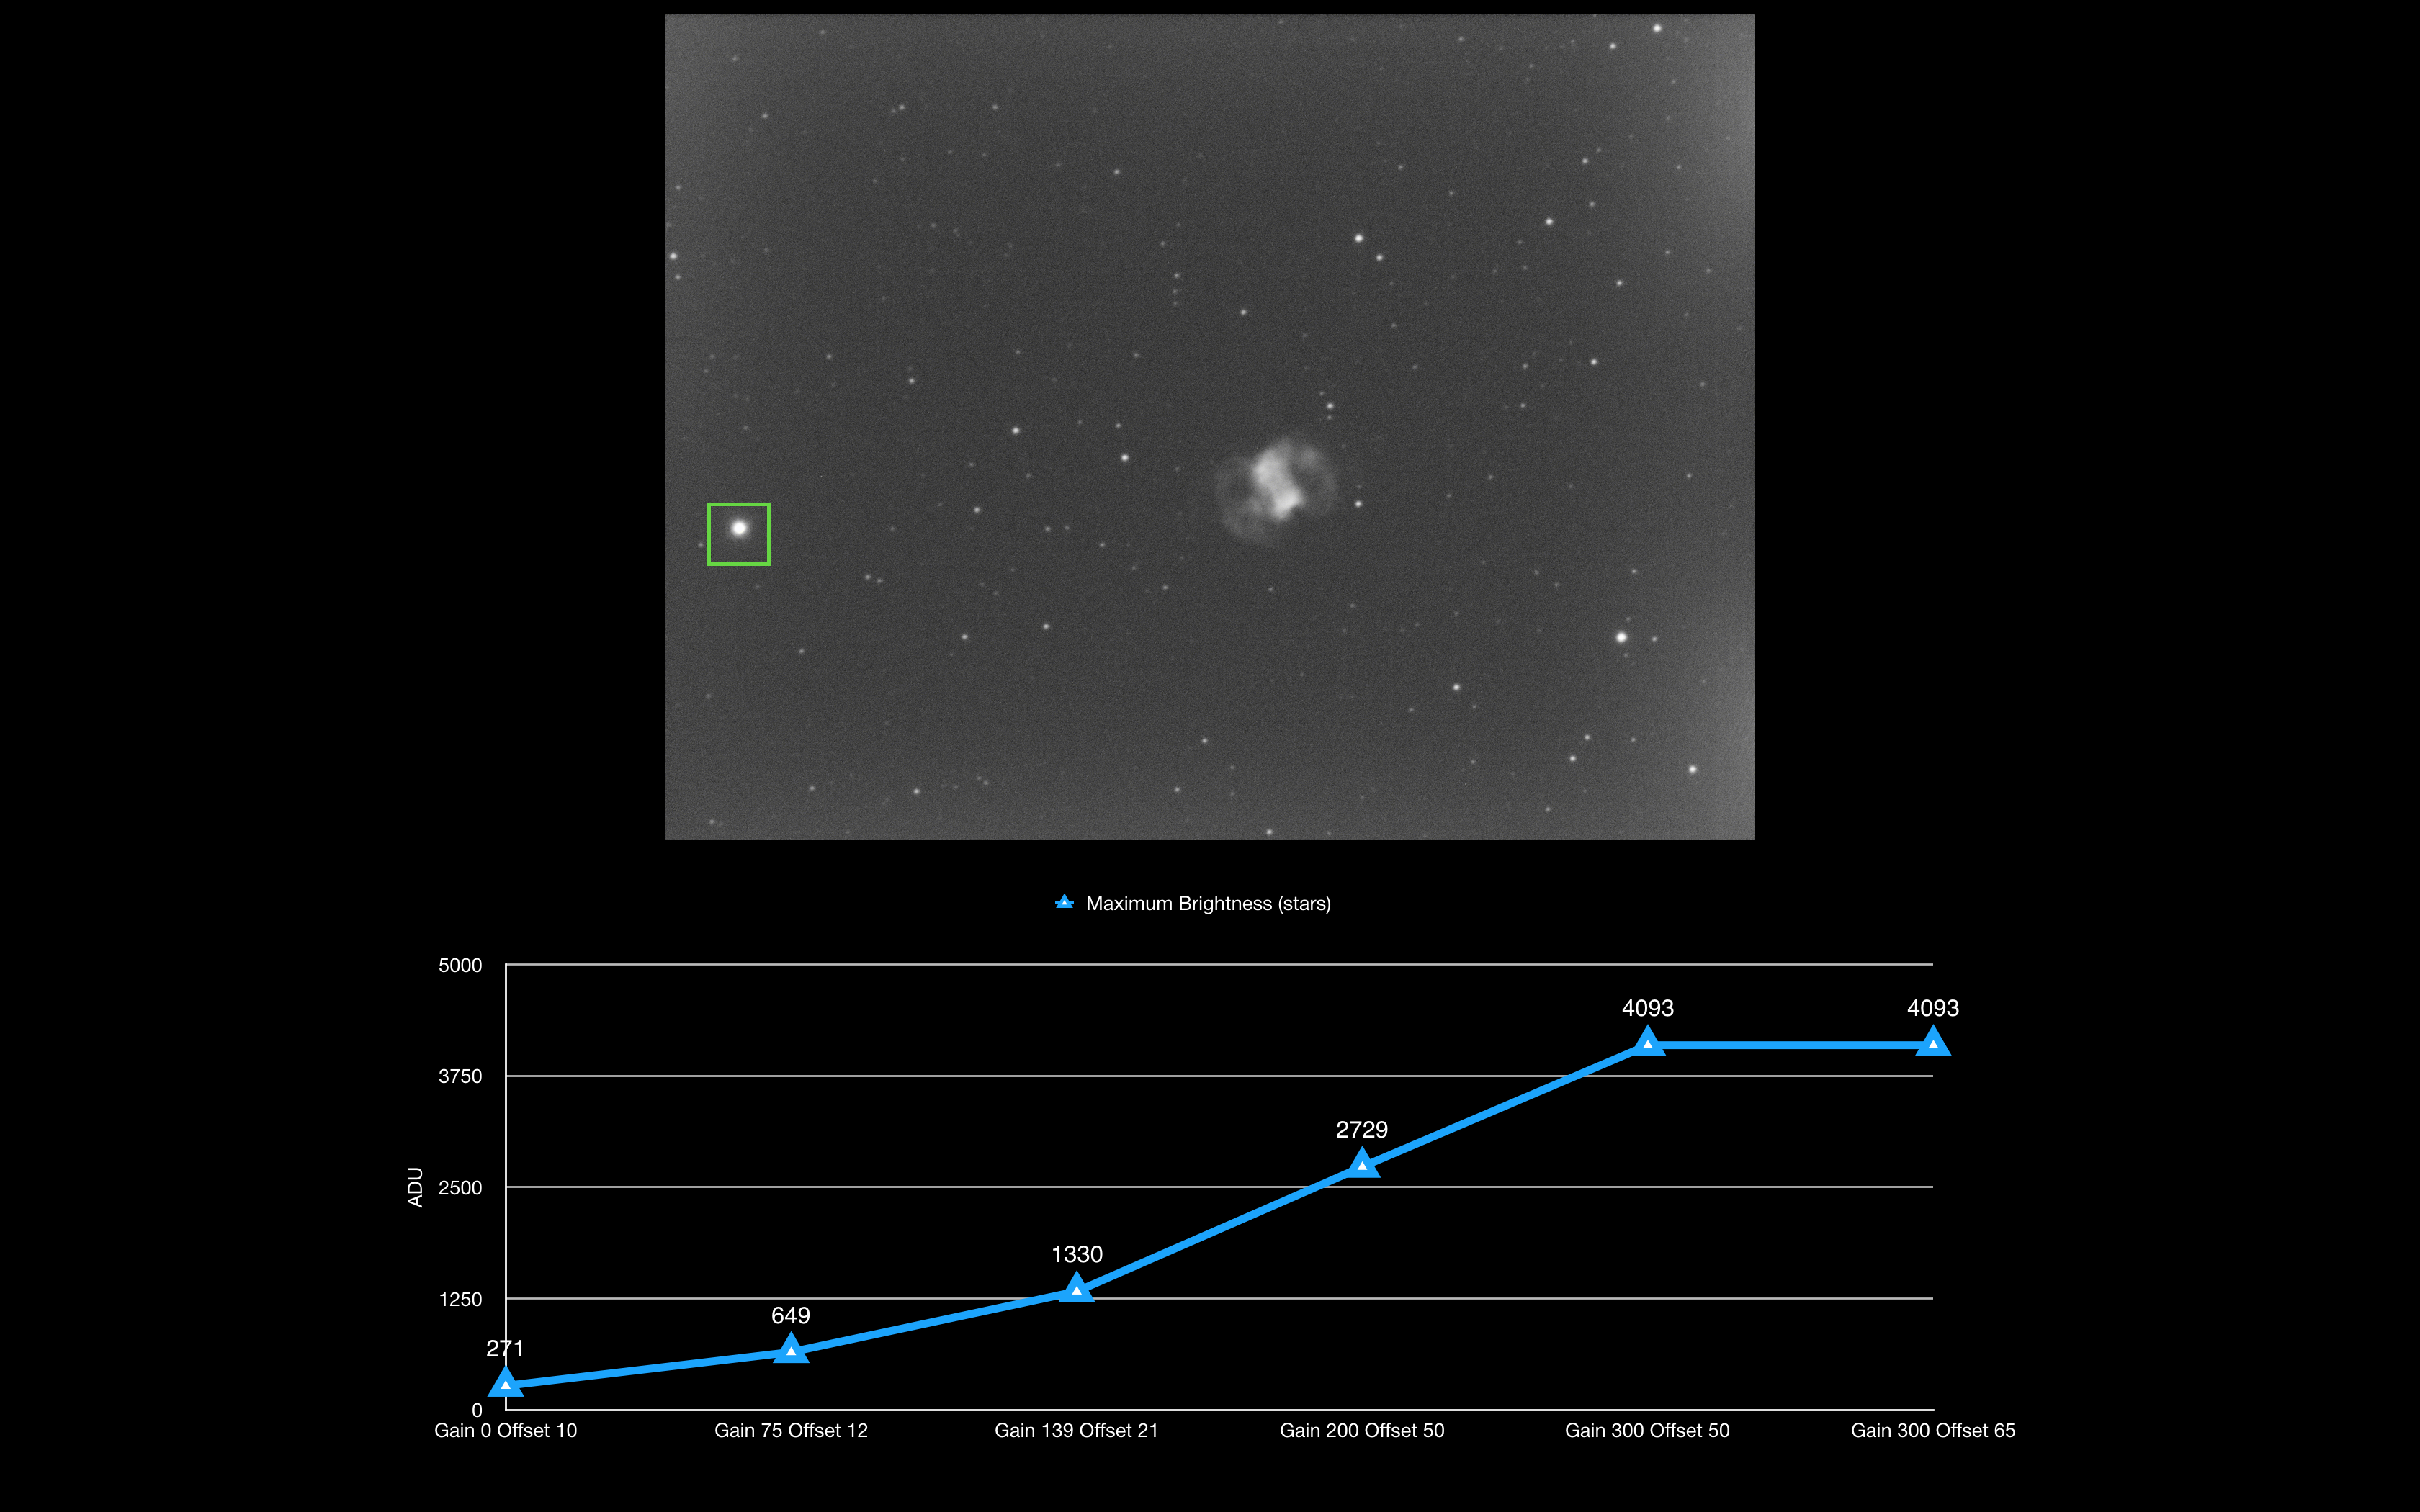
This graph looks at the bright star SAO 22551 (HIP 8063) which is mag 6.66 and the brightest star in the image. Again as previously seen in the right hand slice of the image the star is saturated by gain 300. All figures are the maximum pixel values.
Now let’s focus on the nebula itself and go back to using the mean ADU figures. The picture below shows the section of the nebula I will use for analysis. In particular I focused in on the brightest lobe of the central portion of the planetary nebula and the faintest portion of the left arc.
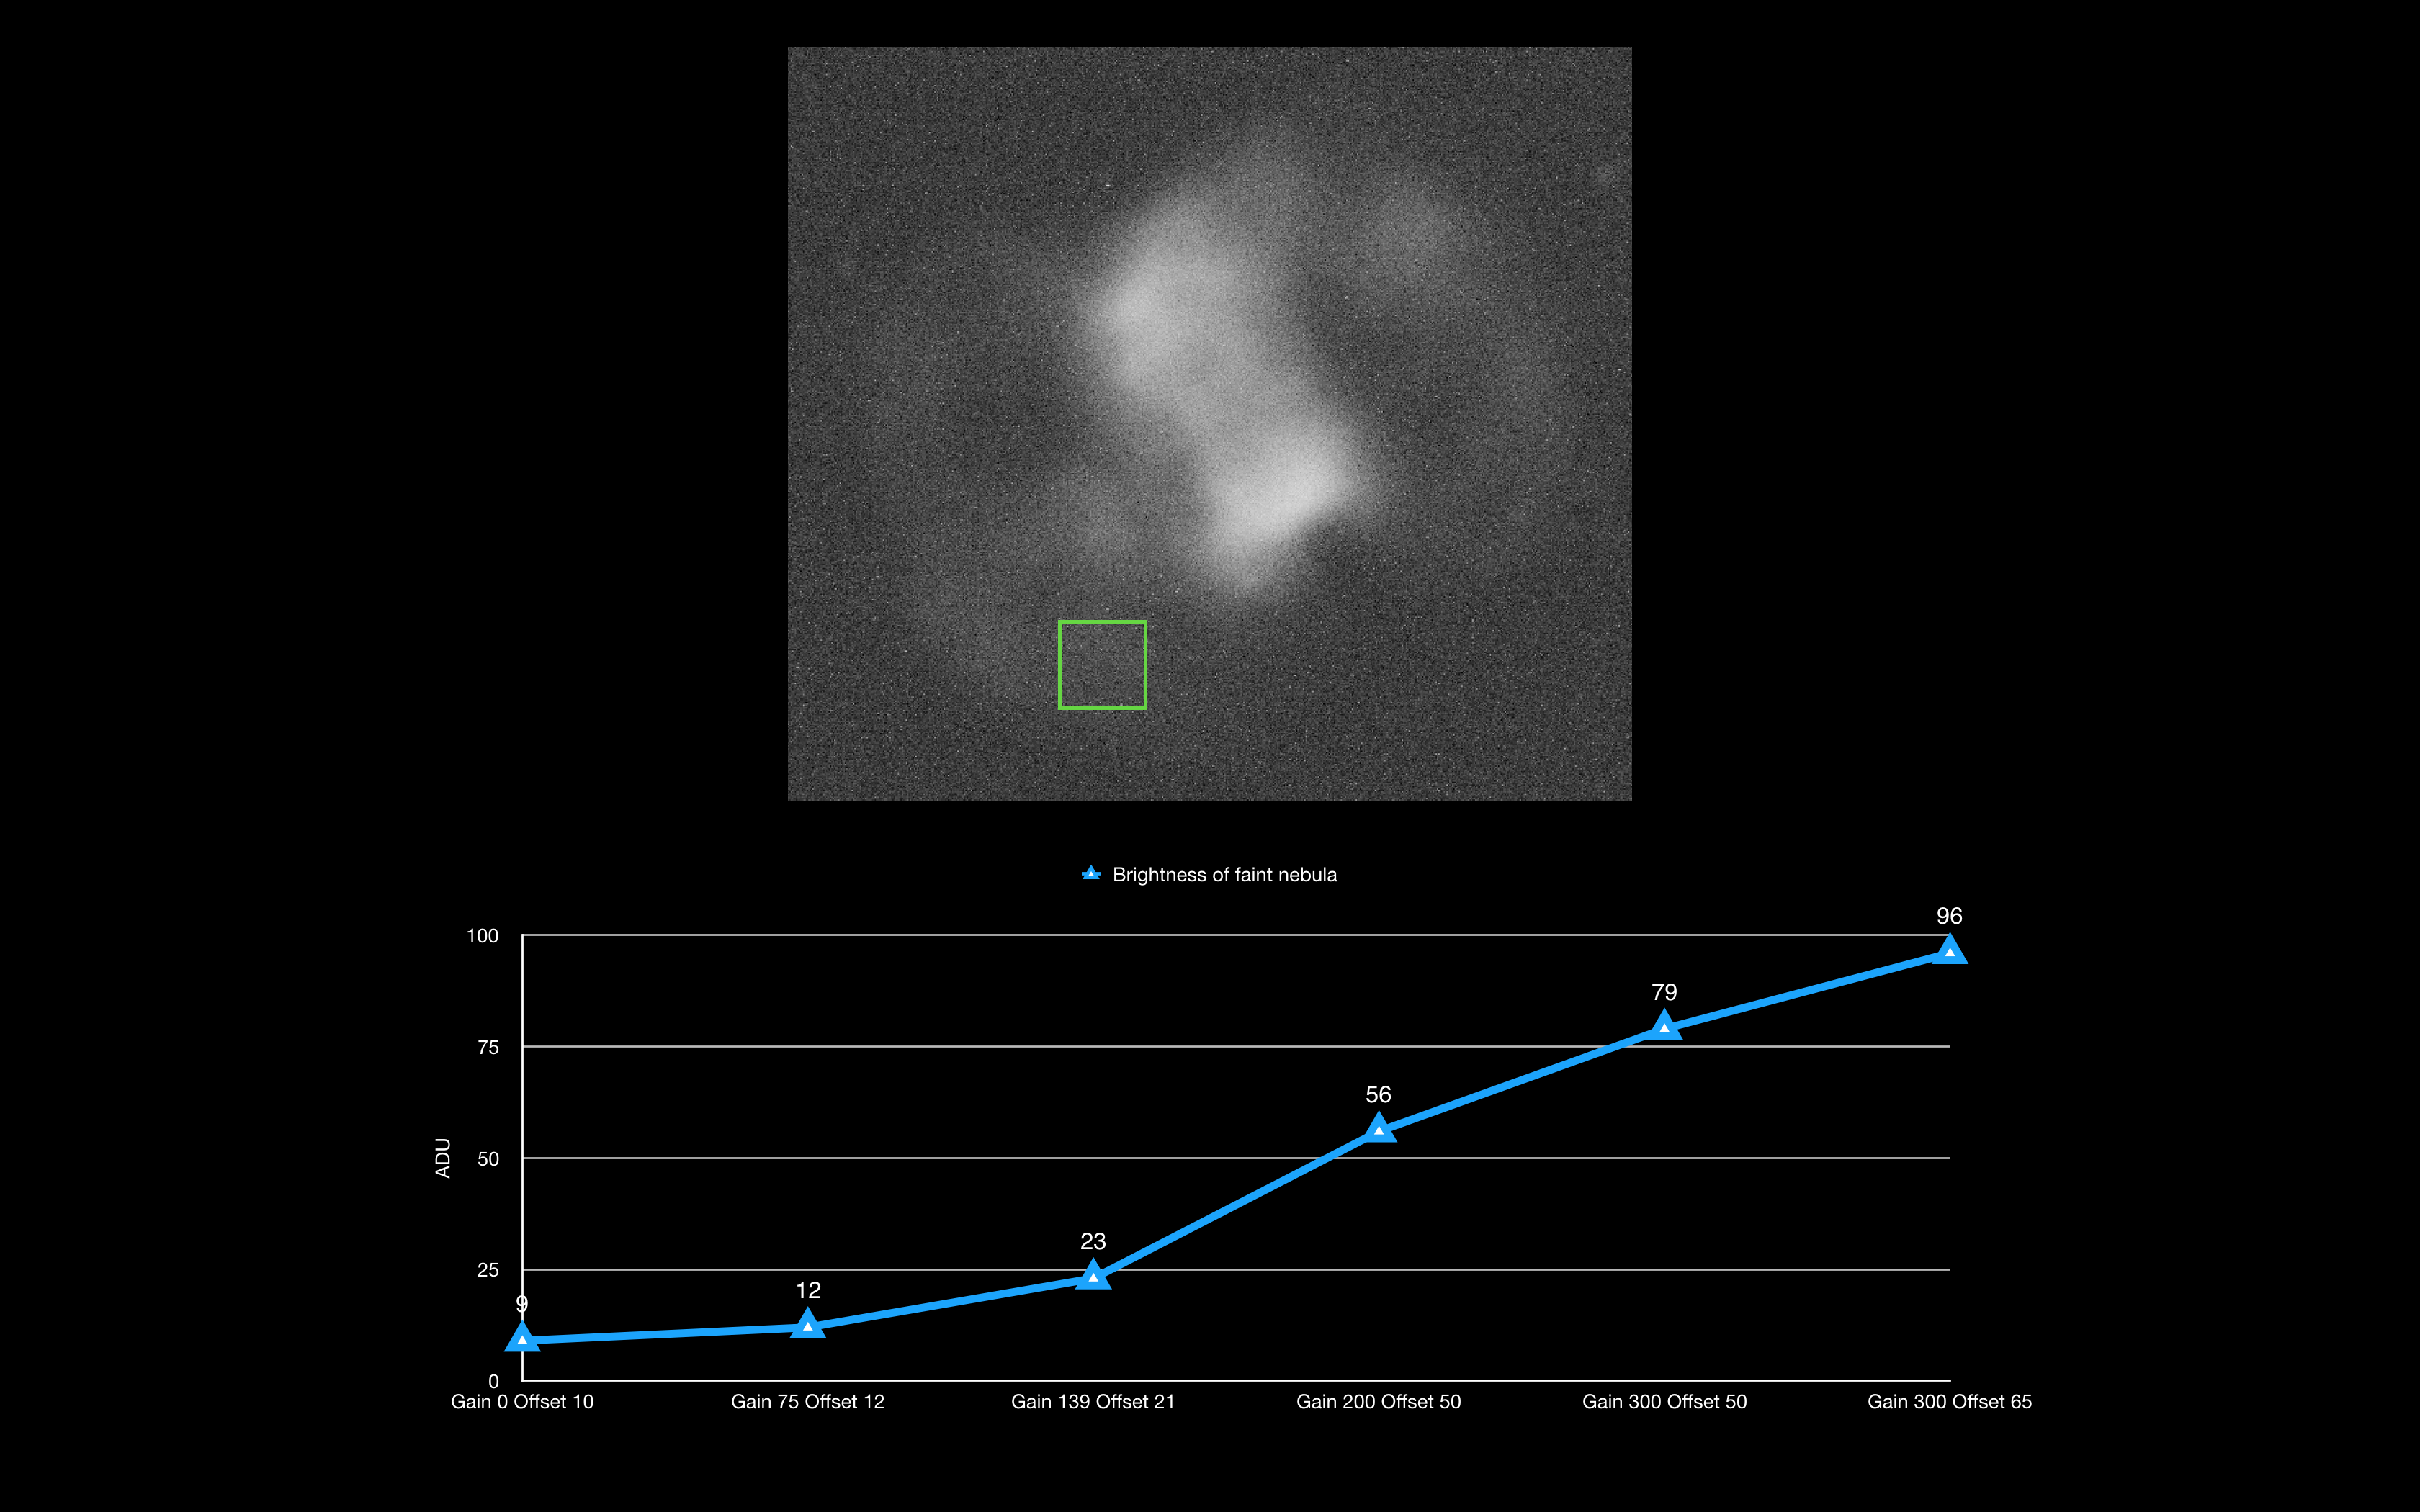
So looking at the faintest nebula within the left arc we can see that it is not very bright at all and the brightest it gets at gain 300 and offset 65 has a mean figure of 96 ADU. Each and every image at the different gain setting and offset setting is seemingly just below that of the background, which in itself is interesting as the nebula seems to be fainter than the background. So more analysis was needed.
However I then went back and looked at a selection of areas of the background across the image to find that the original background selection to the bottom left of the image was brighter than other areas. Below you can see the image of gain 200 and offset 50, this time with 5 selection boxes. Preview 6 is the nebula as recorded before is mean 56 ADU. Preview 5, so the sky right next door to it has a mean figure of 55, so just below the nebula, hence it is only barely visible. Preview 1 is 54 ADU and Preview 4 is also 54 ADU. So there is brightening on that bottom left corner of the image, so had the nebula fallen at that spot then it would be swapped by the background.
There is only 1 ADU between the nebula and the background adjacent to it at gain 200 offset 50. If we looked at the same to regions in the image of gain 300 and offset 50 then you get a 2 ADU difference. The image with gain 300 and offset 65 gives a 3 ADU difference. So the results show that both gain and offset both help increase the contrast between the background sky and the faintest part of the nebula.
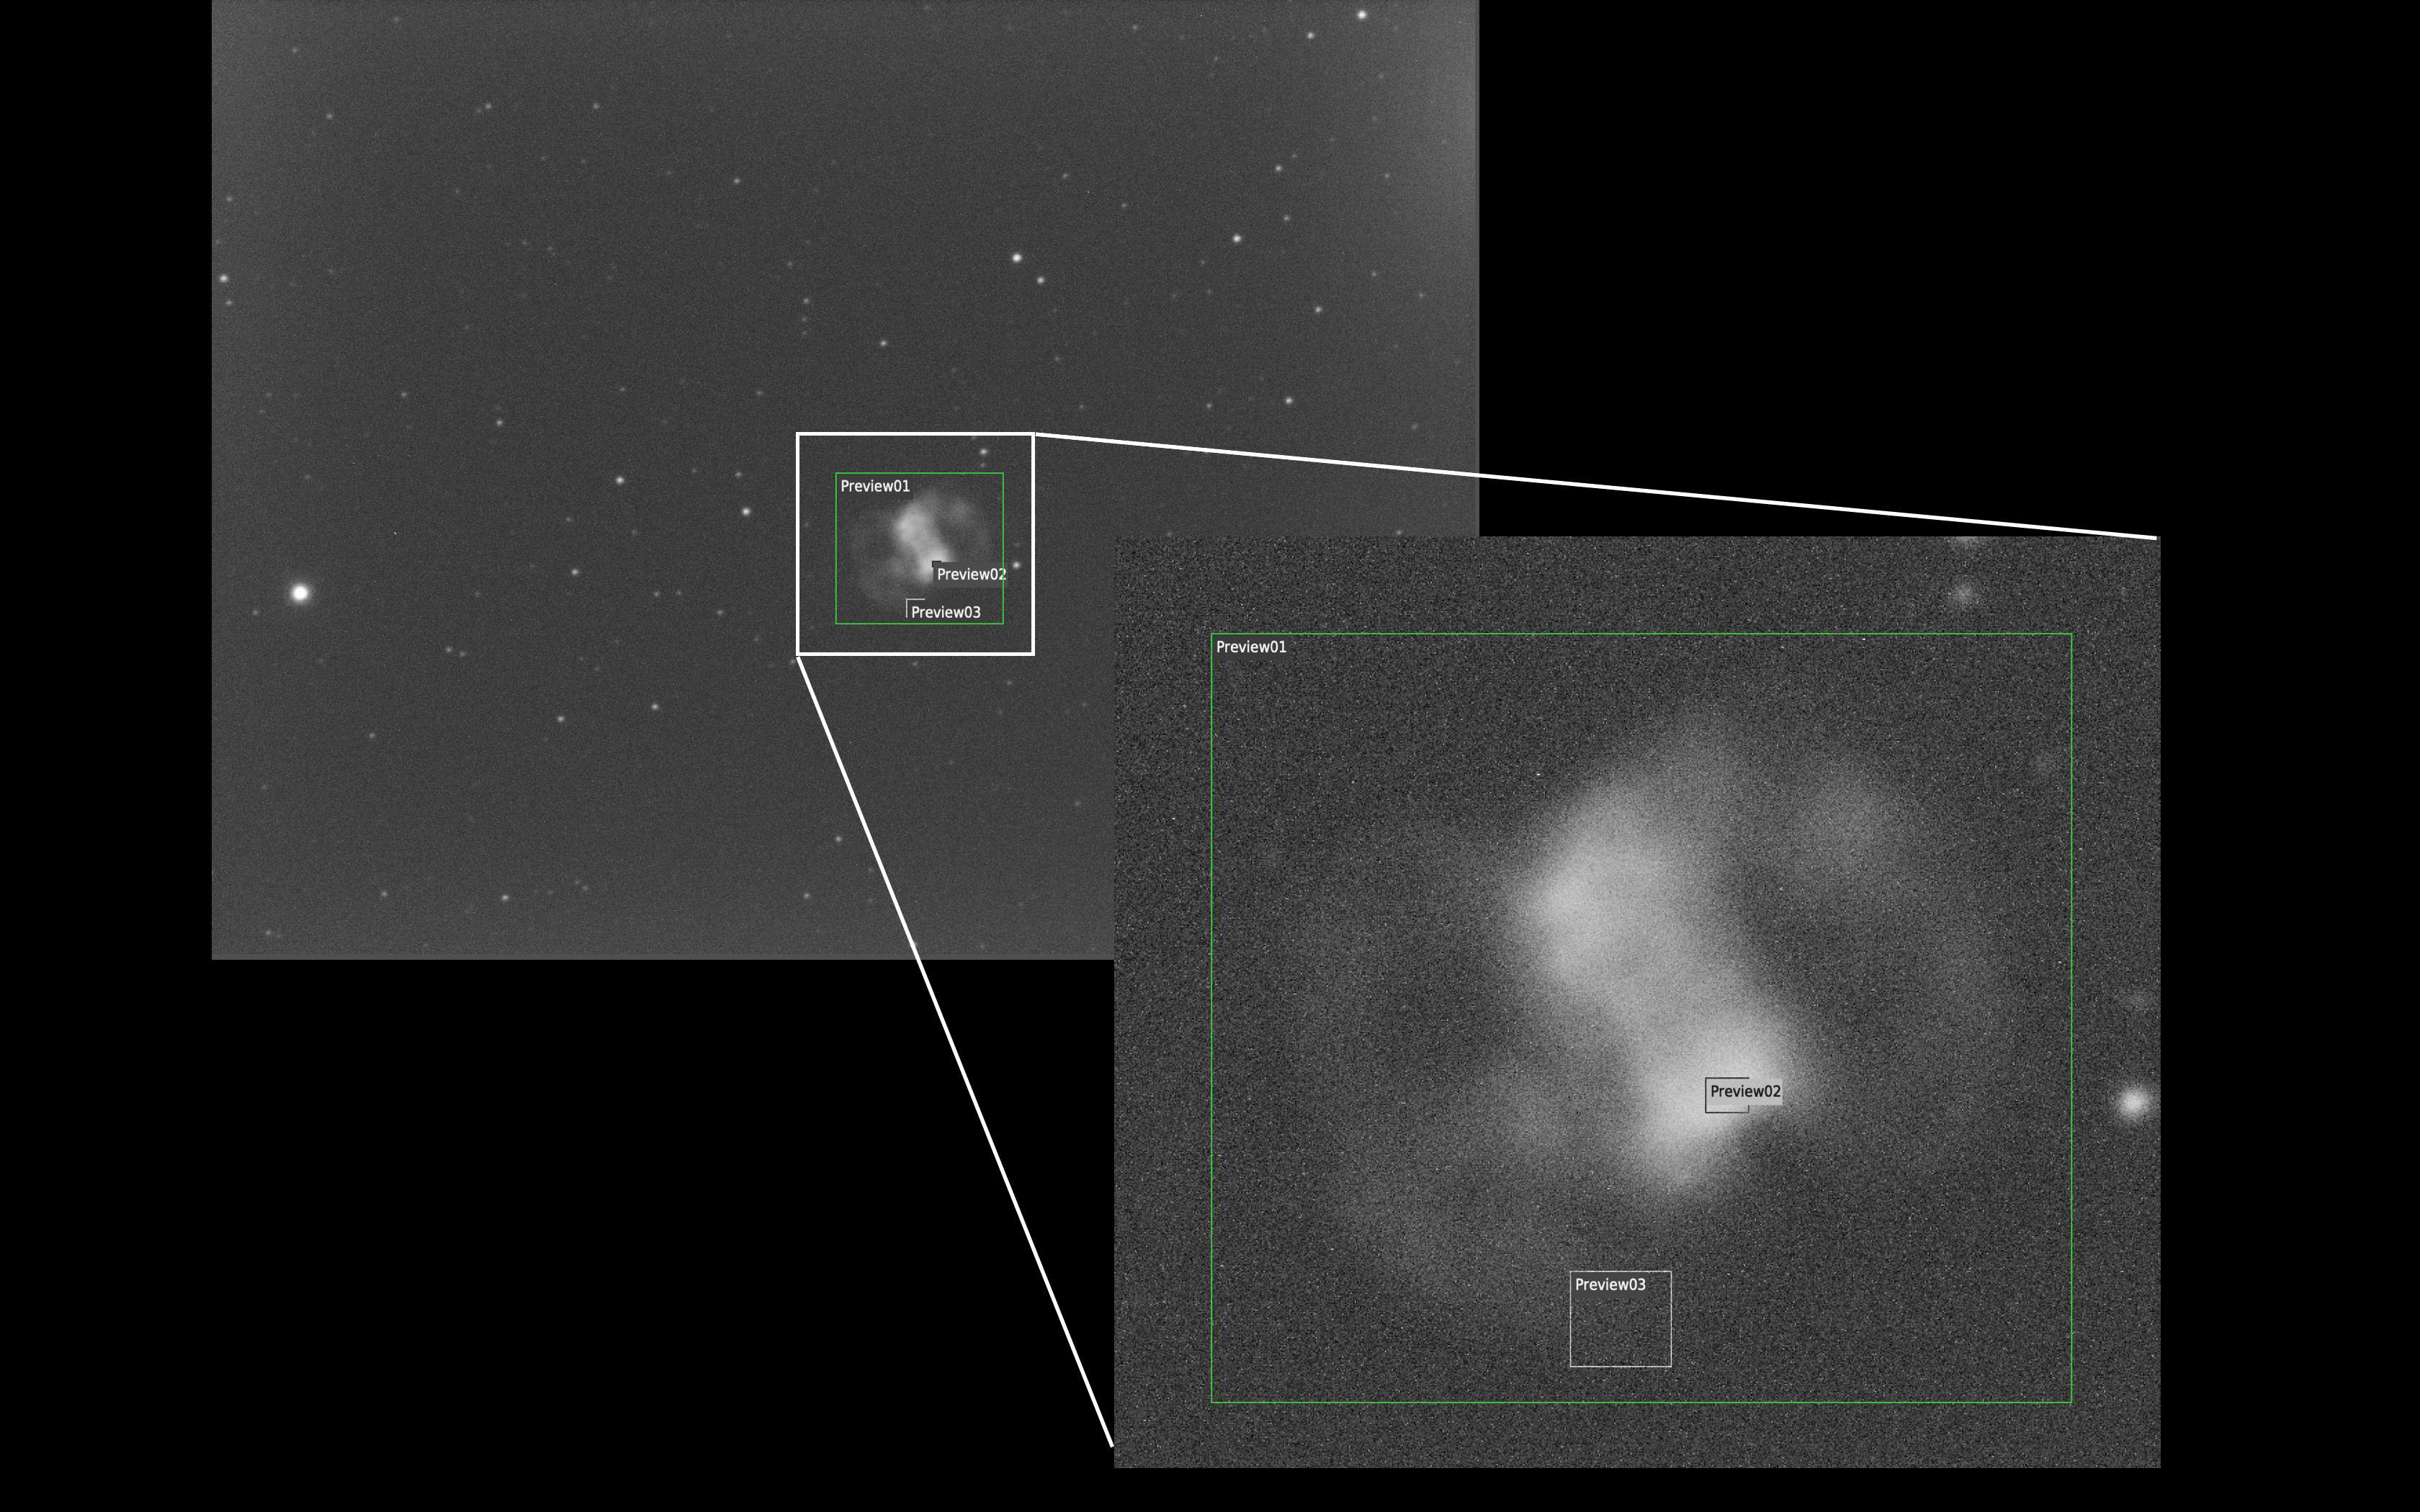
Various previews can be seen to analyse the background vs nebula brightness
The final image below shows the brightest part of the nebula. At gain 300 and offset 65 you see a mean value of 544 ADU which compares to 96 ADU for the faintest part of the nebula and an adjacent background of 93 ADU.
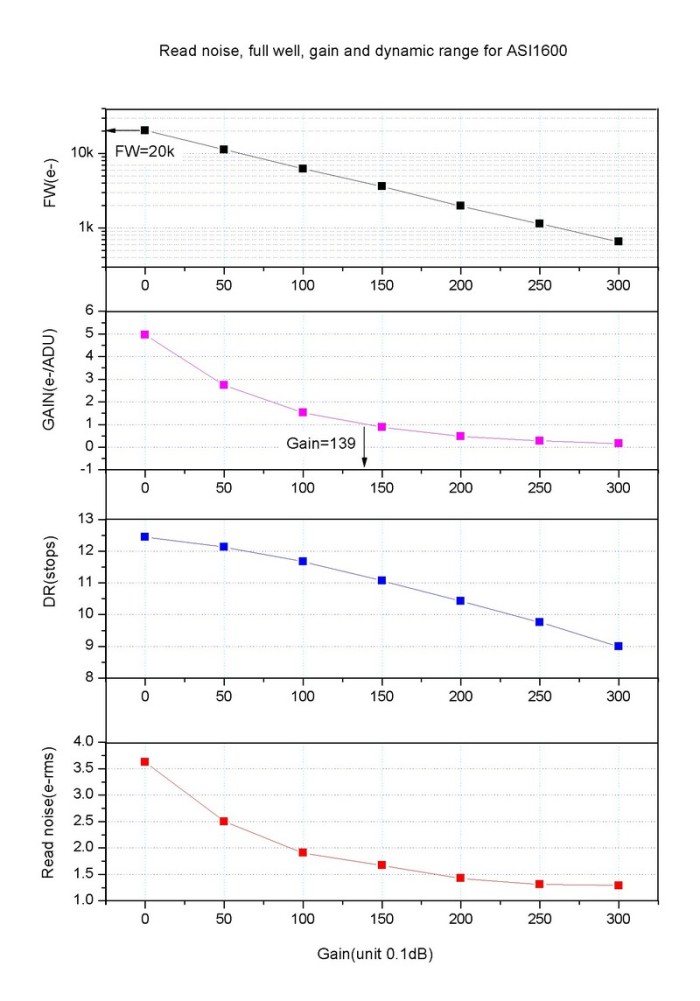
The final piece of information pertains to the camera/chip specification and performance. The graphs below are from the ZWO website and clearly show as expected the more you increase the gain the read noise is lowered but unfortunately so is the full well maximum (the amount of electrons you can store in a pixel) and the lower the dynamic range, which for deep sky objects is a required.
So from this first piece of testing what have we learnt? Whilst there seems to be a good sense for increasing the gain and offset to help with the SNR especially between the background and the faintest part of the nebula, the increase in amp glow, decrease in dynamic range and reduction in the well count are all factors. Stacking as we will see, will undoubtably help the situation without necessarily setting a high gain. You can see why people say use Unity Gain, so the setting where 1 electron on the sensor = 1 ADU potentially gives the best result from a tradeoff point of view.
I have spend over 4 hours today reading about the Gain and Offset settings for the ZWO ASI1600mm Pro Cooled mono CMOS camera I have on the back of the 12″ Officina Stellare 305 RiDK f/7/9 telescope.
ZWO ASI1600mm Pro Cooled on Officina Stellare 305 RiDK
In particular the posts by Jon Rista and the images with a similar setup from Glen Newell have led me to a handful of setting I will now try from my location and on M76, the Little Dumbbell planetary nebula that I had started to image recently. I must also comment that Kayron Mercieca also had some useful information pertaining to testing your camera and OTA imaging train for exposure times. See link here
Discussion on exposure times and setting – Cloud Nights
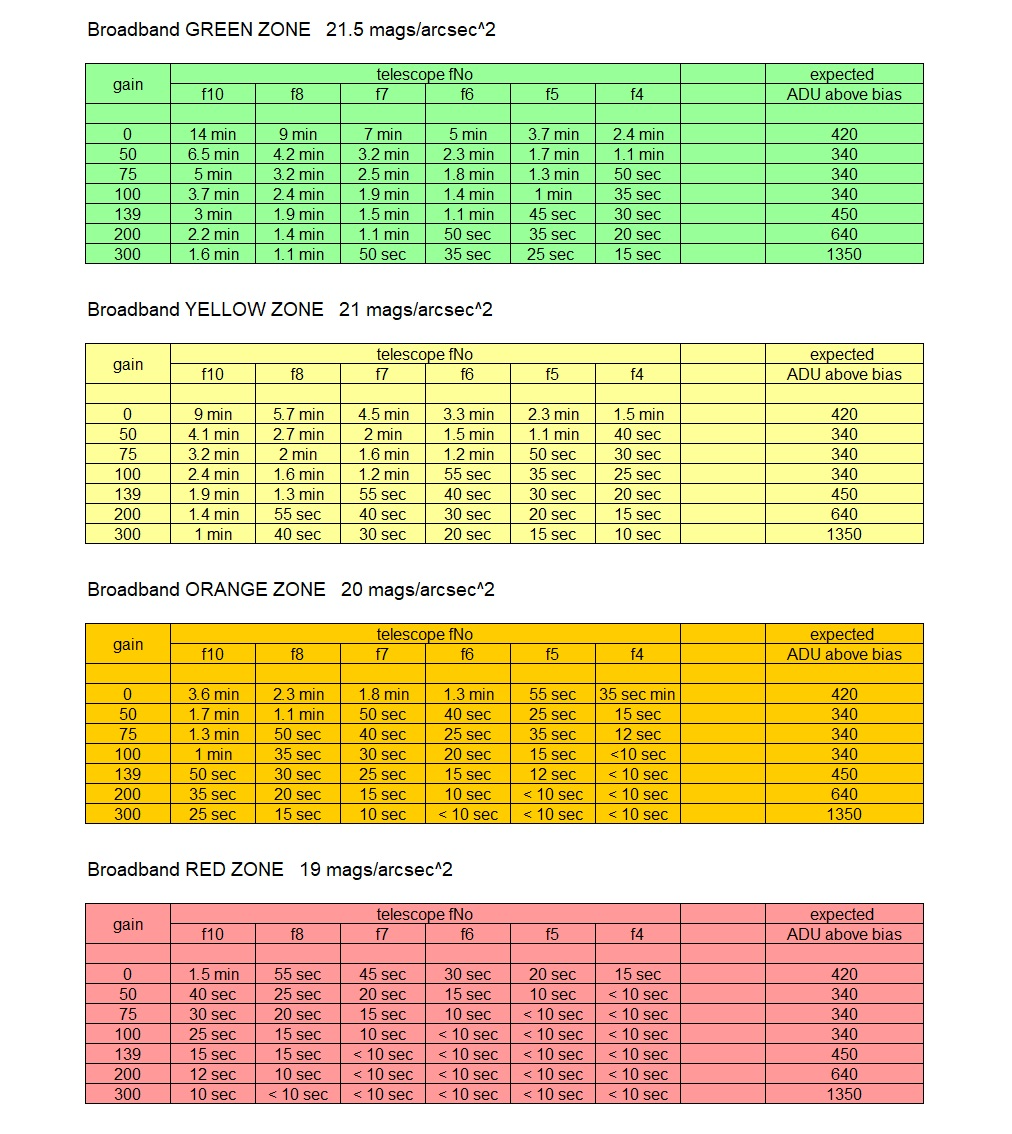
So I have already taken a set of images on the 8th October, 14 of them and they were at a Gain and Offset of 10 (I believe these settings are less than perfect) and an exposure of 1200s, so 20mins through an Astrodon OIII narrowband filter. My location is on a good night in the Orange Zone as per the charts borrowed from the forum discussions and when referring to broadband imaging. For narrow band as per my test here I am between the purple and blue zones.
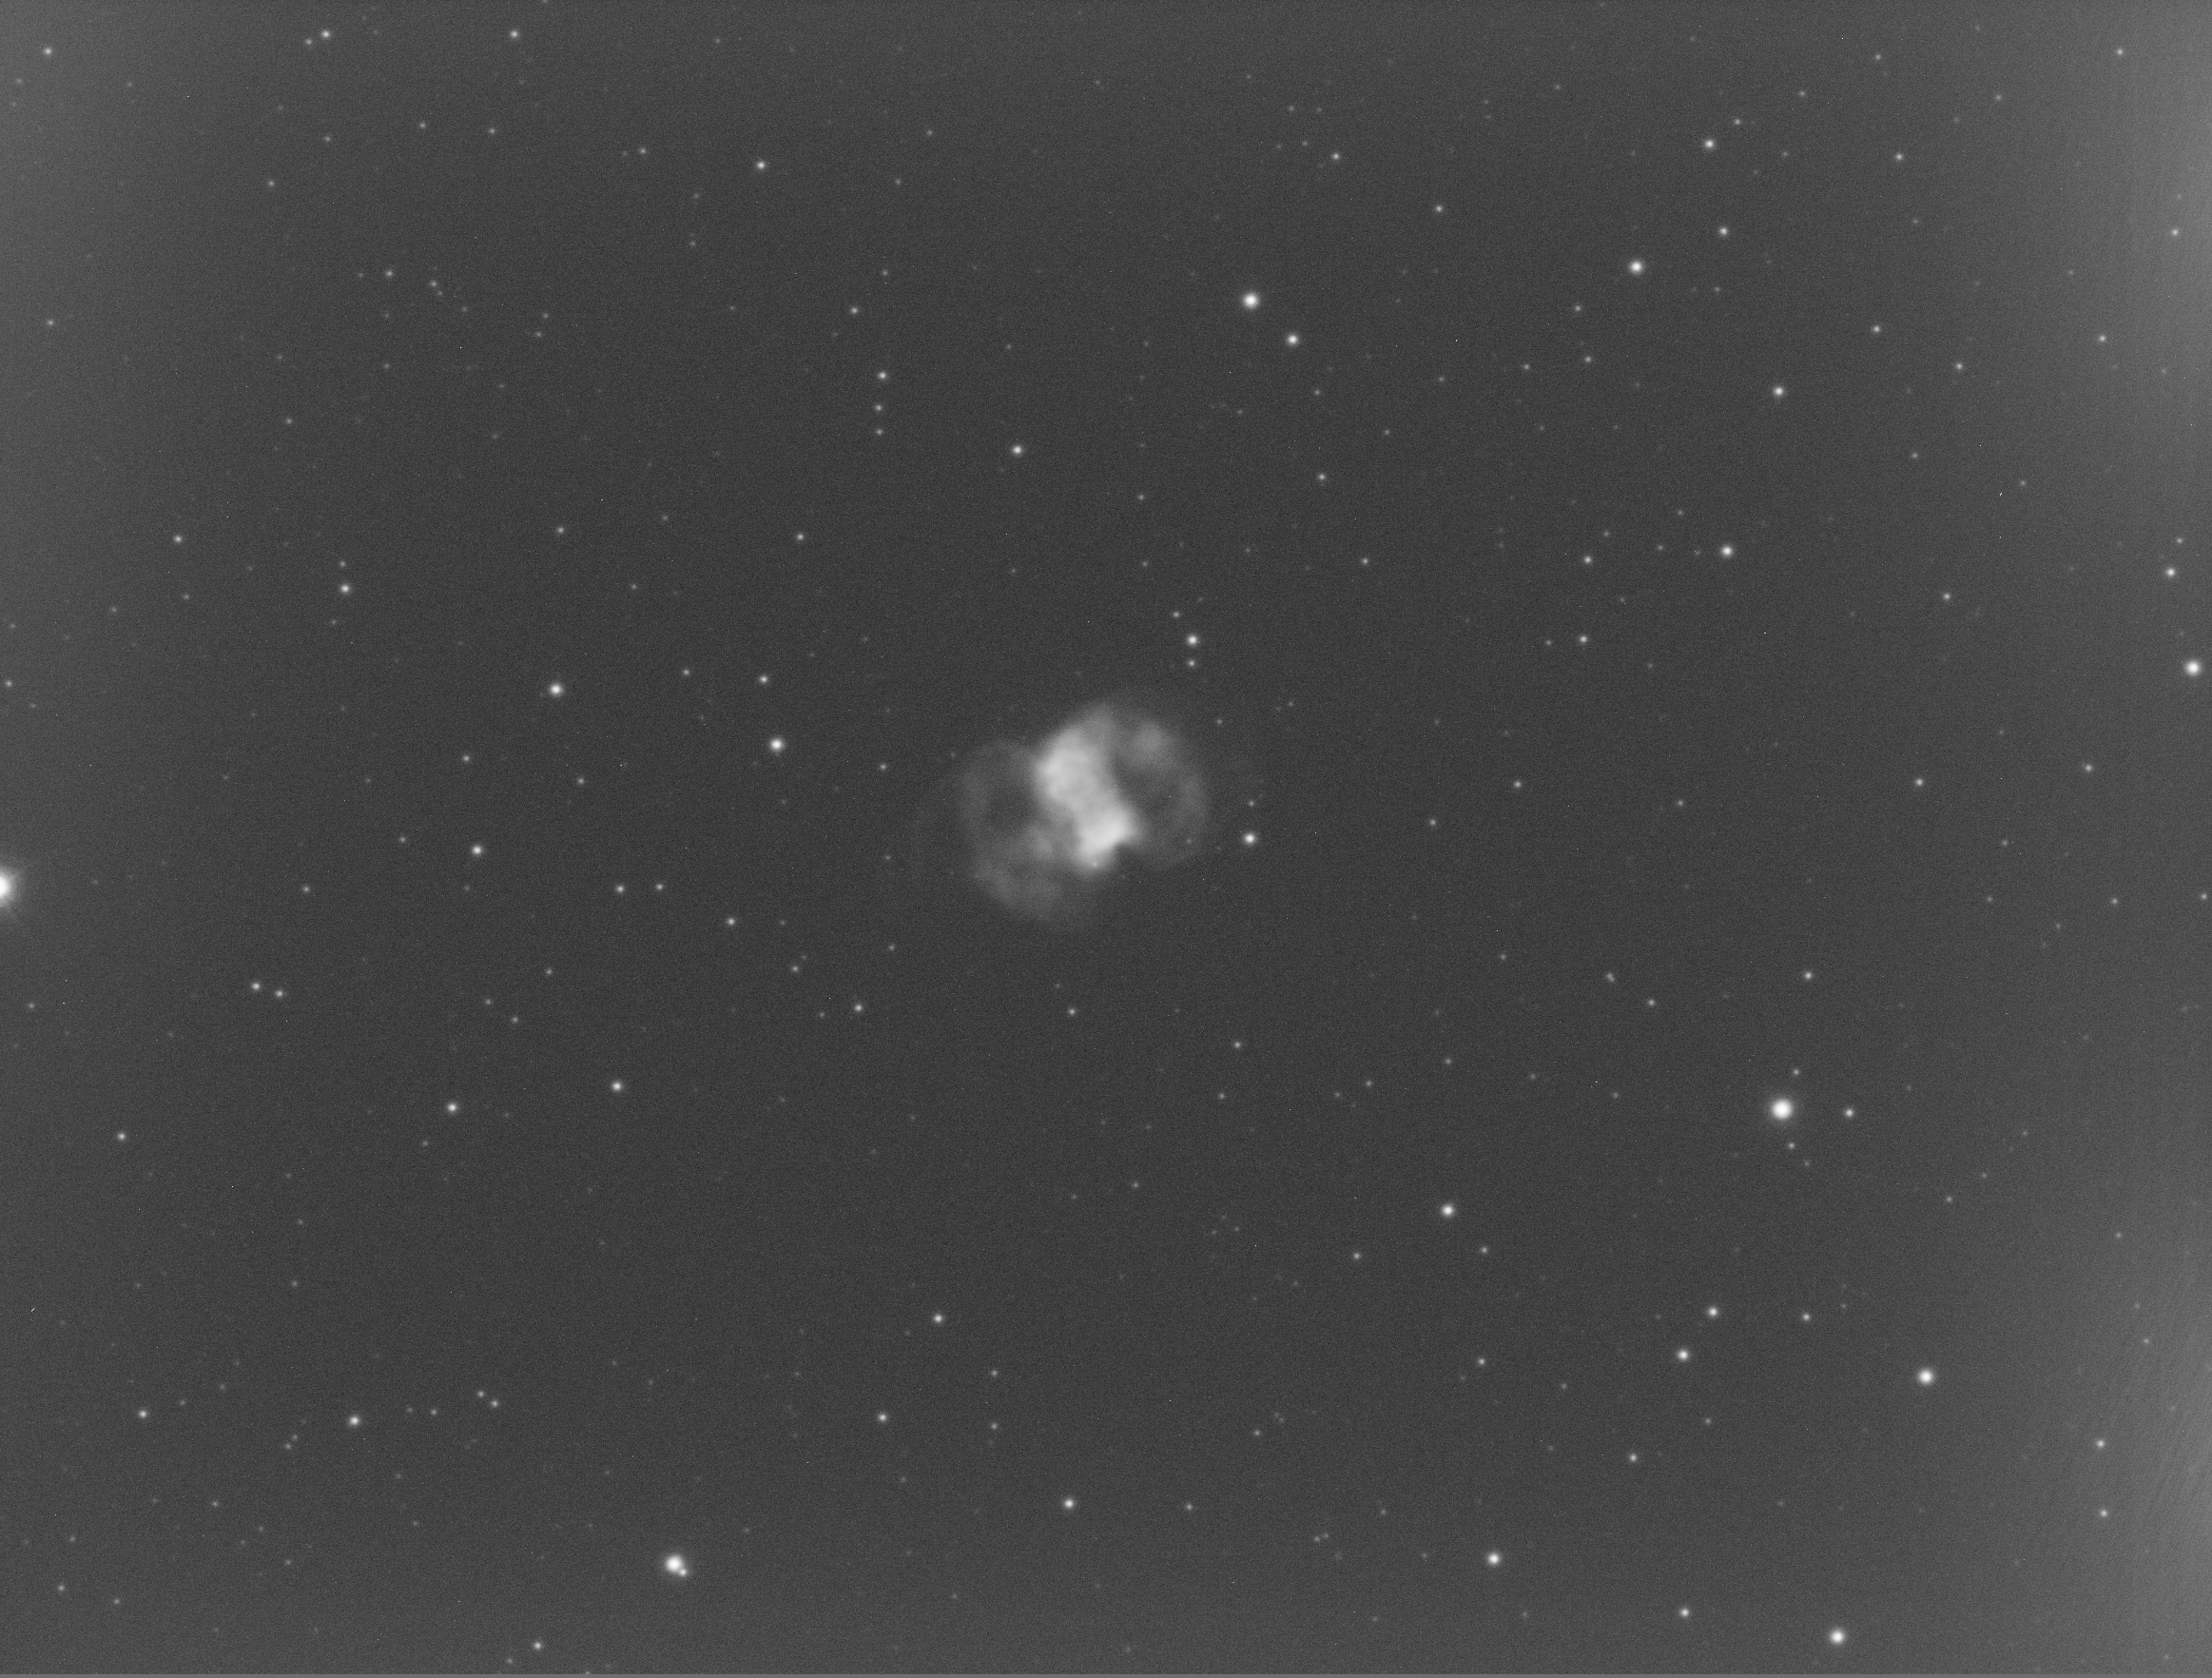
Inspecting the original frames I took you can see slight amp glow from the right of the image, the background has a median of 10 ADU at 12bits. None of the stars are saturated or clipped. The brightest star is 1,854 ADU our of a dynamic range of 0-4,095 ADU. The faintest nebula I can see is 11 ADU so just above the background and the brightest part of the nebula is 77 ADU.
M76 – 1 x 20min OIII Gain 10 Offset 10 – ASI1600mm Pro Cooled
So I will attempt to take a set of images at the following settings across 4 exposure times of 300s, 600s, 900s and 1200s at or after astronomical night at 20:56 onwards if the clouds hold off.
Gain 0 – Offset 10
Gain 75 – Offset 12
Gain 139 – Offset 21
Gain 200 – Offset 50
Gain 300 – Offset 50
Gain 300 – Offset 65
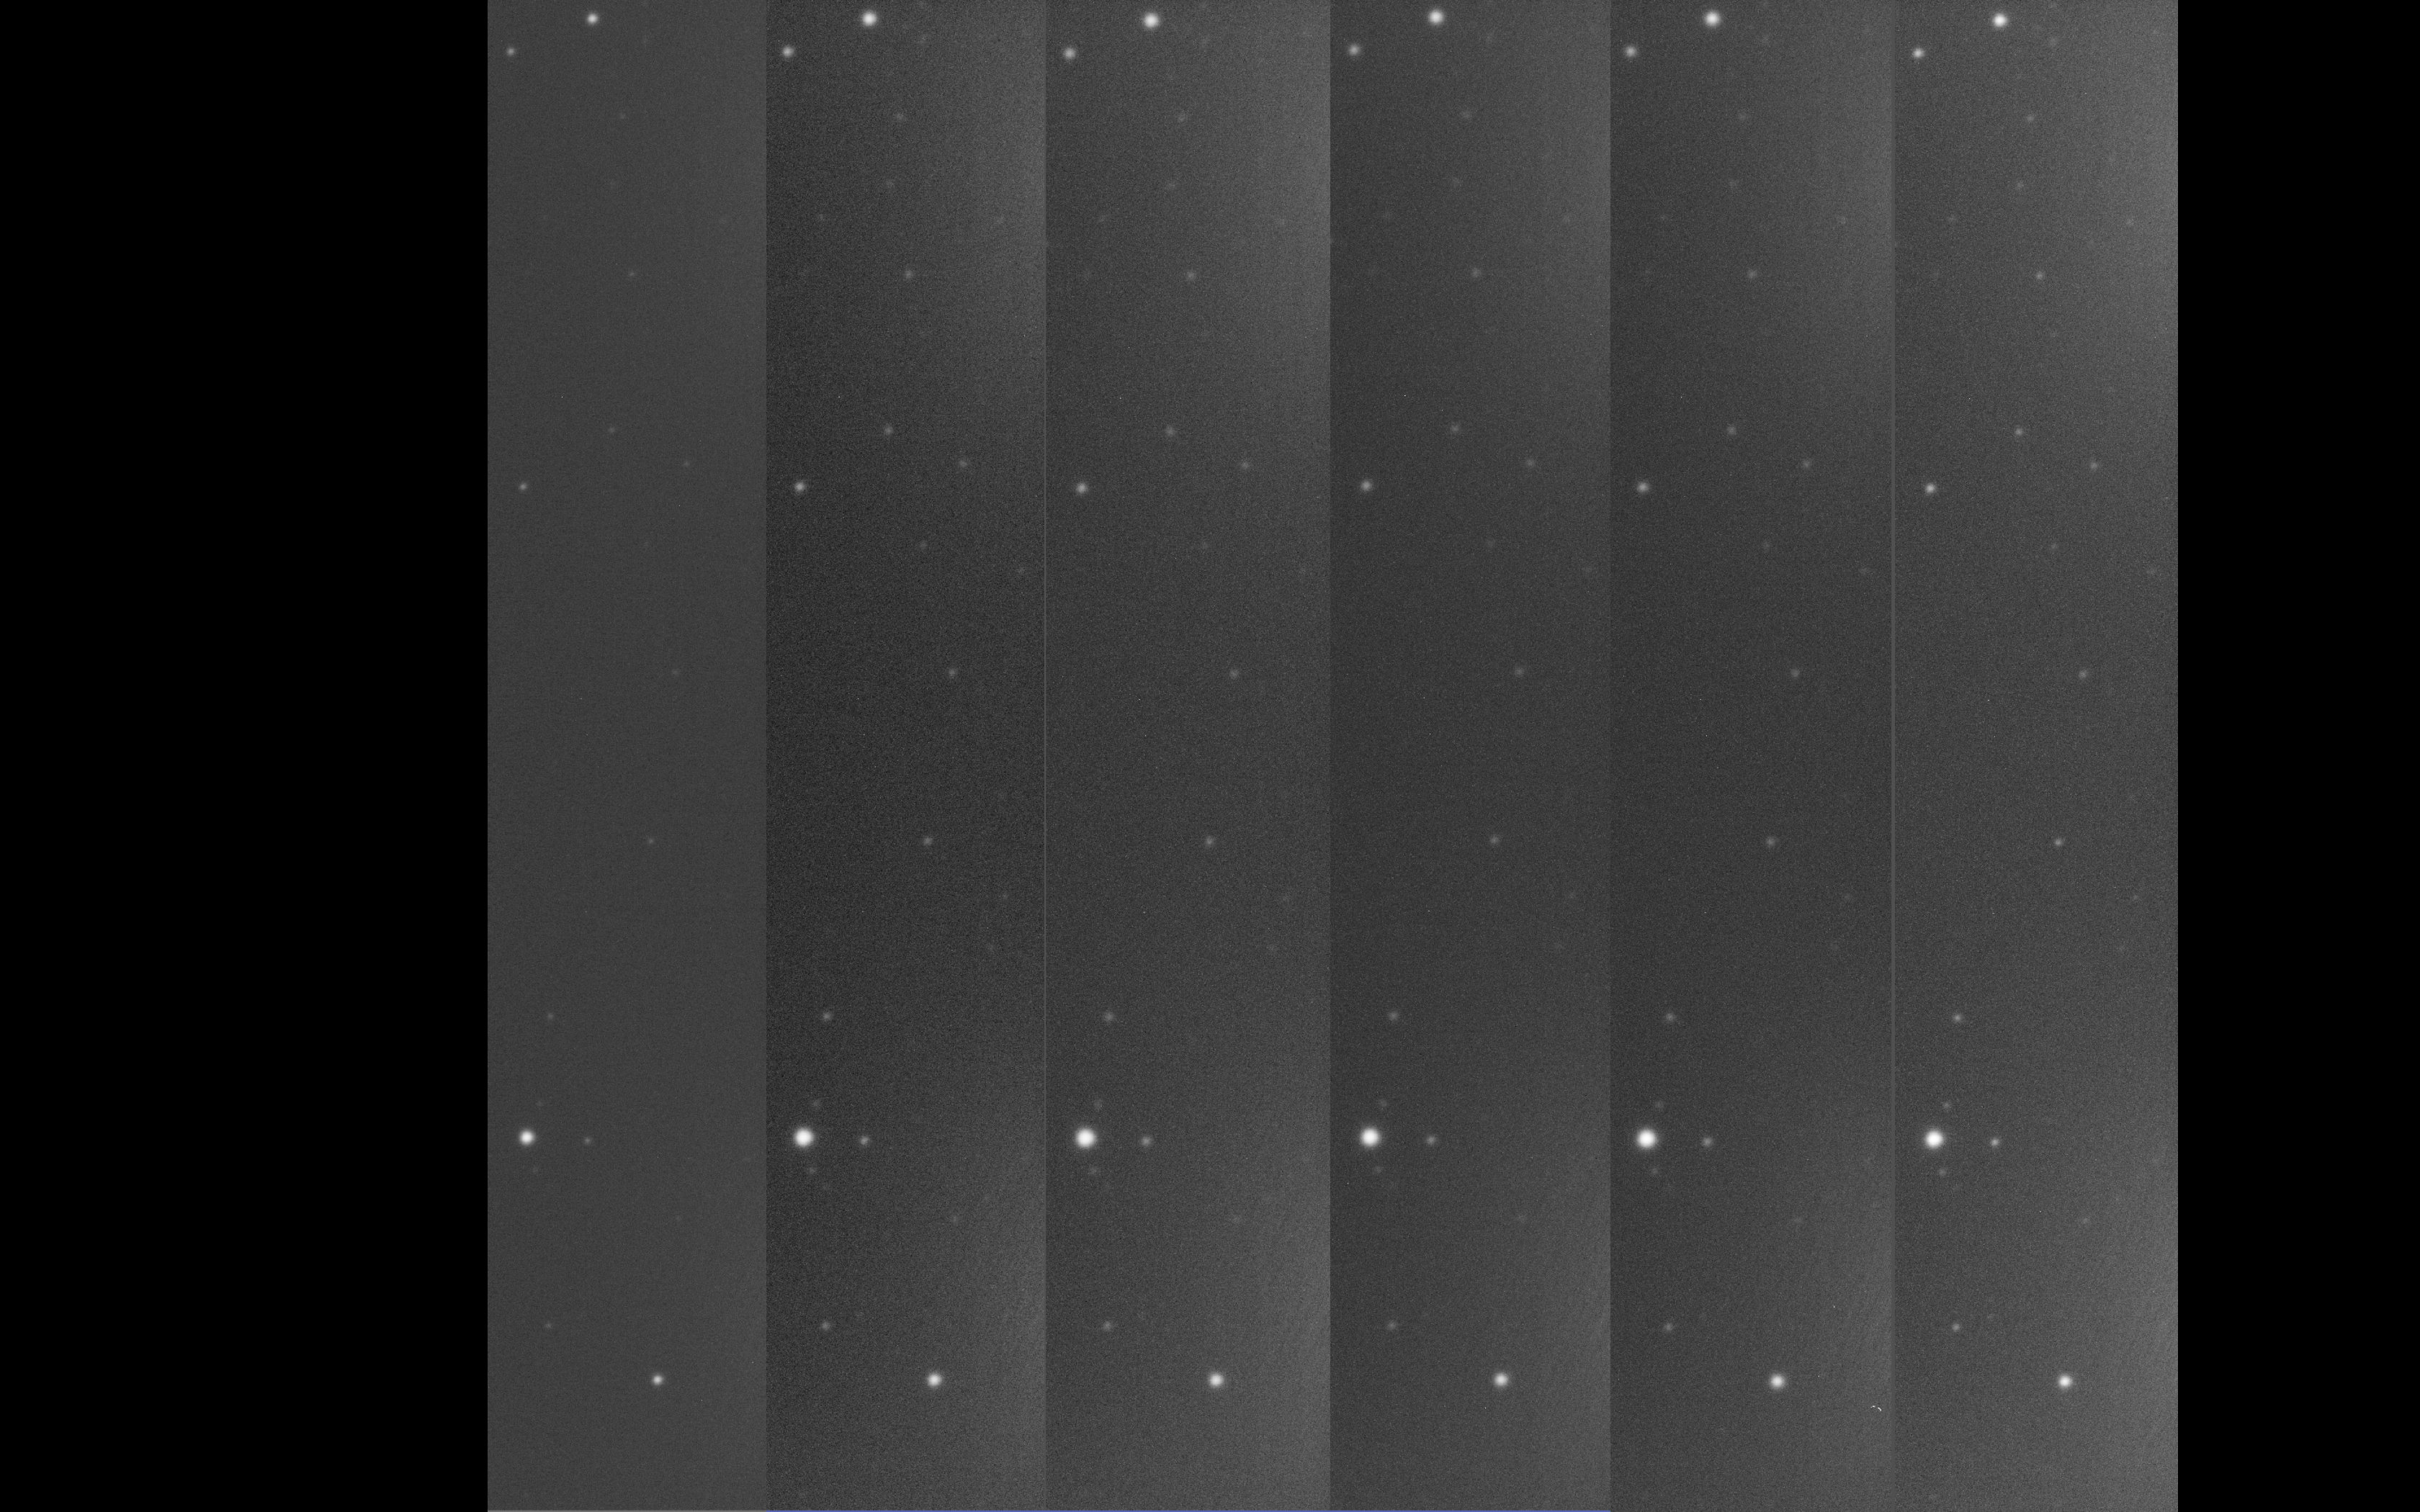
So after several false starts of broken cloud disrupting my ability to keep the dome open, I managed to grab the first 6 frames of 300s as above. Here is an animated GIF of all the images in order of Gain lowest to highest. (Click the image to animate or right mouse click and download)
In my next blog I will look at the analysis of the first 6 frames whilst I take the other frames to compare.
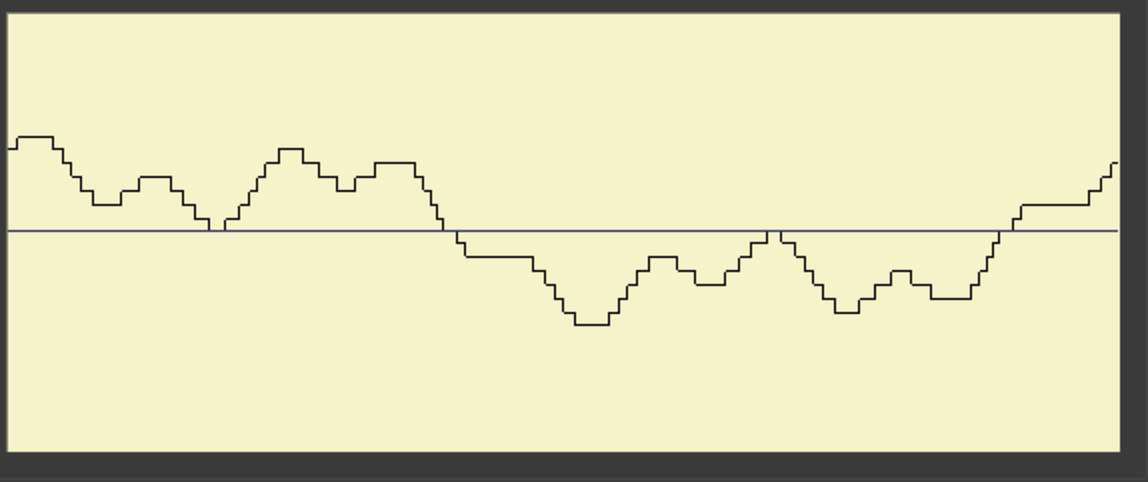
An unexpected clear spell this evening, I was sitting out on the patio looking at the clouds clearing and so setup the dome to perform the Periodic Error Correction (PEC) analysis for the mount.
To perform this I needed to unplug the hand controller for the MEII, unplug the ST4 guider cable, turn off a bunch of settings within the autoguider software with The SKY X (TSX) and also turn off TPoint.
I then connected the ZWO ASI1600MM to TSX rather than SGPro. This was so that I could record the log needed for the PEC through the autoguider add on software which records in a format that the PEC software requires. The challenge again was that I could not get the ZWO camera to connect in TSX. I just kept getting error 200. Searching TSX forum I finally found the issue and downloaded the latest driver from ZWO but through the link from Software Bisque. To install I needed to log in as Admin.
So I started to record the star movement without performing any guiding. Once done I imported the log file Autoguider.010.log into the PEC portion of TSX.
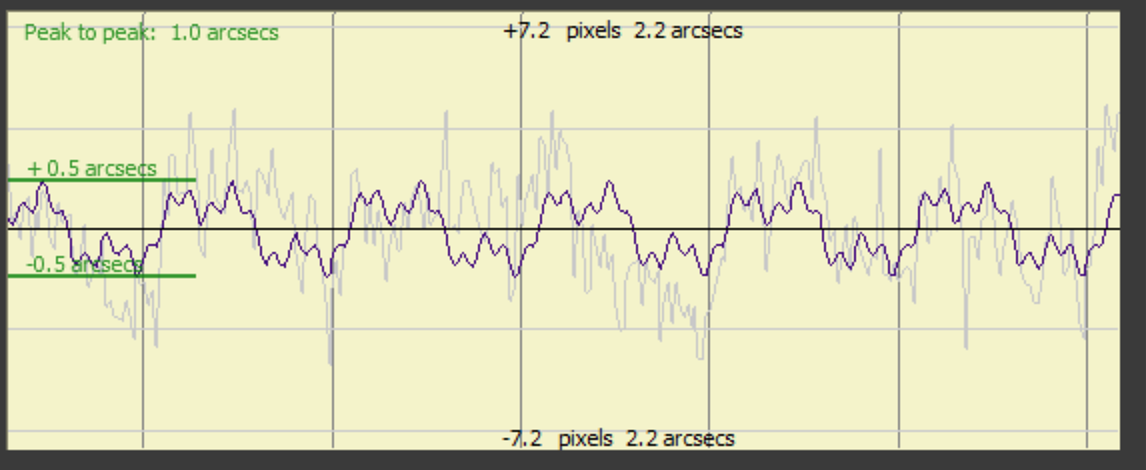
I then performed a fit so that you could see the sinusoidal waves before I then fitted the correction to it. A quick look using PHD2 Drift Alignment to see what the drift now was, was very promising with a sinusoidal wave over 10-15 minutes.
Final fitted curveModified CurveSinusoidal Drift Alignment check
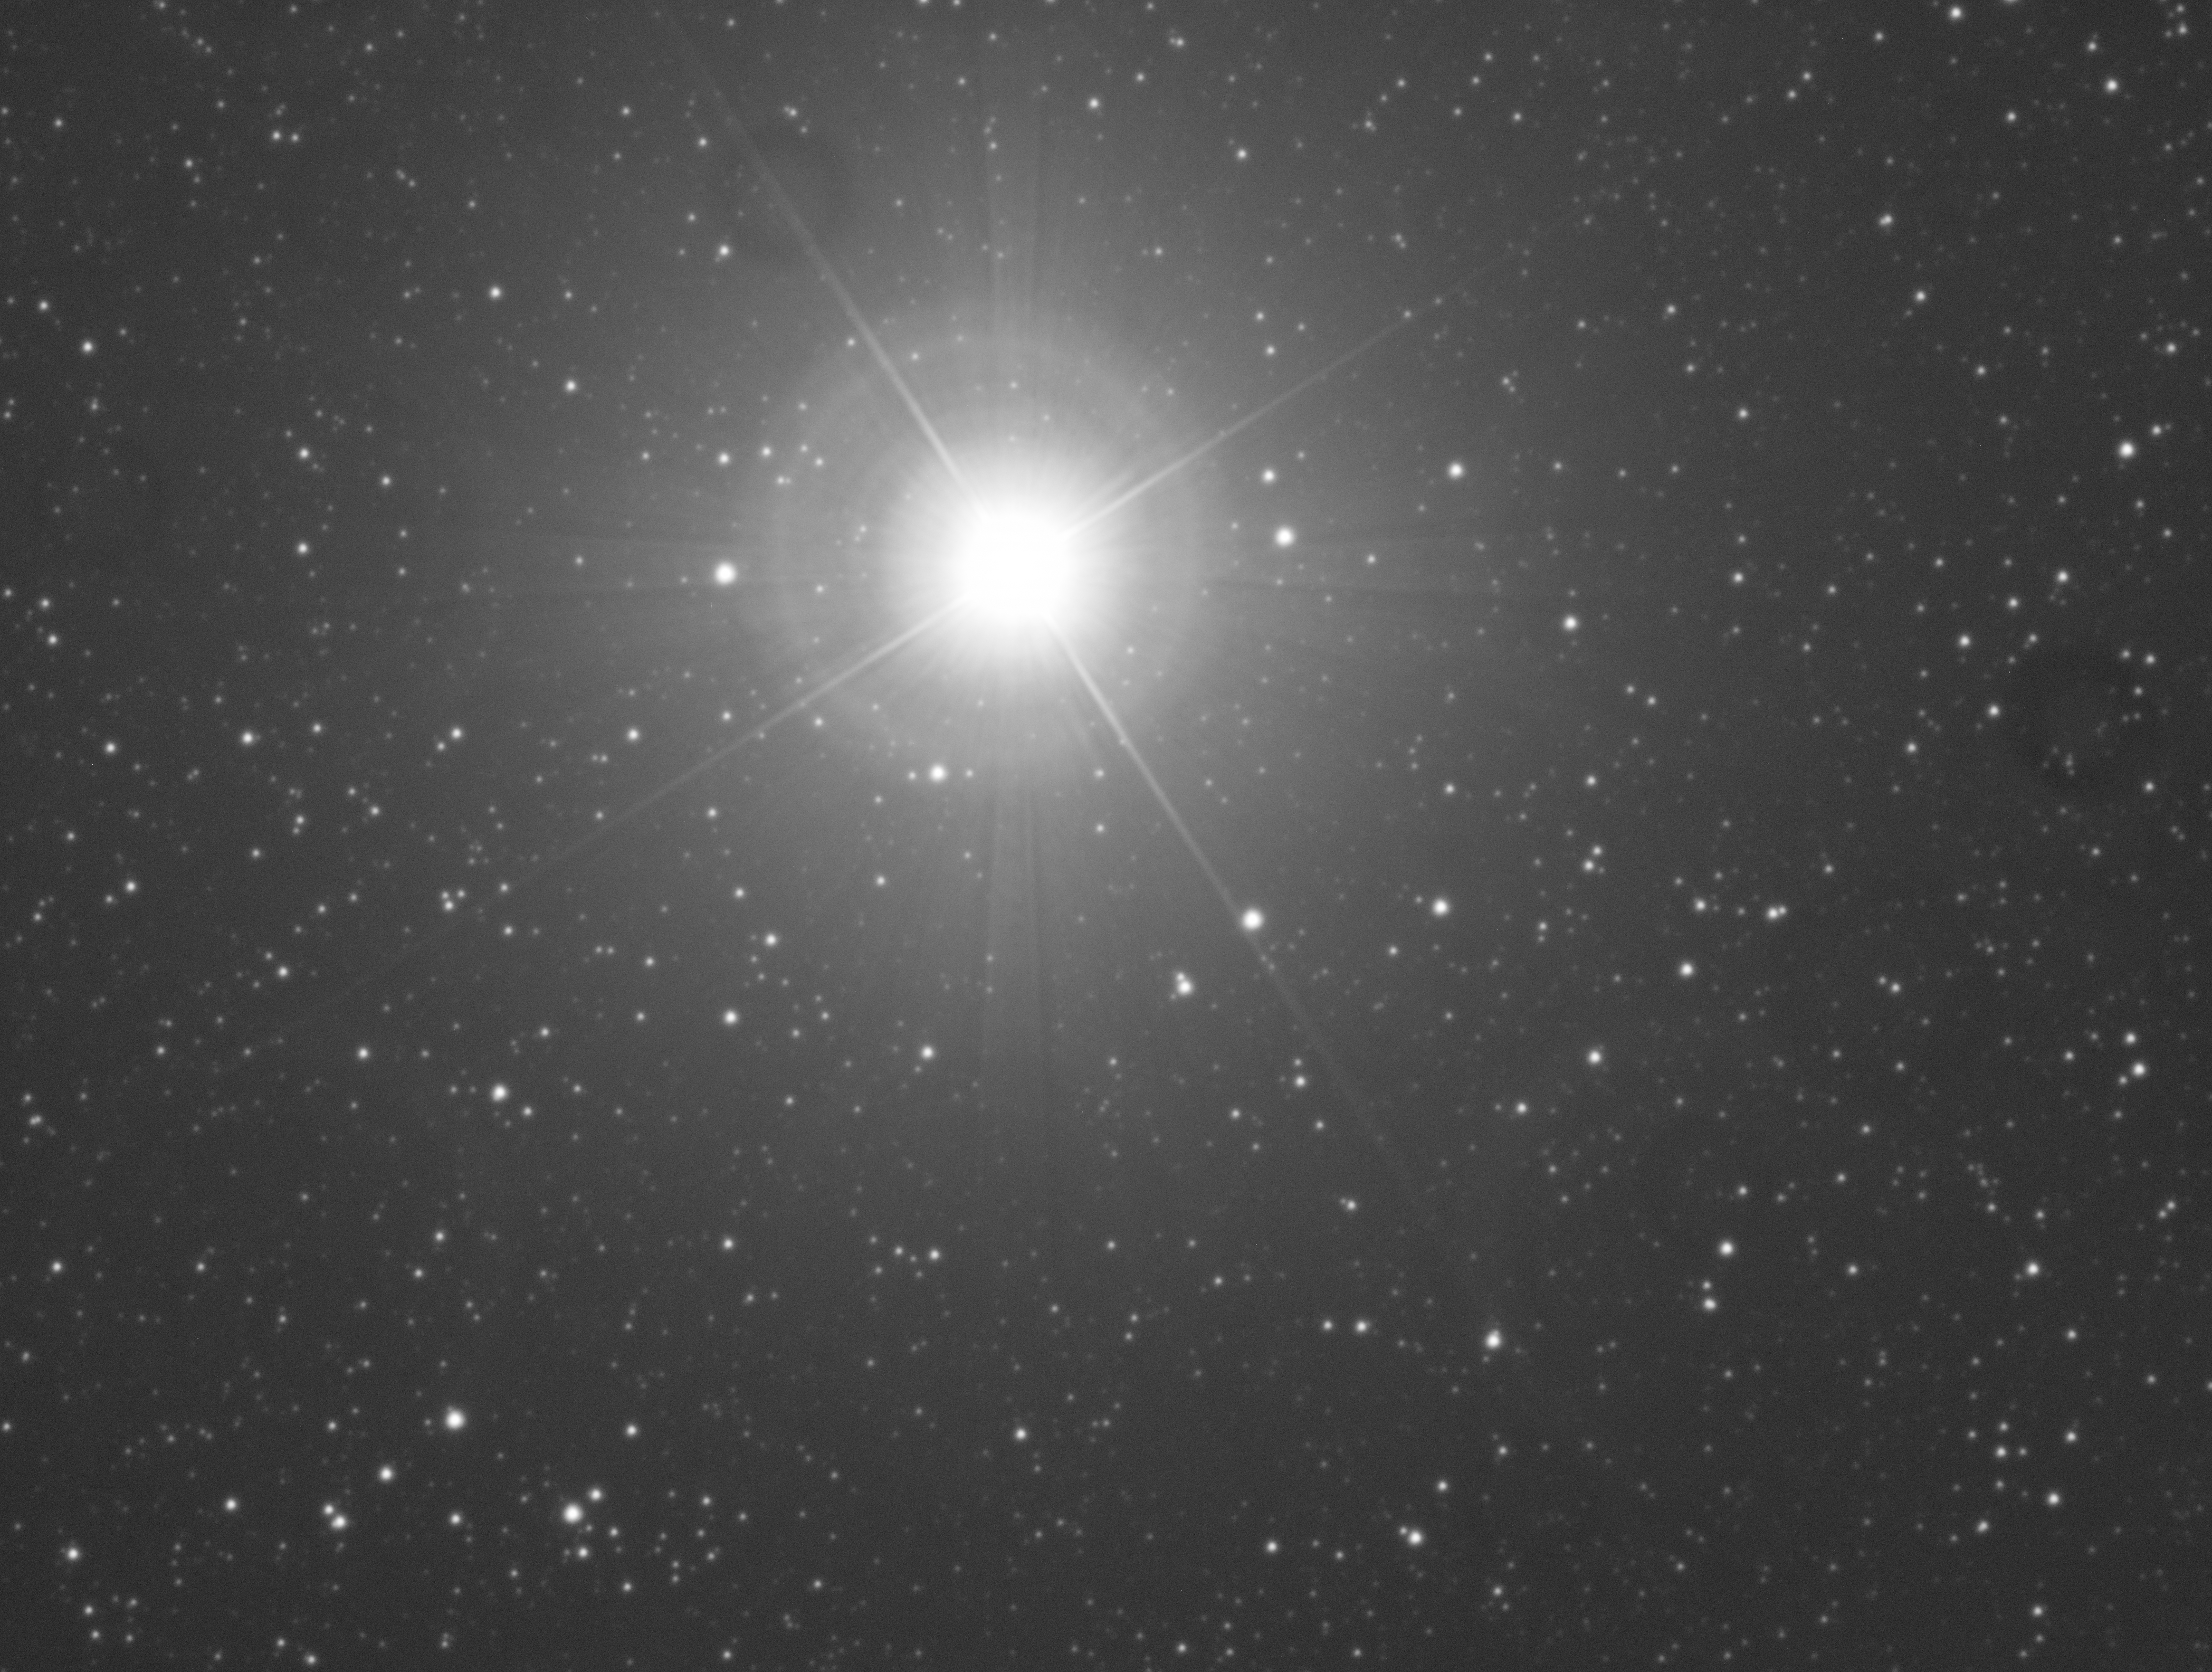
I then went off and tried to image unguided to see if it made a difference, it had, I recorded a 10min unguided image through the 12″ 2.5m focal length scope with no trailing of Altair.
10min Unguided Altair exposure
I then attempted to slew and take an image of the Elephant Trunk in Ha again, however I was foiled by not only the cloud moving in but also not being able to get past the message Guider Settling. I need to talk through with GingerGeek to see why that is. Meanwhile bedtime for Mr Shave-Wall.