22:00 – 01:44 (GingerGeek came over and Bob was remote)
So the original plan was to perform another exoplanet observation and improve/learn from our previous experiences. However the weather did not look like it was going to be accommodating so we decided to change plans.
At first we planned to take a shot of Pluto and then go back to it later on in the month to see how far it had moved but it was low and below the the IMT3 visible horizon.
Next up was to continue imaging Messier objects for Dave’s Messier Marathon collection. We settled on M14 and had created and started an imaging sequence but again the clouds rolled in putting a stop once more to some constructive imaging.
So we then decided to track an asteroid for as long as we could before the clouds stopped us. Once Dave had loaded the asteroid database into TheSkyX we then choose one close by to the previously planned Exoplanet. The asteroid 85275 1994 LY (magnitude 14.01) was in the constellation of Ophiuchus.
We turned off PHD autoguiding and mount control in the SGPro control panel as we were going to be using mount tracking on the asteroid instead of sidereal.
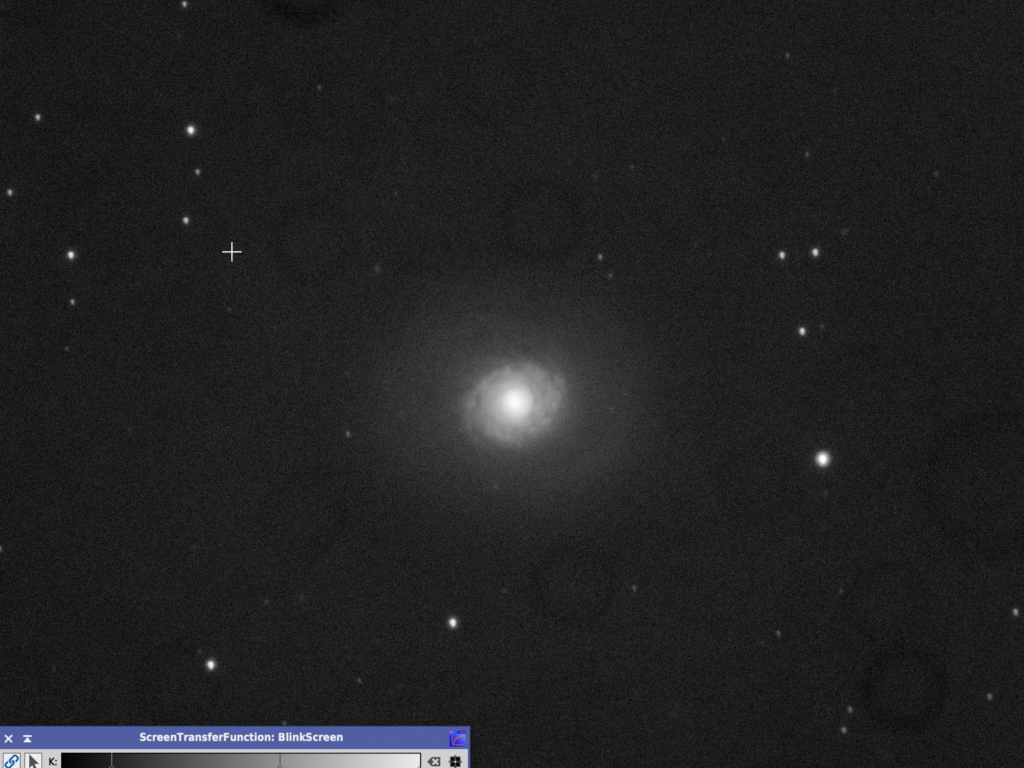
Autofocus using Luminance filter – 60,389 position, HFR 5.0, Temp 24.94℃. We started at 22:46 and took a series of 30 second images until the cloud cover stopped us. Dave then used the Pixinsight blink script to stitch the resulting FITS->PNG images into a movie, then looped the short AVI, added titles and music in iMovie (best viewed full screen and in HD).
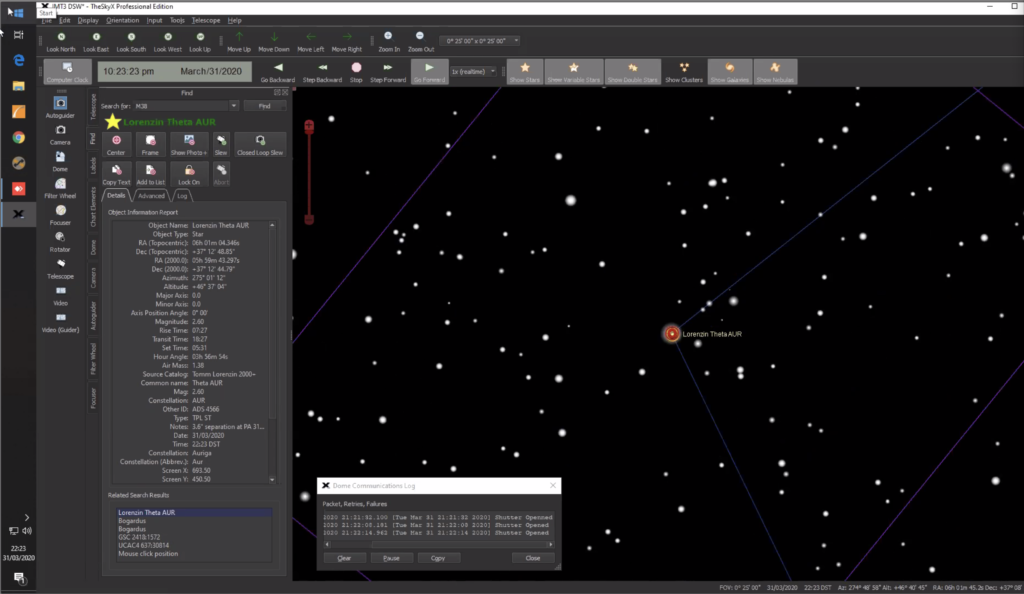
I opened the dome at 8:30pm and then went off to do some more work. A few calls later and it was time to come back and see if I could grab comet C/2020 F3 NEOWISE which had now moved further West and further in altitude over the past week, meaning it should be visible from the dome. Below is Arcturus as I performed a quick sync.
Arcturus
Below you can see Arcturus on The Sky X with the dome slit showing and the obstructions from the horizon also present.
TSX
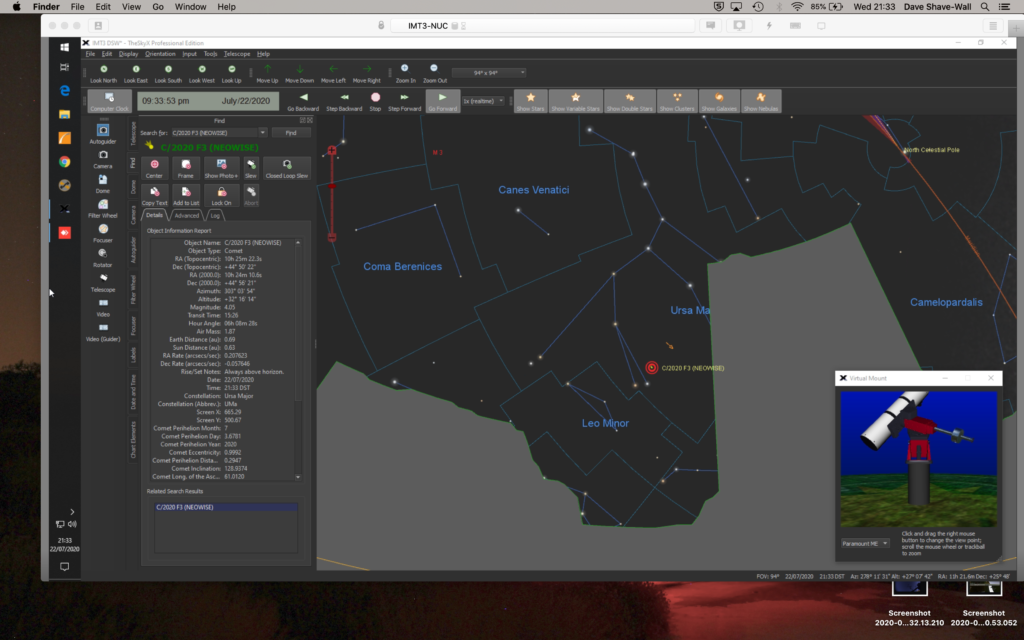
Comet NEOWISE can be seen just above next doors tree.
NEOWISE
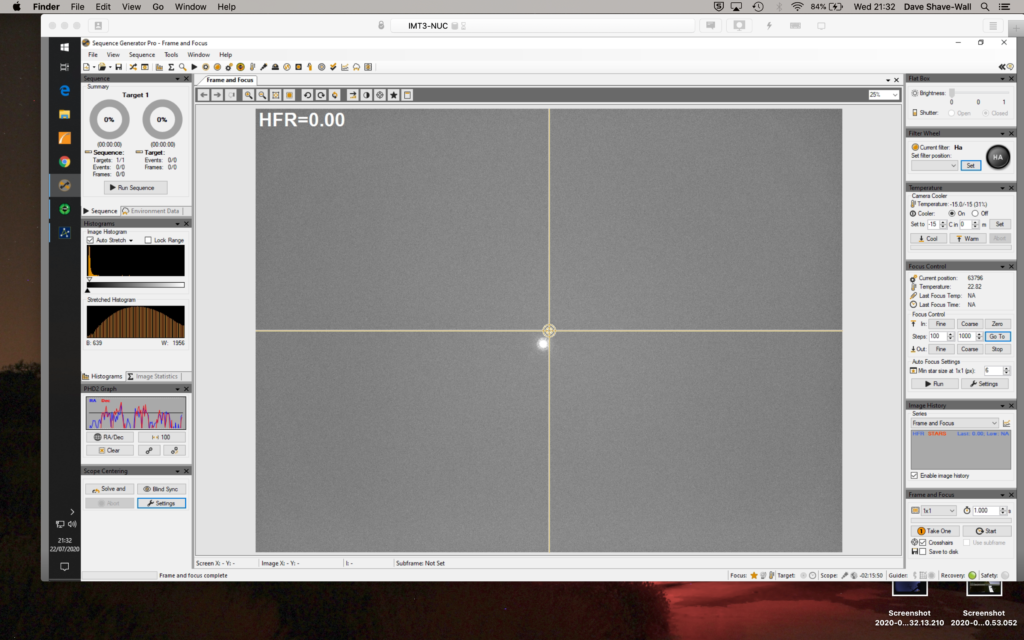
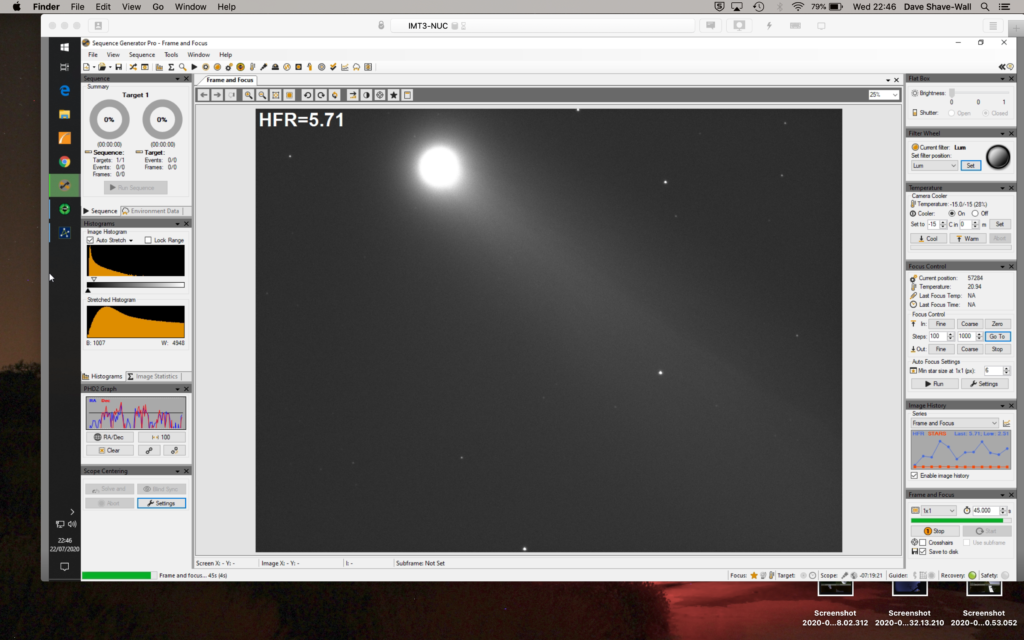
A quick peek with the camera and I could just make out the comet.
Quick peek of the comet but clouds
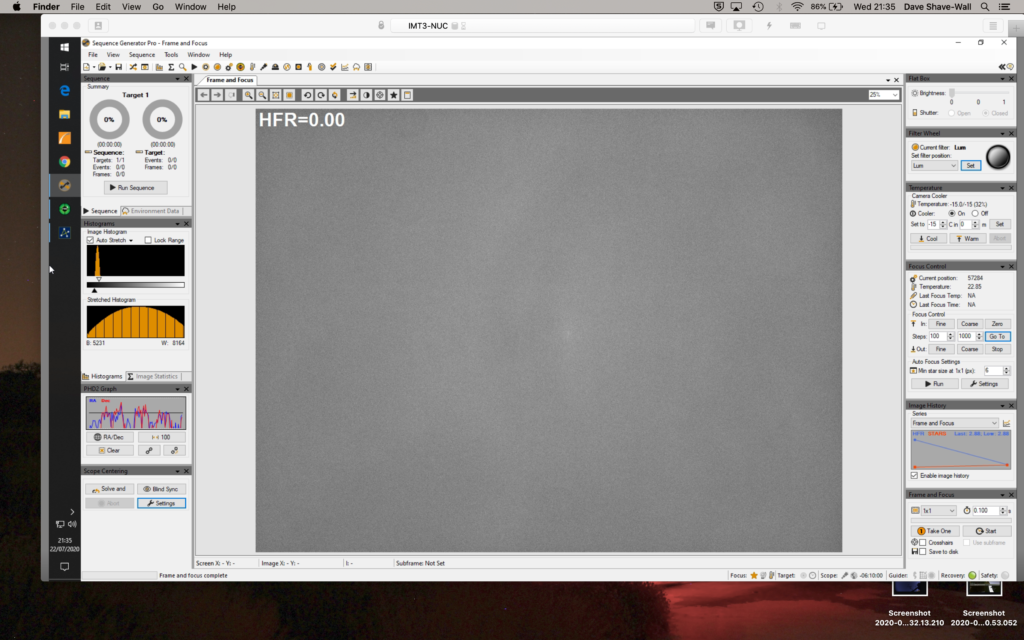
Clearly more clouds rolled in which is typical
More clouds!
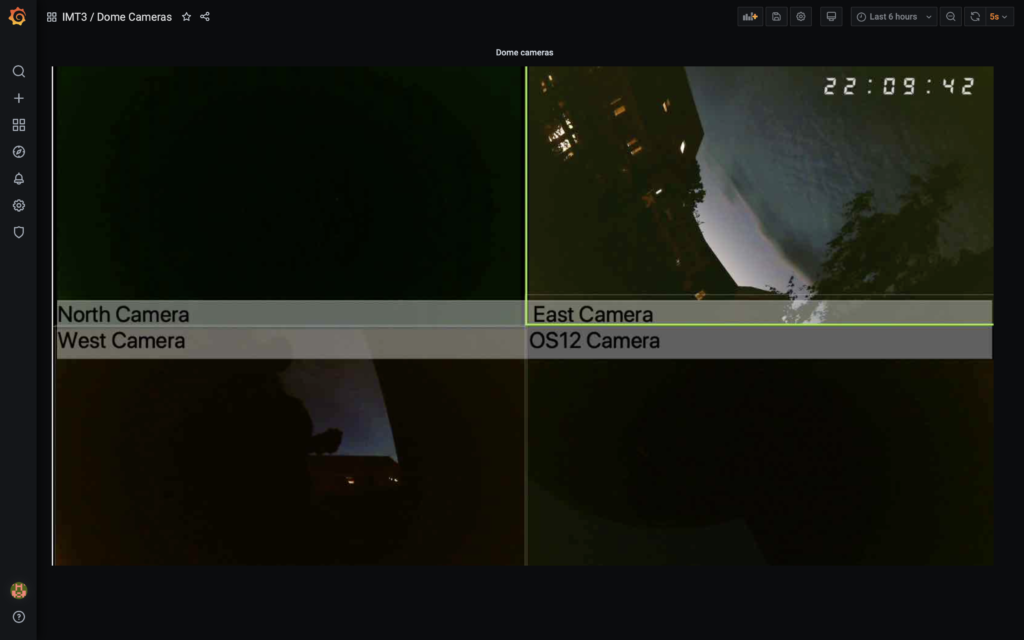
Looking at the cameras in the dome I could see the cloud bank of cloud (picture top right)
Cloud bank approaching
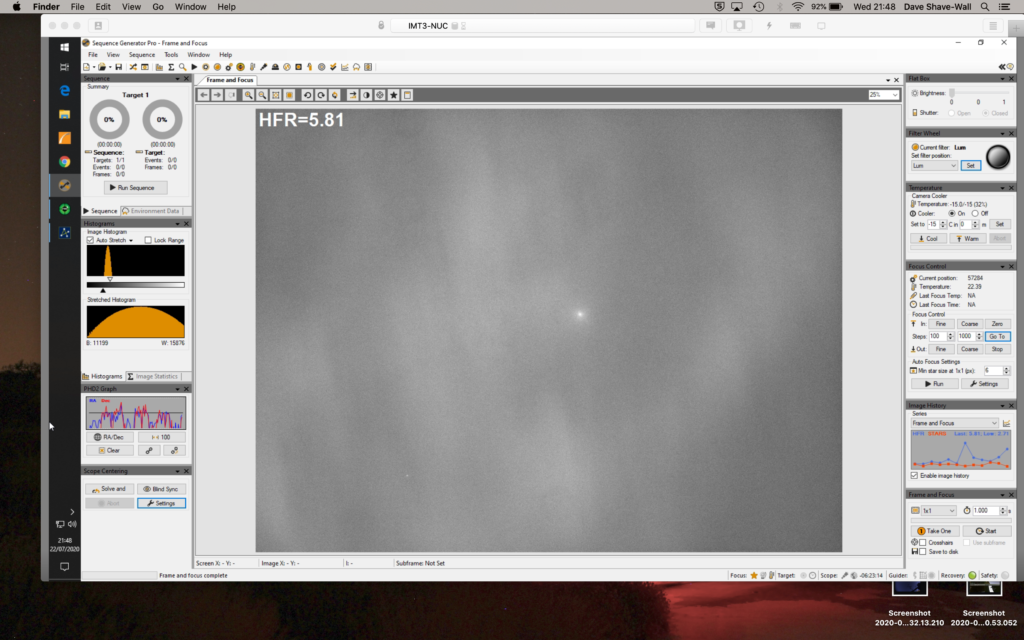
Fortunately the comet could be seen at the back of the cloud bank.
45 second exposure of Comet C/2020 F3 NEOWISE
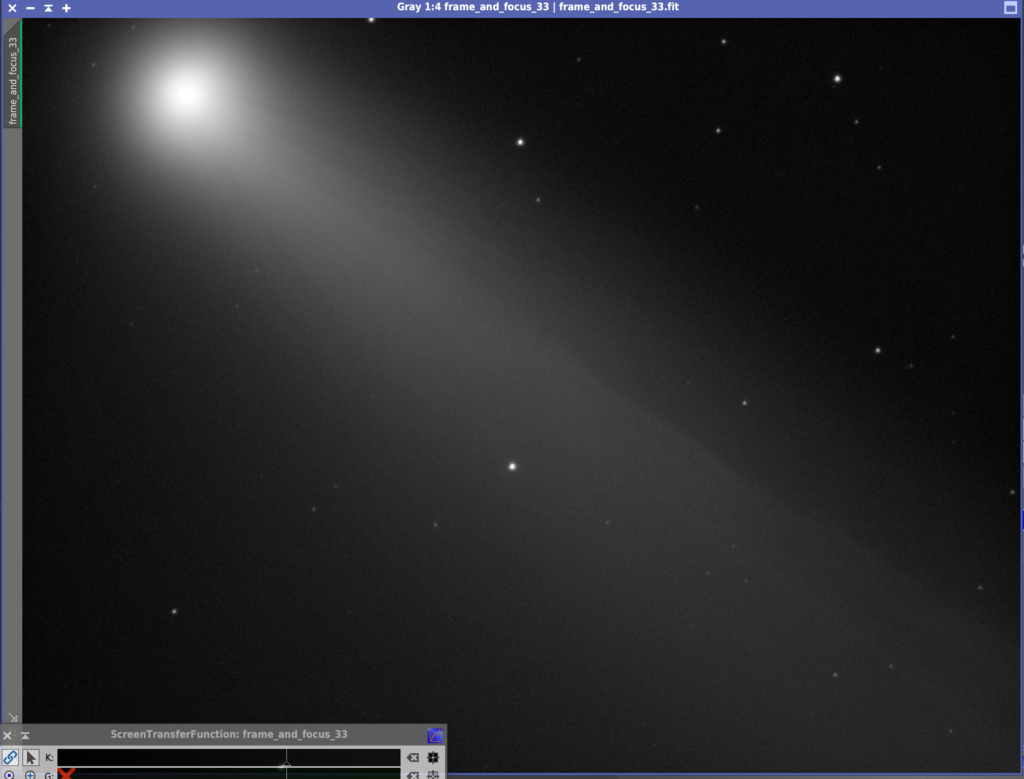
So I set about quickly taking some images before the comet disappeared behind the tree.
90 second exposure of Comet C/2020 F3 NEOWISE
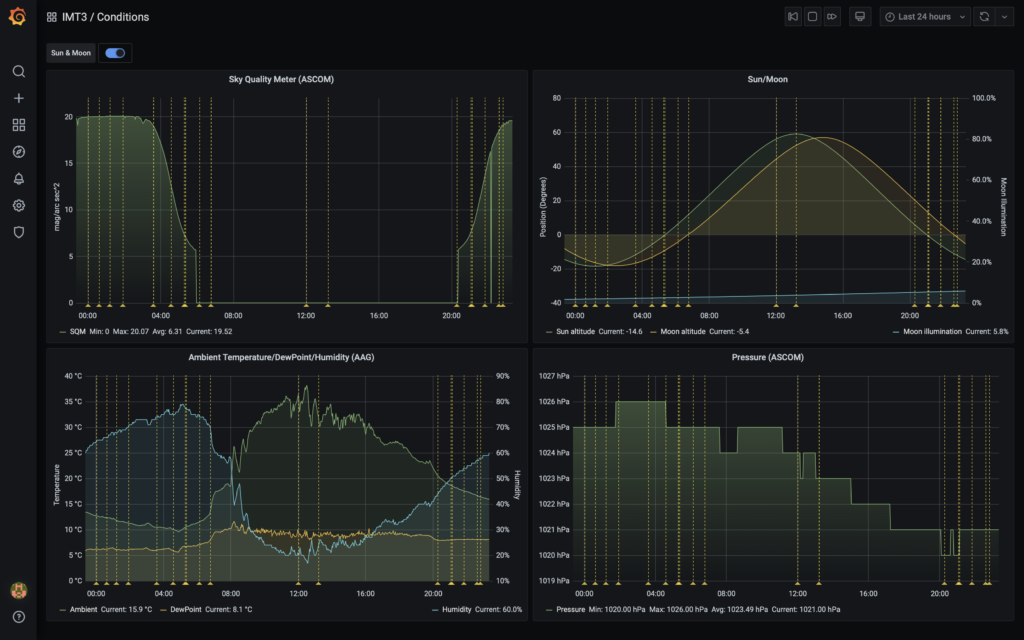
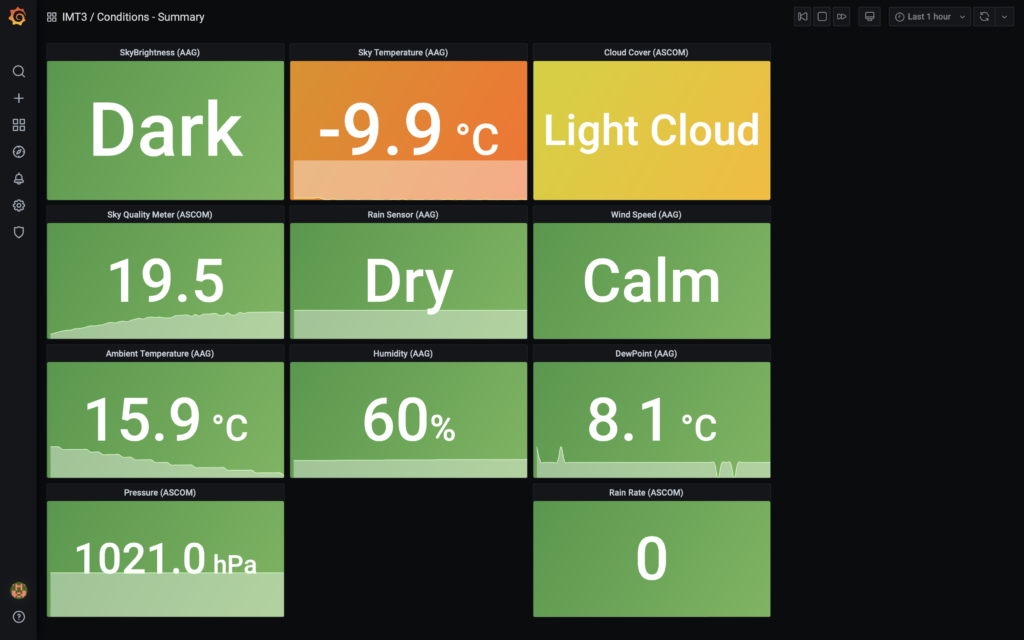
The other useful thing tonight was using the monitoring GingerGeek put together. Below are a selection of shots from the website.
IMT3 Conditions
The chart below shows the light cloud cover and the sky temperature is representative of the sky clarity and relates to cloud coverage too. The scale is inverted to -18℃ is a cloudless beautifully clear night sky, which tonight was not!
IMT Conditions Summary – Fisherprice style 🙂
At least there was no rain 🙂
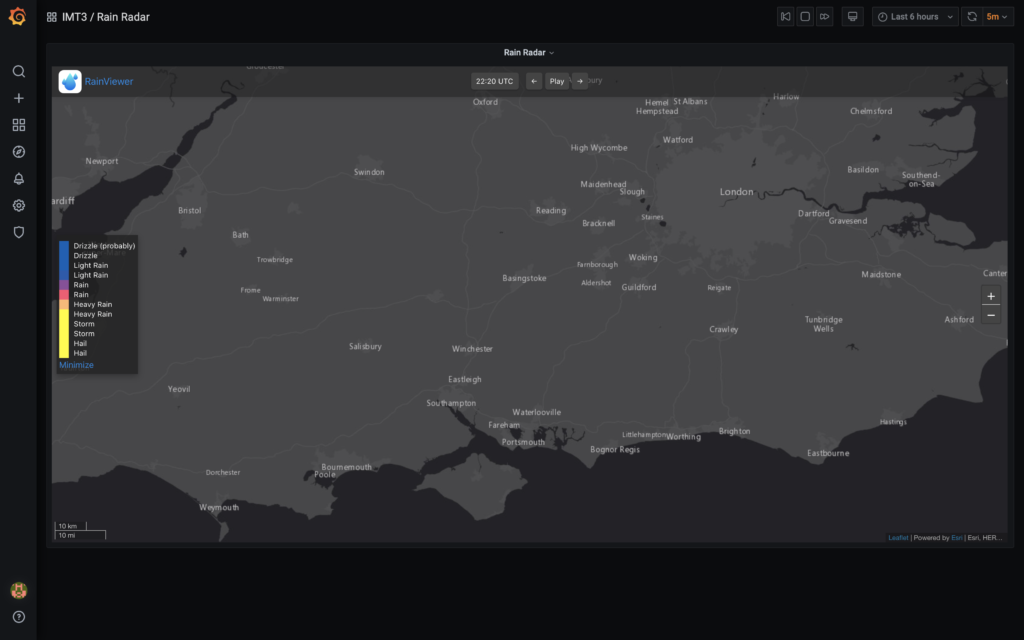
IMT3 Rain Radar
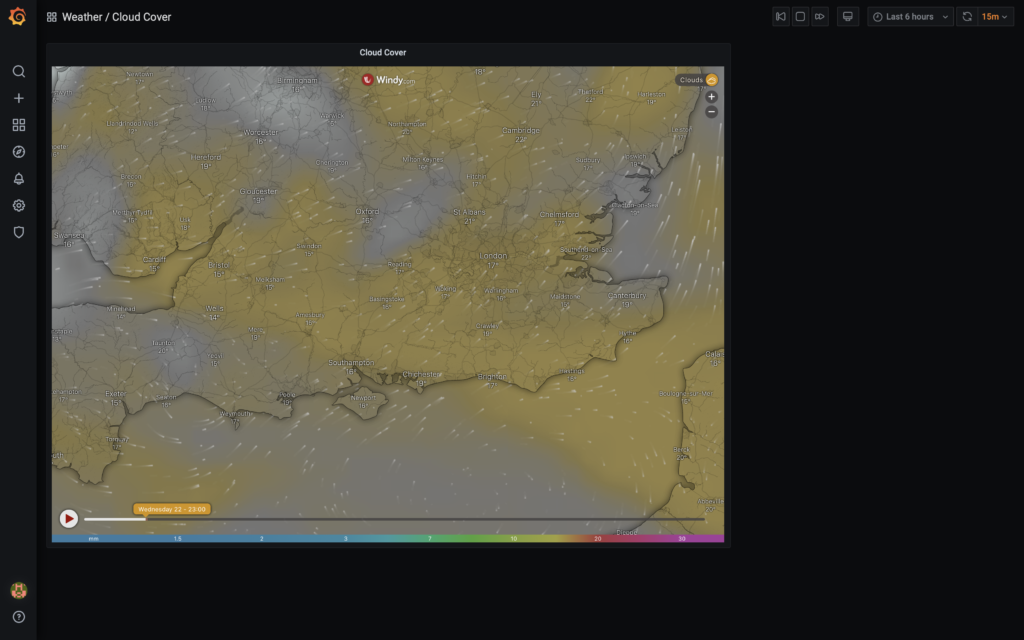
This image below shows the cloud bank just North West of Reading that was a problem.
IMT3 Cloud Cover
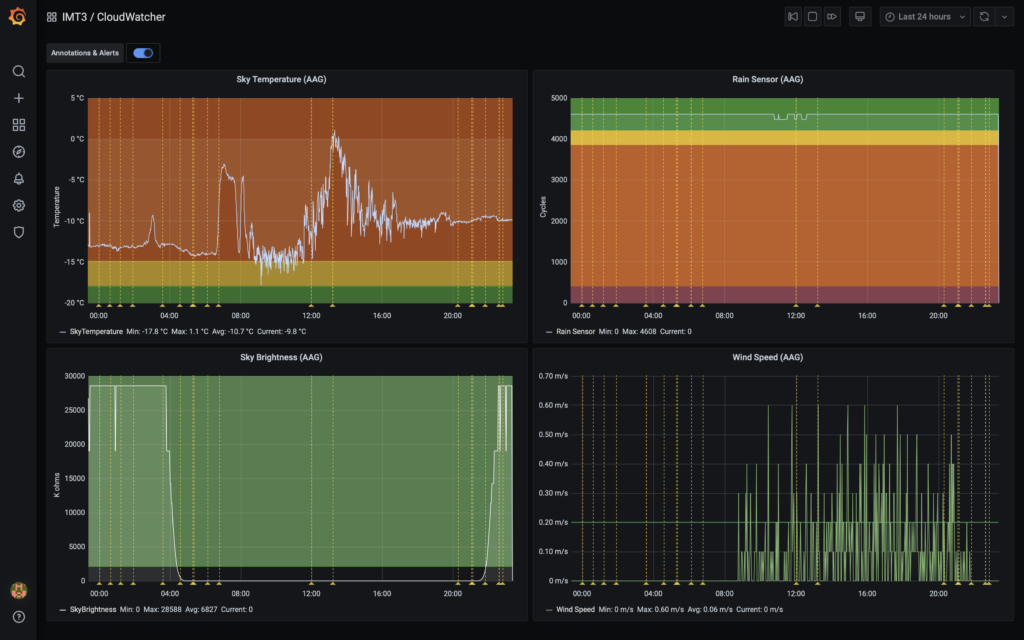
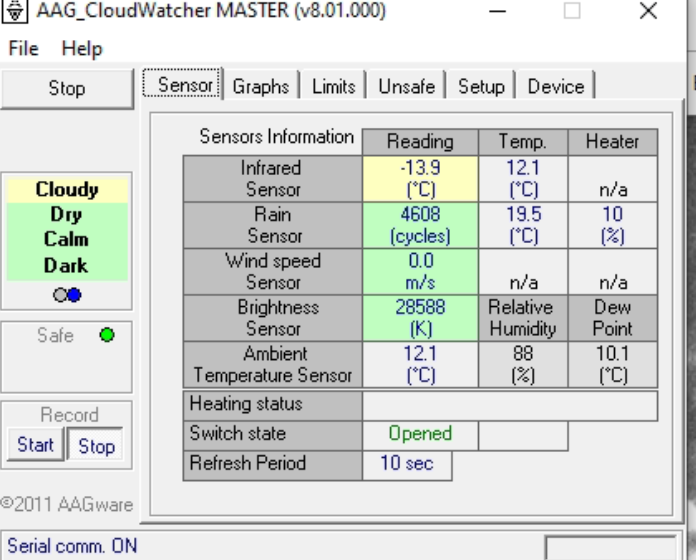
This next chart is from the data produced by the AAG CloudWatcher weather station. Note the sky temperature is nowhere near the -18℃ to be clear.
IMT3 AAG Cloudwatcher weather station
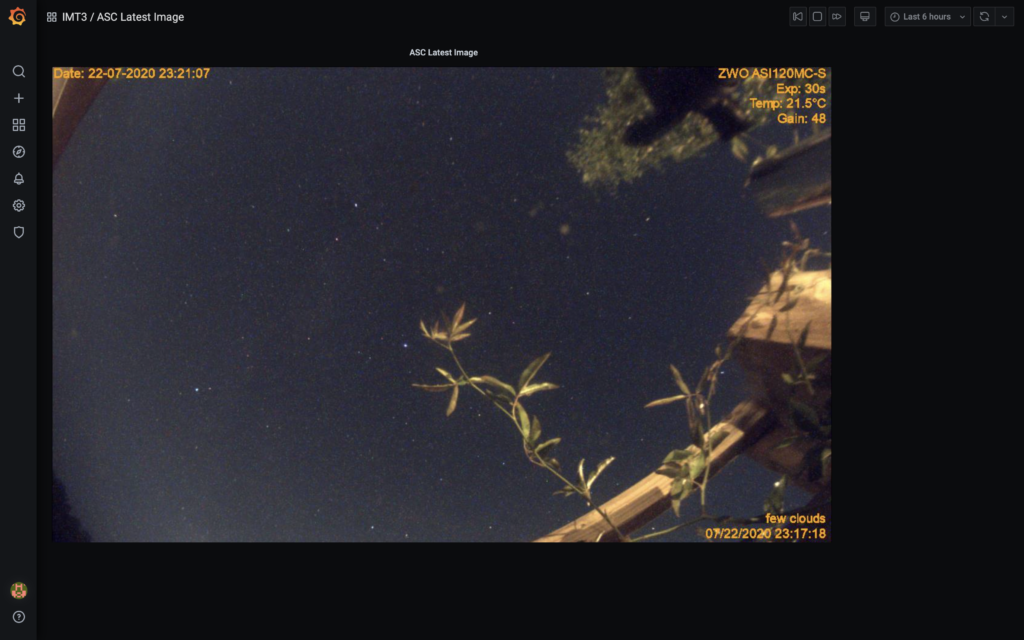
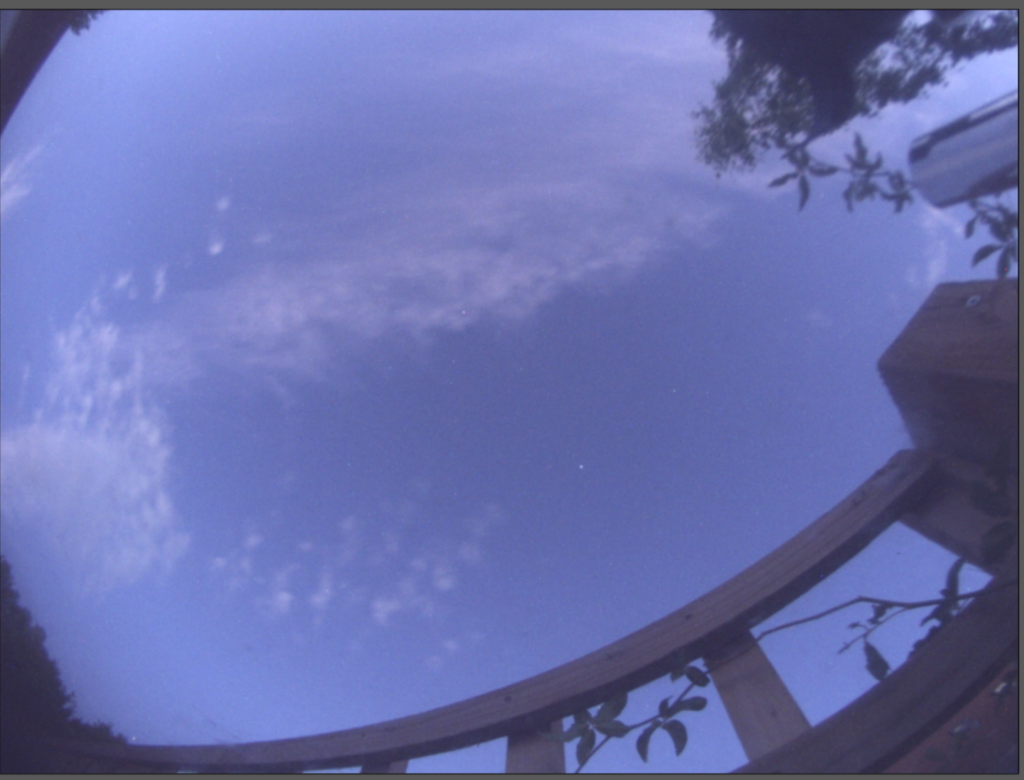
And finally the all sky cam just as I packed up showing the clouds clearing
So I opened the dome late this evening as it was not due to be clear. However an opening in the cloud meant I could test guiding again on the 12″, especially whilst it was light in the late Spring weeks.
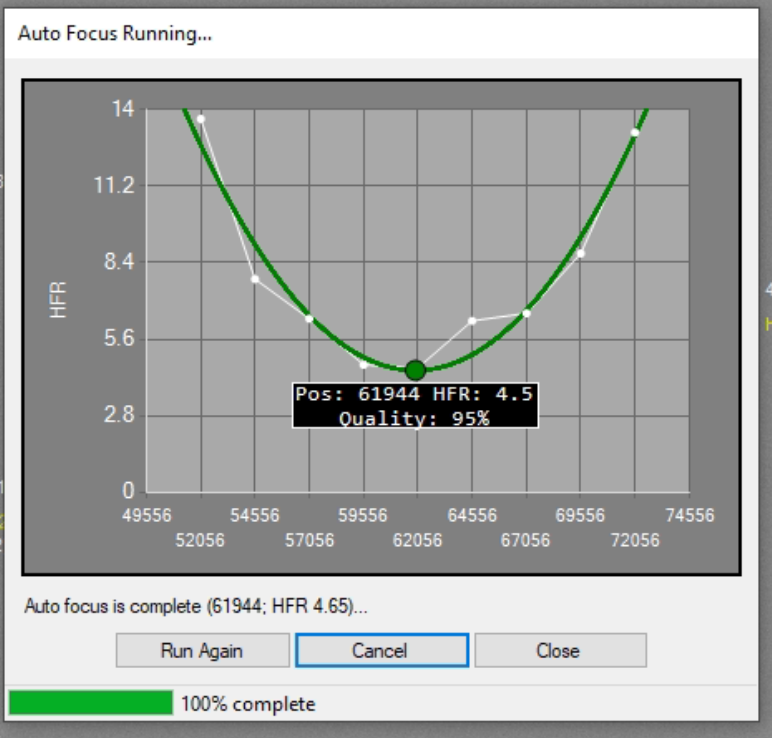
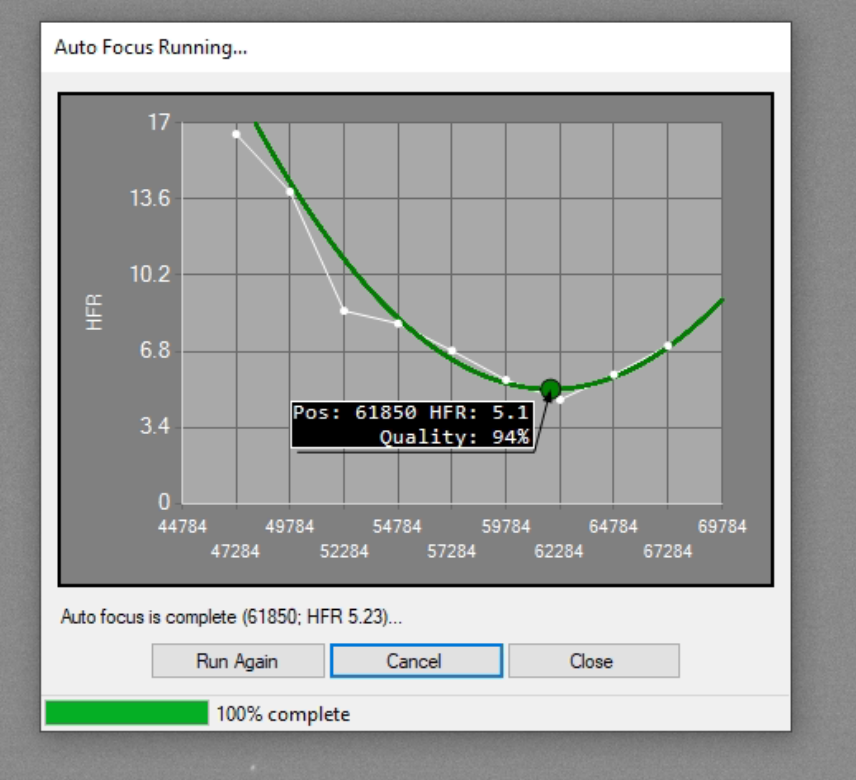
The first job was as always to focus which brought me to a reading of 61944 at 19.83℃.
Focus run
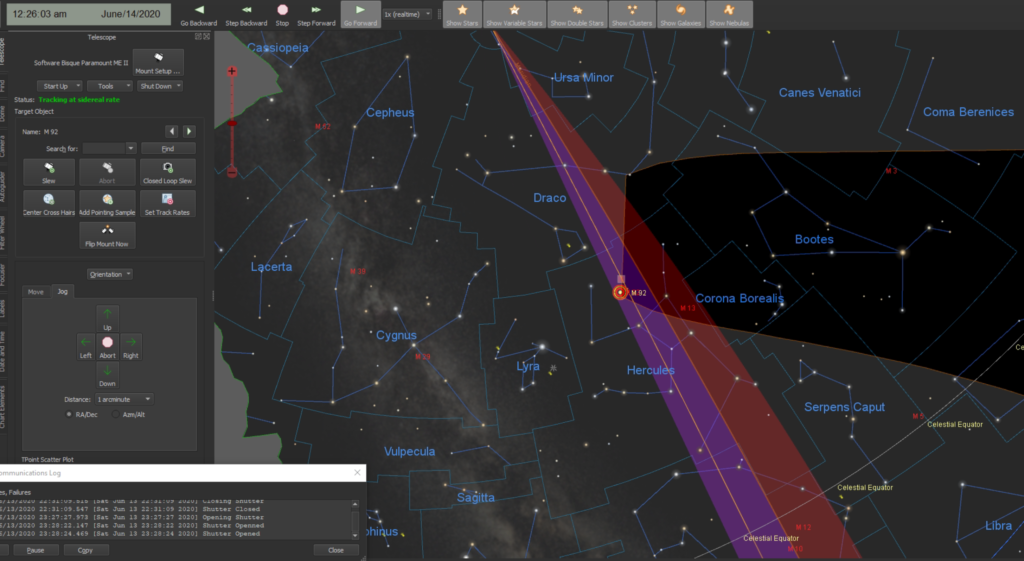
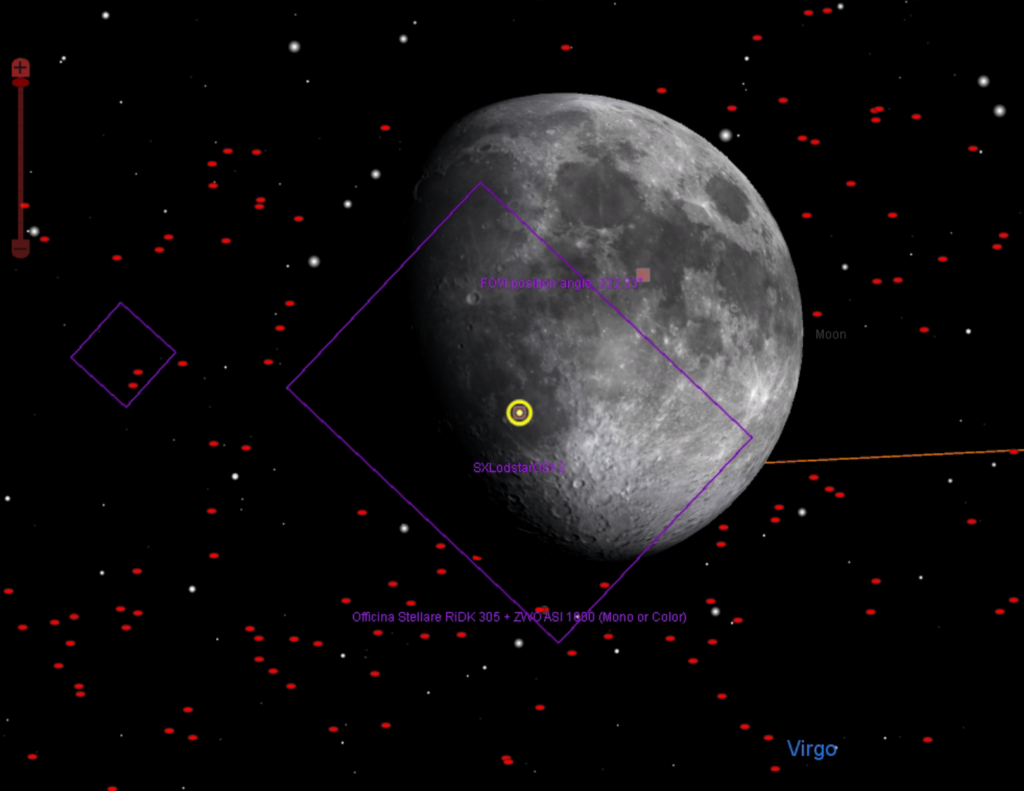
Another small job was to sort the guider FoV out. I went ahead and used M92 to align the guider.
Aligning guider FoV using M92
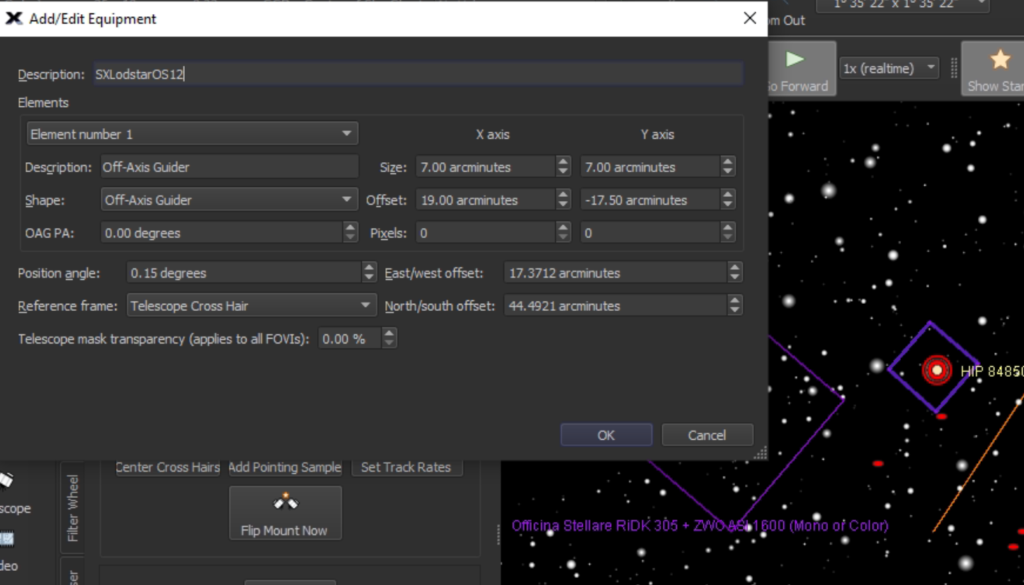
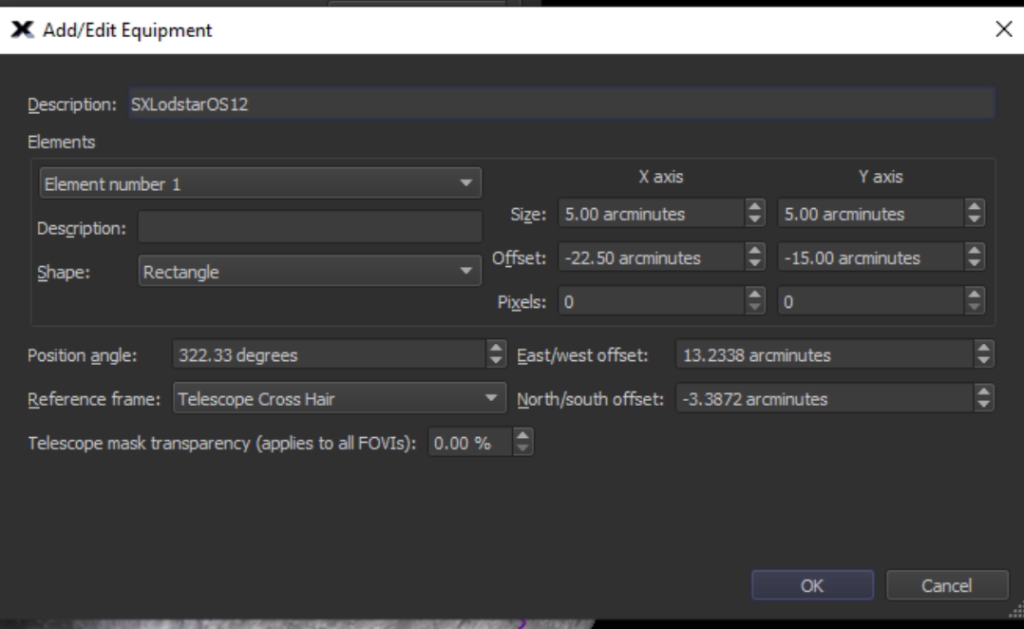
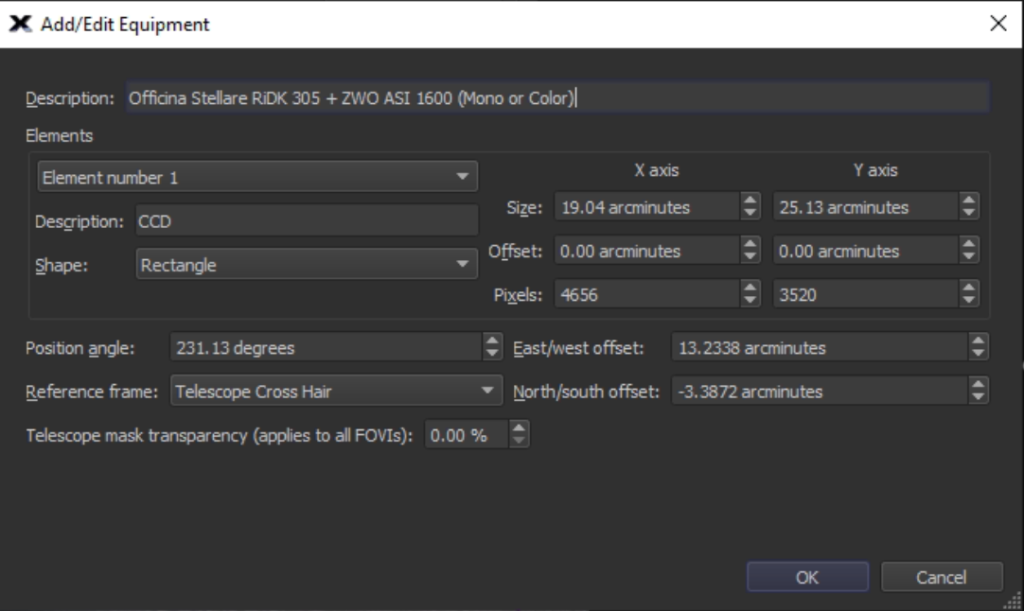
The final FoV settings are here for completness.
FoV for guider
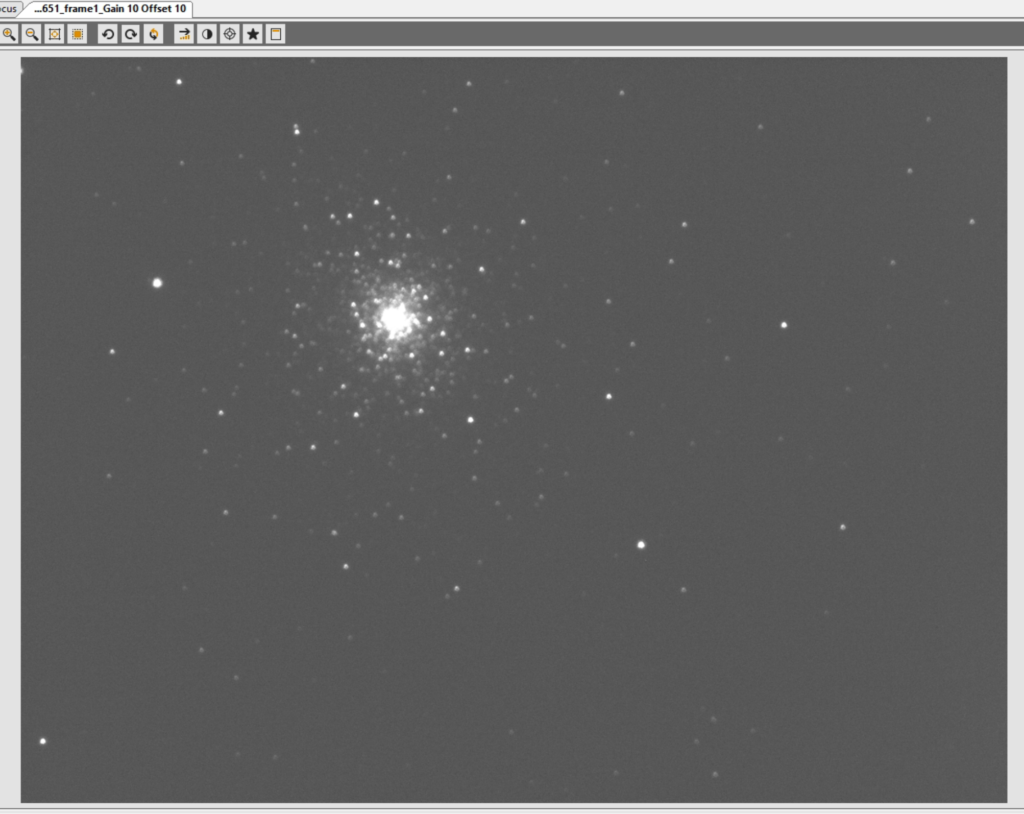
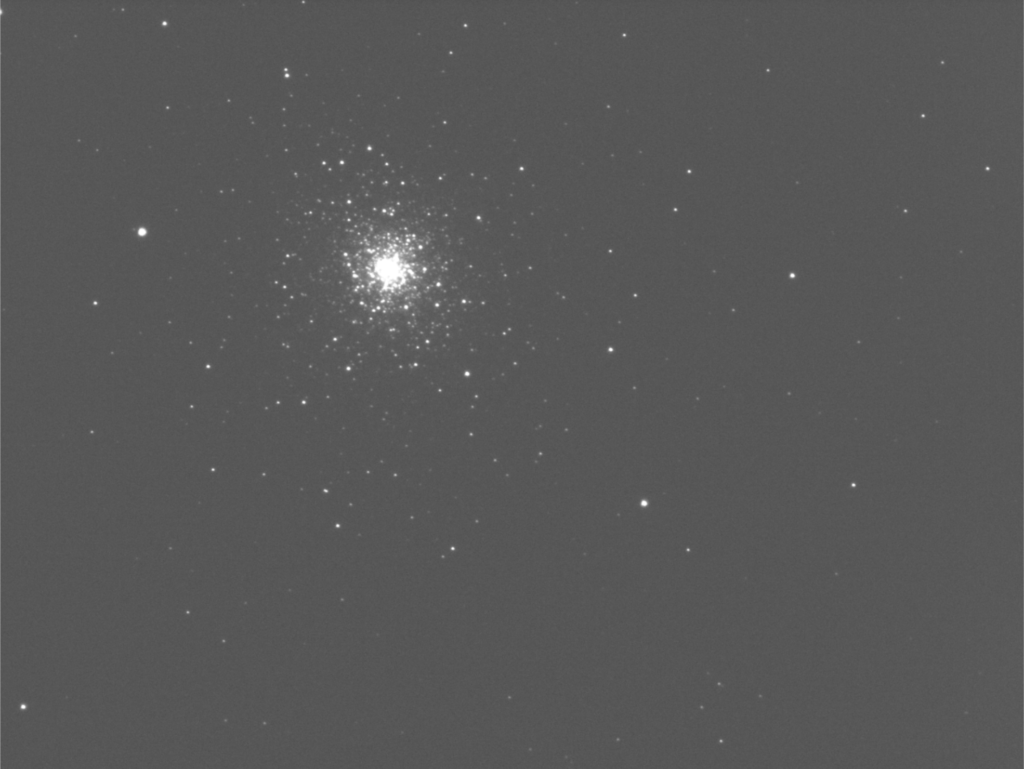
Set AS1600 to Gain and Offset 10 due to cluster being very bright and I needed to set a standard of 60 seconds minimum exposure. Gain 139 and Offset 21 gas saturated unless I selected 15 seconds, Gain 75 and Offset 12 saturated at 30 seconds so hence 10 and 10 which came in about 58k ADU.
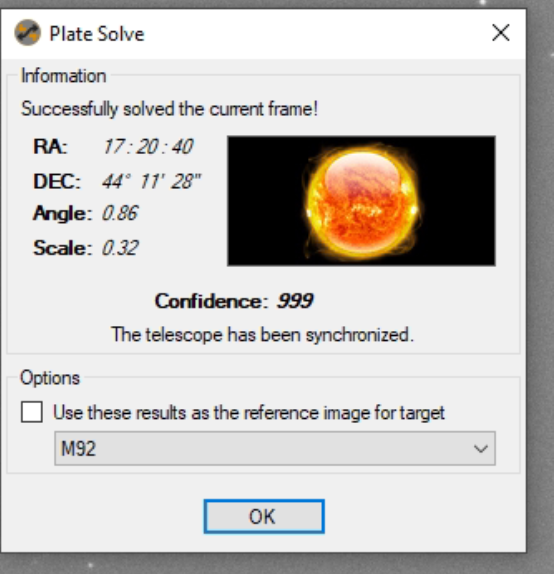
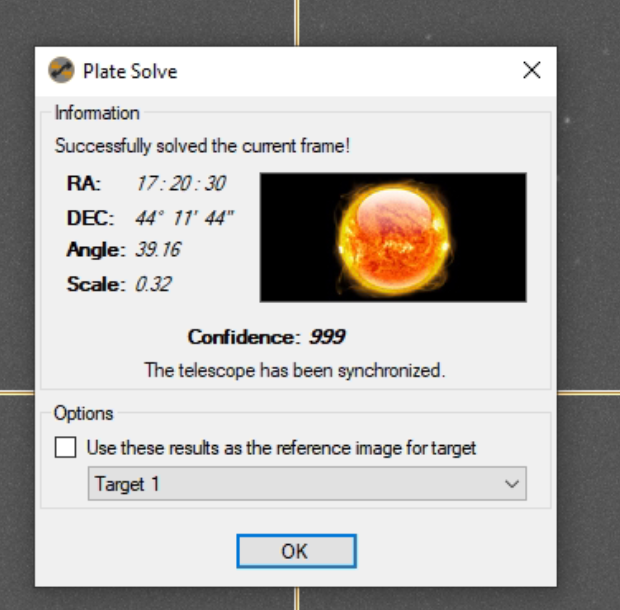
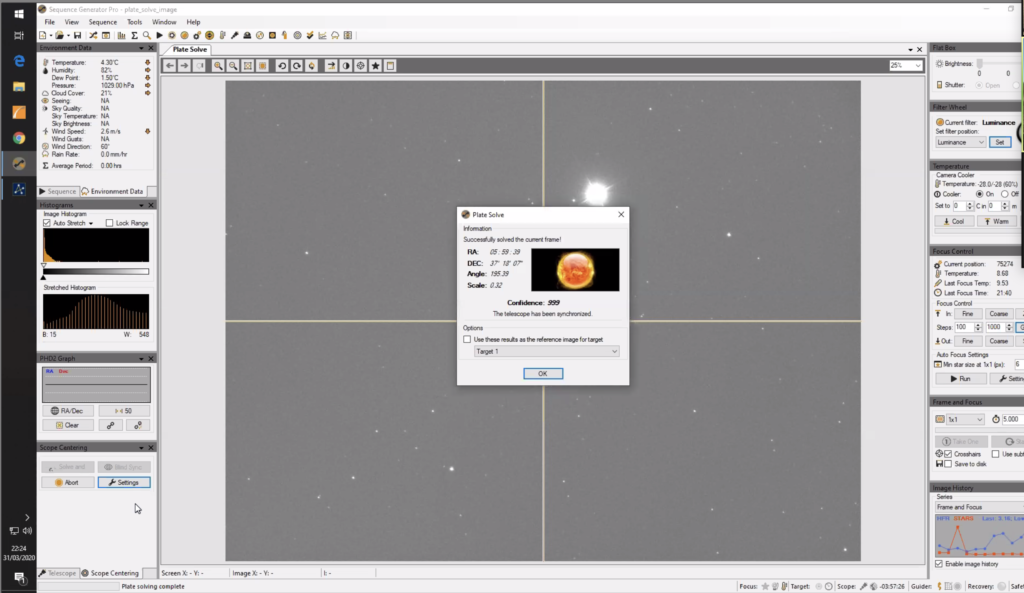
I then performed a slew to a nearby star so I could centre the scope, there platsolve completed successfully and I updated TSX and the FoV for the 12″ with the new angle.
Platesolve
The first image of 60 seconds came down and was out of focus, I then realised changing the profile SGPro forgot the autofocus setting, so I had to stop the run, delete the images and set the original focus point then rerun.
M92 out of focusM92 in focus
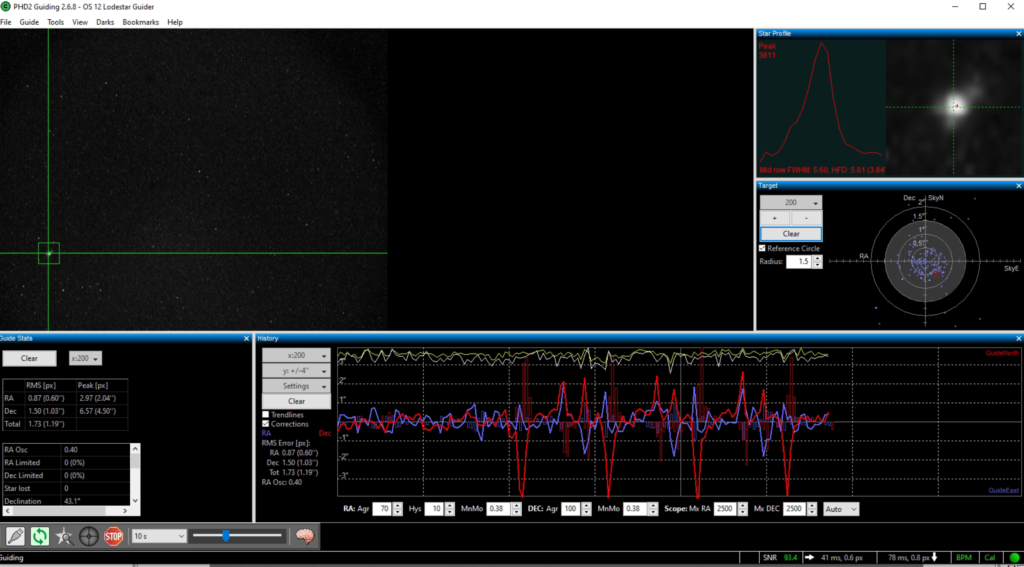
Next I ran a few images but then to my horror I had the same guiding issue, where the star moves being dragged up and down in a periodic way. I slewed elsewhere and tried again and the problem did not occur. I was near M92 and just East of the Meridian and quite high up. Not sure why that is a problem.
Near the Meridian
I could not resolve, I waited a while then performed a meridian flip and low and behold the problem went away, again not sure why. I still have this terrible noise coming from the RA motor/gear area. I decided to bite the bullet and take off various caps on the scope listening and looking inside. I decided it was not after all, the through the mount cabling but coming from the RA gear itself, so I looked for the MEII guide for removing the worm block and then followed the instructions to take off the RA cover.
RA gearing and belt noise
This gave me instant feedback on what the issue was, the belts driving the axis were making a noise. On looking through forums on Bisque.com I found a few people with similar issues and needing to grease the belts, they were told Lubriplate was a good grease. This is an American grease so I will find a similar here and then apply, I will ask Bob first for his suggestion.
So the night wore on and the LRGB frames of M92 I thought I would take whilst testing guiding progressed. At one point the imaging stopped due to cloud. I just caught the dome before it closed to change the safety sensor due to cloud. When it cleared it never really cleared, with the sky temperature reading about -14℃.
Not very clear
Nearing the end of the imaging session, I had caught about 15 frames of each of the filters.
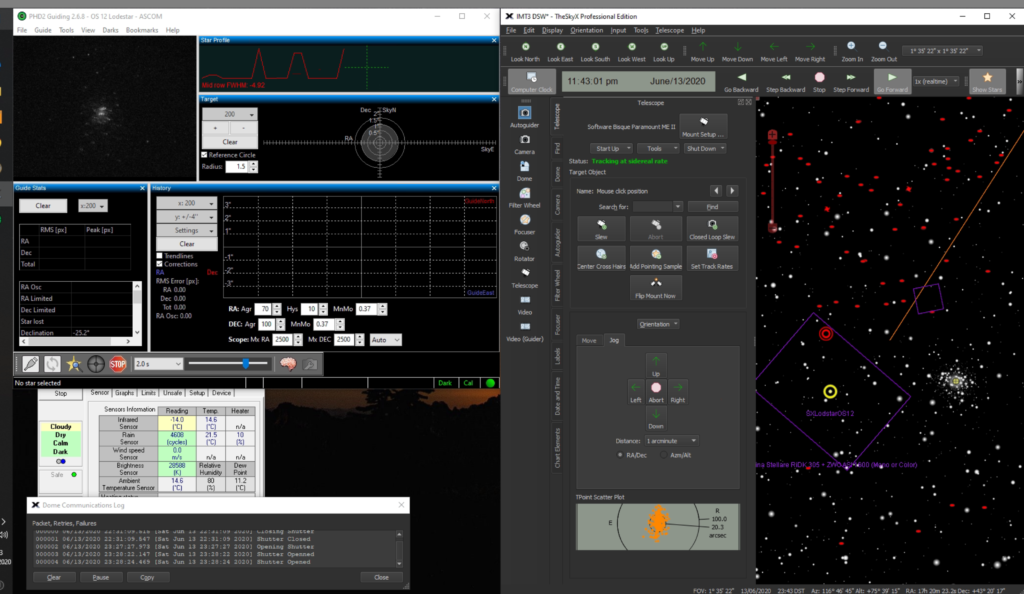
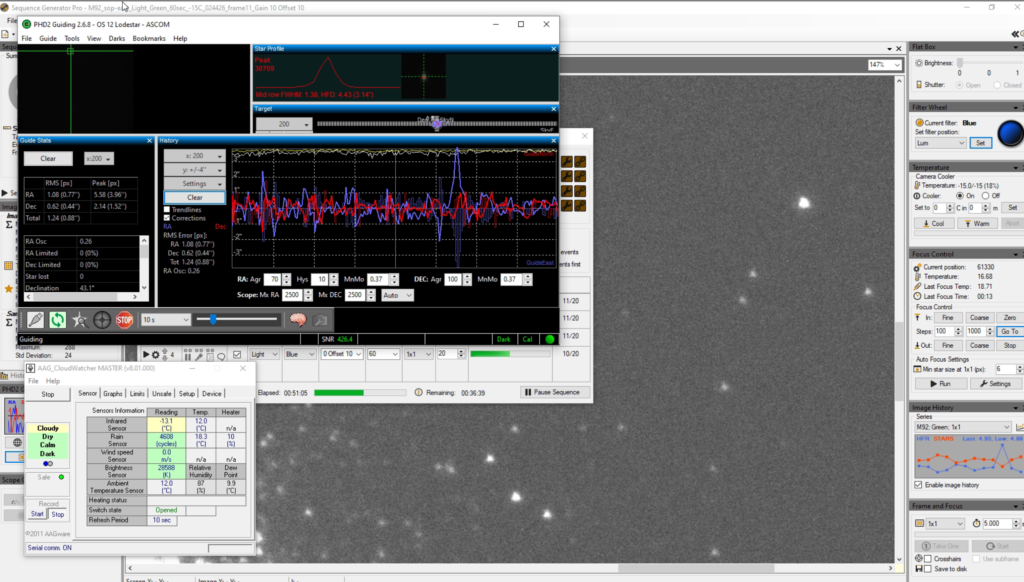
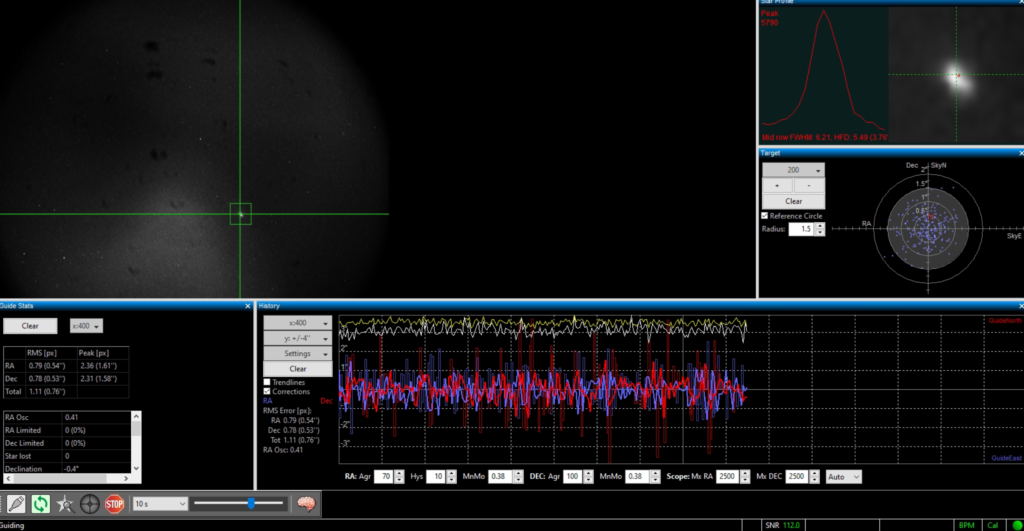
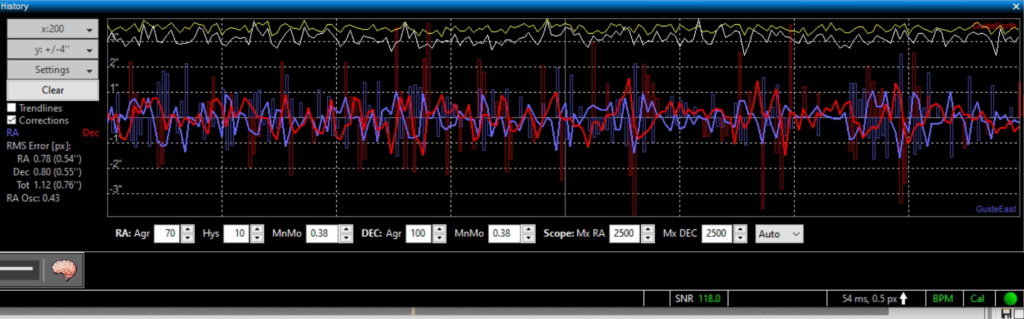
Good guiding and imaging
The guider was behaving mostly with he odd funny jolt. By 3:30 am the sky was lightening very quickly.
3:30am and bright
By this time I had stopped guiding and imaging. I closed the dome, slewed the scope to the flat panel and proceeded to take a set of LRGB flats for Gain 10 Offset 0 and also Gain 139 and Offset 21 as request from the previous nights imaging.
Now guiding on star to West side of mount around 0 degrees Dec and near the Meridian to see if problem reoccurs, graph looks ok but there is a slight regular pattern of error.
Slewed to M92 which is a glob currently at Alt +74, Dec 43 and on the East side of the mount where I had issues last night. I plate solved the image.
The auto focus run looked good
Found guide star by moving M92 slightly off centre. Now guiding. All looked good for a short while. So each section of PHD2 graph is 25 points, so when you have 100 points selected there are 4 sections of the graph. This mean each section/column represents own my case 250 seconds as I expose for 10 seconds, so just over 4 minutes per section. So the errors I saw last night were about 12mins apart. This cannot be the work gear as it has a cycle of 2min 29sec. This is from the latest Paramount manual for the MEII.
Tracking at the sidereal rate, one revolution of the worm takes 149.6 seconds (2 minutes 29 seconds).
The right ascension gear has 576 teeth.
The declination gear has 475 teeth.
The error I am seeing is about 4mins. I cannot continue imaging as every few frames are trailed.
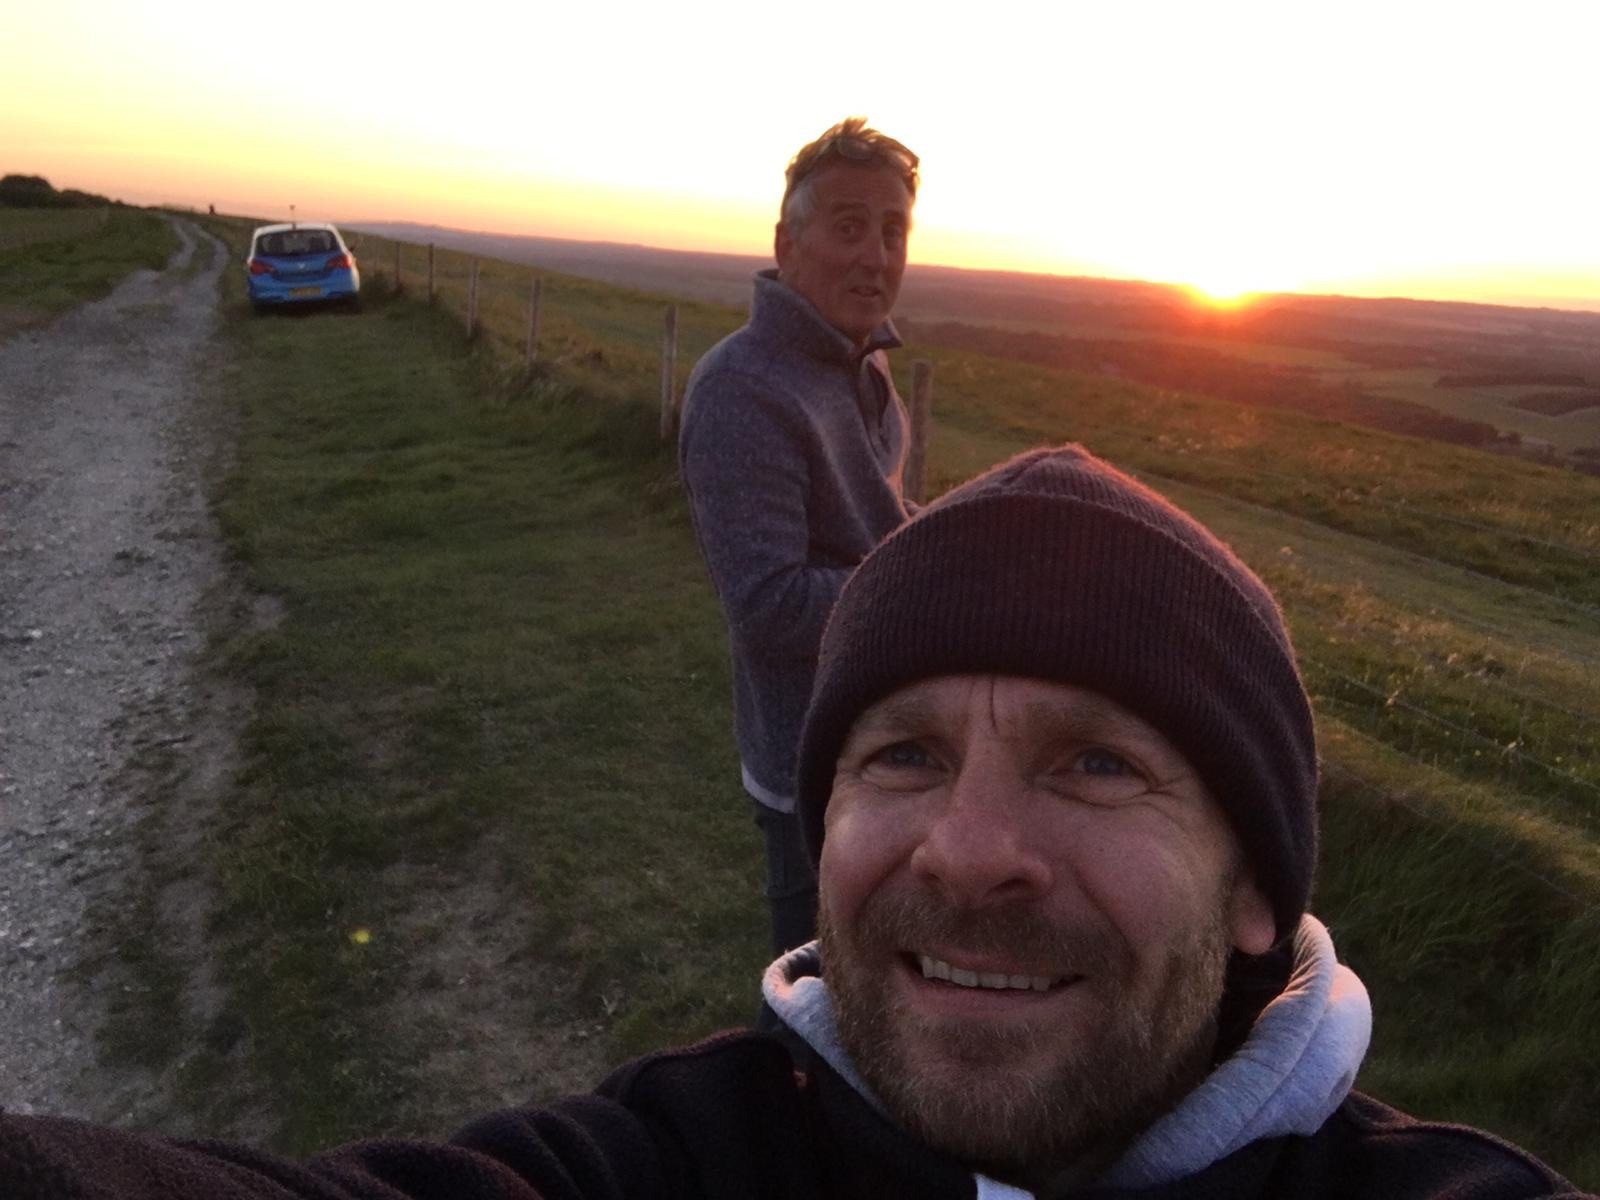
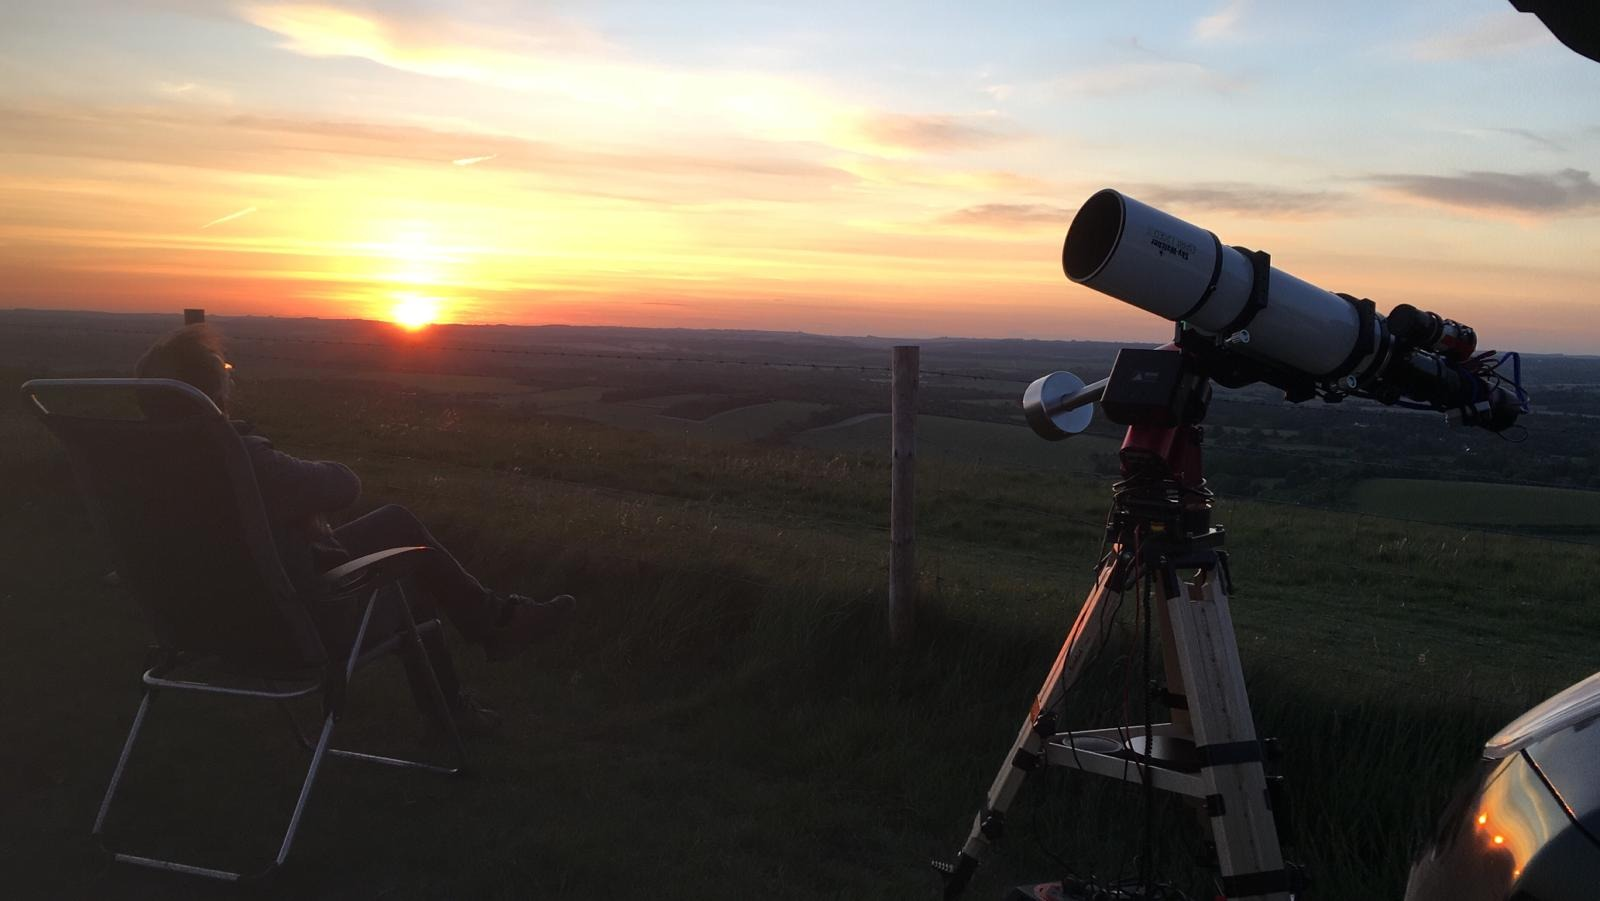
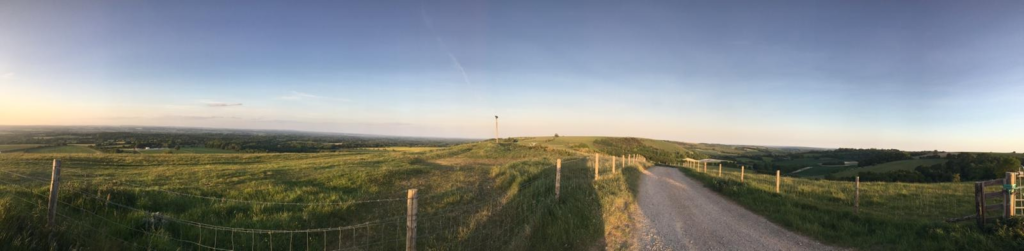
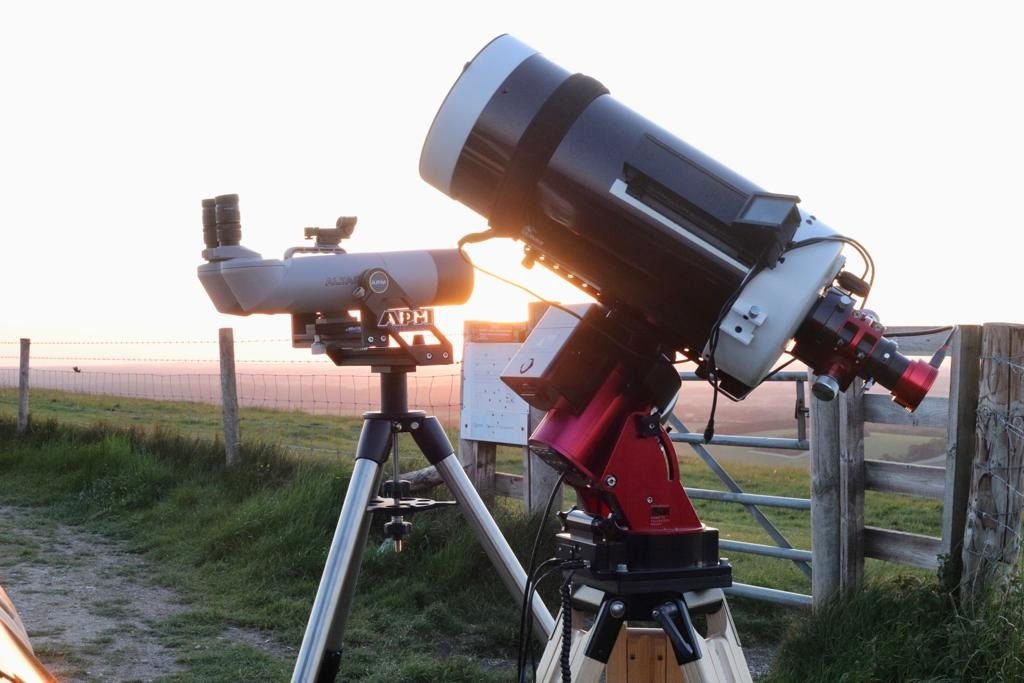
So back off to Combe Gibbet again tonight for hopefully a full night until dawn and with a coat. I met with my friend Alan for once again some social distancing astronomy. Again Alan had a much better 4×4 car to get up to the gibbet than my little electric Nissan Leaf, however once again I managed to make it there.
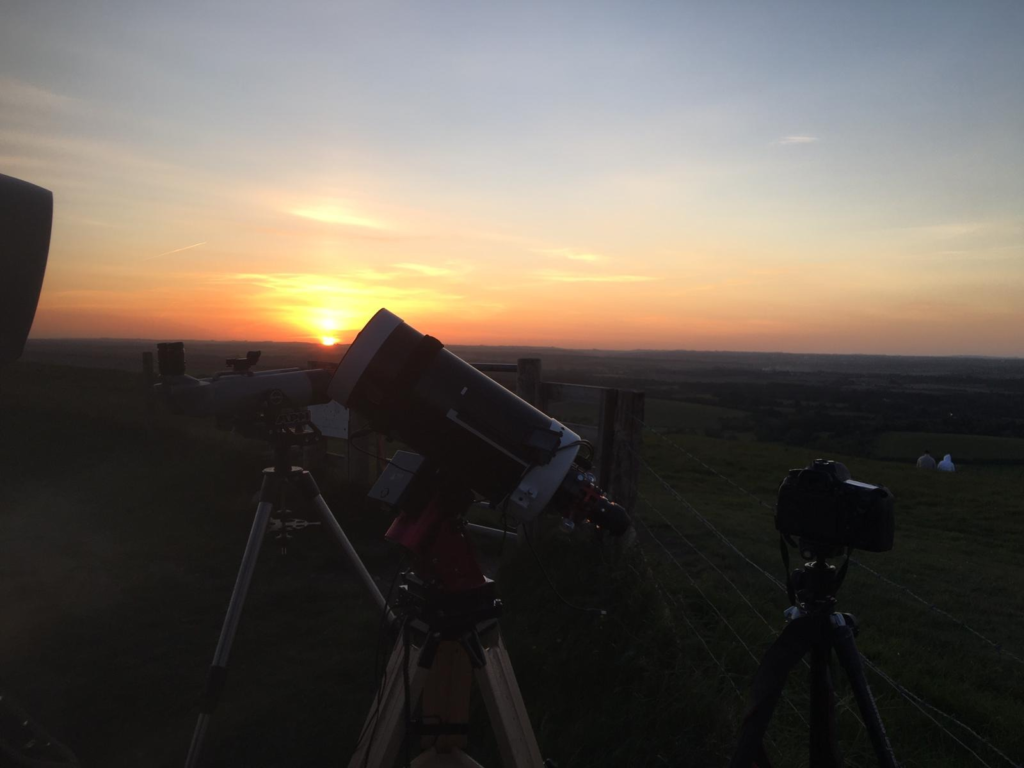
Sunsetting with Esprit 120 and Alan in his chair
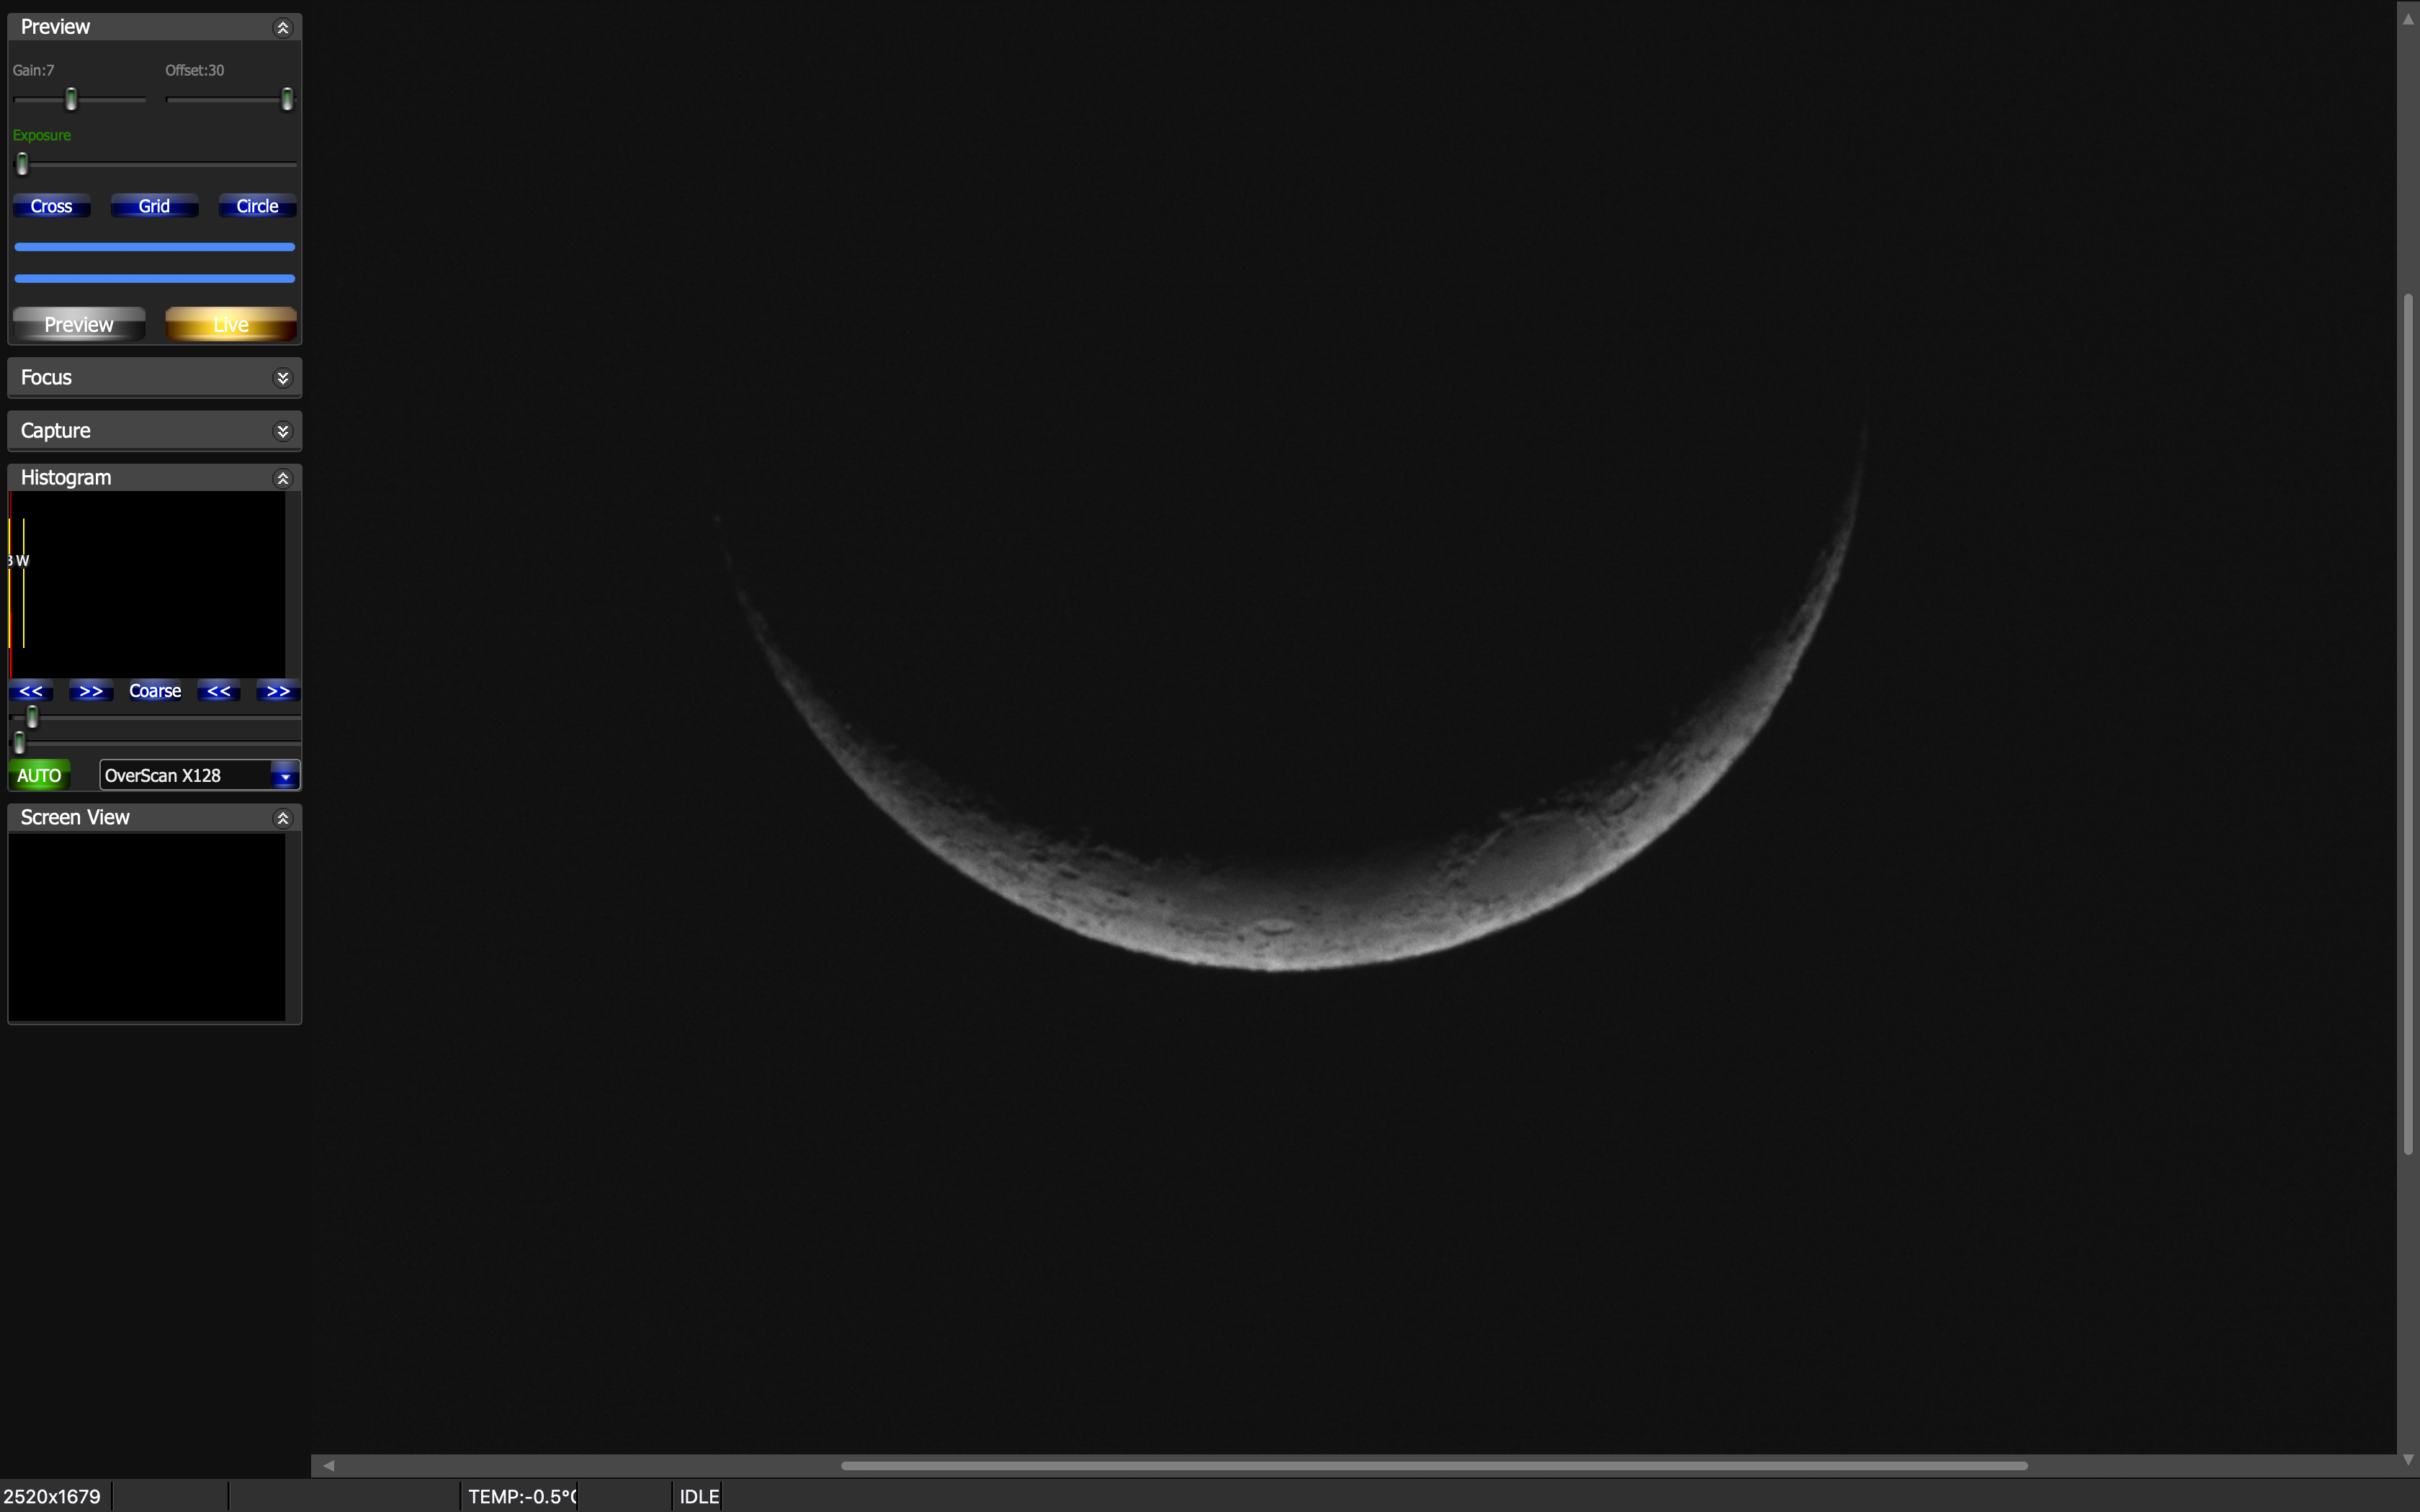
After setting up, it quickly became apparent that I forgot the guide camera as it was still attached to the Mak180 that I thought I would leave at home tonight ?
Quick look and focus on the Moon
So despite the slight setback I polar aligned on the uneven ground and managed to get the scope pointing in the right direction. It took me a while to work out why it was not pointing at the objects when slewing with a perfect alignment, then I realised I had the location set incorrectly. A quick look at my GPS on my phone and I input the coordinates into The SkyX and the target was nearly spot on. I adjusted, performed a sync and then was able to slew continuously thought the night with the object in the FoV.
As I was challenged with no guider I could only take 2 minute images and if in the West low down then 1min. So I stetted for those 2 exposures along with 30 seconds for one particular object.
Below are the lost of targets I went after and imaged. I tried to get 15-20 minutes in total for each. We had some early night high cloud, the wind had again dyed down after sunset and although cold, we were both wrapped up warm, although later in the night Alan became cold so wrapped himself up in the dog blanket from the car ?
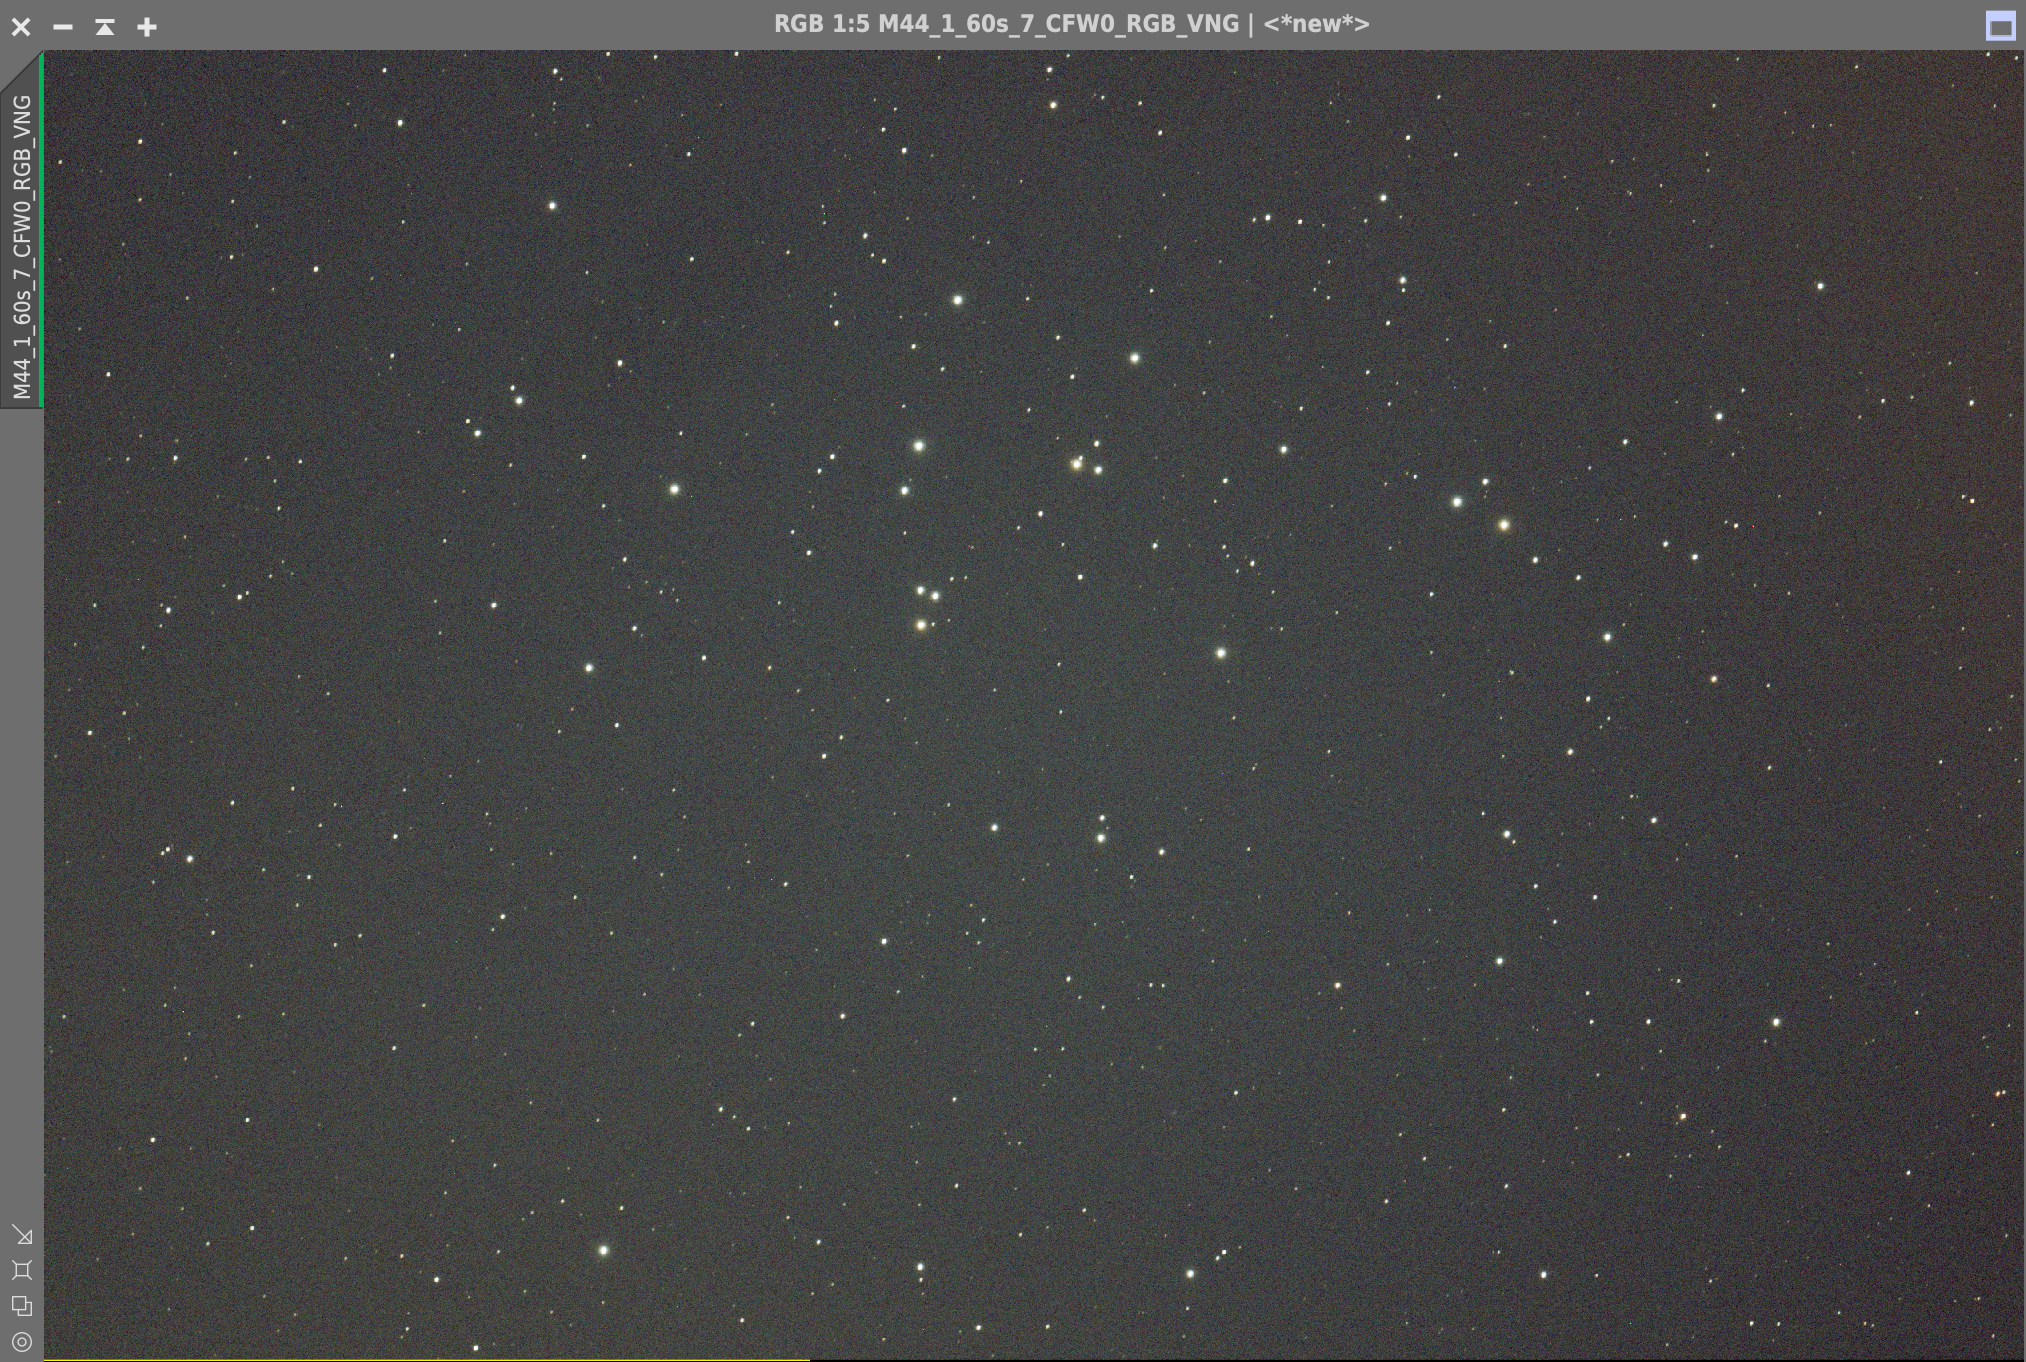
First up was M44 Beehive Open Cluster, which filled the view nicely so I took 20 x 60 seconds, careful not to saturate the stars. The QHY168C camera was set to Gain 7 and Offset 30 with a temperature of -20℃.
M44 60s
I then tried SH2-129 emission nebula but no luck, it was not registering at all at such short an exposure. I had a similar issue with SH2-155 Cave nebula. Both of these I will try again when I have my guider.
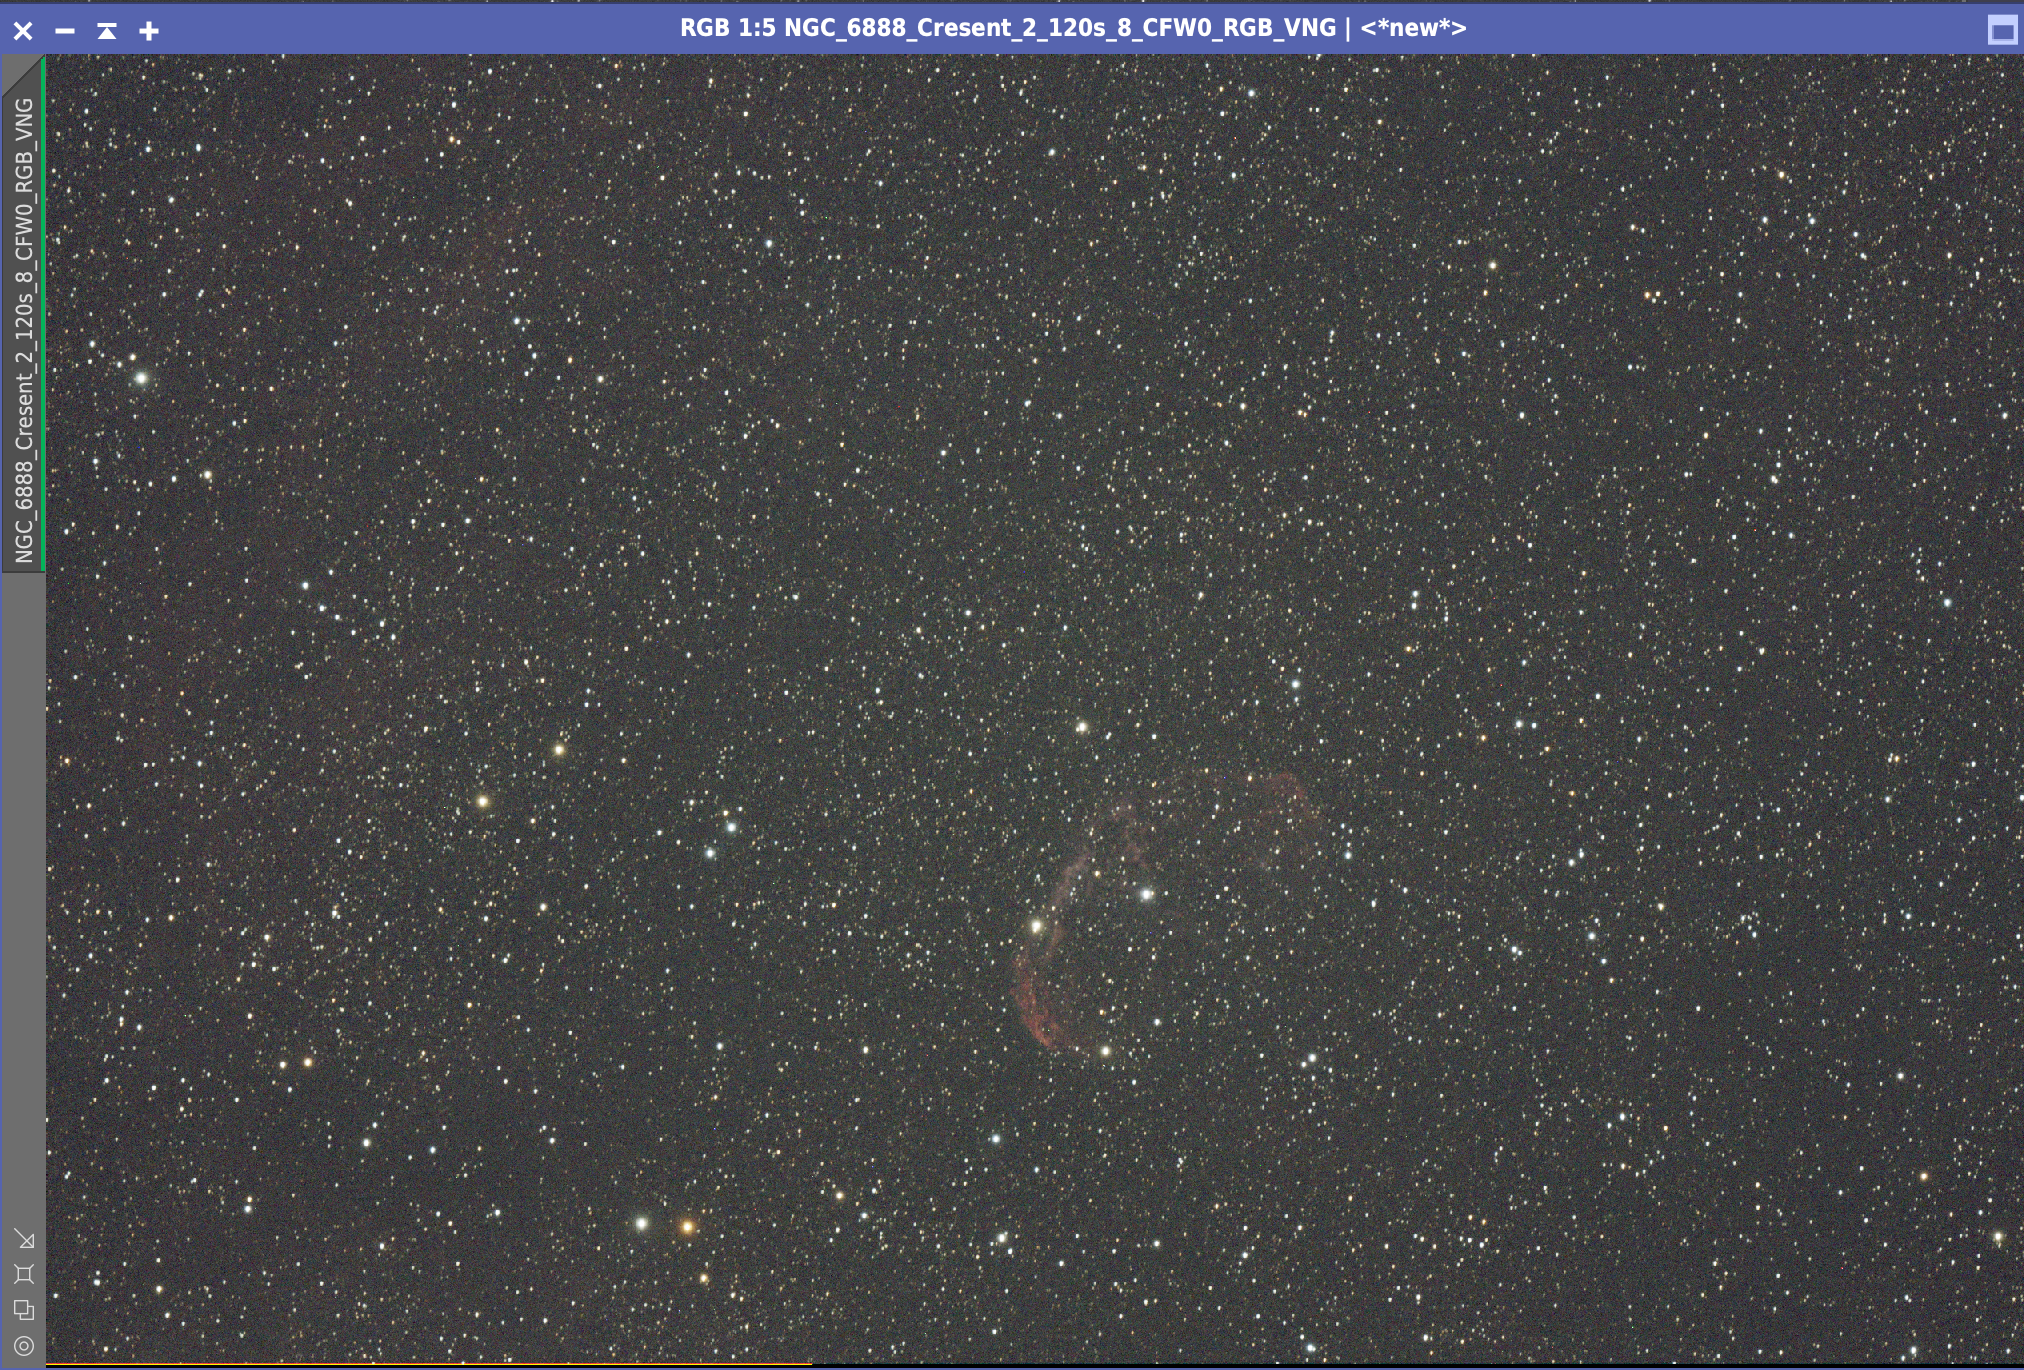
I then slewed to NGC 6888 Crescent nebula and took 20 subs of 120 seconds.
NGC 6888 Crescent 120s
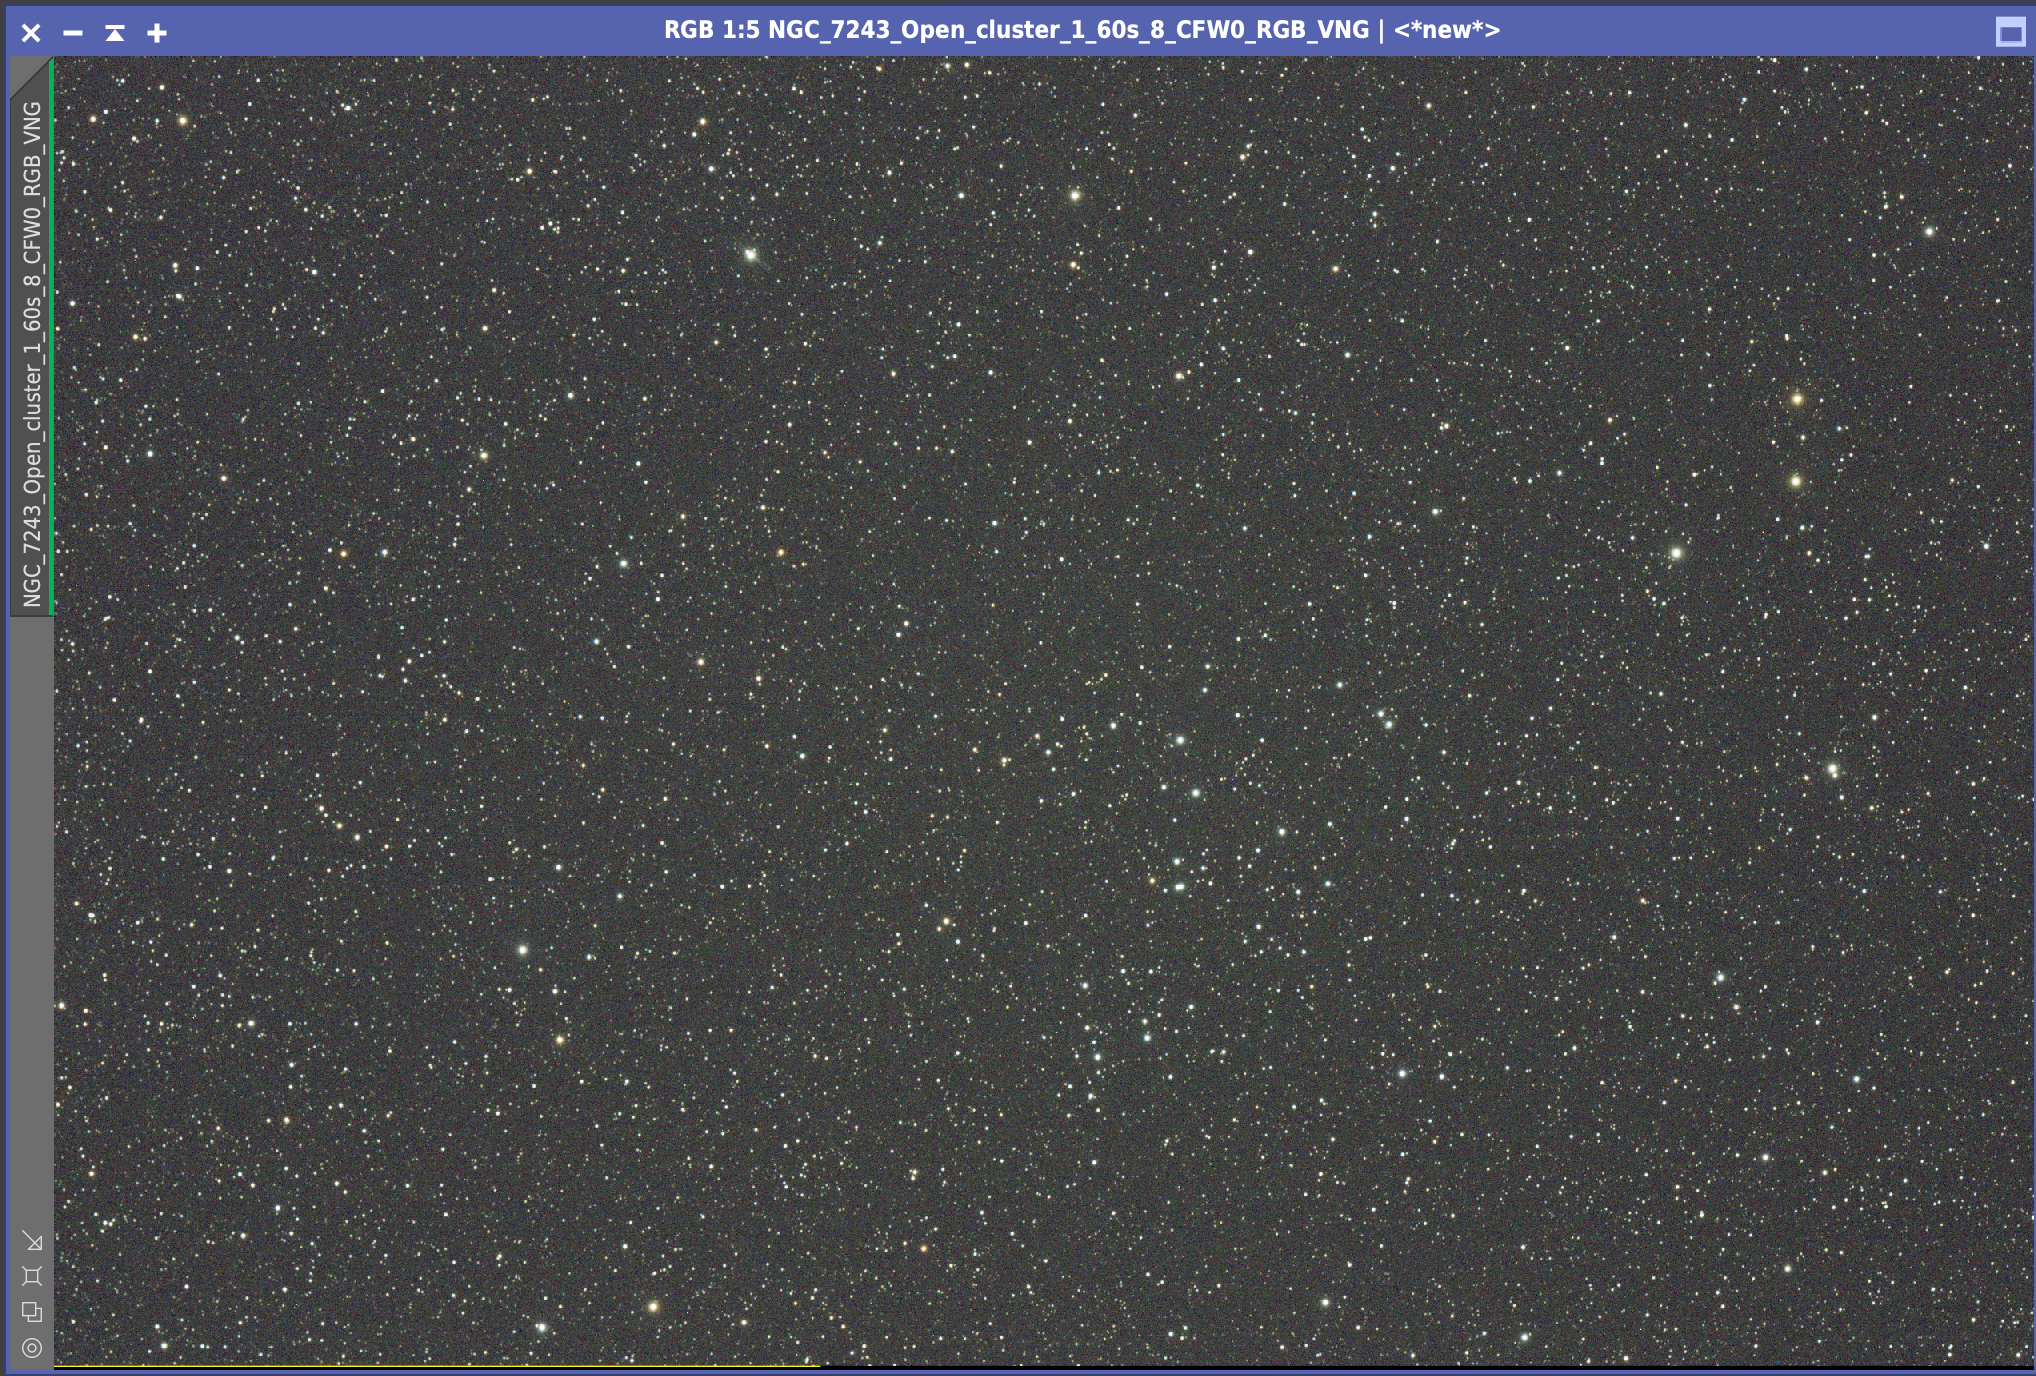
Next tried to image Trio in Leo M65, M66 and the NGC but I realised I had already imaged, although not processed and the image trailed at 1 minute due to its westerly location. So instead I headed for NGC 7243, a lovely Open Cluster in Lacerta and part of the Herschel 400 at 60 second exposure.
NGC 7243
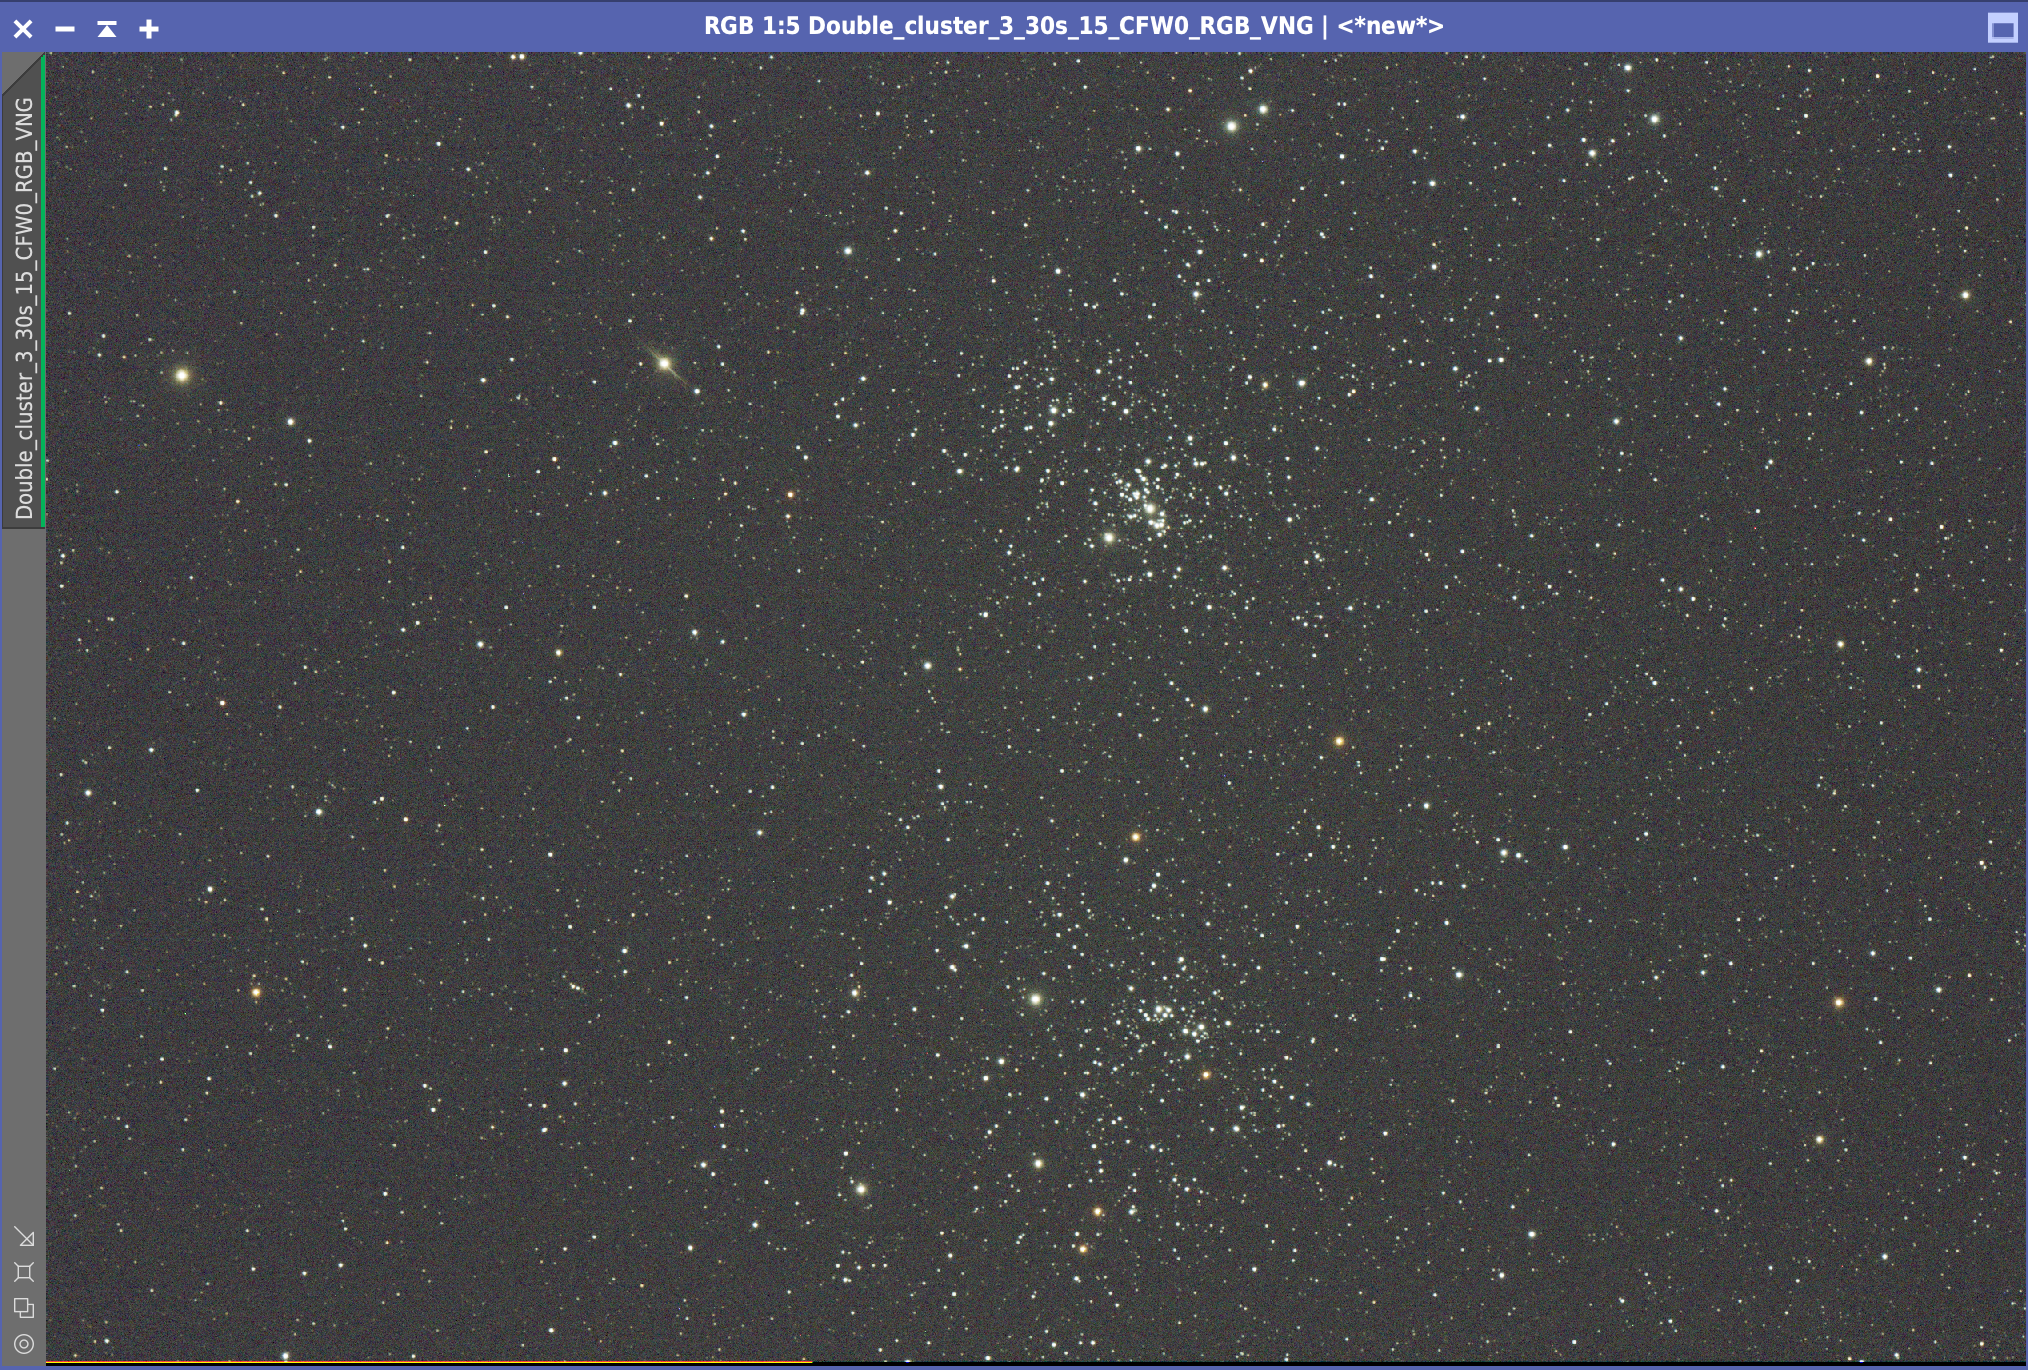
Next I looked at the double cluster in Perseus and decided to quickly take a few images with the Esprit 120 ED even though it was not on my original target list. Due to its bright stars I took 40 x 30 seconds.
Doublers Cluster in Perseus
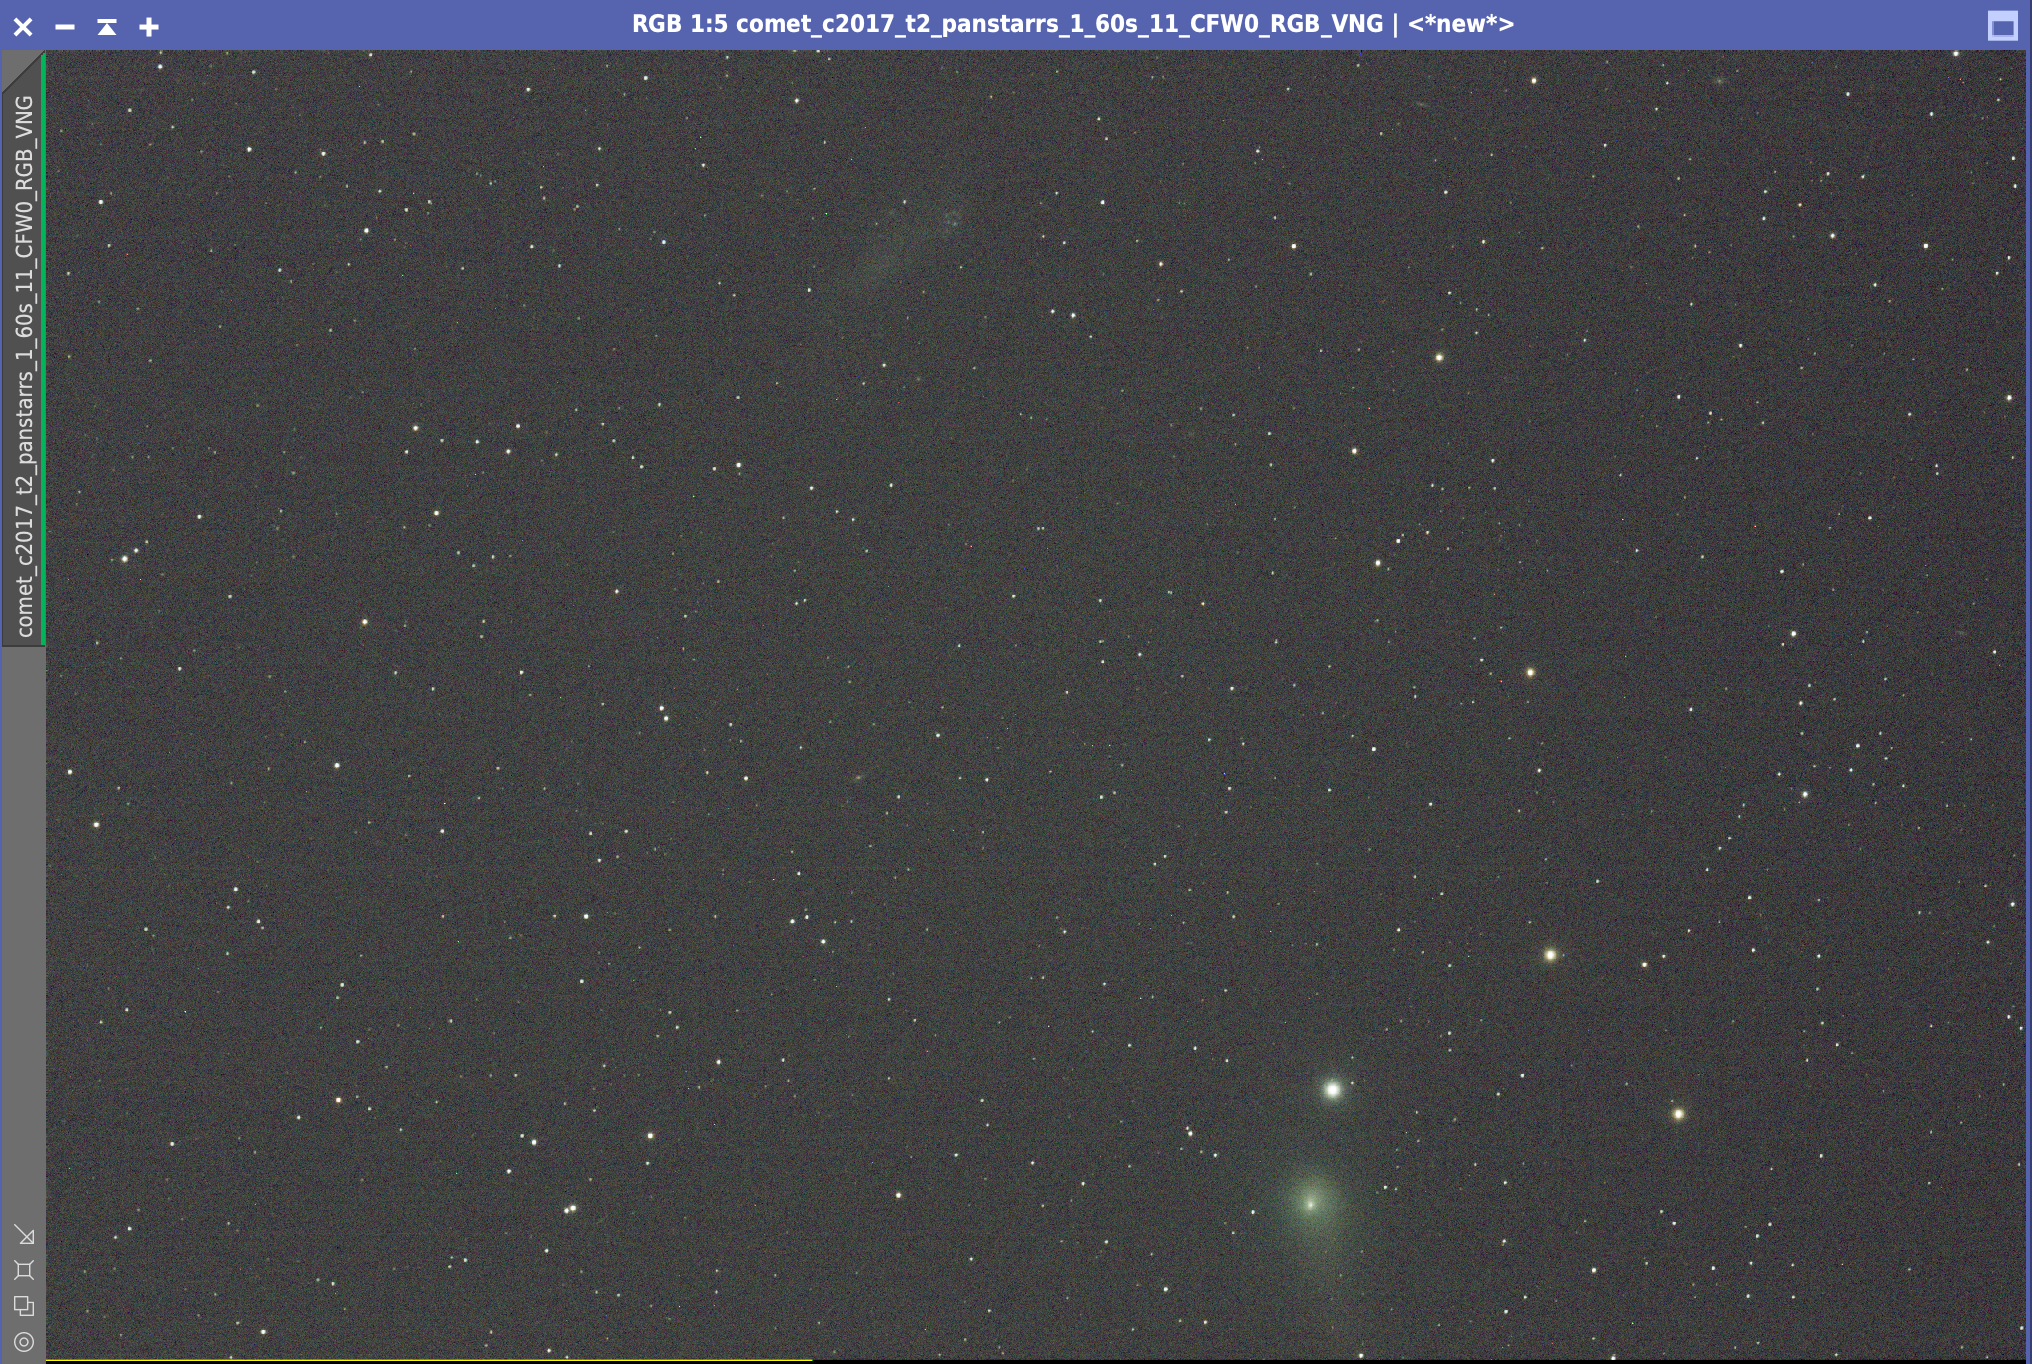
Now it was time to grab an image of Comet c/2017 T2 PANSTARRS which was located near a galaxy called the Coddington Nebula. I purposely got the comet at the very edge of the frame to get the galaxy in, although I noticed the tail was pointing in the opposite direction than shown on Sky Safari.
Comet C/2017 T2 PANSTARRS and Coddington Nebula
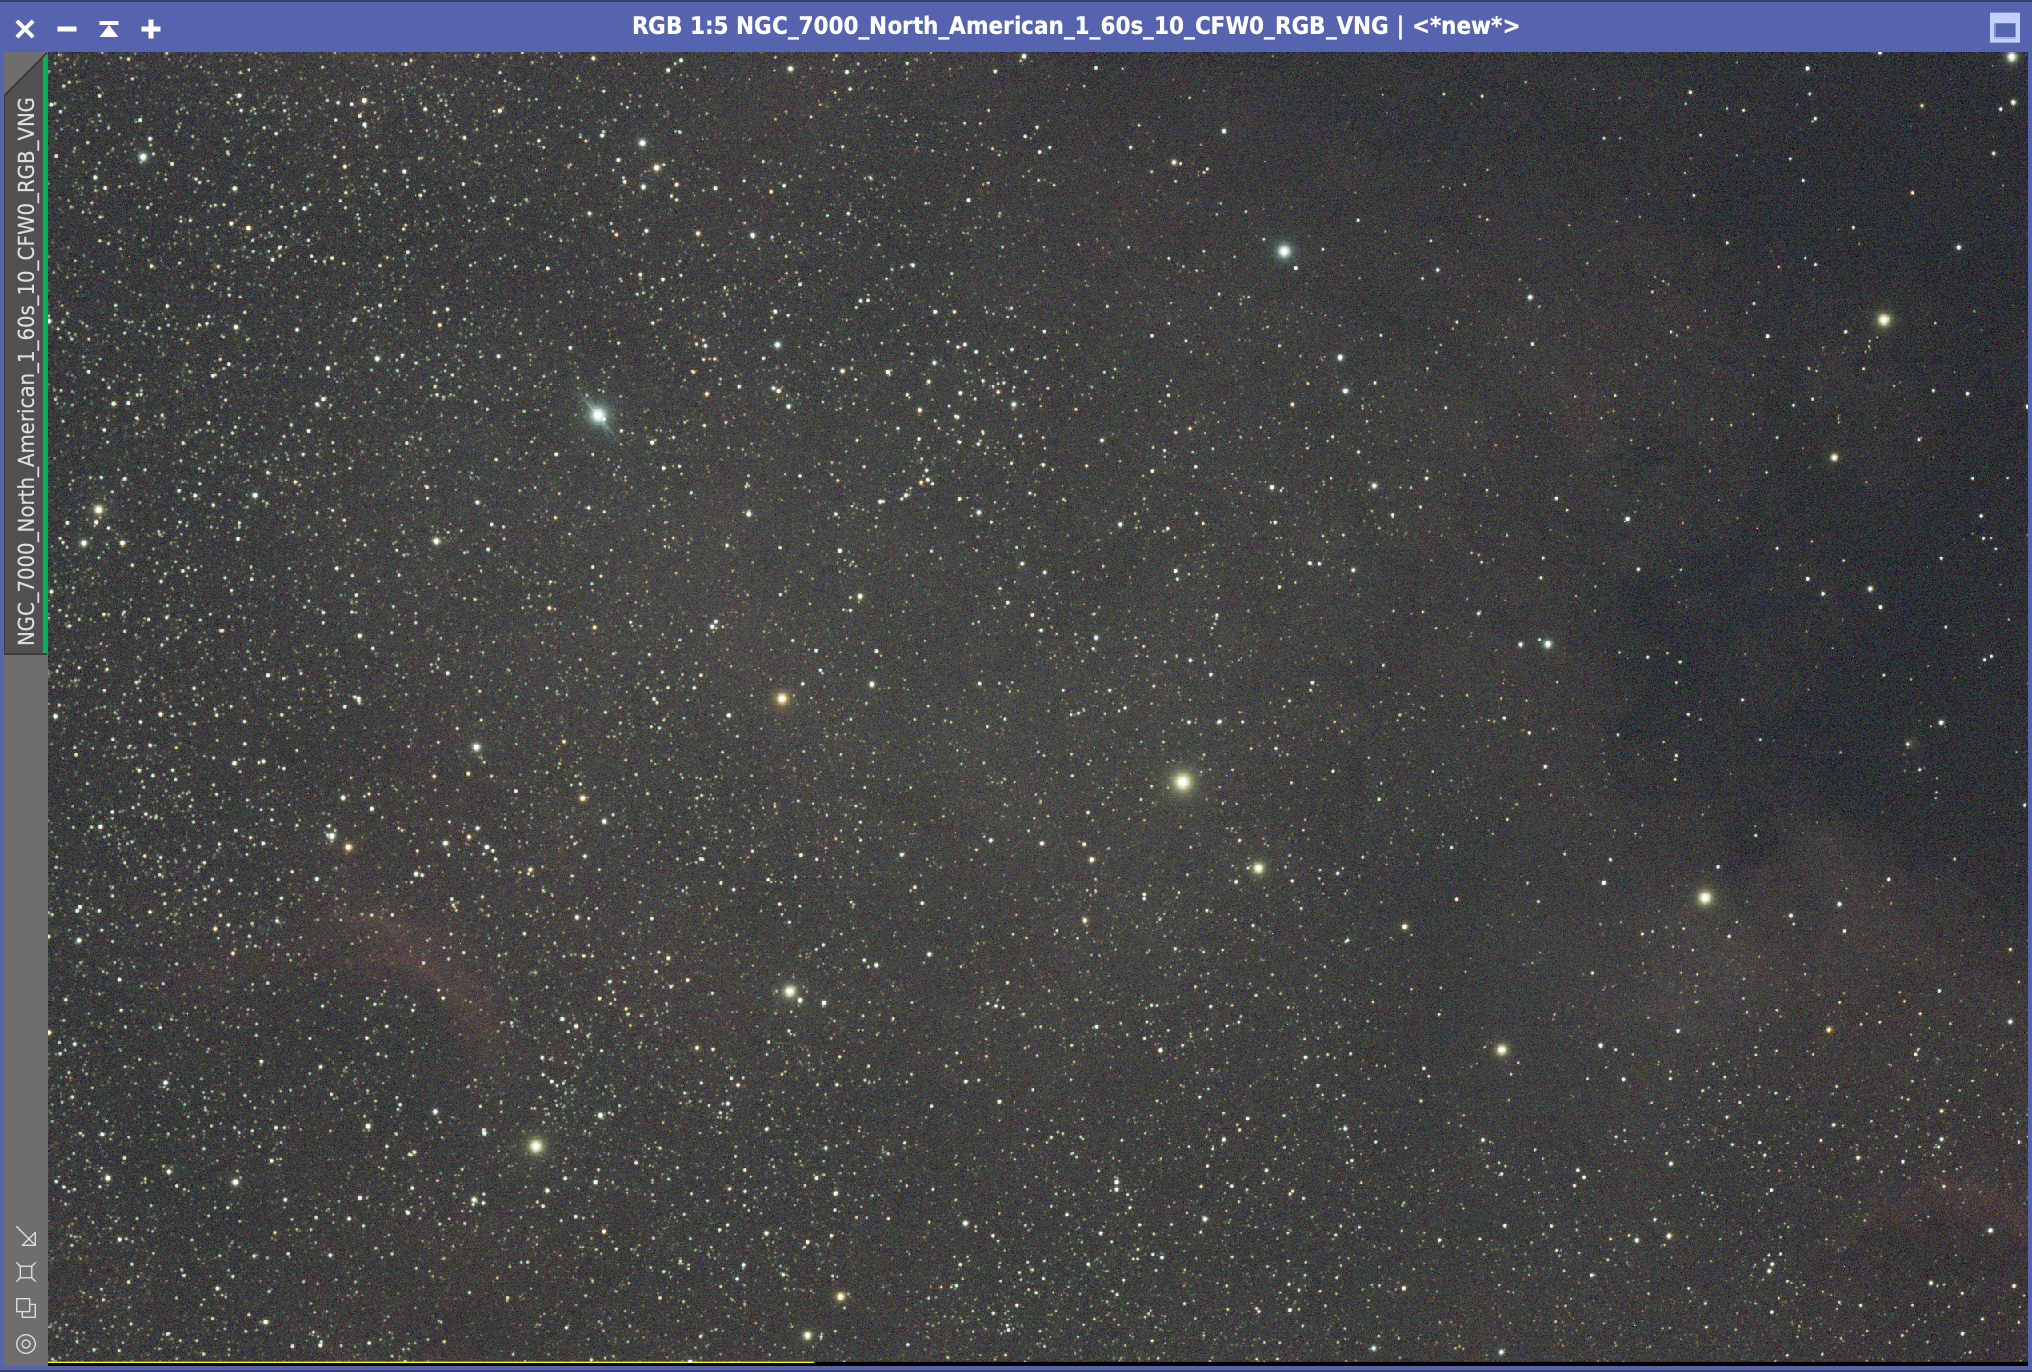
The night wass really dark, even though it is not true astronomical darkness, the location really helps. The image quality is also much better. I slewed to NGC 7000 the North American nebula that Alan was also imaging. Again 60 seconds was probably not long enough so I need to come back to this object when I get my guide camera fitted.
NGC 7000 North American Nebula 60s
Finally just as dawn was approaching and the light was clearly increasing, I took a few images of Comet C/2020 F8 SWAN to see if I could see it. Was was apparent was it was super faint even at 60 seconds !
Comet C/2020 F8 SWAN
So as dawn approached, Alan and I took flats, darks and flat darks.
During the night we viewed through the 4″ binoculars the Moon, Venus, Mercury, Double cluster, M39 Open cluster, M57 Ring Nebula, Alberio, M56 Globular Cluster, Saturn and Jupiter. Unfortunately I packed up the binoculars before I remembered Mars was up ! So packed up the car, ands drove very tired 50 minutes home.
Tonight I traveled 50mins and 26 miles to Combe Gibbet, a high point for us in the South of England called the North Downs in Berkshire, which at 940ft above sea level places it in the wind, so it is cold but affords a distance from many towns, so it is dark. The is indeed a Gibbet at the top if one should want to take a hanged man or woman and display them for all the surrounding villages to see ? very barbaric, but part of our history.
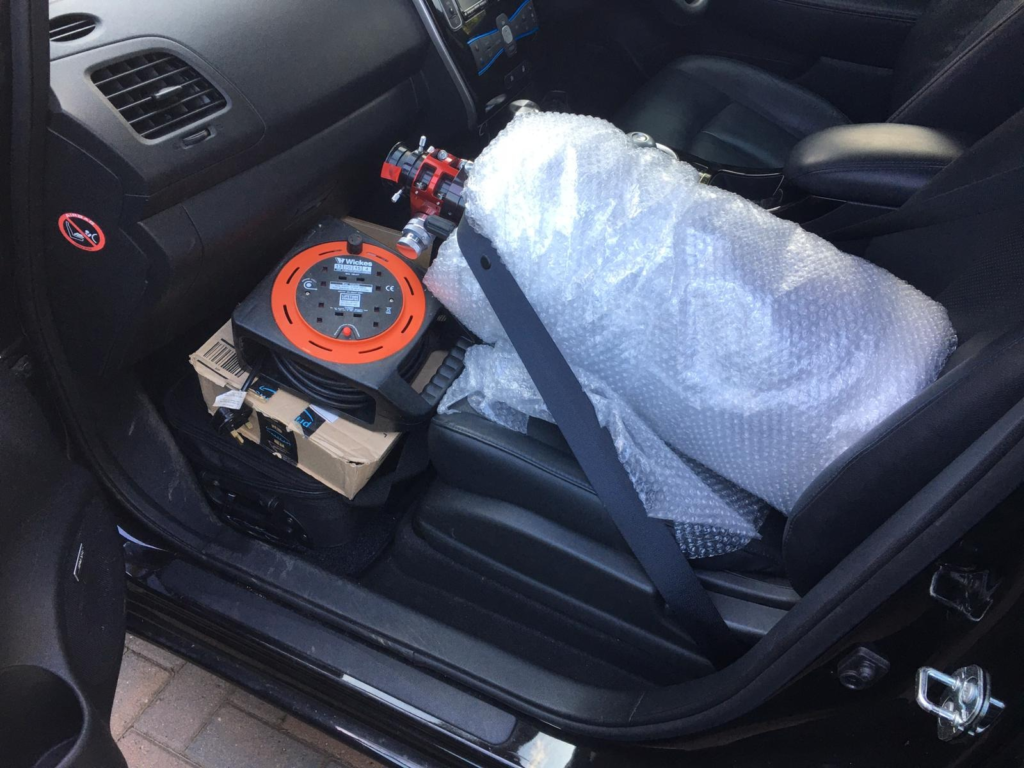
The car was packed with various astronomy gear, the Mak180 for Lunar and planets.
Mak180
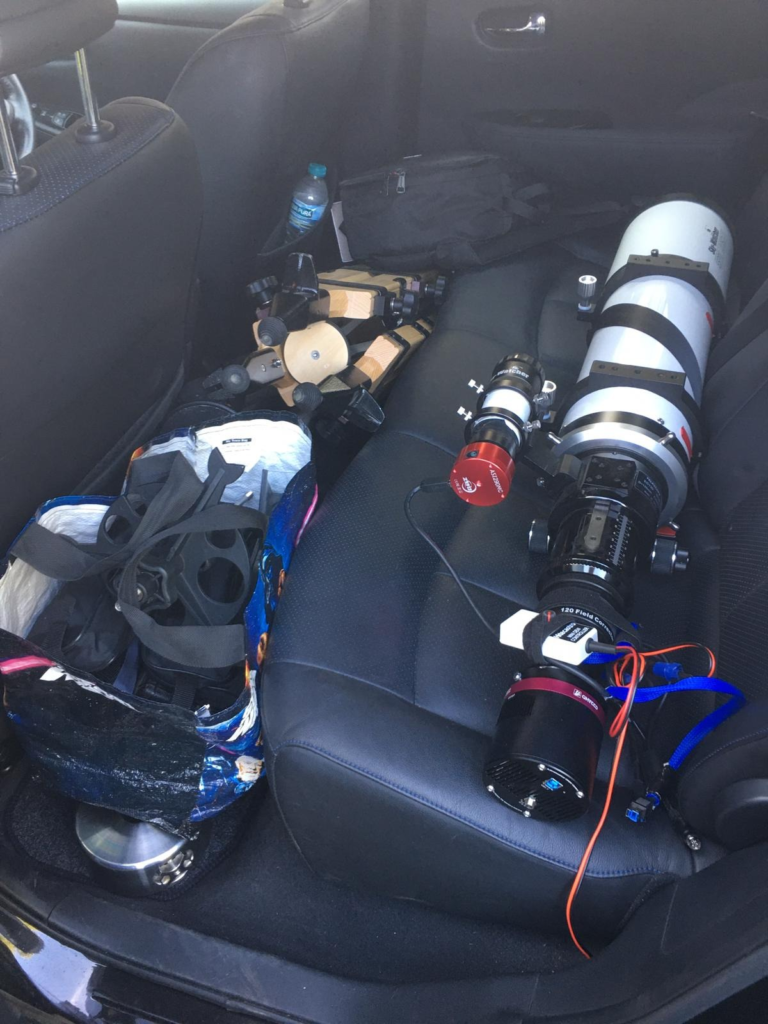
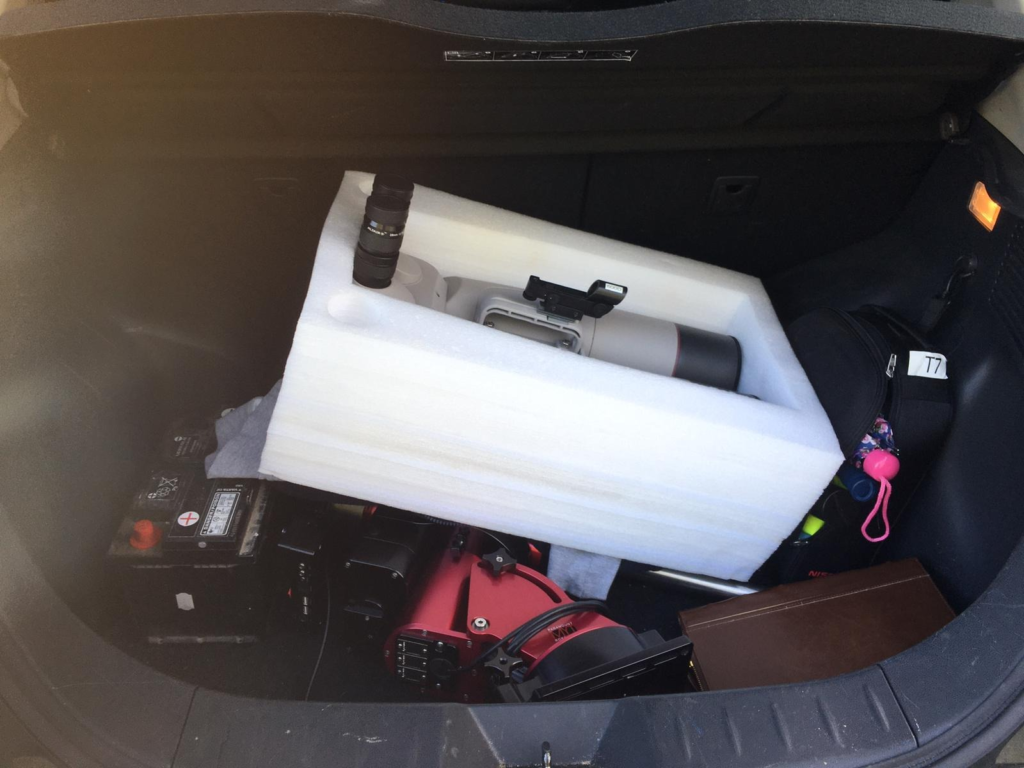
The Esprit 120 ED Pro.
Esprit 120 ED Pro
And of course the Altair Astro 4″ binoculars with my Paramount MyT mount.
Altair 4″ Binos and Paramount MyT
I met a a social distance my friend Lawrence who was in a much better car than myself more suitable for the off-road terrain of getting to and just past the gibbet. Lawrence brought his trusty binoculars and his deck chair. Meanwhile I setup the 4″ Altair binoculars, the Mak180 OTA on the Paramount MyT and my Canon 6D on a tripod.
All set for tonightSun setting
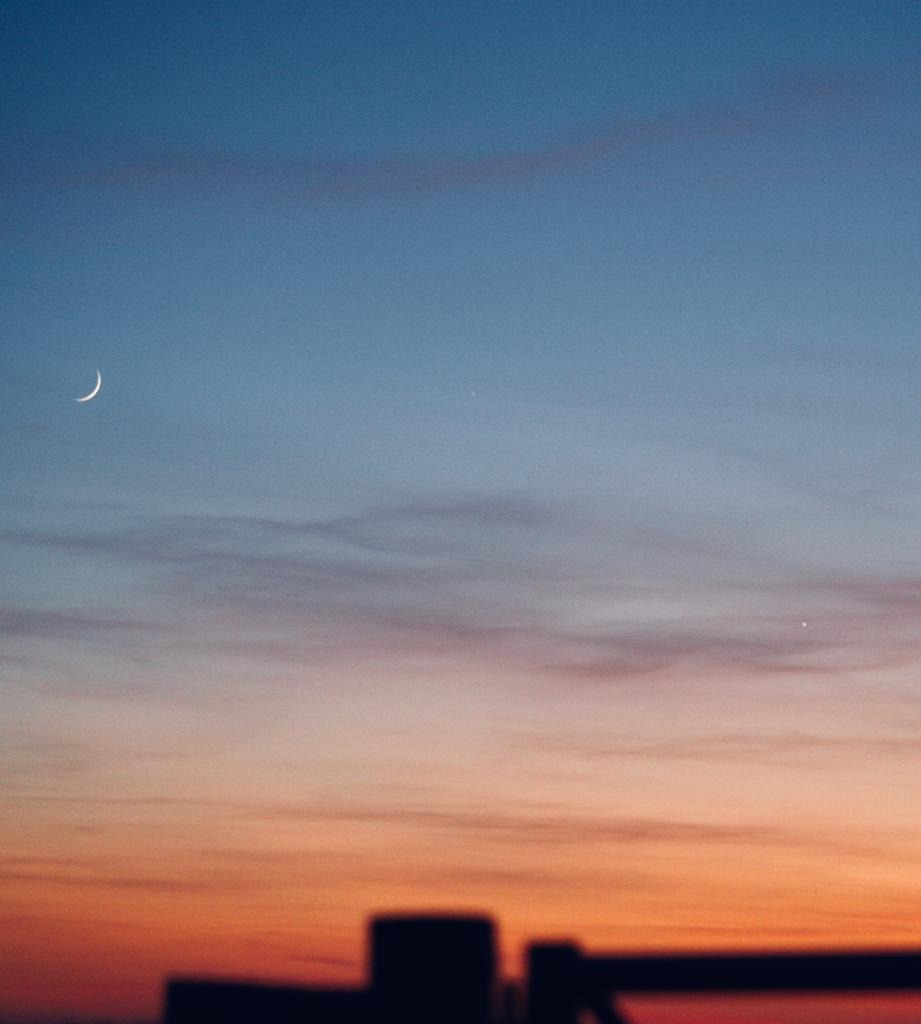
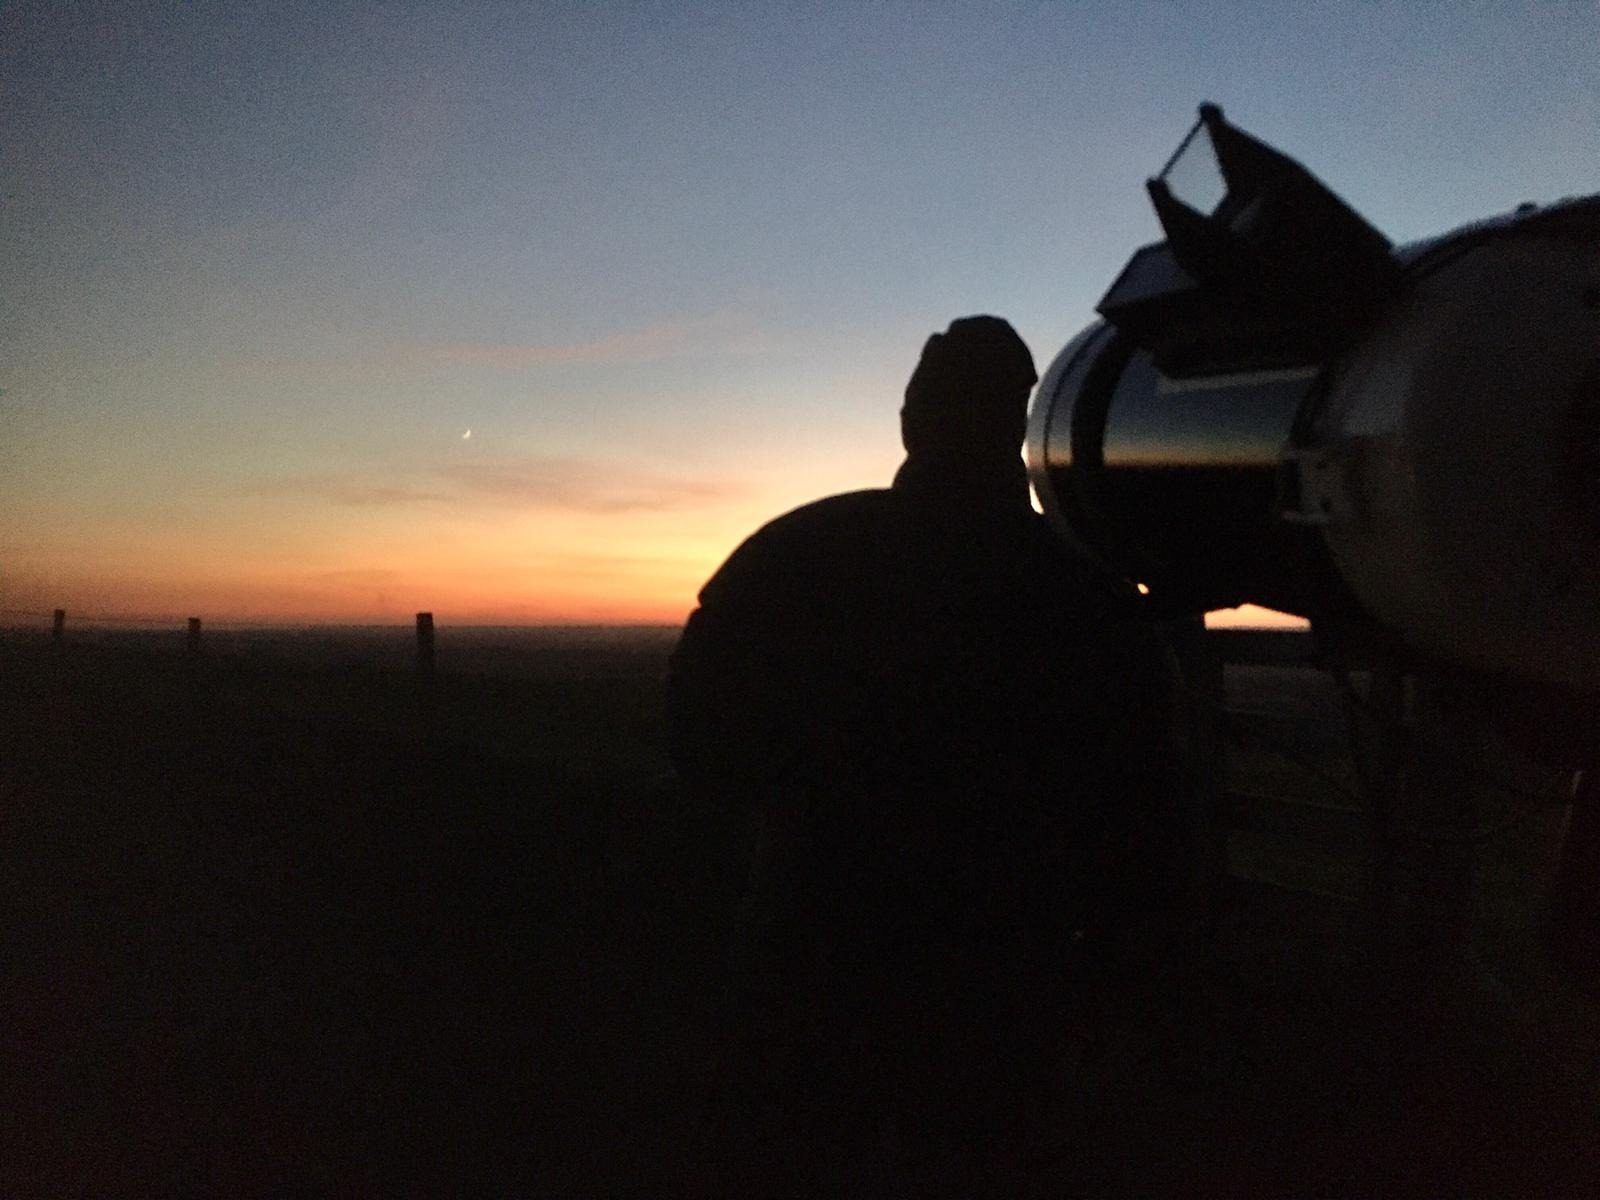
As the Sun set from this location we spied Venus first and took a look through the binos.
Moon, Mercury and Venus
I captured some frames in the Mak180 with the ZWO 294MC camera. We then moved to the sliver of a Moon 2.8% illuminated and 1.6 days old. I placed the Mak180 on this for a few frames also. Lastly we moved the binos to Mercury, which is unbelievably small. Very faint in the twilight sky and surprisingly faint in the binos. I once again slewed the Mak180 and captured some 4GB files.
Lawrence looking at the Moon
We then went a hunting for comet C/2020 F8 SWAN but it did not appear in the star field where it should be despite being able to see Mag 8.9 star. The comet was purportedly magnitude 5.8 but this was not the case. I checked my ephemeris on both SkySafari and The SkyX and I wass definetly in the right part of the sky and confirmed the star paterns from my star hoping, but alas no comet.
Lawrence looking at Mercury
So although the wind was now dying down both Lawrence and I were cold so at just gone midnight we packed up and set off home. I must remover by coat tomorrow!
Addendum, I had read an article the following day that the comet may have broken up but I cannot yet confirm this.
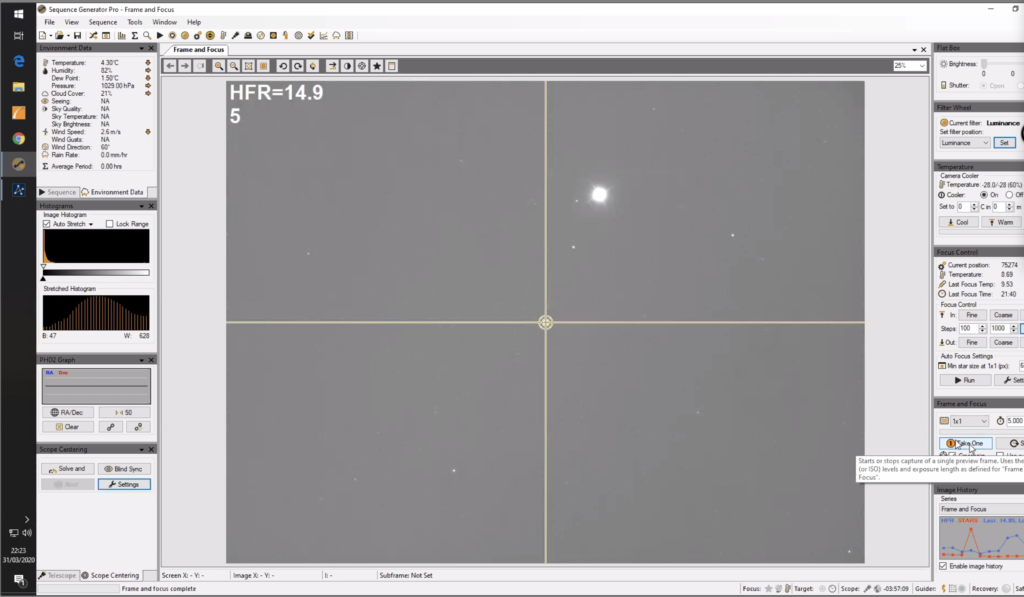
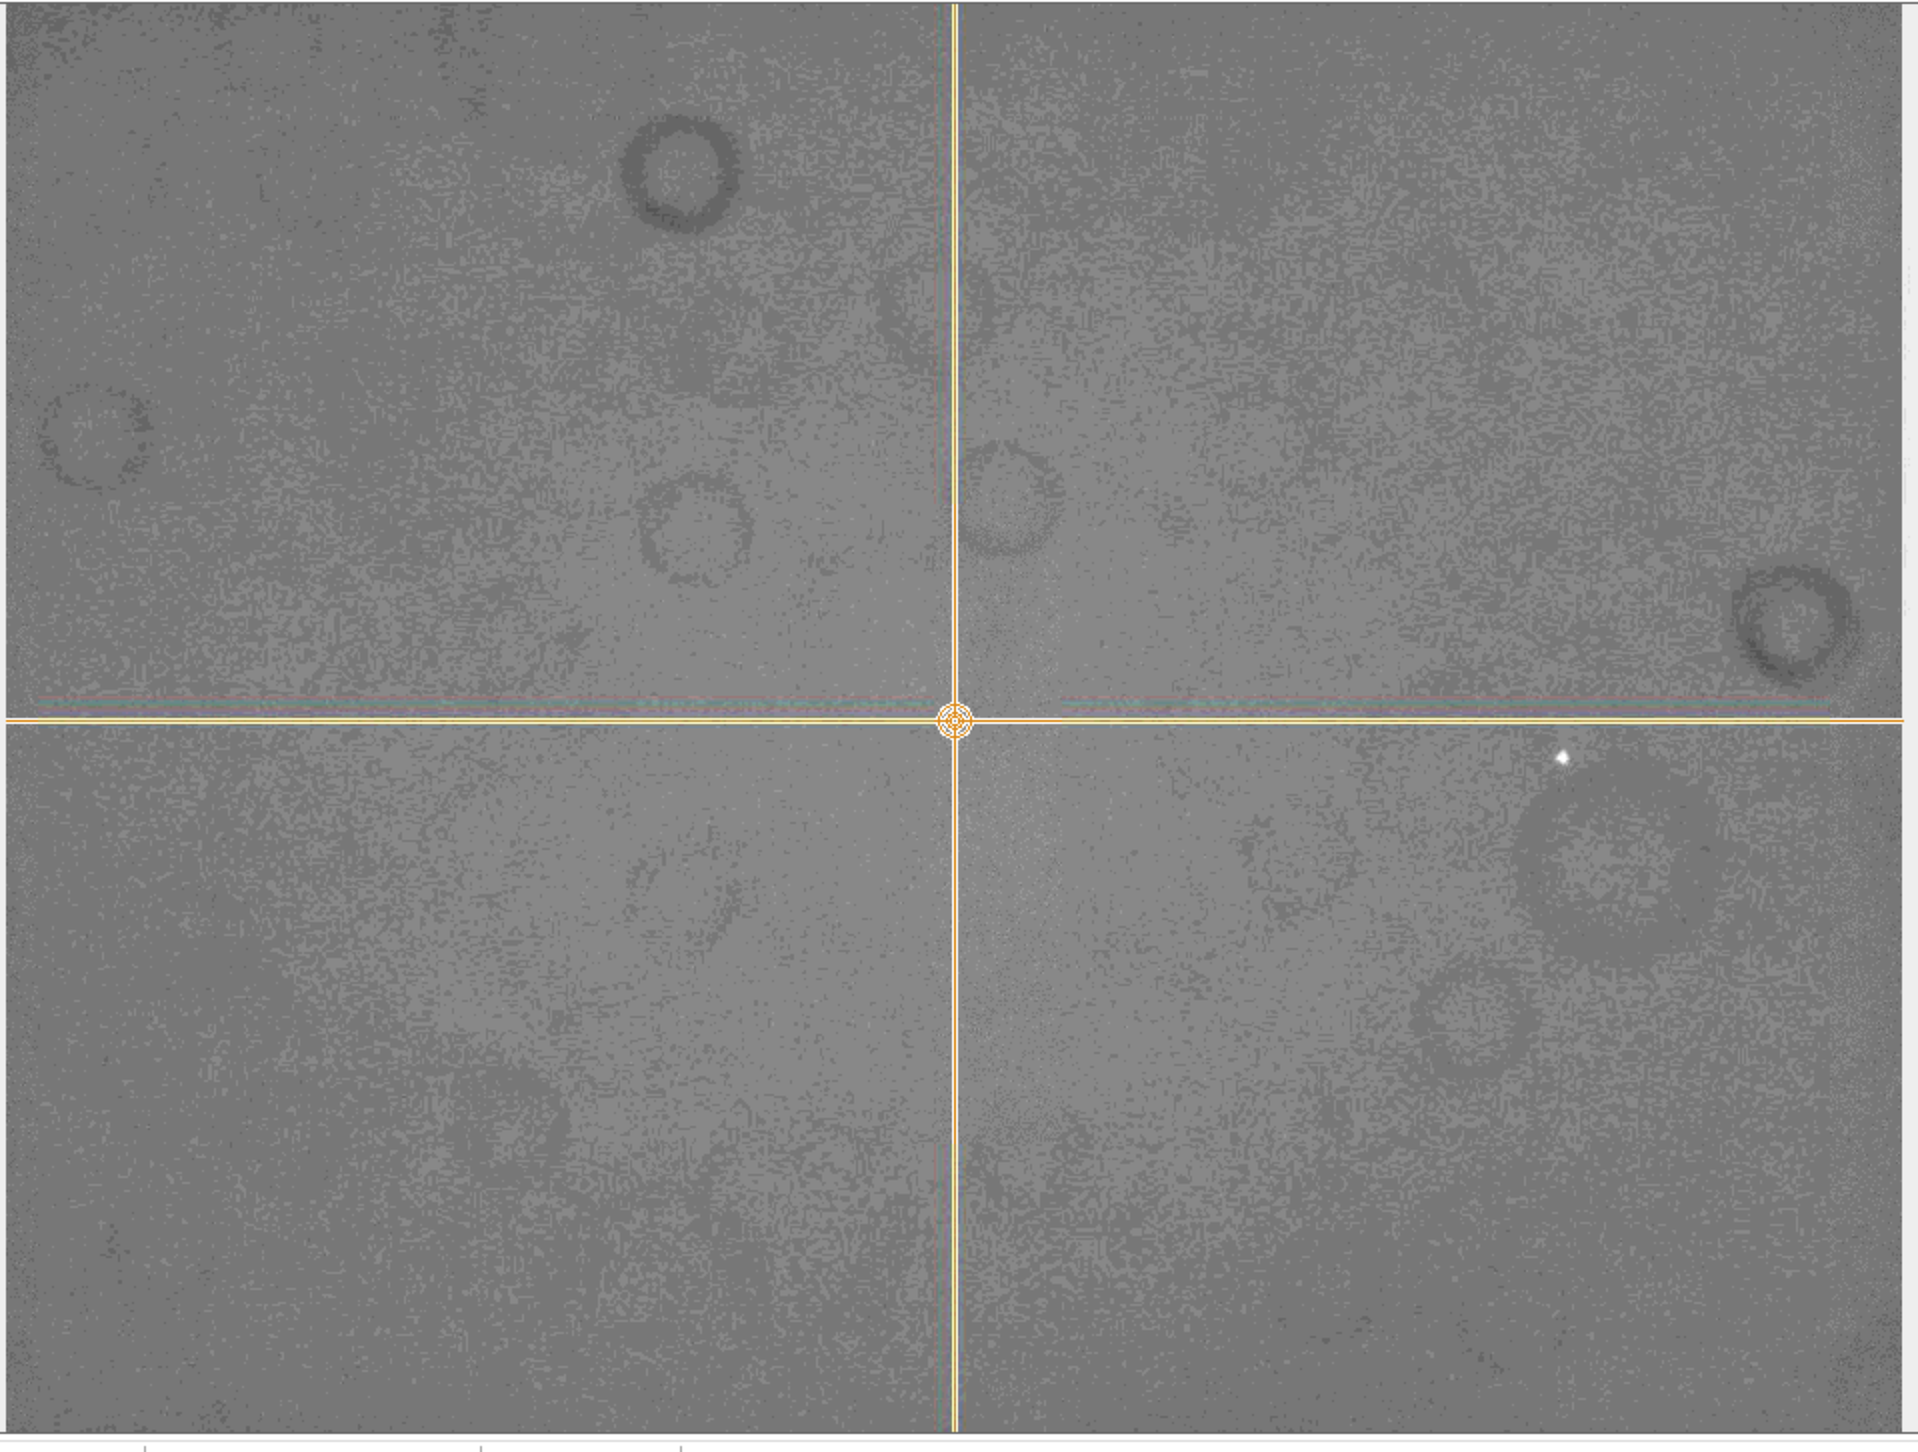
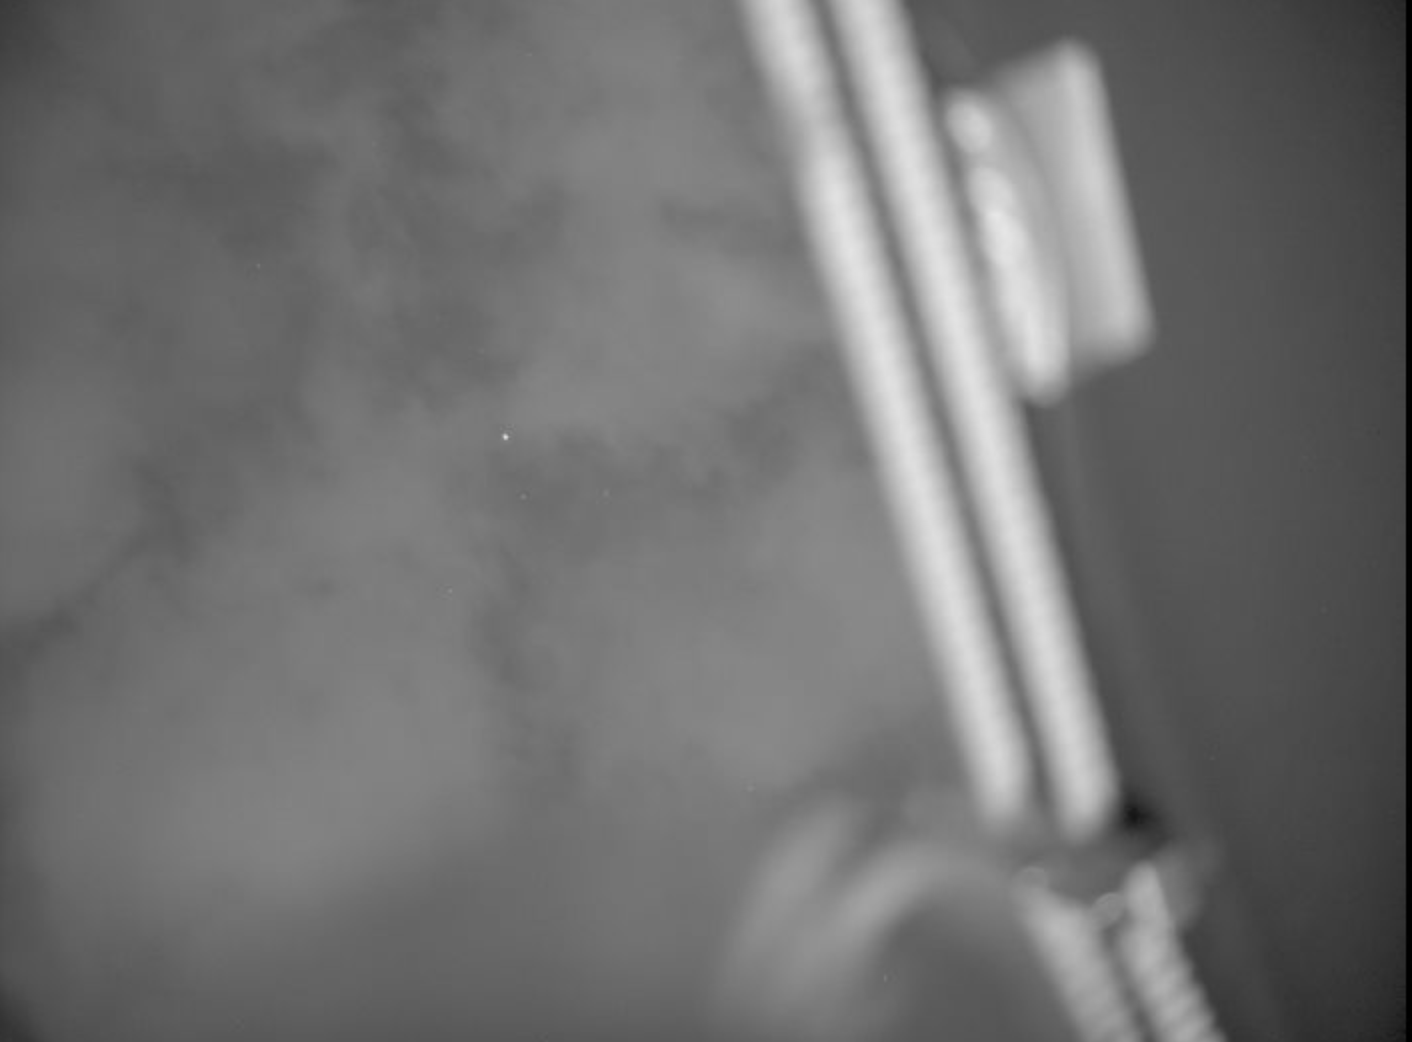
This evening GingerGeek and I simply set out to align the off axis guider of the OS on TSX. We did this buy focusing on the Moon and adjusting the off axis guider for he crater we were seeing. The resulting image is not very good which give rise to a though that the OAG should move it’s position in the imaging train to give better star renditions, the issue is I think it is as far back as it can go due to the filter wheel.
Camera -23°C, focus point 74534, temperature 15.81℃
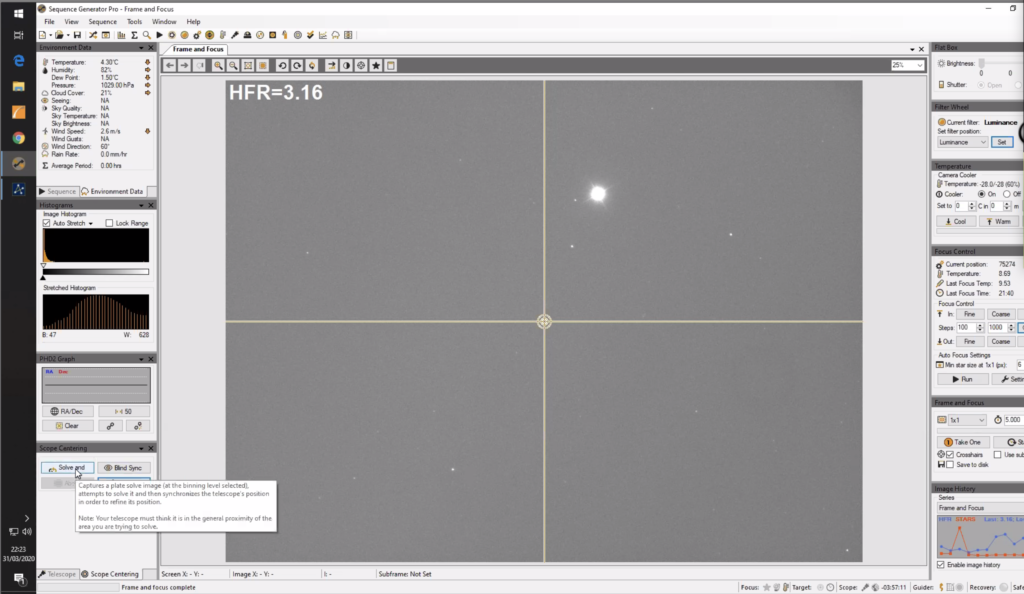
Frame & Focus / Plate Solved / Centred
21:38 Autofocus Run – Failed.
21:50 Integrating M85 Event 1 Frame 1 for 300 seconds Lost guide Star
22:13 Switch Guider to SW Lodestar
Integrating M85 Event 1 frame 1 for 300 seconds. Aborted run as M85 approaching the meridian and guiding graph was not looking good. Guider not calibrated.
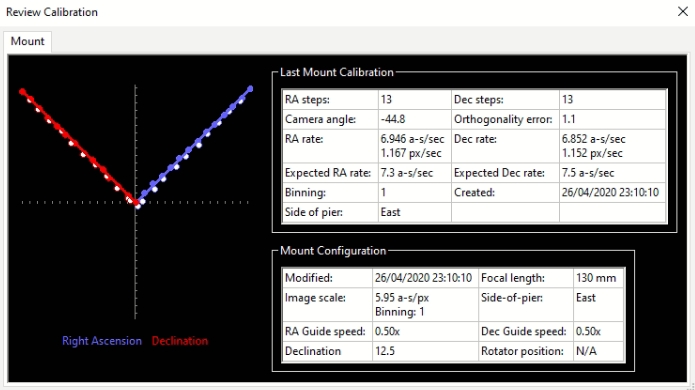
Meridian flip to Chertan in Leo, Tak FS-102 now on top of configuration, Esprit below the OS 12″ so will be the better to guide with the QHY5 MiniGuideScope attached to the FS-102.
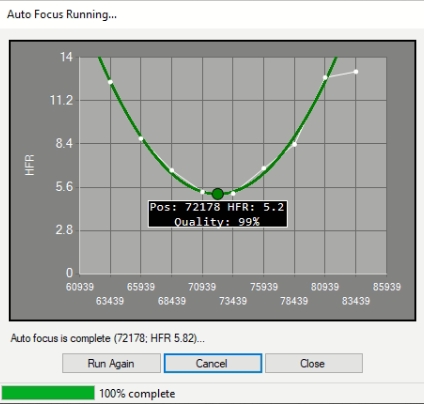
22:51 Slewed to a star field near Chertan for Auto Focus run. Start focuser position 72885, final focuser position 72178 ….. nice graph.
22:56 Calibrated QHY5 MiniGuideScope guider
23:08 Calibration suceeded, guiding.
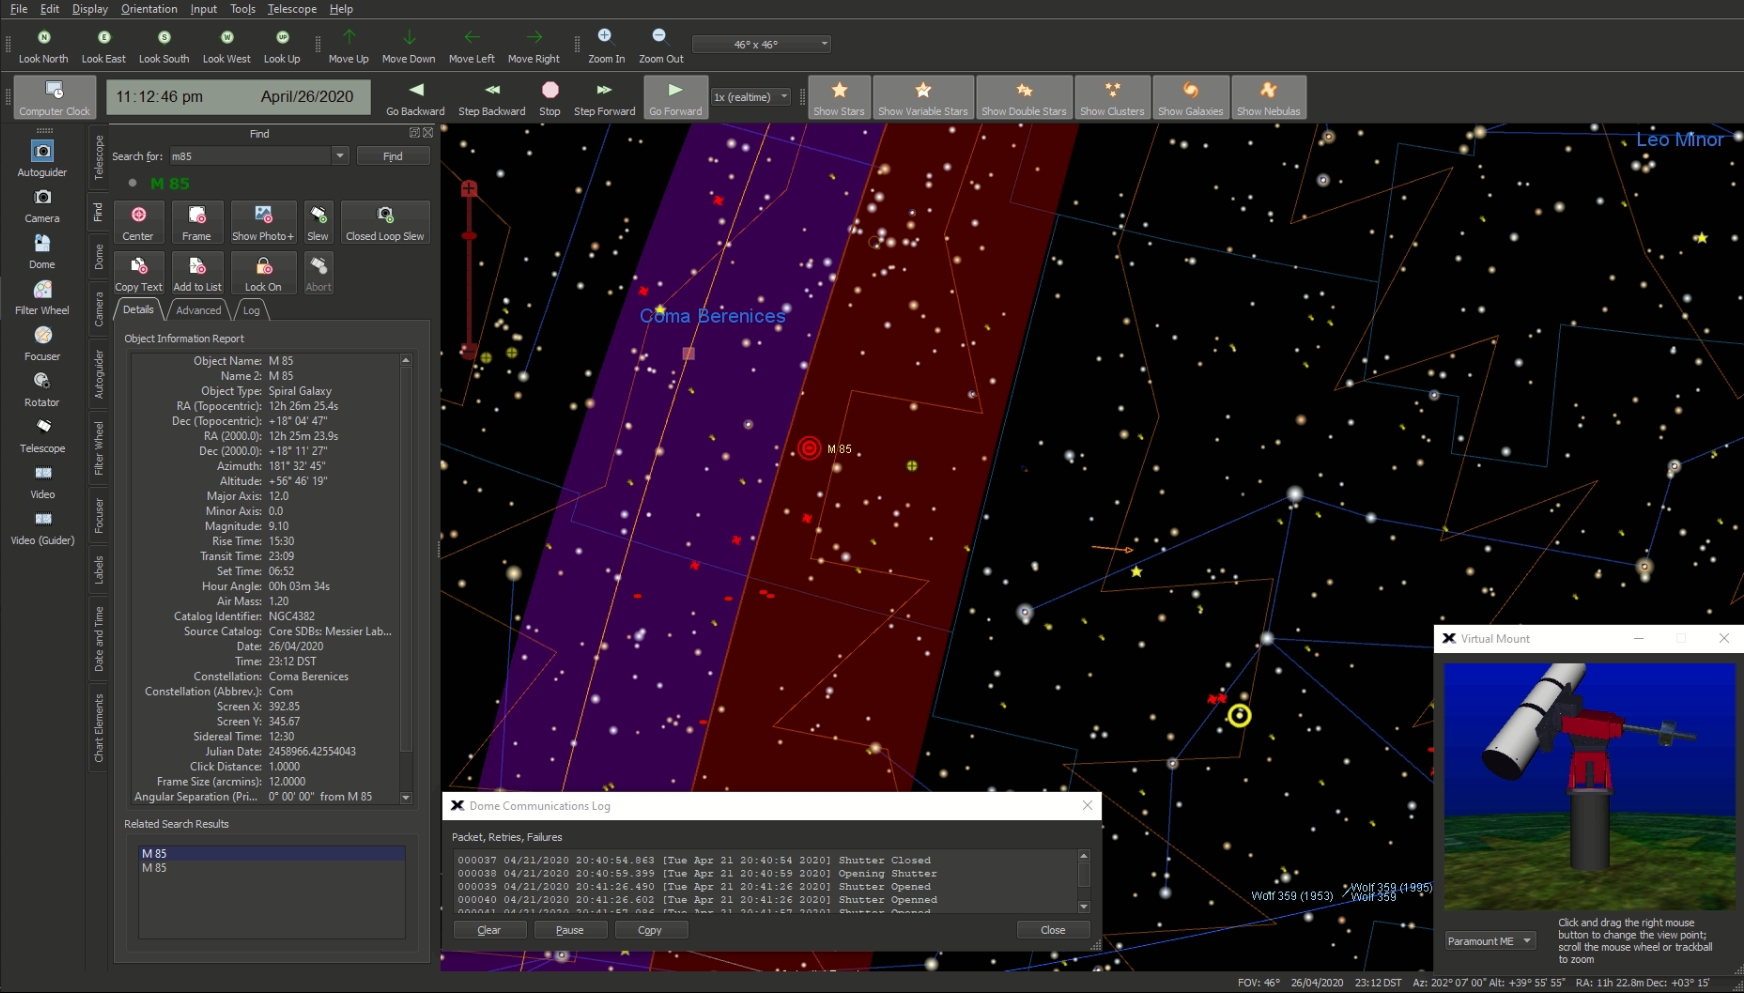
Stoped guider and slewed to M85 which had just crossed the meridian.
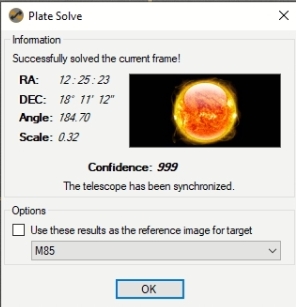
Frame & Focus / Plate Solved / Centred
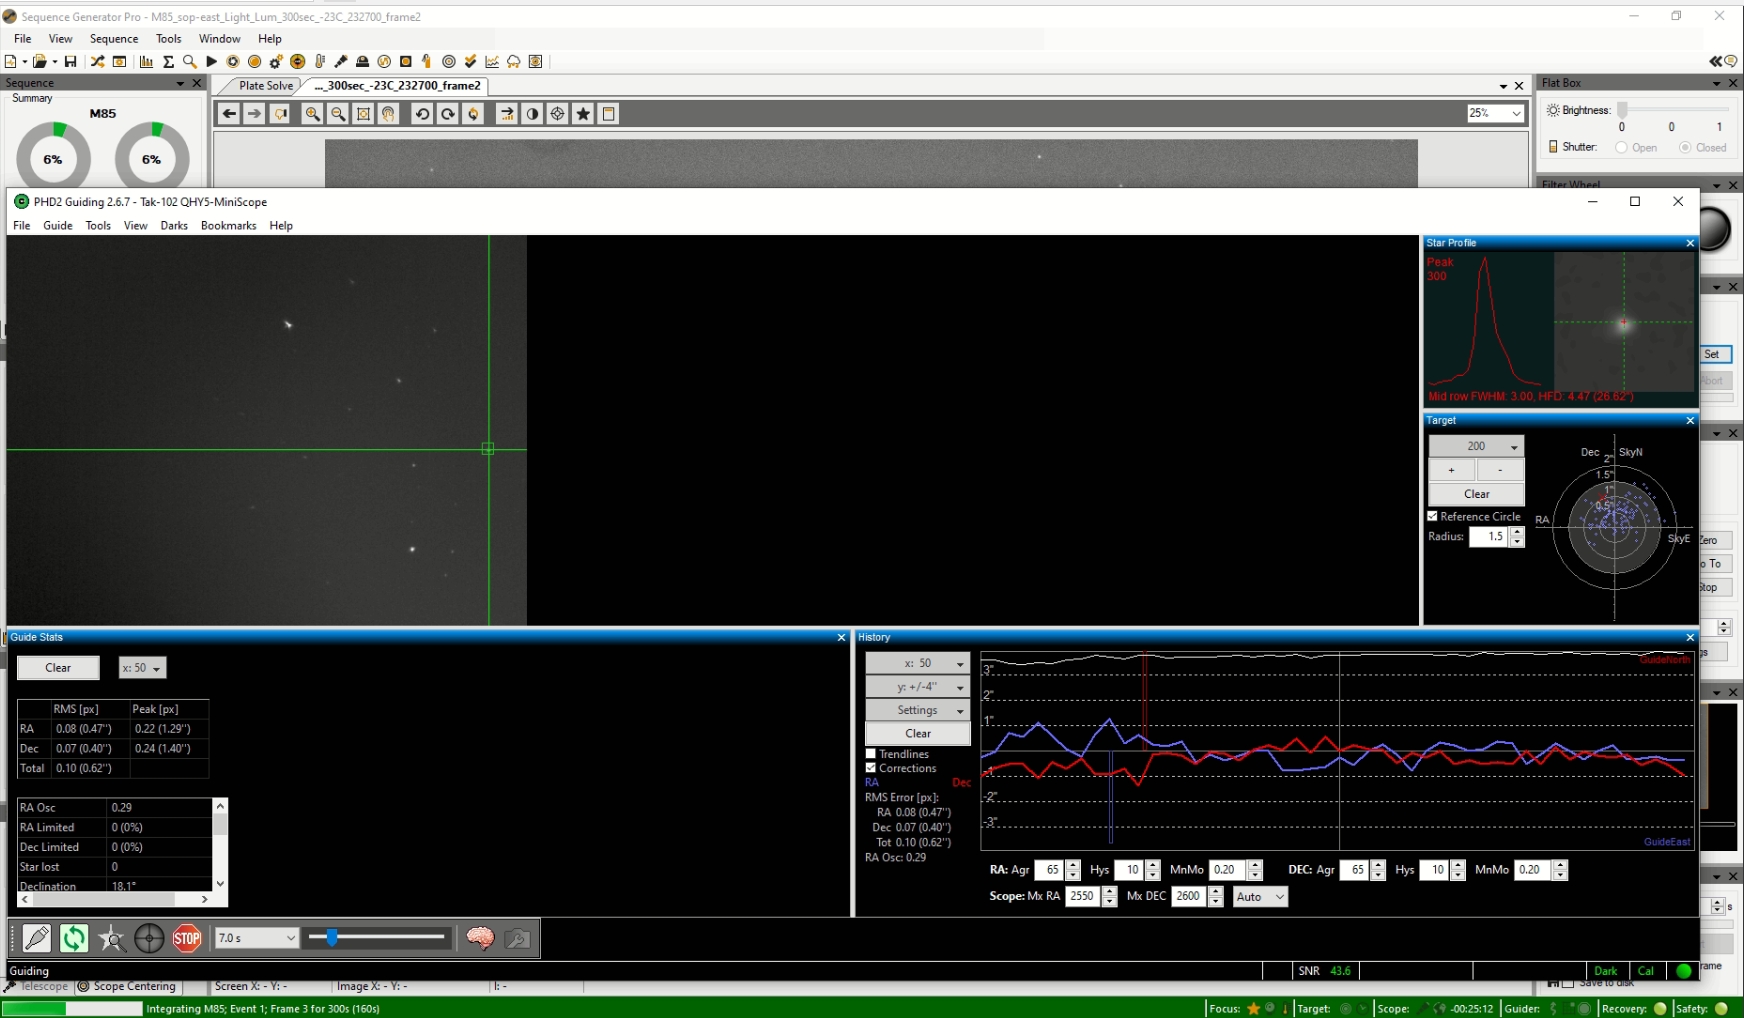
23:21 Integrating M85 Event 1 Frame 1
23:44 Telescope connection lost due to poor communication
23:48 SGPro reported USB error – lost FLI Focuser. FLI connects Ok in The Sky X.
Fix is to click on the spanner in SGPro for the Focuser and Rescan, Focuser now reconnects.
So first I could not see any USB devices that were plugged in to the USB hub on the mount. A reboot of the mount fixed that problem. Next I could not auto focus, I did not get to the bottom of that so tried to focus manually best I could. Then PHD2 settings were wrong for the OS12 and the associated lodestar guider, the calibration steps were 100 rather than 400, the min move was 0.66 rather than 0.18. I had taken screen shots before on the blog so changed them back, I am not sure why they have changed. I then managed to calibrate the guider on the OS12, given I have taken off the camera to clean the filters the other day.
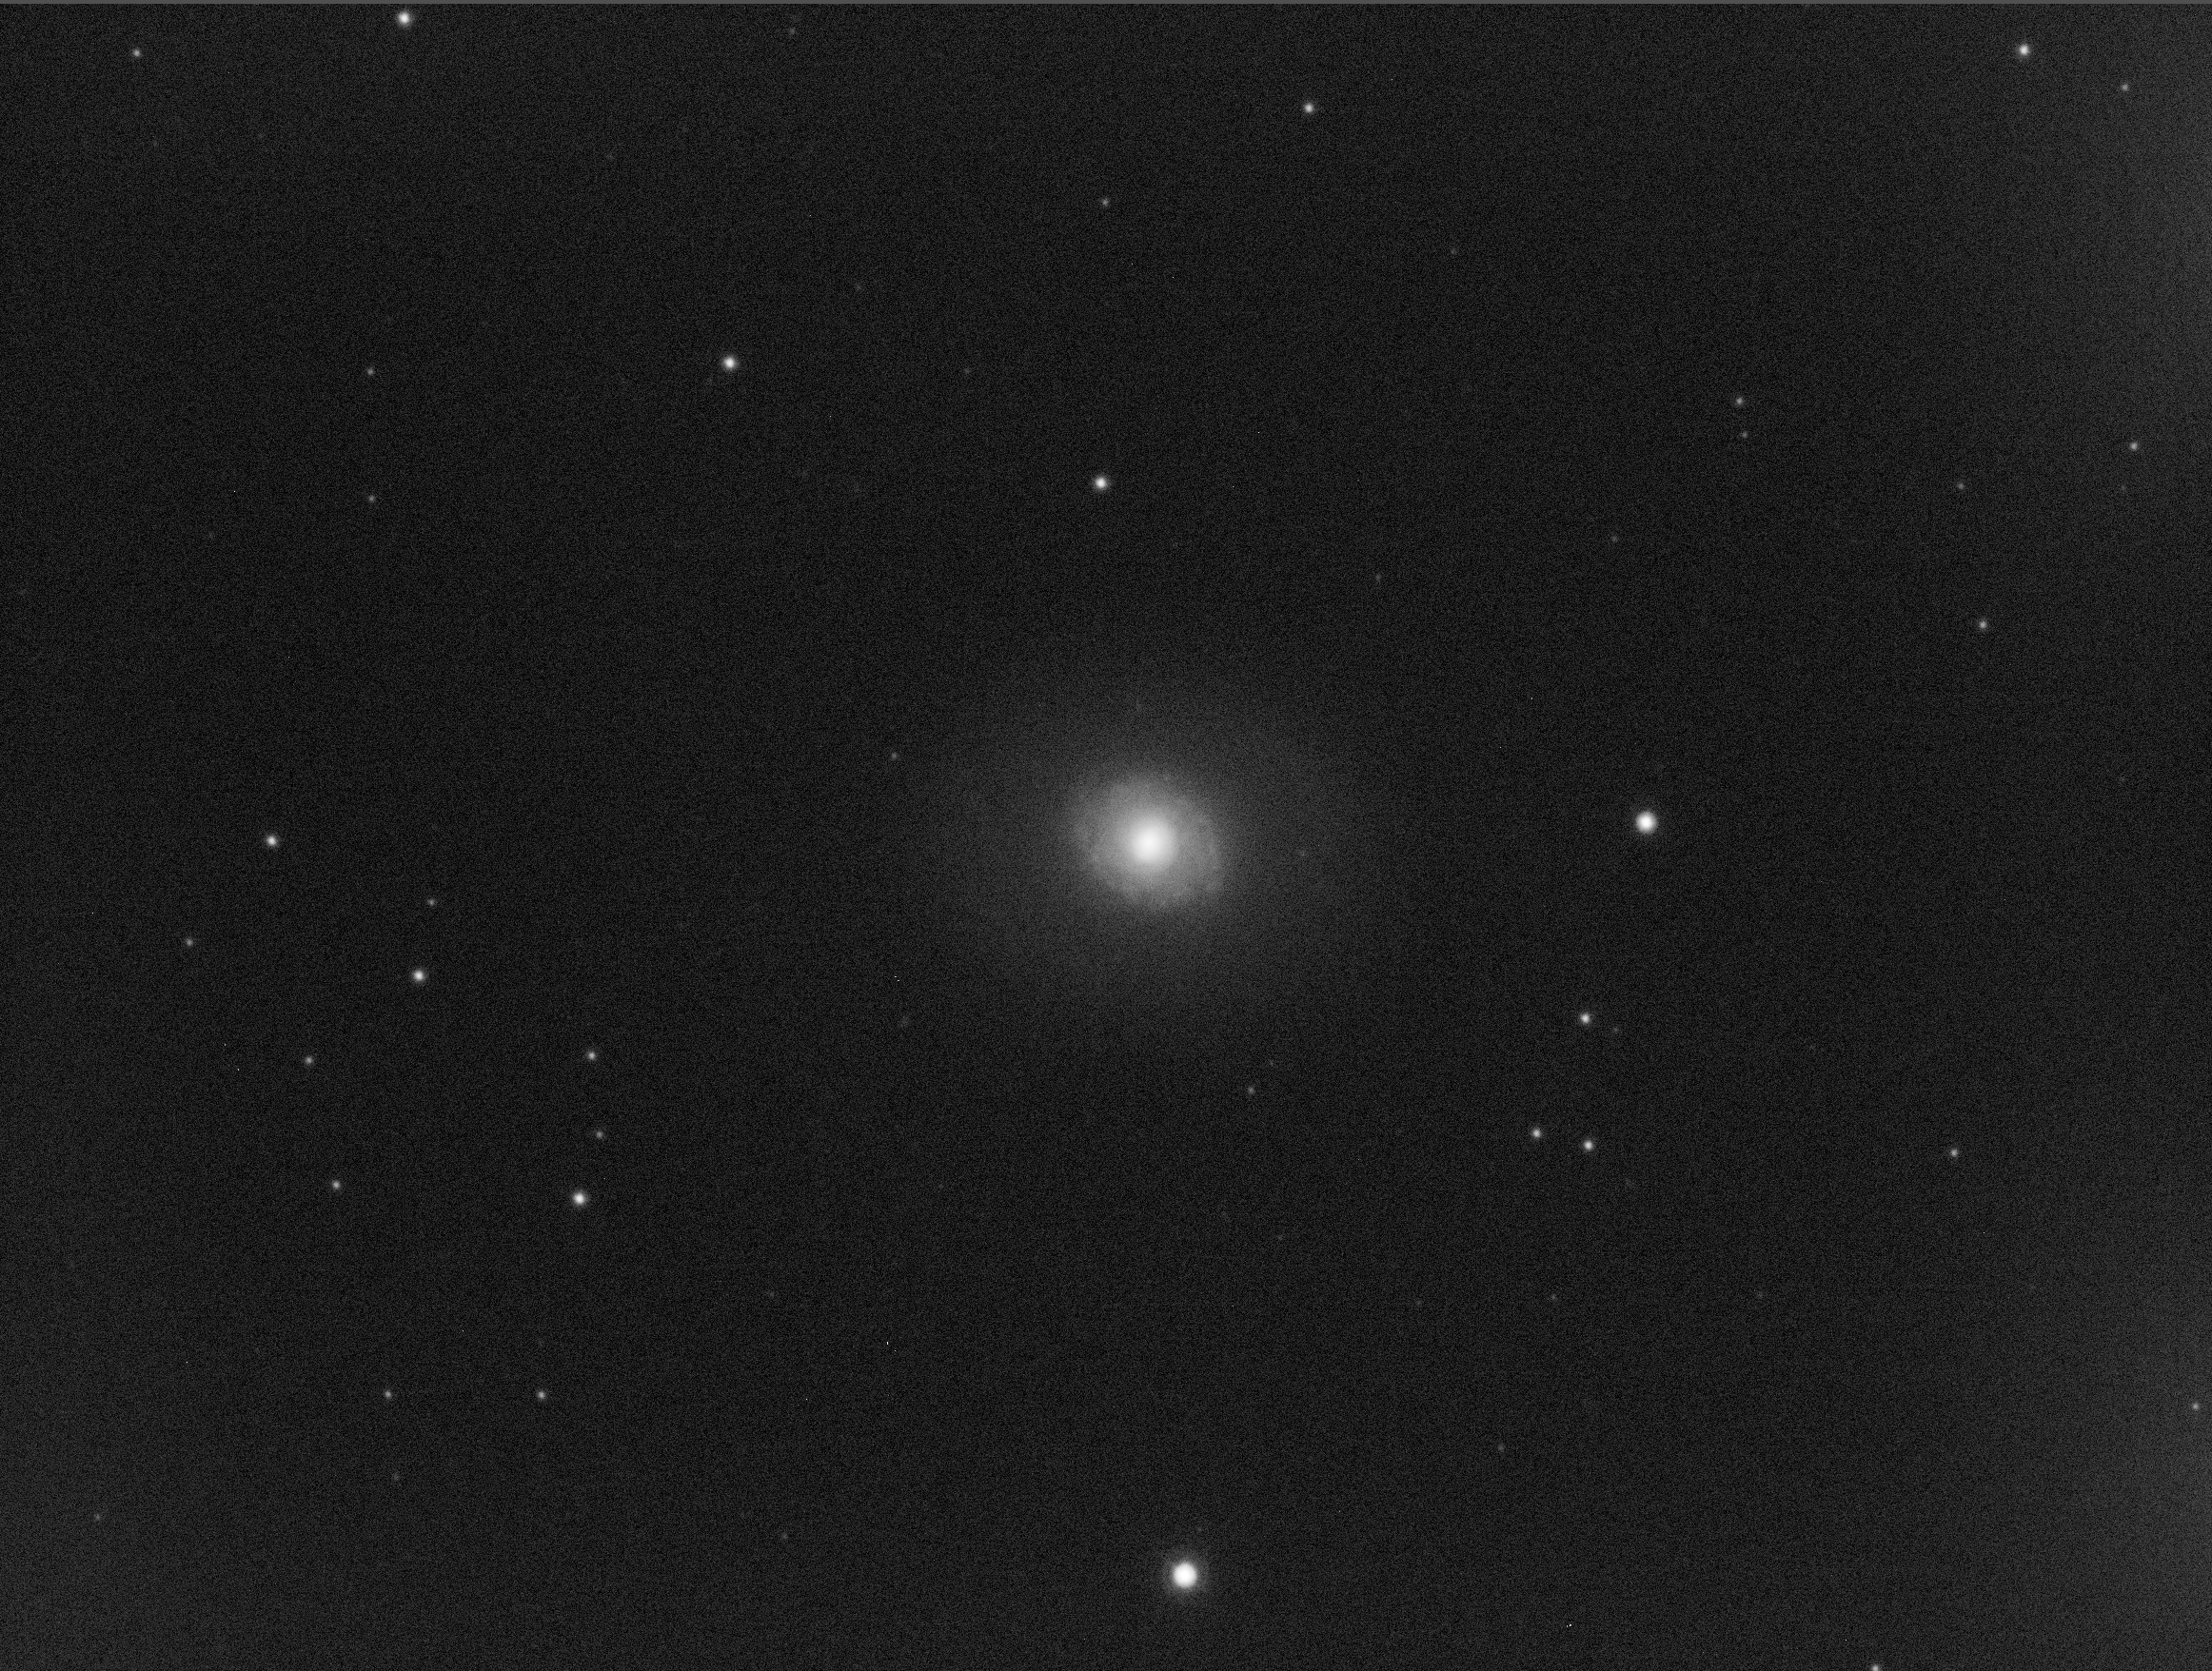
@22:15 I started imaging RGB on M94 on the OS12.
M94 5min Red
The guiding was not bad after calibration. I set to expose once every 8 seconds on the only guide star in the FoV.
Guiding with PHD2
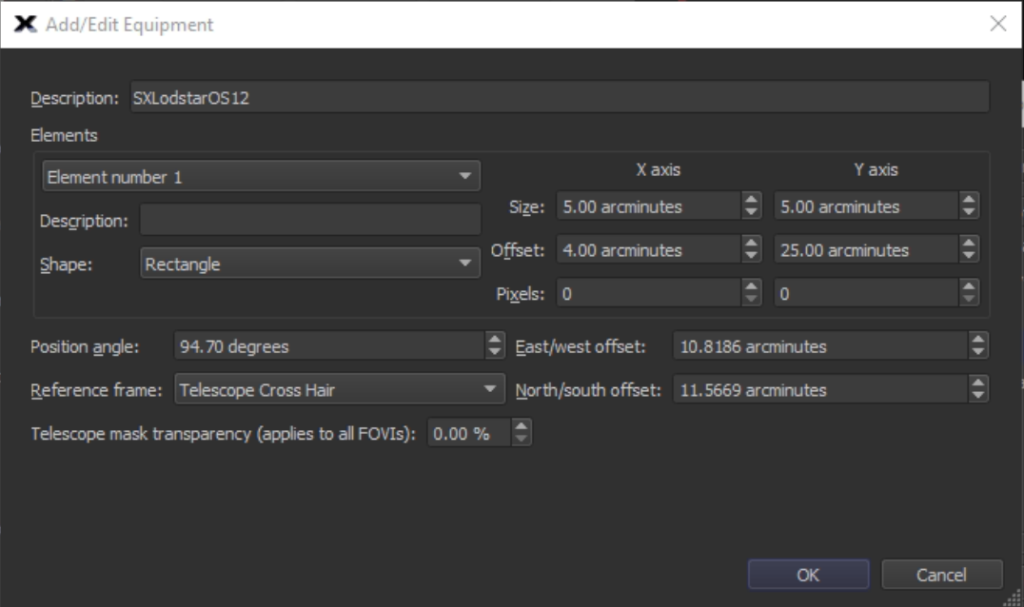
What I do need to do is set the FoV indicator in TSX for the Lodestar guider to the correct position to help find a guide star. Else I really should try to guide with one of the other scopes. I am now off to bed, I will leave the scope collecting the rest of the green, 2 left and the final 12 blue. Then Bob will take over imaging for the rest of the night.
Bob took over Green which lost the guide star, so he performed a meridian flip, continued on the Green and then took some Blue. Bob then took some HA, OIII, SII at 5 and 10 minutes for a test. The Ha would be useful for the galaxy as an LRGBHa image. Bob turned in at 2:50am.
M94 10min Ha
I also noticed this morning that the Offset was wrong in the ASI camera profile which was called ZWO camera in the dropdown and in fact was set to 50 rather than 21 for this Gain which was correctly set at 139. I have also changed the OSA12 No Guider profile to use the ASI2 camera rather than the ZWO one, not sure the difference. I have adjusted the setting back to 21 so all the OS12 profiles now use Gain 139 Offset 21 as their standard. If we want the other 2 setting that need changing for each time we run, along with subsequent darks and flats etc would be Gain 0 Offset 10 and Gain 75 Offset 12. For the moment the Darks and Flats etc from last night are Offset 50 so we can only use for last nights images.
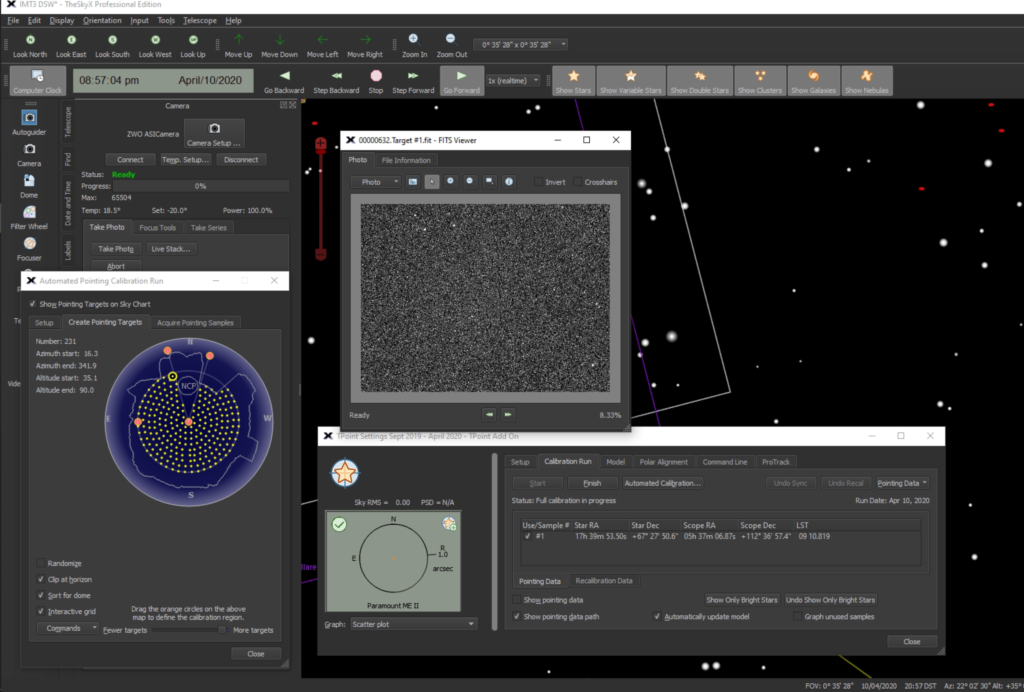
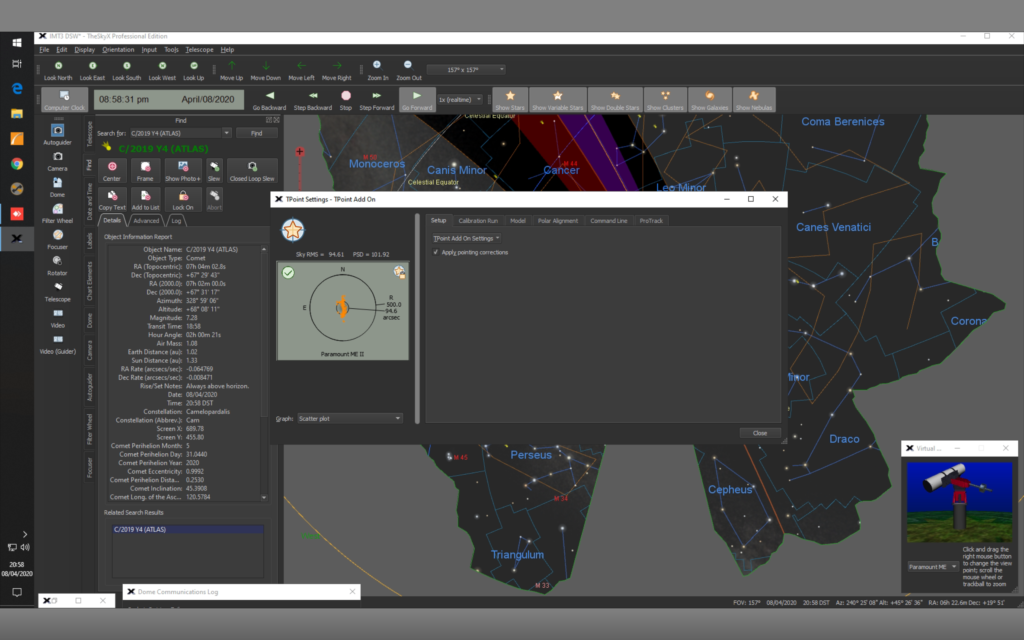
Another night of trying to complete a TPoint run. After opening the dome around 4pm to cool down and turning the fans on the 12″ and pulling back the light shield material we (Bob, GingerGeek and I) @20:49 completed Slew and Sync to test plate solving ability which worked well.
First Solve and Sync works
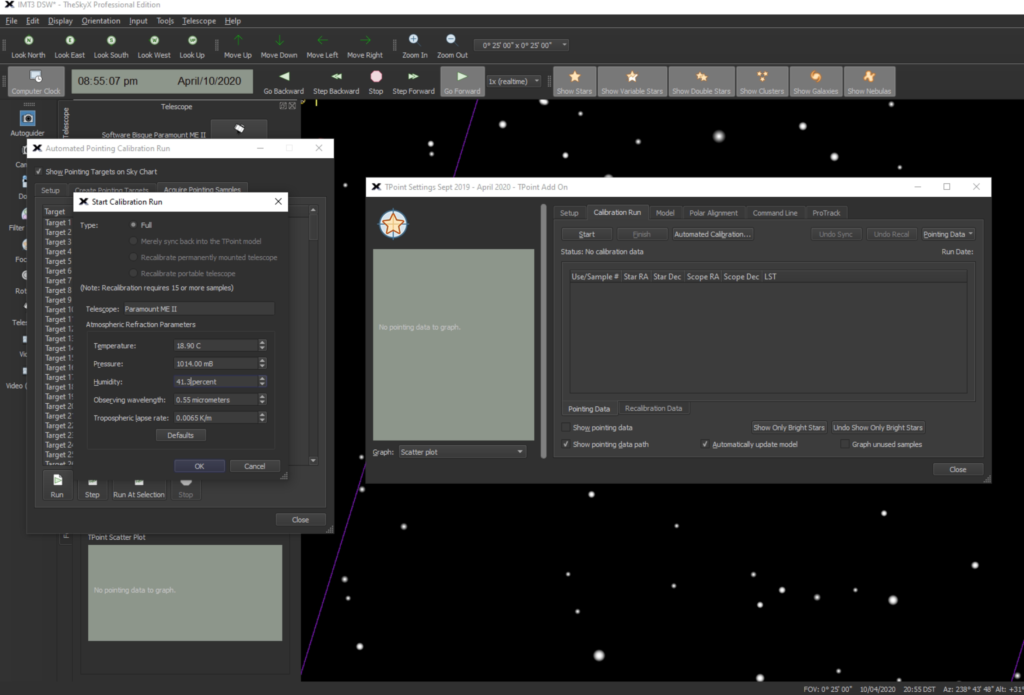
We then started the TPoint run.
Starting TPoint RunFirst point captured out of 231 points
Our first failure was Point 28 @21:21. The following are other failures.
Failed Point 50,51,52,53 @21:42
Failed Point 55 @21:45
Failed Point 60 @21:53
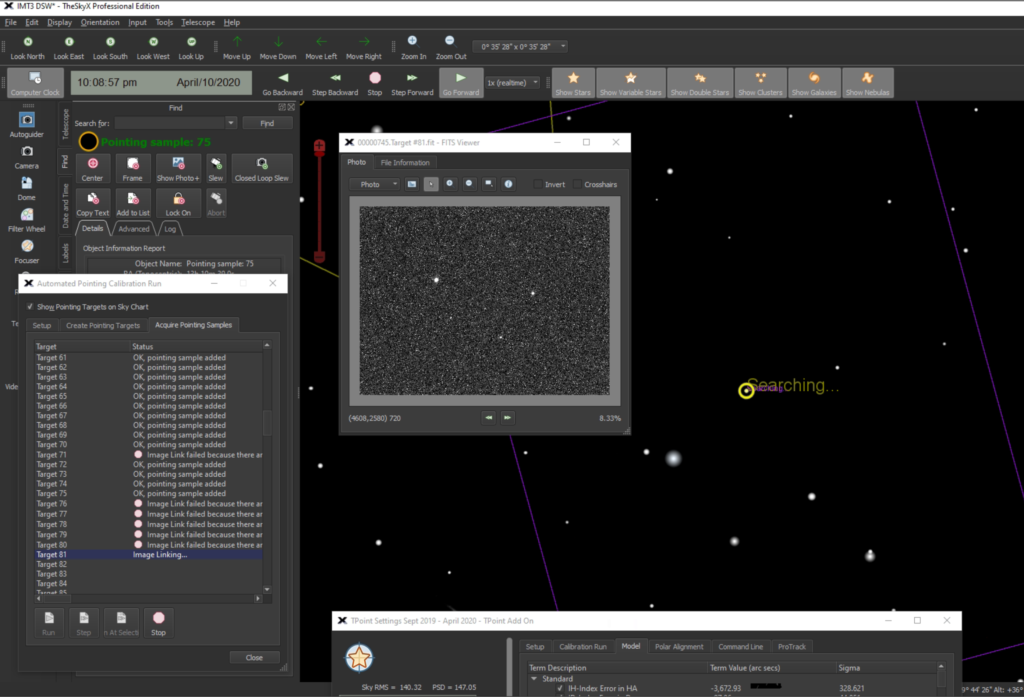
Failed Point 71,76,77,78,79,80,81,84,85,86,89,
TPoint failures
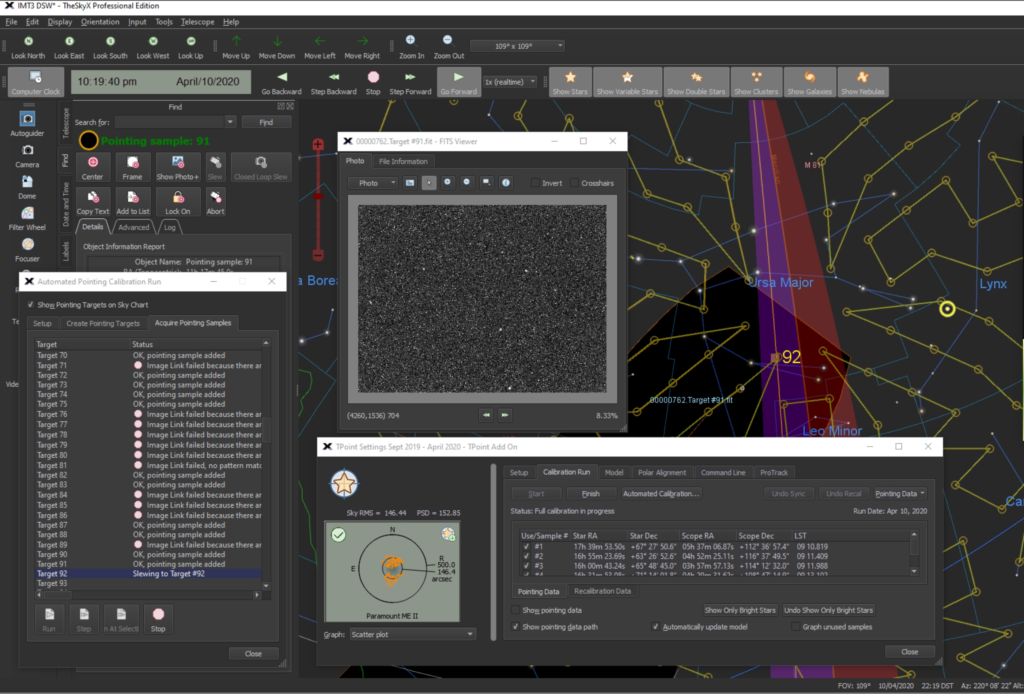
We then performed the first of a few meridian flips back and forth at Point 92
Meridian Flip
At pointing sample 96 we changed from 20s exp to 25s (20 failed at this point) to see if this helped the failure rate, it helped a little. The sky clarity was not great nor was the 12″ pointing correctly through the dome at the Meridian so need to look at this at a future point.
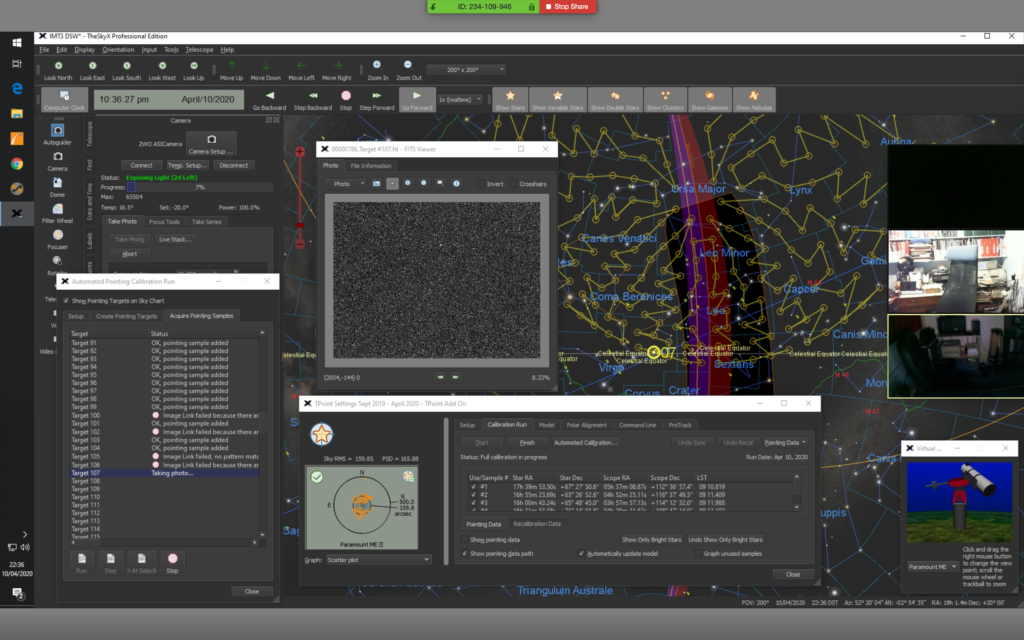
More Tpoints failed as follows. TPoint 100,102,105,106,107 (at this point scope 1/3 obscured by slit!)
Tonight I set out to perform a TPoint run to improve the values we got last October. However it transpired to be more difficult than I thought. We updated TSX after October to there latest release, this seemed to have changed some of the parameters for plate solving. This meant that every time we took an image in the TSX it would not plate solve and so we could not perform the TPoint run. After the best part of 1 hour I gave up and let Bob take over the scope to play.
Meanwhile I then setup the Mac 180 to image Venus, however, by the time I got round to it and found it in the telescope and thus on the chip it was low down the side of the house opposite by the roof and was bumping around badly due to thermals. I found it difficult to centre the scope on Venus with such a small chip so I may need a more repeatable way of doing this moving forwards. I took a couple of videos just for posterity even though I felt the quality would be poor.
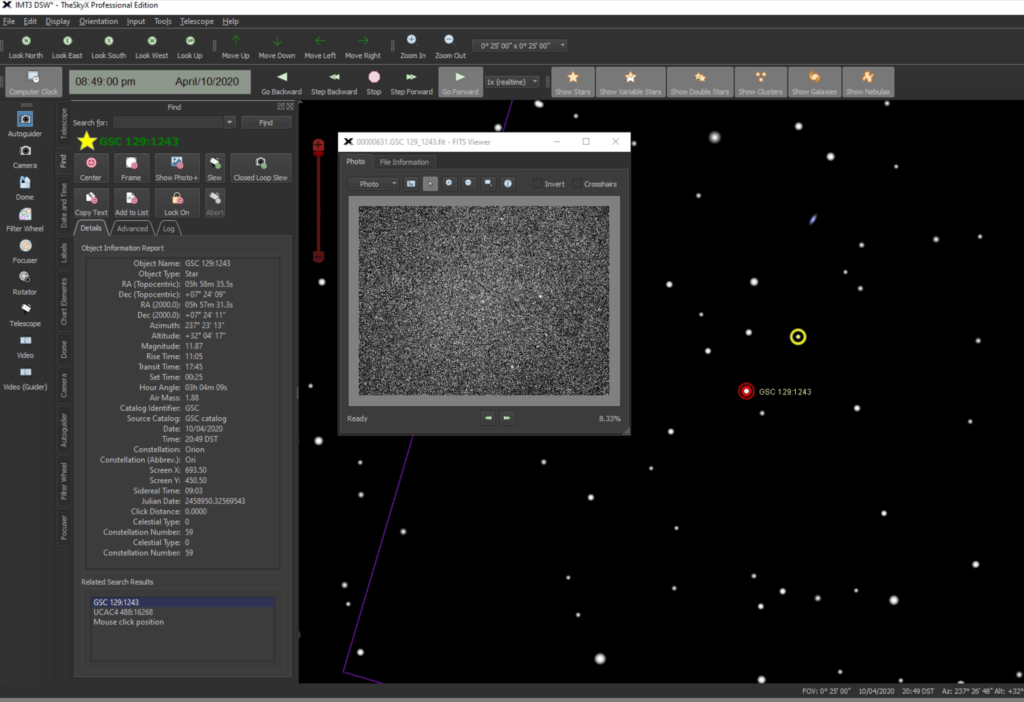
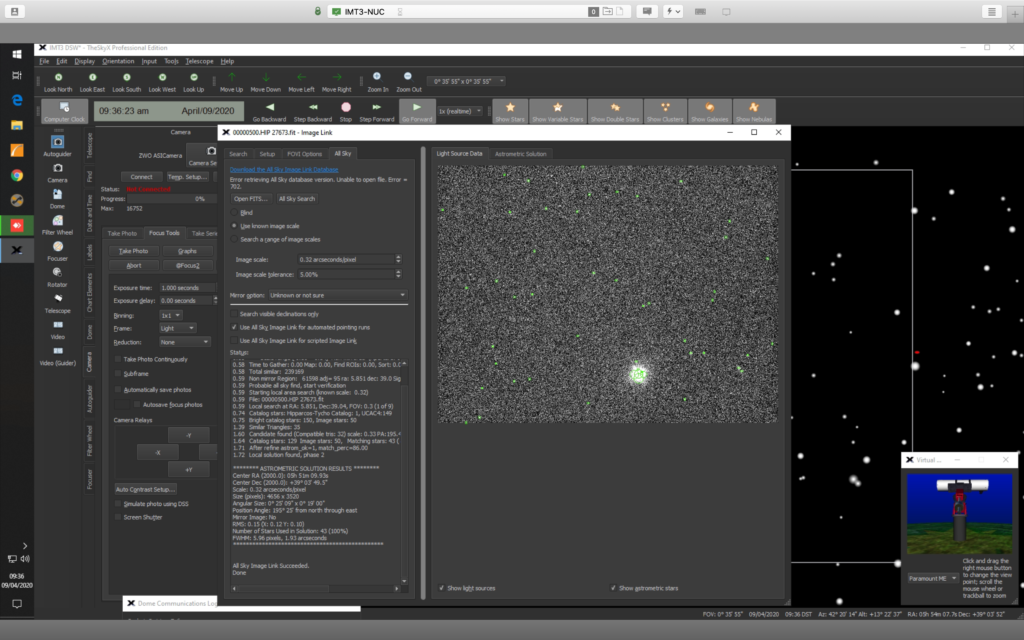
Subsequently the following day I opened up the images take with TSX and also download the All Sky Database that was missing to both the NUC in the dome and my local Mac. I then started to change the settings in Image Link within TSX until I could solve the image.
Solved image using Image Link All Sky Search in TSX
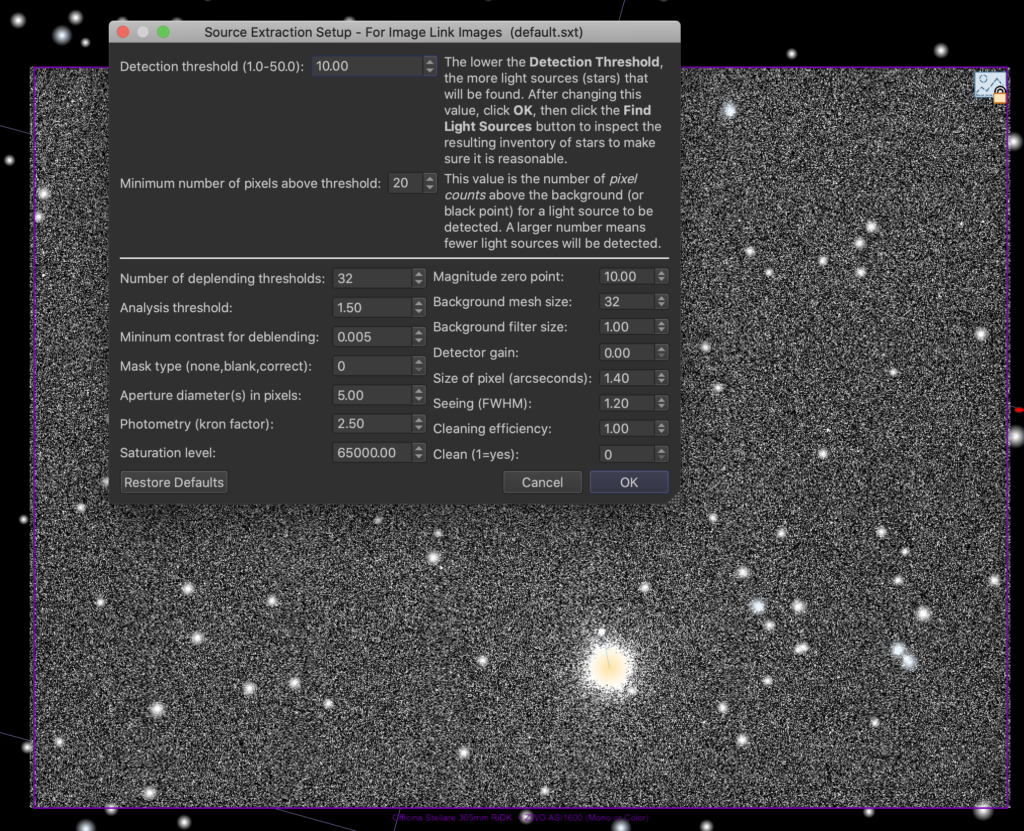
The key parameter transpired to be the Image Scale Tolerance on the All Sky tab setting it to 5% from 1%. Also I changed the Image Scale back to 0.32. On the Setup tab I selected Setup under Source Extraction and changed the detection to 10.0 and the minimum number of pixels to 20.0.
New Source Extraction Settings and solved image
I then tried a second image and that solved in 1 sec too so very happy. I will try to give the TPoint another go tonight as well as Venus on the Mac 180. If TPoint works I will take RGB on the Tak. First solution from the image I solved can be seen below.
TSX Image Link solved
The resulting astrometric solution from TSX is below based on another 60s exposure image is below as text.
******* ASTROMETRIC SOLUTION RESULTS ********

Center RA (2000.0): 07h 14m 12.34s

Center Dec (2000.0): +32° 34' 16.1"

Scale: 0.3250 arcseconds/pixel

Size (pixels): 4656 x 3520

Angular Size: 0° 25' 13" x 0° 19' 04"
Position Angle: 195° 28' from north through east

Mirror Image: No

RMS: 0.88 (X: 0.45 Y: 0.75)

Number of Stars Used in Solution: 40 (100%)

FWHM: 8.98 pixels, 2.92 arcseconds

***********************************************
Things still to resolve
Check out why WSX is loosing connection and shutting the dome
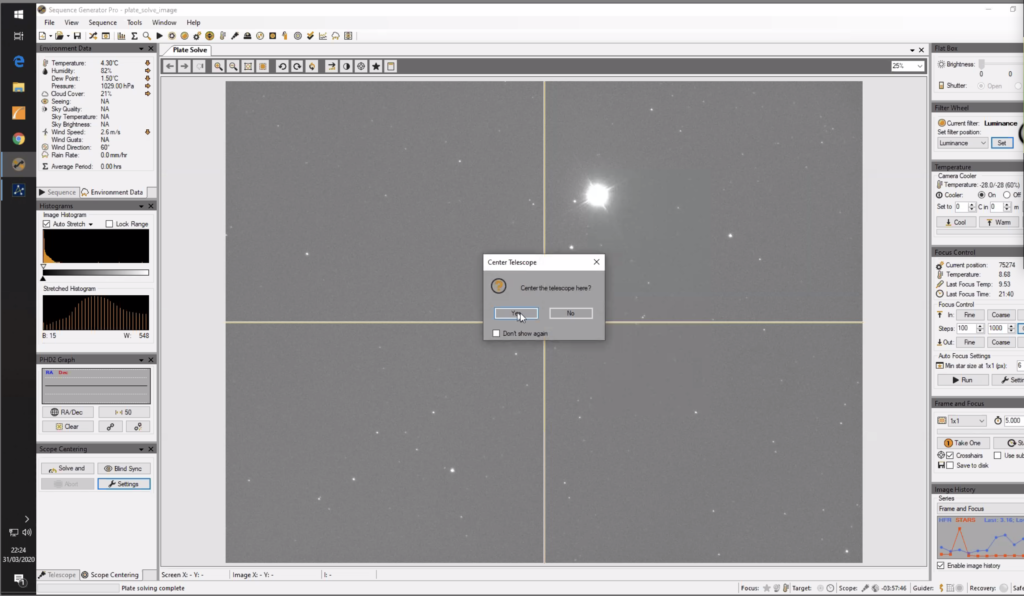
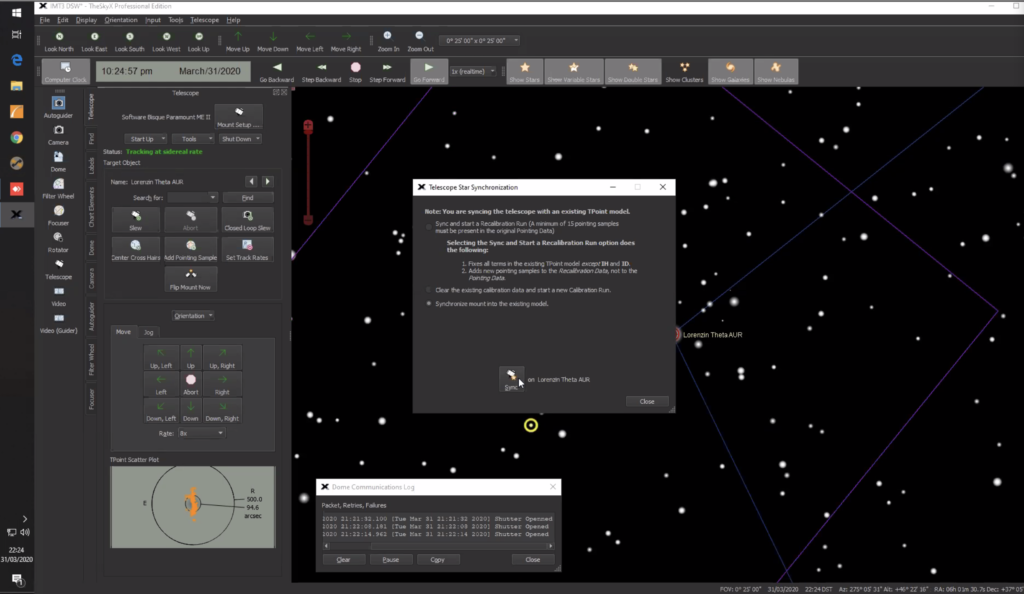
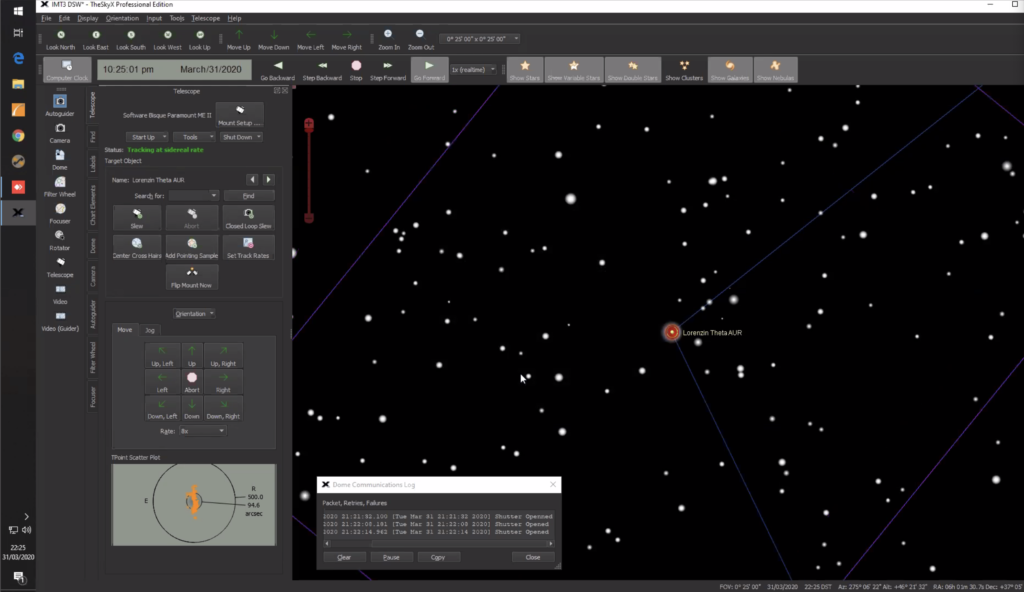
Tonight GingerGeek, Bob and I wanted to make sure the newly installed version update for SGPro was working. In particular we wanted to get the sync and solve working, so that we could centre an object, but also the autofocus as the was a major update.
In TSX select an object and slew to itIn SGPro take a quick 5s image of the objectIn SGPro click the Solve and Sync button on the bottom leftIn SGPro the image is now solved and synced to in SGPro
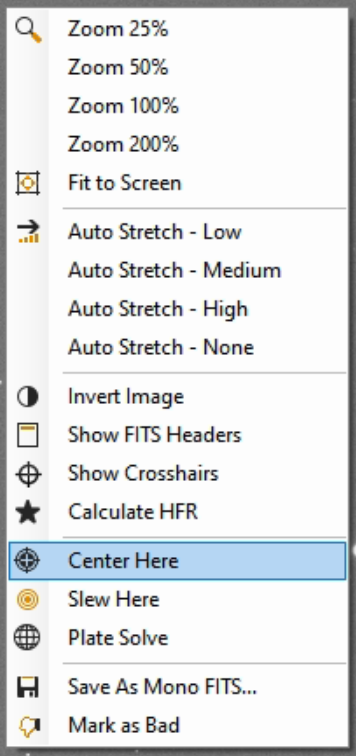
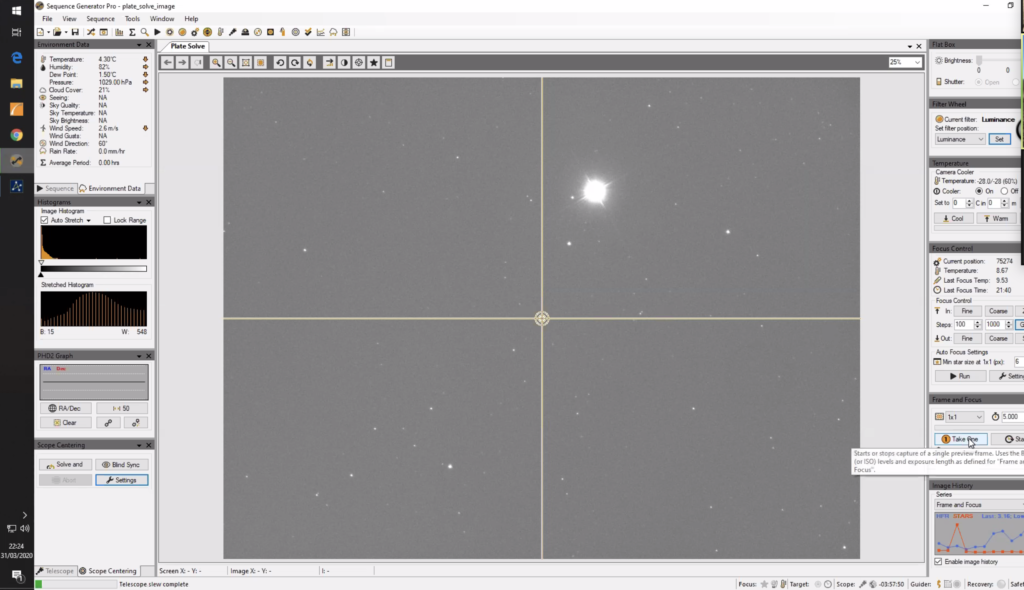
In SGPro right mouse click on the object and select Center Here from the menu
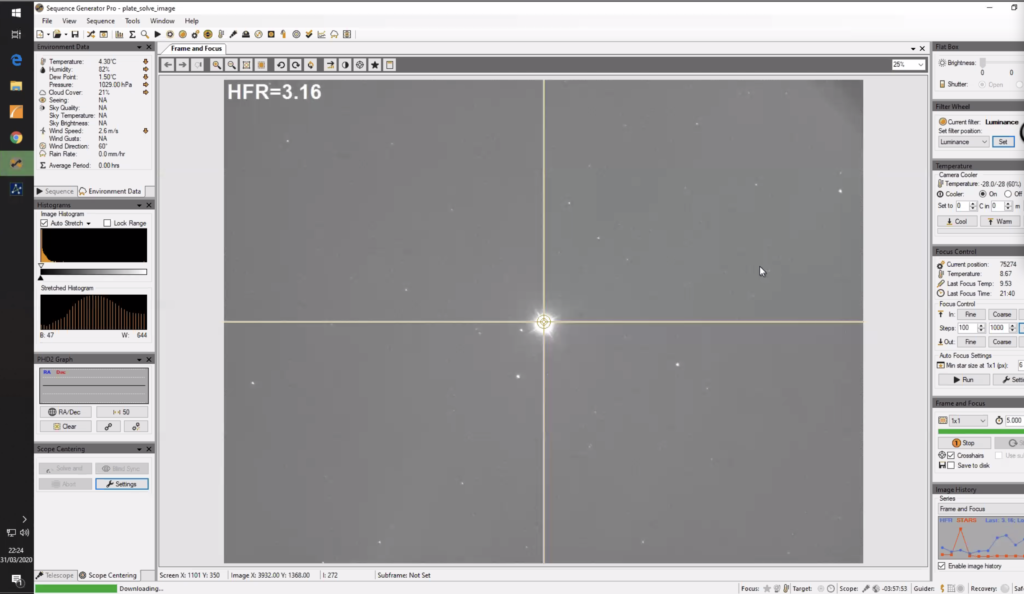
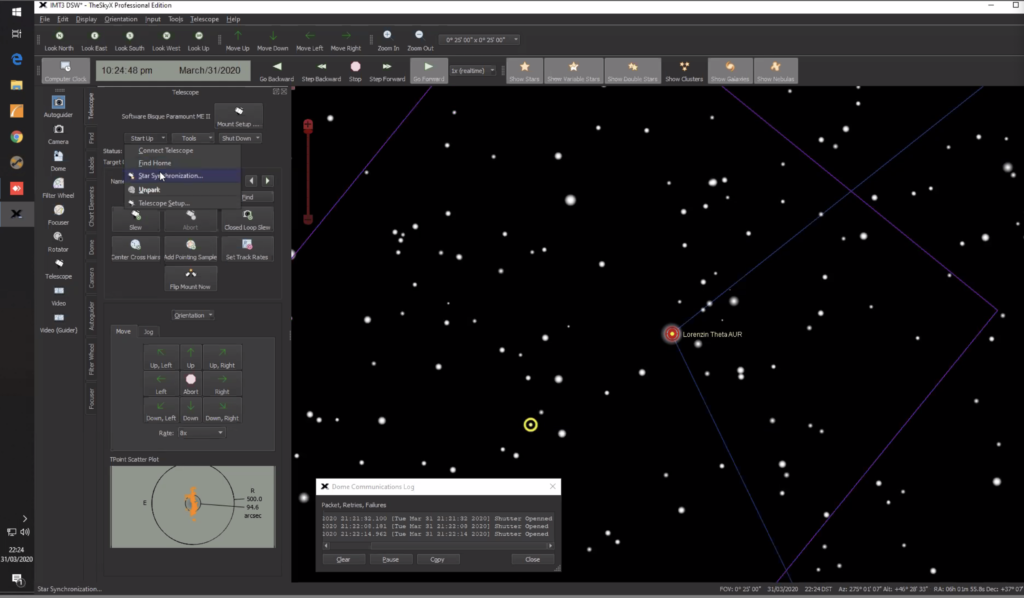
In SGPro select Yes on the Center Telescope windowIn SGPro take another 5s image using Frame and FocusIn SGPro the object should now be in the centreIn TSX from the Telescope tab click on the Start Up button and select Star SynchronisationIn TSX make sure Synchronize mount into existing model is selected and click on SyncIn TSX notice the FoV indicator from the camera has shifted to a new positionIn SGPro take another 5s image using Frame and FocusIn SGPro the resulting image should not have moved
The mount in TSX and SGPro are now synced to the correct position in the sky.
Tonight I plan on setting the 12″ imaging M94, a Messier galaxy in Canes Venatici.
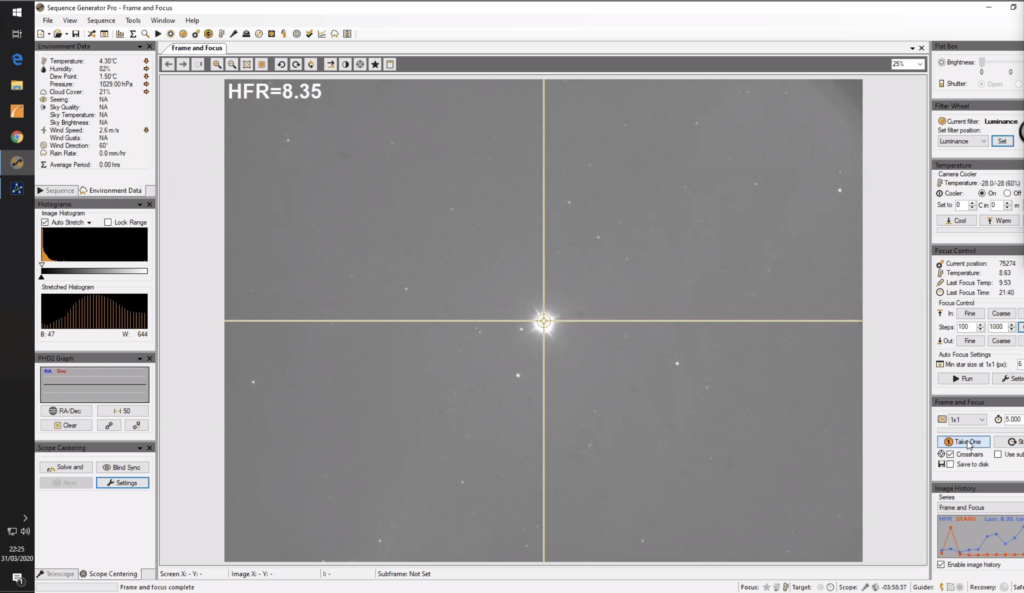
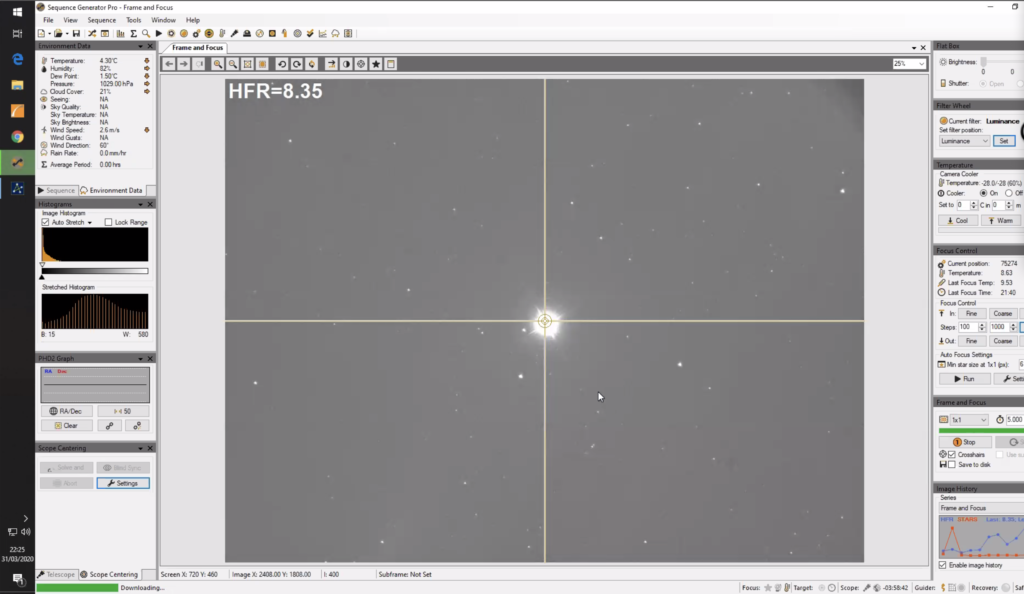
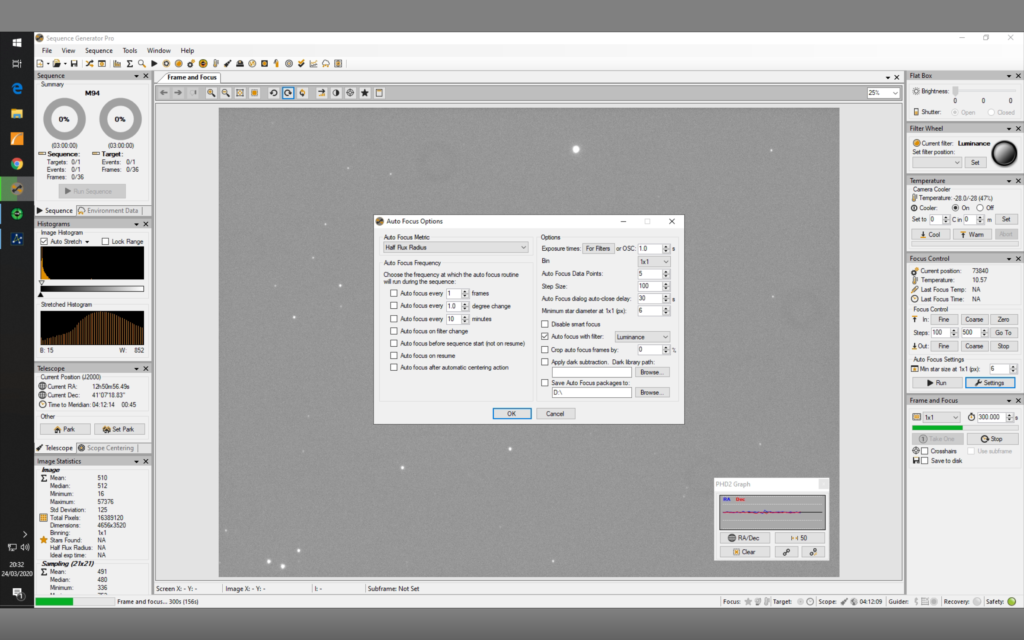
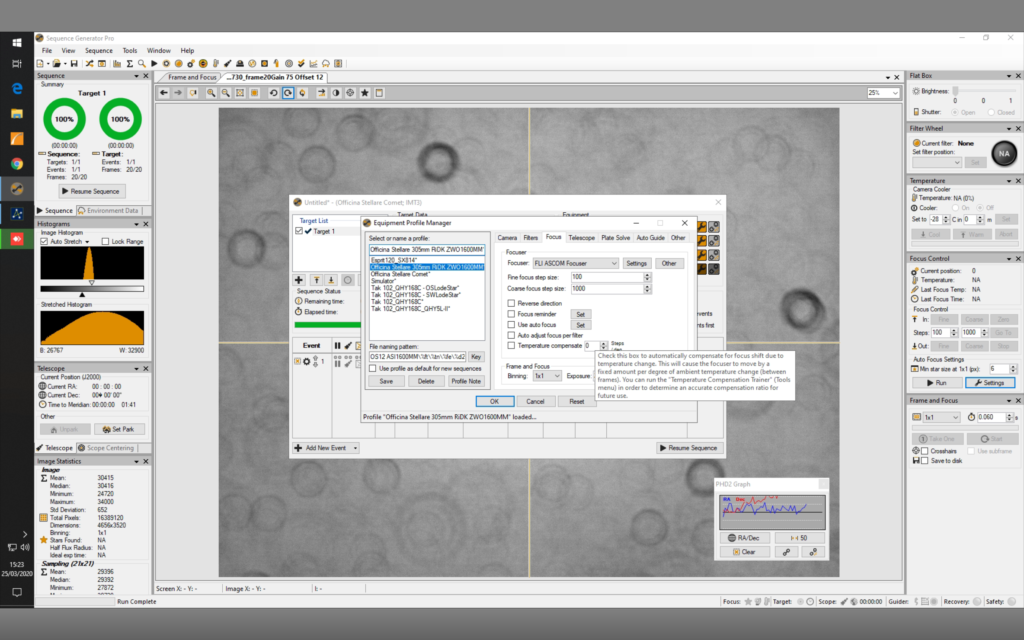
I slewed to nearby star and focused using SGPro after changing a couple of settings in the step size and amount of data points to be used, I set step size to 100 from previous 1000 and data point to 5 from previous 10 and got a much better focus. Focus landed up first time around at 738840
SGPro Autofocus settings changed
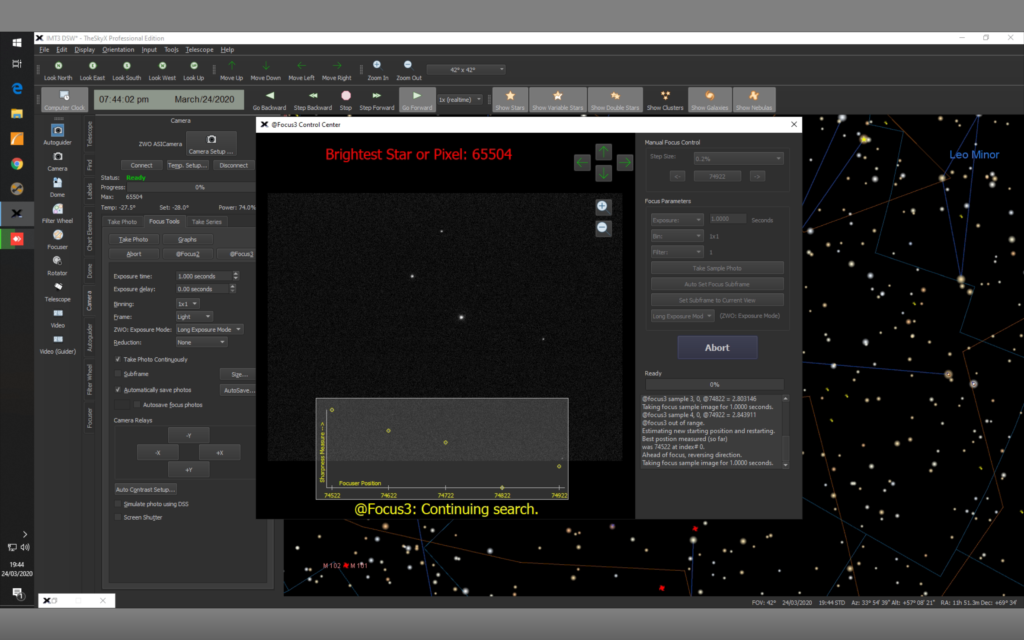
I had tried to get @focus working in TSX but it would fail every time on the galaxy with not enough stars. This meant I could not use TSX to solve and sync to centre M94.
SGPro autofocus
I then tried to centre with SGPro and that also failed so instead I used TSX to connect to the camera and manually moved M94 to the centre of the chip. I ned to get the local plate solver working as it was not running.
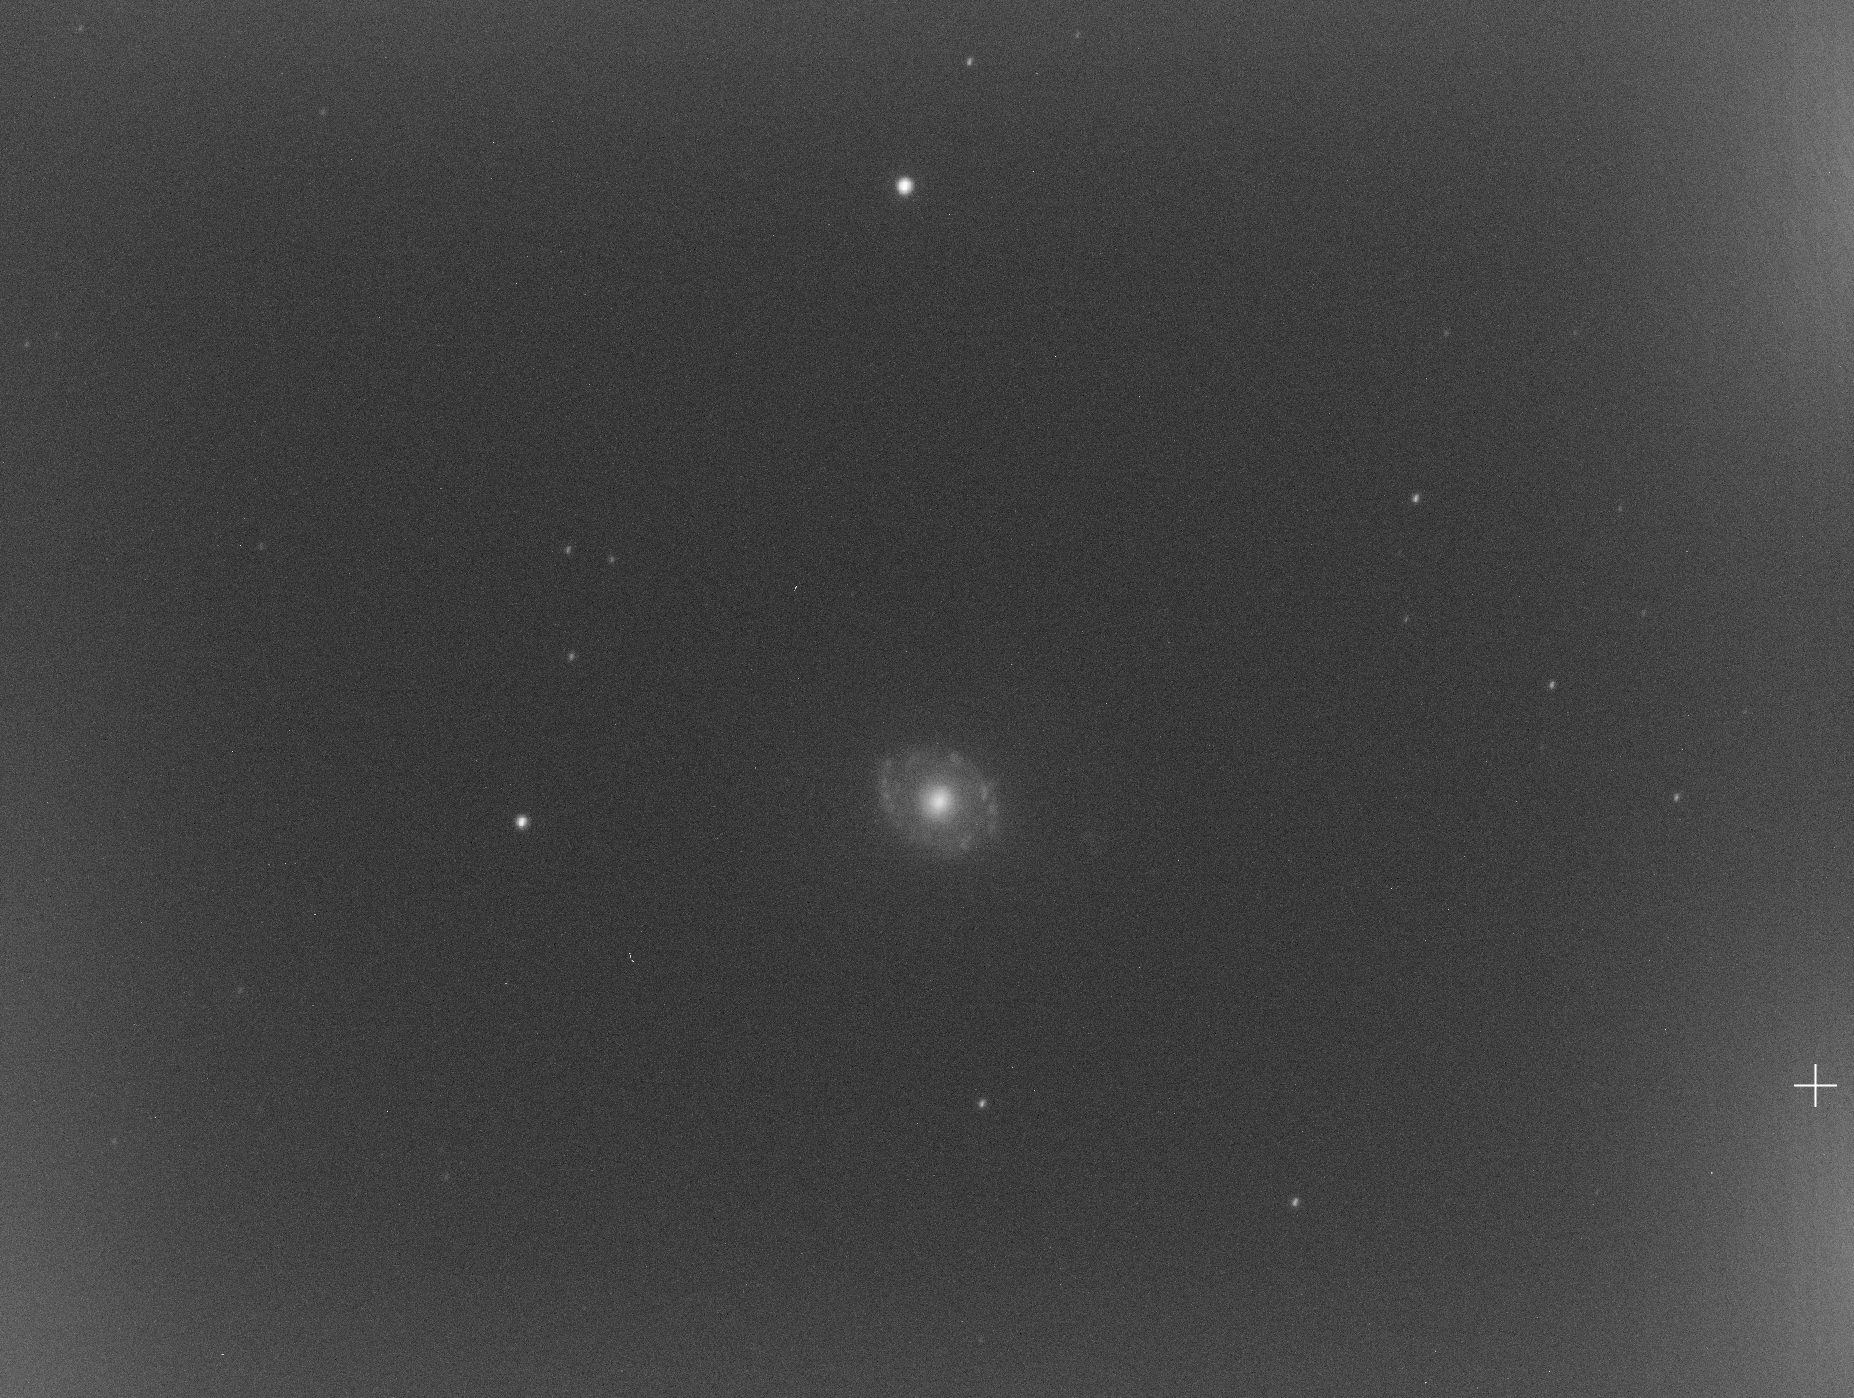
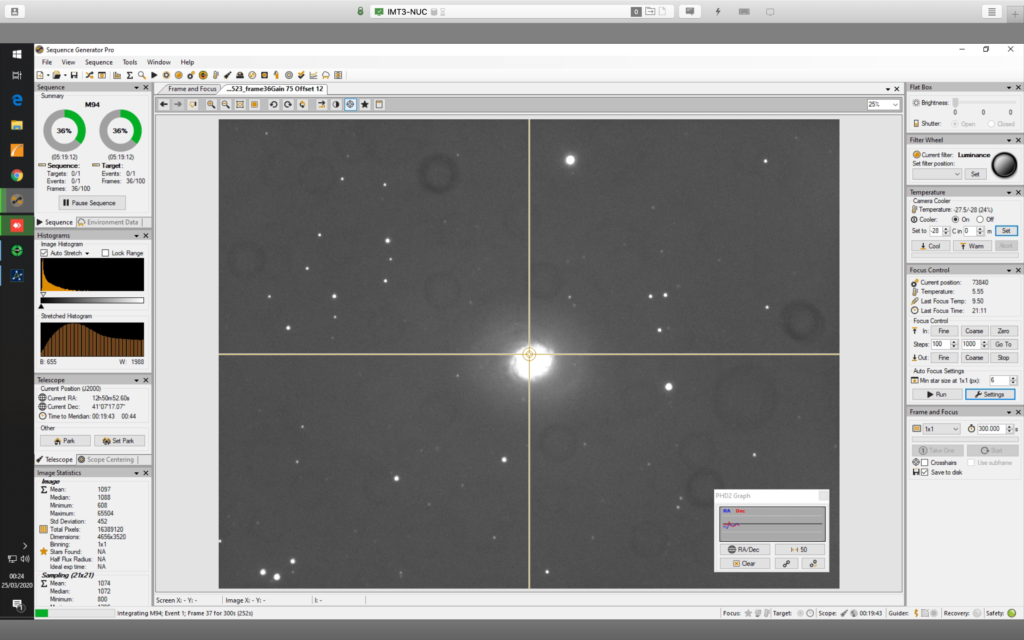
@ 20:32 I took an initial 5min sub to see what the image would be like after setting PHD2 guiding running.
5 min M94 sub
@1:20 and after gathering 3 hours of data I moved to other side of mount so meridian flip. I refocused as it had drifted a lot. I now need to consider setting up focus move for temp as the focus shift is dramatic. I also changed PHD2 Hysteresis setting to 0.20 from 0.10 as the PHD was having problems guiding.
I struggled to find guide star and landed up exposing for 15s and then having to increase, possibly needs recalibrating on this side of the mount. But also I need to find a brighter guide star by moving the mount offsetting the galaxy. The other way is using one of the piggy backed scopes which I may do next time.
@1:43 the dome closed, not sure why, might have been high cloud but probably because the WSX software lost contact with the WSX hardware. I did a reset and reconnected and then it was fine, but as the dome had closed I packed up with 3 hours of Luminance data on M94. I now need to take flats on the morning.
Single 5 min sub stretched in PI
Learning’s for next time……….
Update the SGPro Equipment profile with the changes for step size and data points for autofocus
Make sure the local plate solver is working and online at localhost
Review Anydesk bug that changes mapping of keyboard
Check out why WSX is loosing connection and shutting the dome
Work out how to use temperature compensation for the focuser in SGPro
Flats from the following day at the same focus point
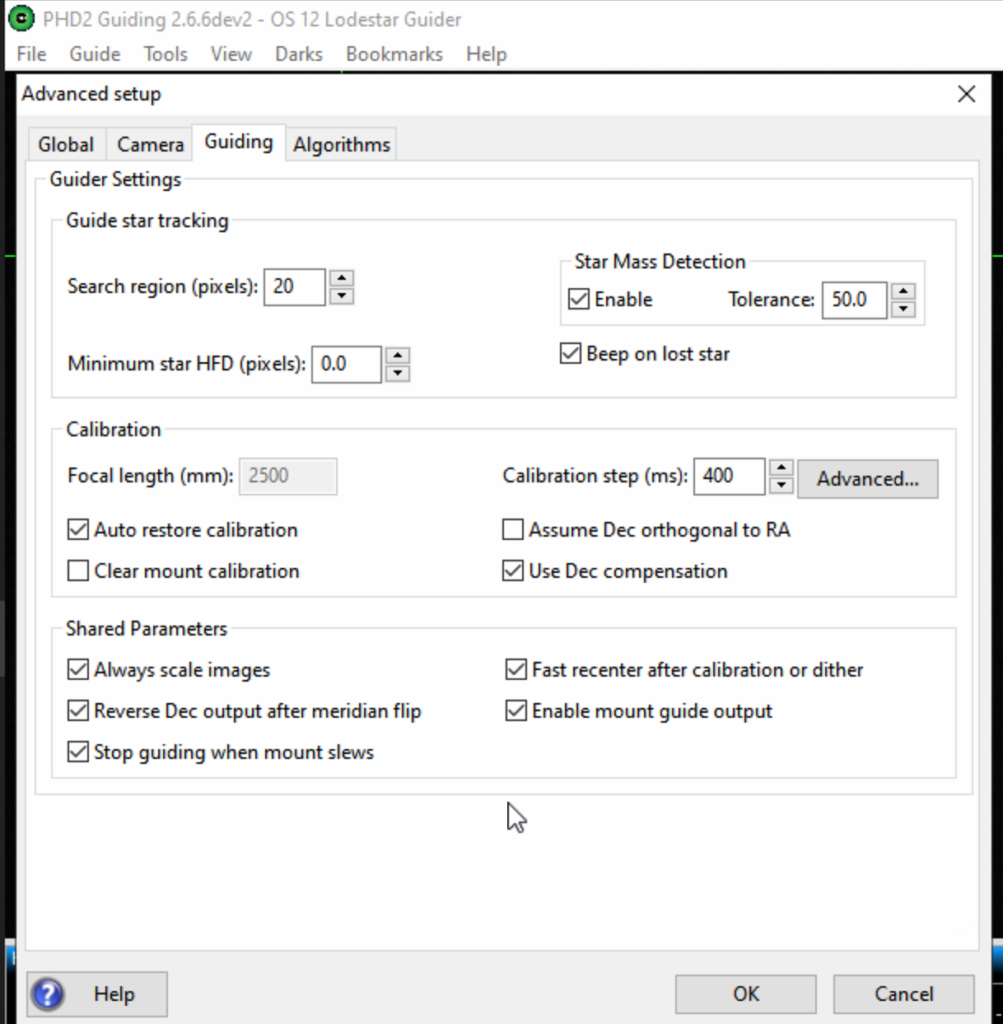
Tonight I wanted to get the PHD2 guiding working when doing a meridian flip without the need to calibrate. A month ago we still failed to get this done, however a little experimenting tonight and changing a single setting has corrected the problem. The setting was the ‘Reverse Dec Outputted After Meridian Flip’ one within the Guiding table of the Advanced Setup, for which I ticked and this fixed the issue.
Reverse DEC output after meridian flip needed ticking!
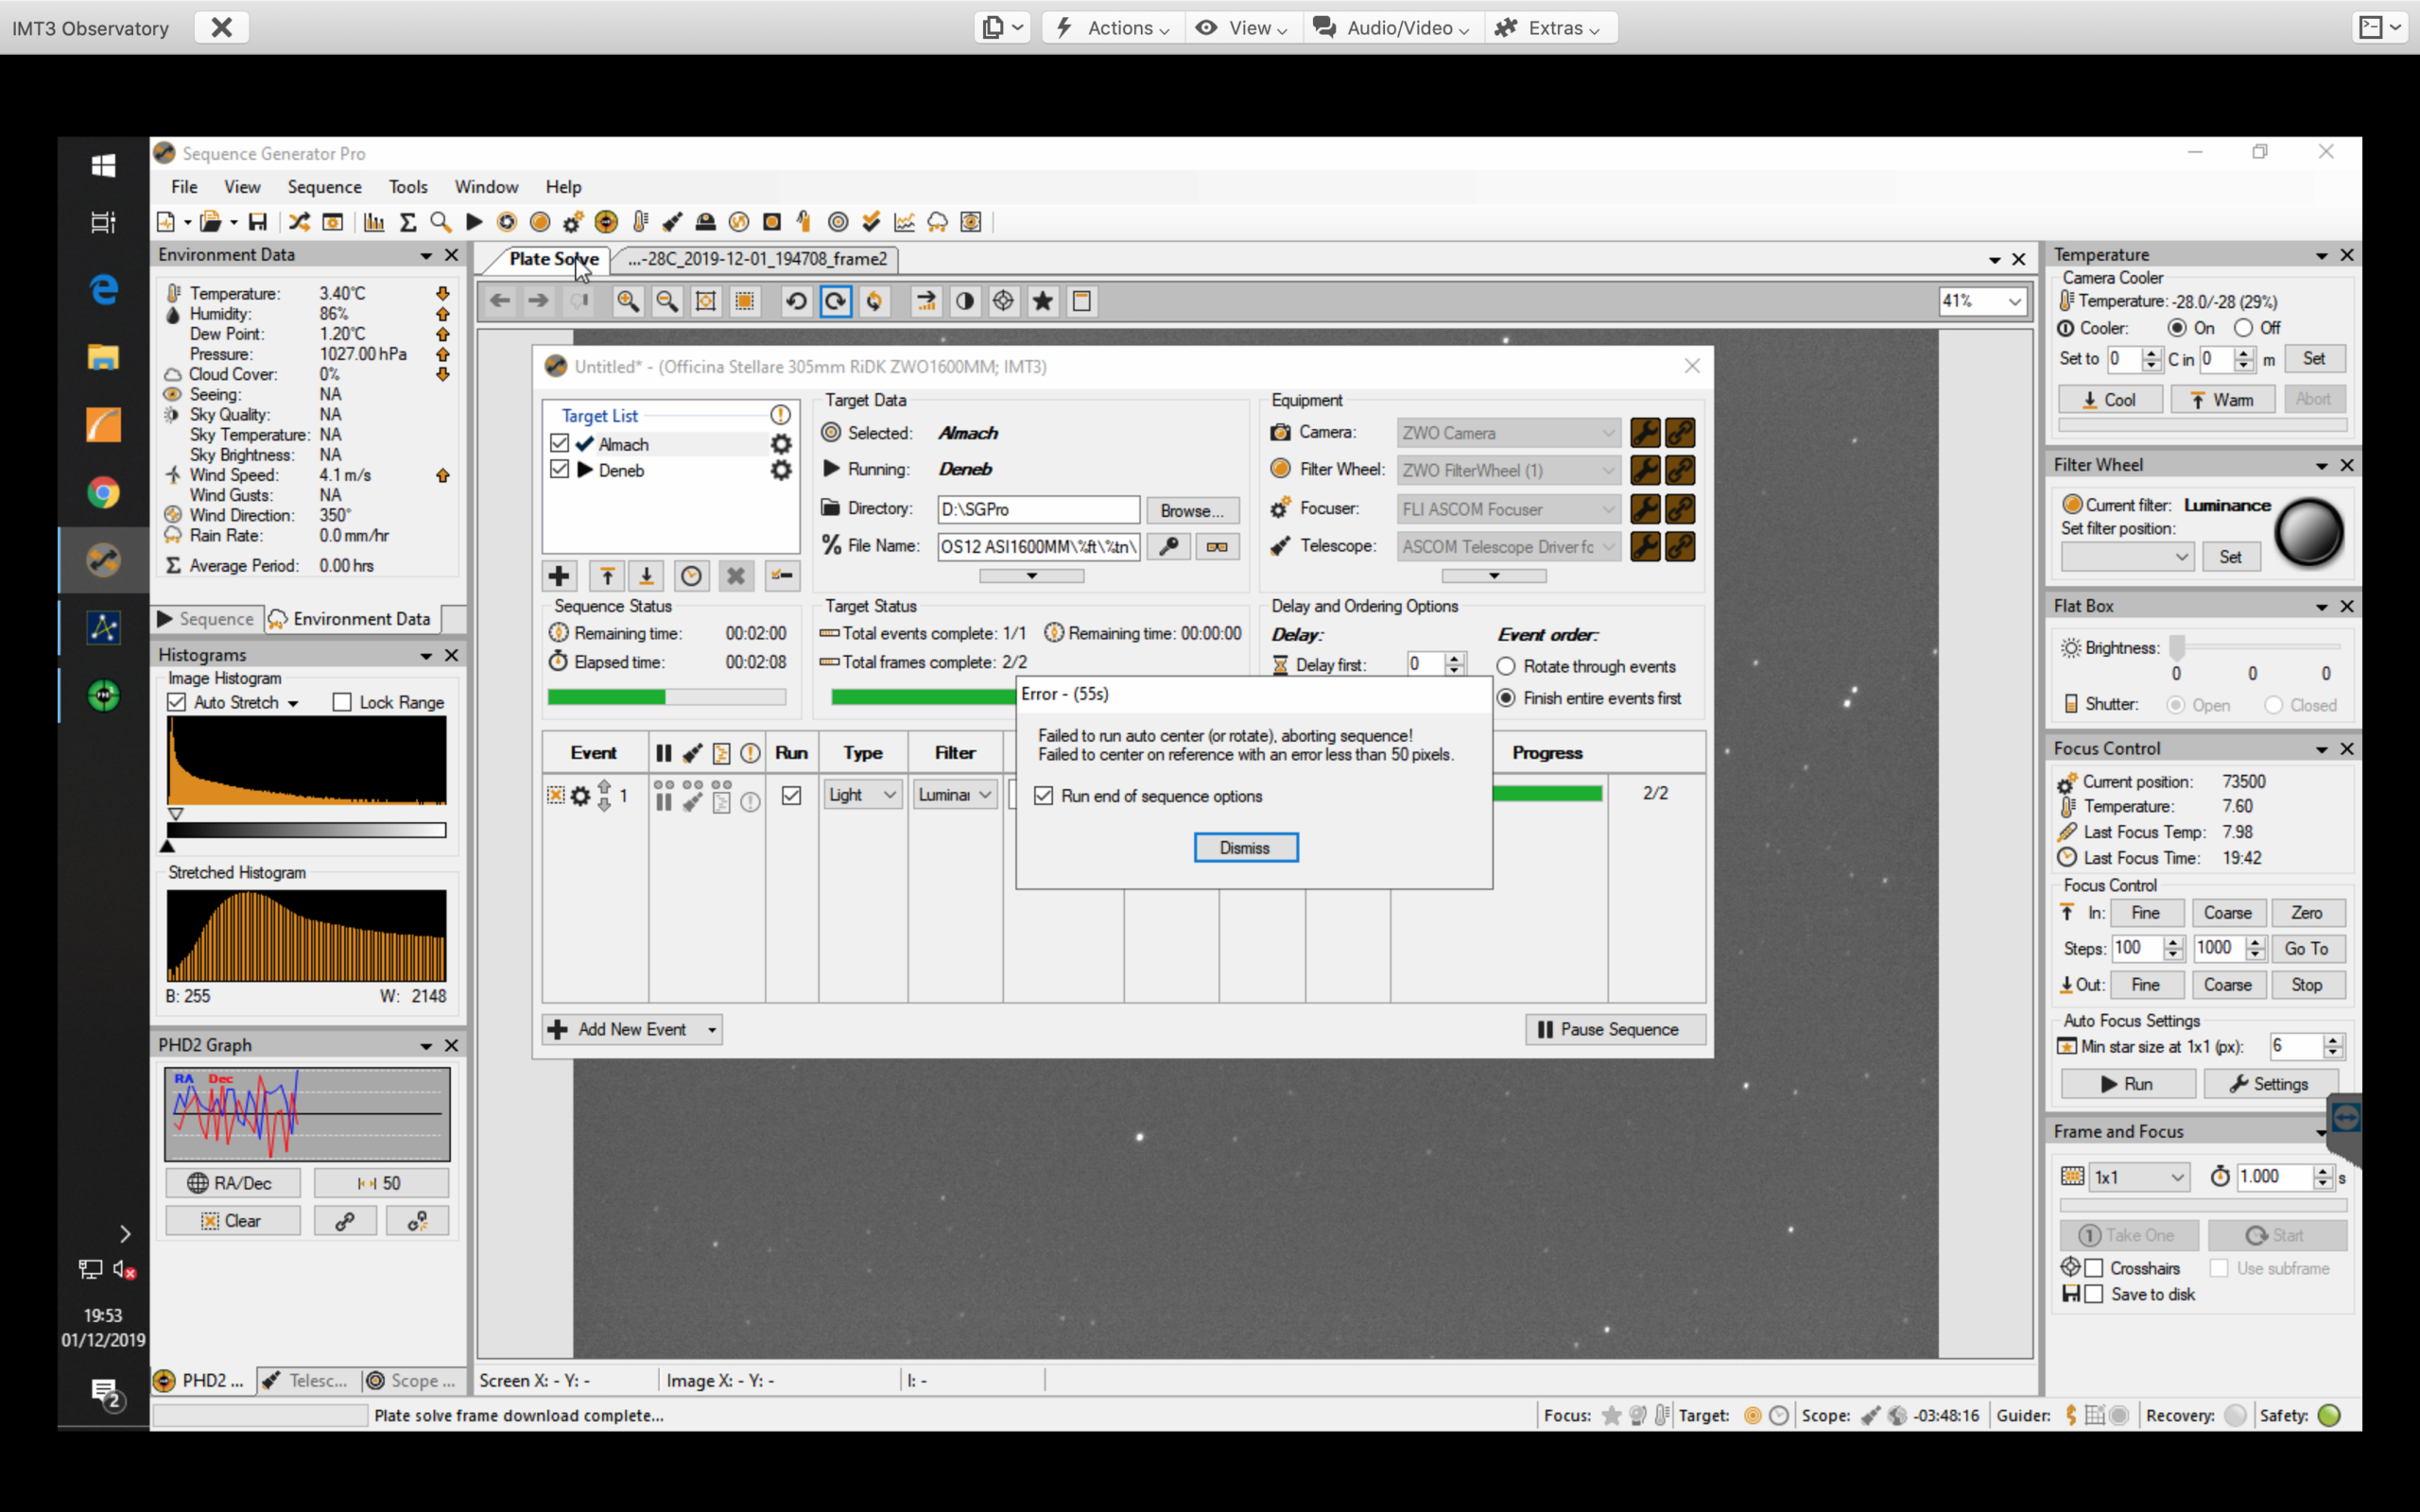
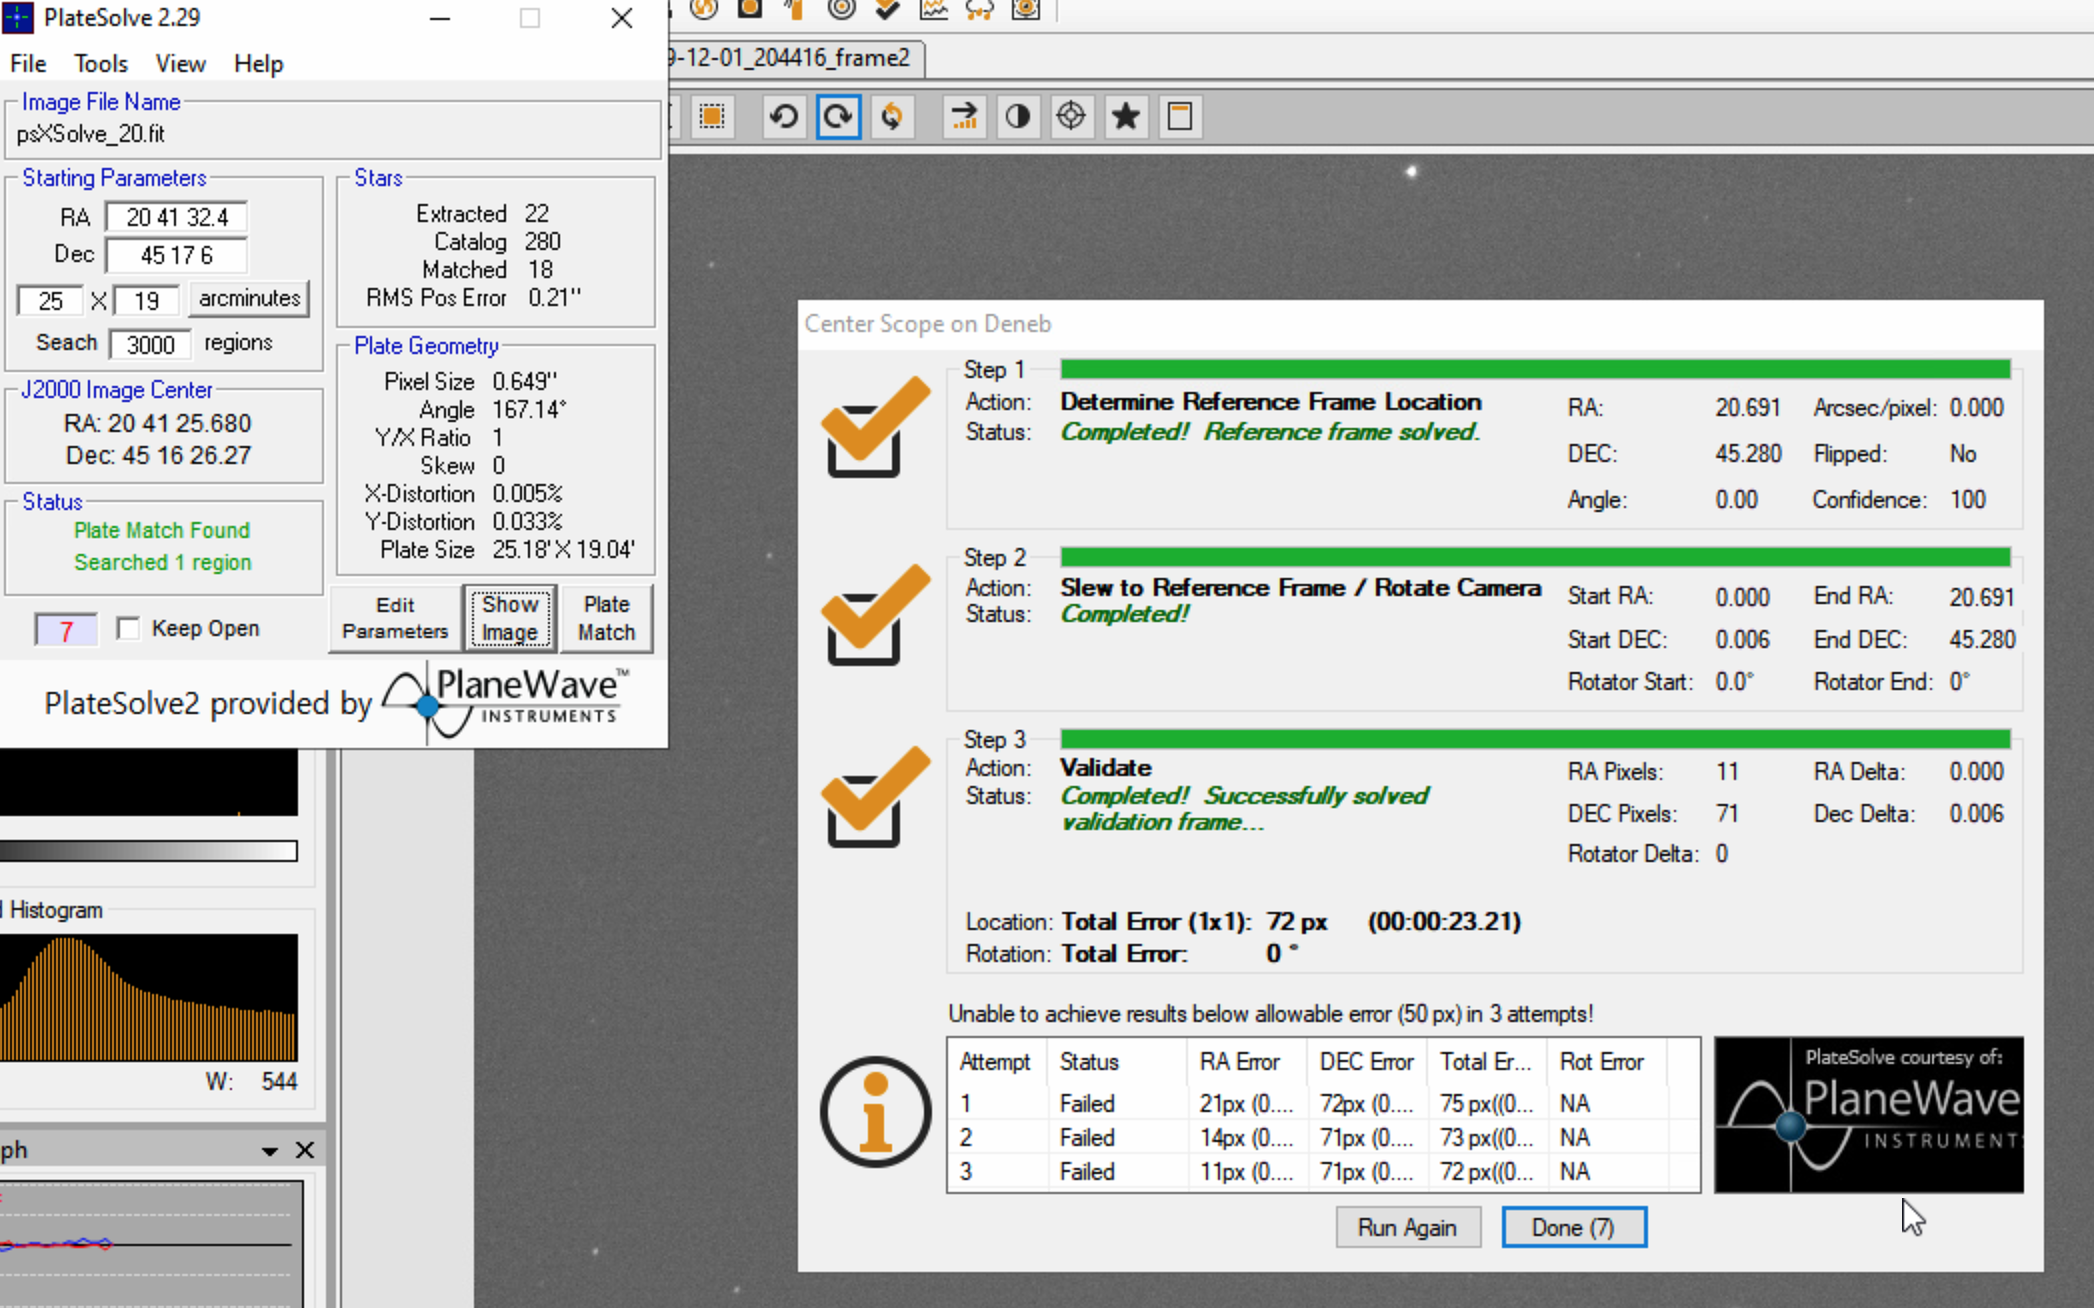
I then decided to try 2 objects either side of the meridian and that worked manually slewing to each and then guiding. What did not work was the slewing automatically to the object in terms of centring on the screen. It slewed to the star, I could see it on the screen, the first object Almach worked ok, but the second object, Deneb appeared on the screen but failed to centre with the error ‘ Failed to auto centre, aborting sequence’ followed by ‘ failed to centre on object with an error less than 50 pixels’. Plate solving works fine, well at least it comes back with success.
Error message failing to centre
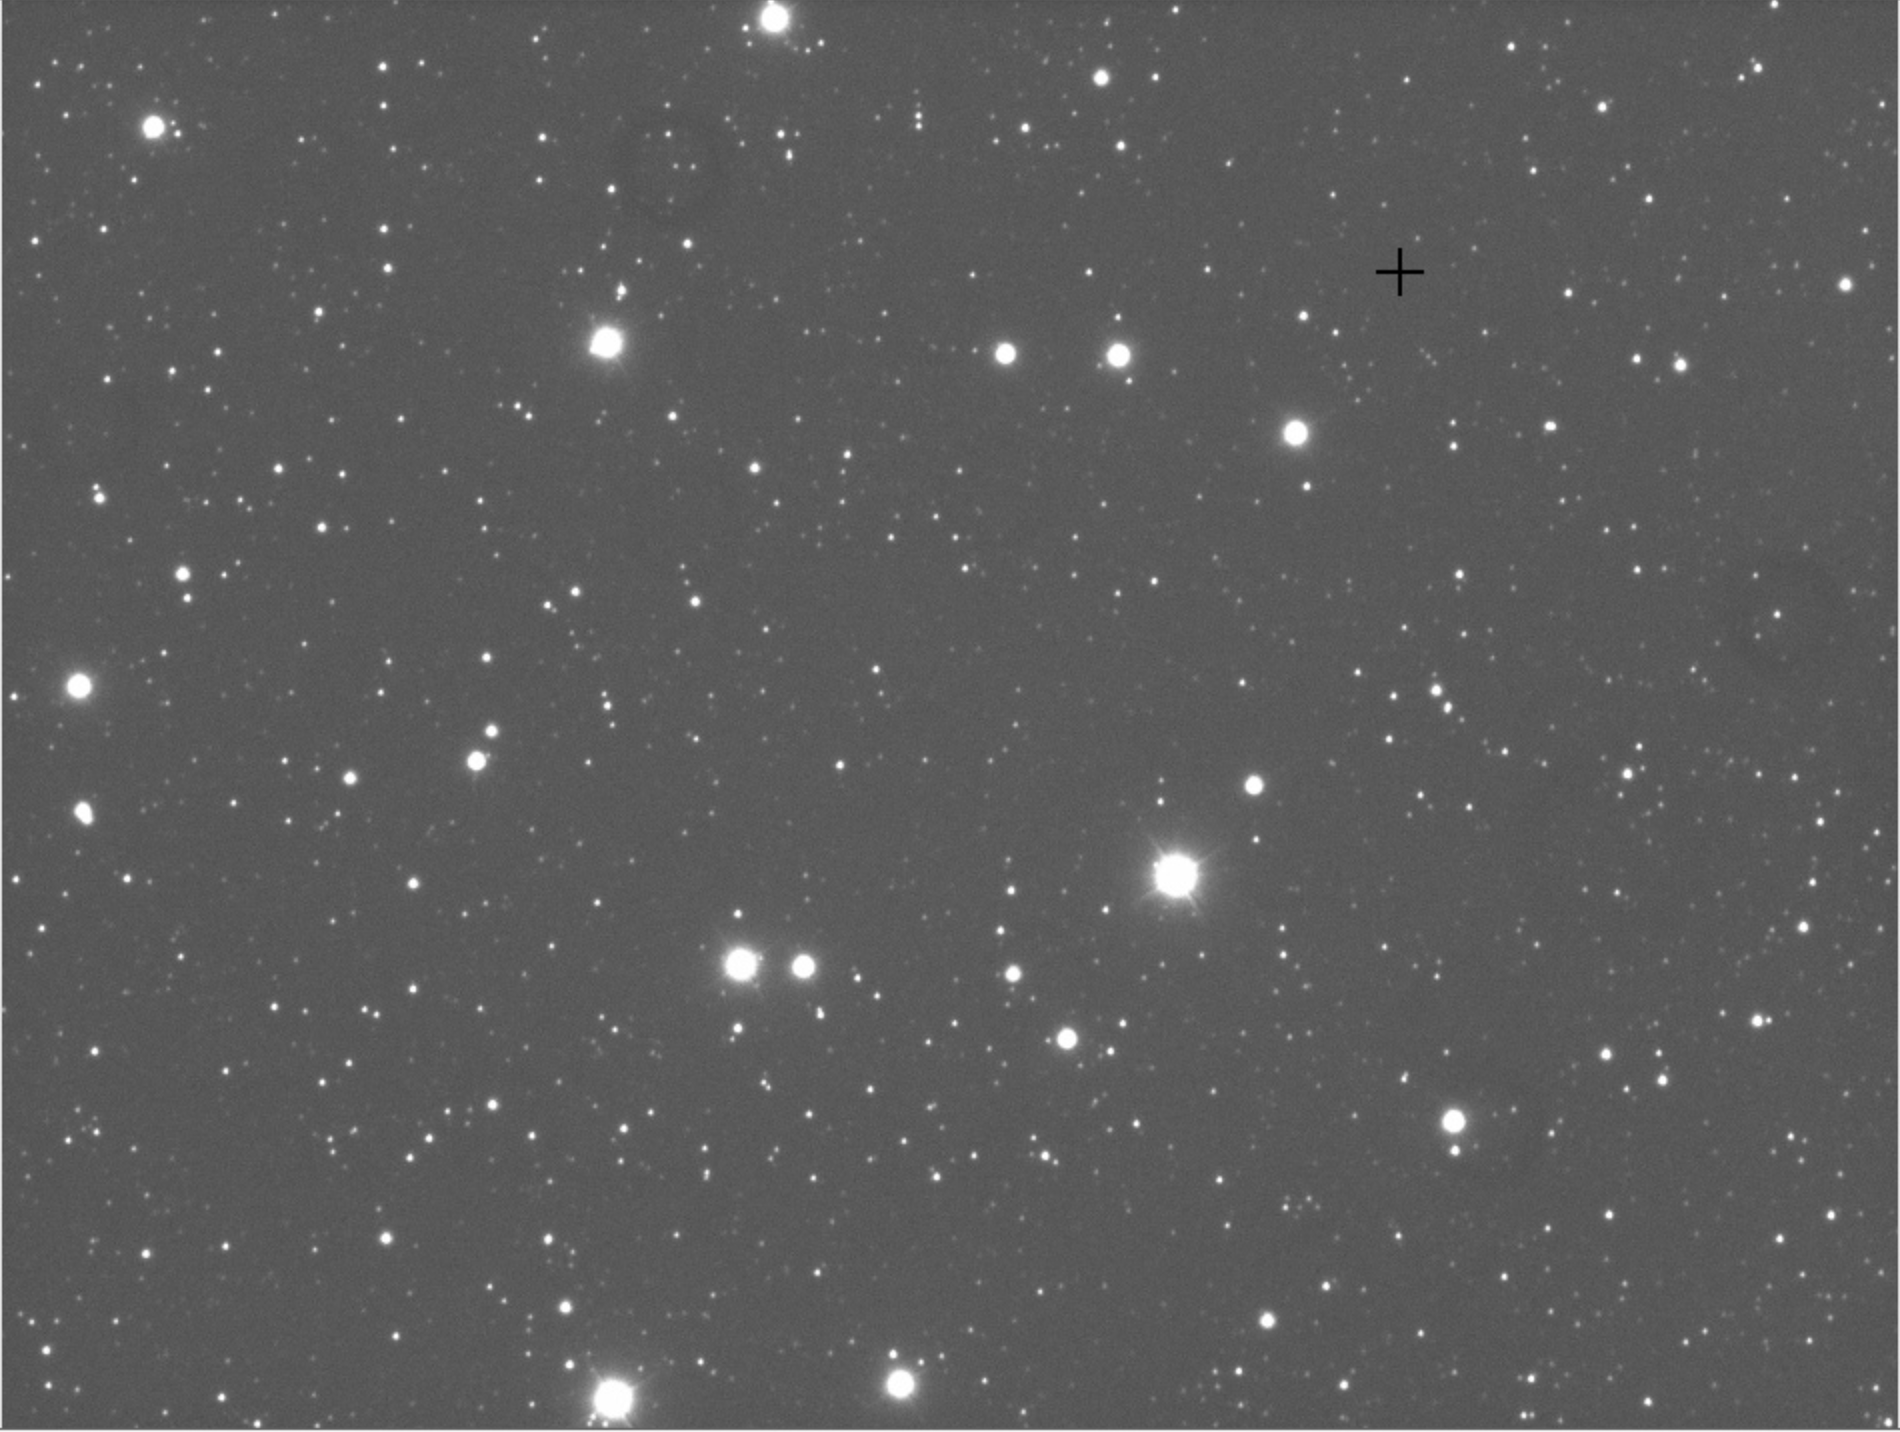
So I tried different sets of co-ordinates from TSX including the Topocentric and 2000.0 sets. Neither made a difference, with 2000.0 data used I still got this set of errors which shows an error in pixels of more than 50 in DEC.
DEC Error when centring
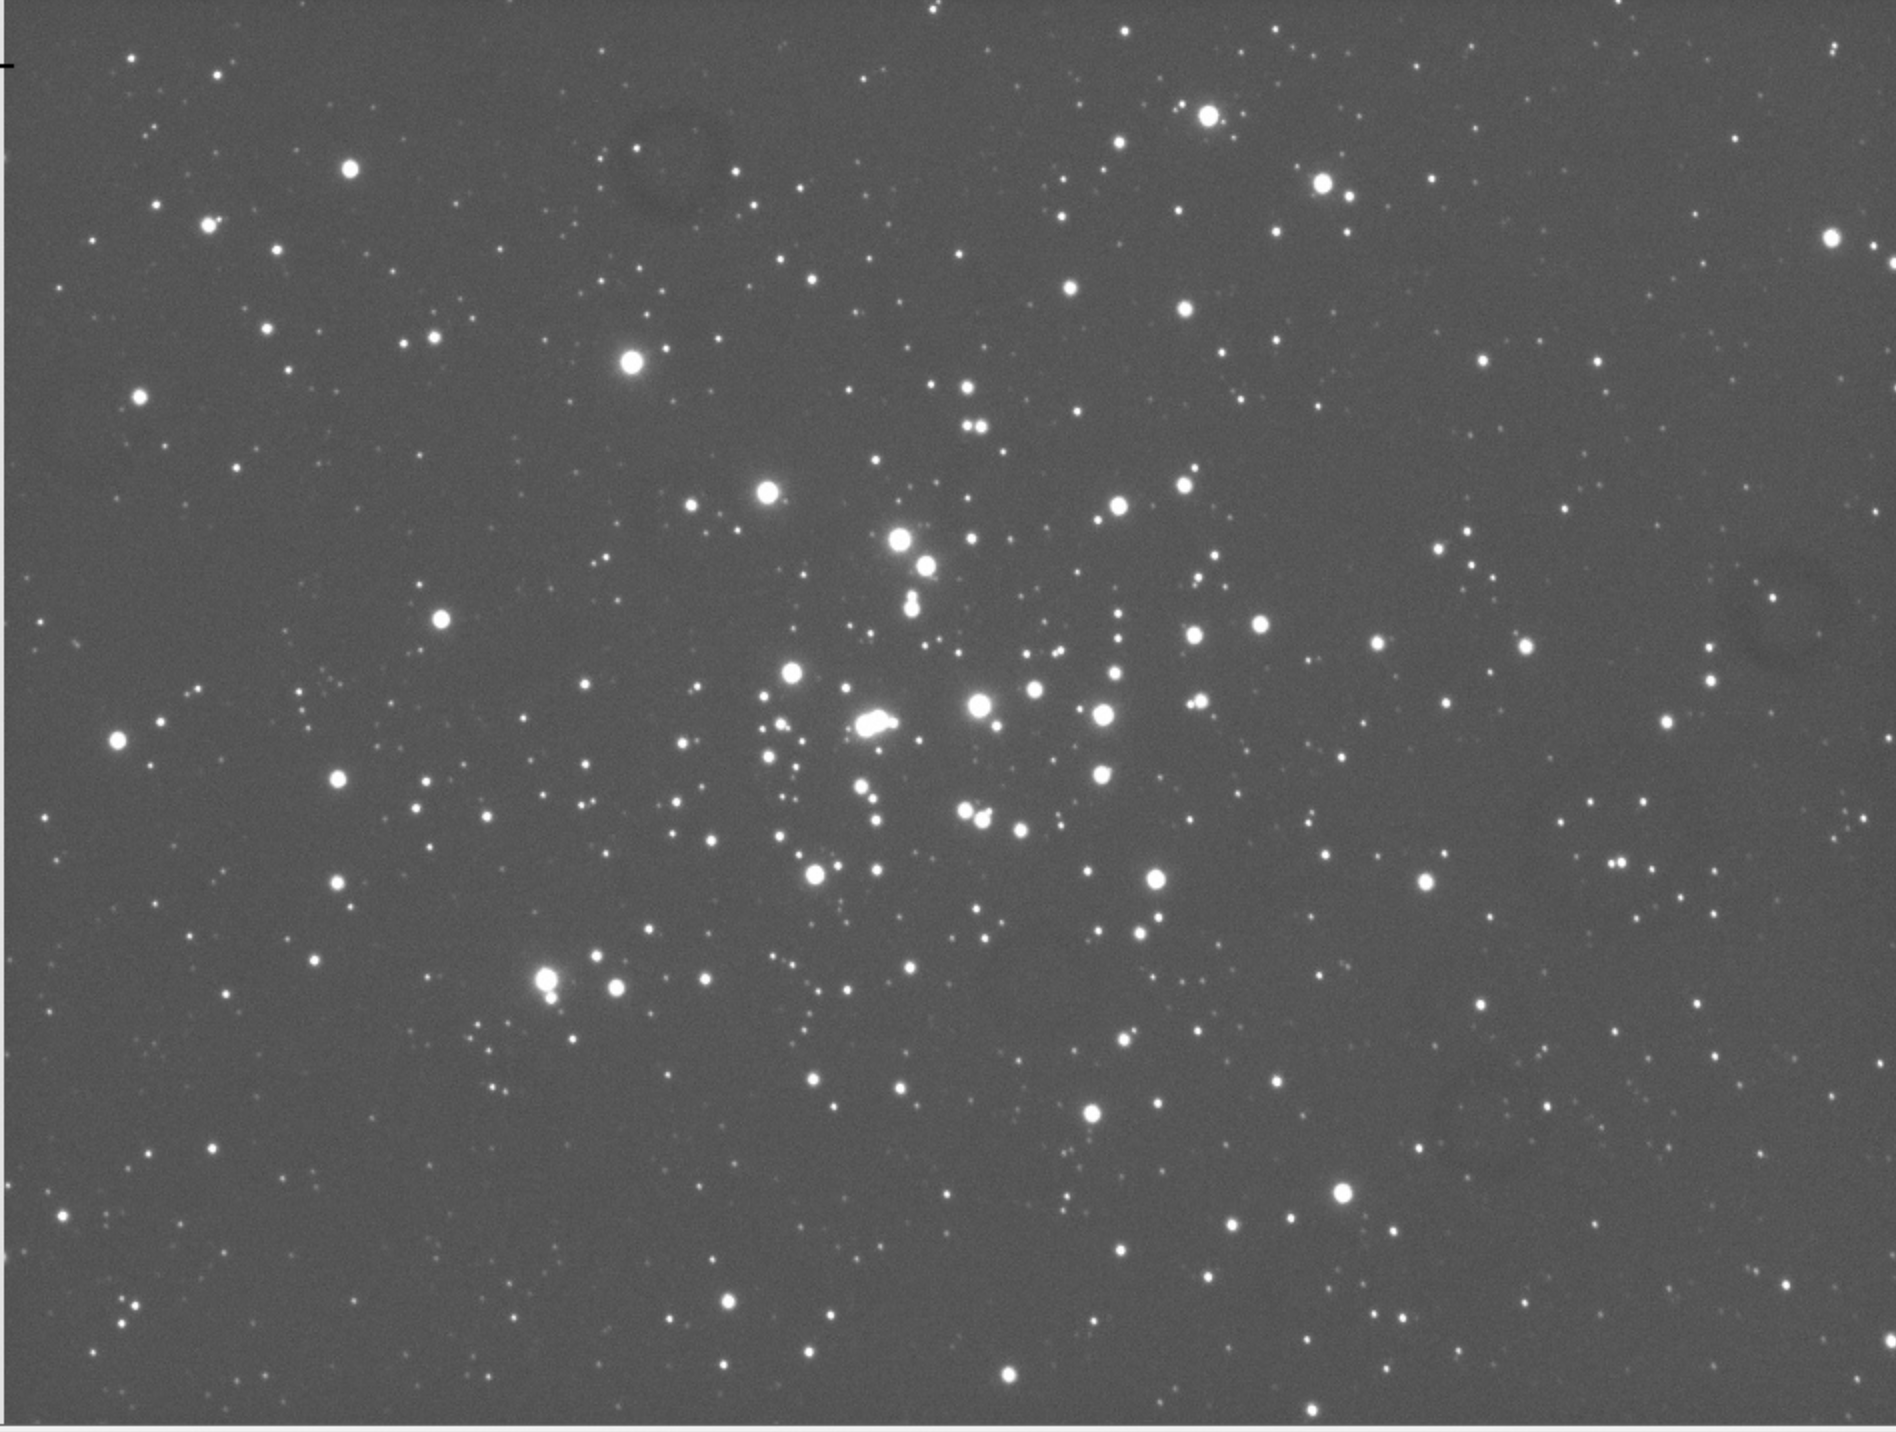
So I decided it might be the very bright object I had picked, star in this case, that was causing the problem. So to further my experimentation this evening I choose two different and less bright objects, M36 and M39, once again on different sides of the Meridian. Success !!
60s uncalibrated guided M39 exposure
So after fixing this I am now happy to go off to bed early (9:30 work tomorrow) with a job well done.
Tonight Bob and myself had a couple of things to achieve on the dome so that it would be ready for Autumn. As the Moon was out in full force, Bob decided to have a go at ironing out some more configuration bugs with guiding whilst I later in the night would test out the automated TPoint run.
Something I had not appreciated about an automated run was that instead of selecting bright stars, slewing and manually centering as you would when doing a non-automated Tpoint run, the automated run takes images of random or selected areas in the sky rather than centering on a star and then determine how far off it is from where it thought. Unlike a Closed Loop Slew that would take 2 images, one when it completes the initial slew and another when it has shifted to account for the error and plate solving to make sure it is now in the right place, the automated Tpoint just takes that single image then moves on, registering the error as it goes, building the model and applying the correcting to make the pointing better.
So at 23:27 Bob had finished attempting to setup guiding in PHD2 on for the QHY5 guide camera on the Talk 102. There wee still some problems, especially around a little trailing in 2-3 minute images. I suspect that the guider was being over aggressive in correcting in RA and possibly DEC causing the issue. Bob started to play with the parameters but decided to try again another night after reading the PHD2 manual.
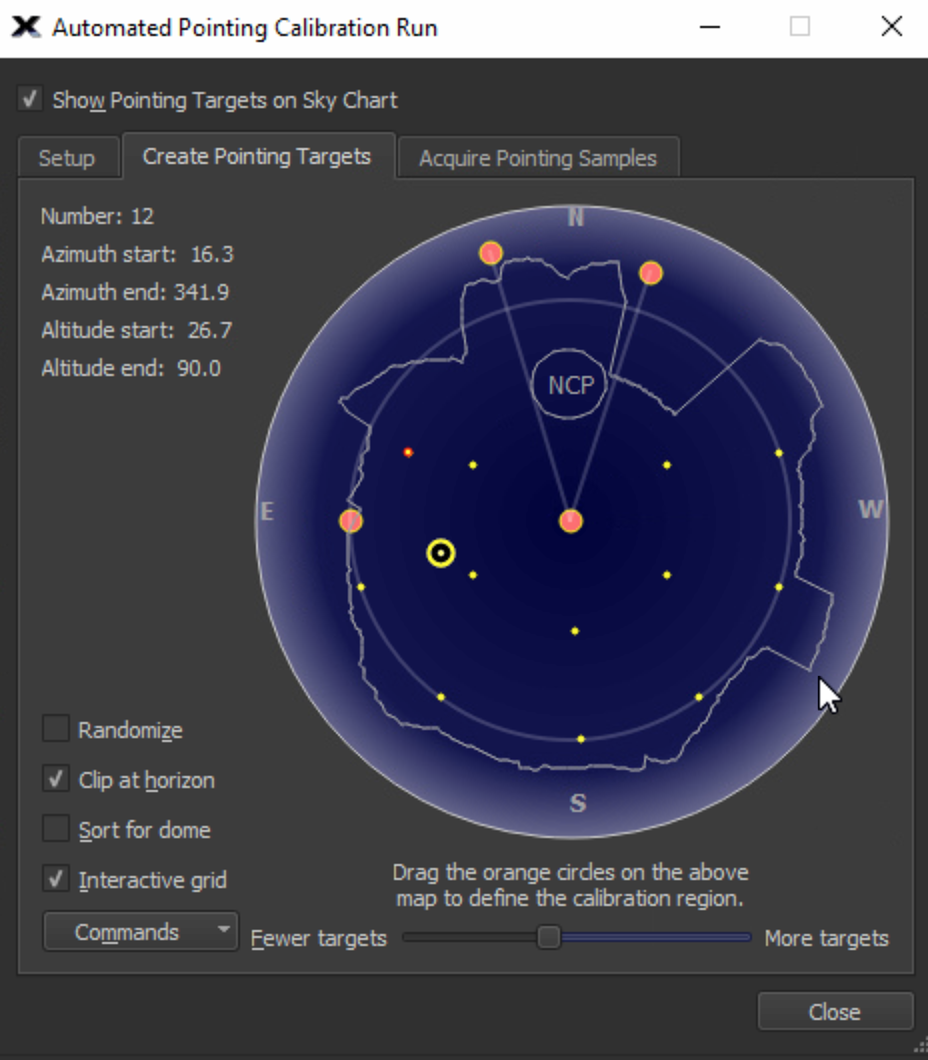
Now for the automated TPointing run. We had to go in and setup The SkyX (TSX) so that it could control not only the dome and mount but also the camera on the back of the OS12″. Once that was done we setup the automated calibration run settings to find 10 targets evenly spread around the sky and avoiding the North Celestial Pole.
Target setup
What we did have a challenge with was the Moon, which being very bright does not lend itself well to being able to plate solve next to it with a large telescope, mainly due to light scatter within the tube and an ever increasing brightness in the background.
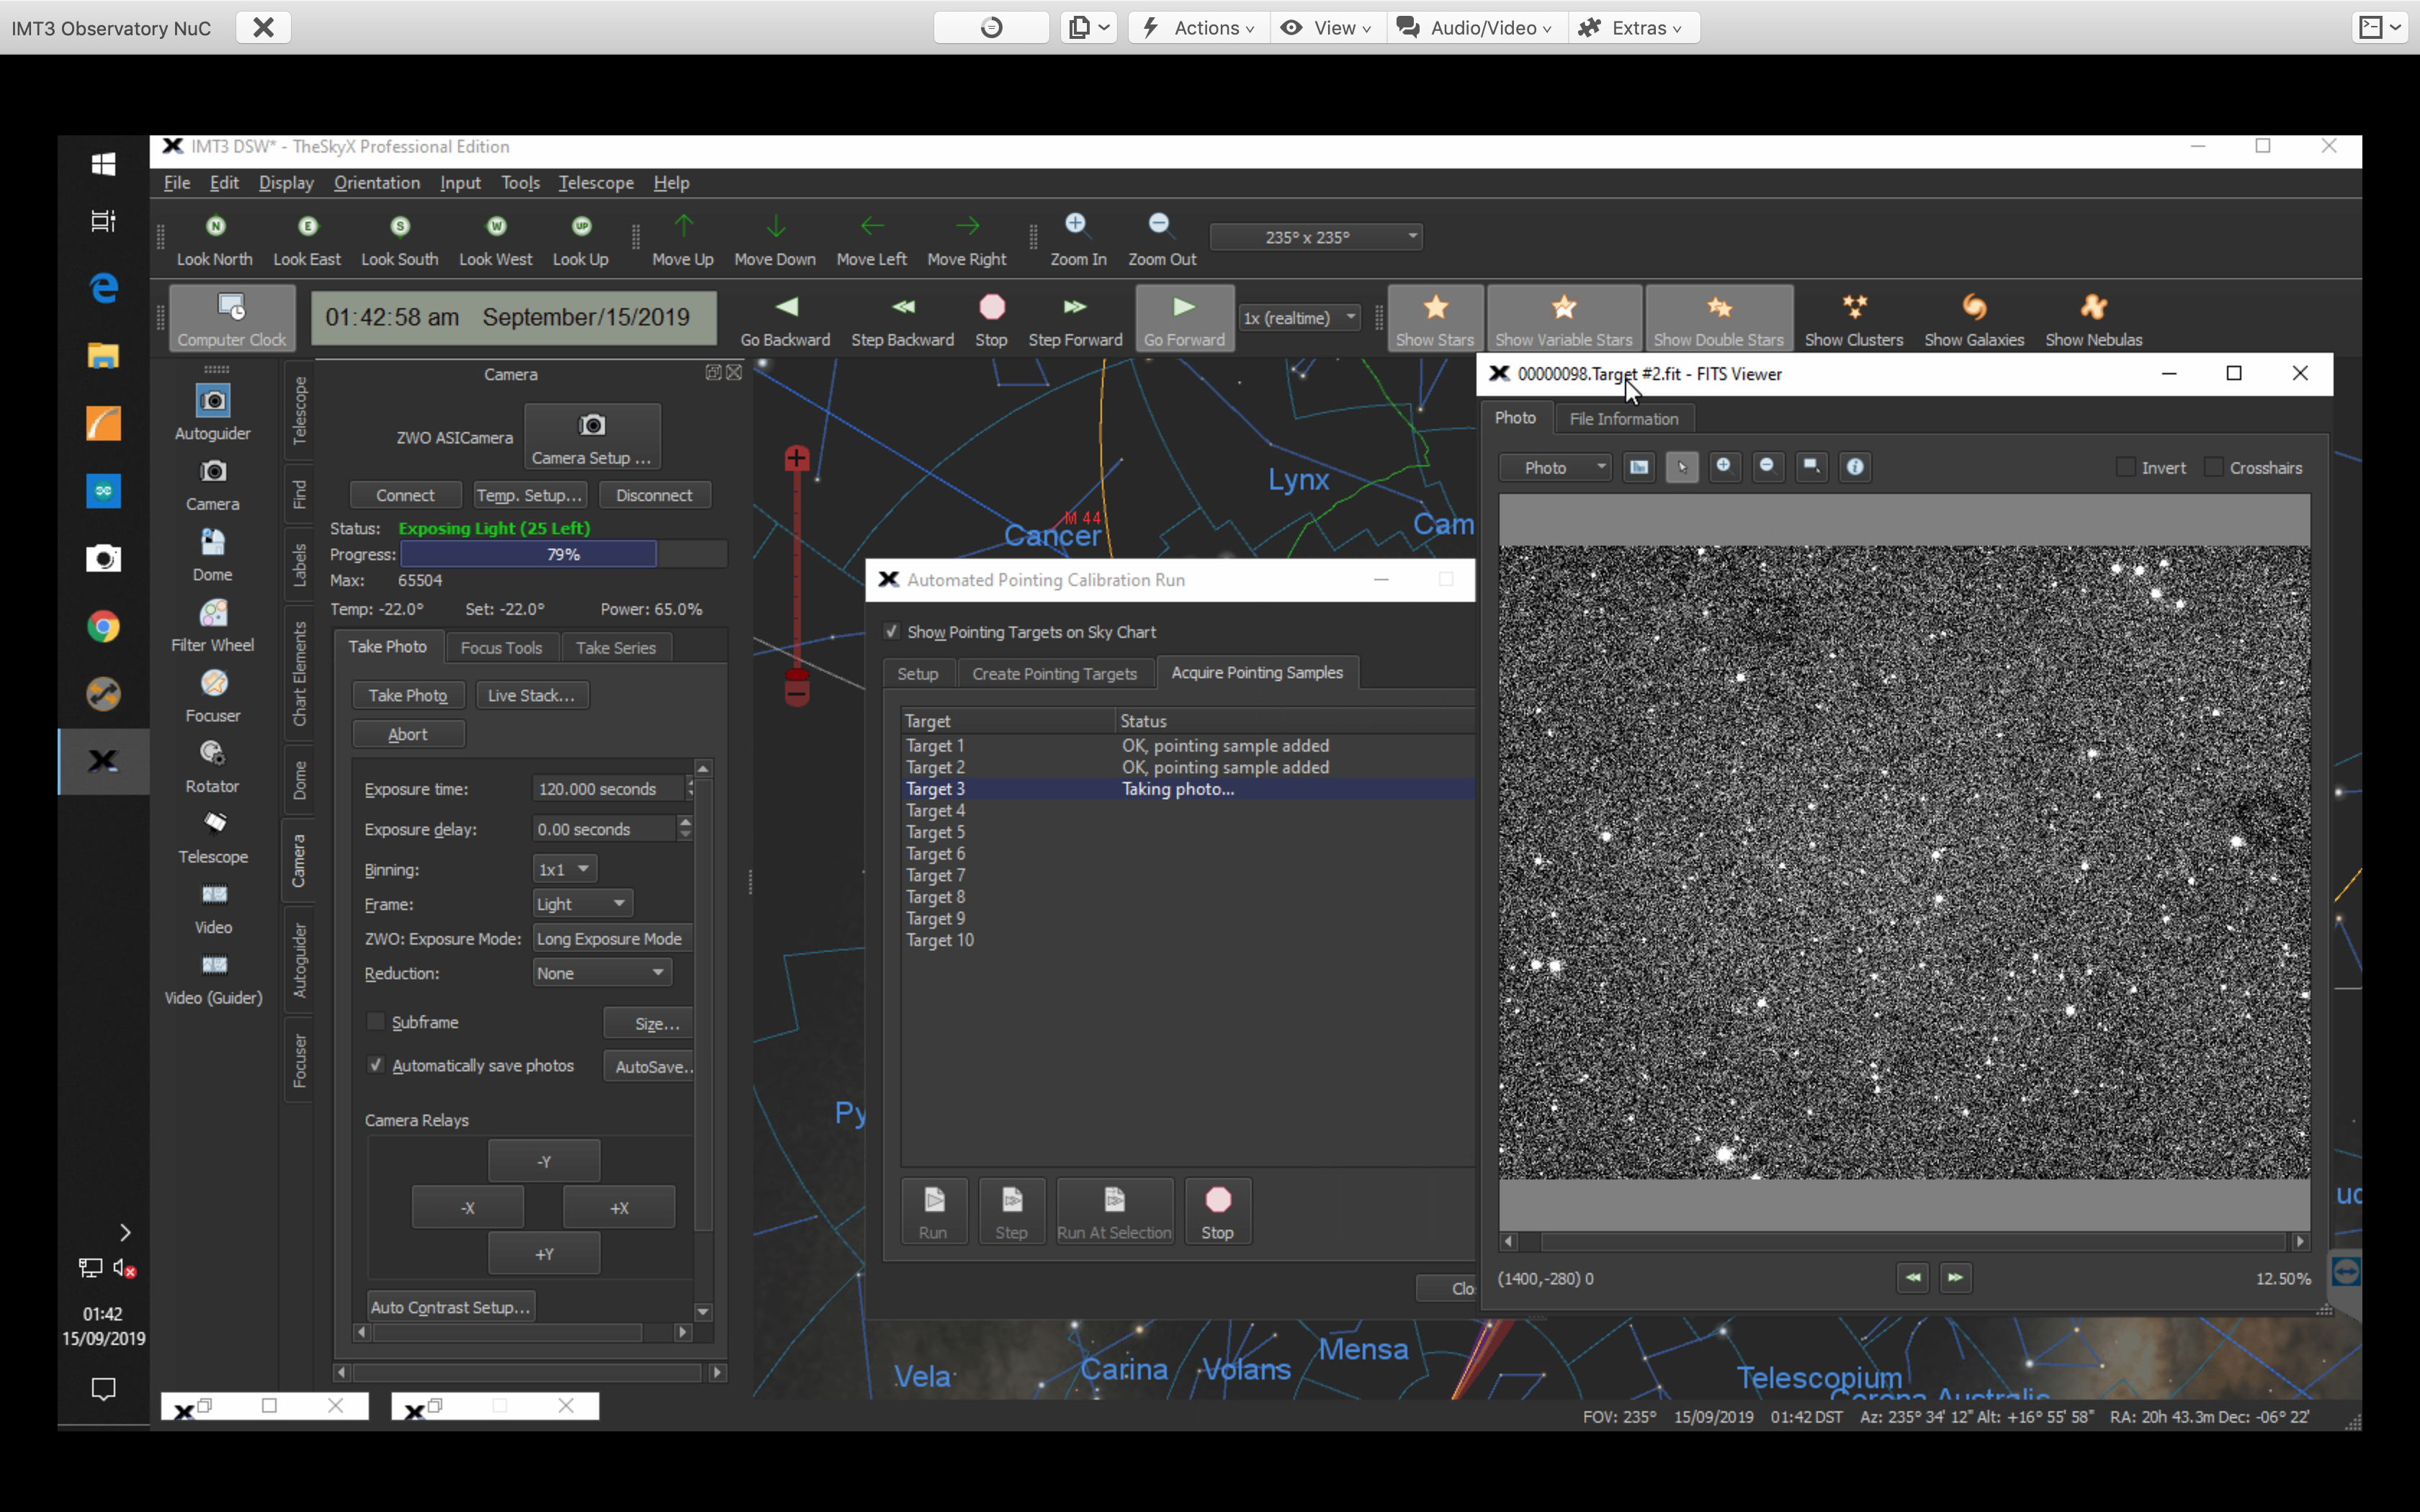
So the first major obstacle when we clicked start, was once it slewed to the first star field, plate solving there. This proved rather difficult to get working, about 1.5 hours of rather difficult! It kept failing to plate solve. So after reading the manual (RTFM) I realised that there was really only 1 parameter that needed to be changed to get this working and that was increasing the exposure.
TPoint in action
After changing this for 30s to 60s and then again to 120s the solving worked. Why? Well because the Signal to Noise Ration (SNR) was simply not high enough due to the background glow caused by a full Moon.
Target 5 acquired
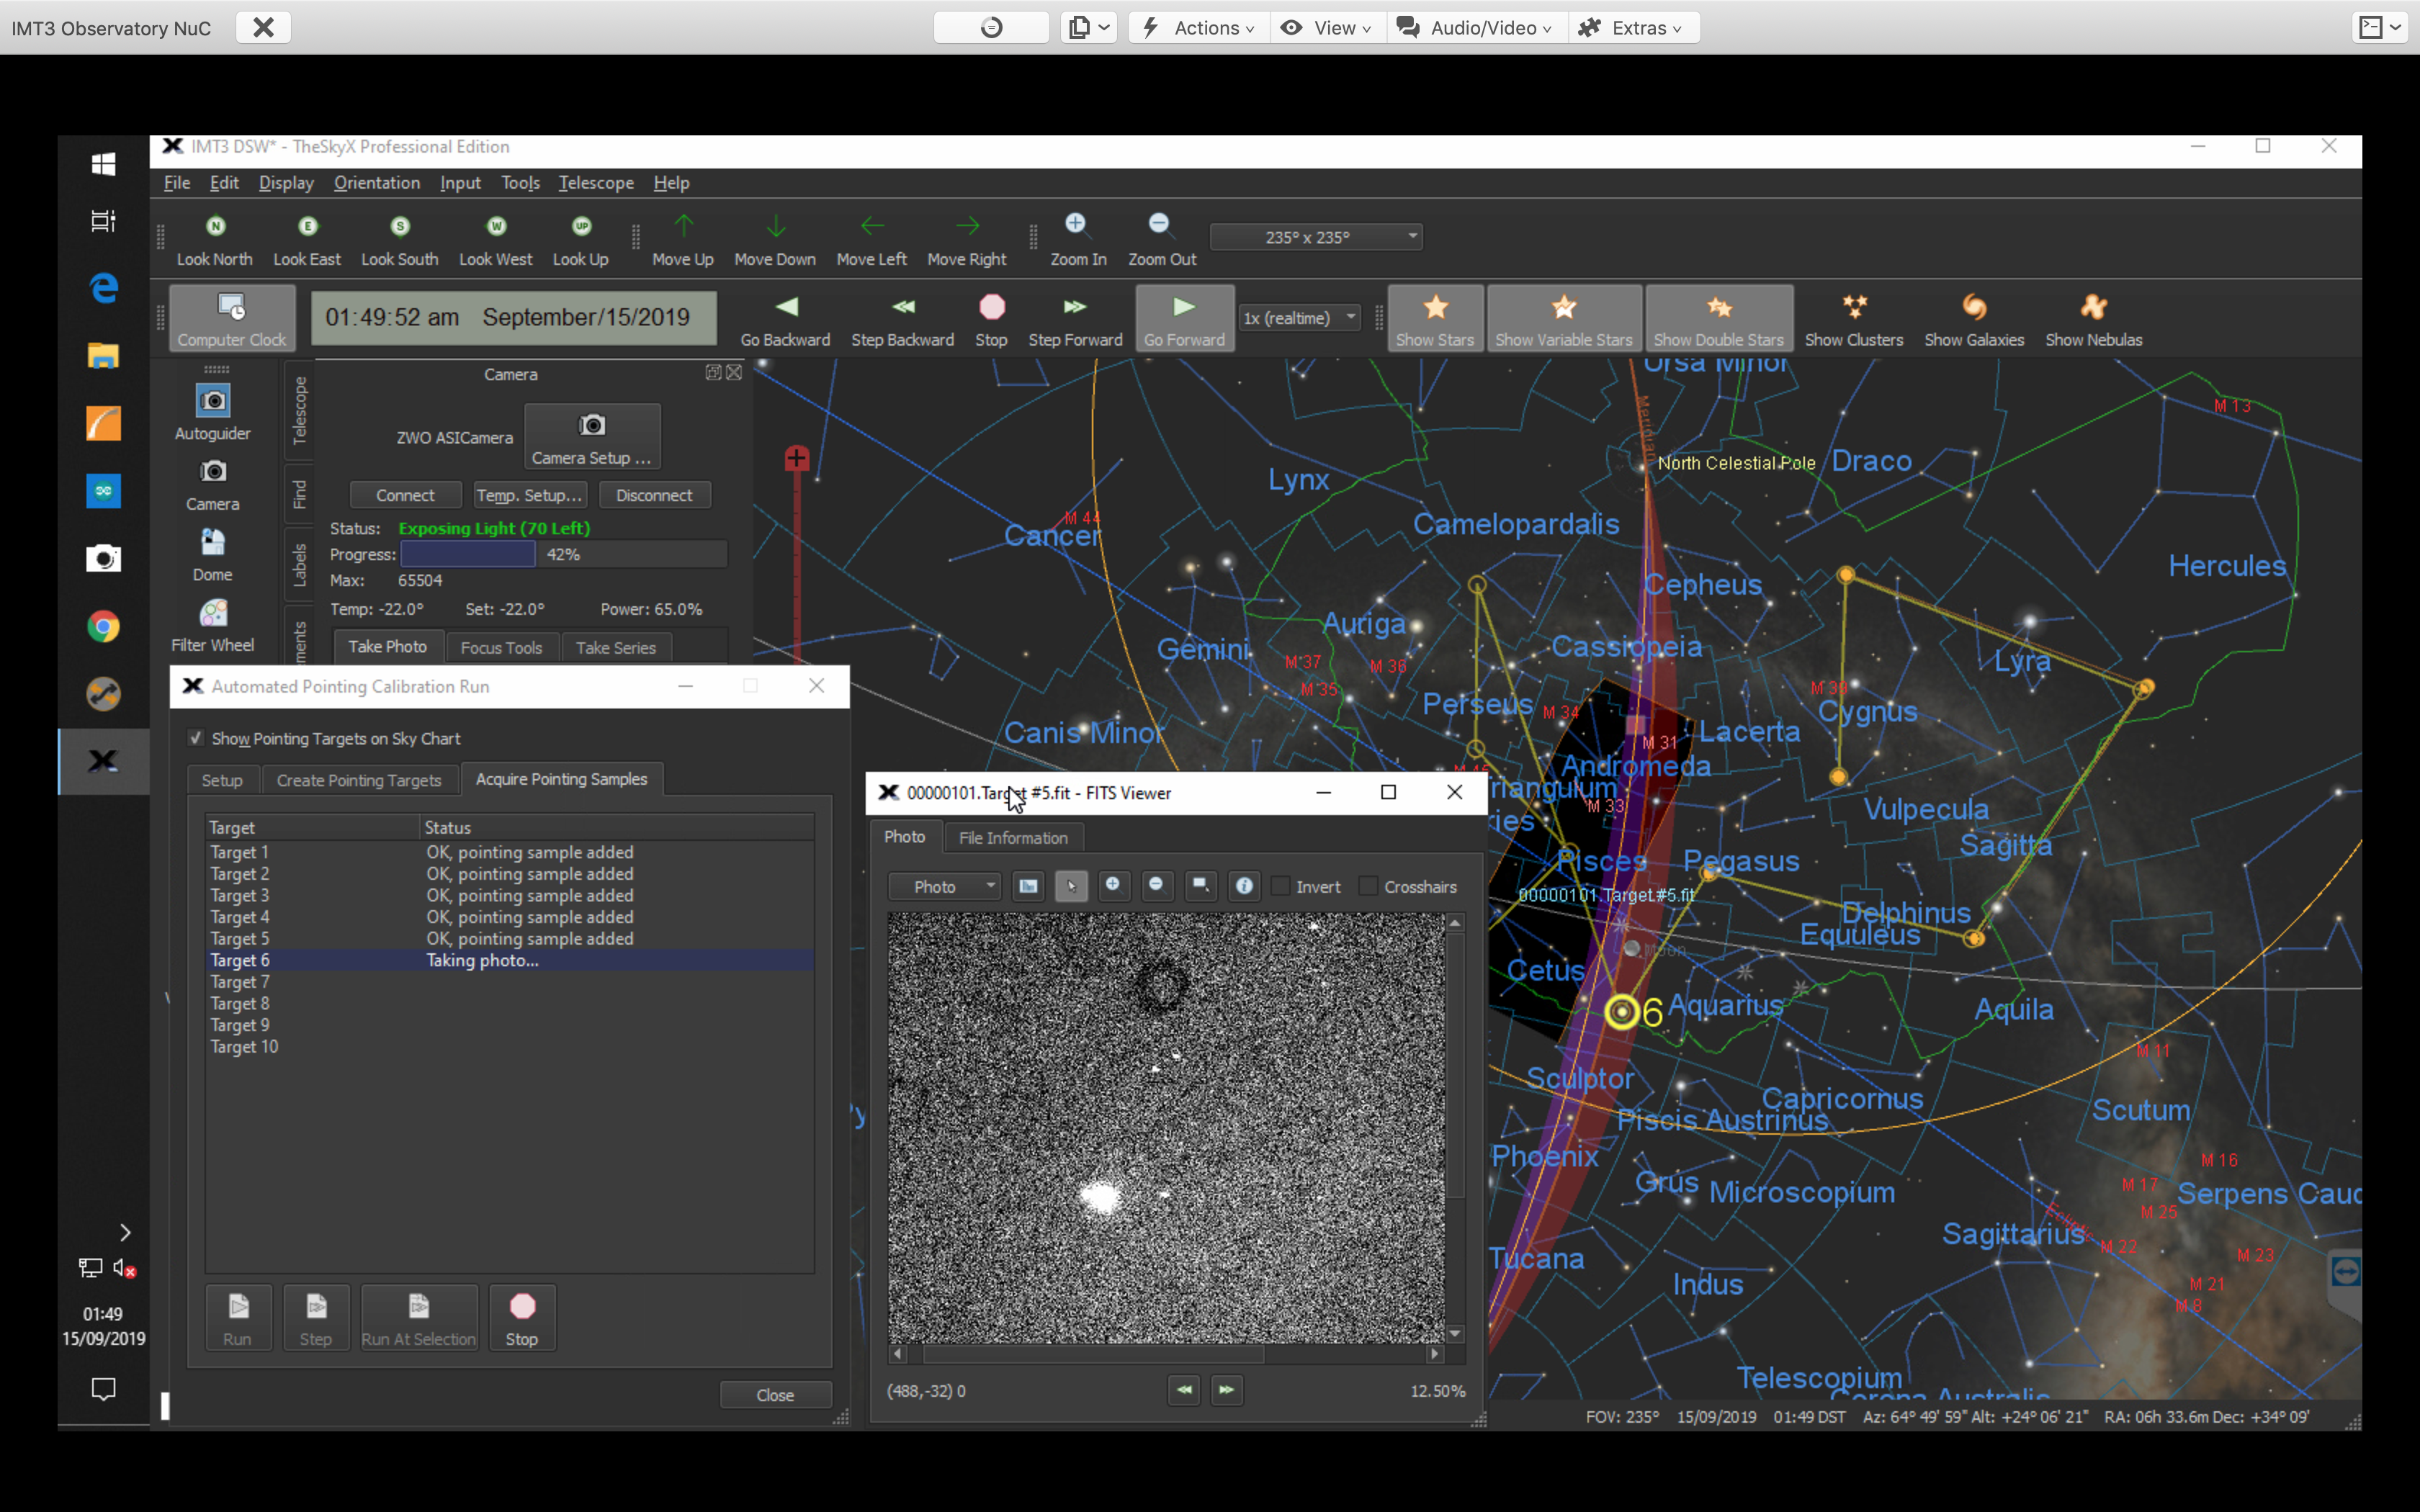
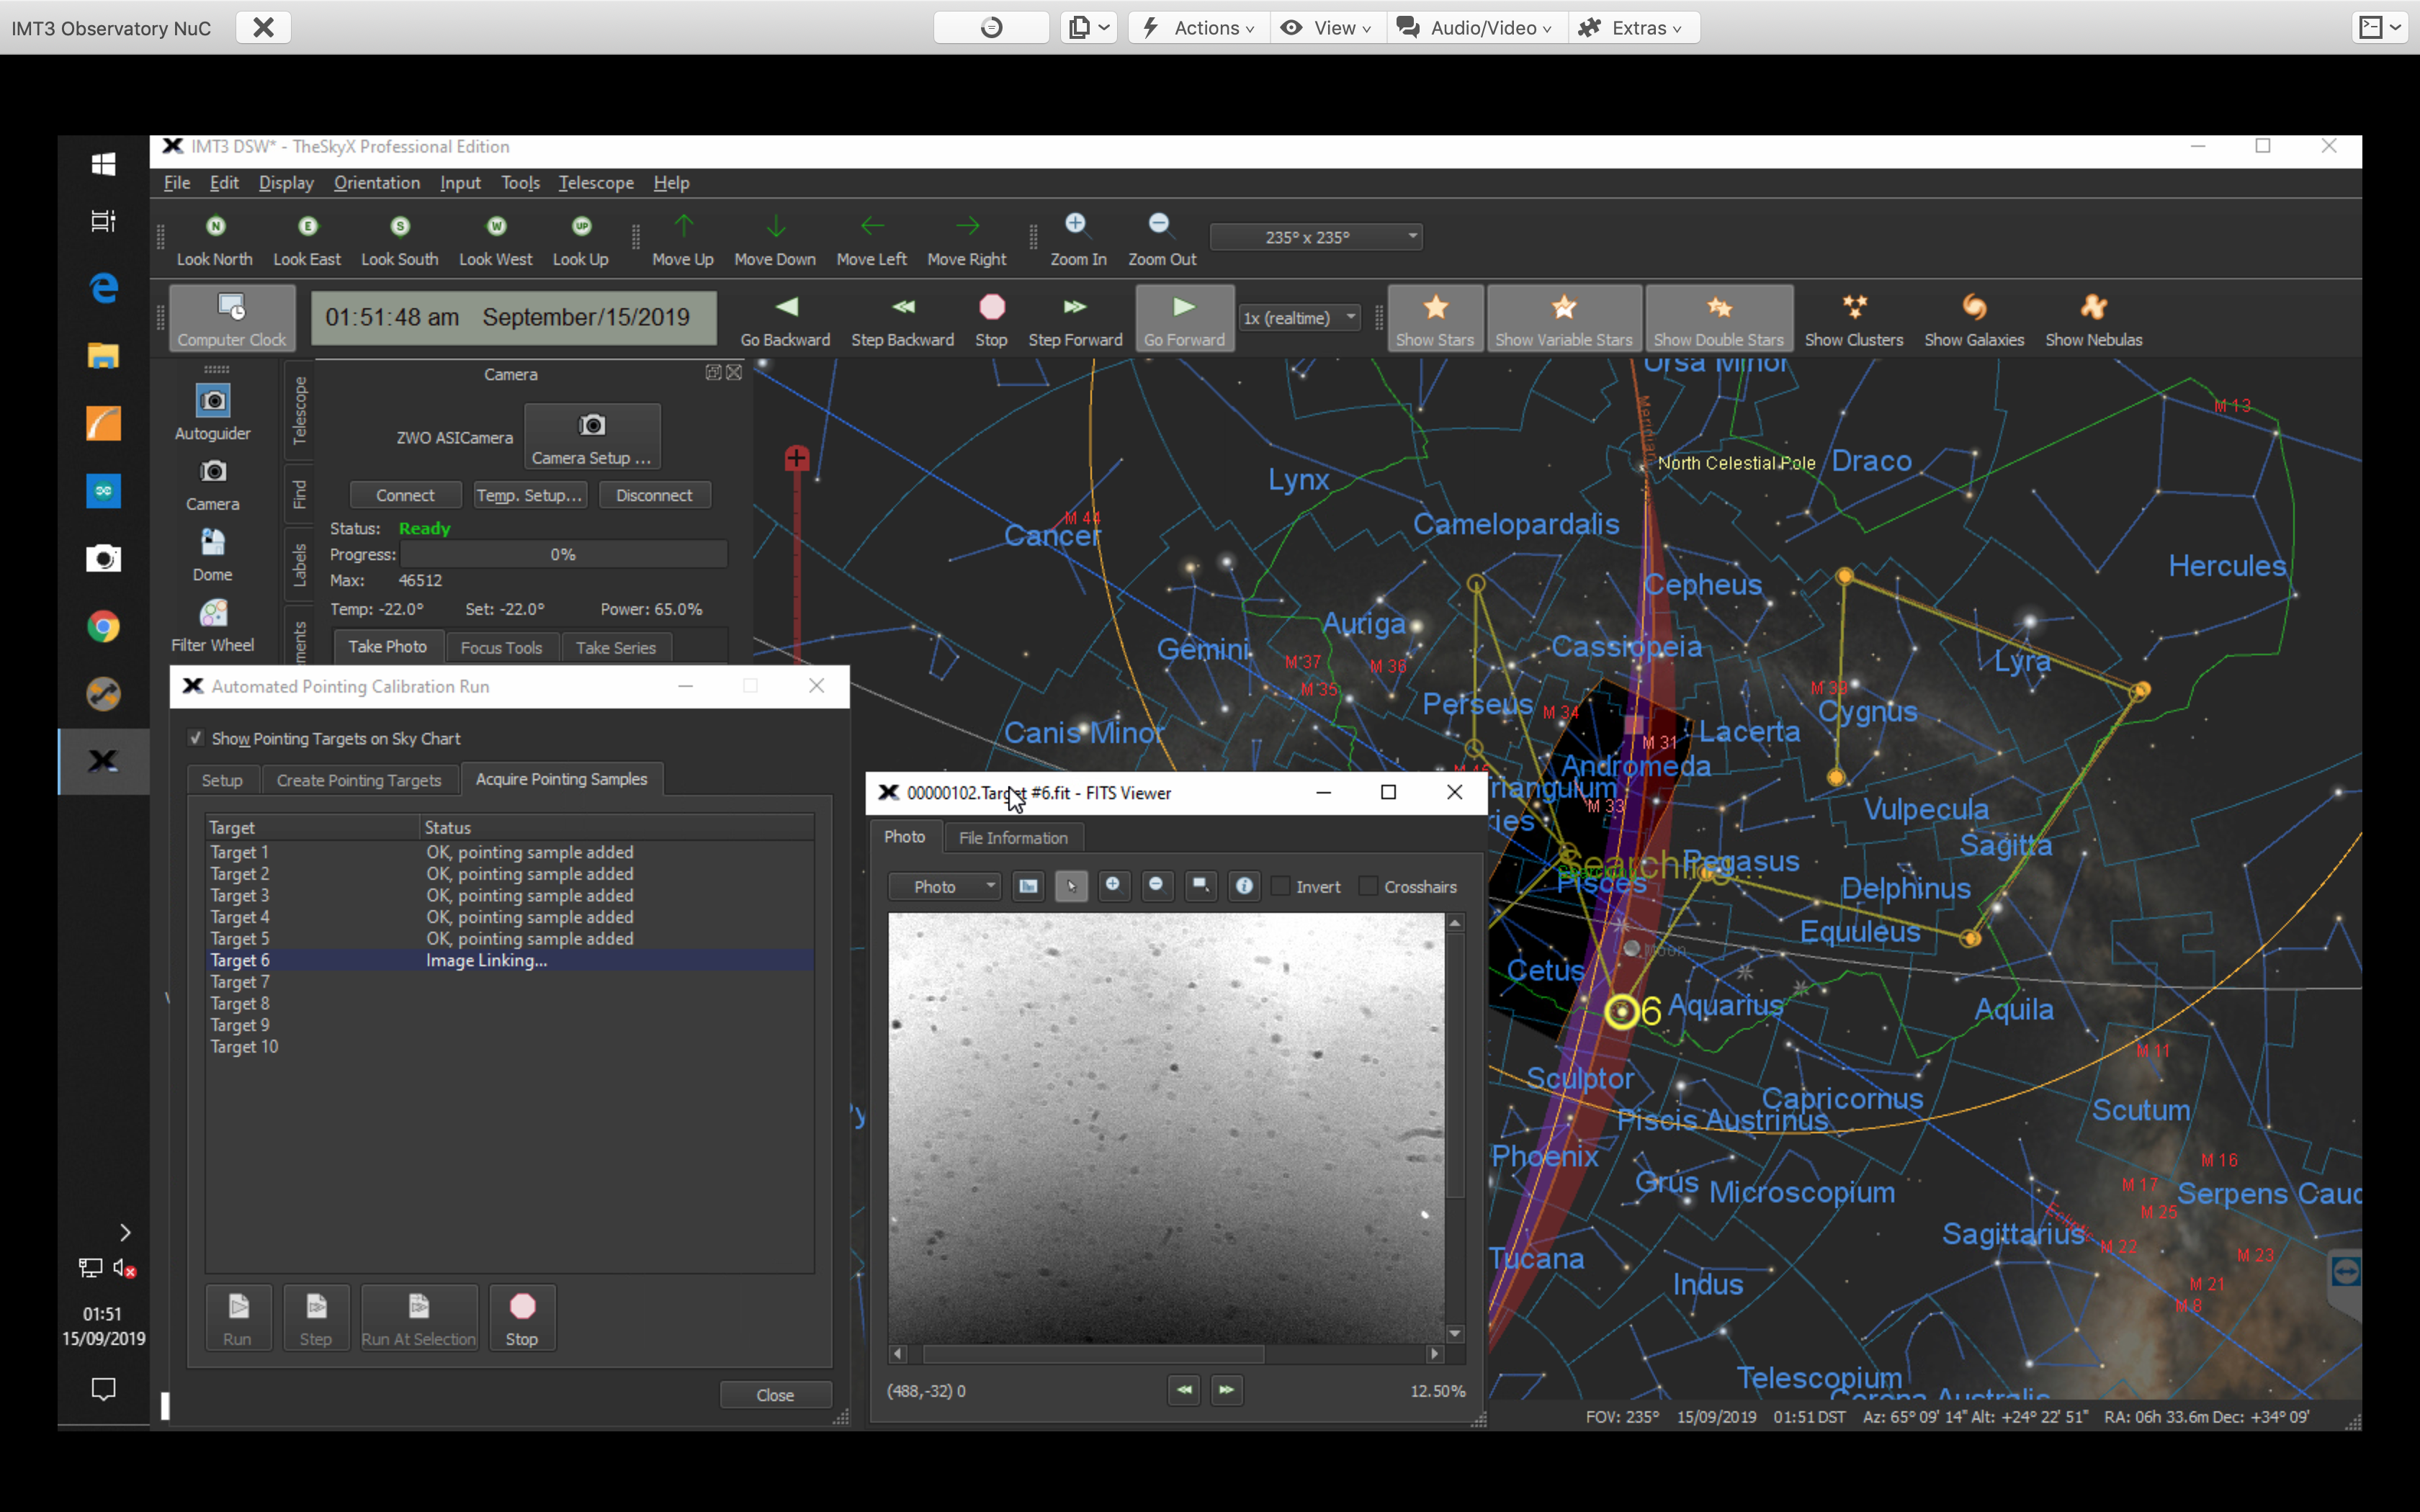
Now the first target was solved the mount went on slewing, the dome turning and the camera imaging until I reached target 6 of 10 and then it failed again. However looking at the downloaded image it was not hard to see why, clearly the Moon was just off to one side.
Nearby Moon….cannot plat solve this!
So I skipped this target and carried on to complete the set. So with an initial 7 targets solved (a few others were near the Moon) that was enough for the mount to land on the target every time and each time the solving got quicker to the point of being sub second.
With the understanding of how to do an automated Tpoint firmly in the bag we decided to shut down the IMT3 for the night and await a cold dark evening after the clocks go back on 21st September to perform a large Tpoint run of around or possibly over 300 targets.
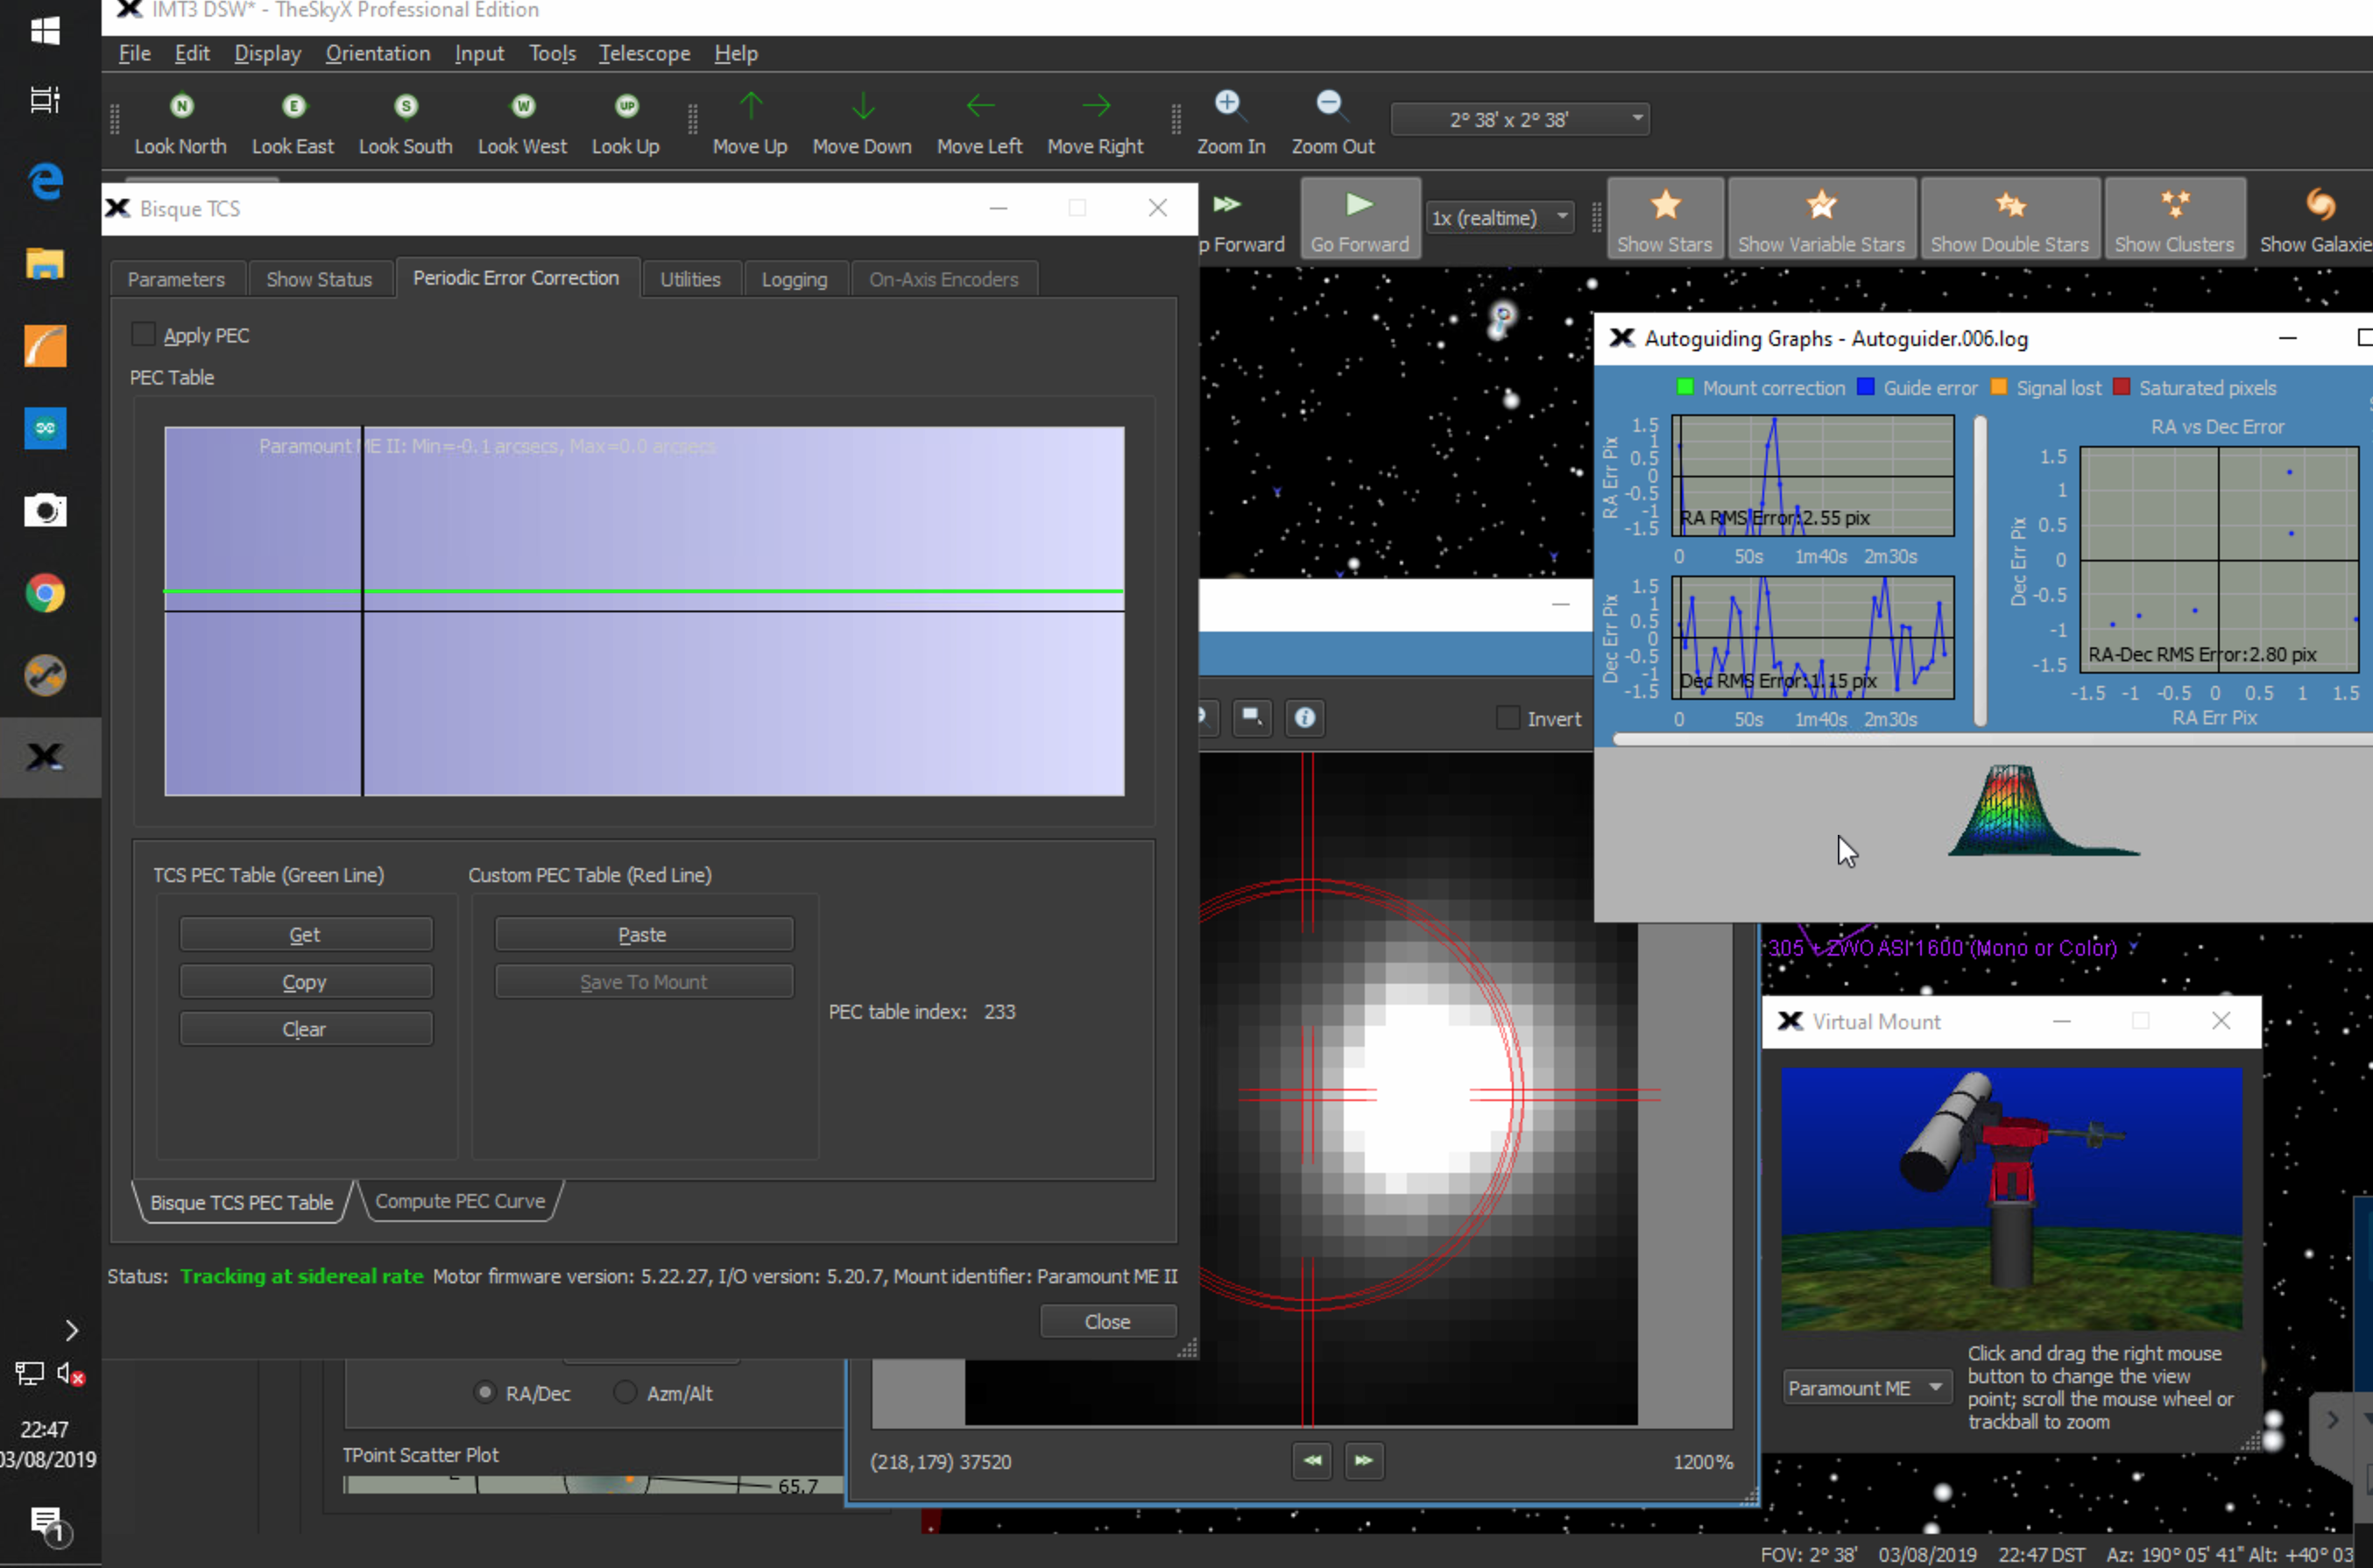
An unexpected clear spell this evening, I was sitting out on the patio looking at the clouds clearing and so setup the dome to perform the Periodic Error Correction (PEC) analysis for the mount.
To perform this I needed to unplug the hand controller for the MEII, unplug the ST4 guider cable, turn off a bunch of settings within the autoguider software with The SKY X (TSX) and also turn off TPoint.
I then connected the ZWO ASI1600MM to TSX rather than SGPro. This was so that I could record the log needed for the PEC through the autoguider add on software which records in a format that the PEC software requires. The challenge again was that I could not get the ZWO camera to connect in TSX. I just kept getting error 200. Searching TSX forum I finally found the issue and downloaded the latest driver from ZWO but through the link from Software Bisque. To install I needed to log in as Admin.
So I started to record the star movement without performing any guiding. Once done I imported the log file Autoguider.010.log into the PEC portion of TSX.
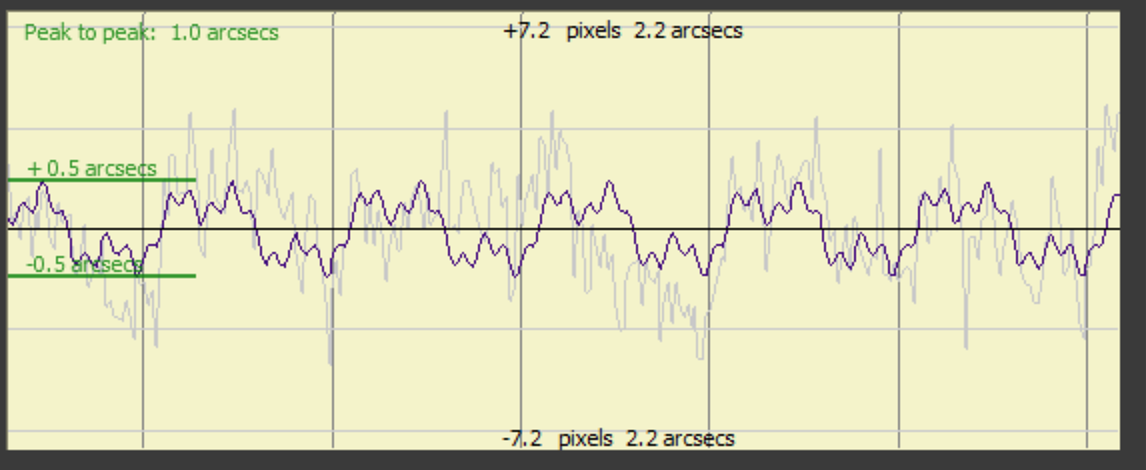
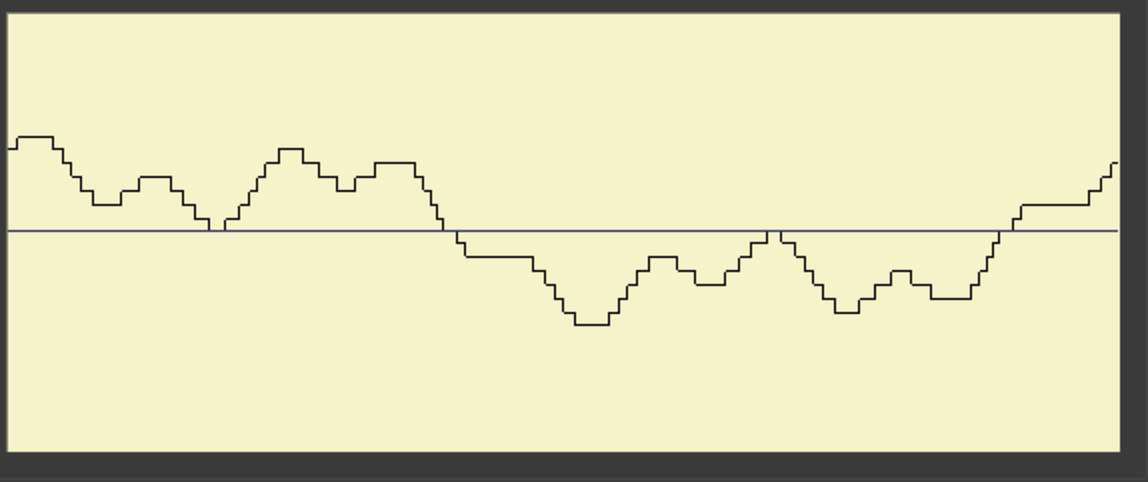
I then performed a fit so that you could see the sinusoidal waves before I then fitted the correction to it. A quick look using PHD2 Drift Alignment to see what the drift now was, was very promising with a sinusoidal wave over 10-15 minutes.
Final fitted curveModified CurveSinusoidal Drift Alignment check
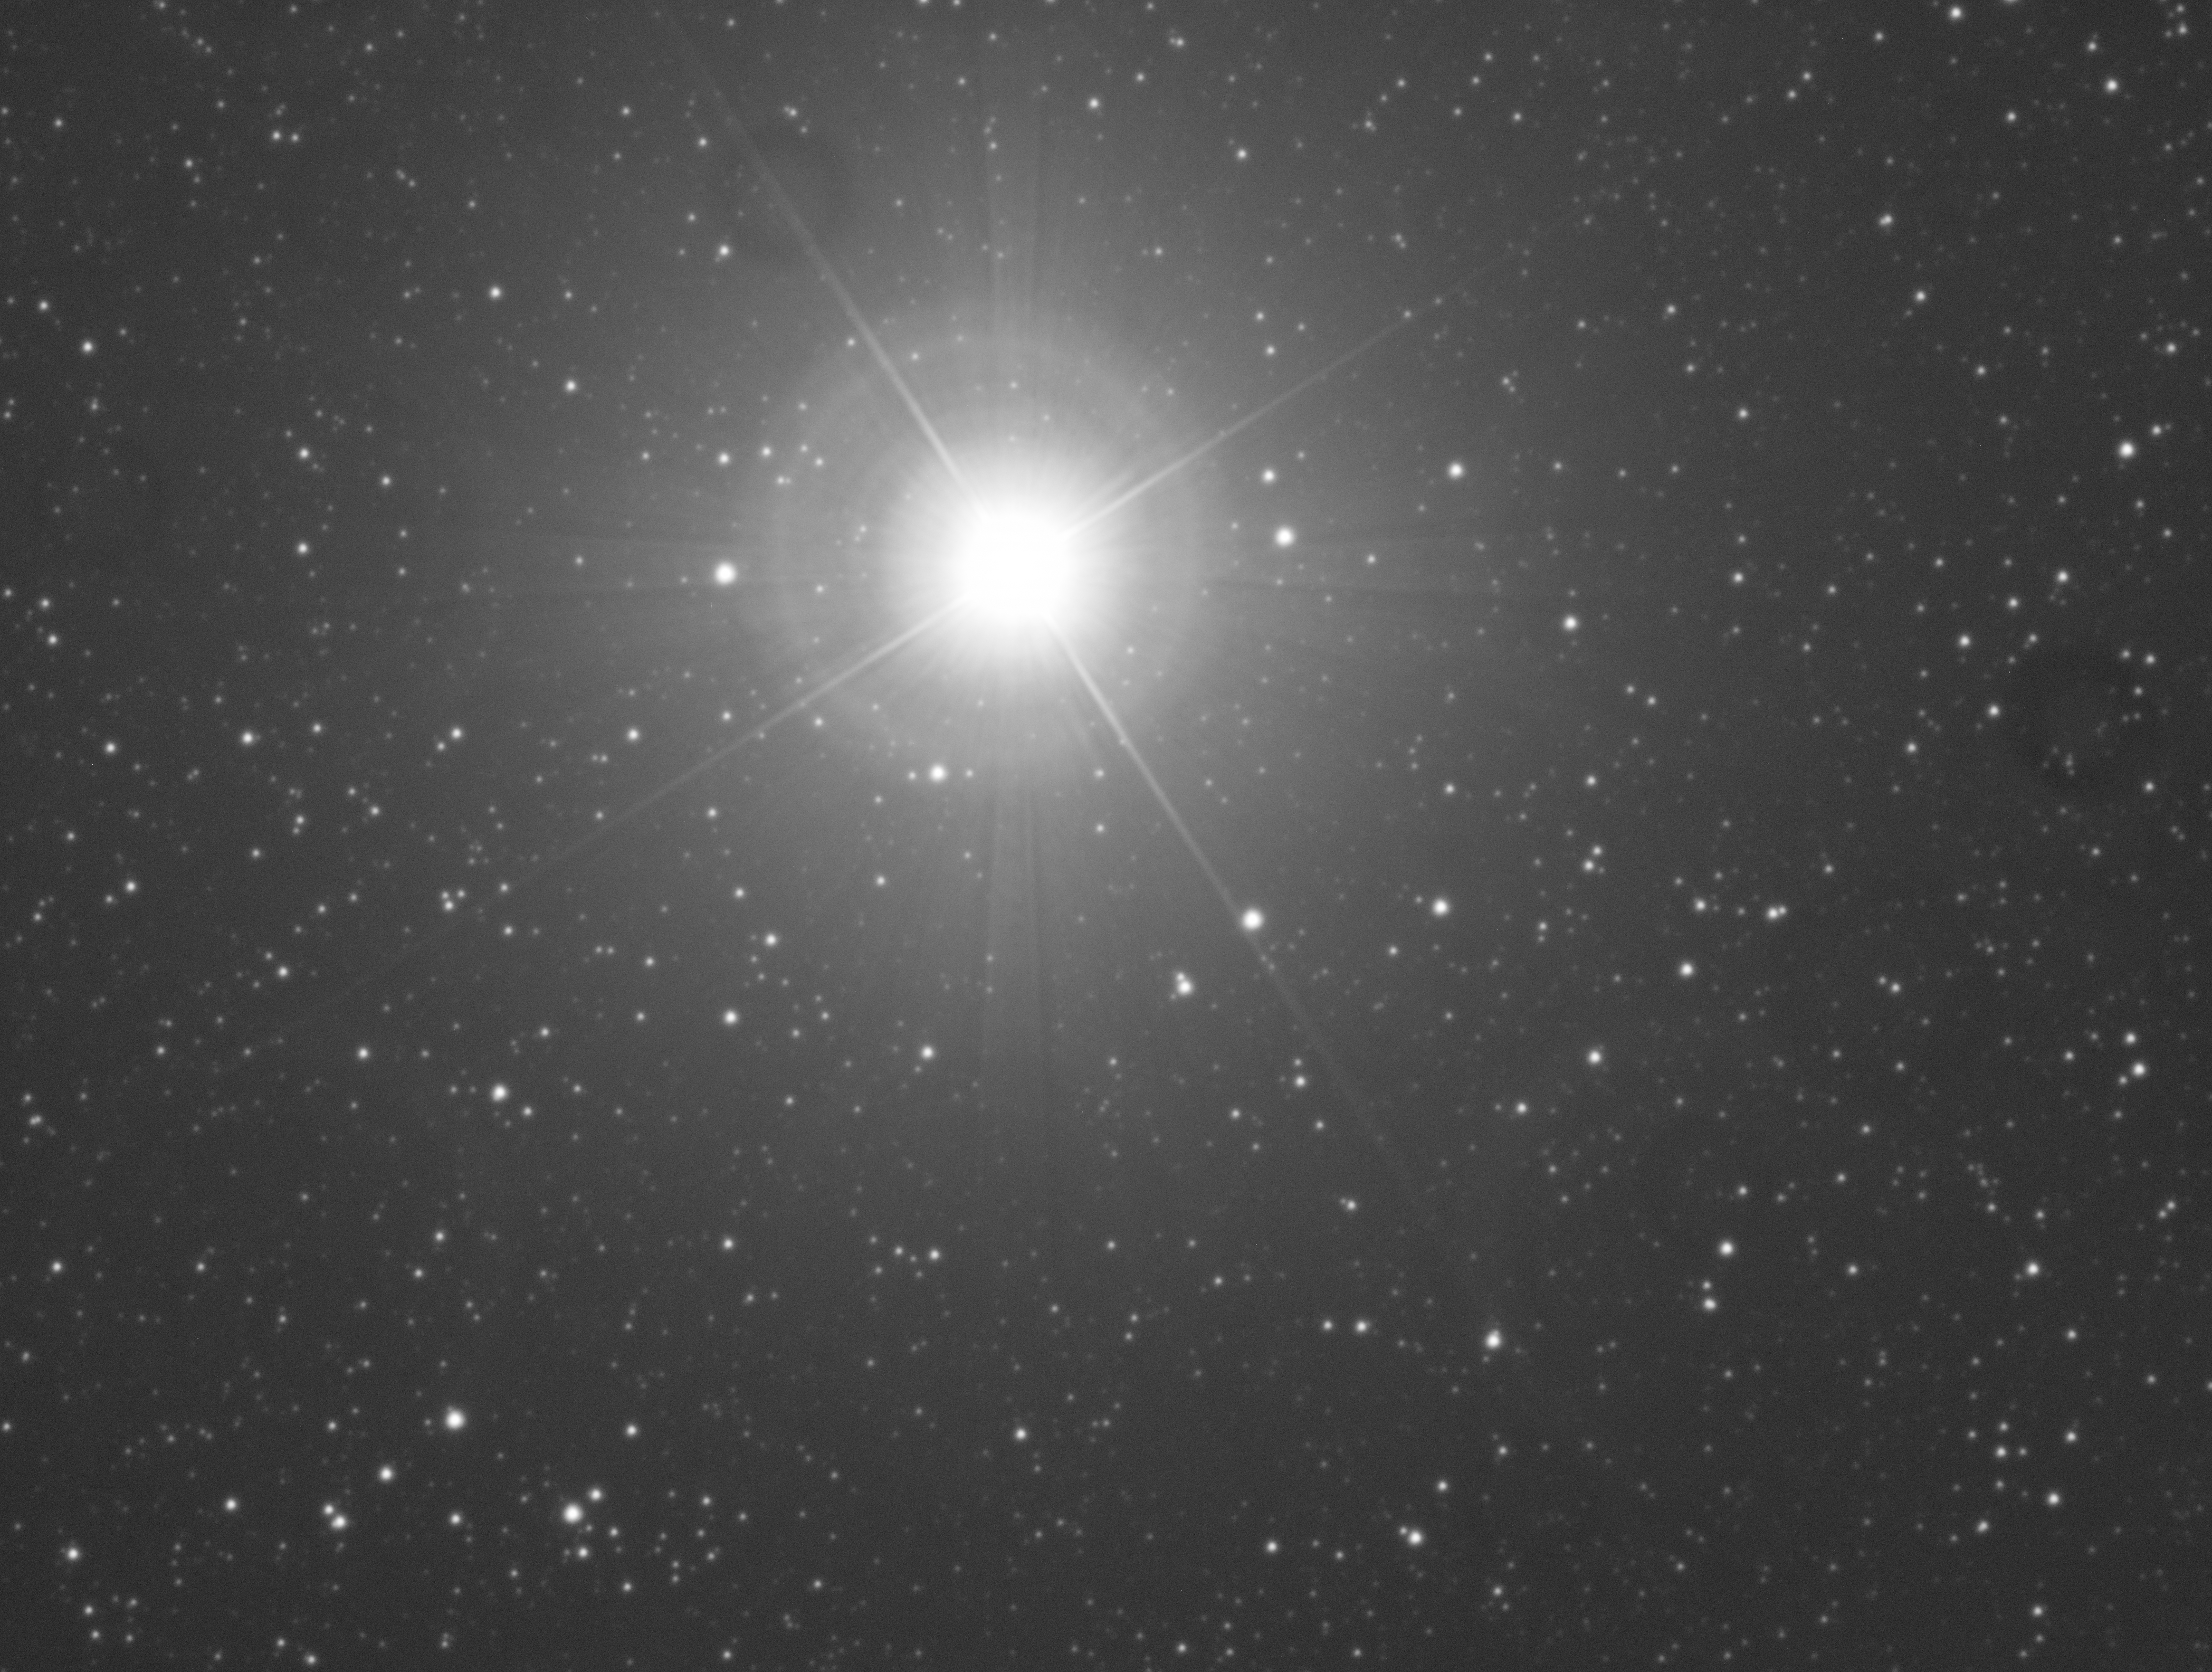
I then went off and tried to image unguided to see if it made a difference, it had, I recorded a 10min unguided image through the 12″ 2.5m focal length scope with no trailing of Altair.
10min Unguided Altair exposure
I then attempted to slew and take an image of the Elephant Trunk in Ha again, however I was foiled by not only the cloud moving in but also not being able to get past the message Guider Settling. I need to talk through with GingerGeek to see why that is. Meanwhile bedtime for Mr Shave-Wall.
This evening GingerGeek and I are going to try and get the guider in focus again. I hope we can do this so I can use the observatory remotely shortly.
On connecting to the observatory I noticed once again that after running the ZWO120MC for a while under ASICAP it went black. I have still not had a reply on the forum and it reminds me not to buy another ZWO as they are particularly bad at support.
That said there are a few things we need to try including taking the 10m USB extension out of the equation. Once I started TheSkyX and SGPro and PHD etc I could see Vega in the image for the 12″. Moving it to the centre and syncing for the moment manually until GingerGeek shows me how to sync and solve with SGPro. The final part here was moving the scope so that Vega was now in the centre of the FoV of the guider square on TheSkyX.
Vega nearly in the middle
So Mark arrived to help focus the guider whilst I looked at the screen on PHD. Before we started Bob remotely once again turned the USB power off to the All Sky Cam to reset it using Node Red. That worked so we had that camera working again.
PHD showed a very bright white screen, we had to wait over another hour for the sky to taken enough to be able to make anything out. Once we could, all we saw was the edge of the dome again.
Edge of dome through camera
It took GingerGeek a while fiddling with the focus to realise the camera on the screen was not the guider! It transpired PHD had for whatever reason picked up the other webcam mounted on one of the OTAs. No wonder we had problems.
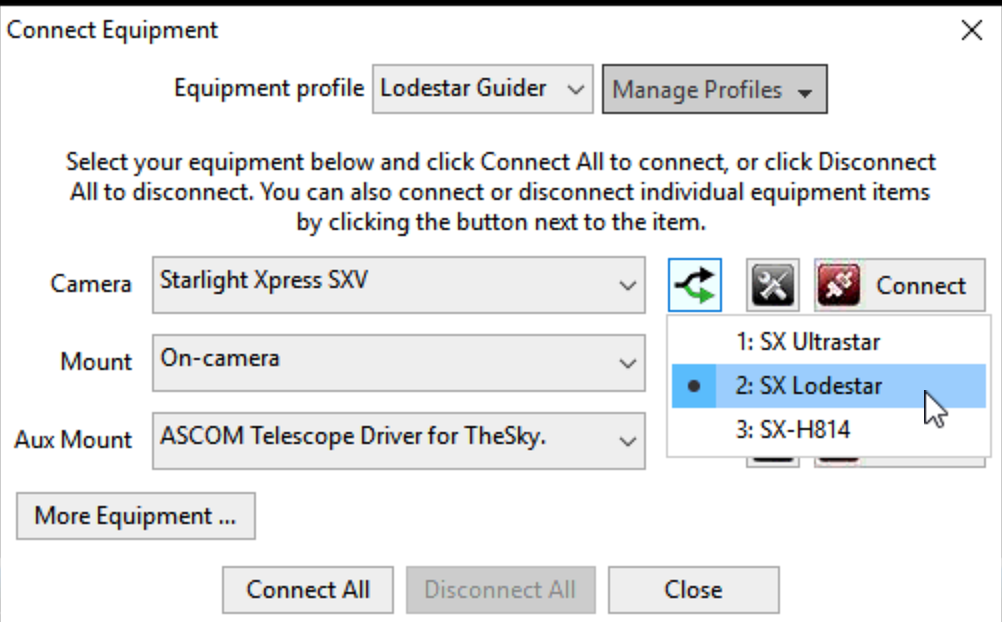
Selecting the SX Lodestar guider from the down list in PHD brought up a picture with Vega in it! From there we had a flat topped star as Vega is too bright for the guider. So we slewed to another star nearby (mag +8) and then refined the focus on that. Next we calibrated the guider again as we had been removing and turning the guide camera.
Once done we then slewed to a star near the Meridian to test output of drift align to find that the mount is still reporting being out in dec which is possible for one of a couple of reasons, either the knobs were not tightened correctly or the mount has moved after being hit. Next weekend I will adjust if clear again, but this also means starting a whole new TPoint model.
When I drift align I will perform that on a star near the meridian and the celestial equator. I will then slew away then back and repeat. If all is well I will then test drift away from the equator to see if we have flex and if so if it is due to balance problems.
It has been interesting to see if we can automate the Pulsar Dome through ASCOM to slave it to the movement of the Paramount MEII and the 3 OTAs that reside on top.
We originally tried using SGPro and a complicated spreadsheet from Pulsar to record and then model the spherical trigonometry that is needed to make this work. After a number of days we gave up as it simply was not aligning the slit of the dome with the main OTA let alone the other 2 that are piggybacked.
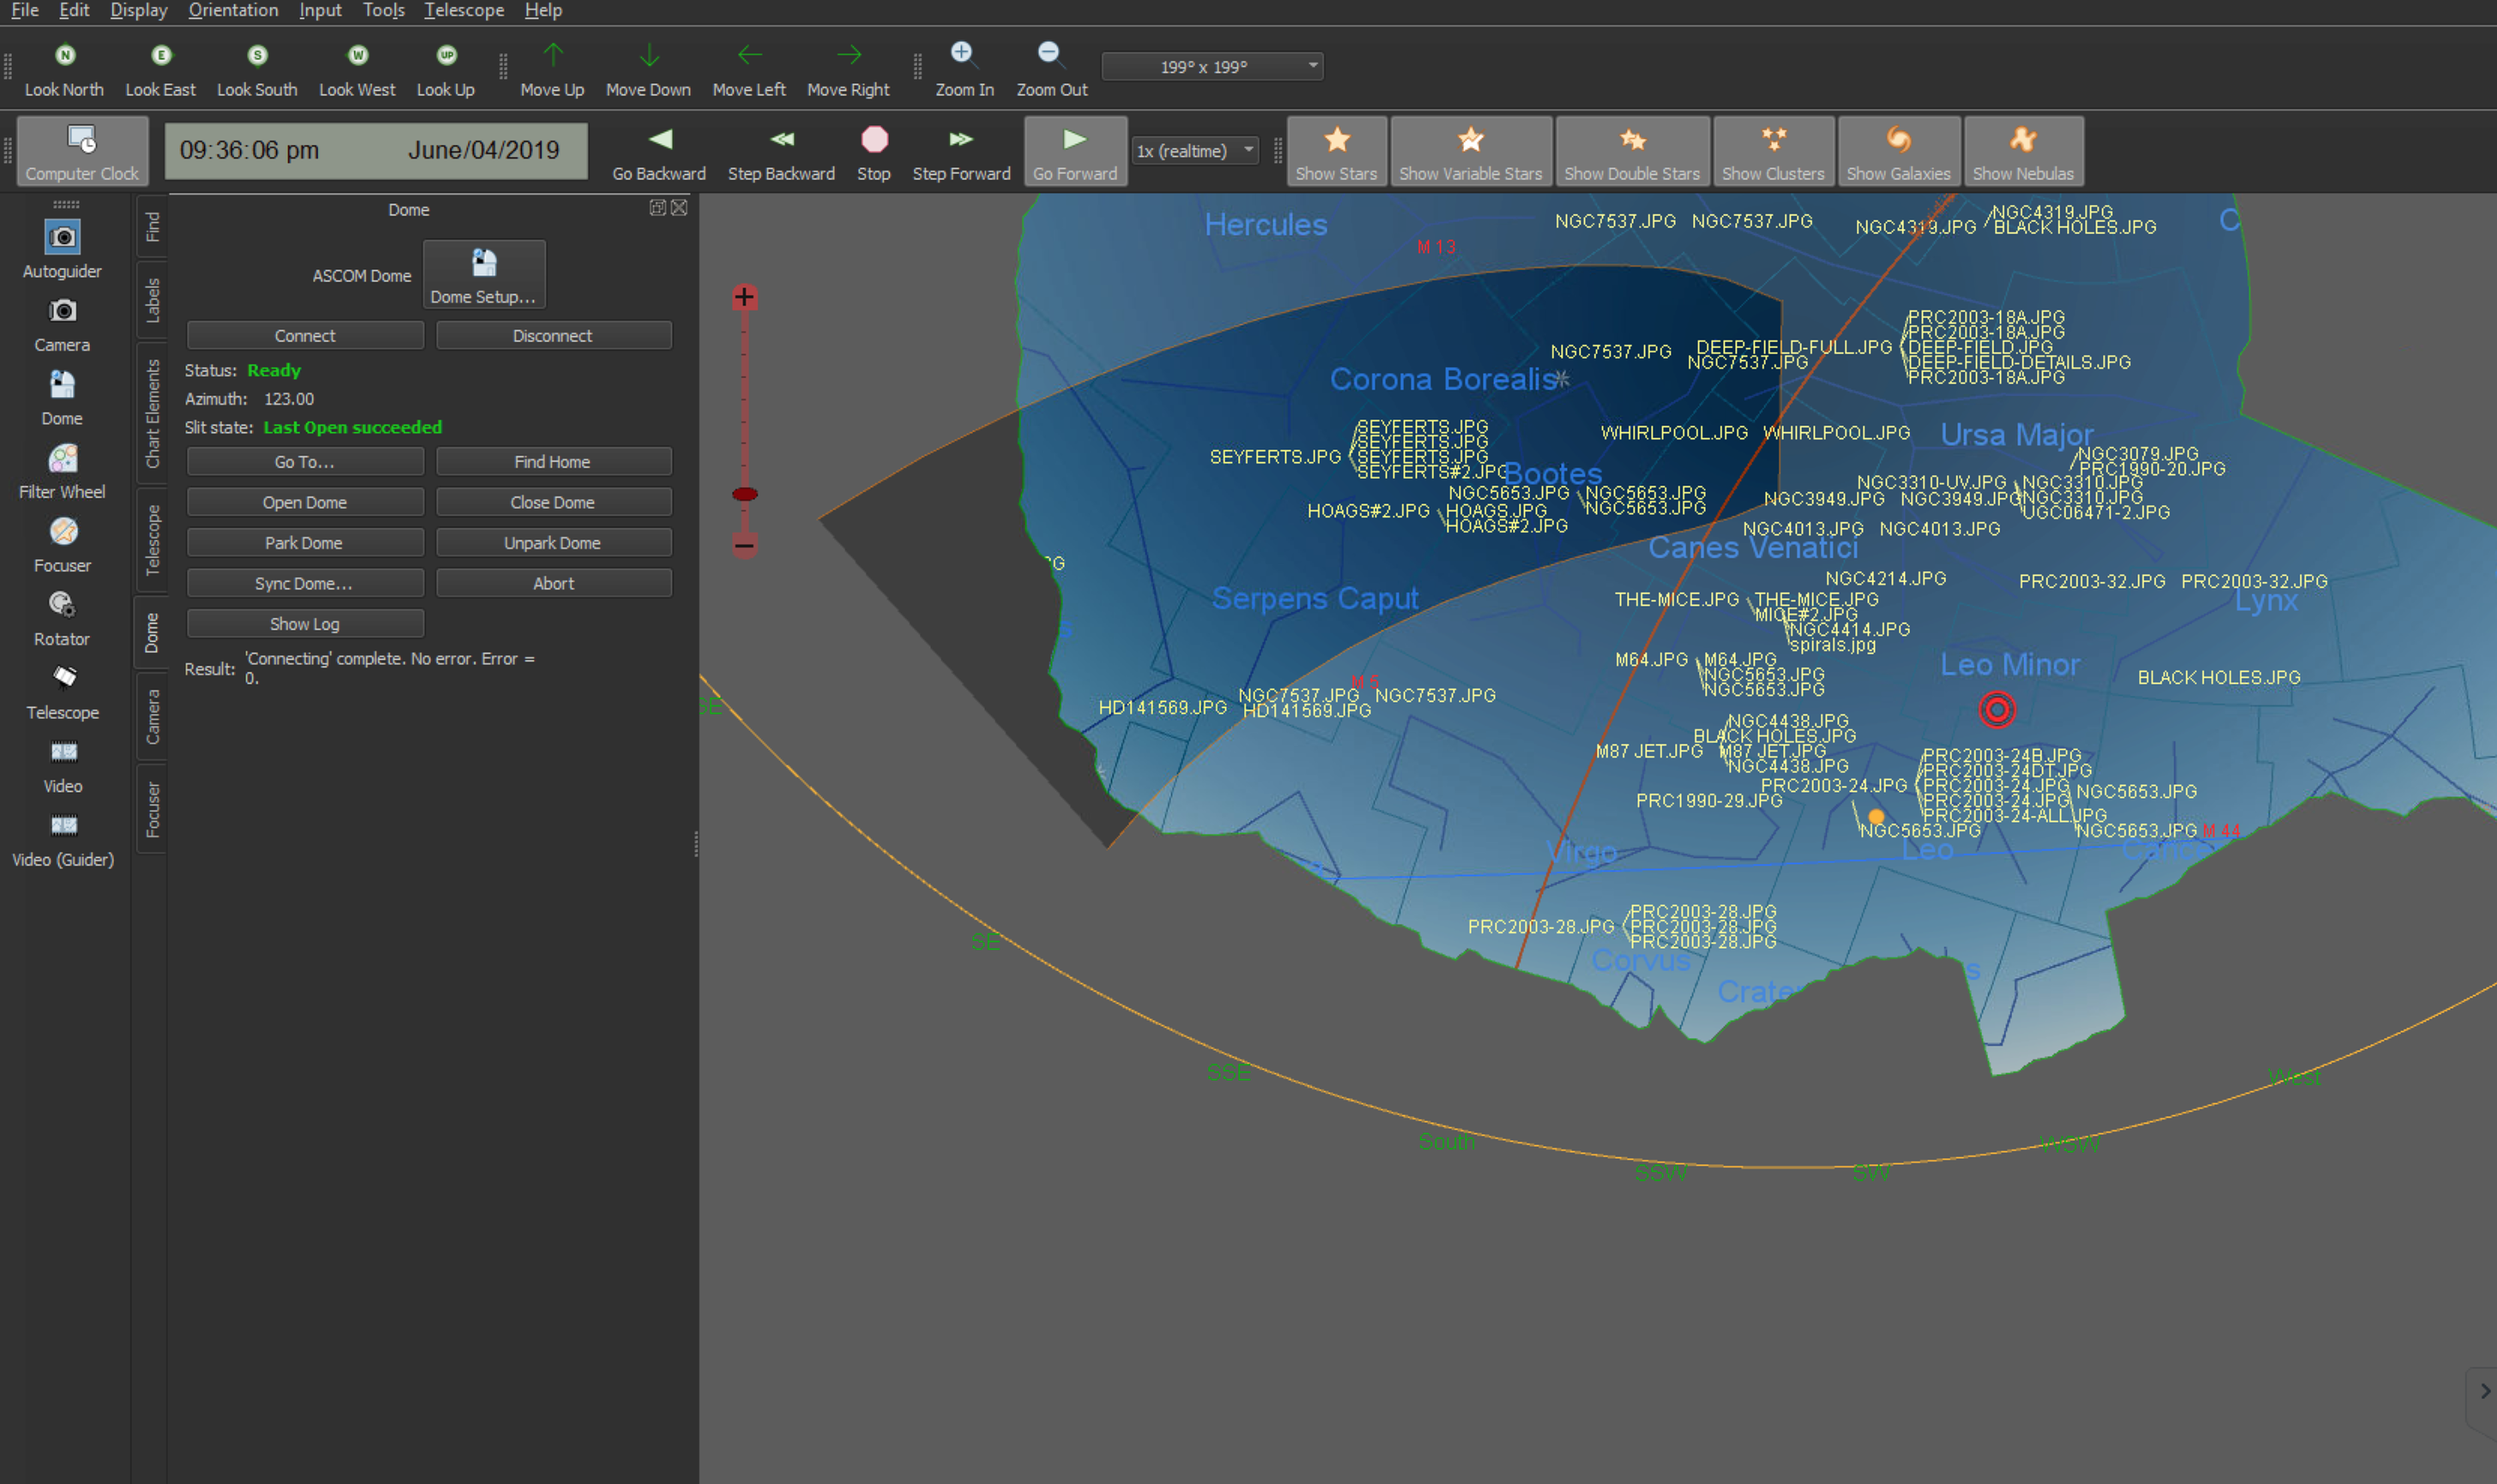
So we are now trying to resolve using TheSkyX Dome Add-On, an expensive piece of software from Bisque that if it works, despite the cost is worth every penny.
TheSkyX Dome Slit visibility
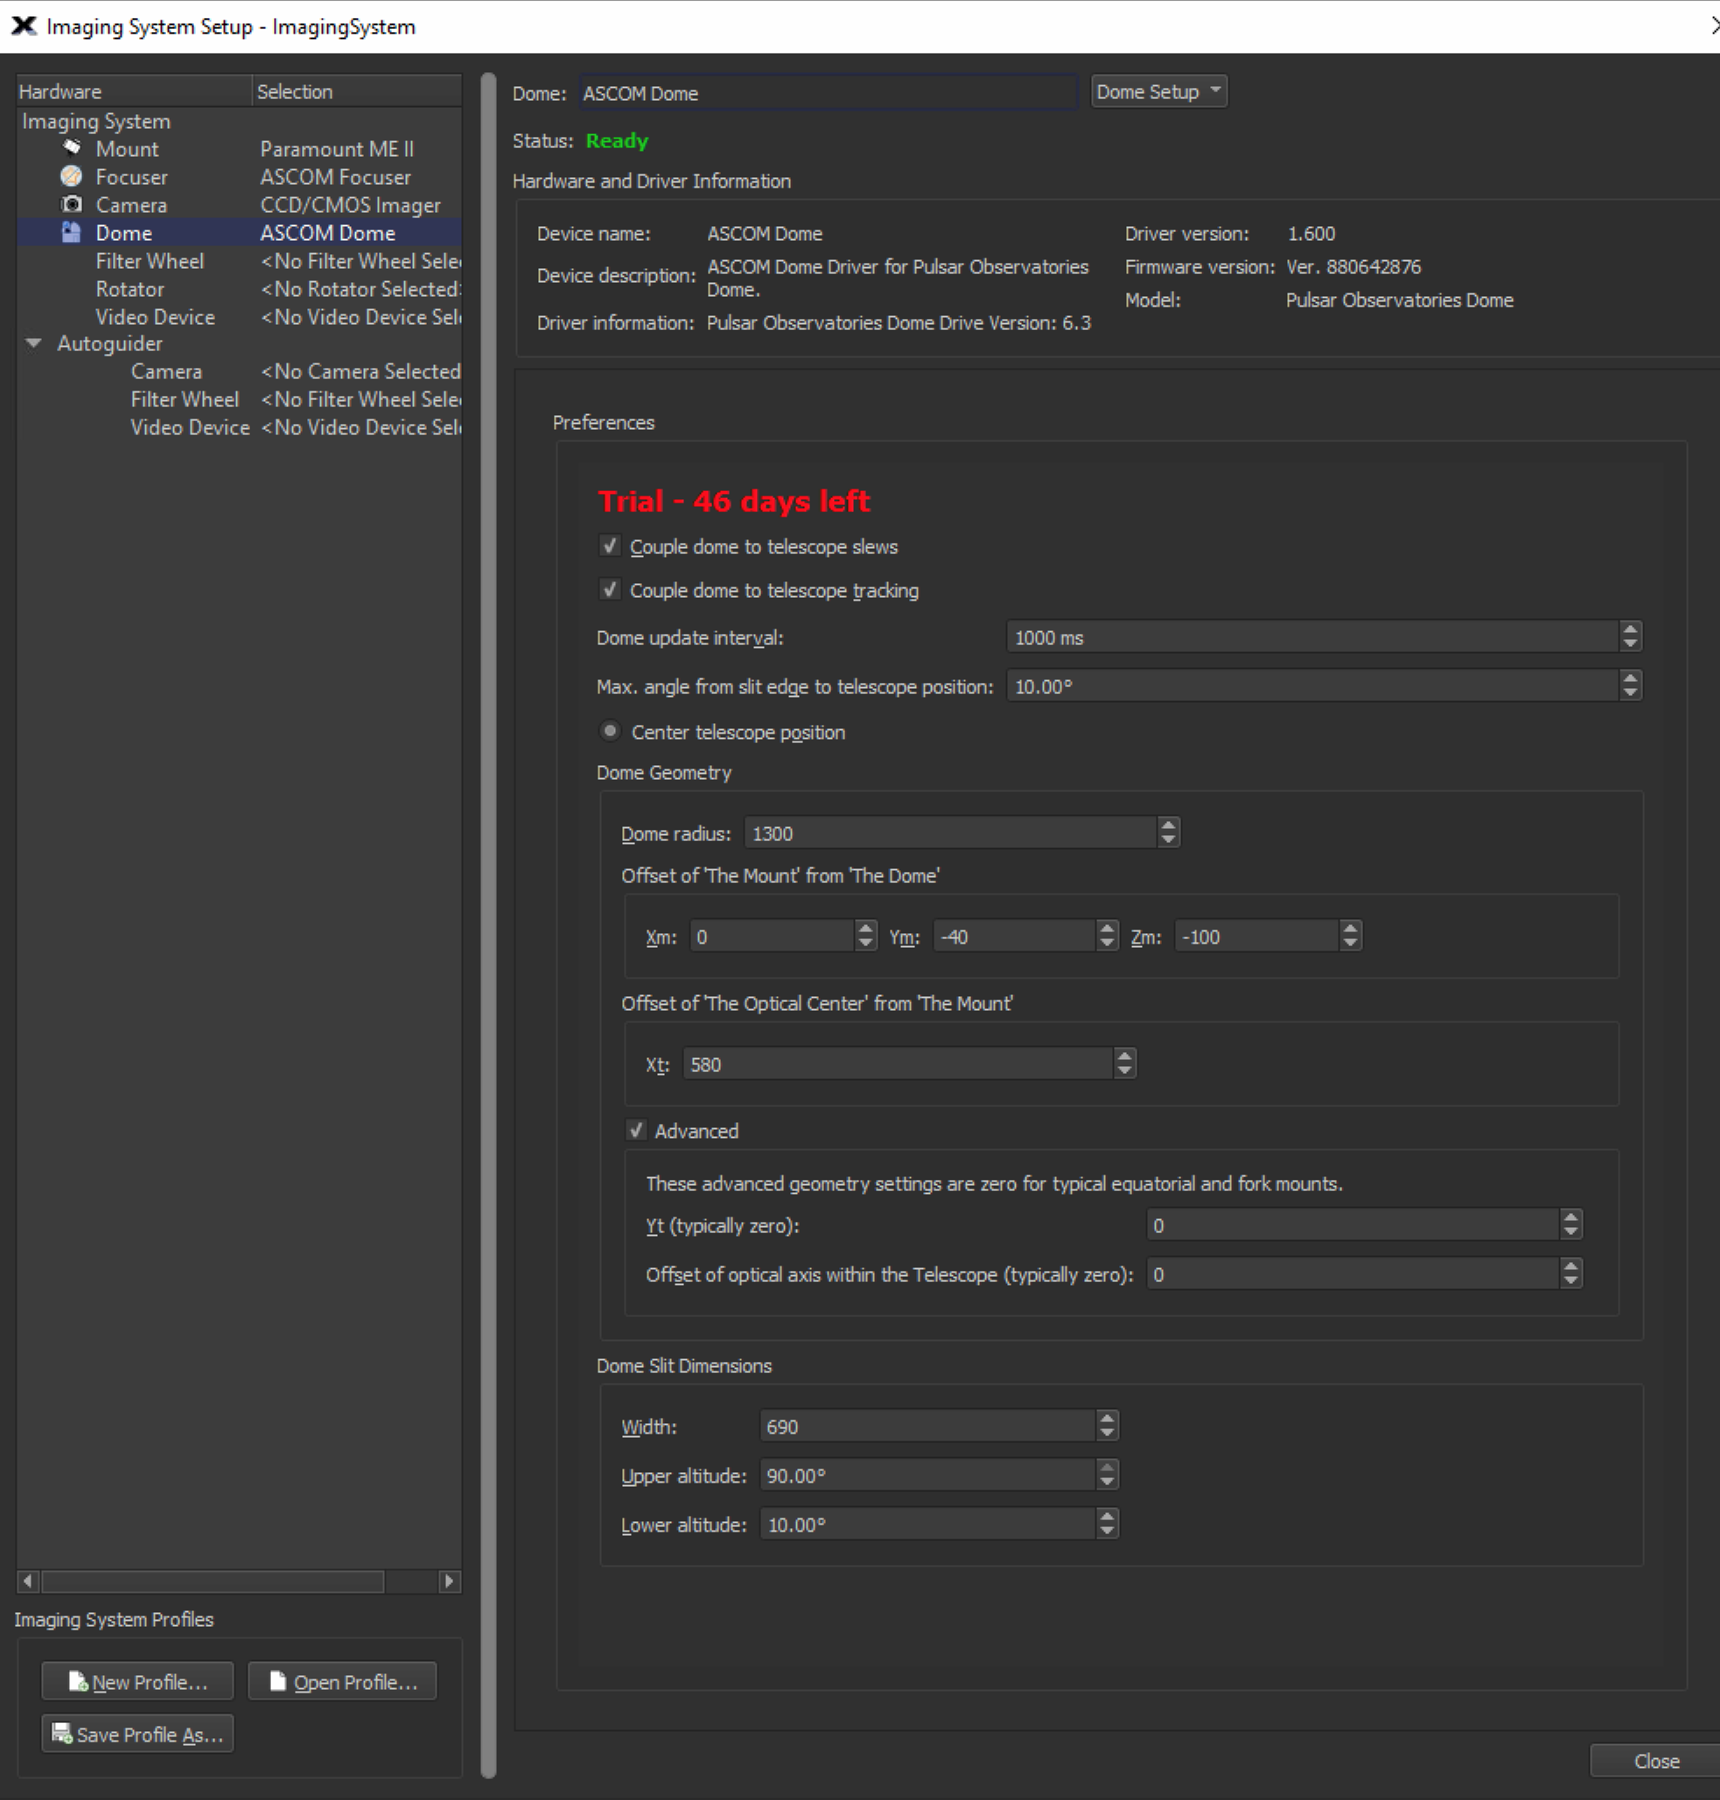
Well after putting in some simple figures as stated in TheySkyX user manual over a few pages, we have managed to slave the dome slit to the main scope with ease. It was really very simple and after the mucking about with SGPro and the model information from Pulsar spreadsheet, it just works. I then took a look at the 2 other OTAs and have changed various figures that I will share once all work flawlessly. These figures are to do with offsets for the OTAs from the optical centre of the main OTA. I have asked Bisque to confirm I am changing the right figures and asked how I save them to a profile or alike so that I do not have to re-enter them every time we want to swap scopes to image from. I have also asked for clarity around moving the dome at sidereal using the distance of the OTA to the dome slit figure.
Dome Add-On setting page for configuring the scope offset
At the moment whilst I await their return on the questions, the mount is able to slew around the sky and the main OTA is always within the centre of the dome. The 2 other OTAs if I change the figures in the fields for the offsets also are in the main through the slit, just near the meridian there is a slight overlap but I have guessed some fo the figures so they may be wrong.
More to update later once I have the clarity from Software Bisque I hope.