Moon 96% Waning.
Our TOSA Manual needs updating now that we have replaced the HiTechAstro Deluxe Cloud Sensor with the Lunático AAG CloudWatcher cloud detector.
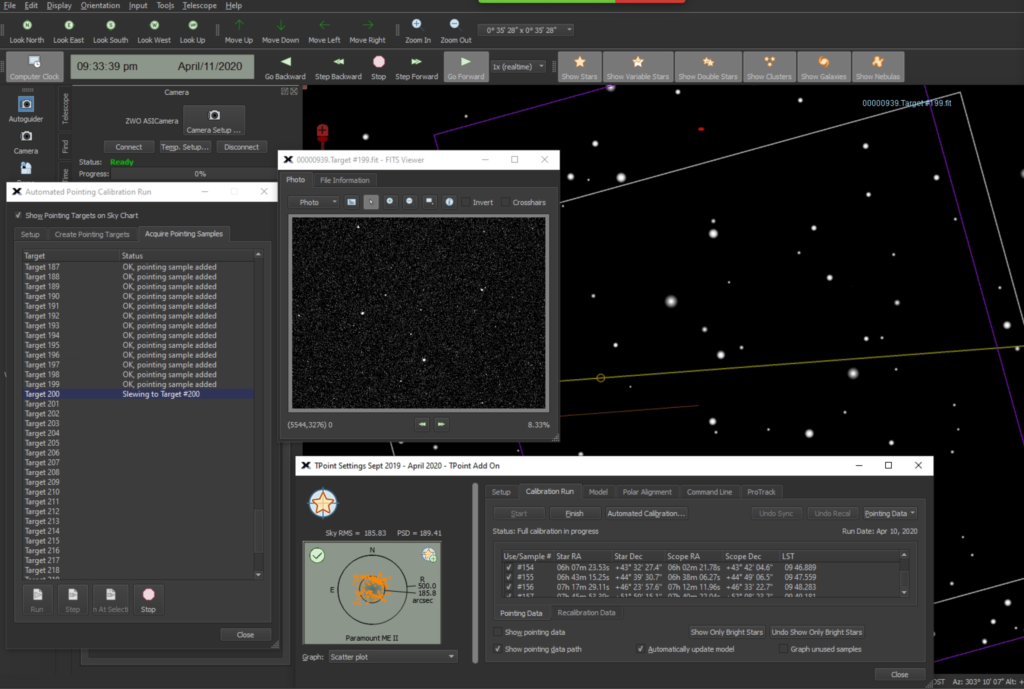
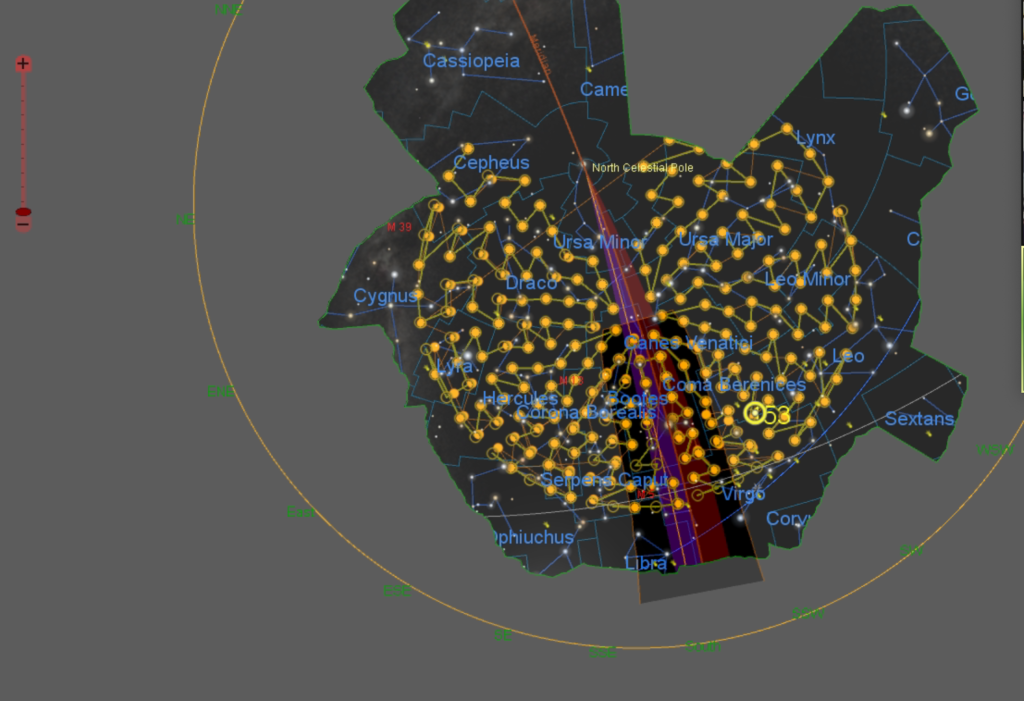
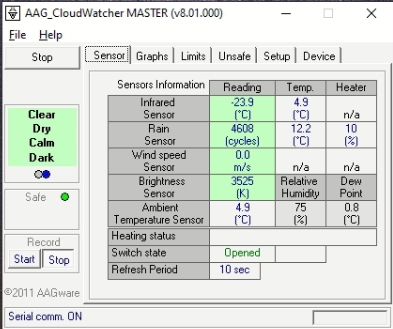
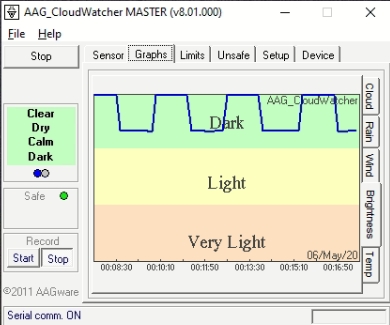
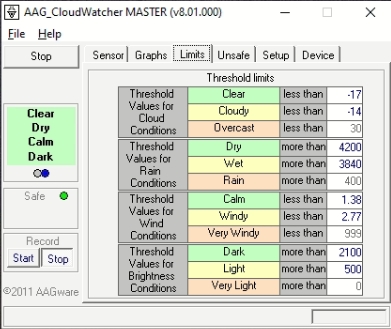
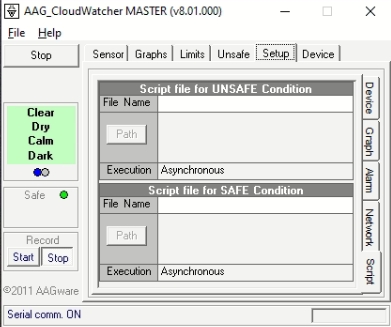
New Screens to get familiar with:
.
.
.
.
 .
.
.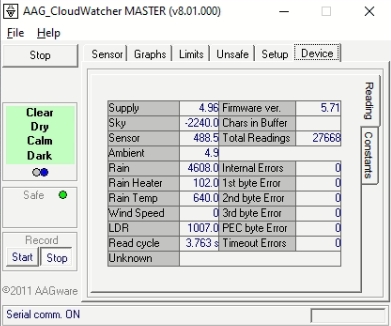
Initially I was unable to open the shutter of the dome. Thinking I’d forgotten to reset the HiTechAstro relay I soon realised I had to figure out why the AAG_Cloudwatcher software was reporting Unsafe. GingerGeek spotted that the Brightness level looked like a sawtooth and should settle after a few minutes, which it appeared to do and the dome shutter opened successfully.
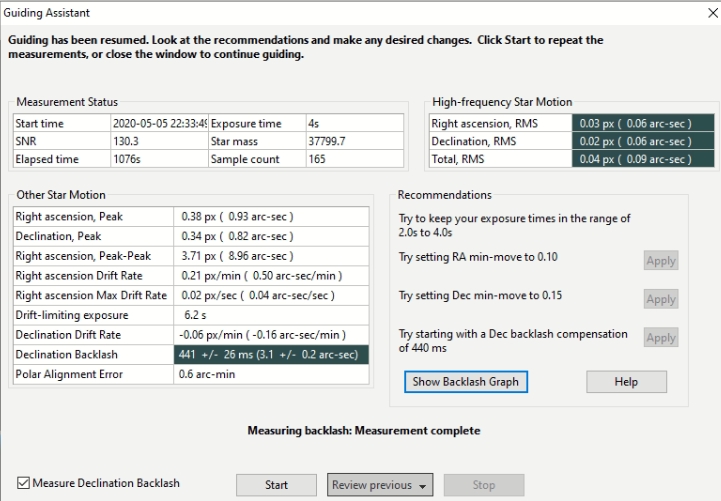
Following on from my previous observing session on 1st May when clouds interrupted play just as I was completing a Guiding Assistant run in PHD2, I started tonight’s session with a quick look at Venus before it set below our horizon and then had another go at running the Guiding Assistant in PHD2 for the OS 12″ / Tak FS-102 combination, with the Tak as the guider for the Officina Stellare.
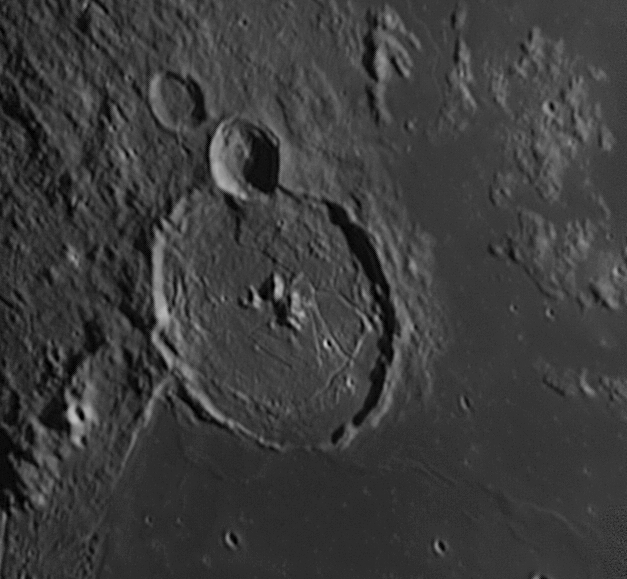
Venus in Ha (because it’s so bright).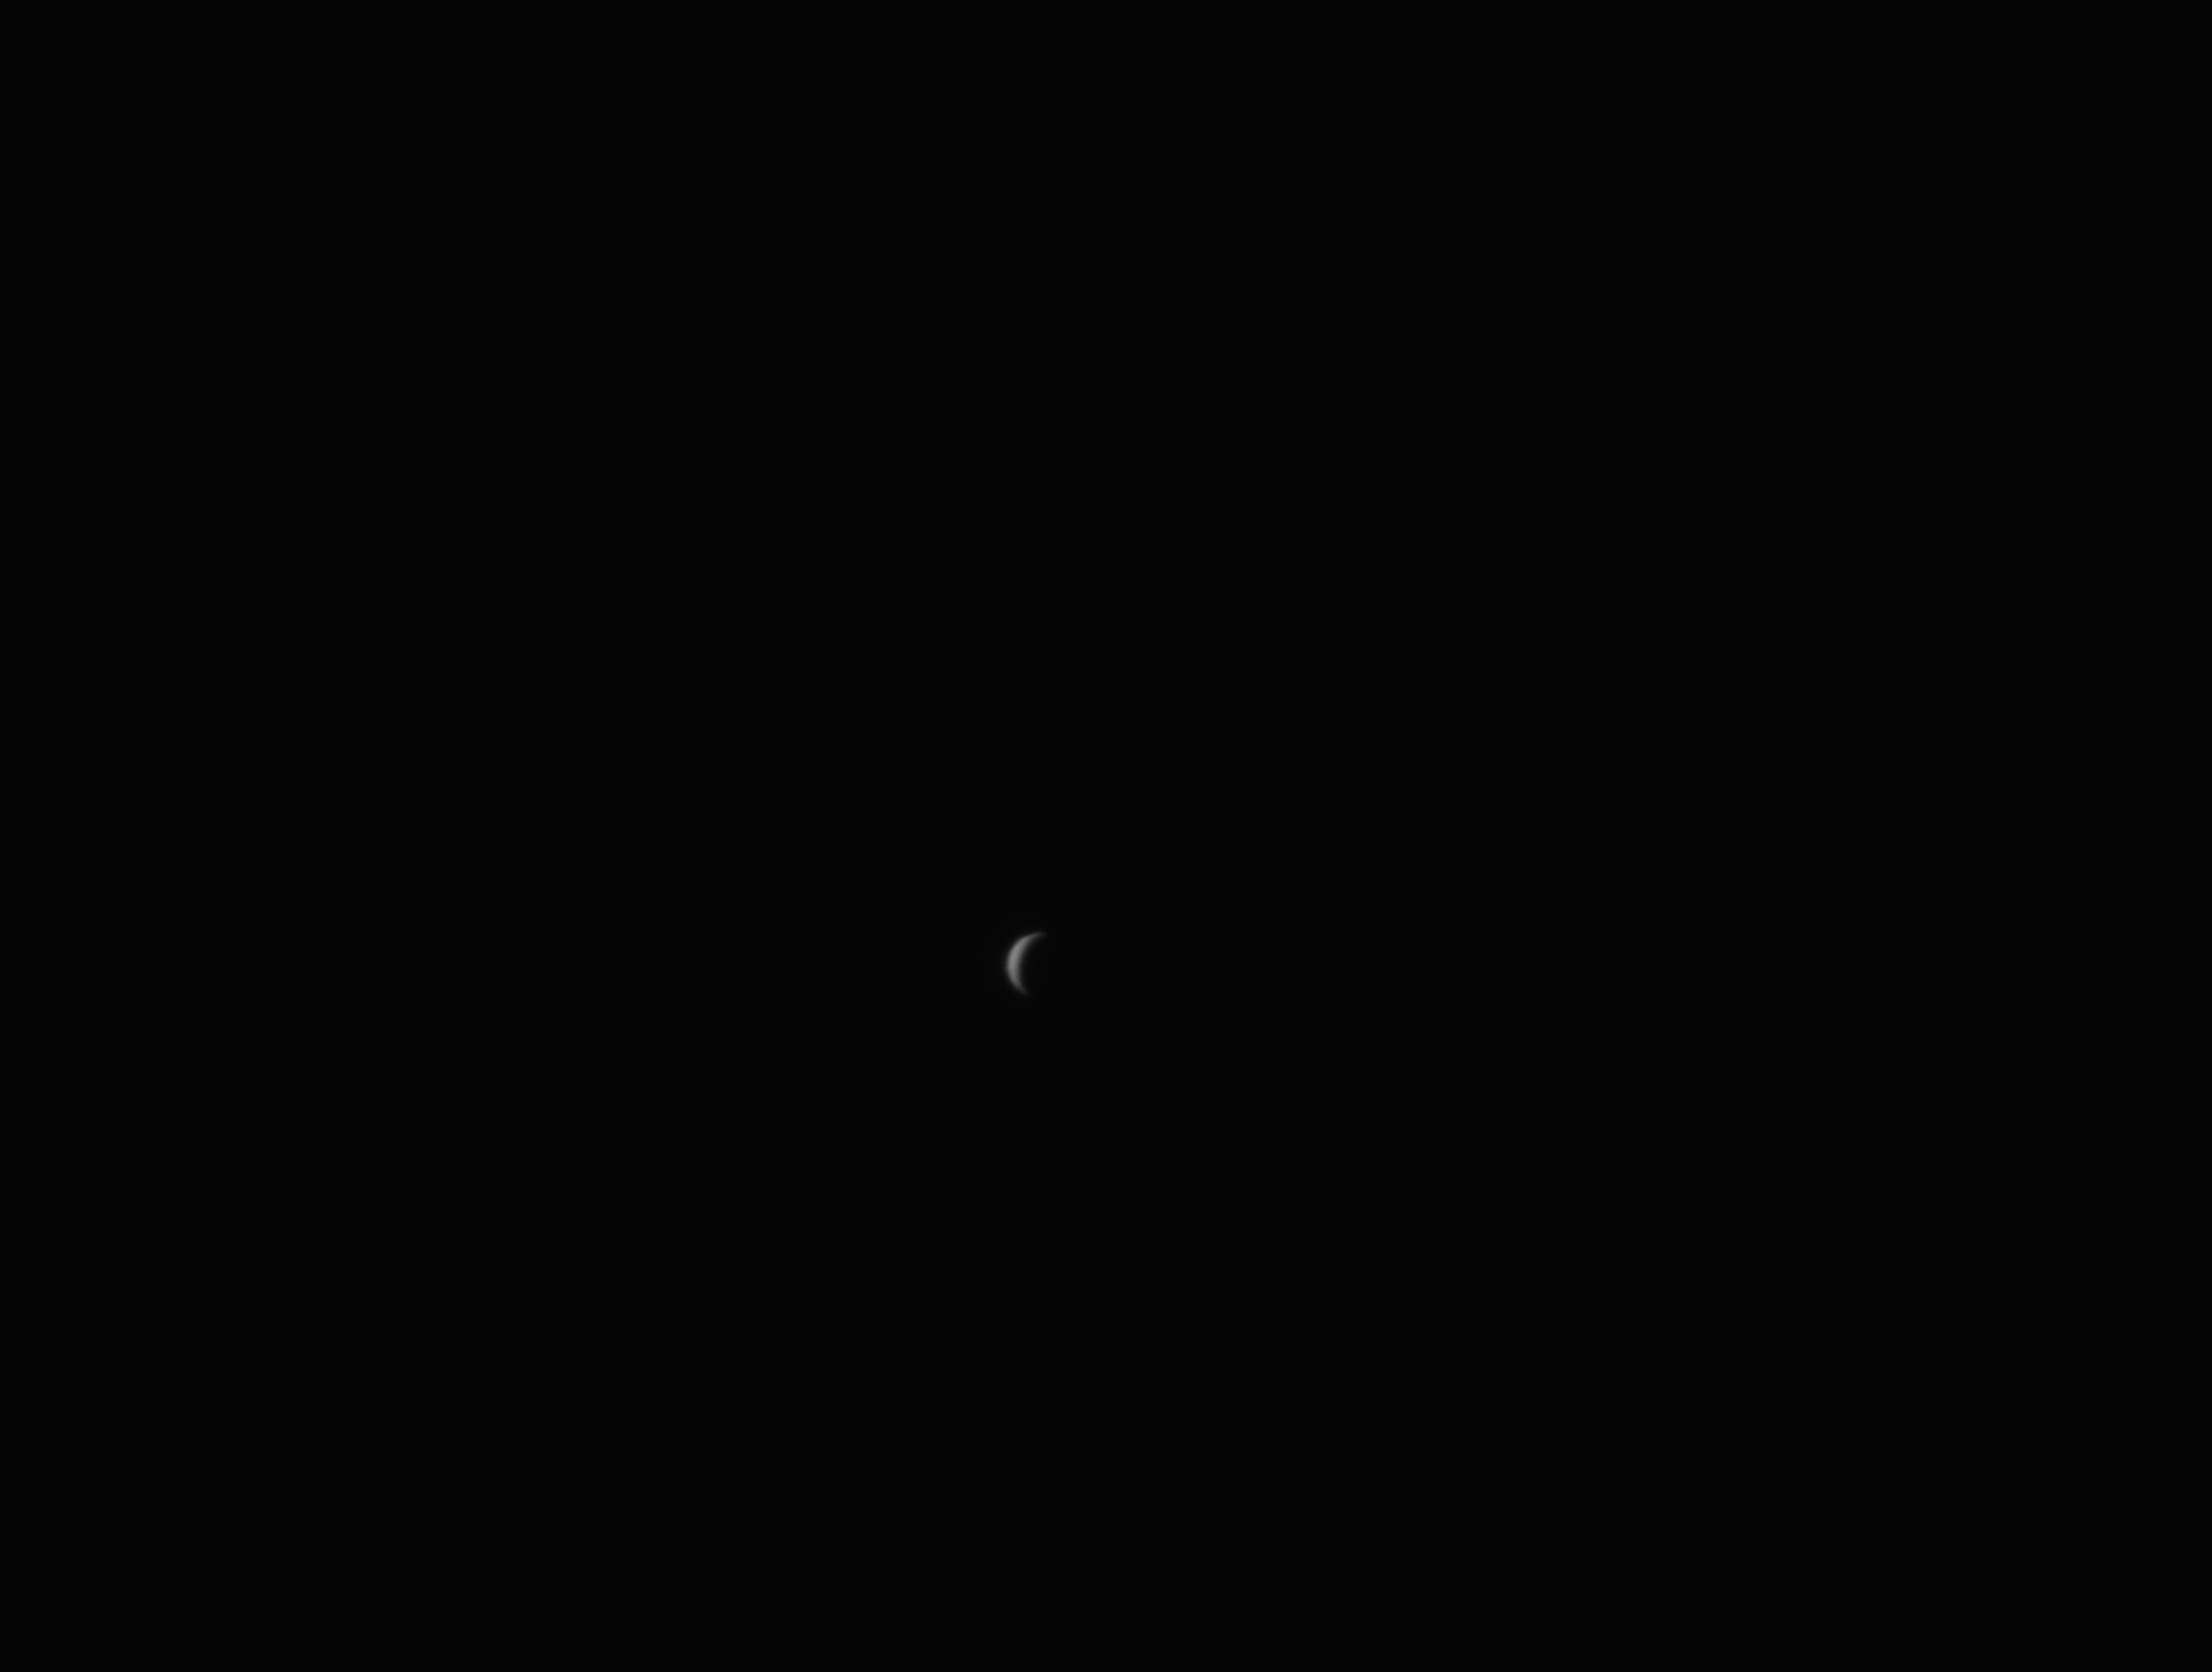
Crop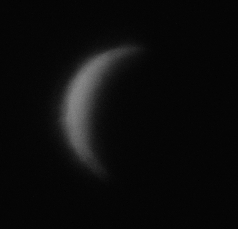
As the Tak has an Alnitak Flip Flat attached to it I added it to the profile I’ve created for the OS12 and Tak combination so that the panel can be opened to allow light through to the camera 🙂
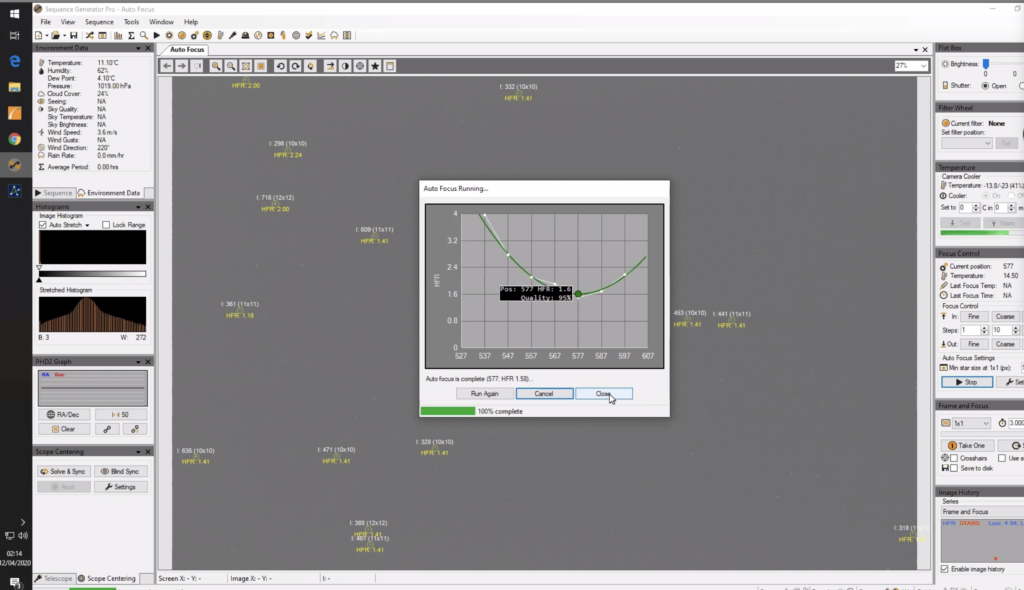
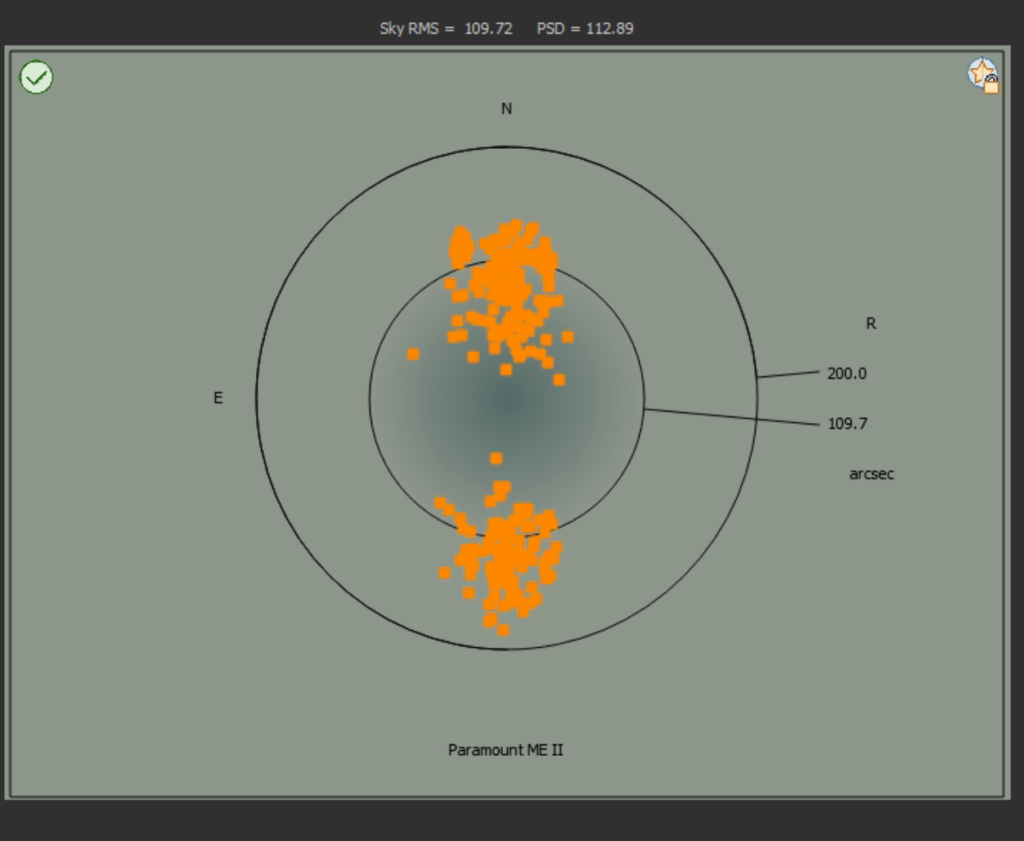
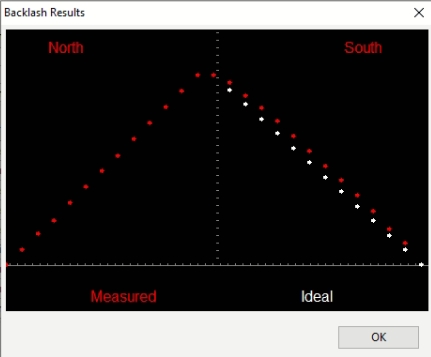
Guiding Assistant completed successfully and values applied for RA MnMo, Dec MnMo and Dec Backlash compensation.
.
Y scale = 2, Target Radius = 1.5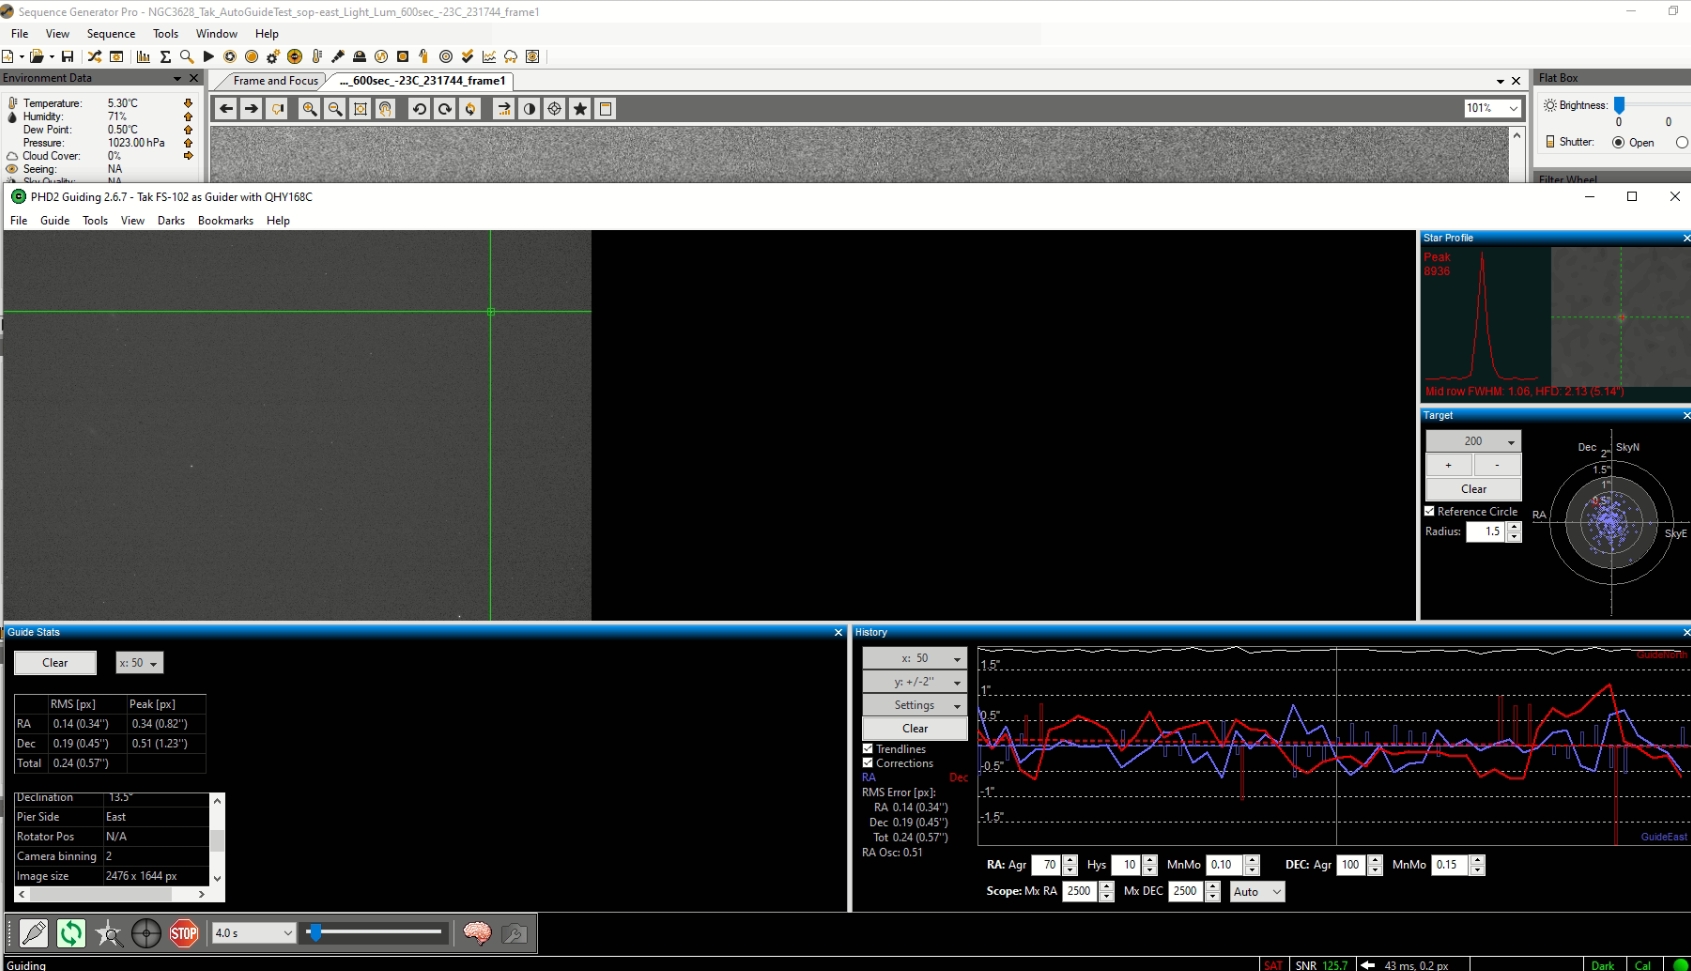
Sequence running for 2, 5, 7, 10, 12 and 15minutes.
2, 5,& 7 minutes exposures ok but trailing beginning to show at 10 minutes, quite evident at 12 minutes and very evident at 15 minutes.
Added 8 and 9 minutes to sequence, but both of these show signs of stars trailing.
Started a sequence of 24 x 5 minute exposures.
Aborted at frame 20 as the NGC3628 was now below the horizon.
The image has drifted and NGC 3628 has not remained fixed in the frame, so we still have issues with guiding as that is almost certainly the source of the drift.
02:22 Slew to M5, just off centre.
Slew to HIP 74975 to centre and focus.
De-selected guider.
02:57 Slewed to M5 and started a sequence of 24 x Lum and 8 x R,G,B 120s frames.
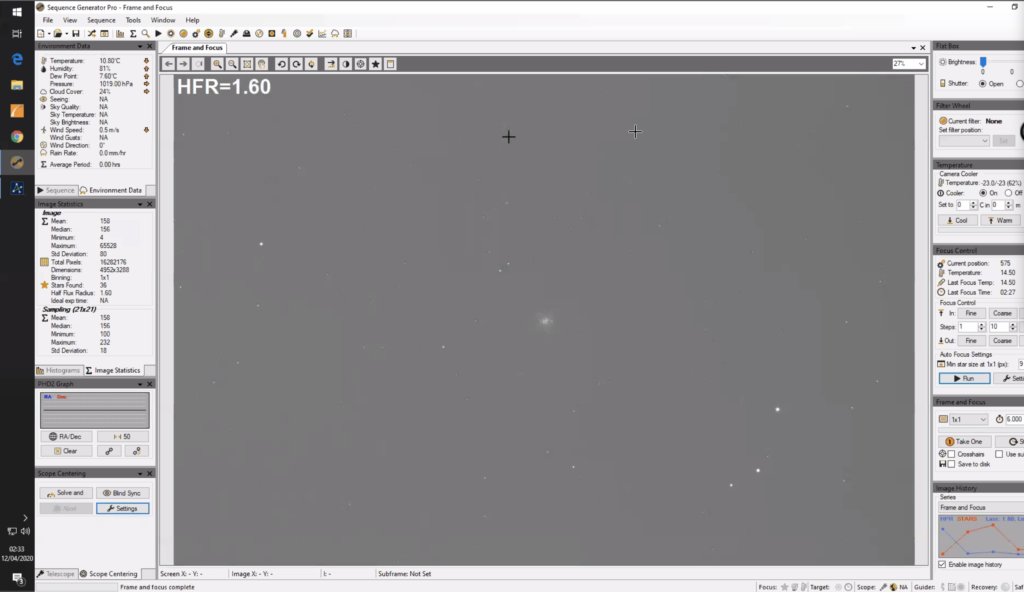
Sample Luminance frame: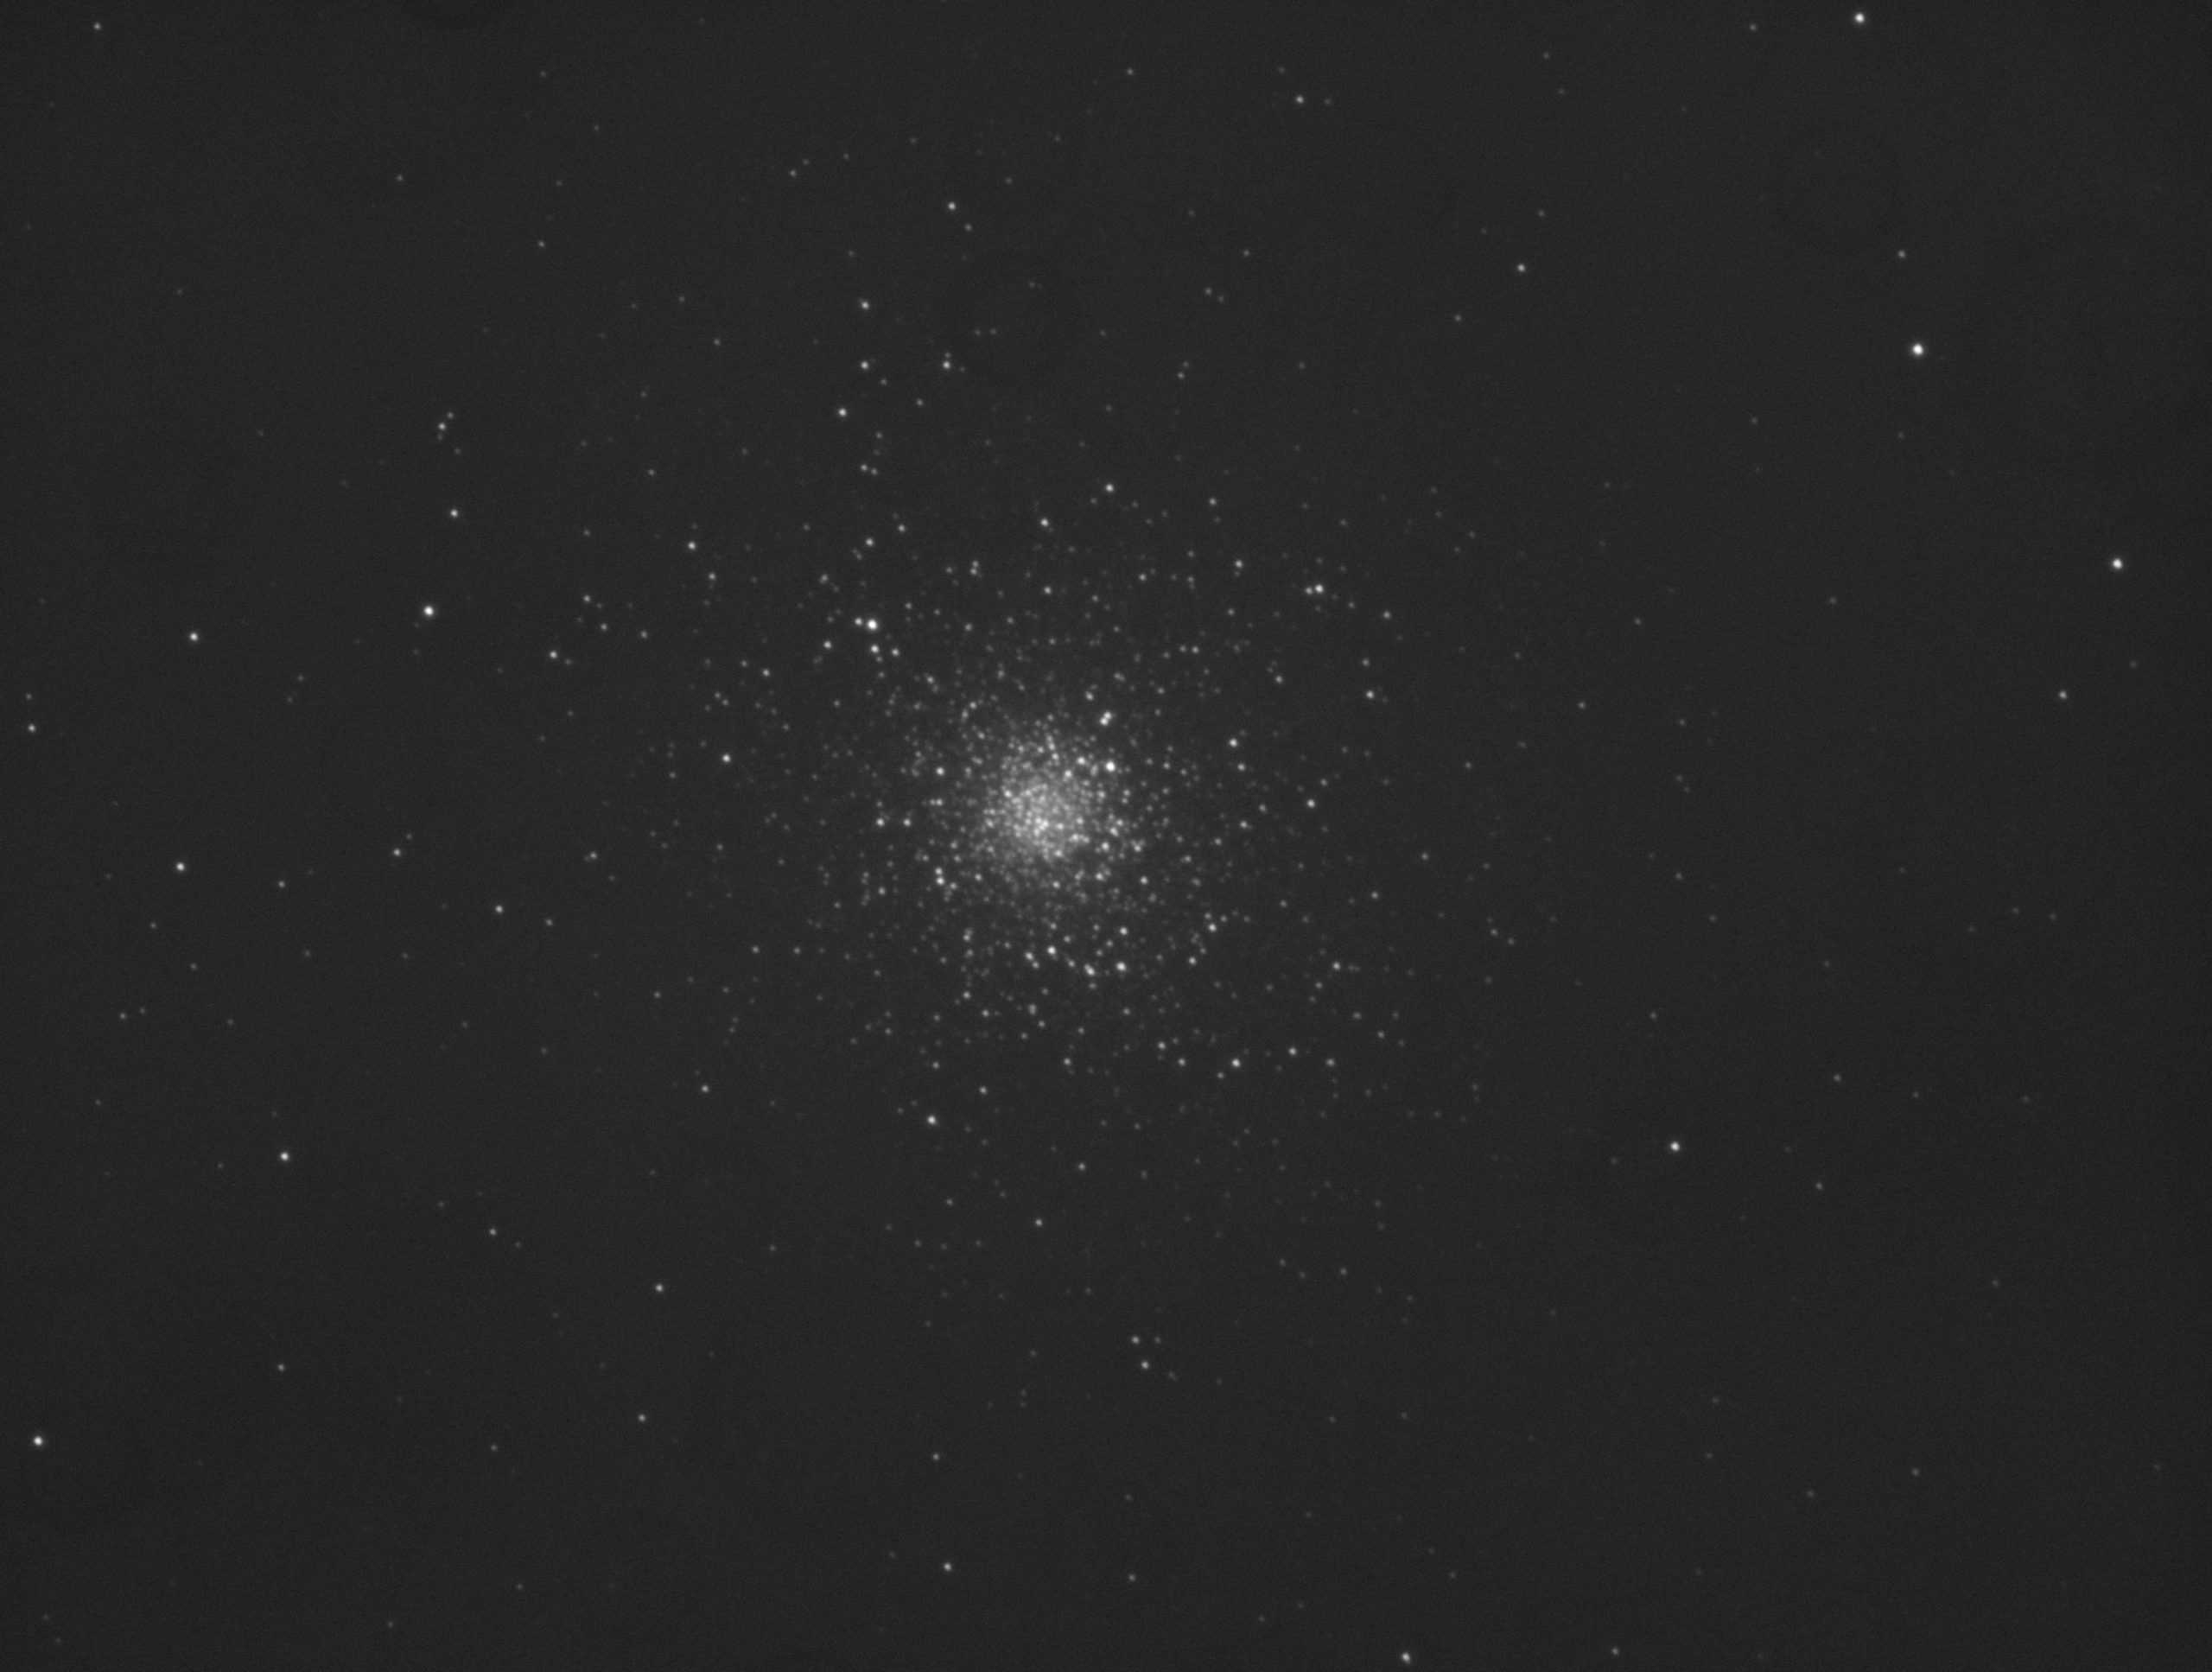
04:08 SQM graph has started to droop. Was 18.2 before 4am, now down to 18
04:10 ASC image brightening quickly
04:15 SQM 17.54
04:24 Camera Warming Up
Disconnected Guider
Telescope Parked and disconnected.
Dome Parked (shutter closed) and disconnected
De-humidifier on.
Camera Power Off
04:30 I’m off to bed