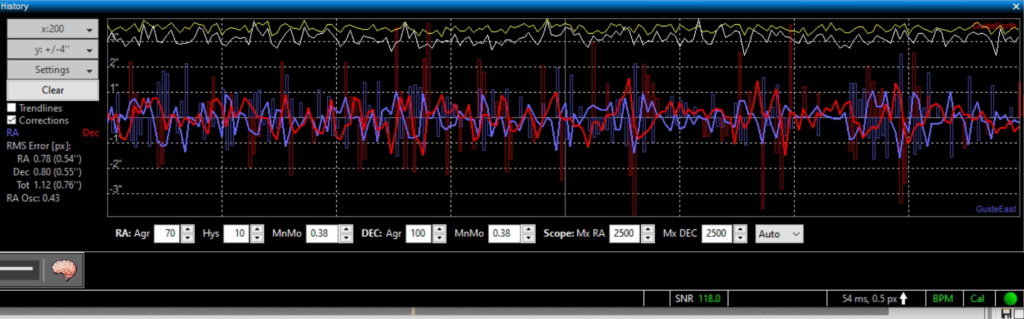
Now guiding on star to West side of mount around 0 degrees Dec and near the Meridian to see if problem reoccurs, graph looks ok but there is a slight regular pattern of error.
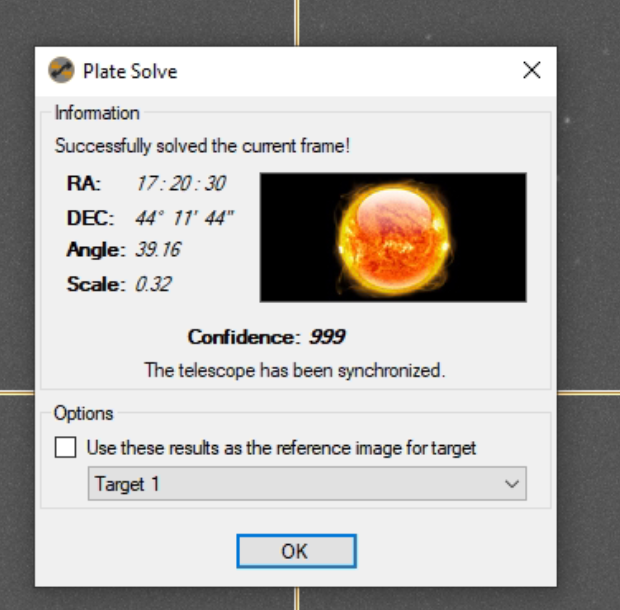
Slewed to M92 which is a glob currently at Alt +74, Dec 43 and on the East side of the mount where I had issues last night. I plate solved the image.
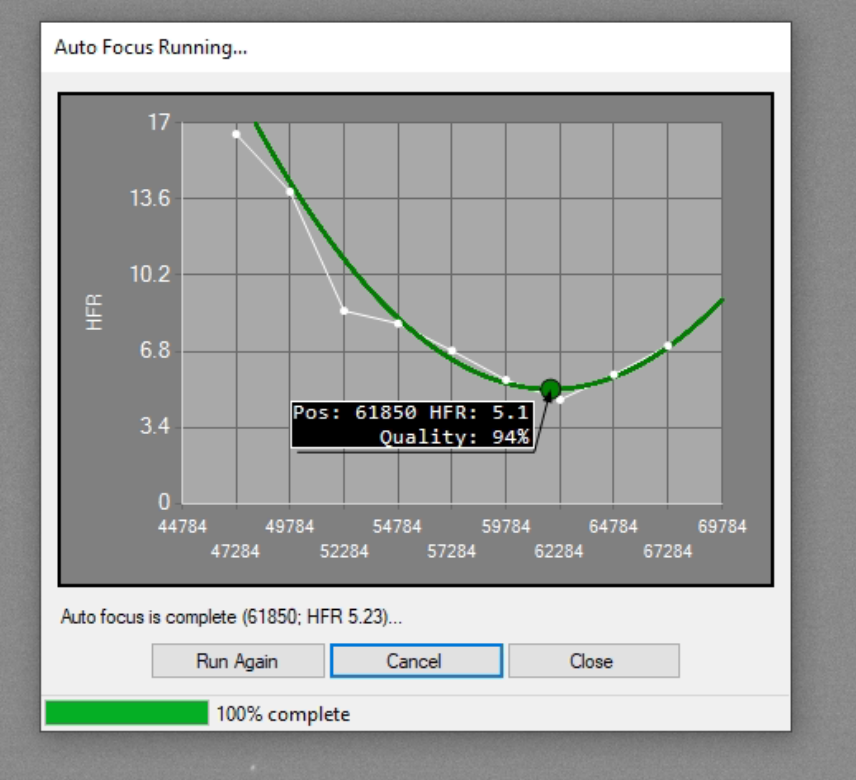
The auto focus run looked good
Found guide star by moving M92 slightly off centre. Now guiding. All looked good for a short while. So each section of PHD2 graph is 25 points, so when you have 100 points selected there are 4 sections of the graph. This mean each section/column represents own my case 250 seconds as I expose for 10 seconds, so just over 4 minutes per section. So the errors I saw last night were about 12mins apart. This cannot be the work gear as it has a cycle of 2min 29sec. This is from the latest Paramount manual for the MEII.
Tracking at the sidereal rate, one revolution of the worm takes 149.6 seconds (2 minutes 29 seconds).
The right ascension gear has 576 teeth.
The declination gear has 475 teeth.
The error I am seeing is about 4mins. I cannot continue imaging as every few frames are trailed.
Back out again tonight for a short period to look at guiding again. So with everything setup and a longer USB 2 cable in use I am now sitting in the warm Orangery. I will try again with the PHD2 software to guide and EzCap to acquire images from the QHY168C. I have set the Gain to 7 and Offset to 30 as previously used on my other QHY168C when used in Tenerife.
I polar aligned using PoleMaster. Then set about syncing the scope with Betelgeuse. It was only off slightly. The sync worked fine tonight. I then slewed to M35 and started the PHD2 guider software, selected a guide star and calibrated the guider. This worked well first time proving my new step size of 4 using a small ms time for the pulse worked.
Then I started guiding and very quickly realised the same problem as yesterday with DEC drift upwards. No amount of fiddling with the setting such as Hysteresis or Aggressiveness changes the constant upwards drift. I then remembered that I could calibrate the settings as the other night under Guider Assistant. I ran this made the changes but still the upward drift.
I then remembered that on the Paramount MEII in the dome I had to drift align with PHD2 to get it properly polar aligned and that PoleMaster was only good enough for short exposures or rough guiding. So I set about drift aligning.
PHD2 Drift Alignment
The first thing to note is that the polar alignment was out by a fair bit to get the accuracy I require in both azimuth and altitude. I have now adjusted both and the graph seems a lot smoother.
So in all it took me around 1 hour to drift align and just as I was about to test the clouds rolled in!
So I used to be able to guide on the Paramount ME without the need for an ST-4 guider cable. This is achieved through information being shared about the position of the star to PHD2 and it then sending commands to the relays on the Paramount ME, however I had yet to be able to get this working with the Paramount ME II and using SGPro as the host program.
So for a short period on the evening of 5th August 2019 I ventured out to complete the setup and get the guider working.
As information is key I had spent time re-reading pieces of the Paramount User Manual, The Sky X Manual and the PHD2 Manual, the later having partial information needed to setup, another piece of information was in The Sky X Manual.
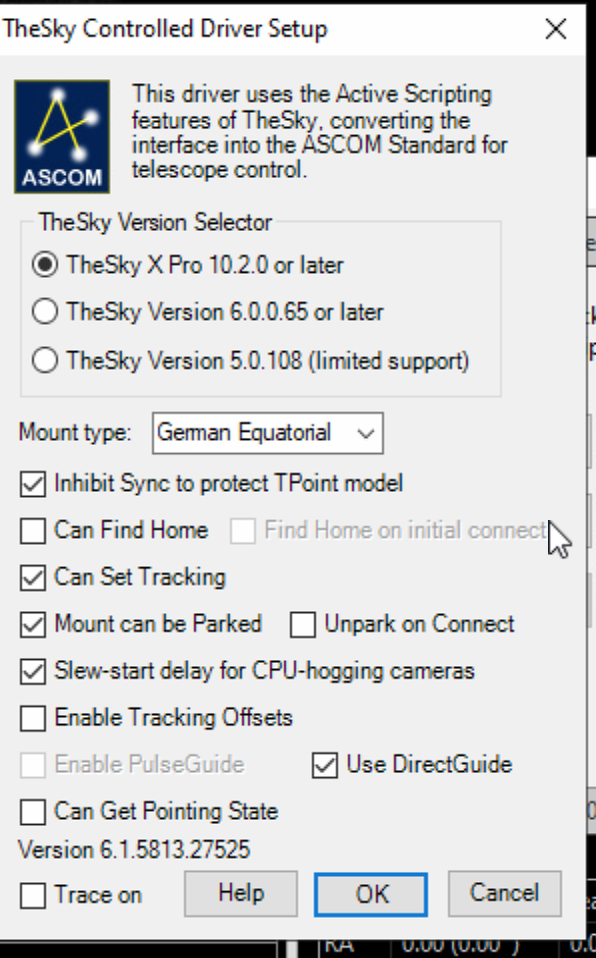
So what did I do? Well DirectGuide is a bit like Pulse guiding that is supported on other mounts, however for the Paramount ME II pulse guiding is NOT supported. So you need to configure and setup for Direct Guide, but where?
Looking at the Connect Equipment window in PHD2 you are presented with 3 options, How to connect the camera, how to connect the mount and a 3rd option around how to connect an Aux mount. It is important to understand when to use that 3rd option around Aux mount as that is what can cause confusion when trying to get Direct Guiding to work.
Aux Mount should only be chosen if you are using an ST-4 cable, if you are not then this option should remain set to None. If you inadvertently select ASCOM Telescope Driver for The Sky within this box the mount will not behave correctly. So leave it set to None!
Configuring Camera and Mount ONLY
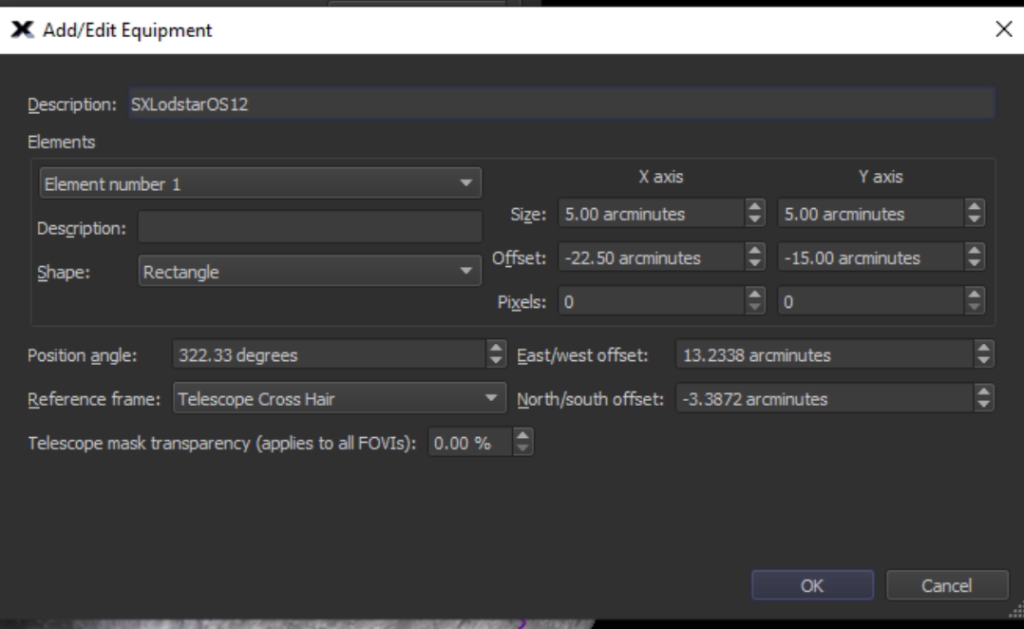
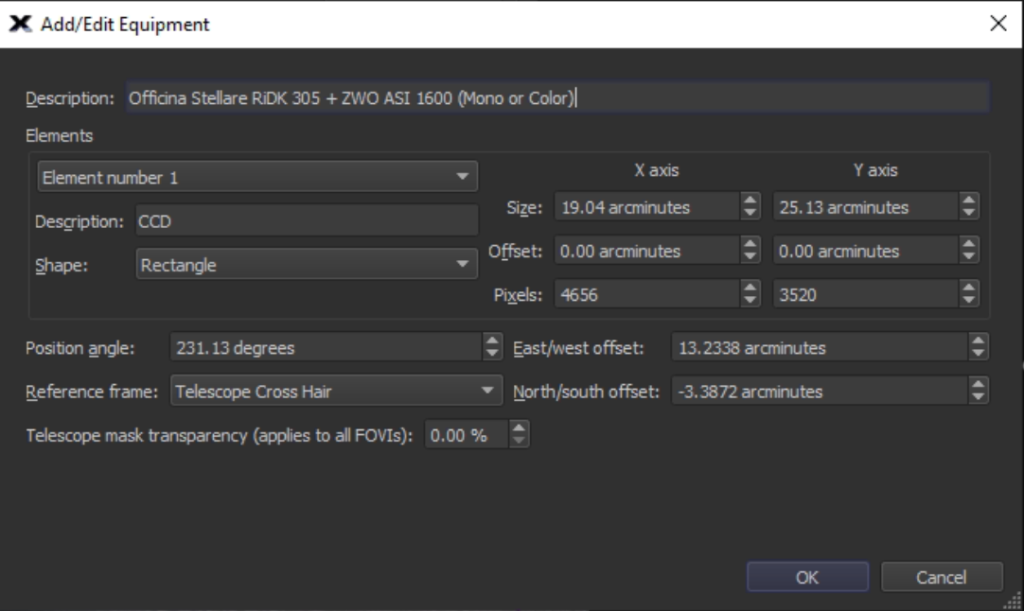
Camera needs to be set for the camera of choice, for me my trusty Starlight Xpress Lodestar is selected. For the Mount I selected ASCOM Telescope Driver for The Sky. Next you need to configure the Mount by clicking on the spanner and screwdriver icon next to the option.
Under here you can configure The Sky Controller Driver Setup, selecting The Sky version, X Pro for me and various options for the mount itself. The key checkbox is Use DirectGuide. This menu of options is from the ASCOM Chooser and you should select any settings you wish to enable. Mine can be seen below.
ASCOM Chooser for Mount and DirectGuide setting
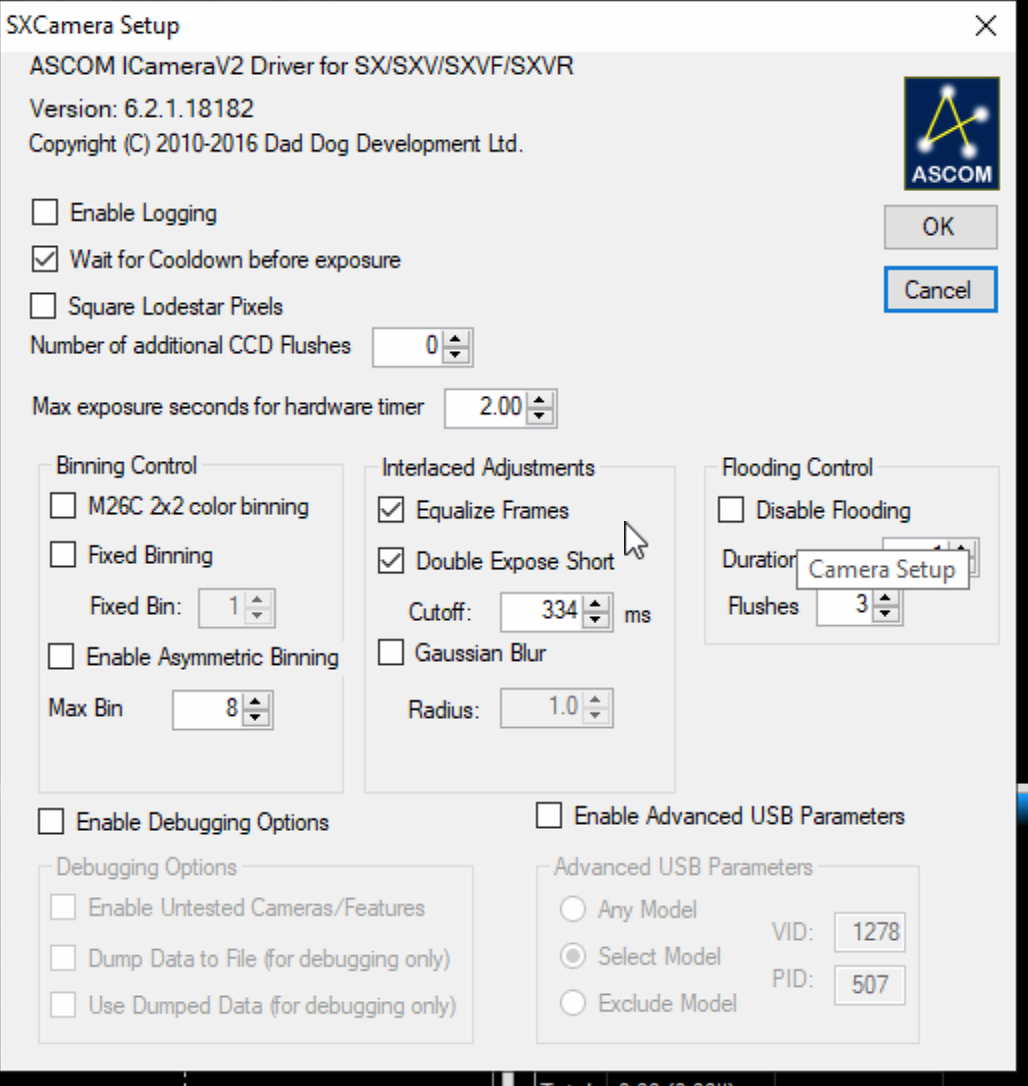
I quickly configured the Camera also and below are the settings that work well.
SX Lodestar Camera Configuration
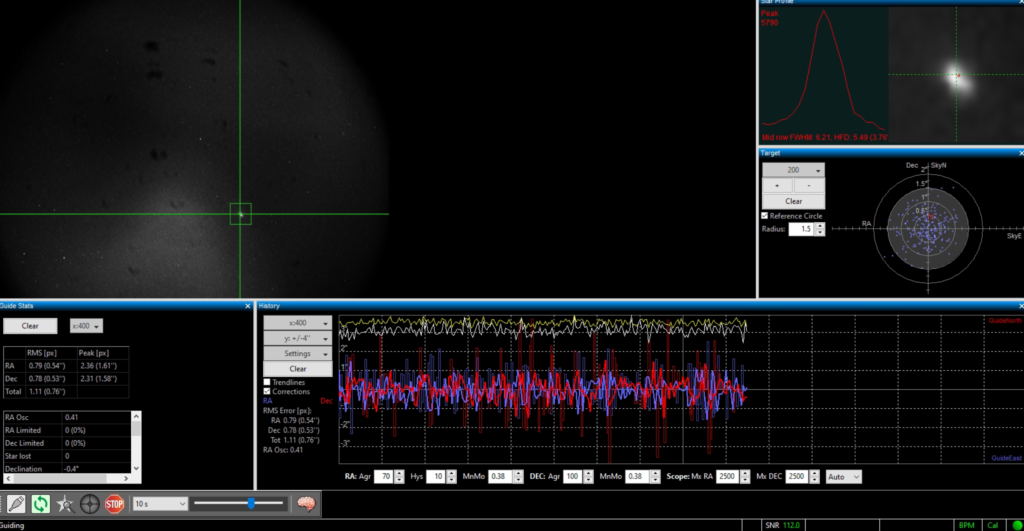
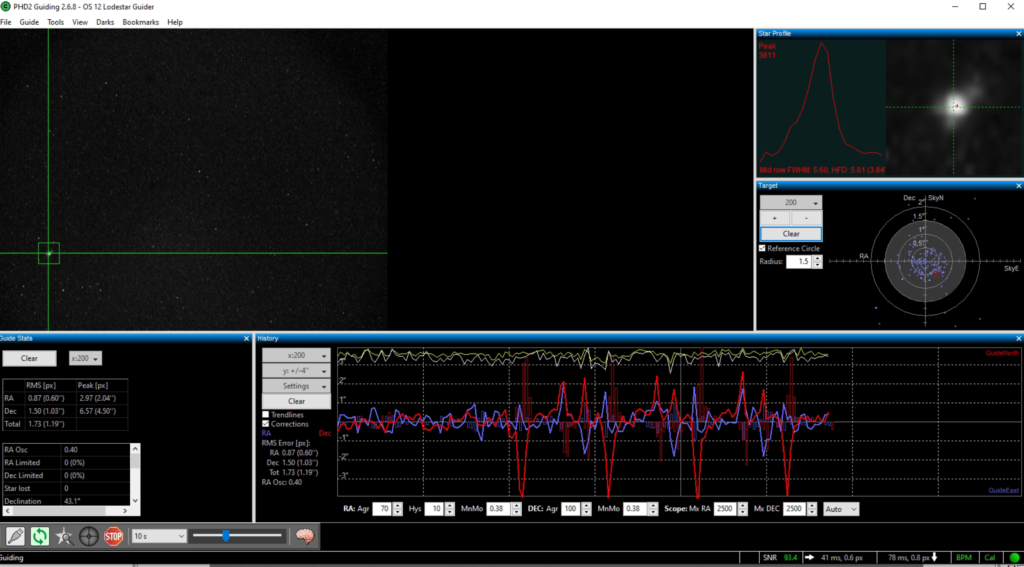
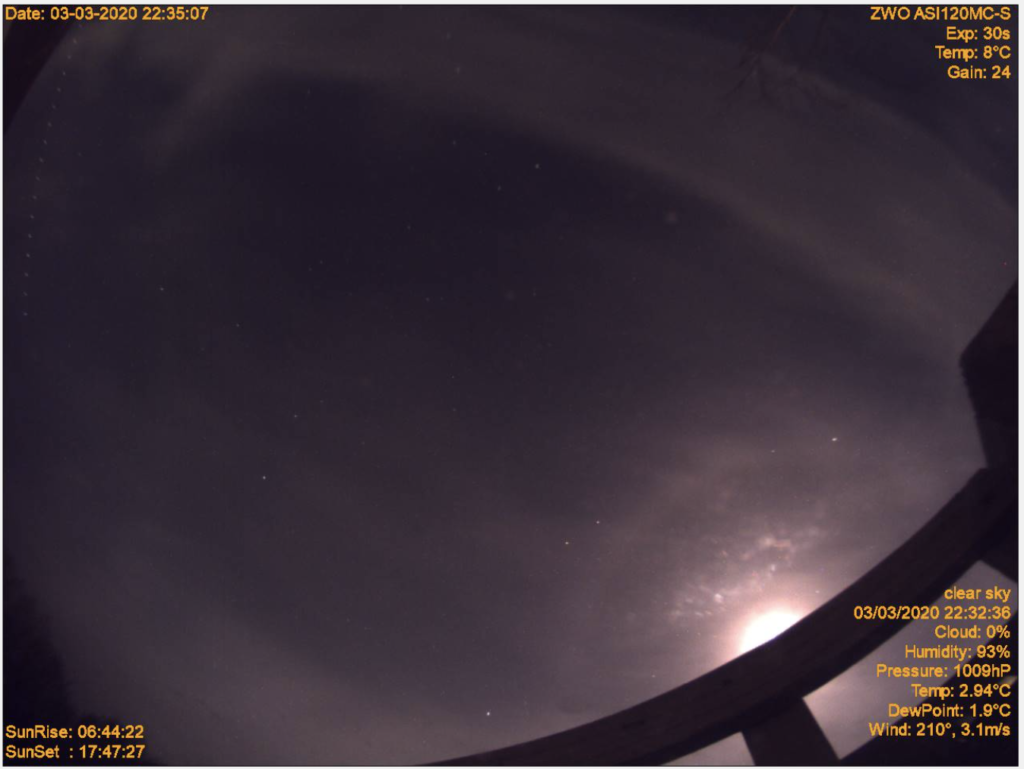
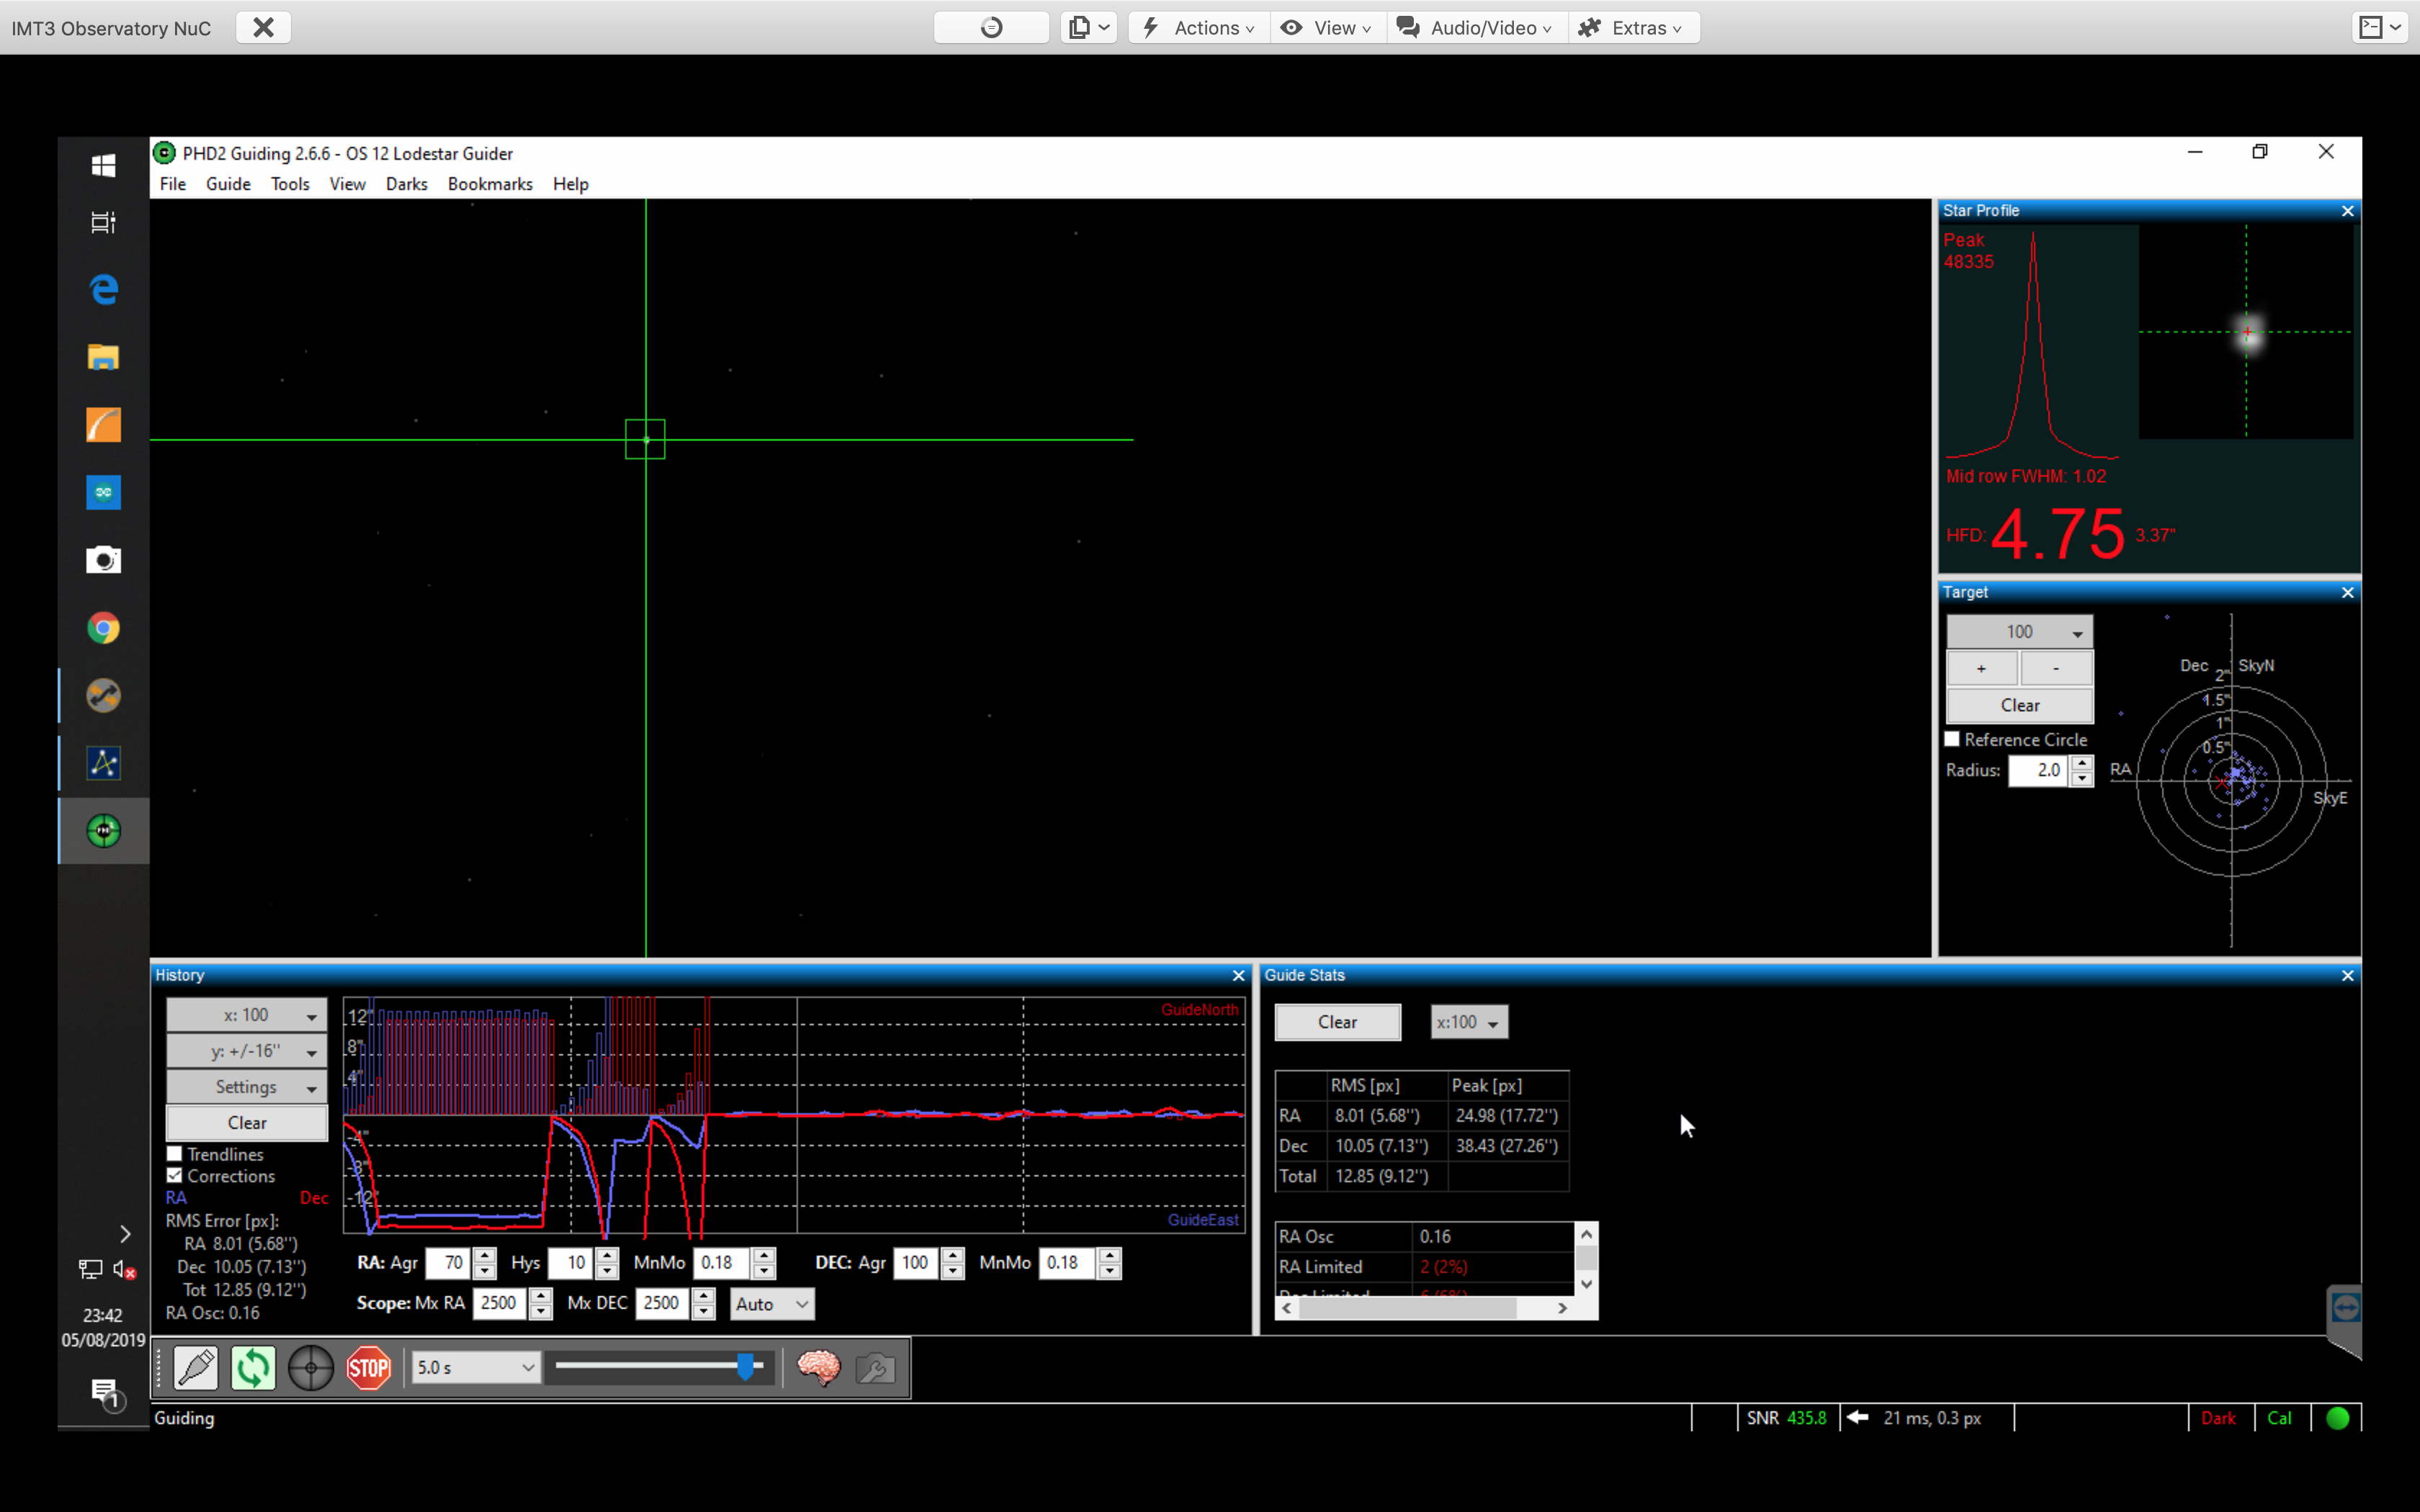
On connecting to both the camera and mount, selecting a guide star and calibrating the guider it is apparent that I have configured the setup correctly. All is now well with the guiding and it produces a smooth chart with tonights seeing as can be seen after several dips produced by cloud at the begging of the guider graph.