
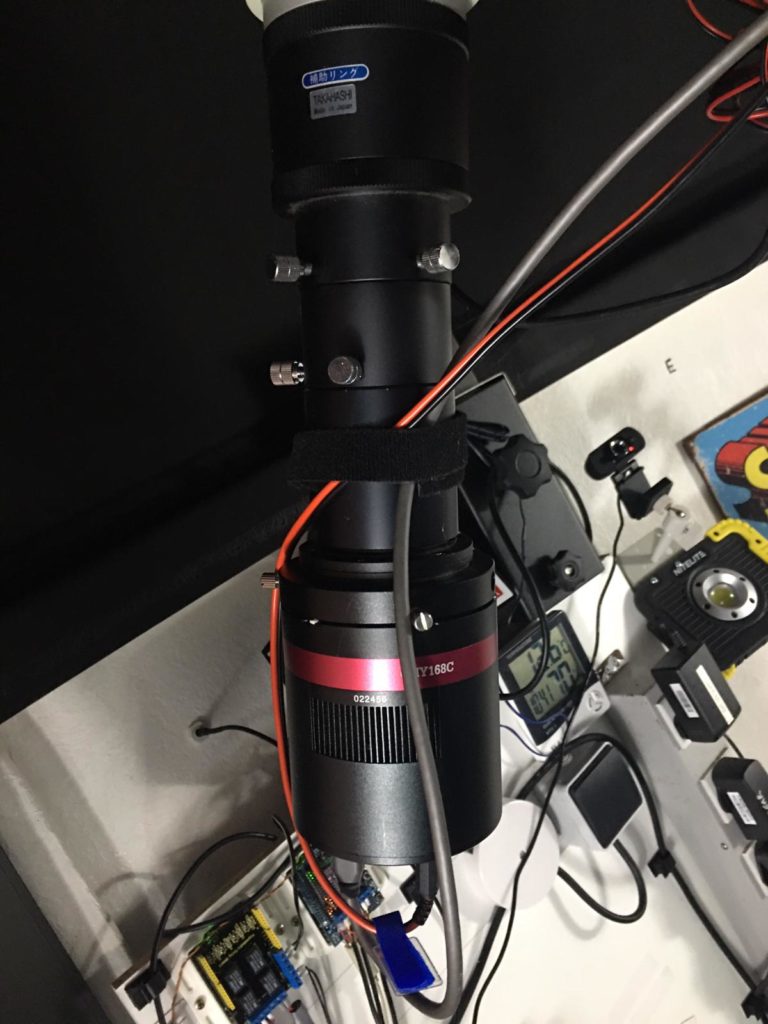
I started the evenings session grabbing some frames of Comet C/2019 Y4 (ATLAS) with my Takahashi FS-102 and QHY168C OSC Camera.
After successfully acquiring some data of various exposure times I decided to try and grab some data from GingerGeek’s Esprit 120, the weather station was reporting Haze and I could see wisps of clouds on the All Sky Camera so it wasn’t worth spending lots of time gathering data but worth using the opportunity to work out a procedure for chasing comets. As I hadn’t switched Dome profiles I found that the view through the Esprit was partially obscured so I switched to Dave’s 12″ OS only to find that the last thing he’d been doing was collecting Dark frames and the cover was still on the 12″.
I was in the process of switching back to GingerGeeks’s Esprit when Dave ping’d me on WhatsApp to say he’d woken up and remember that he cover was on and did I want it removed … perfect timing !
I managed to grab some frames for comparison with those I’d taken with the Tak earlier in the evening but aborted the sequence as clouds were messing up the results. So decided to try GingerGeek’s Esprit one more time as the clouds appeared to have passed by.
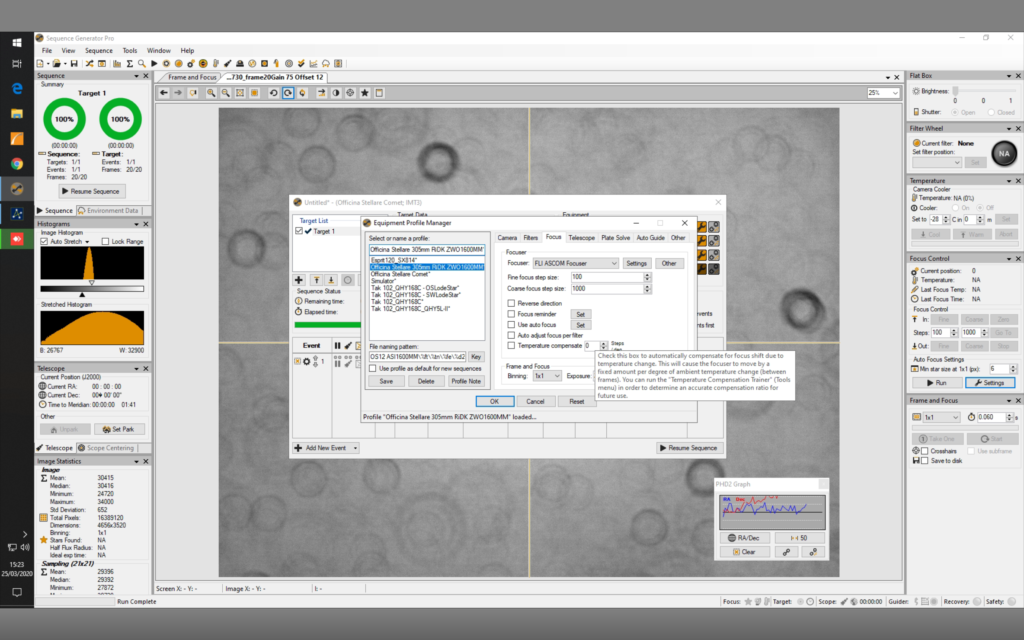
I found I had to create a new Profile for GingerGeek’s Esprit as the only profile available had the ASCOM Telescope Driver for TheSky selected and as Dave had mentioned to me previously, this was not needed when Tracking a Comet as that would be done by the Mount under direct control of TheSky X.
This does create a problem in that with these profiles you cannot Plate Solve and Centre the object as they is no Telescope for SGPro to work with, so we’ll need to figure out how to do that in TheSky X or start the session with the Telescope selected, centre and frame the comet, set the Tracking Rates to the comet then switch to a profile without a Telescope to run the SGPro sequence.
The weather deteriorated and the Wx Stn Auto closed the slit at 01:27 part way through a 15minute exposure.
Another night of good lessons learnt.
Blog
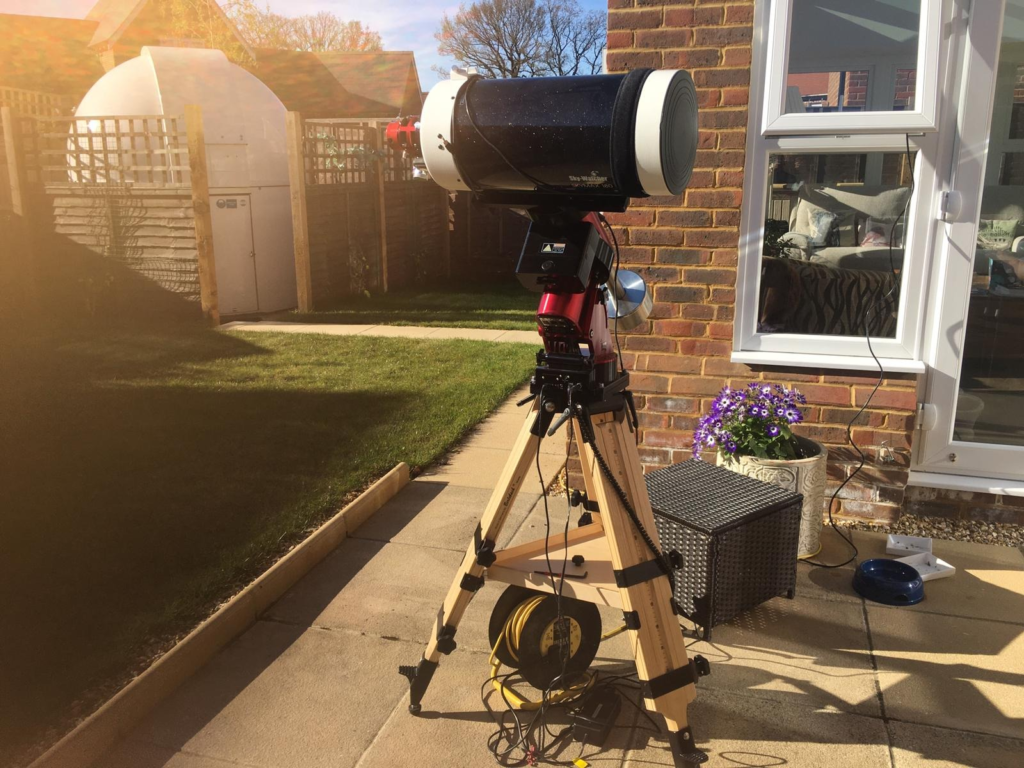
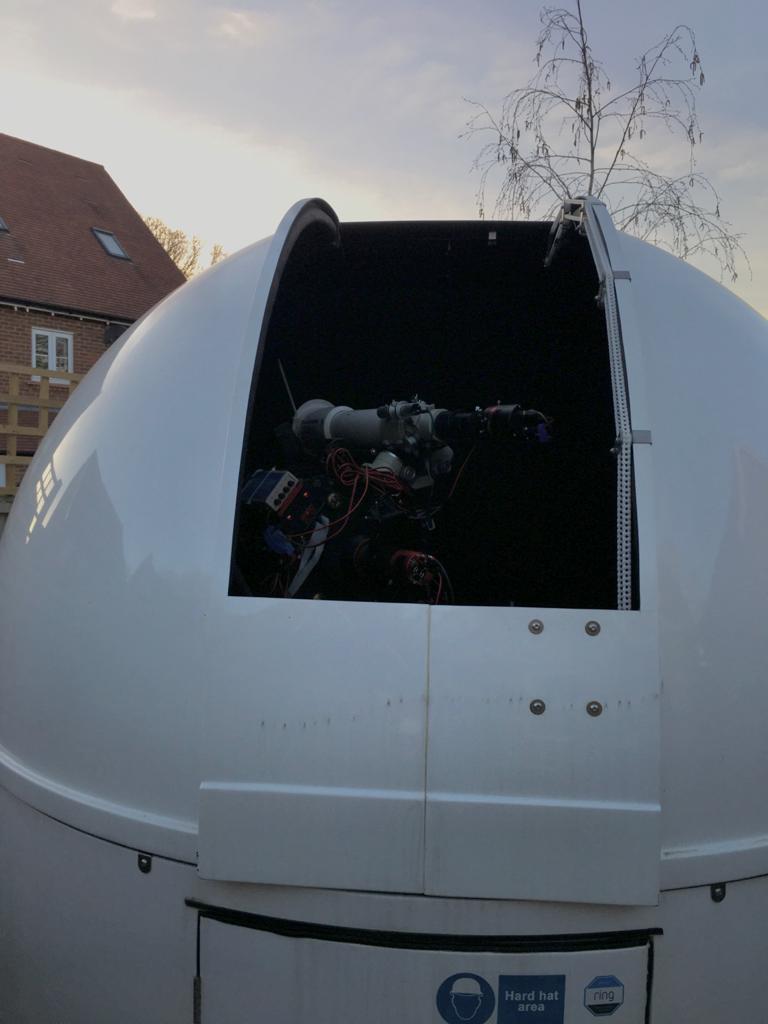
Viewing Report 4th April 2020 – IMT3 & Travel Setup Mak 180
Viewing time period – 18:42 – 04:21
Hoping to perform a TPoint run tonight, along with gathering some frames on M53 through all 3 scopes (along with Darks and Flats for the Esprit), as we only got some frames through the Tak yesterday. I also hope to try out the Mak 180 Sky-Watcher on the portable mount at the same time from the garden. I will also join the BAS Zoom meeting with all the rest of the gang on as we go through the night, which we have been doing for the past 11 days due to this unprecedented lockdown of society globally due to the Coronavirus, Covid-19 SARS-Coronavirus2 outbreak.
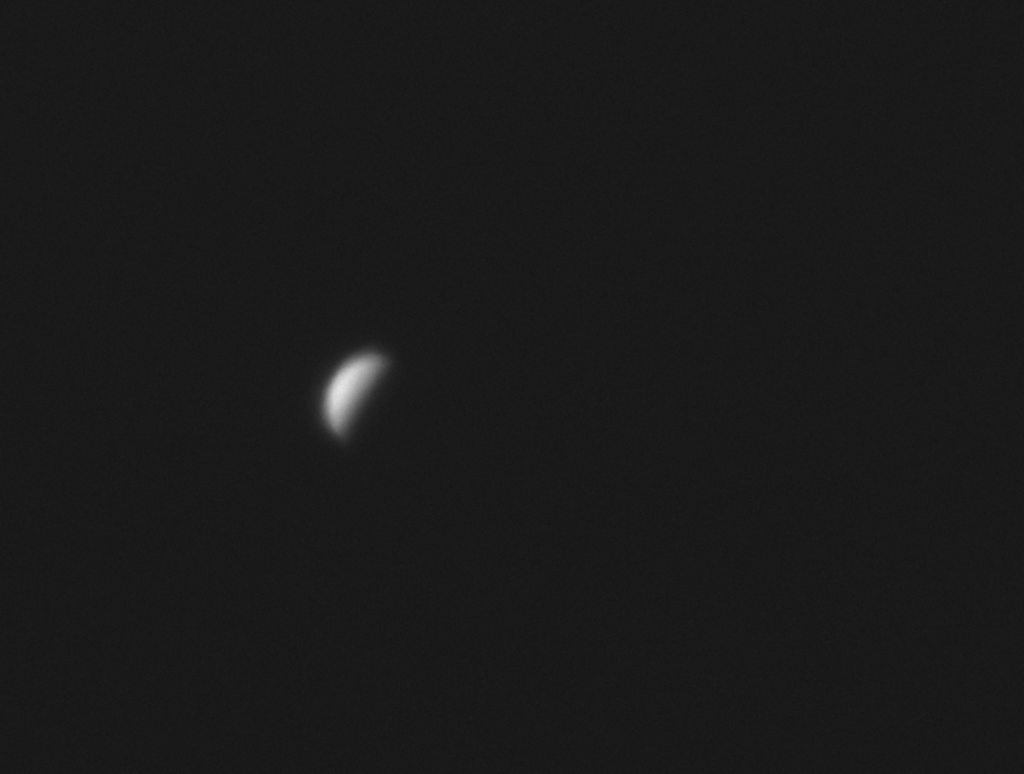
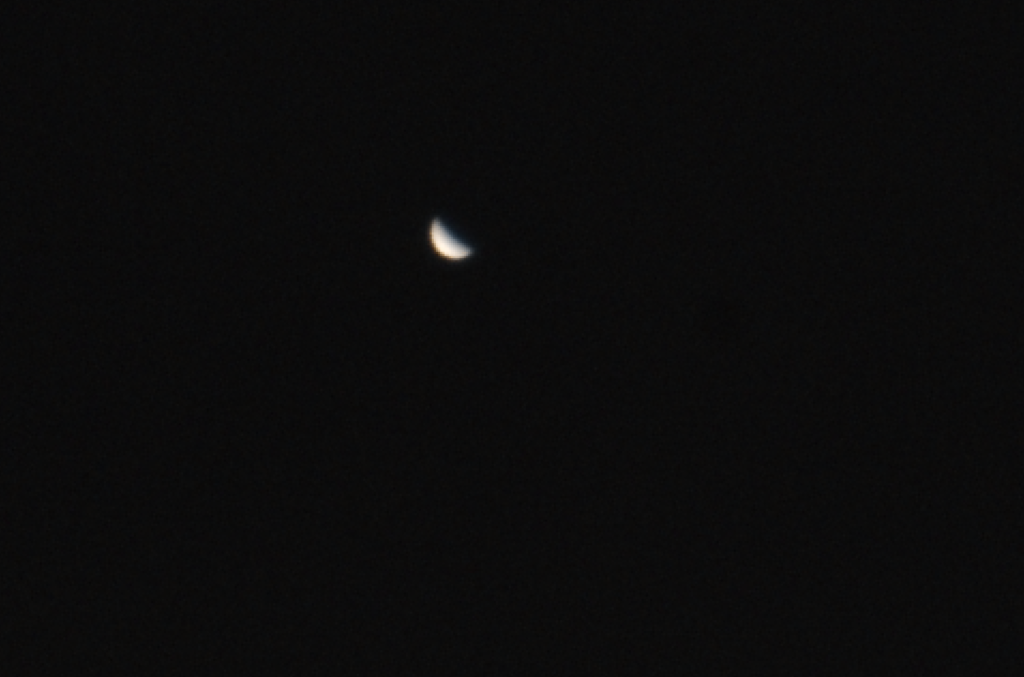
So progressed well tonight, spent the whole night on Zoom with the other astronomers so good company. Managed to image the following Lunar 100 objects, L13 – L30 – L42 – L53 – L59 – L65 – L68 as well as Venus which was at a phase of 44.75%.
@23:53 finished imaging with the Mak 180
Unfortunately M35 has now set and Bob is still imaging the Moon so I will have to grab M35 tomorrow early if it is clear……
I saw big problems with calibration with PHD2 which need to be looked at on the Tak.
@4:21am went to bed whilst the IMT3 was taking Darks
Things to still resolve
- Check out why WSX is loosing connection and shutting the dome
- Clean filters for the 12″ to get rid of doughnuts
- Clean sensor for QHY168C
Viewing Report 3rd April 2020 – IMT3
Viewing time period – 18:56 – 00:59
So early on as always I opened the dome to cool down. Tonight Bob, Gingergeek and I want to image Venus in the Pleiades. Even before it got dark and as I slewed the telescopes to Venus, it was visible straight away so I took a quick image, 0.001s from both the 12″ and Bob’s FS102.
I then went off to watch TV with Helen whilst Gingergeek and Bob grabbed some more images of Venus.
Around 10pm I re-joined Bob and GingerGeek and we set about imaging Venus as it passed by M45 Pleiades in the Tak FS 102. We then went on to perform autofocus on the Tak followed buy setting up the autofocus on the Esprit 120ED
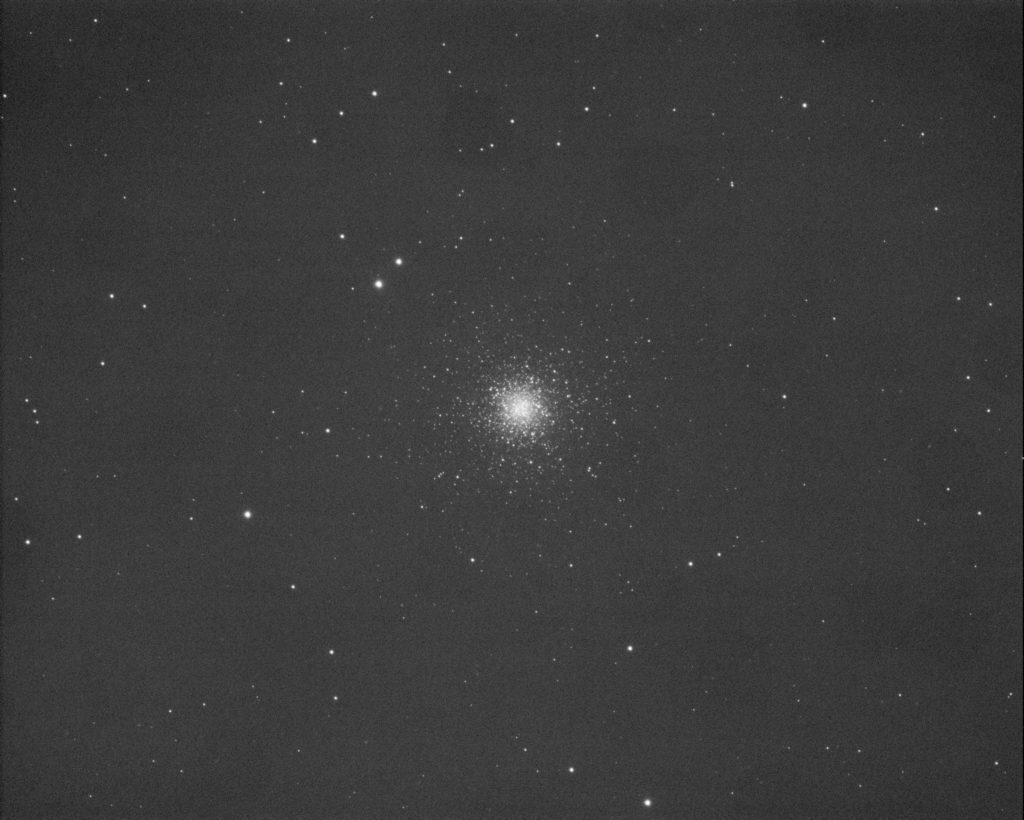
Before the clouds decided to put a stop to play, we took some images of M53 the globular cluster on the Esprit around 00:10am using the Luminance filter.
By 00:59 the clouds finished play 🙁
Viewing Report 31st March 2020 – IMT3 12″ – Sync and Solve
Viewing time period – 20:30 – 22:20
Tonight GingerGeek, Bob and I wanted to make sure the newly installed version update for SGPro was working. In particular we wanted to get the sync and solve working, so that we could centre an object, but also the autofocus as the was a major update.
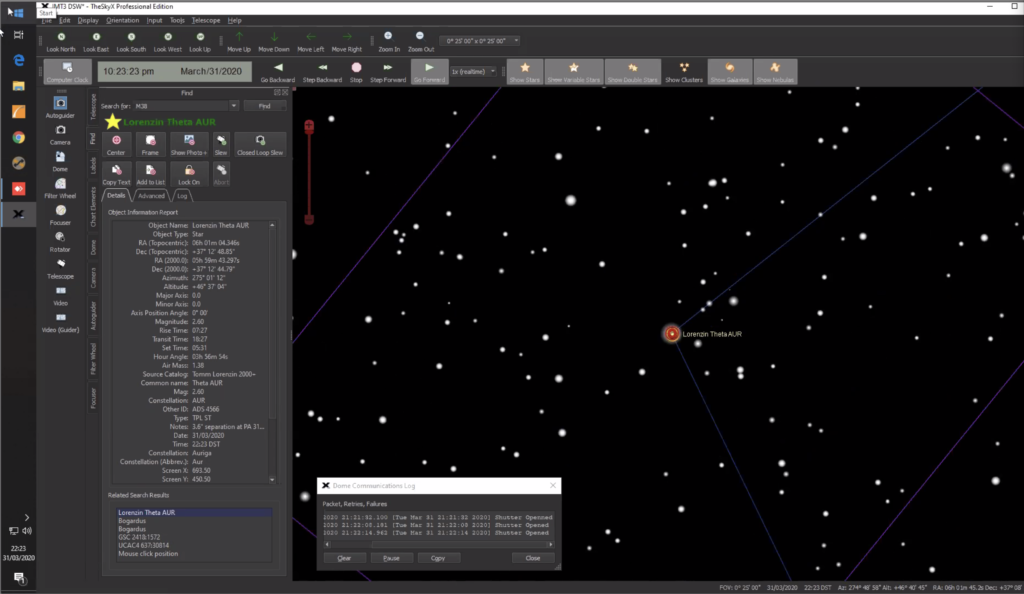
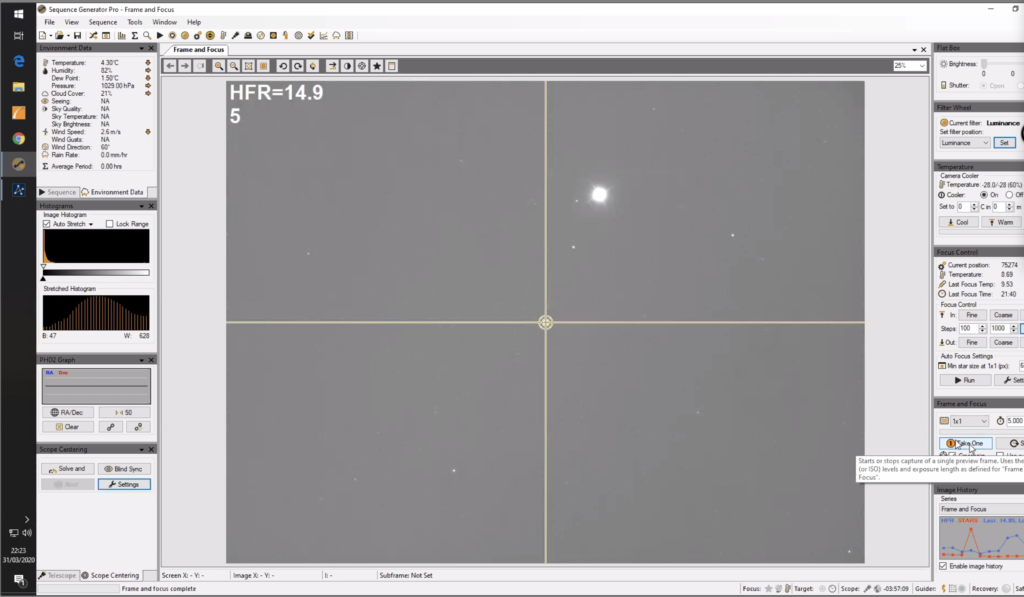
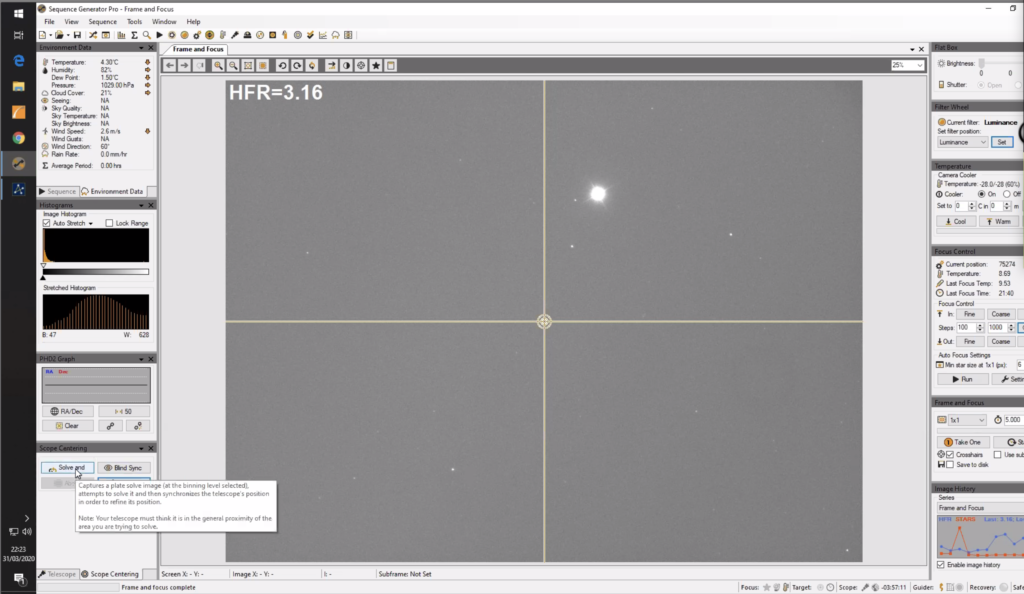
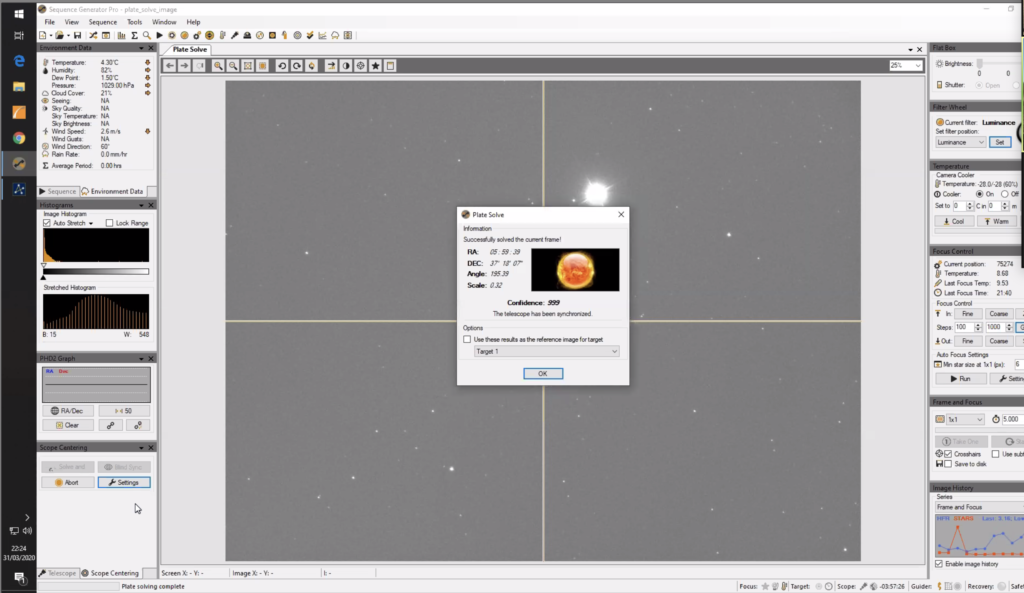
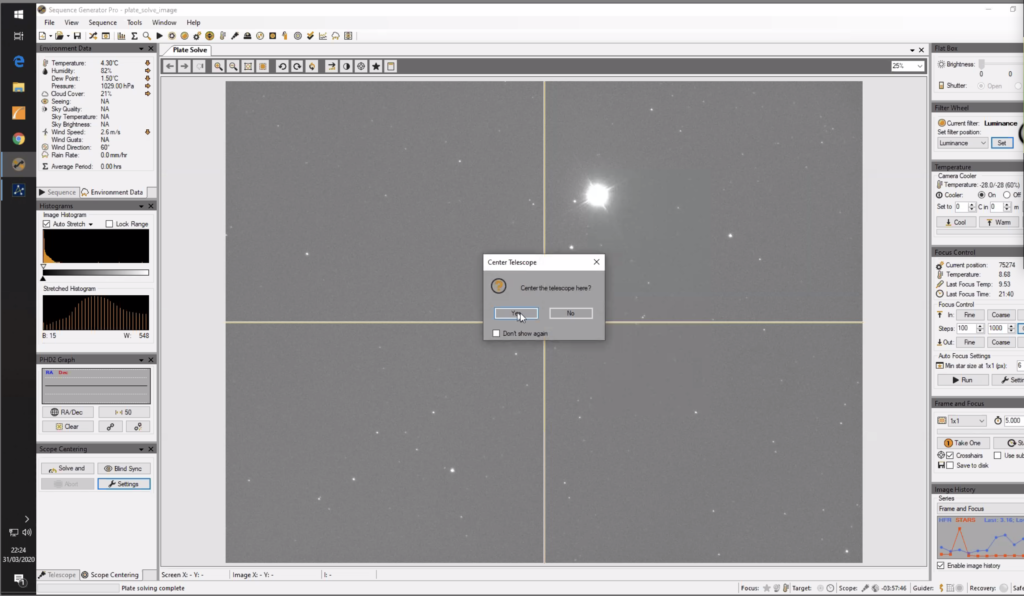
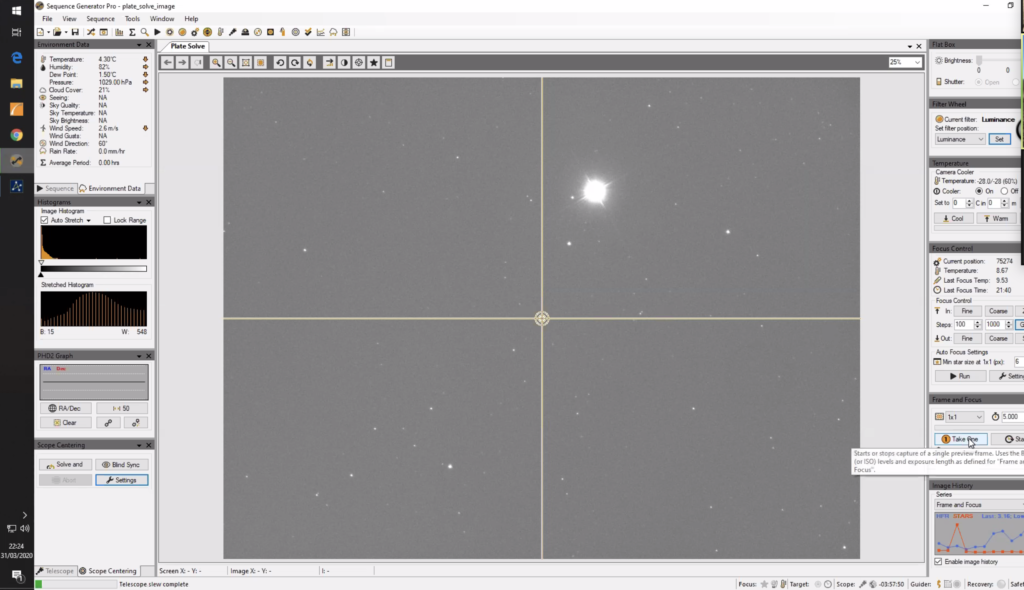
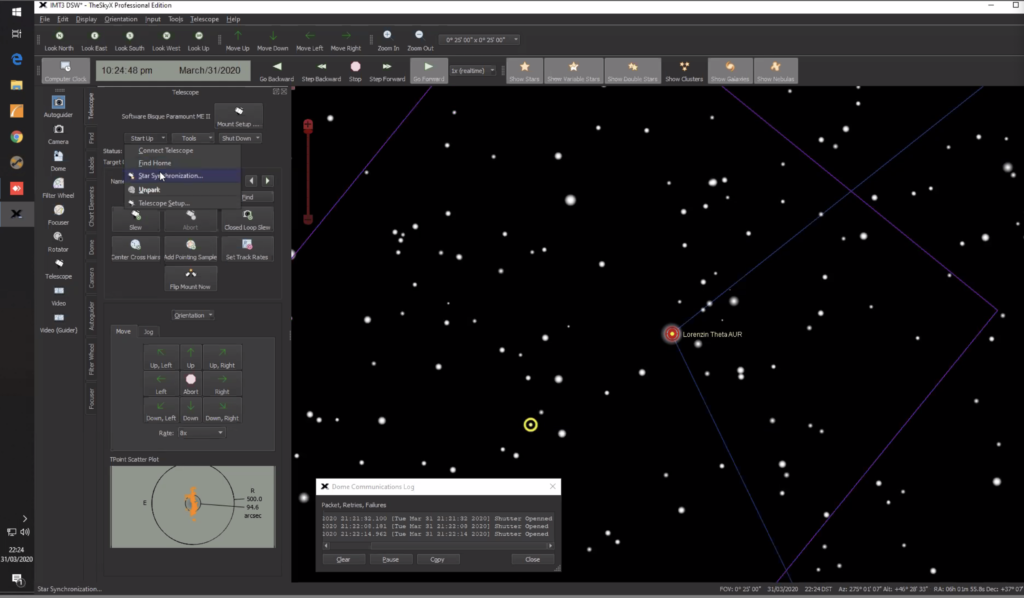
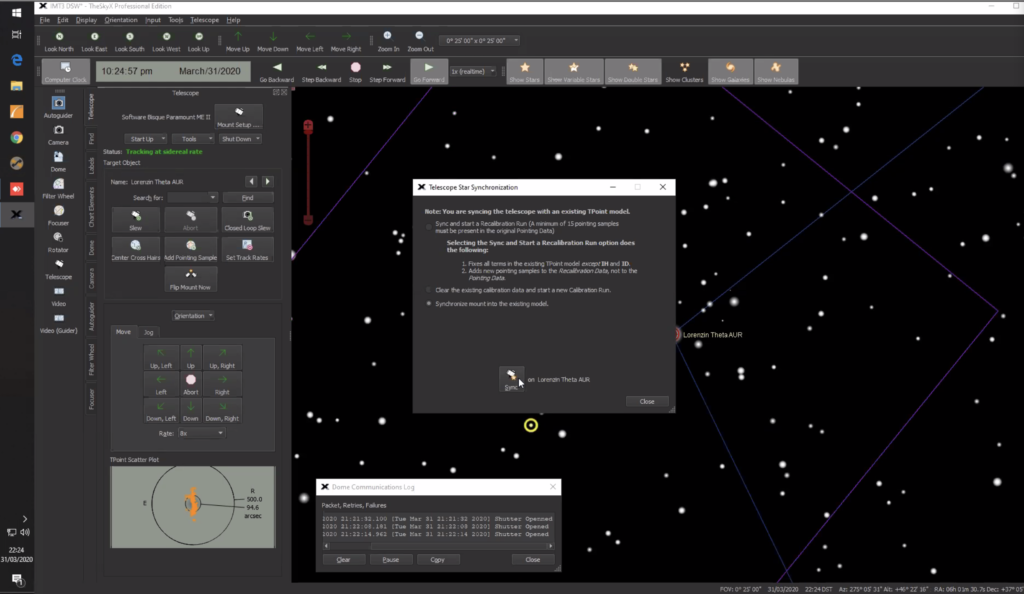
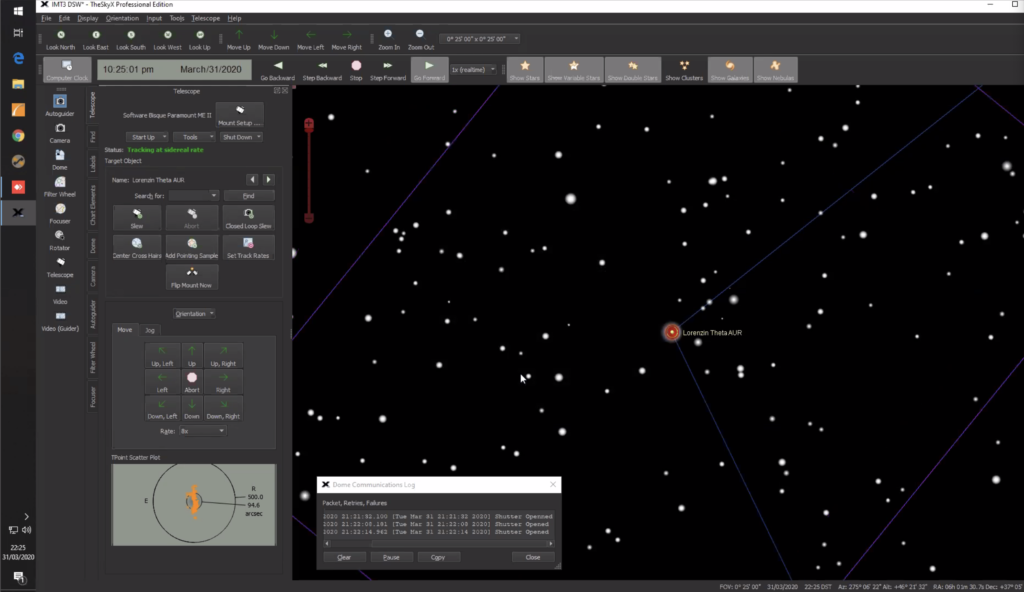
The mount in TSX and SGPro are now synced to the correct position in the sky.
Viewing Report 27th March 2020 – IMT3 12″
Viewing time period – 17:18 – 02:07
Cooling down telescope ready for tonights viewing
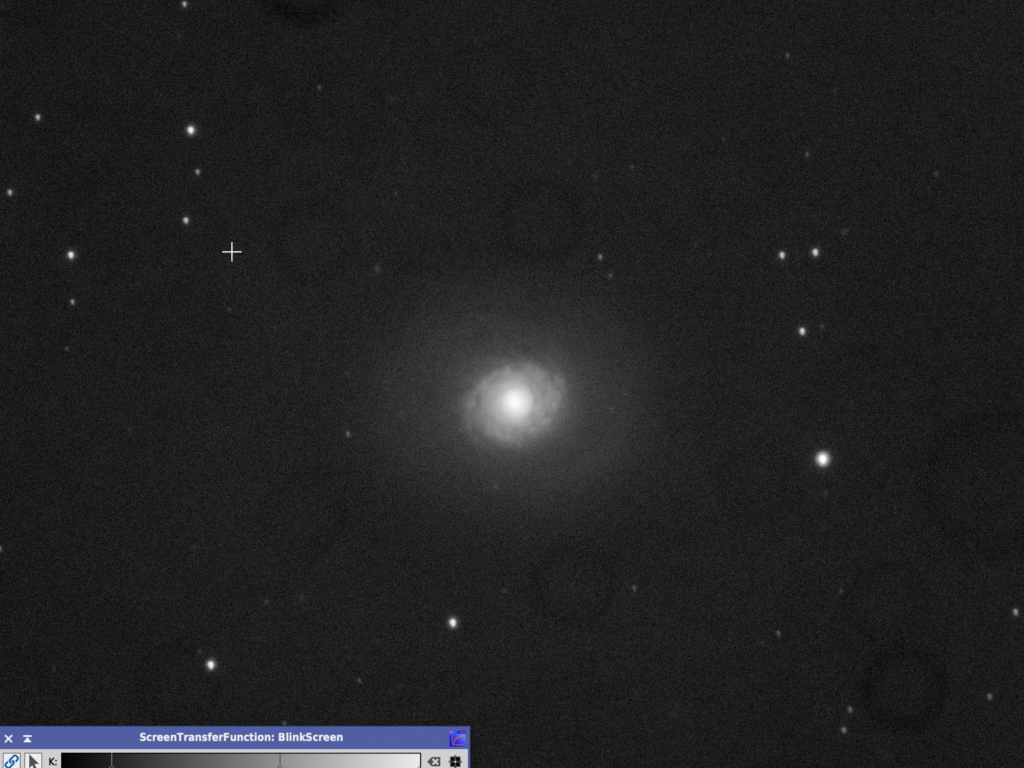
M94 and NGC 3395/3396 are the 2 targets for tonight, some luminance on M94 and RGB on NGC 3395/3396 if I get enough time. I always try to open the dome early to give at least 2-4 hours cooling before I use.
When I was about to start with autofocus I tried to recenter back on the target but the mount respond and it transpired that the mount thought it was out of balance. I went to the dome and the mount was beeping proving it was out of balance. So I turned the mount off, manually moved the scopes pack to the park position and then turned the mount back on and all was well.
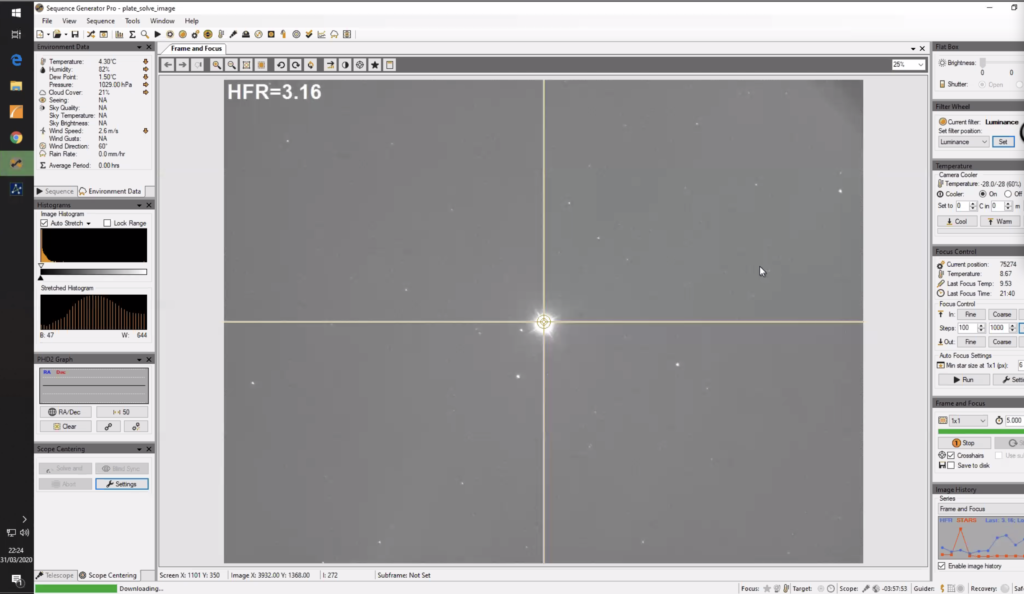
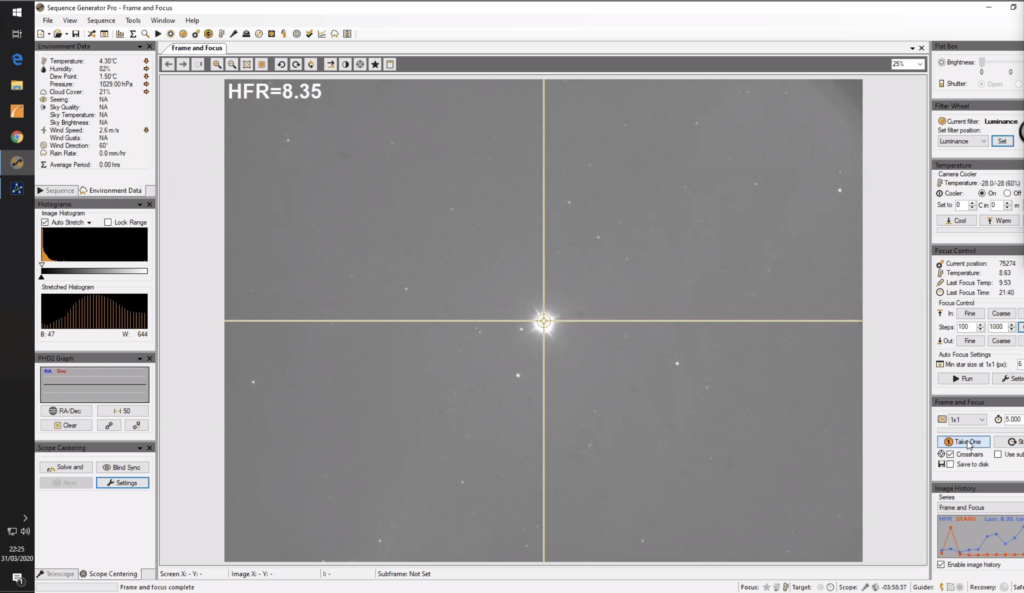
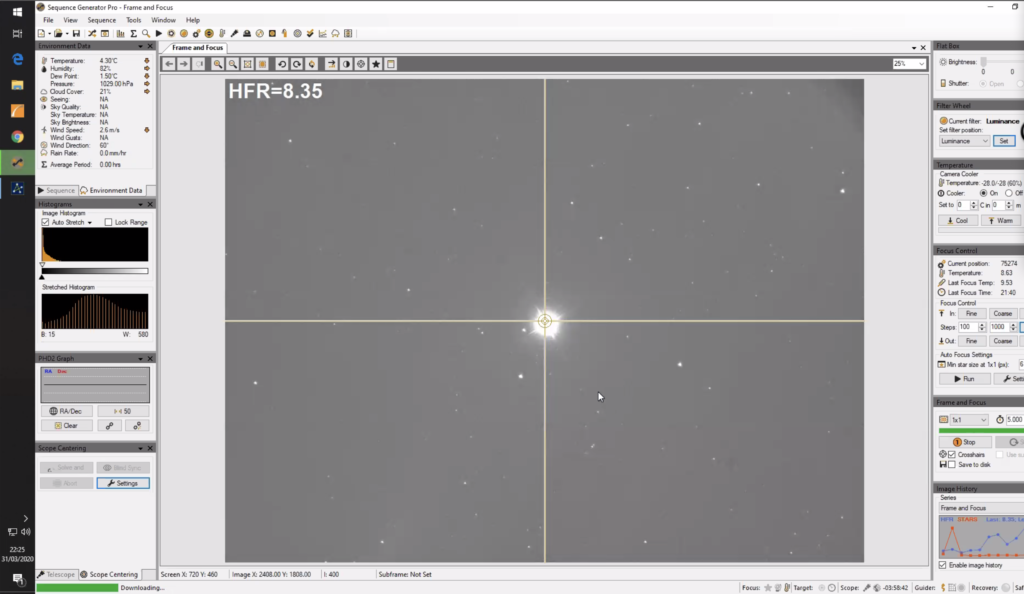
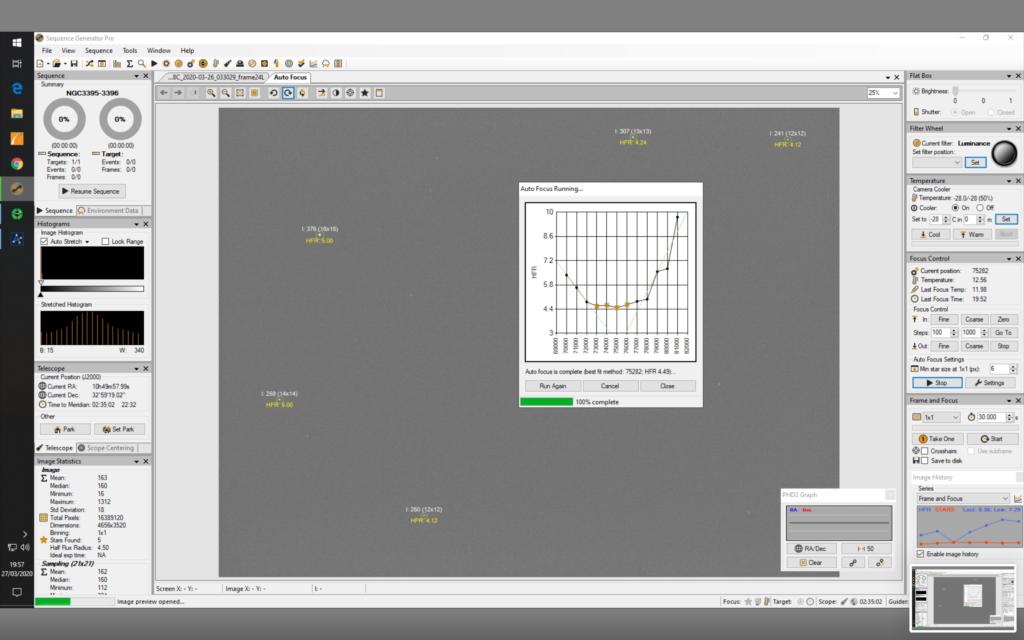
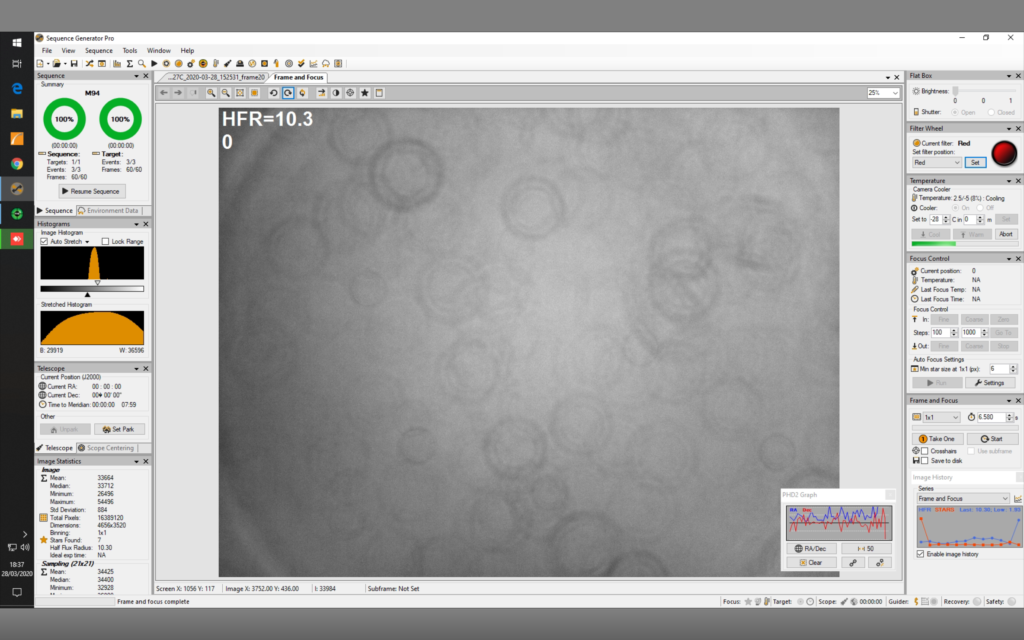
@19:57 I performed the autofocus for the night on Luminance which scammer in at a position of 75282 on the focuser.
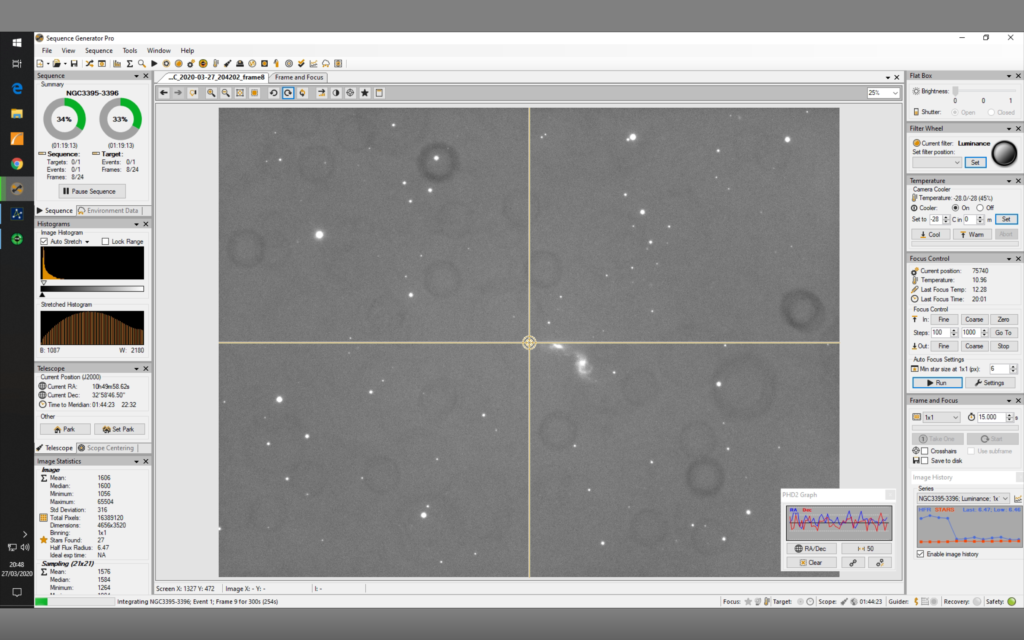
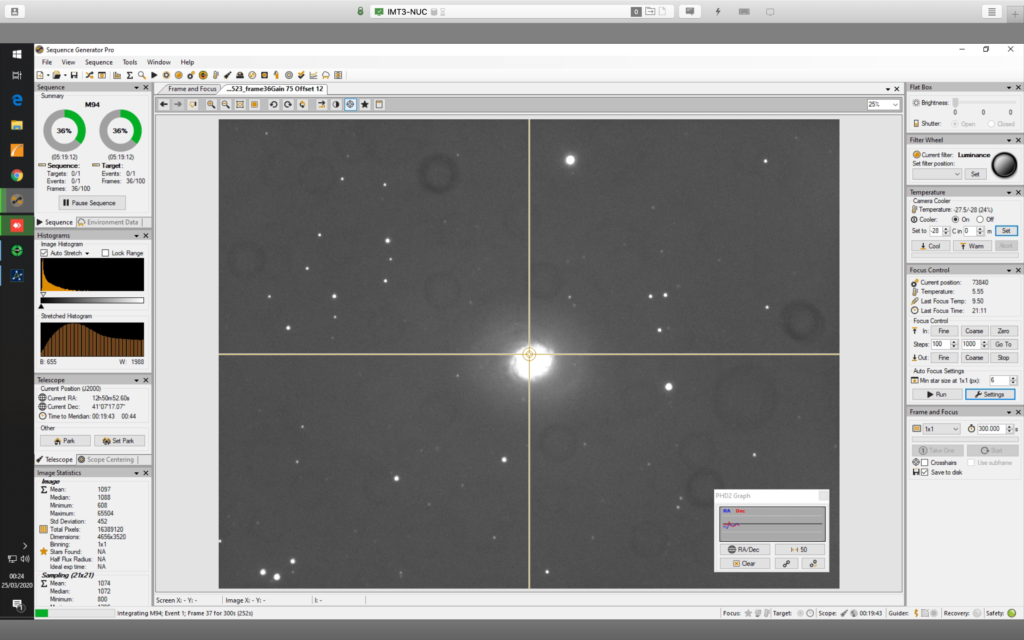
@20:10 I started an imaging run of 24 x NGC 3395/3396 with Luminance filter. Once done I planned on grabbing RGB frames before moving on to M94.
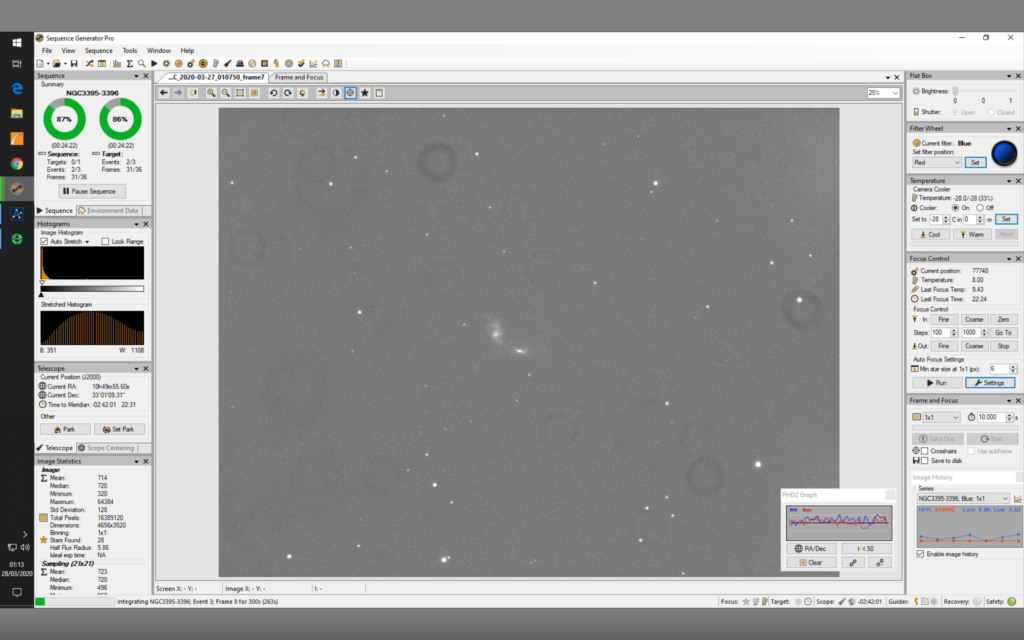
@22:32 I started on the RGB frames for NGC 3395/3396 after refocusing on the Red filter.
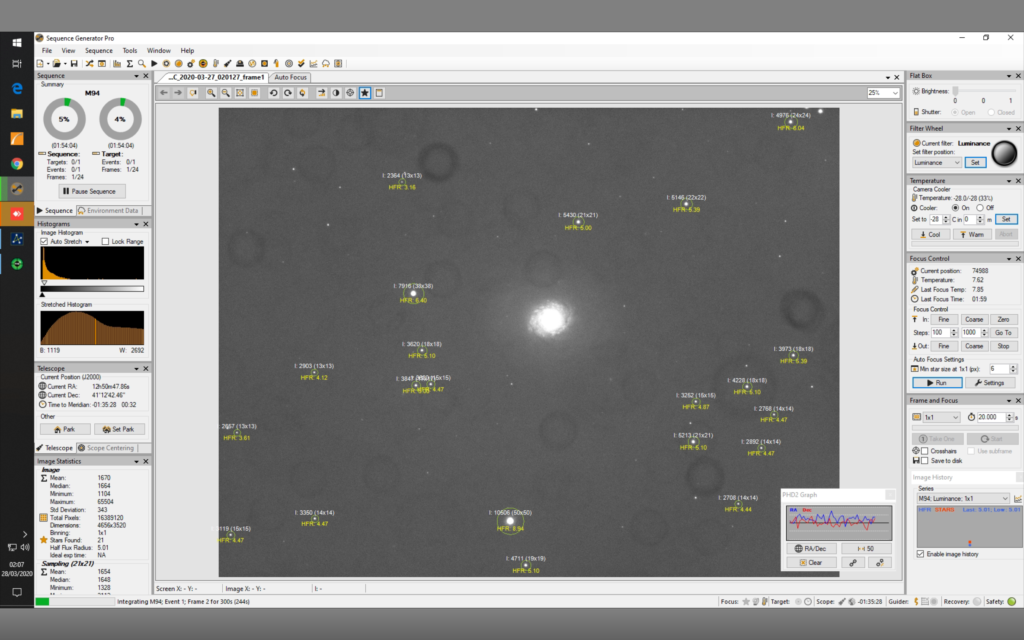
@1:40 I slewed to M94 and changed the filter to Luminance. I performed a refocus and shifted from 77895 to 75884 on Red filter by accident. So we (I had Bob on Zoom by this point) refocused on the Luminance and the new focus position was 74884. So the difference is 1000 for Luminance to Red. I also changed the step size for the focuser temperature compensation from 531 to 431 to see if the HFR is more stable.

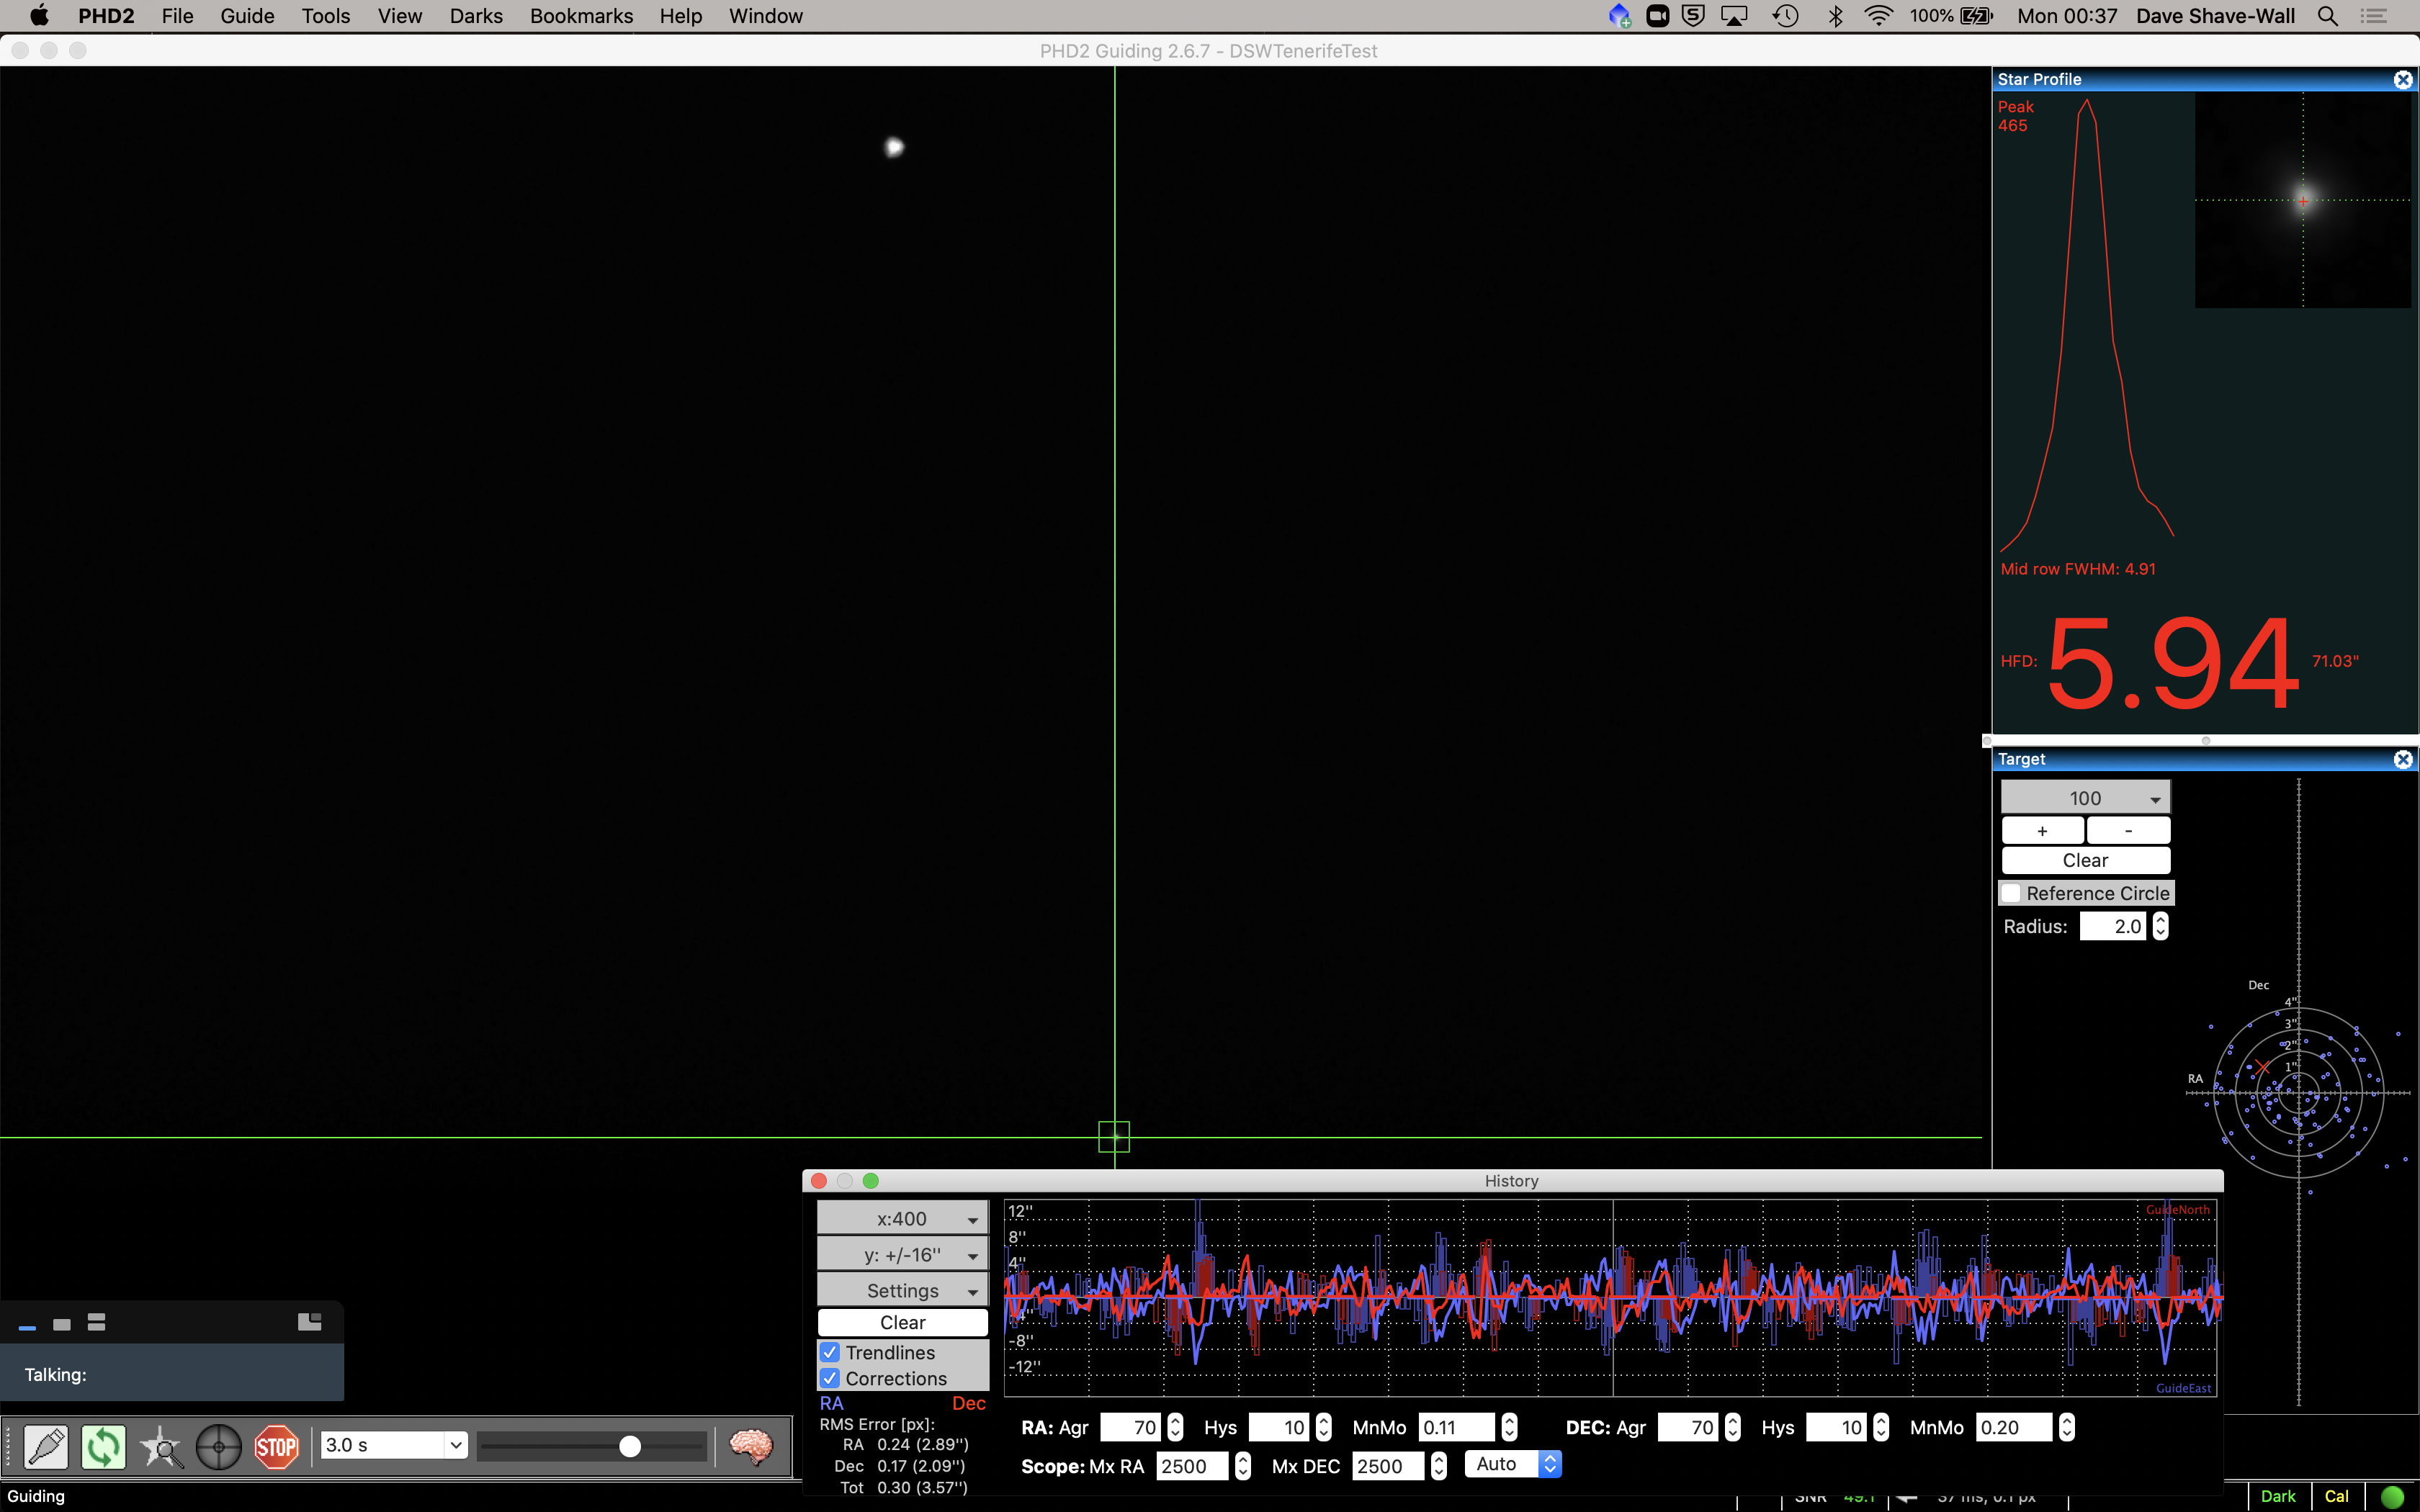
I noticed tonight that PHD2 lost the Use Direct Guide check mark twice and thus complained about pulse guide not being supported. I had to stop guiding, disconnect the mount in PHD2 and go into the settings, check the Use Direct Guide and reconnect the mount and start guiding again. Something to look into possibly.
@02:07 I went to bed and left the scope gathering another 2 hours of Luminance data on M94.
Addendum …….
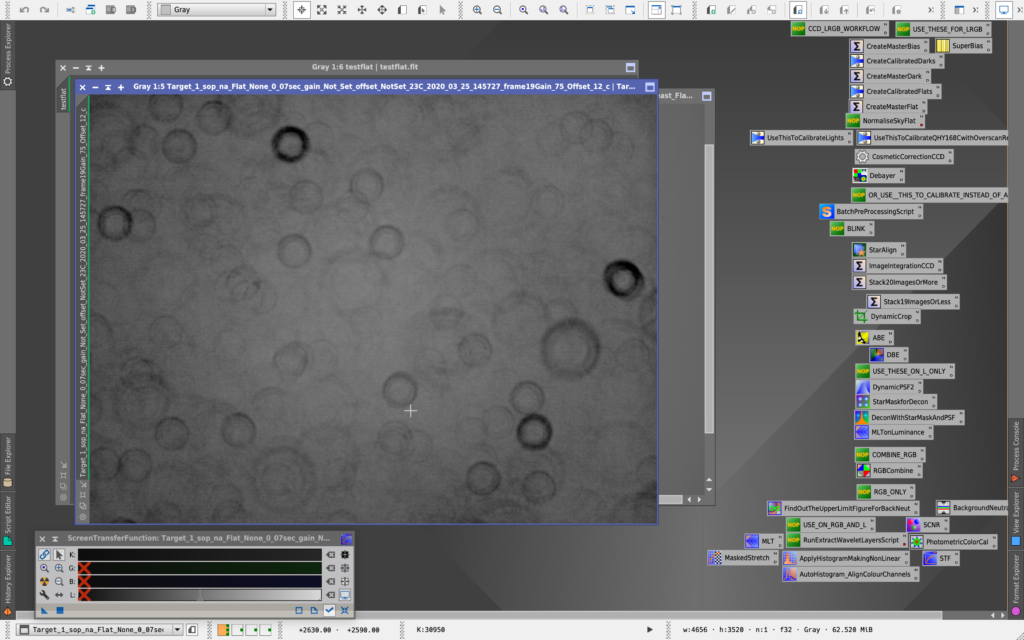
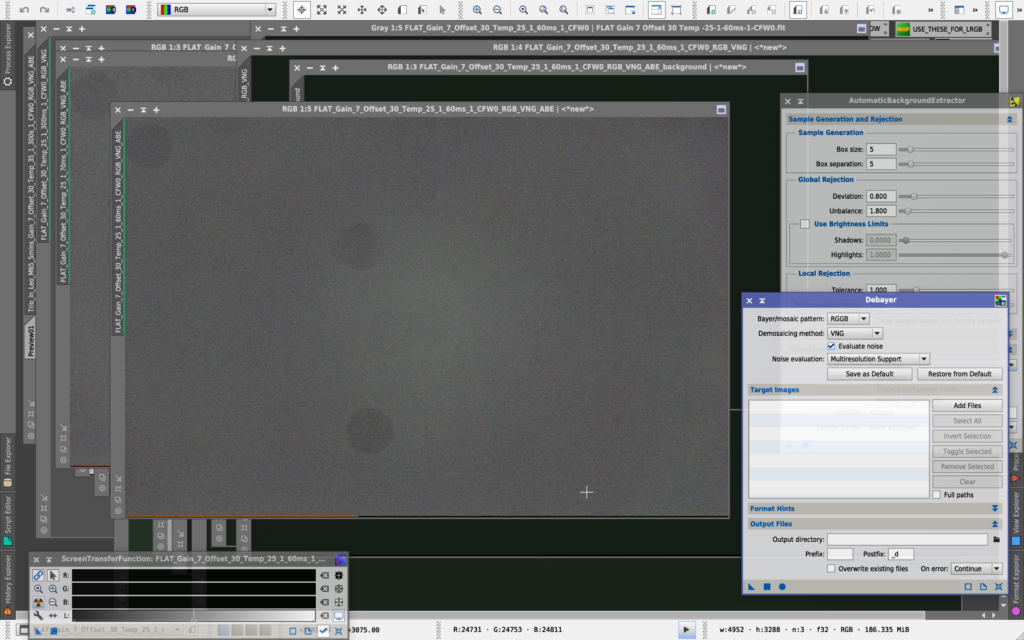
The following day I took the ZWO ASI1600MM CMOS Camera off the back of the 12″ and cleaned the sensor window. What I found was the dark dust doughnuts disappeared and the rest for the doughnuts were actually on the filters.
Things to still resolve……..
- Check out why WSX is loosing connection and shutting the dome
- Fix Slew Here and Centre Here in SGPro that does not work
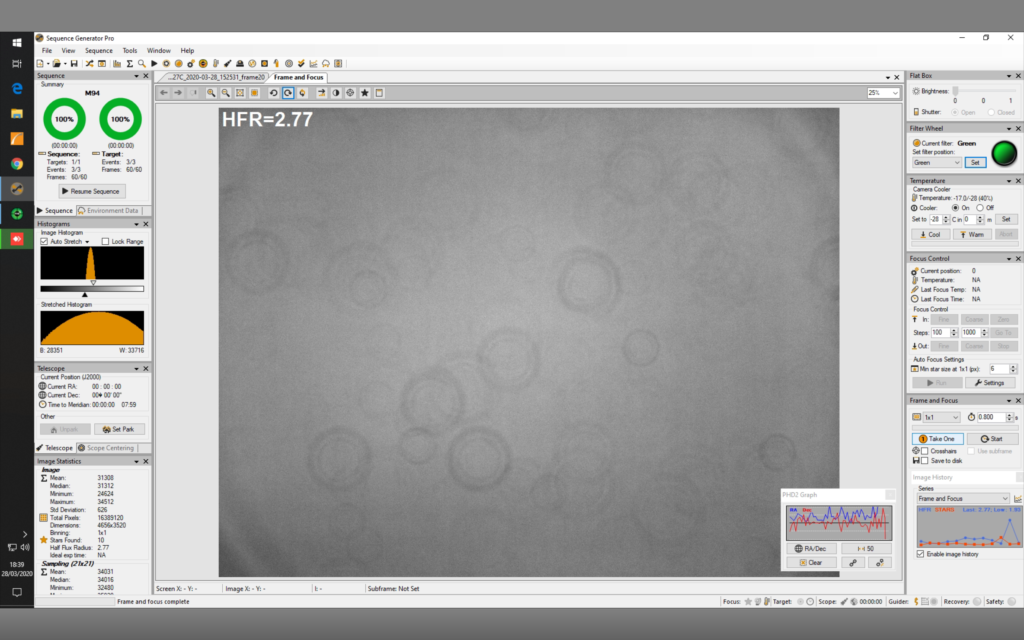
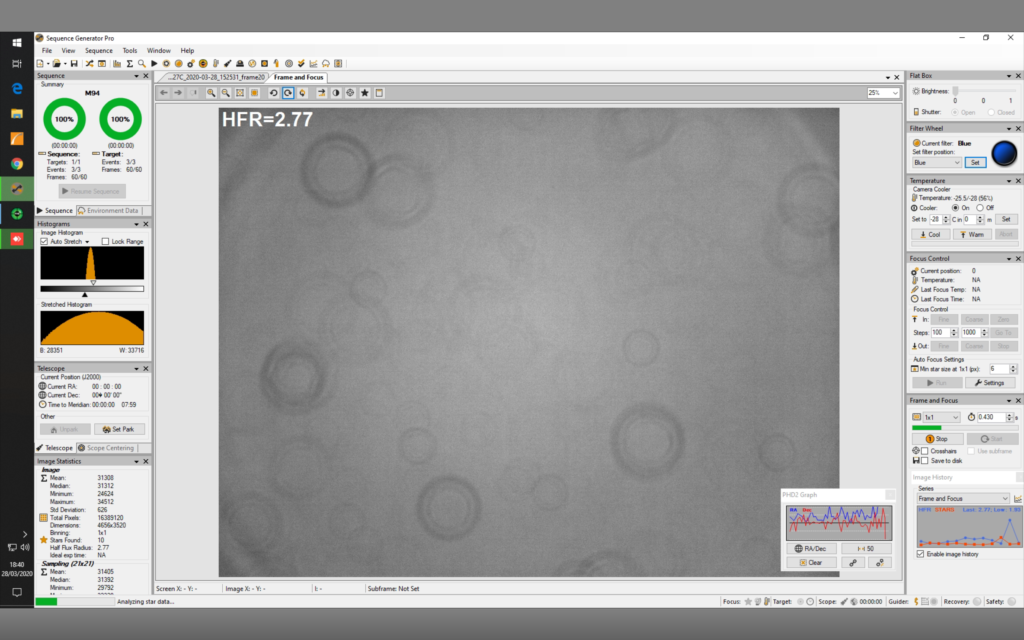
- Clean filters for the 12″ to get rid of doughnuts
- Clean sensor for QHY168C
Viewing Report 25th March 2020 – IMT3 12″
Viewing time period – 19:15 – 23:05
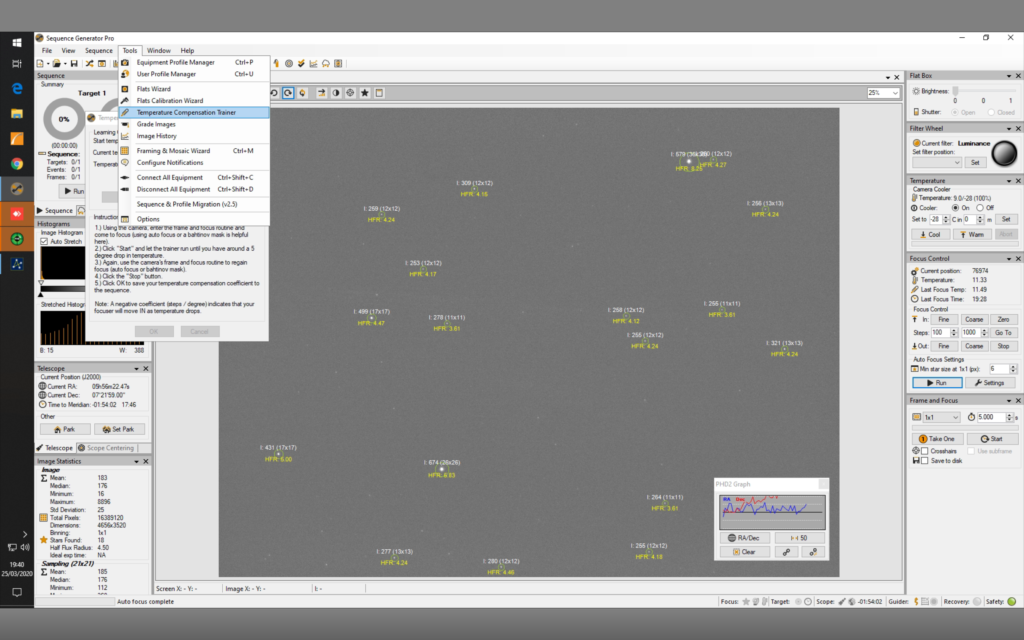
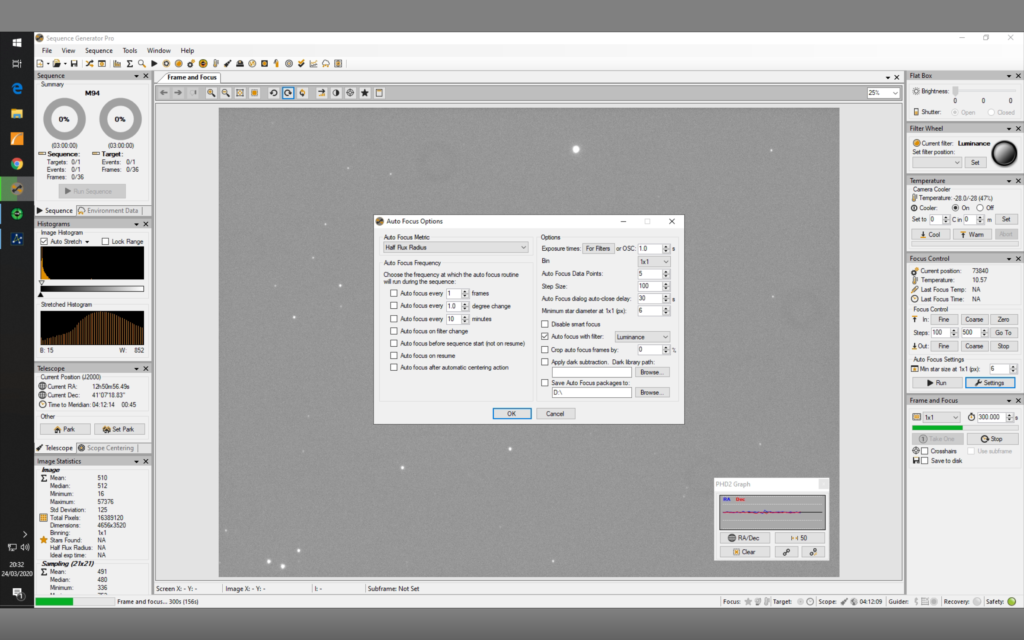
As I found last night I need to get Temperature Compensation working for the focuser if I am to produce any decent images. SGPro has a Temperature Compensation Trainer which I will follow.
I started @19:35 by taking an image of a star field to make sure there were no bright stars and then ran the autofocus routine. This came back with a focus position of 76974 at 11.5℃.
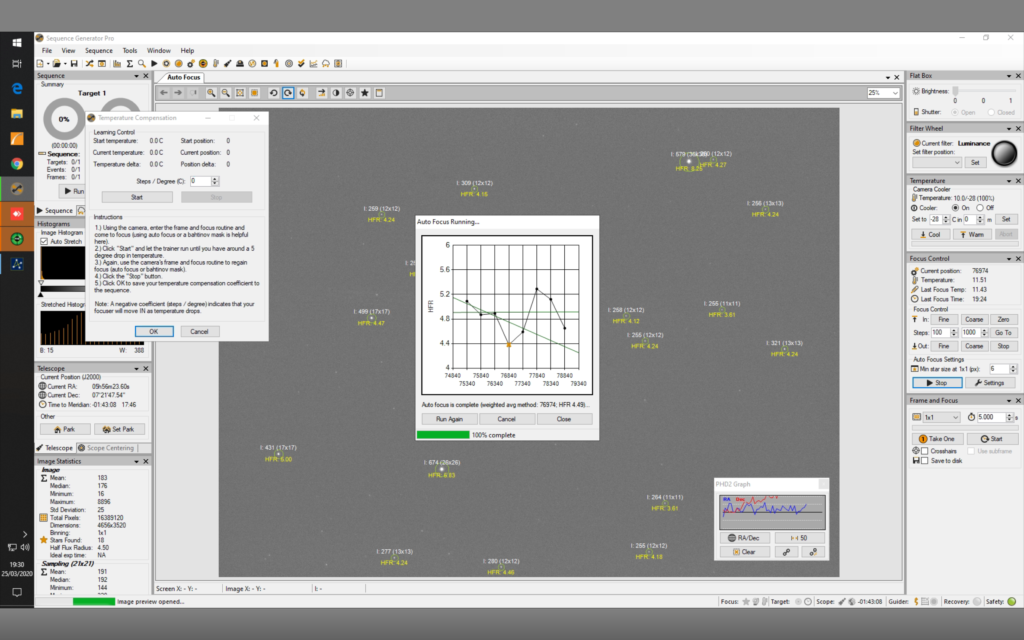
Next I started the Temperature Compensation wizard which seems to measure the difference in focus position over a 5℃ decrease in temperature. It takes the initial reading above and then you wait until the temperature has dropped by 5℃.
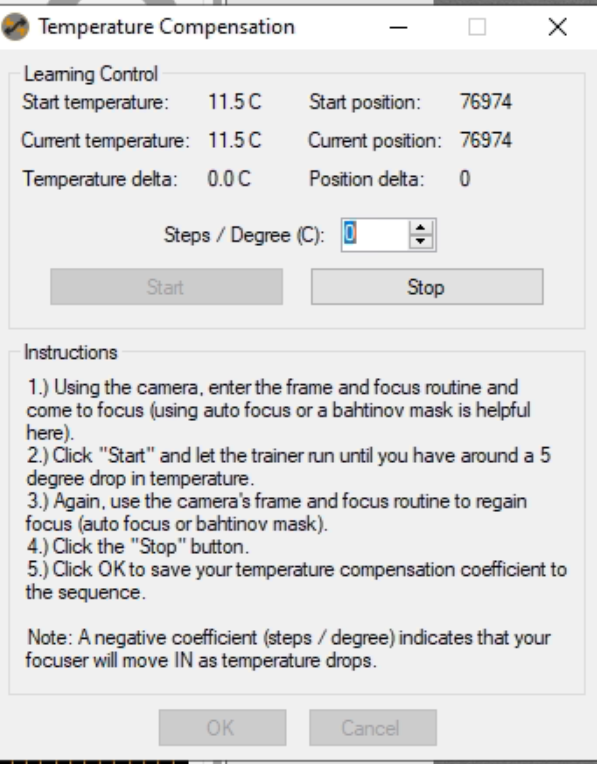
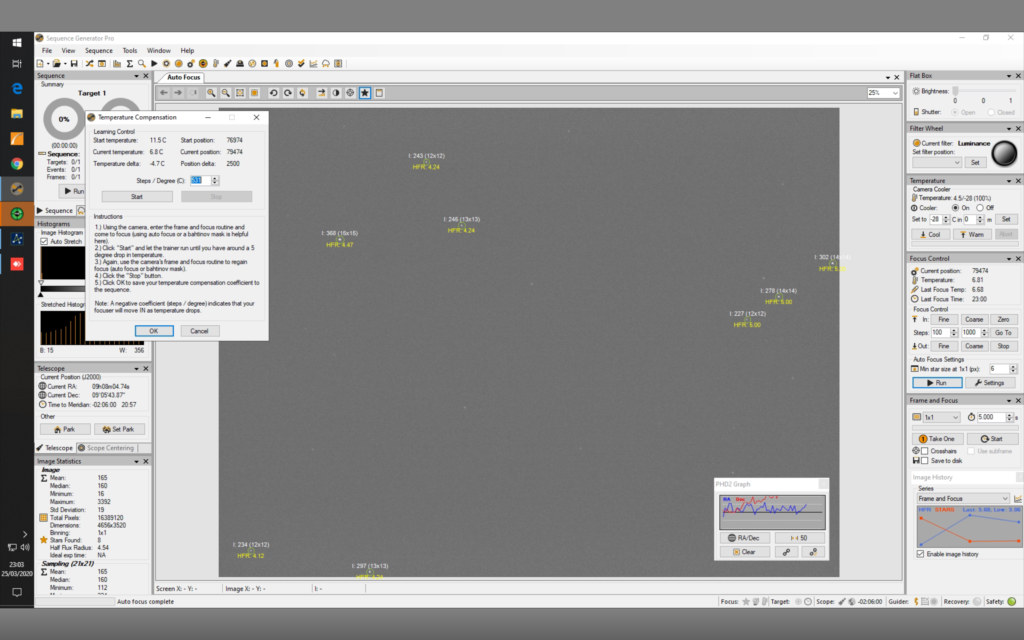
It took 3.5 hours for the temperature to drop by 5℃. So @23:08 I then ran the autofocus routine and got the next image and result. This resulted in 531 steps per 1℃ of temperature change.
Viewing Report 24th March 2020 – IMT3 12″
Viewing time period – 18:16 – 01:43
Tonight I plan on setting the 12″ imaging M94, a Messier galaxy in Canes Venatici.
I slewed to nearby star and focused using SGPro after changing a couple of settings in the step size and amount of data points to be used, I set step size to 100 from previous 1000 and data point to 5 from previous 10 and got a much better focus. Focus landed up first time around at 738840
I had tried to get @focus working in TSX but it would fail every time on the galaxy with not enough stars. This meant I could not use TSX to solve and sync to centre M94.
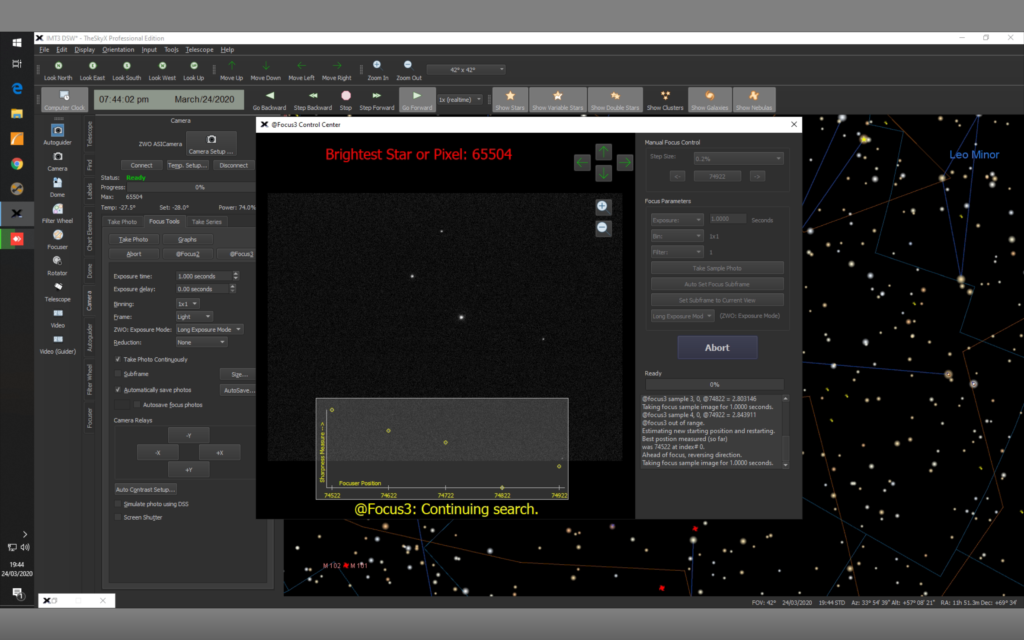
I then tried to centre with SGPro and that also failed so instead I used TSX to connect to the camera and manually moved M94 to the centre of the chip. I ned to get the local plate solver working as it was not running.
@ 20:32 I took an initial 5min sub to see what the image would be like after setting PHD2 guiding running.
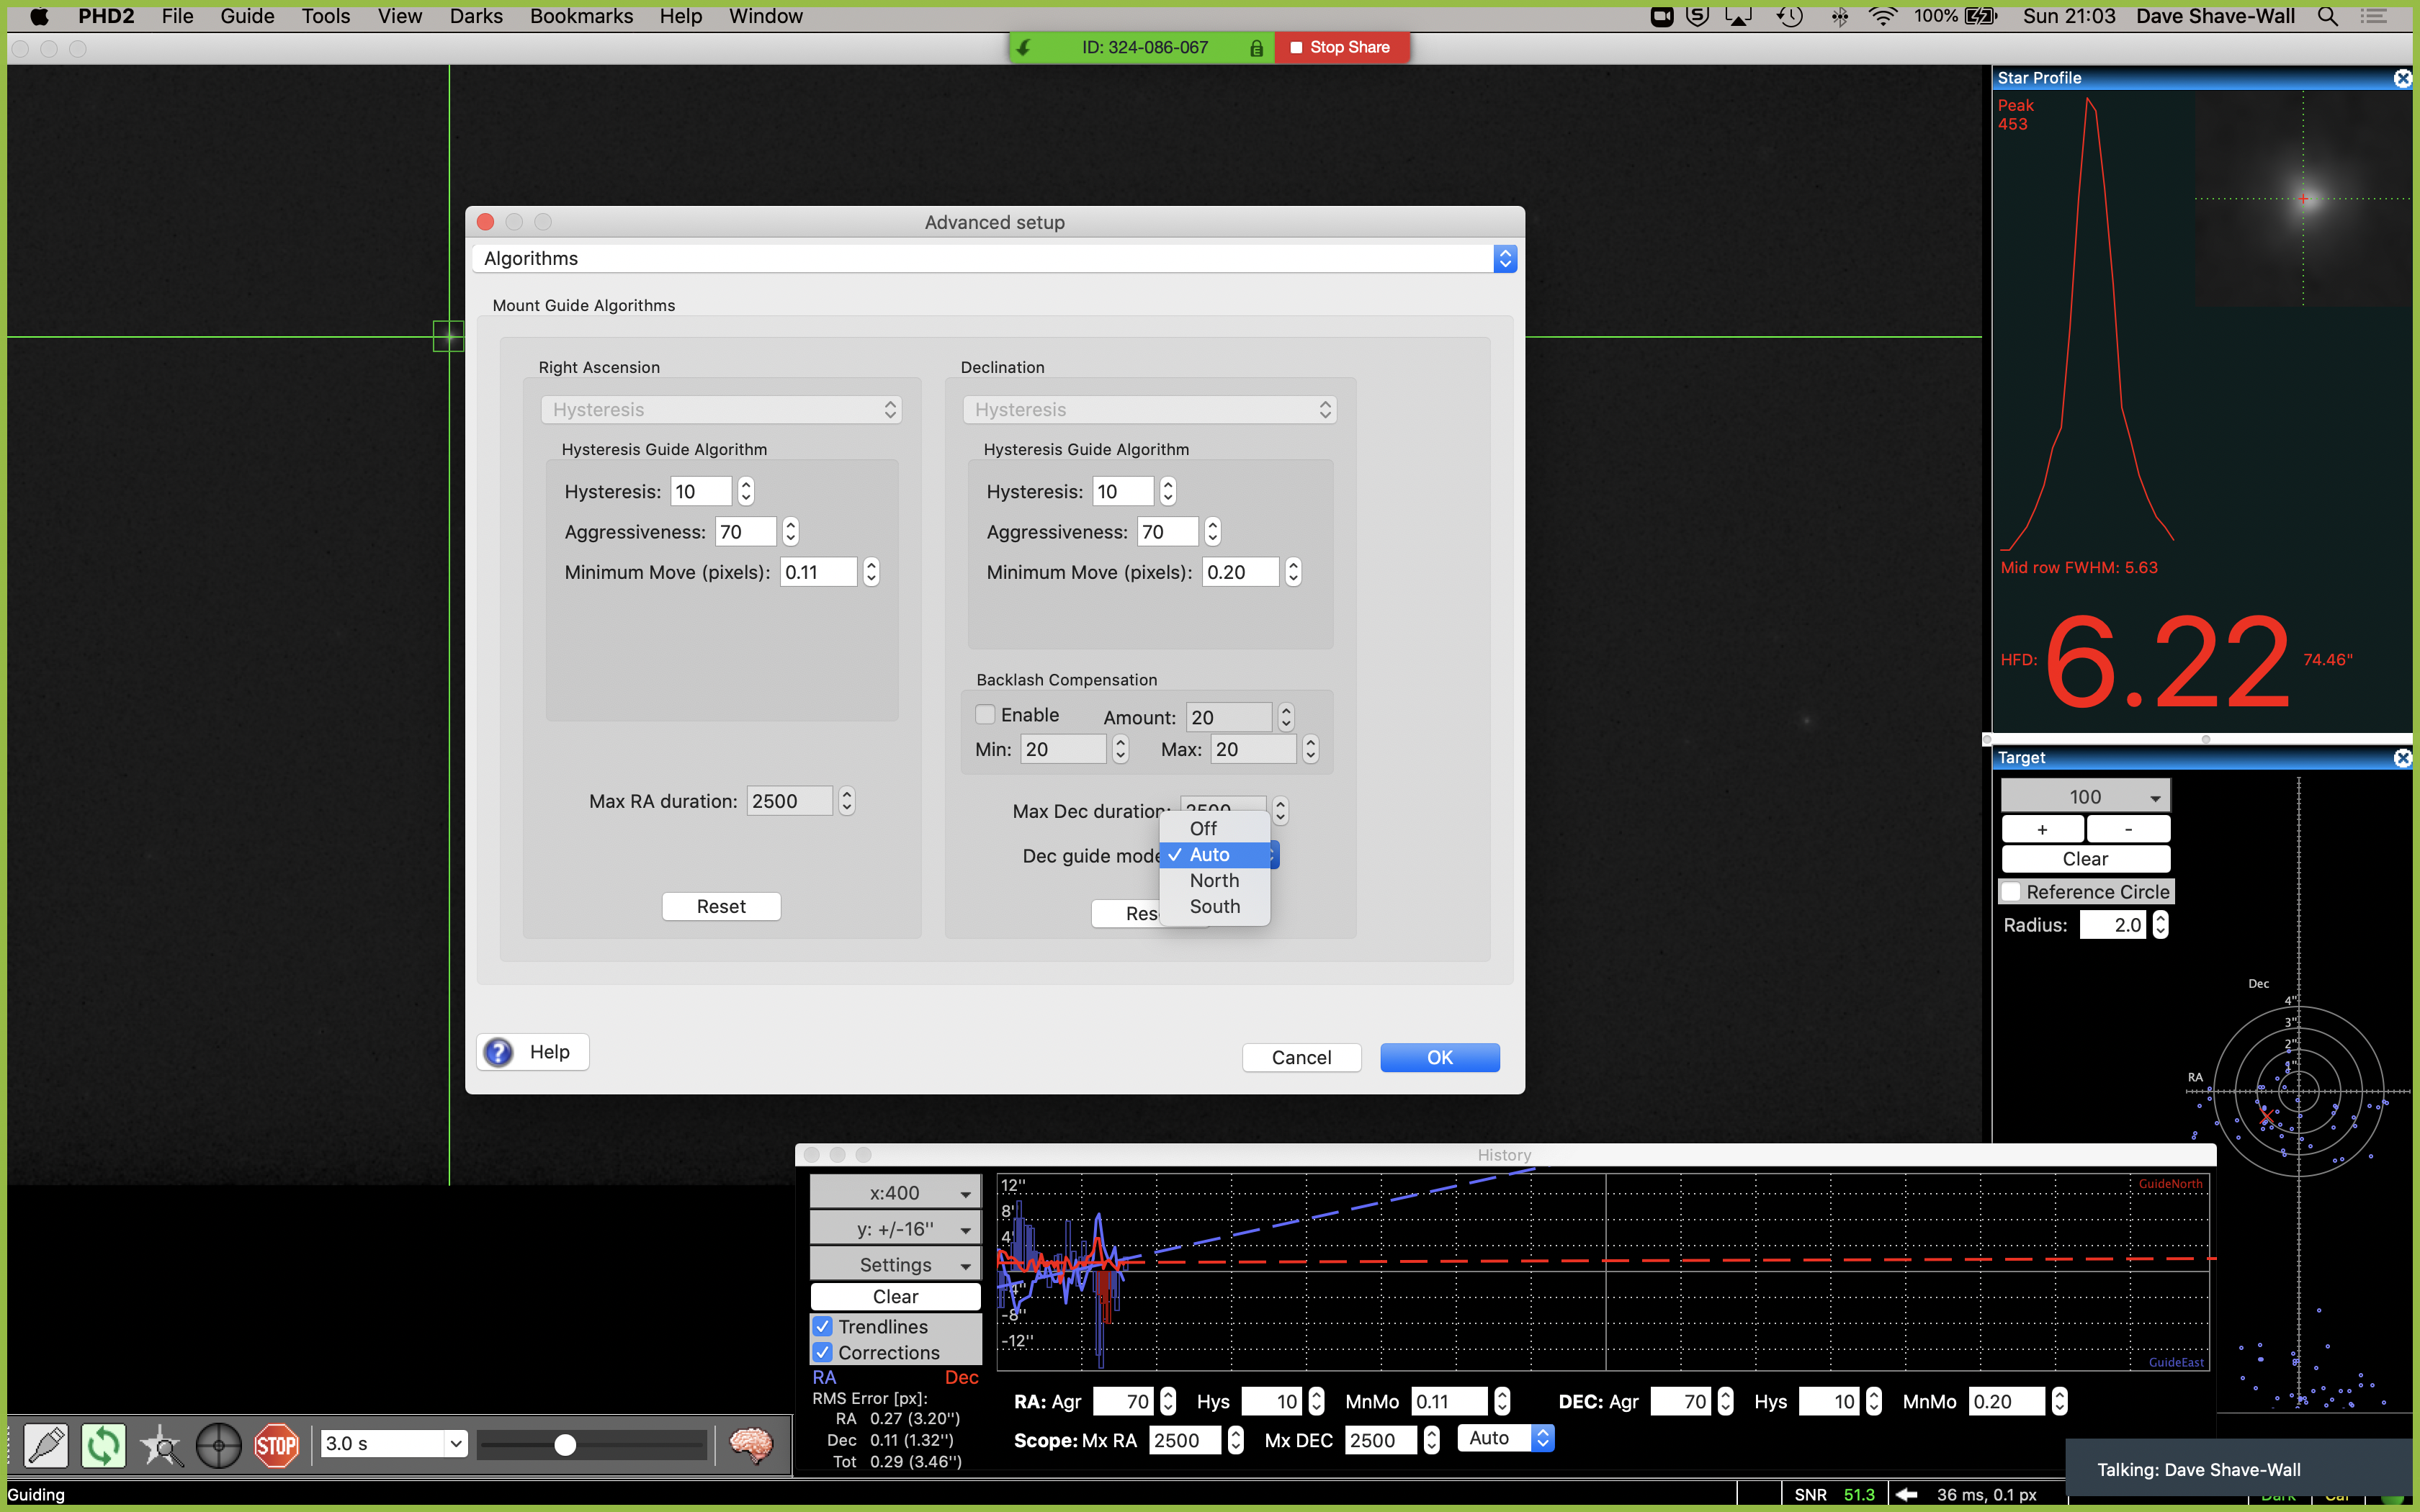
@1:20 and after gathering 3 hours of data I moved to other side of mount so meridian flip. I refocused as it had drifted a lot. I now need to consider setting up focus move for temp as the focus shift is dramatic. I also changed PHD2 Hysteresis setting to 0.20 from 0.10 as the PHD was having problems guiding.
I struggled to find guide star and landed up exposing for 15s and then having to increase, possibly needs recalibrating on this side of the mount. But also I need to find a brighter guide star by moving the mount offsetting the galaxy. The other way is using one of the piggy backed scopes which I may do next time.
@1:43 the dome closed, not sure why, might have been high cloud but probably because the WSX software lost contact with the WSX hardware. I did a reset and reconnected and then it was fine, but as the dome had closed I packed up with 3 hours of Luminance data on M94. I now need to take flats on the morning.
Learning’s for next time……….
- Update the SGPro Equipment profile with the changes for step size and data points for autofocus
- Make sure the local plate solver is working and online at localhost
- Review Anydesk bug that changes mapping of keyboard
- Check out why WSX is loosing connection and shutting the dome
- Work out how to use temperature compensation for the focuser in SGPro
Viewing Report 23rd March 2020 – Travel Scope
Viewing time period – 18:23 – 04:08
@18:28 took flats for last night
@18:47 finished 20x -25℃ Flats 0.06s now taking Darks, will do more flats later when the cooler can get to -35℃ which right now it can’t as ambient outside temp is 7℃ so I can only get to -33℃ at 100%
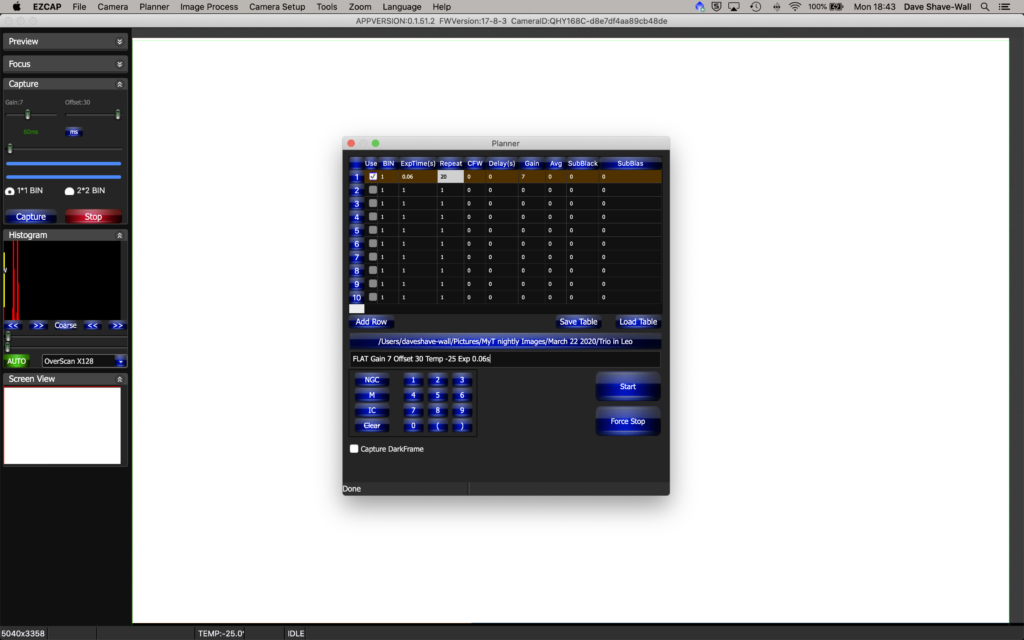
@21:47 just finished Flats at -35℃
@22:49 started imaging Whale and Hockey Stick for Herschel 400
@00:47 I have 2 hours worth of data, performed meridian flip and continued to image the Whale for another 2 hours whilst I went to bed
@4:08 finished imaging and packed up
Viewing Report 22nd March 2020 – Travel Scope
Viewing time period – 19:33 – 05:12
Once again unto the darkness ……….
I started setting up before dusk and the scope was ready for my on the patio once darkness had fallen. The first thing to do was use Polemaster to get the polar alignment roughly done.
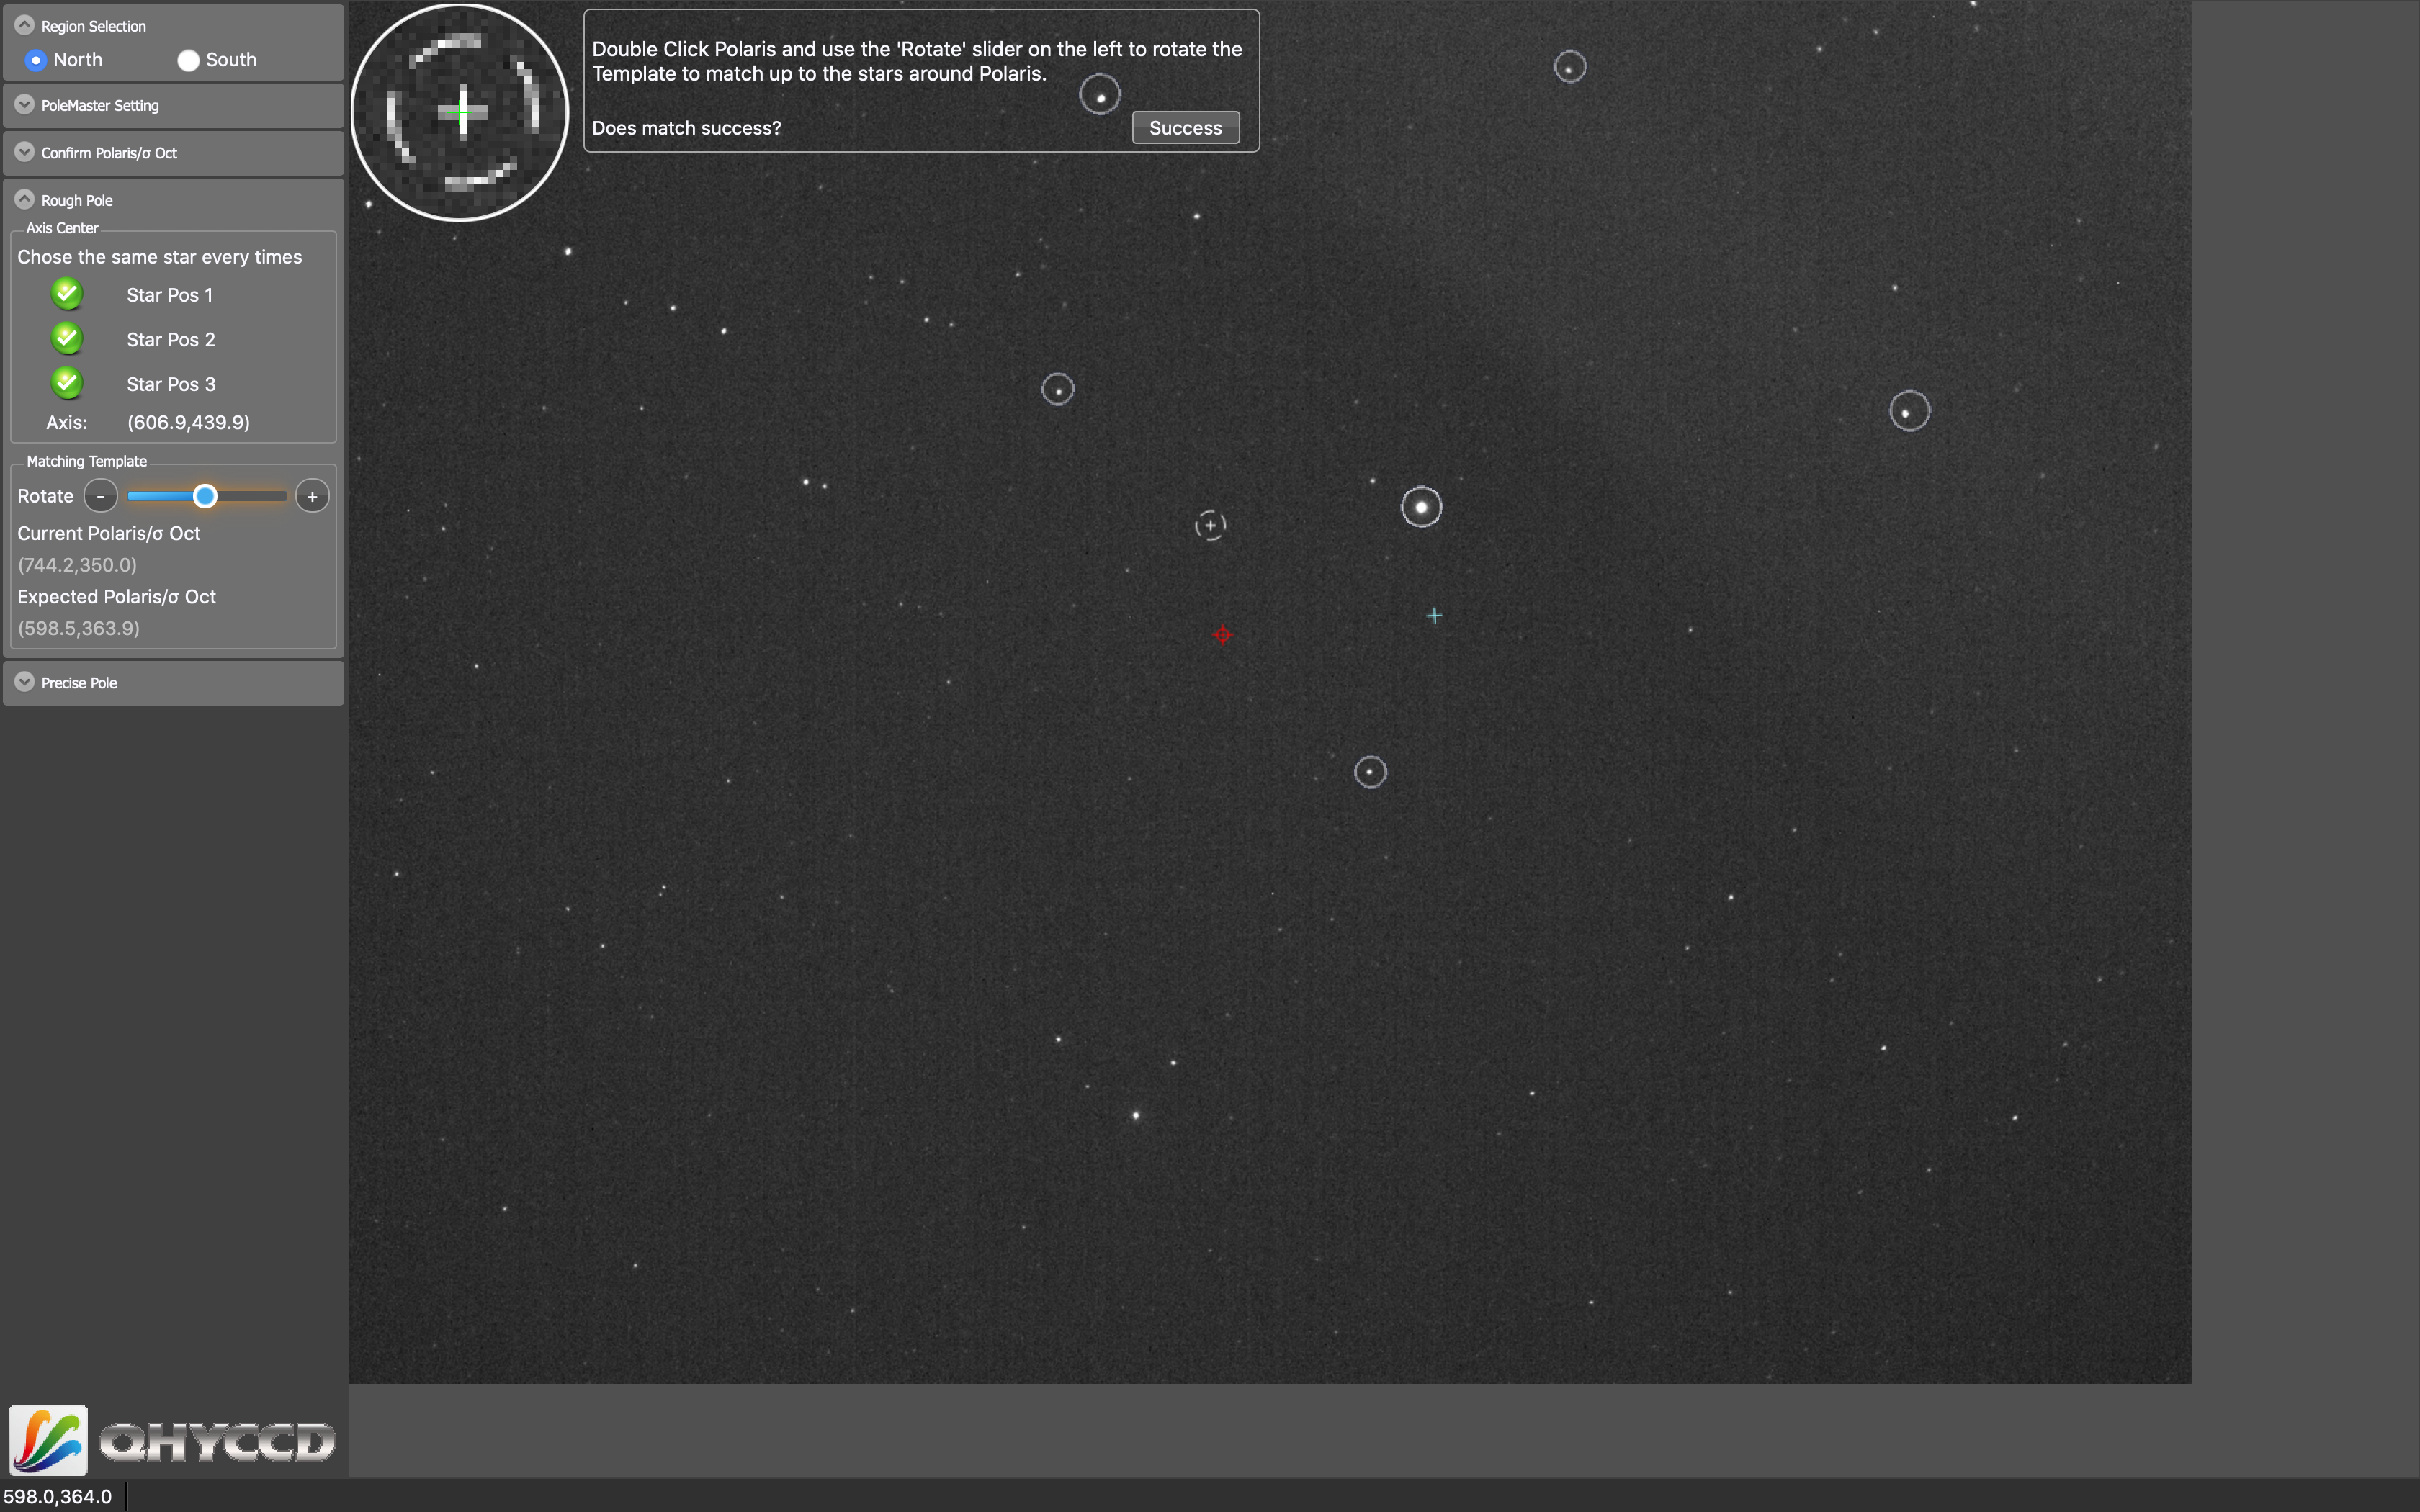
@19:43 finished Polar alignment and started PHD2 drift alignement
@20:07 finished drift aligning in Dec
@20:23 after doing the washing up I am now back to do the drift alignment of the altitude
@20:29 finished drift alignment in the altitude and did not need to adjust
@20:43 slewed to M35 and set the camera temp -25℃ and its running at 40%. I have set Gain to 7 and Offset to 30
I then joined the BAS Zoom call along with many others from the society. I shared my screen and explained the problem I was having that the DEC axis was still drifting. Mil Dave took me through the settings and it transpired that I had the Dec Guide Mode set to North rather than Auto. This meant it was not correcting for the error as it drifted South., I set to Auto and PHD started to correct! It now works 🙂 Thanks Mil Dave!
@21:20 I had started gathering 5min exposures of M35
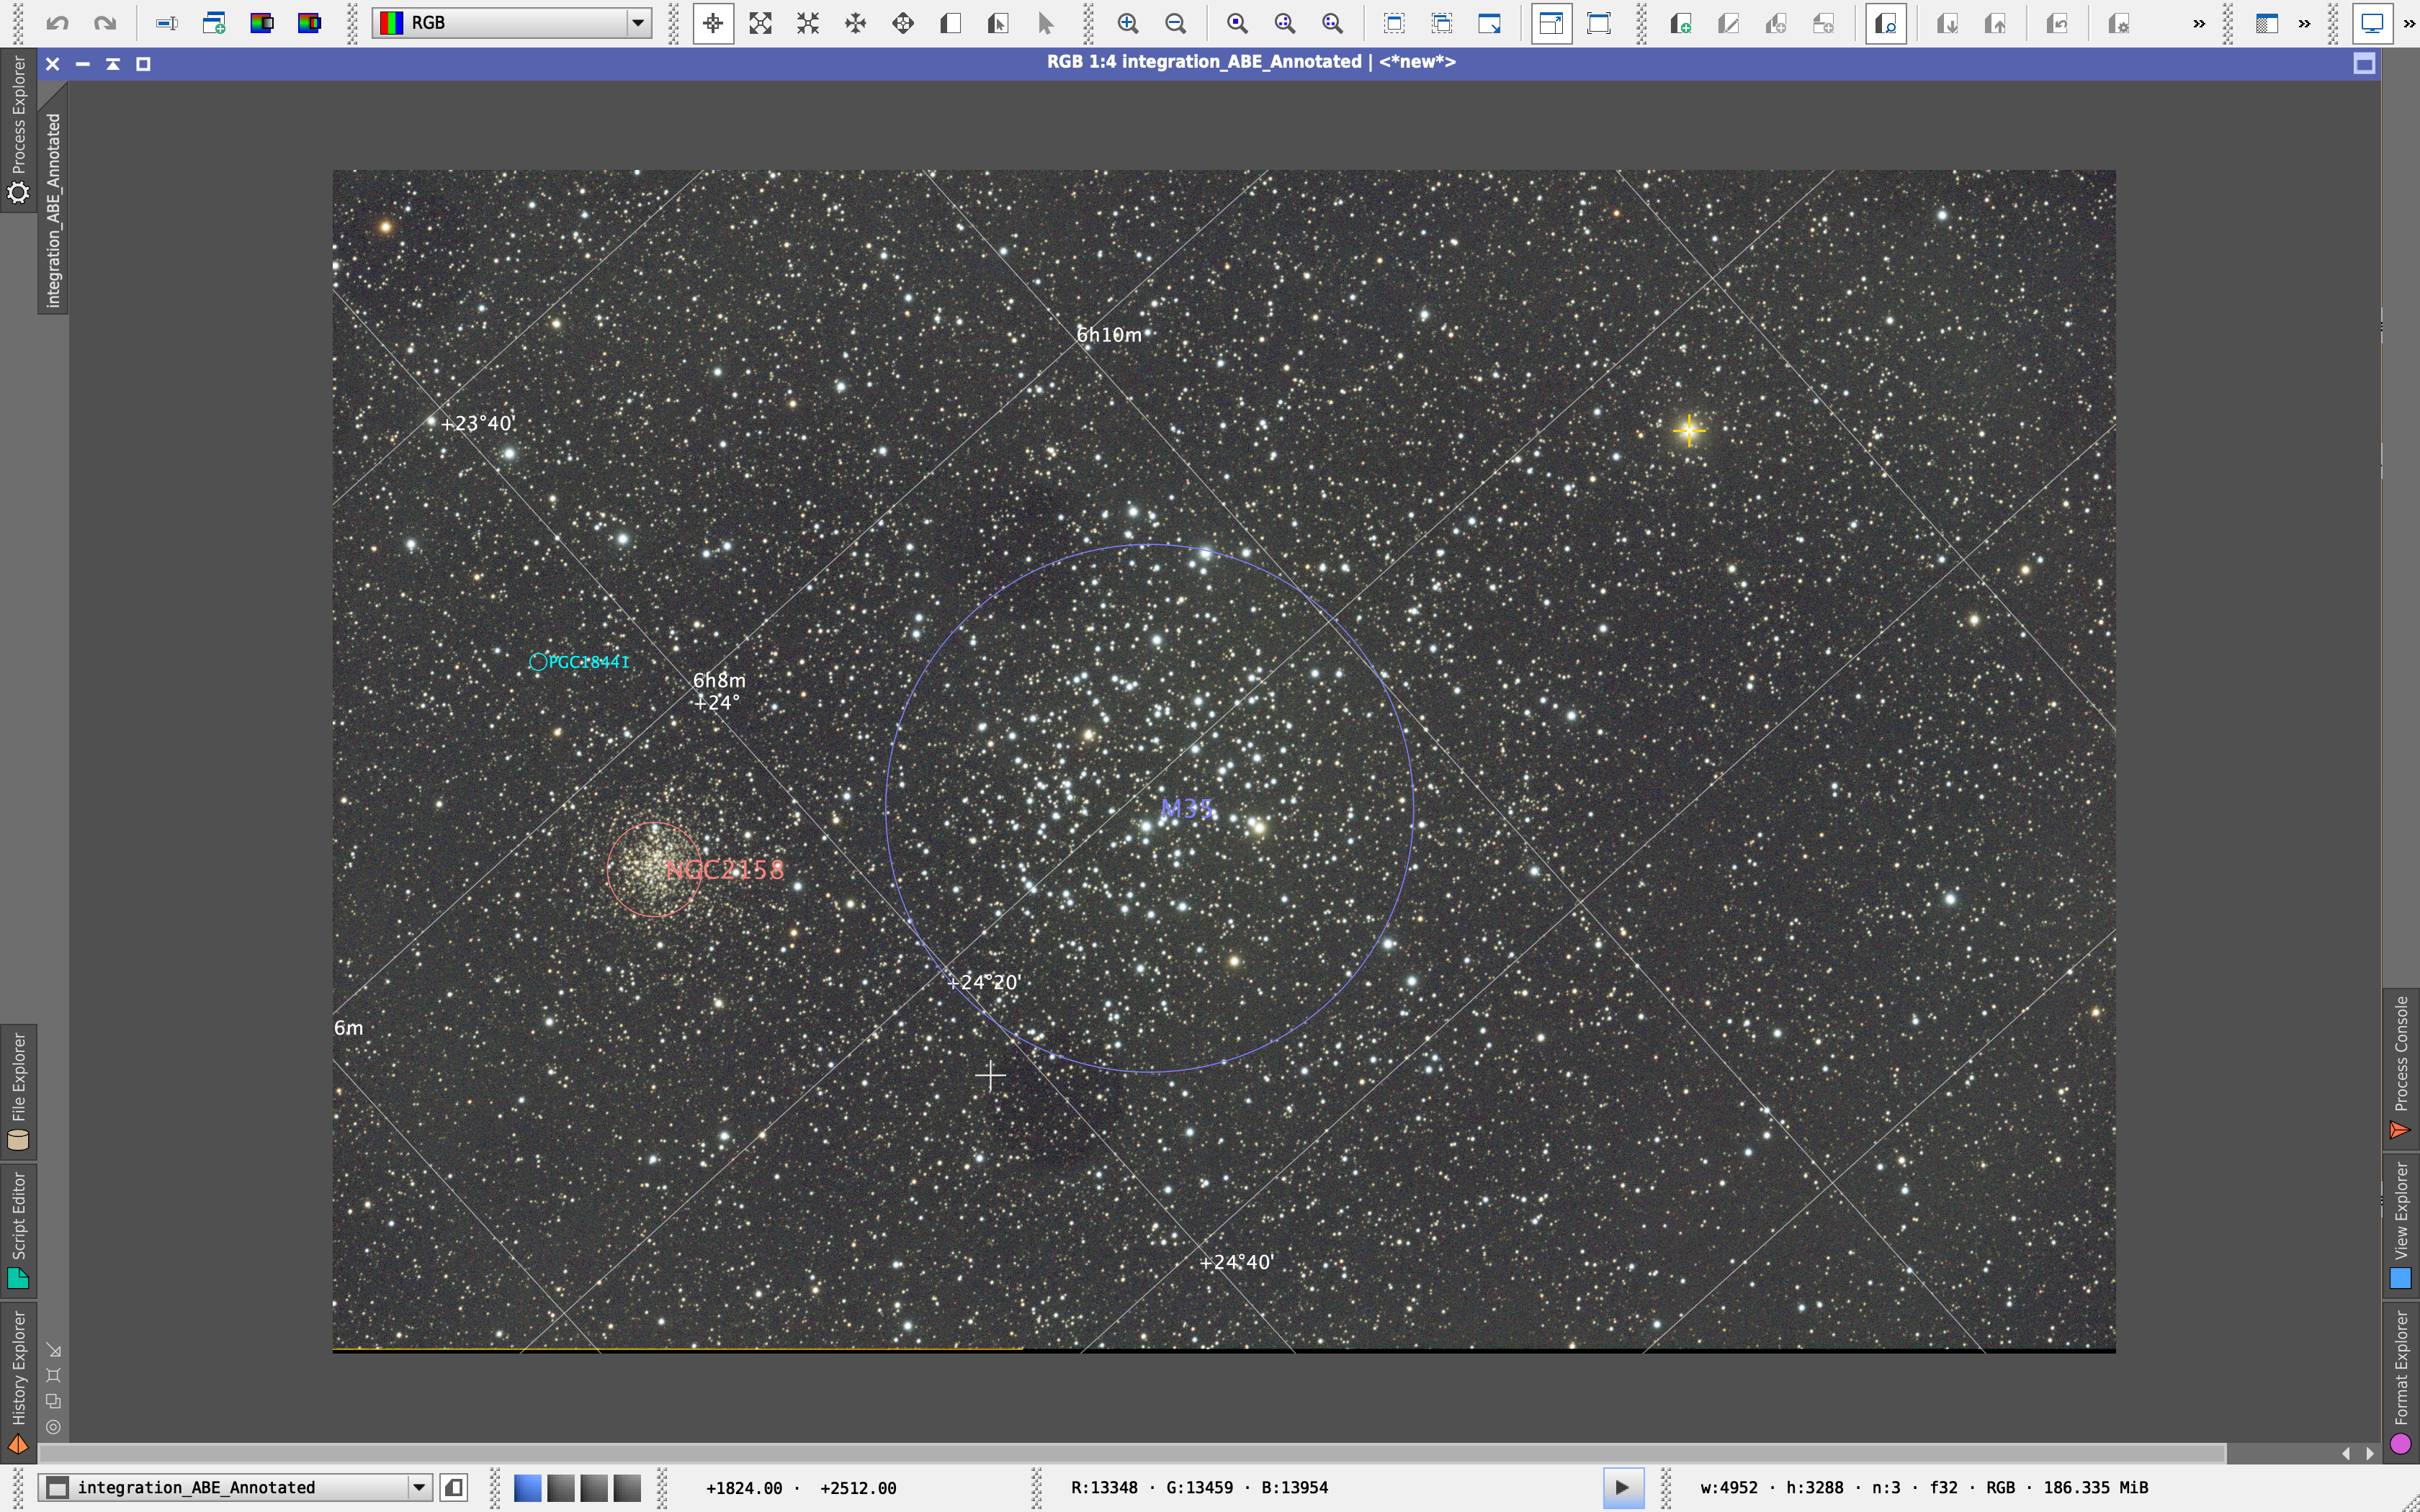
@23:00 finished capturing M35 now waiting for M65 Trio in Leo to go across the meridian
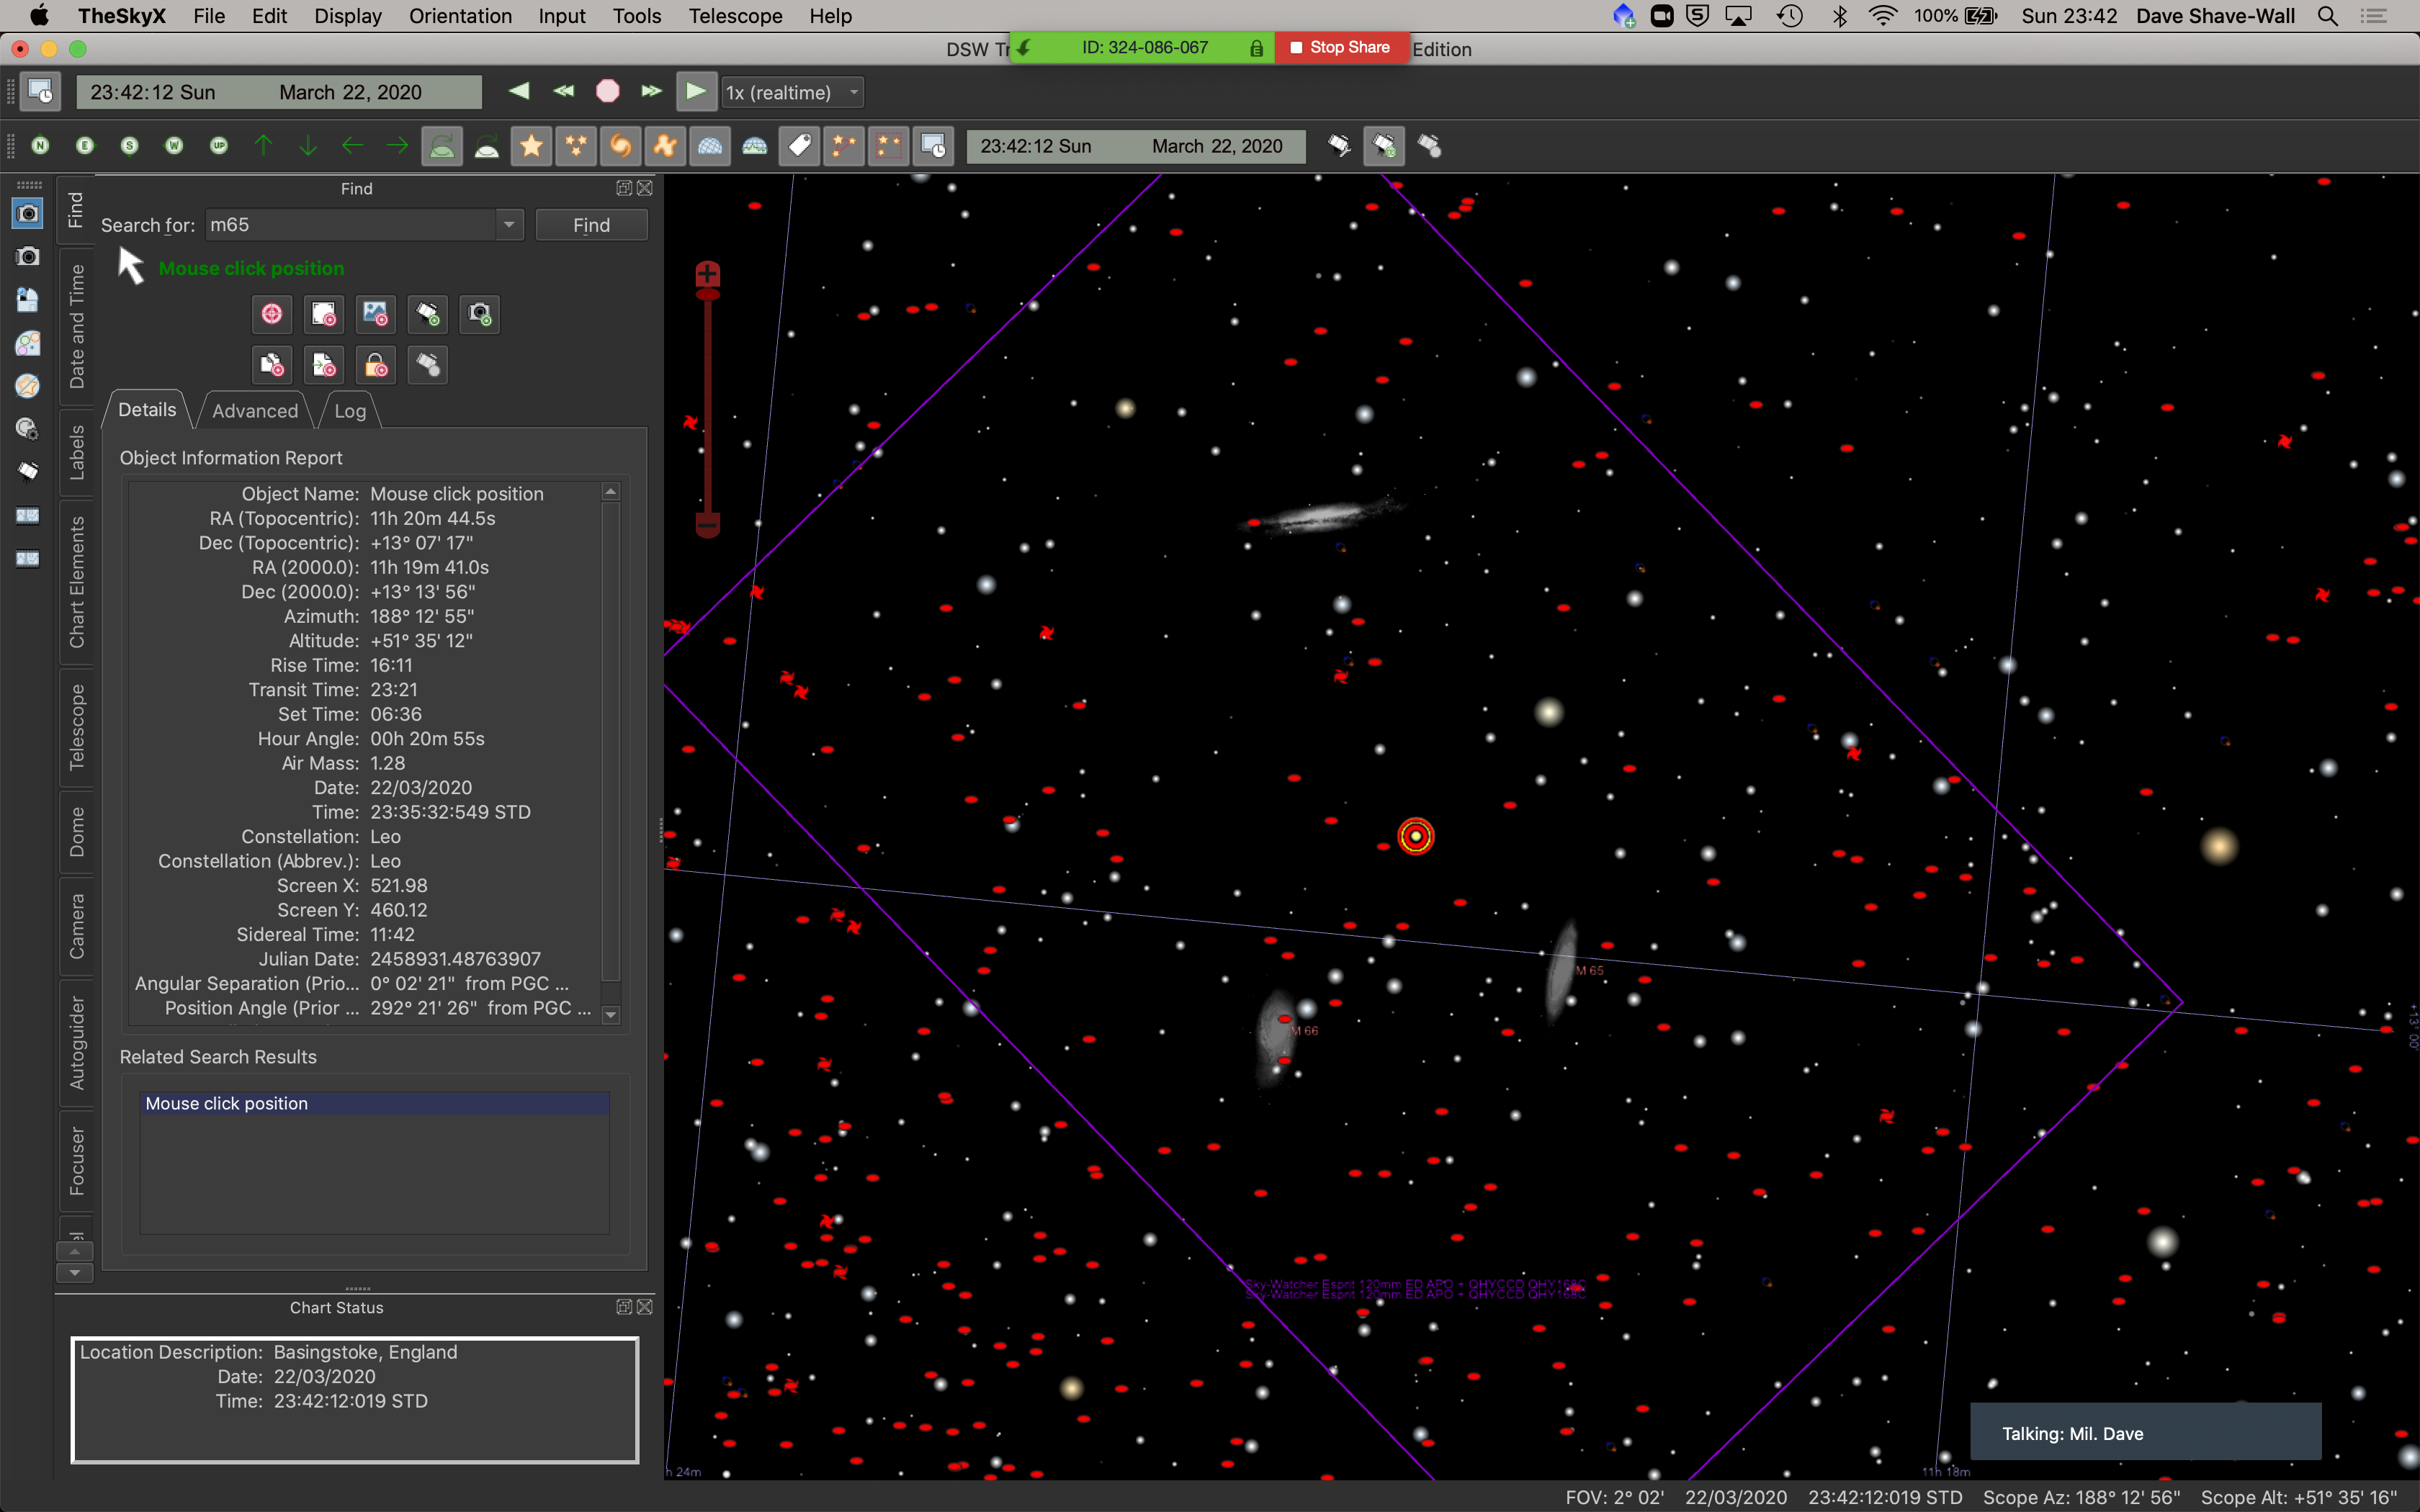
@23:46 started imaging Trio in Leo although there is some high level cloud
MUST REMEMBER TO TAKE FLATS TOMORROW!
IMT3 Tak QHY Camera Clean
Bob had noticed a lot of dirt on or near the sensor on the QHY168C camera that forms part of the imaging train on the Tak FS102. Today I took the camera off for a little spring clean.
The first thing was to mark the rotation angle of the camera so that it goes back on exactly. 21 degrees is the rotation angle as measured through an actual image.
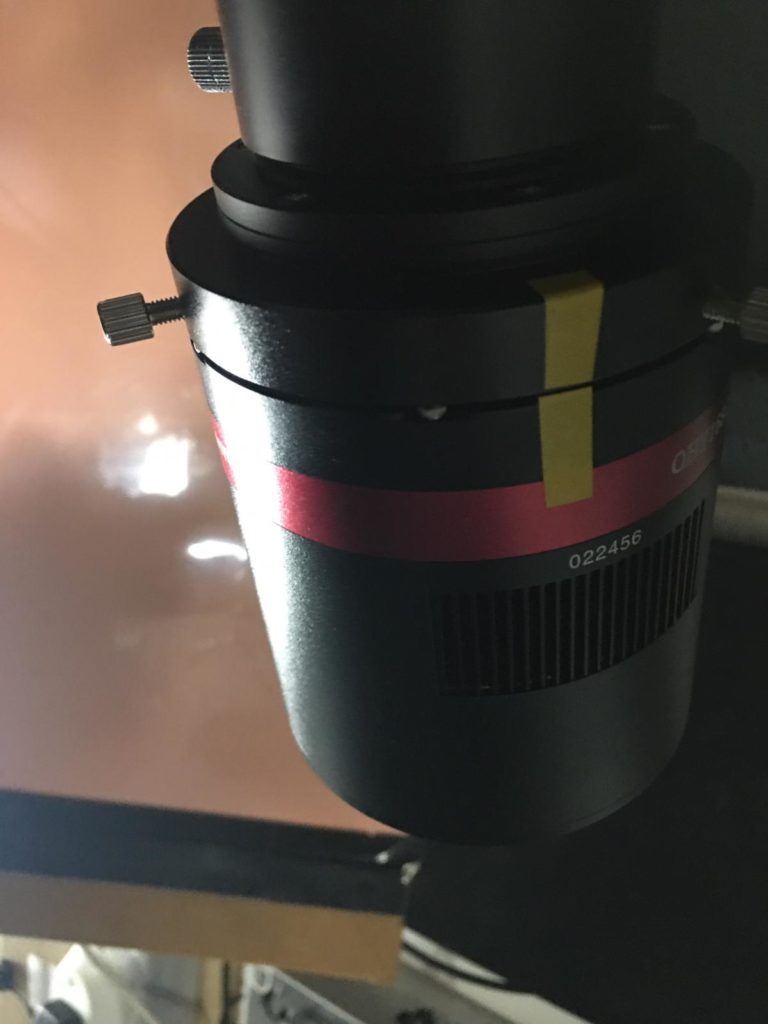
Next I took the camera off loosing the 3 screws holding it in position and then took a look at the CMOS chop glass cover for dirt.
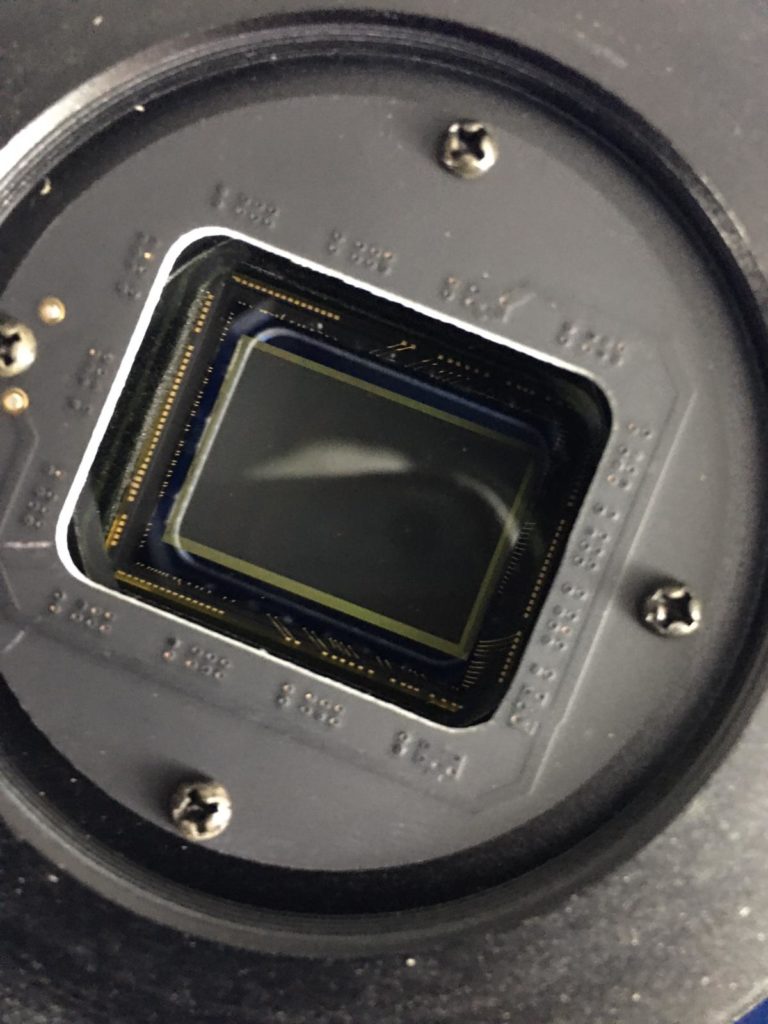
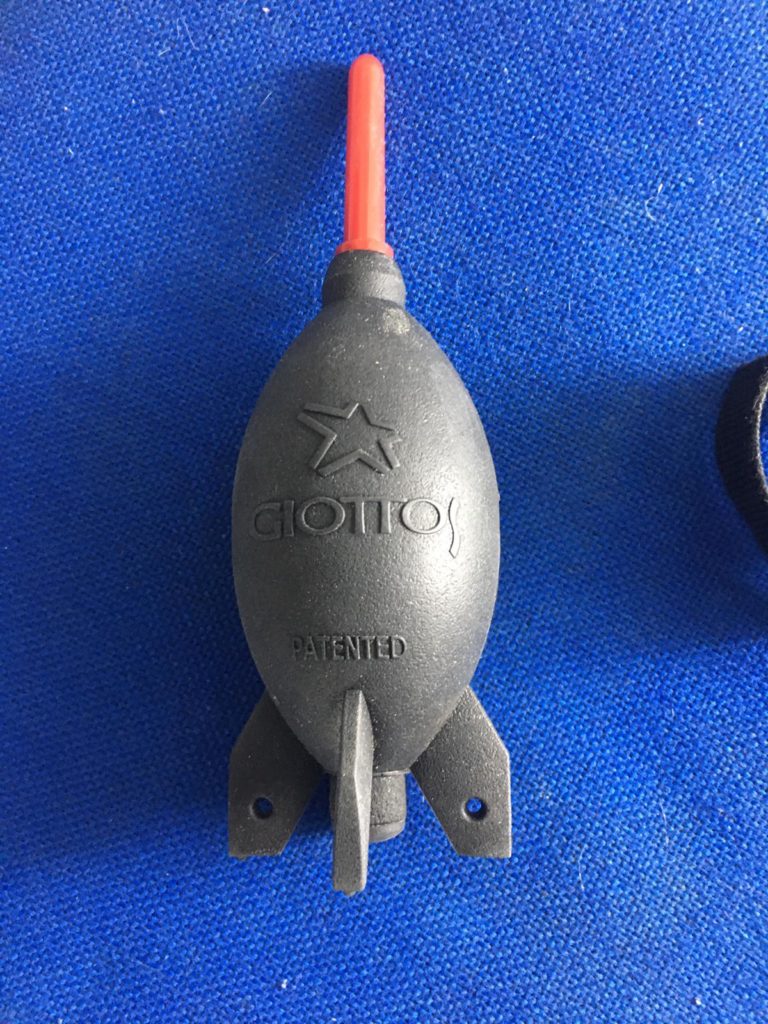
There was really only a couple of pieces of dirt on the cover so I removed them with the blower.
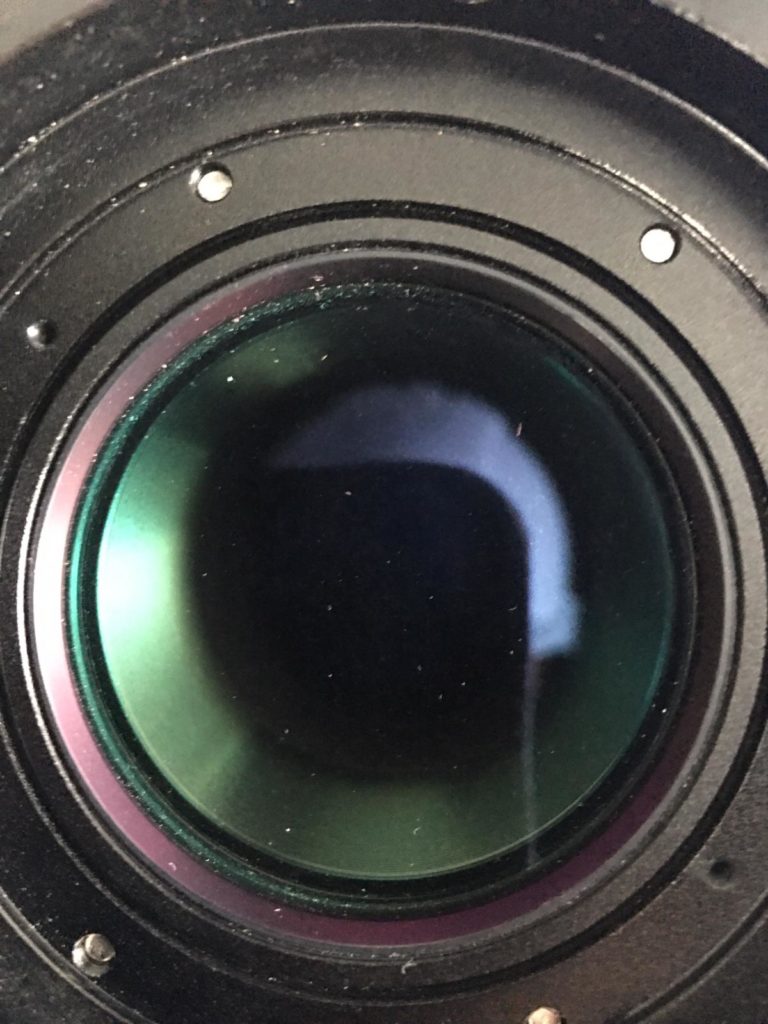
Next I took off the extension tube with which has the glass UV lens inside. At this point I forgot to mark up the position angle when I took the extension tube off. So when I reattached I look at the image train photo to adjust. Hopefully it will be very close and will only require minor adjustment.
Looking at the UV filter it was instantly visible that there was plenty of dirt and dirt on the glass lens, however it transpired to be on the inside of the lens toward the OTA. O removed the filter to clean with the rocket blower.
I then reattached the filter, the camera and reset the angle. I followed up by feeling for any play in the Tak OTA bracket that piggy backs it on the OS12″ OTA. I could not feel any. I was checking due to a shift on the FoV when Bob was recently imaging. Again the next time out we will need to readjust.

Viewing Report 3rd March 2020 – Travel Scope
Viewing time period – 19:37 – 22:35
Back out again tonight for a short period to look at guiding again. So with everything setup and a longer USB 2 cable in use I am now sitting in the warm Orangery. I will try again with the PHD2 software to guide and EzCap to acquire images from the QHY168C. I have set the Gain to 7 and Offset to 30 as previously used on my other QHY168C when used in Tenerife.
I polar aligned using PoleMaster. Then set about syncing the scope with Betelgeuse. It was only off slightly. The sync worked fine tonight. I then slewed to M35 and started the PHD2 guider software, selected a guide star and calibrated the guider. This worked well first time proving my new step size of 4 using a small ms time for the pulse worked.
Then I started guiding and very quickly realised the same problem as yesterday with DEC drift upwards. No amount of fiddling with the setting such as Hysteresis or Aggressiveness changes the constant upwards drift. I then remembered that I could calibrate the settings as the other night under Guider Assistant. I ran this made the changes but still the upward drift.
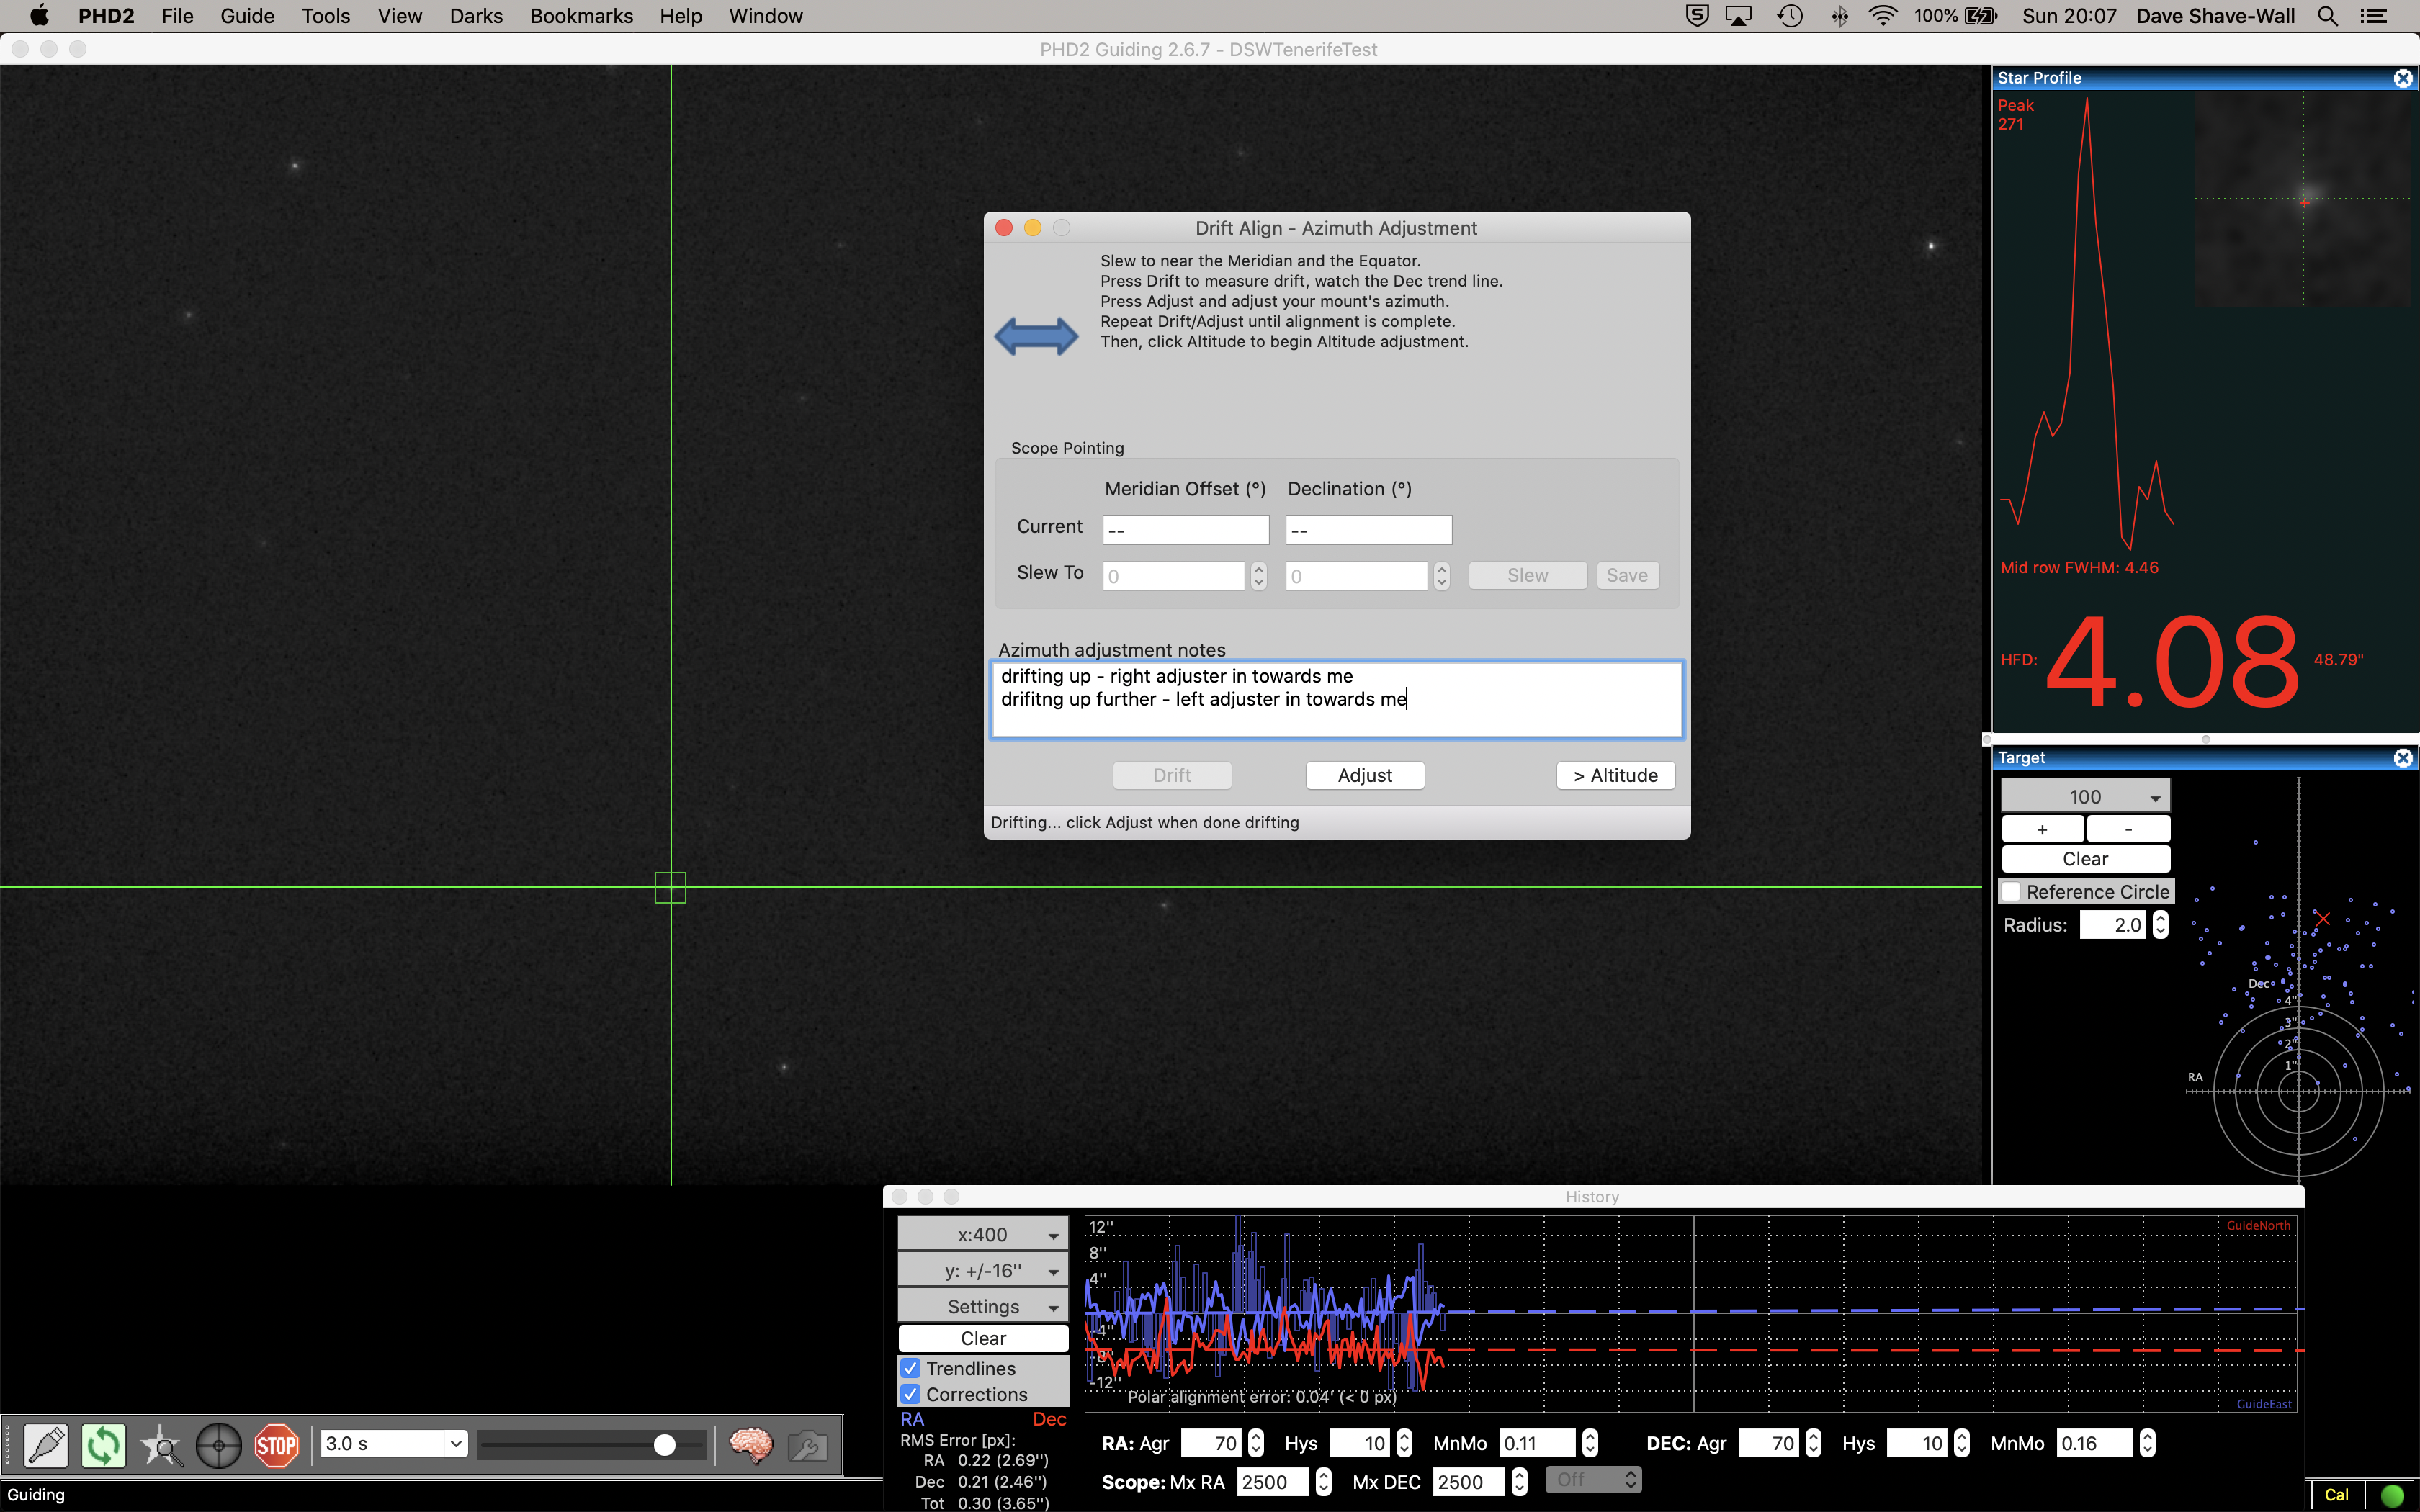
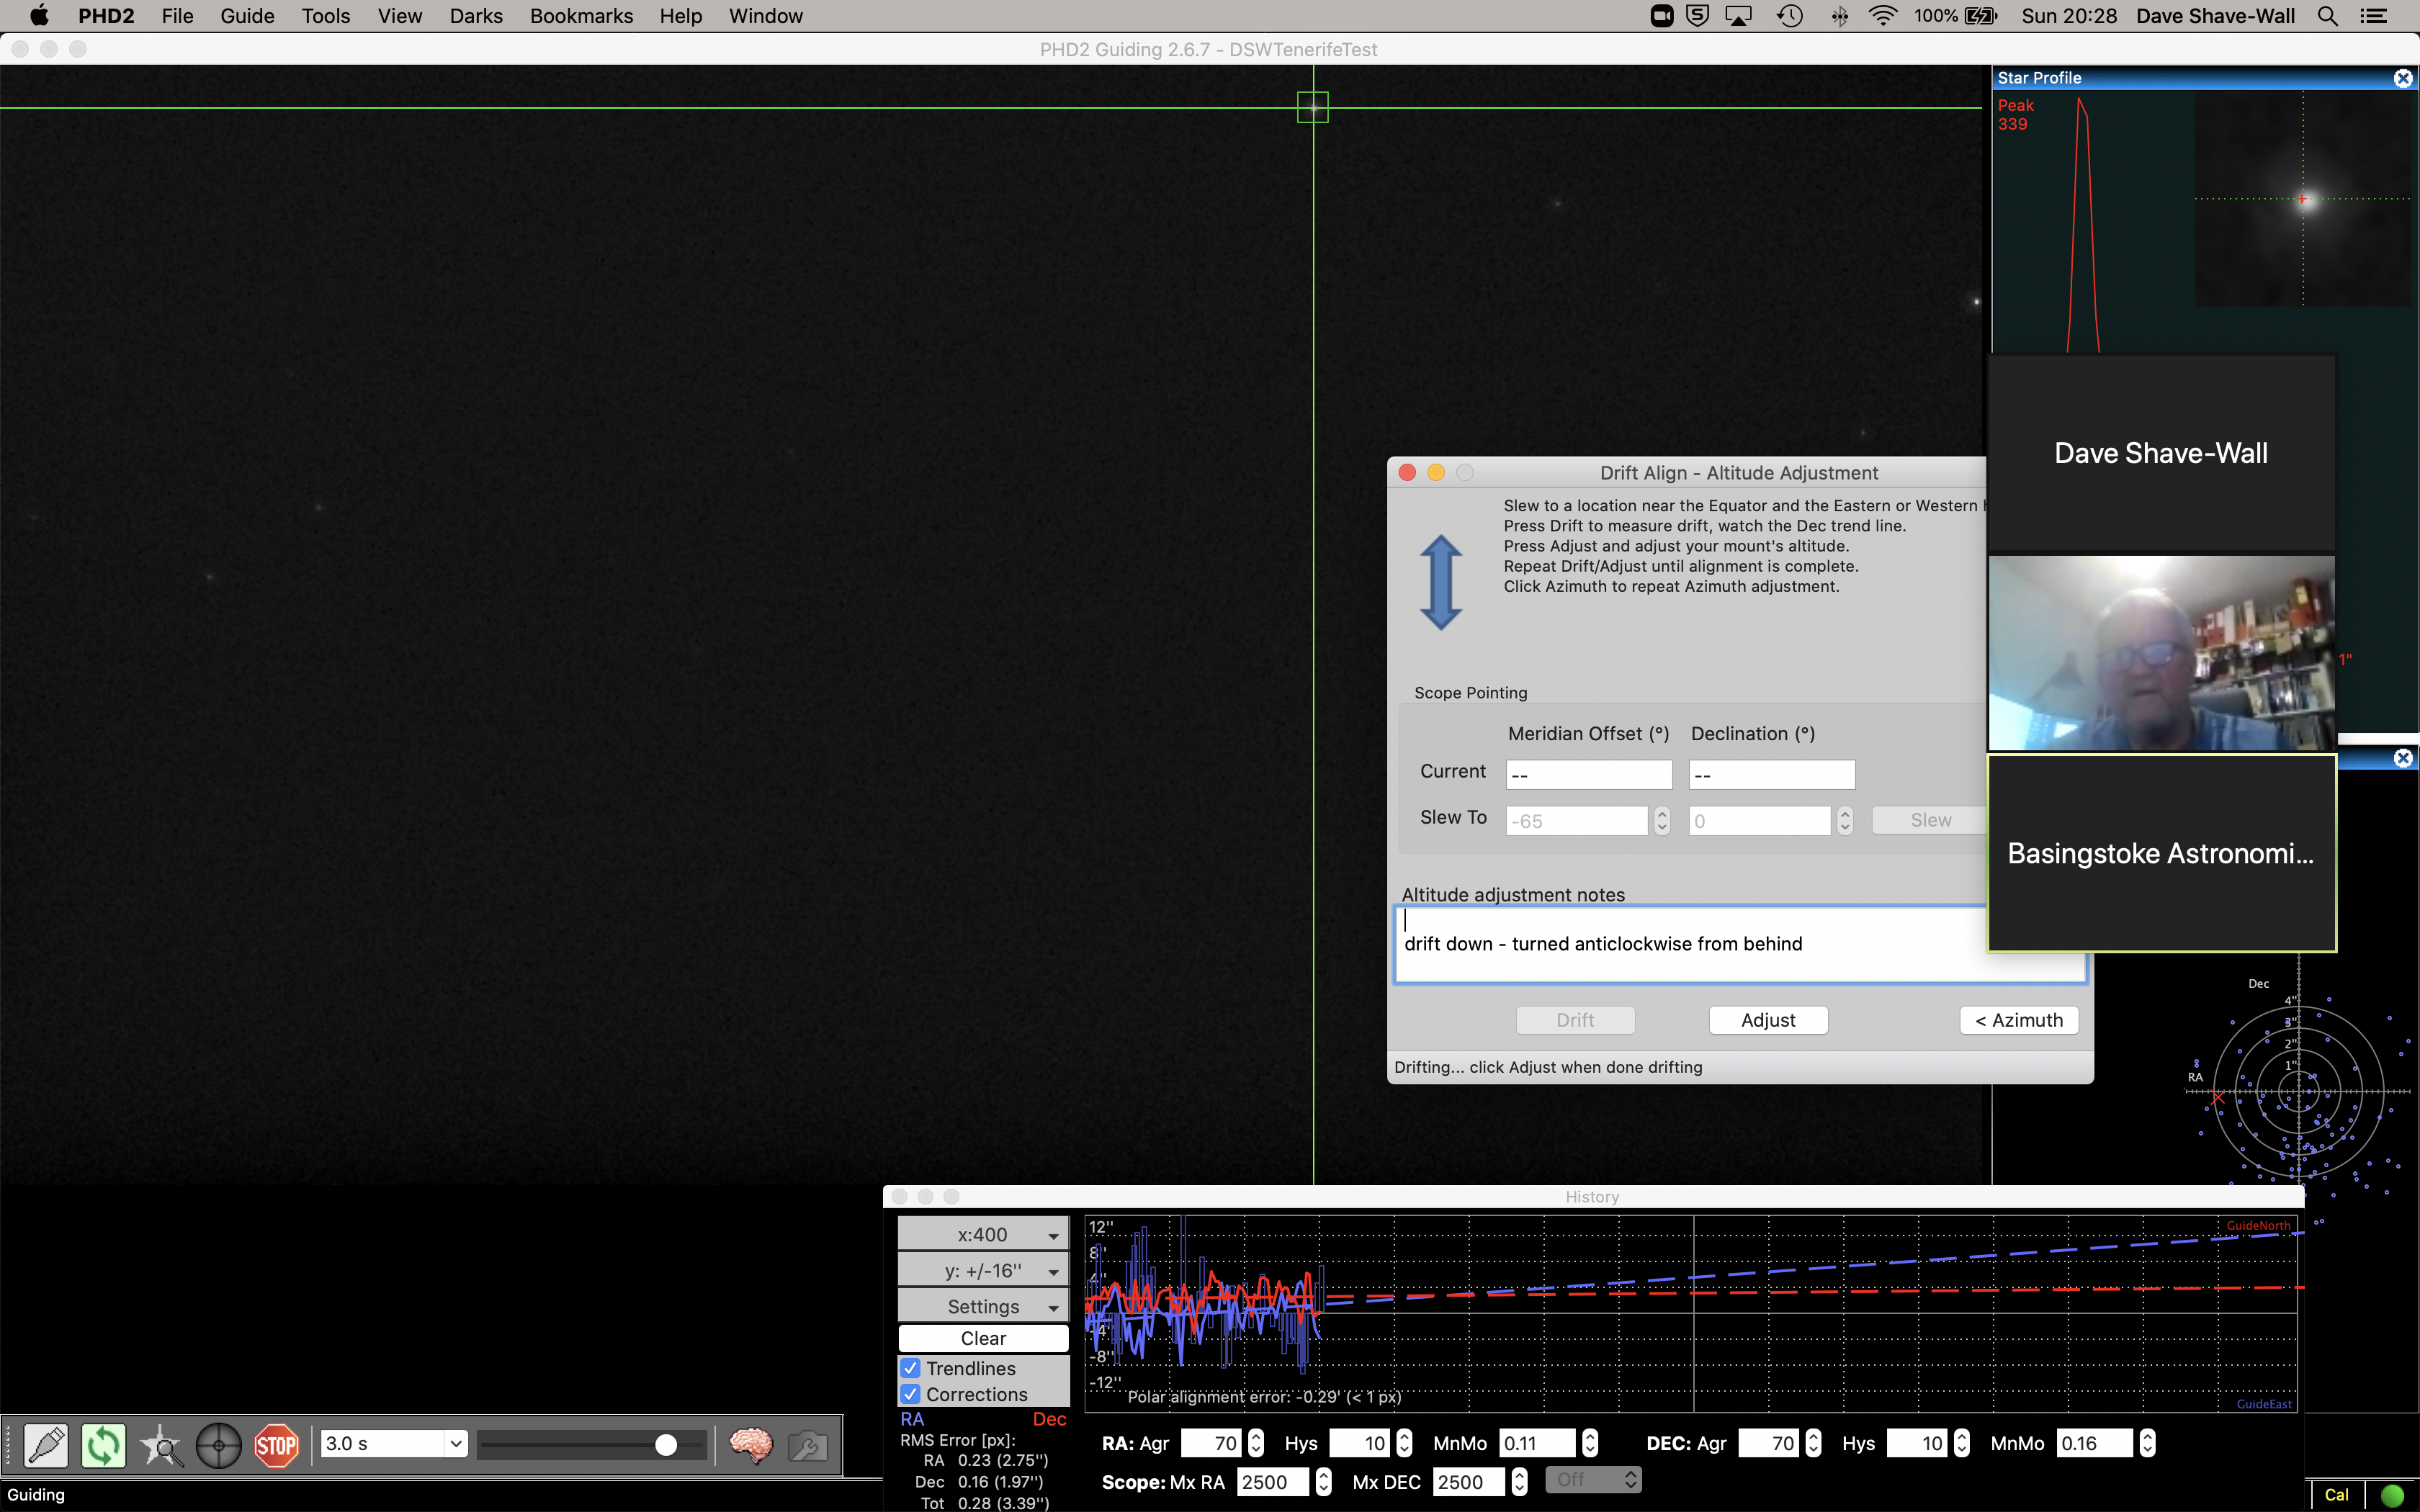
I then remembered that on the Paramount MEII in the dome I had to drift align with PHD2 to get it properly polar aligned and that PoleMaster was only good enough for short exposures or rough guiding. So I set about drift aligning.

The first thing to note is that the polar alignment was out by a fair bit to get the accuracy I require in both azimuth and altitude. I have now adjusted both and the graph seems a lot smoother.
So in all it took me around 1 hour to drift align and just as I was about to test the clouds rolled in!
Viewing Report 2nd March 2020 – Travel Scope
Viewing time period – 19:30 – 23:00
Tonight I wanted to continue to try and get guiding working, I setup outside on a much calmer night, no real wind tonight. Bob once again is playing with the IMT3.
I setup in the same place on the patio and again fed the USB cable through the window. I used the Polemaster to get the mount in the right position and then slewed to Betelgeuse to see if it was in the centre and it was!
I then slewed to M35 and connected the guider with PHD2. After some back and forth I got it calibrated but it was complaining about the amount of steps being to small for calibration and the guiding was all over the place. The screen brightness was still very white. I solved this by changing the Gain for the camera.
I decided to give TheSky X a go at guiding instead of PHD2. Unfortunatly it was not much better and at one point I could see the downloaded image from the guider then suddenly it disappeared, I had changed nothing but now it was black. Nothing I could do would make it come back including disconnecting. So I went back to PHD2.
I managed to fix the issue in PHD on the amount of Steps being used to calibrate by adjusting the calibration step size down from 5333 to 1300. This increased the steps from 3 to 5. Much better and now I don’t get the error.
However right now I still cannot get the Dec to behave. Whilst I can take a 5 min image the Dec is wonder up from where it should be and no amount of tweaking the Aggressiveness or Hysteresis changes that.
Furthermore, I decided to take images with The Sky X over EzCap but after 4 images TSX hangs every time……. So I have now given up tonight and will come back out the next cleanser night to resolve the issues.
Viewing Report 1st March 2020 – Travel Scope
Viewing time period – 17:35 – 23:00
First time out for a very long time with the travel setup. I need to get the guiding working before the Tenerife holiday in July. I have left Bob to play with the IMT3 whilst I work through the bugs.
The challenge is at first remembering how to set everything up. I found after some effort I was actually missing a cable, it was in the black wheelie case in the garage with the laptop tent and scope daytime cover, but more about that later.
So So after finding a place on the patio where I could feed the USB cable through the Orangery window, I put the Berlebach tripod down and placed the MyT mount on top. I tightened the screws and then placed the Sky-Watcher Esprit 120 ED on top of the Versa Plate. Once in position I balanced the scope then connected the various cables, now all through the mount due to my good friend Bob making up some power connectors for me.
So I tried to guide through PHD2. There was a large wind blowing. On trying to calibrate the scope would not move. After what seemed like an hour I remembered that cable, this was again the ST4 guider cable that is needed on the Mac if you are guiding with PHD2 as there is no ASCOM. So I connected the ST4 cable and it worked.
What I could not achieve tonight was to get the guide graph behaving, it was a mess. The wind was at fault but still there were other issues, not least the slider to control the contrast of the screen was causing anything above 0.5s to become white.
After many hours I gave up and brought the rig in. I had been using TheSkyX to slew there scope, PHD2 to guide and EzCap to connect to the QHY168C camera and take images. I will try again tomorrow night.
Analysis Report for first partial Exoplanet Data – IMT3 Observatory
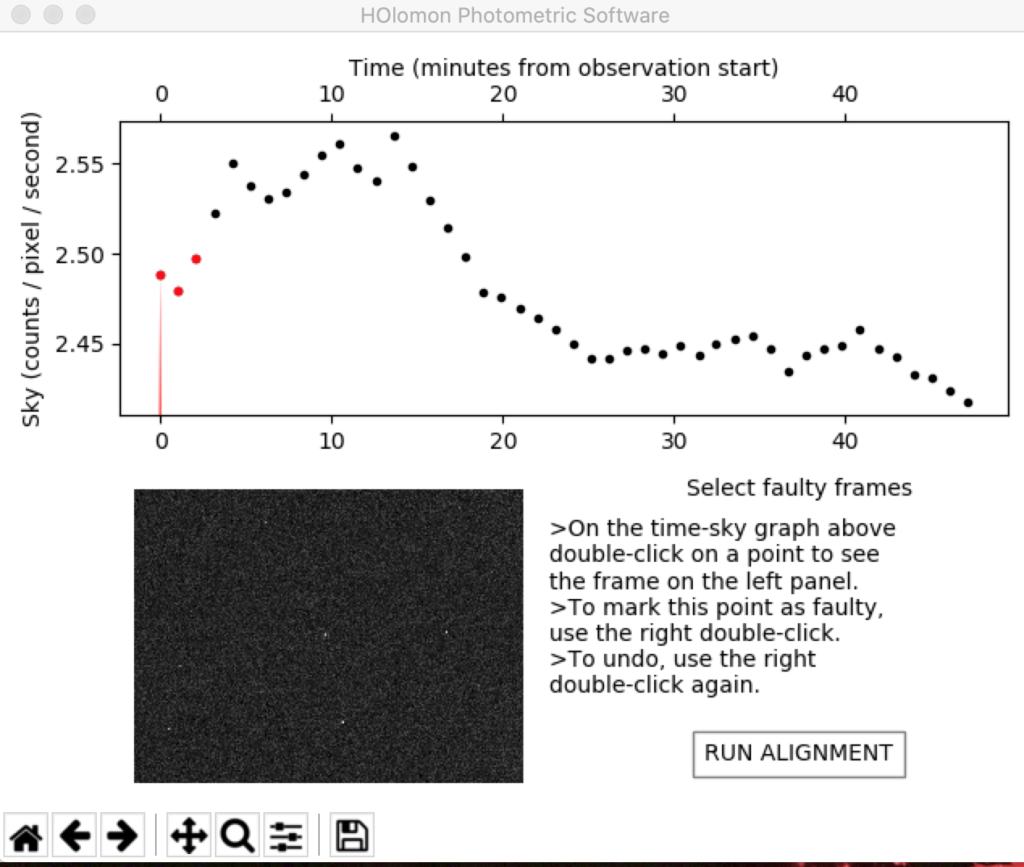
I managed to get only 45 minutes worth of data the other night to test if I could both acquire data and then process it. It took some time to get the downloaded HOPS software from the ExoClock mission working on my Mac, but with the help of Angelos from the project. So I opened the 46 images, I did not capture darks or flats and of course no bias due to it being a CMOS camera. I added information about the observatory and then ran the reduction and alignment code.

So the initial chart looked promising, I had taken the first set of frames almost on time for the transit even though you are supposed to start 1 hour before. This was because it took me so long to setup. So the data looks like it shows a decrease in brightness over the 45mins, however I have asked Angelos for his opinion and await a response.
I then selected the target star, KELT-18 with the red circle below, along with 5 comparison stars. I may have selected stars incorrectly here as they are probably suppose to be not variable.
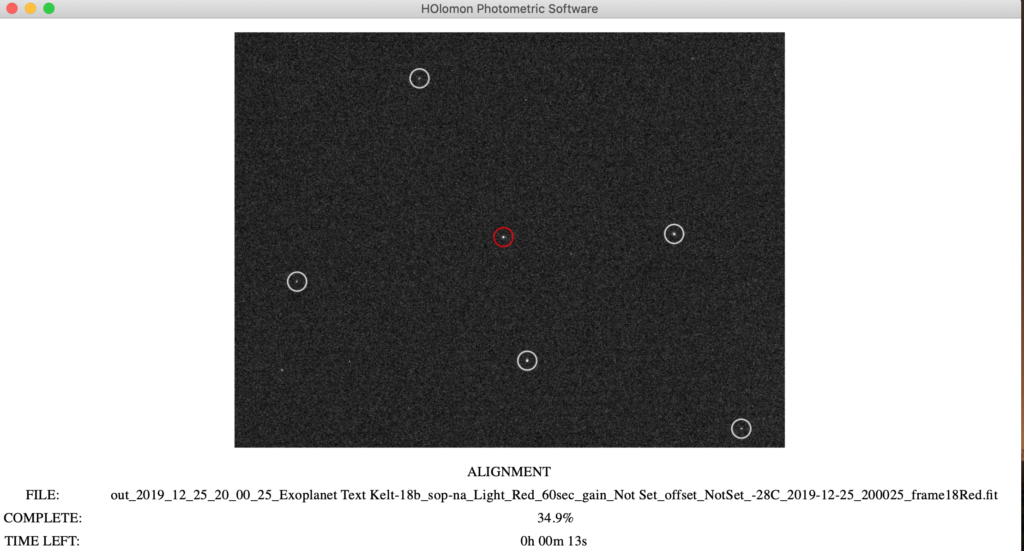
The resulting table appeared with the size of the box for each star and its position.

I then ran the photometry code and the following chart was created which to me showed I had done something wrong given the scatter.
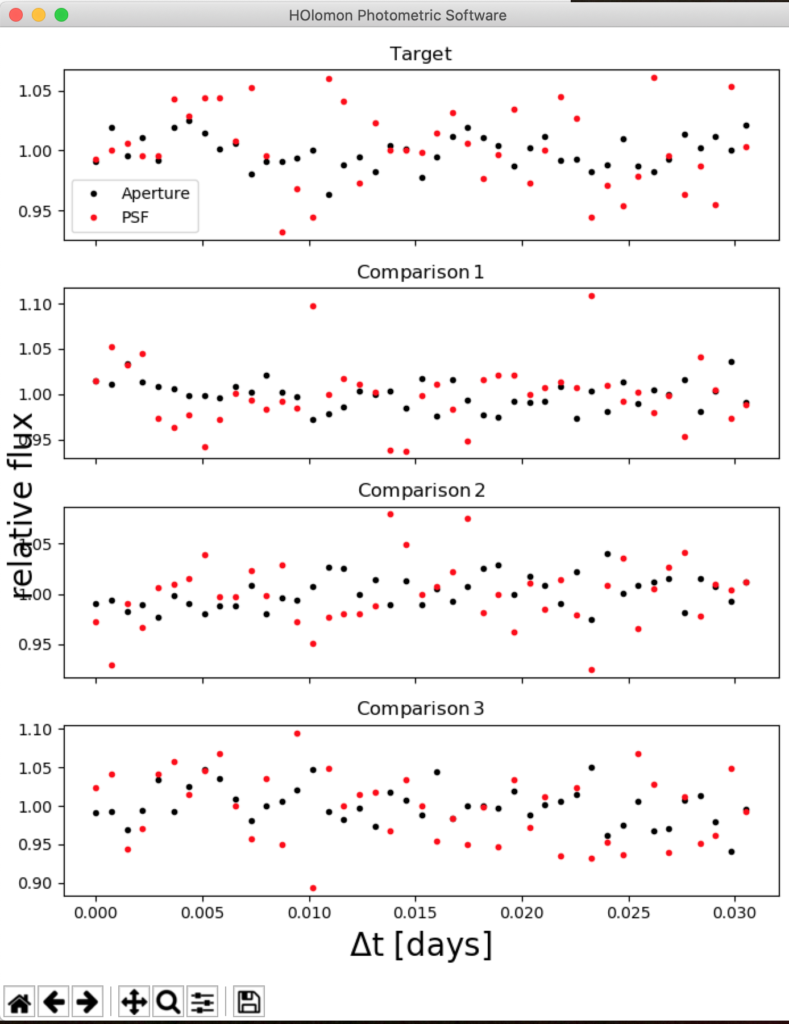
I then for fun ran the fitting code from this screen.
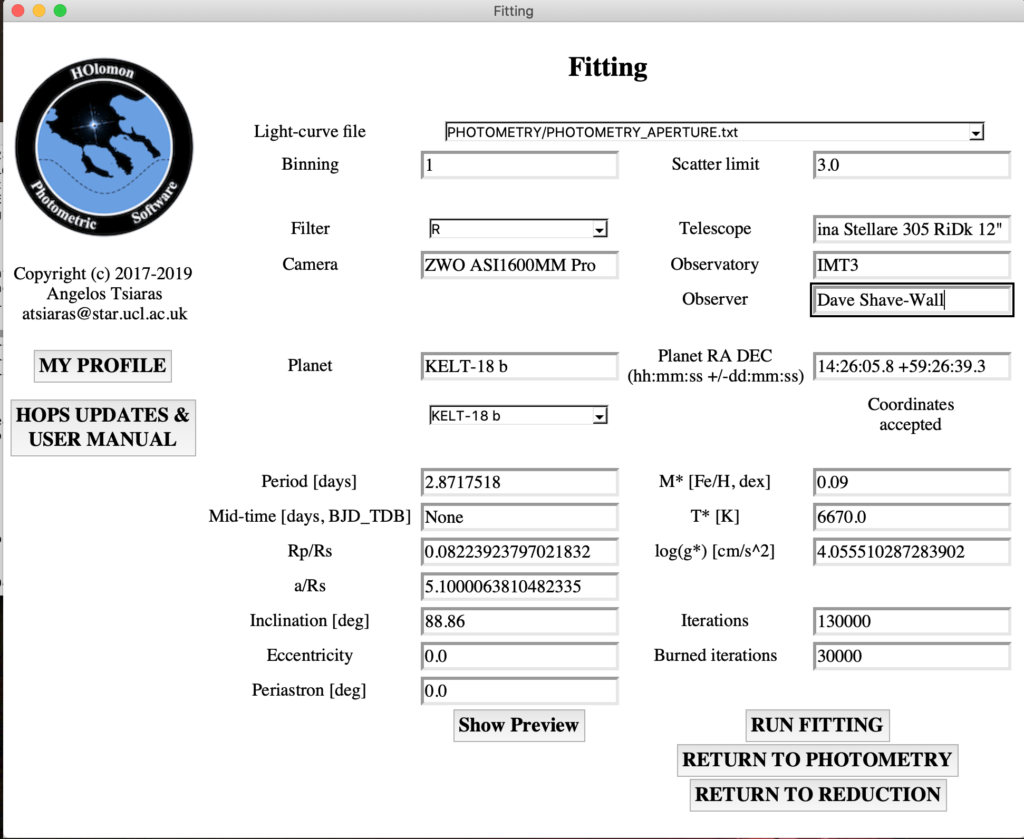
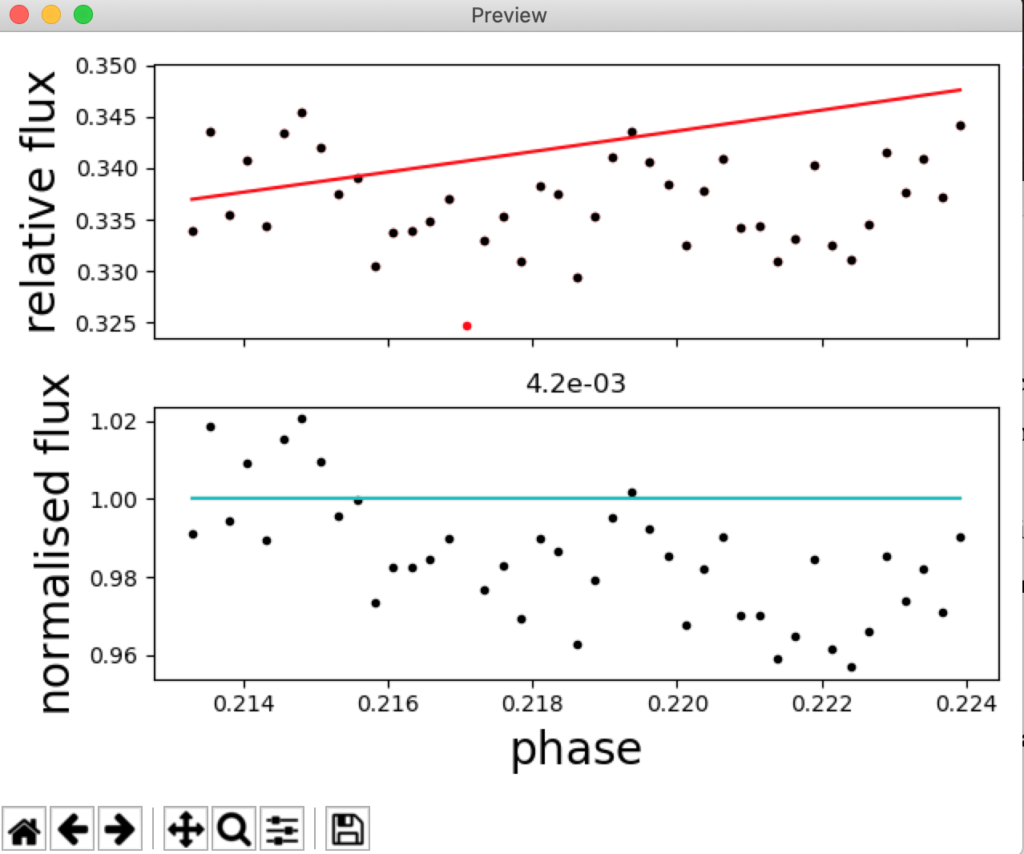
The fitting showed and increase in brightness which was clearly incorrect. So I have learned a few things with this, first is to read up on using the software for analysis, second is to gain more data and calibration frames.
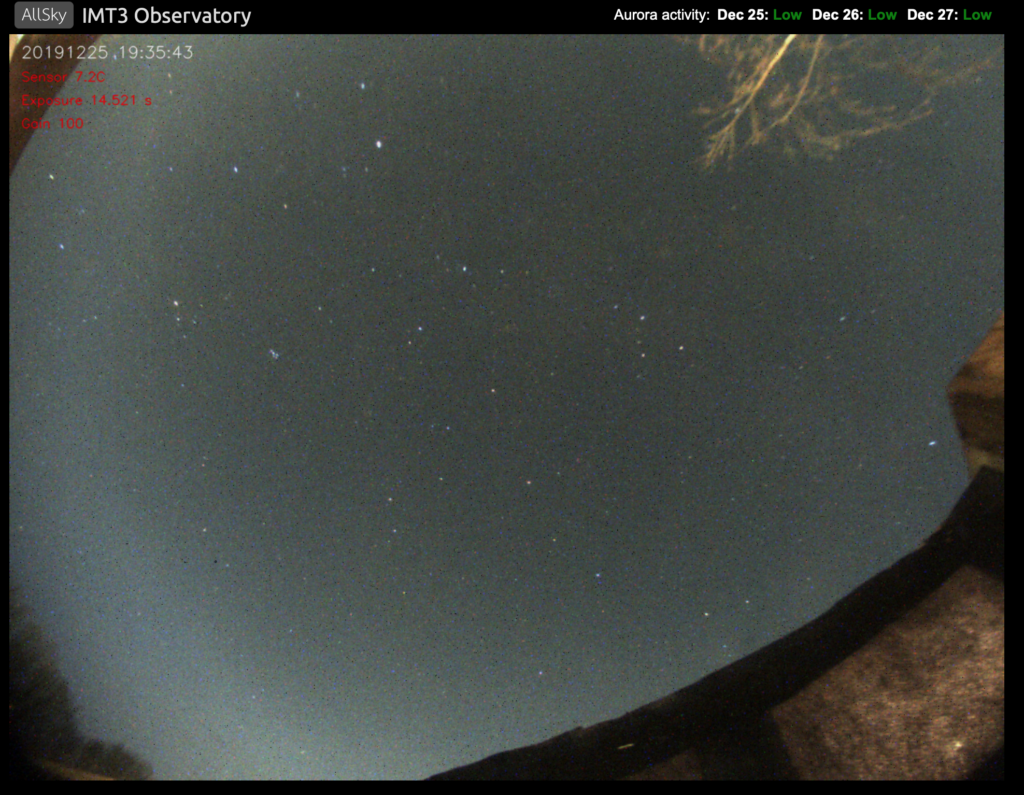
Viewing Report 29th December 2019 – IMT3 Observatory
Viewing time period – 17:43 – 17:48
EXOPLANET – HAT-P-20b
Slightly hazy right now but I have opened the dome up and turned the cooling fans on the 12″. Slewed to Atik, a mag 2.8 star in Perseus and aligned the scope.
So the star was almost in the centre when I slewed the scope to it, a slight tweak and now synced on it centrally. The Hitec Astro weather station reports slight haze
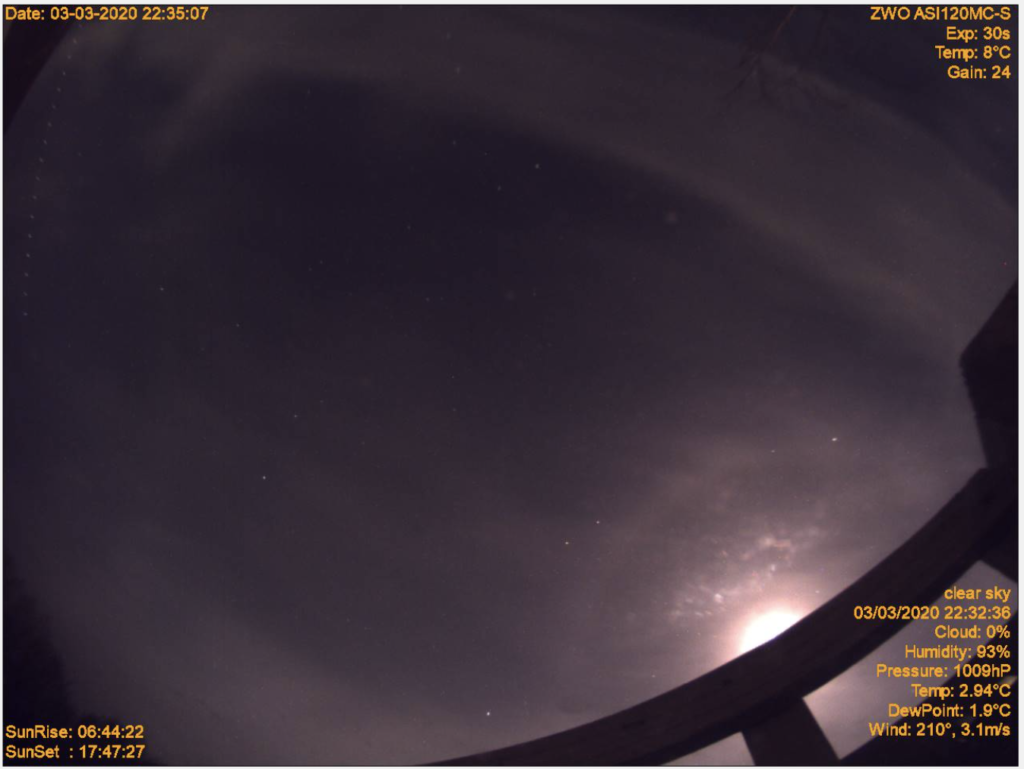
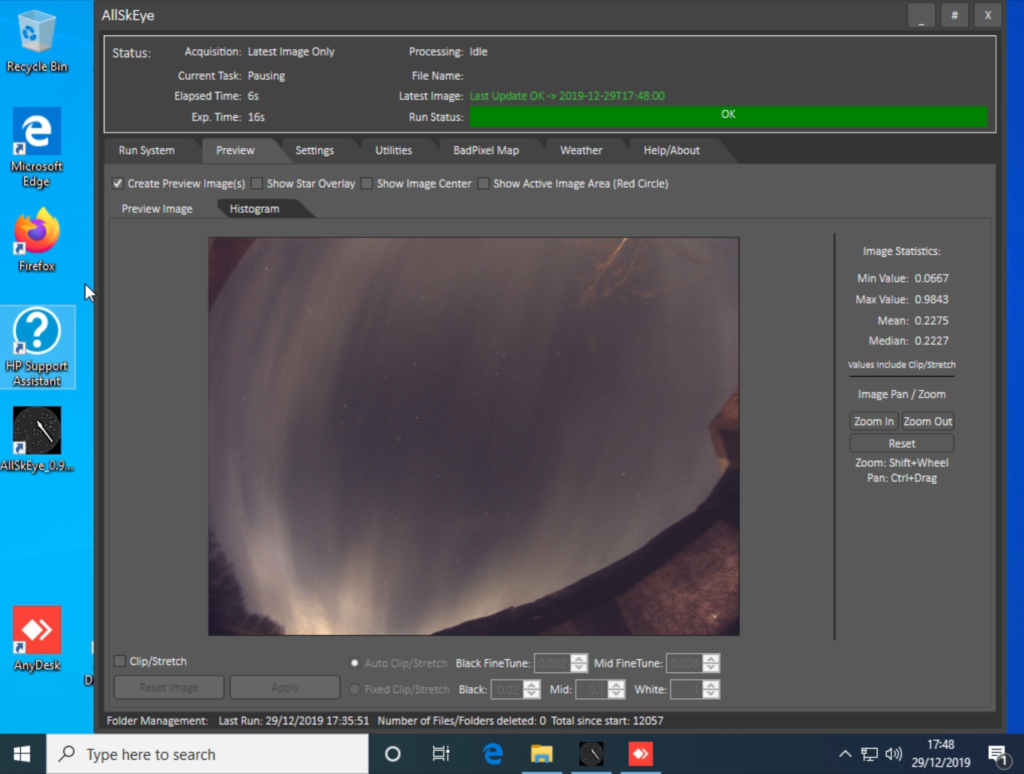
Gingergeek installed a new Intel Windows small form factor computer recently in replacement for the RPi so we could run the AllSkEye software and see if the loss of one of the colour channels was software or hardware. Here is tonights image, which still needs colour calibrating during the day.
Viewing Report 25th December 2019 – IMT3 Observatory
Viewing time period – 19:10 – 20:32
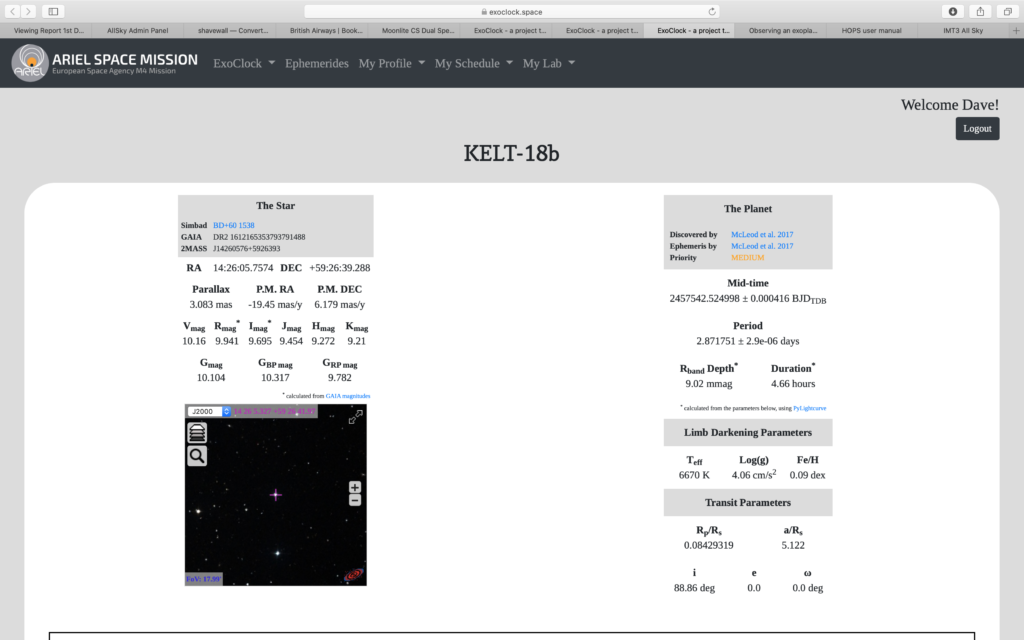
EXOPLANET – KELT-18b
As always on Christmas Day, or at least it seems so, the sky was clear for a period of time before the clouds rolled in. The day was dry and cold, sunny and bright, the first time in over a month of rain. Now was the time to take a look at a star and see if I could calibrate my setup for imaging an exoplanet transit.
I used the exoclock.space website to find objects for my location and then entered the RA and DEC into The Sky X (TSX) and slewed to it. The star and its associated planet tonight was KELT-18 and the planet KELT-18b. This was very low to the North when I slewed and I struggled doing a slew and sync with the scope in TSX due to not enough stars found.

So instead I placed the RA and DEC into SGPro and asked that to perform a slew and solve, which incidentally worked an absolute treat. The star was centred in the middle of the FoV and the star pattern matched that from the Exoclock website which they give you.
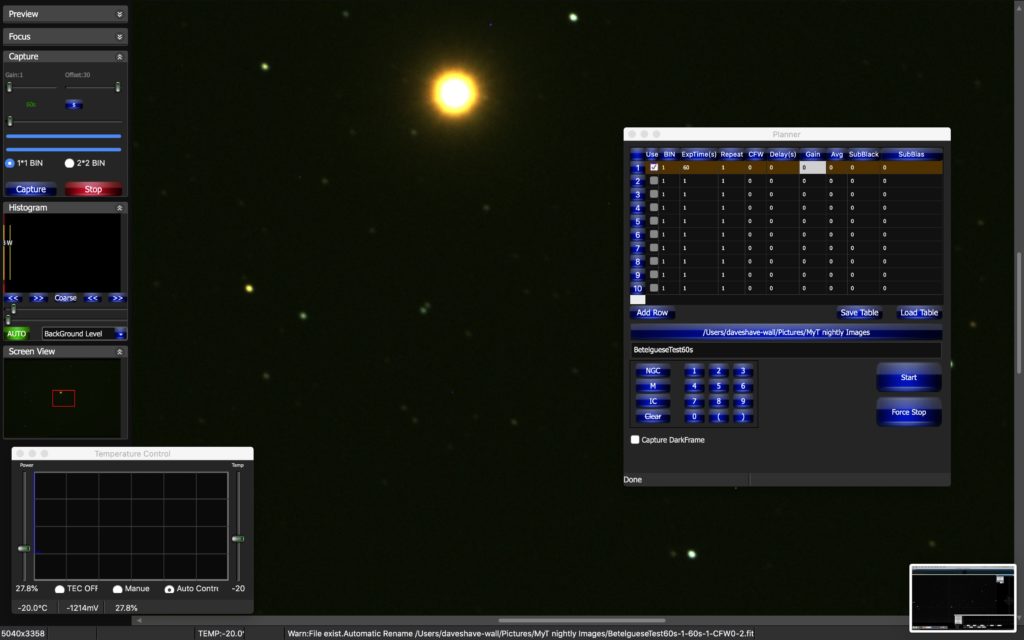
I then setup SGPro to take as many images as I could, each being 1min long as I could not find a guide star. At 1min I did not get any trailing and I should have said, all of this through the 12″. I set the cooler to -28℃ which consumed about 26% power so nicely cold. I choose the red filter as described to lower the amount of noise in the image and allow calibration with other astronomers images.
I had to change the user profile to the Comet profile as I did not wan the guider trying to settle, so restarted the run and was off. I managed to go for around an hour and thus grabbed 46 images. I am not sure if I can use the HOPS software from Exoclock to plot these but will try. I did not bother with calibration frames and if needed I can grab some later.

Either way, a good hours viewing in-between the outgoing festive cheer from one side of my family and the incoming festive cheer tomorrow from the other.
Merry Christmas and Clear Skies
Viewing Report 1st December 2019 – IMT3 Observatory
Viewing time period – 19:03 – 21:27
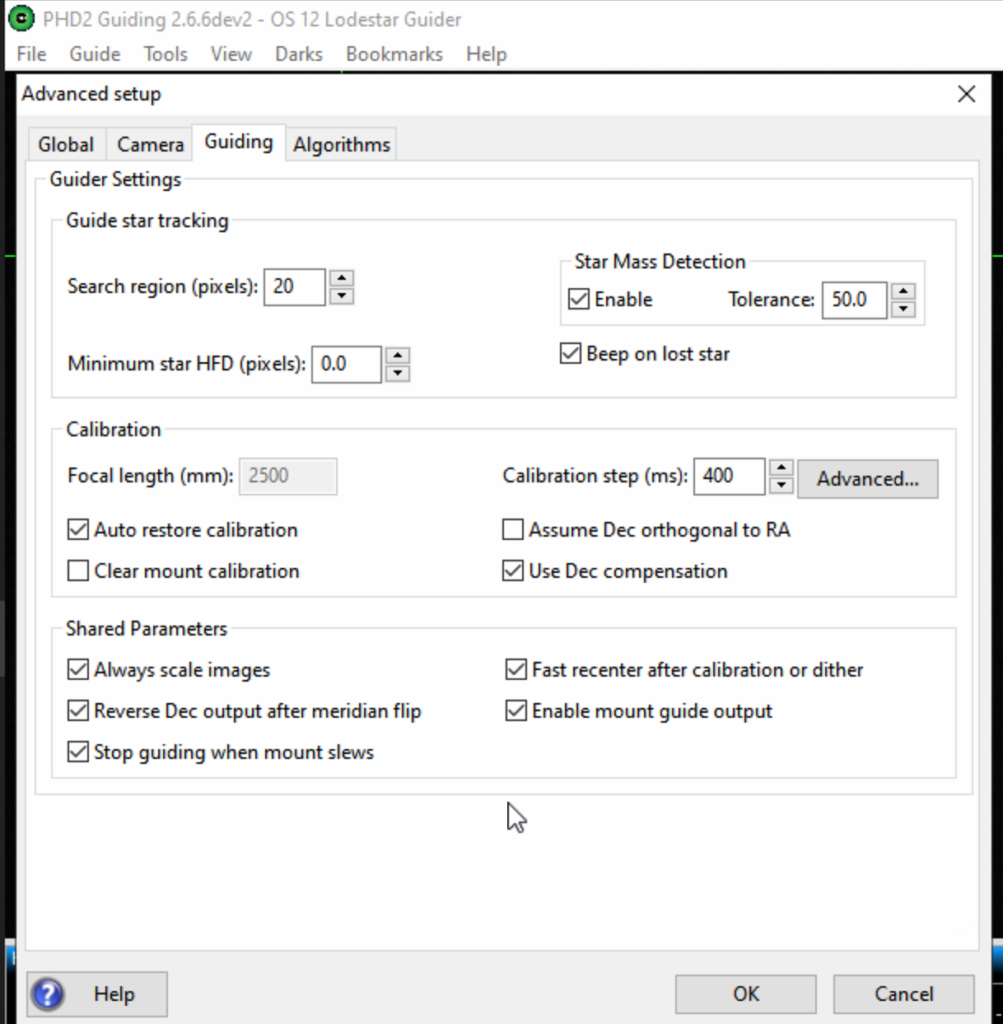
Tonight I wanted to get the PHD2 guiding working when doing a meridian flip without the need to calibrate. A month ago we still failed to get this done, however a little experimenting tonight and changing a single setting has corrected the problem. The setting was the ‘Reverse Dec Outputted After Meridian Flip’ one within the Guiding table of the Advanced Setup, for which I ticked and this fixed the issue.
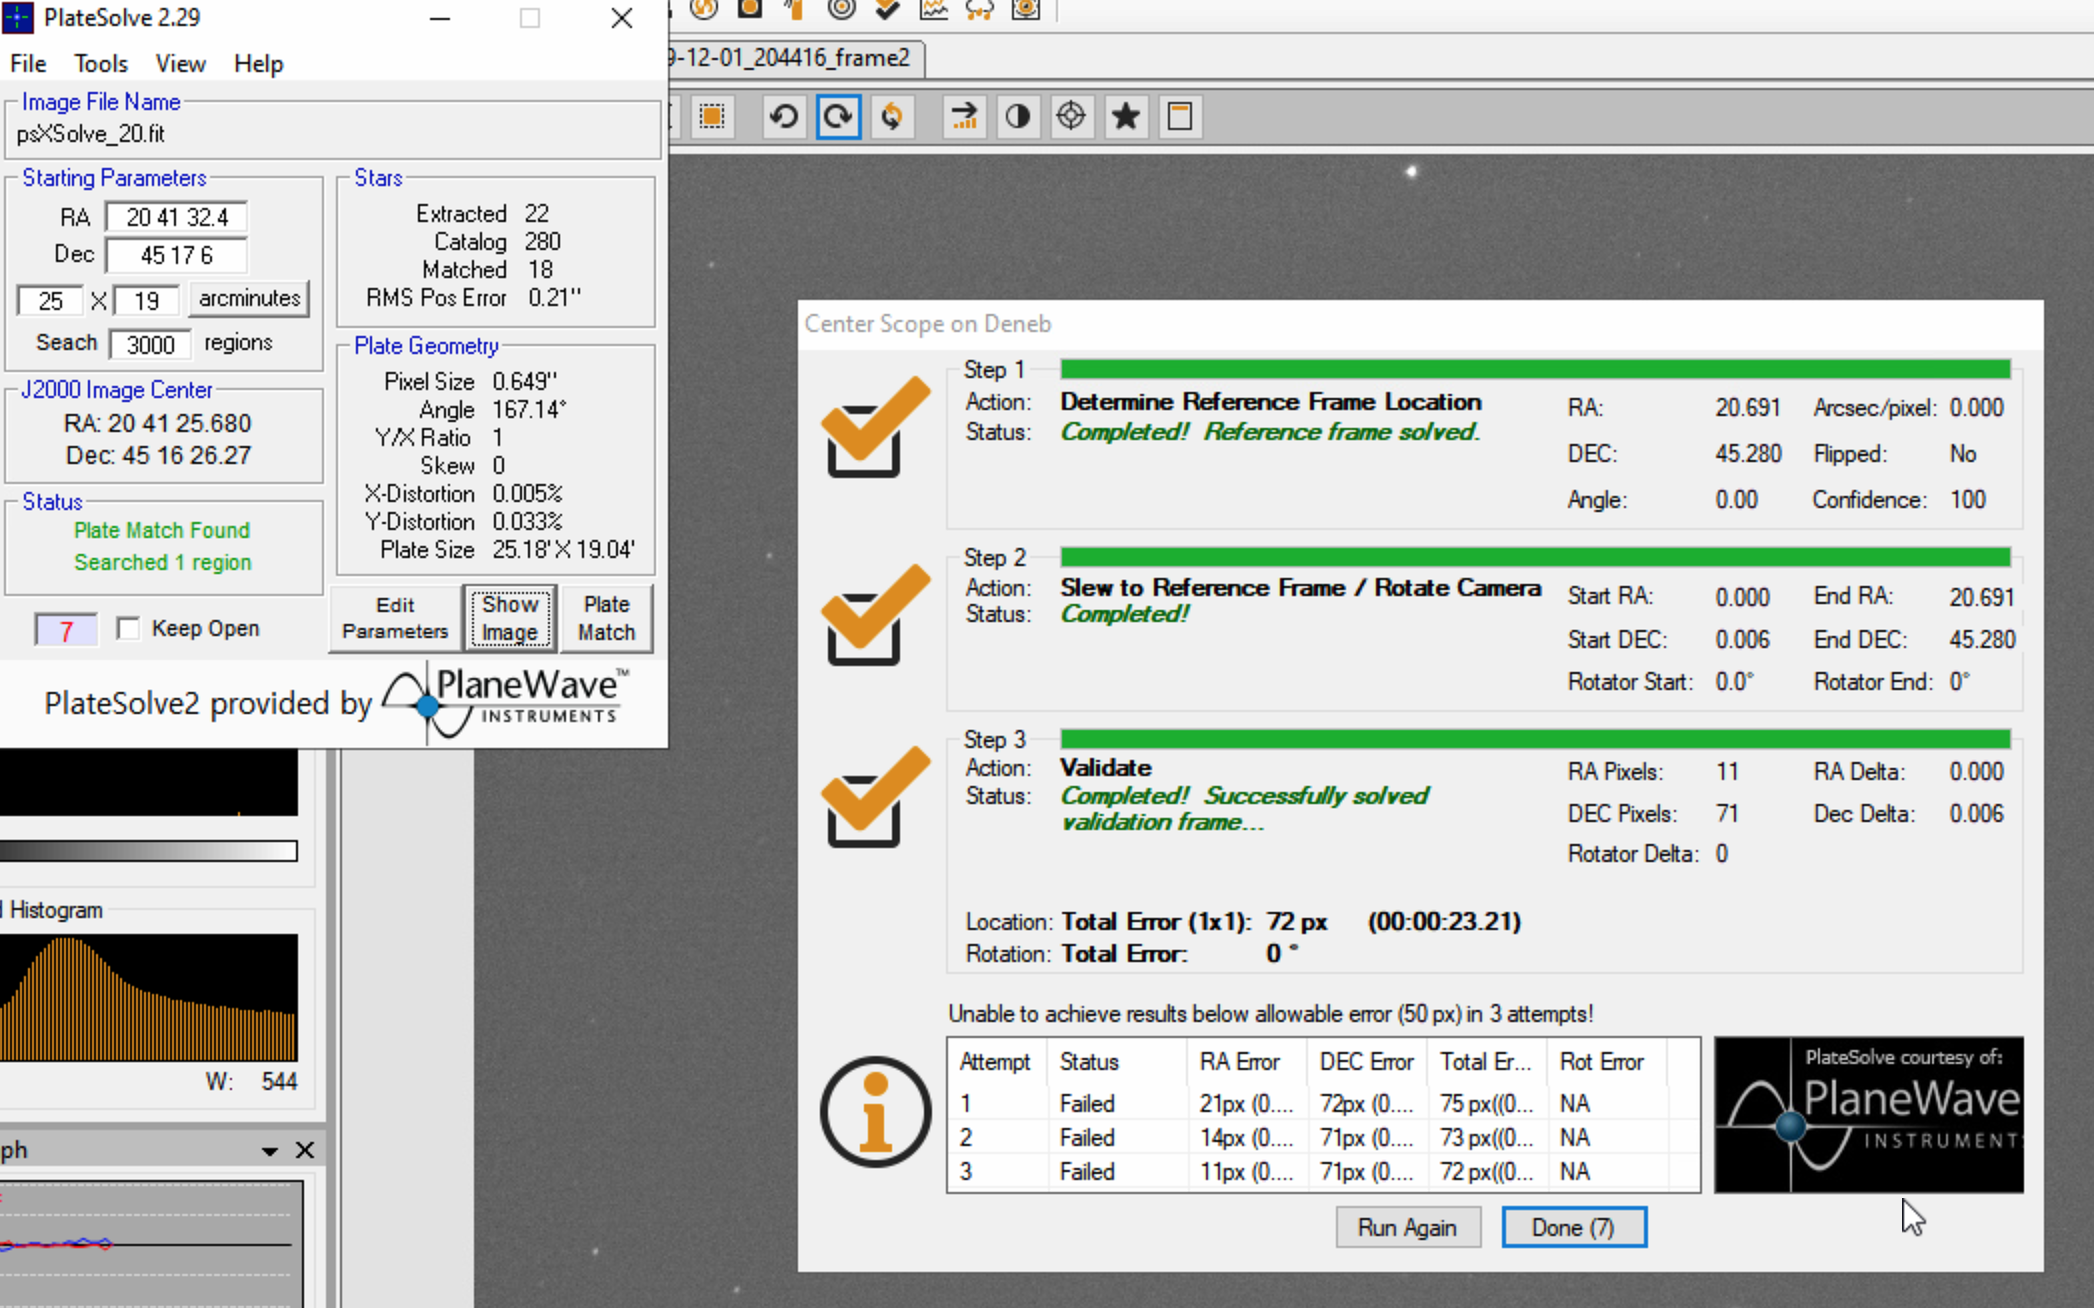
I then decided to try 2 objects either side of the meridian and that worked manually slewing to each and then guiding. What did not work was the slewing automatically to the object in terms of centring on the screen. It slewed to the star, I could see it on the screen, the first object Almach worked ok, but the second object, Deneb appeared on the screen but failed to centre with the error ‘ Failed to auto centre, aborting sequence’ followed by ‘ failed to centre on object with an error less than 50 pixels’. Plate solving works fine, well at least it comes back with success.
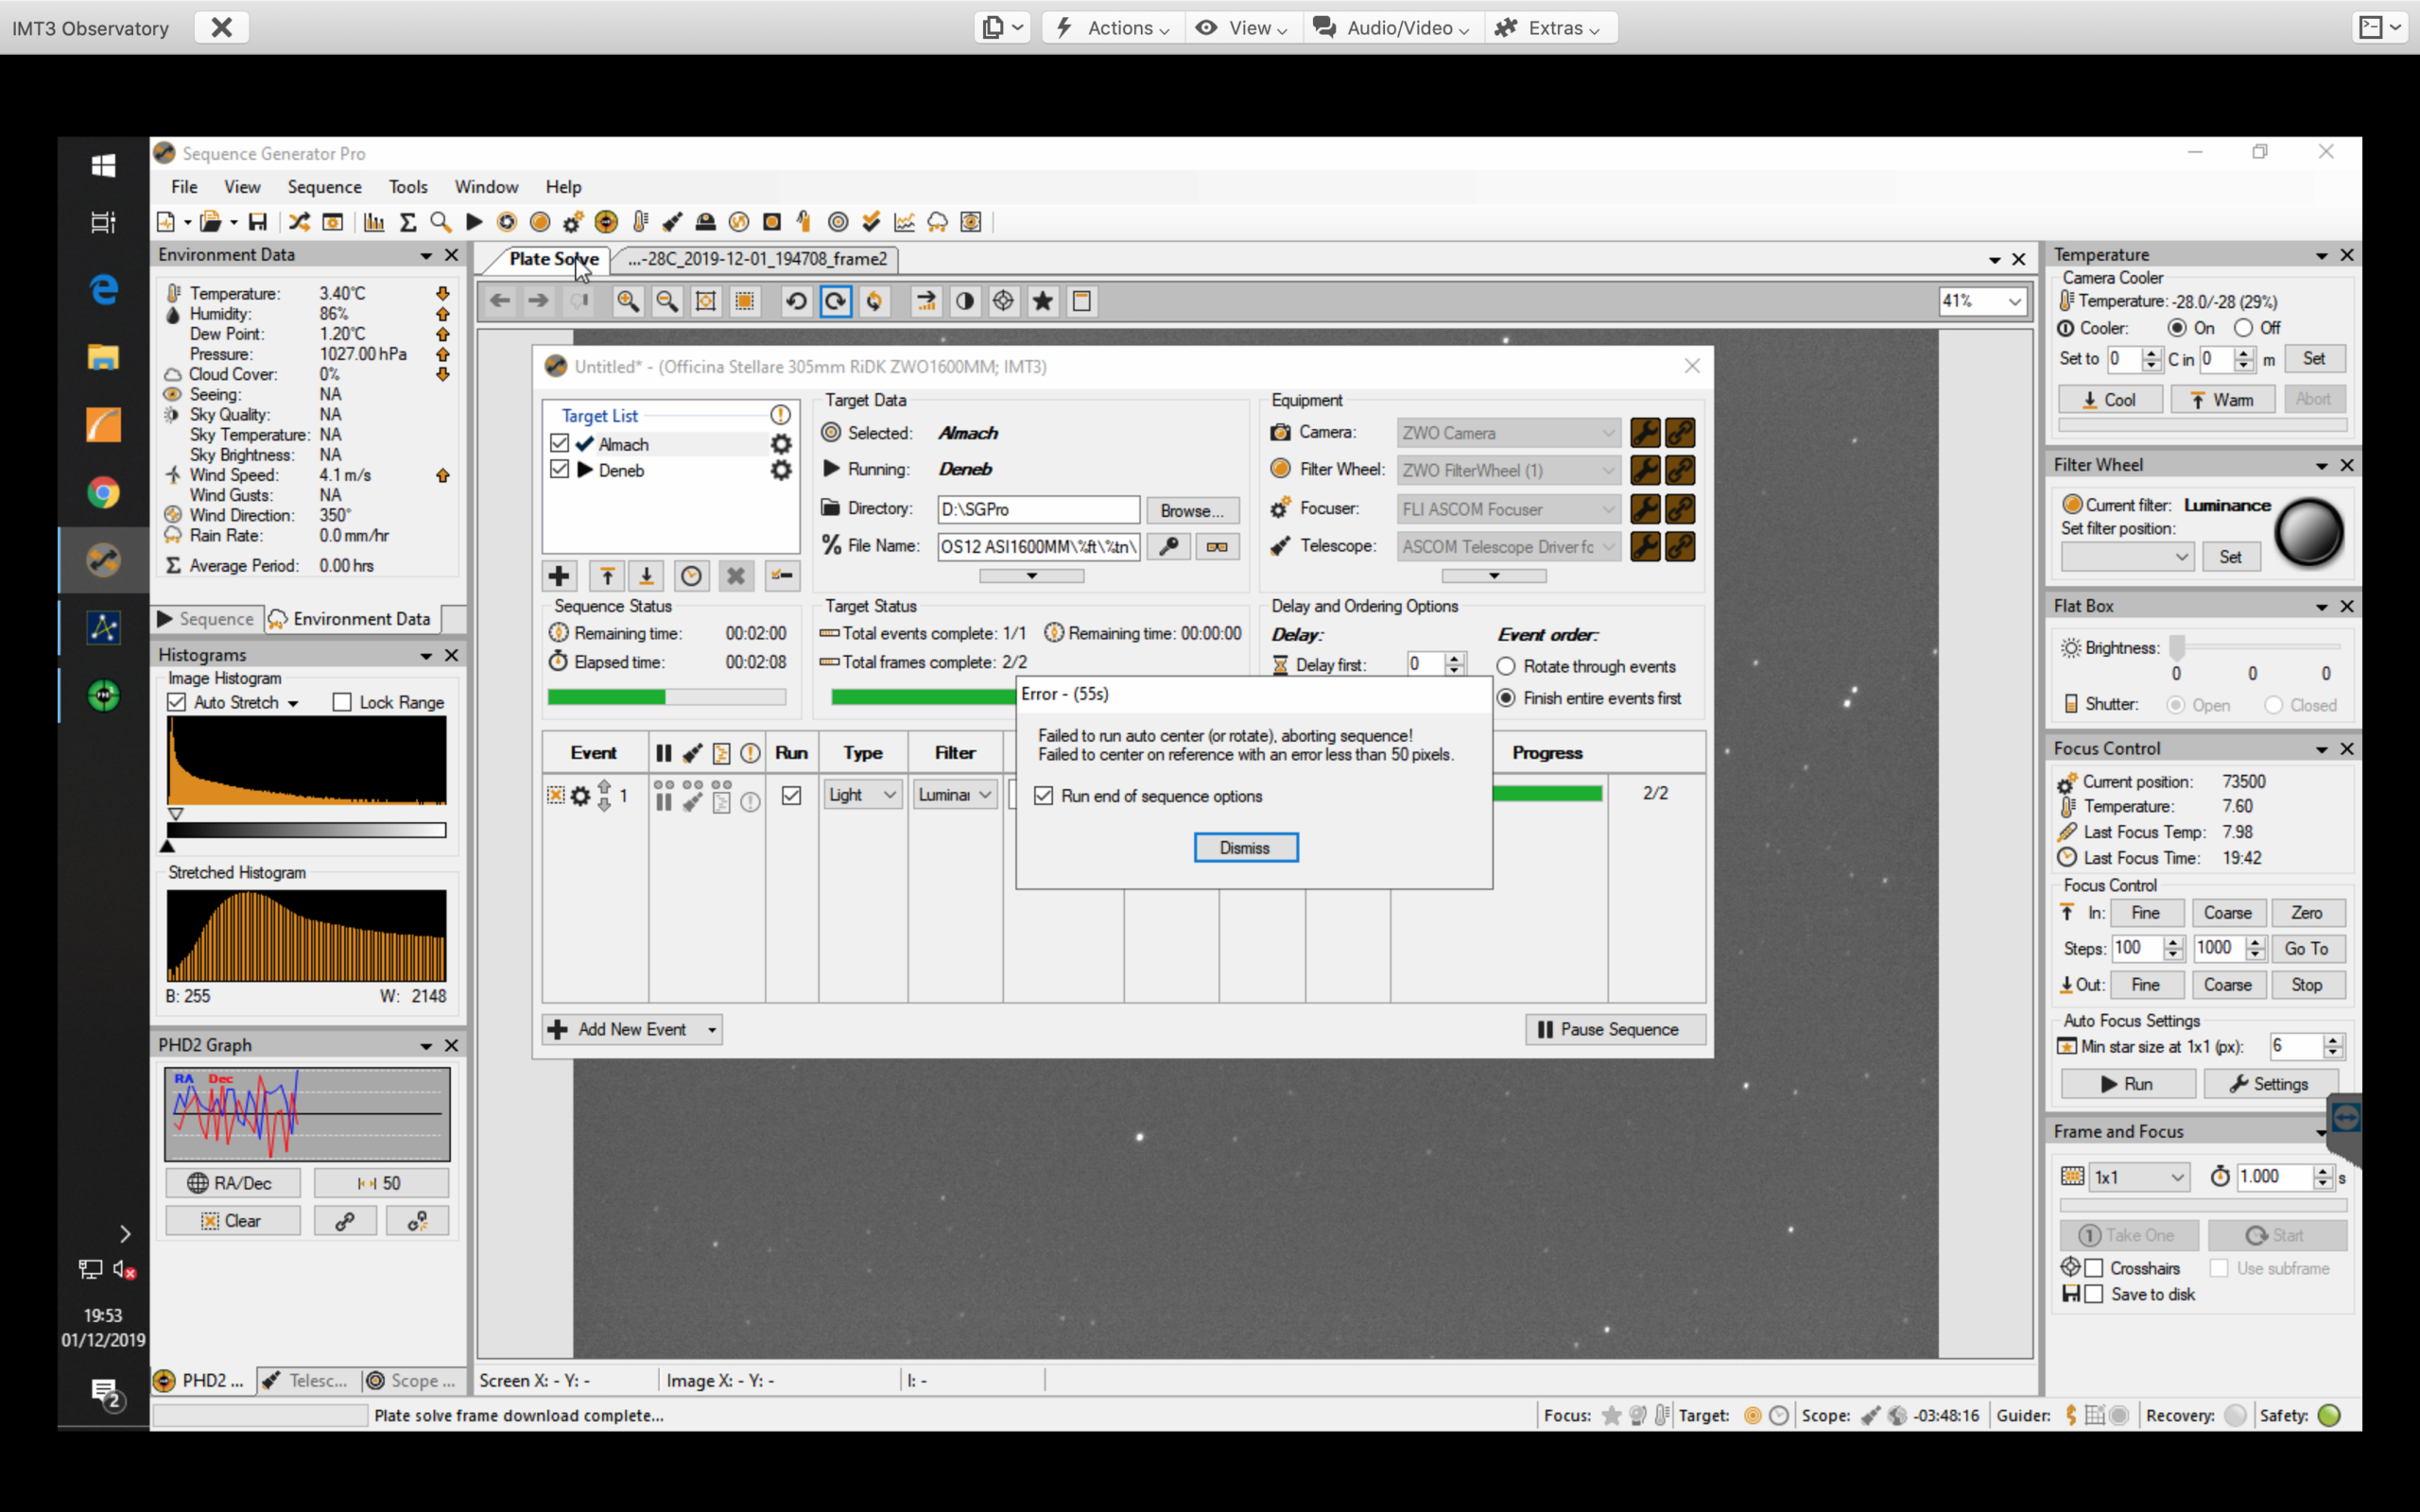
So I tried different sets of co-ordinates from TSX including the Topocentric and 2000.0 sets. Neither made a difference, with 2000.0 data used I still got this set of errors which shows an error in pixels of more than 50 in DEC.
So I decided it might be the very bright object I had picked, star in this case, that was causing the problem. So to further my experimentation this evening I choose two different and less bright objects, M36 and M39, once again on different sides of the Meridian. Success !!
So after fixing this I am now happy to go off to bed early (9:30 work tomorrow) with a job well done.
Clear Skies 🙂
Viewing Report 27th/28th October 2019 – IMT3 Observatory
Viewing time period – 19:01 – 00:05
GingerGeek and I tried to sort a few things last night, namely PHD2 guiding on both sides of the mount without any recalibration, automated meridian flip within SGPro, focusing and plate solving. After nearly 2 hours we had not fixed any of these problems. So we need further research/reading to resolve.
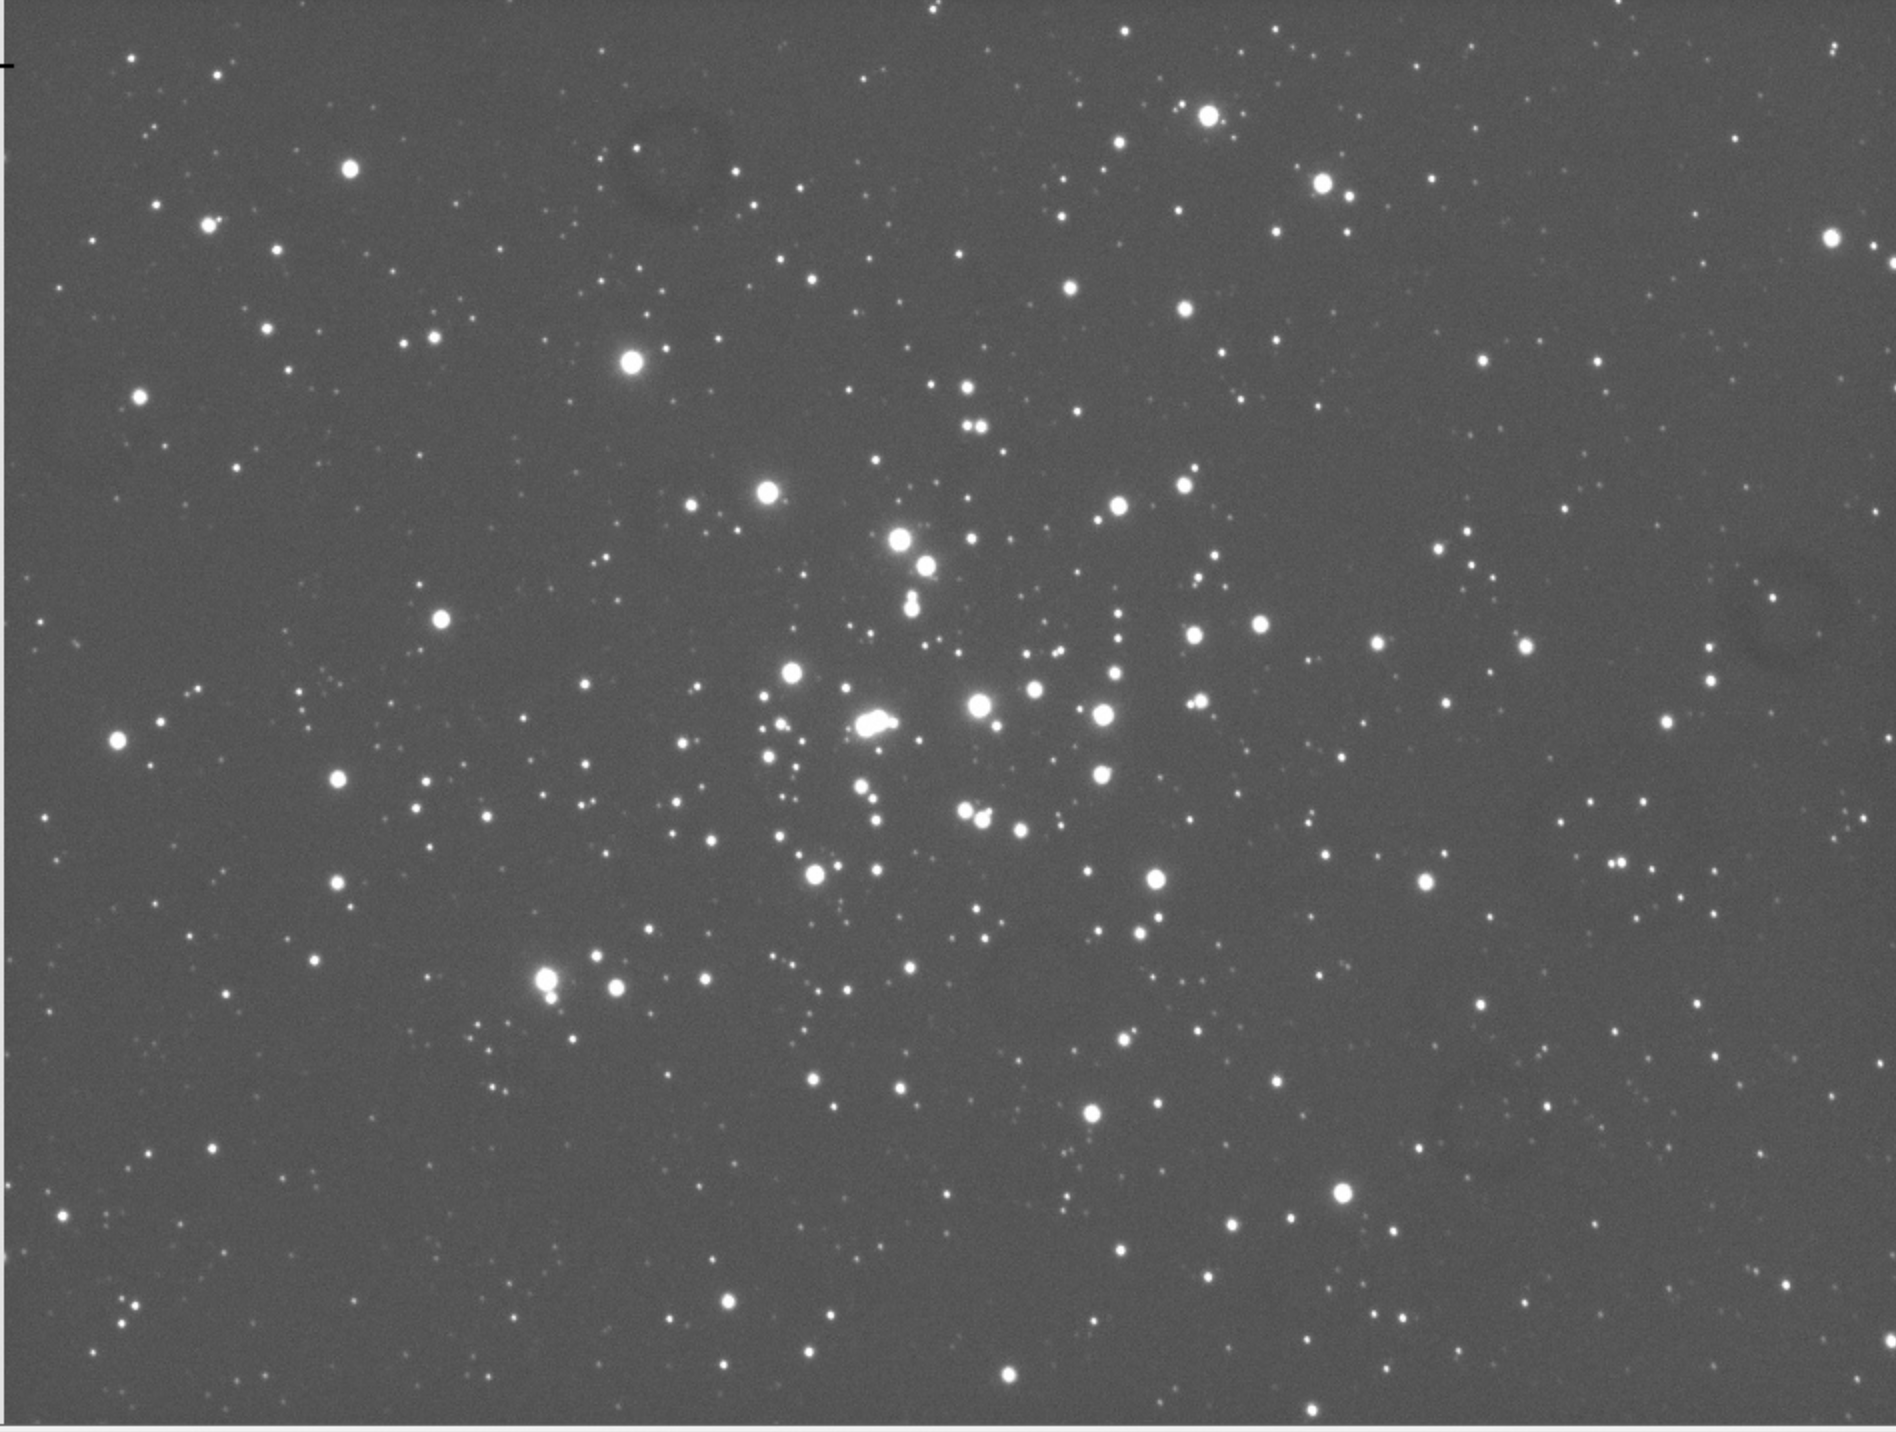
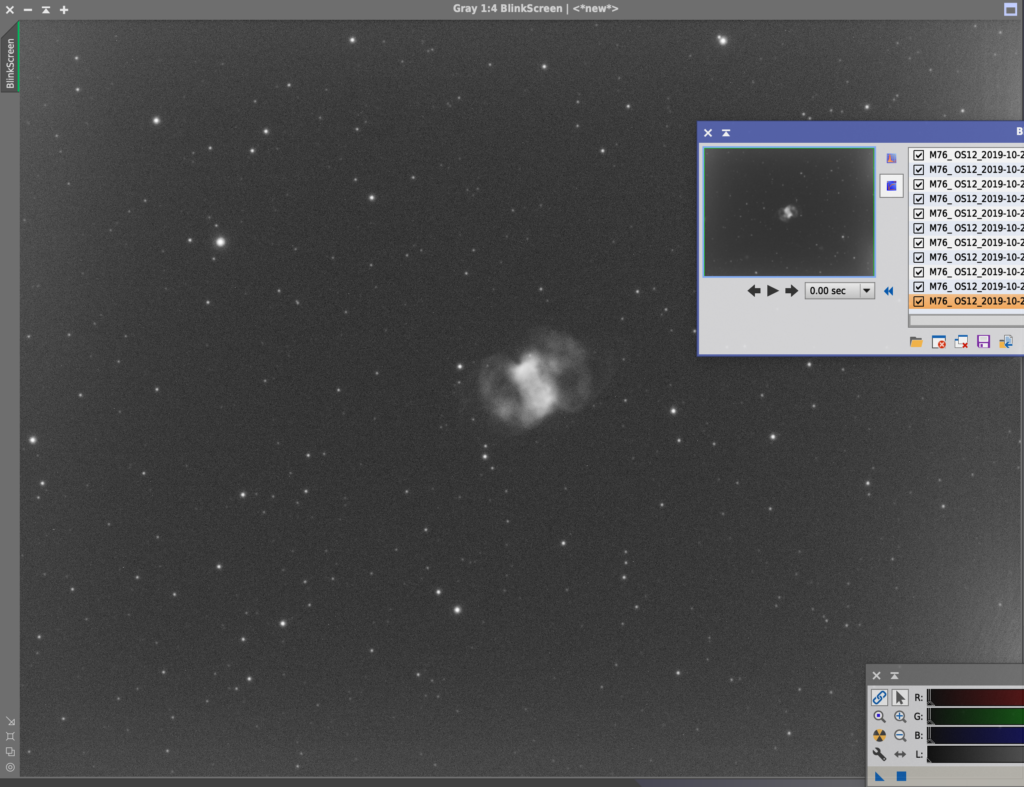
Instead @9pm I decided to take some more images of M76 since it was due to be fairly clear all night. What I found was this was quite simple to now setup and get working as long as I did not mind performing a manual flip at 11:30pm.
There was one other issue last night which was around the dome closing, it suddenly did this around 10pm, not sure why, I think (I now in the light of day cannot be sure) the relay went off. Looking at the Keogram and then the ASC movie for last night it does coincide with a set of cloud going over so maybe that is why it closed. It will be nice to then get it to reopen when clear, another thing to fix at some point.
So as I say, setting up for the run was straightforward and I used TSX rather than SGPro to centre and platesolve M76 as normal. I then took a sample image of 60 seconds found that the focus was more or less spot on for OIII, despite earlier challenges with focus not working and all was ready to go.
On the point of focus problems, we could not get an accurate V-Curve earlier in the evening, SGPro kept coming up with different focus points after each run and eventually we put this down to the dome and scope not having had time to cool given it only being 30 minutes or so. The outside temperature was around 3℃ whilst the inside was just shy of 9℃. Later in the evening the difference was much smaller (I should remember to record this). I can get the ambient temp for the outside the next day from the FITS header but I have no record of the inside ambient temp, something else to fix.
So I went off to bed just after the meridian flip around 11:30pm and after watching a few frames come down. This morning I took flats and darks and closed the dome which was still open with the first frost of the season having set in and frost was covering the inside of the dome.
Viewing Report 22nd/23rd October 2019 – IMT3 Observatory
Viewing time period – 21:38 – 01:50
Quick set of images this evening to take some more data of M76. I can image for 3 hours before a meridian flip. I need to get the automated flip working and thus the plate solving that seems to be having issues. For now I will open the dome and just set it running on OIII through the 12″.
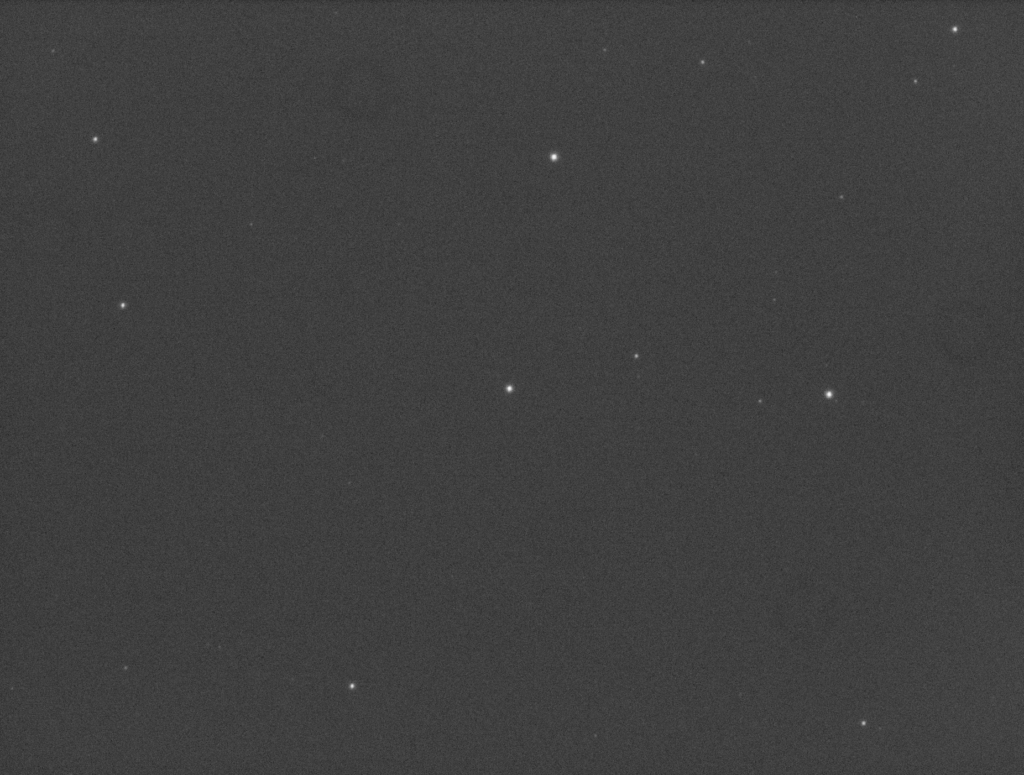
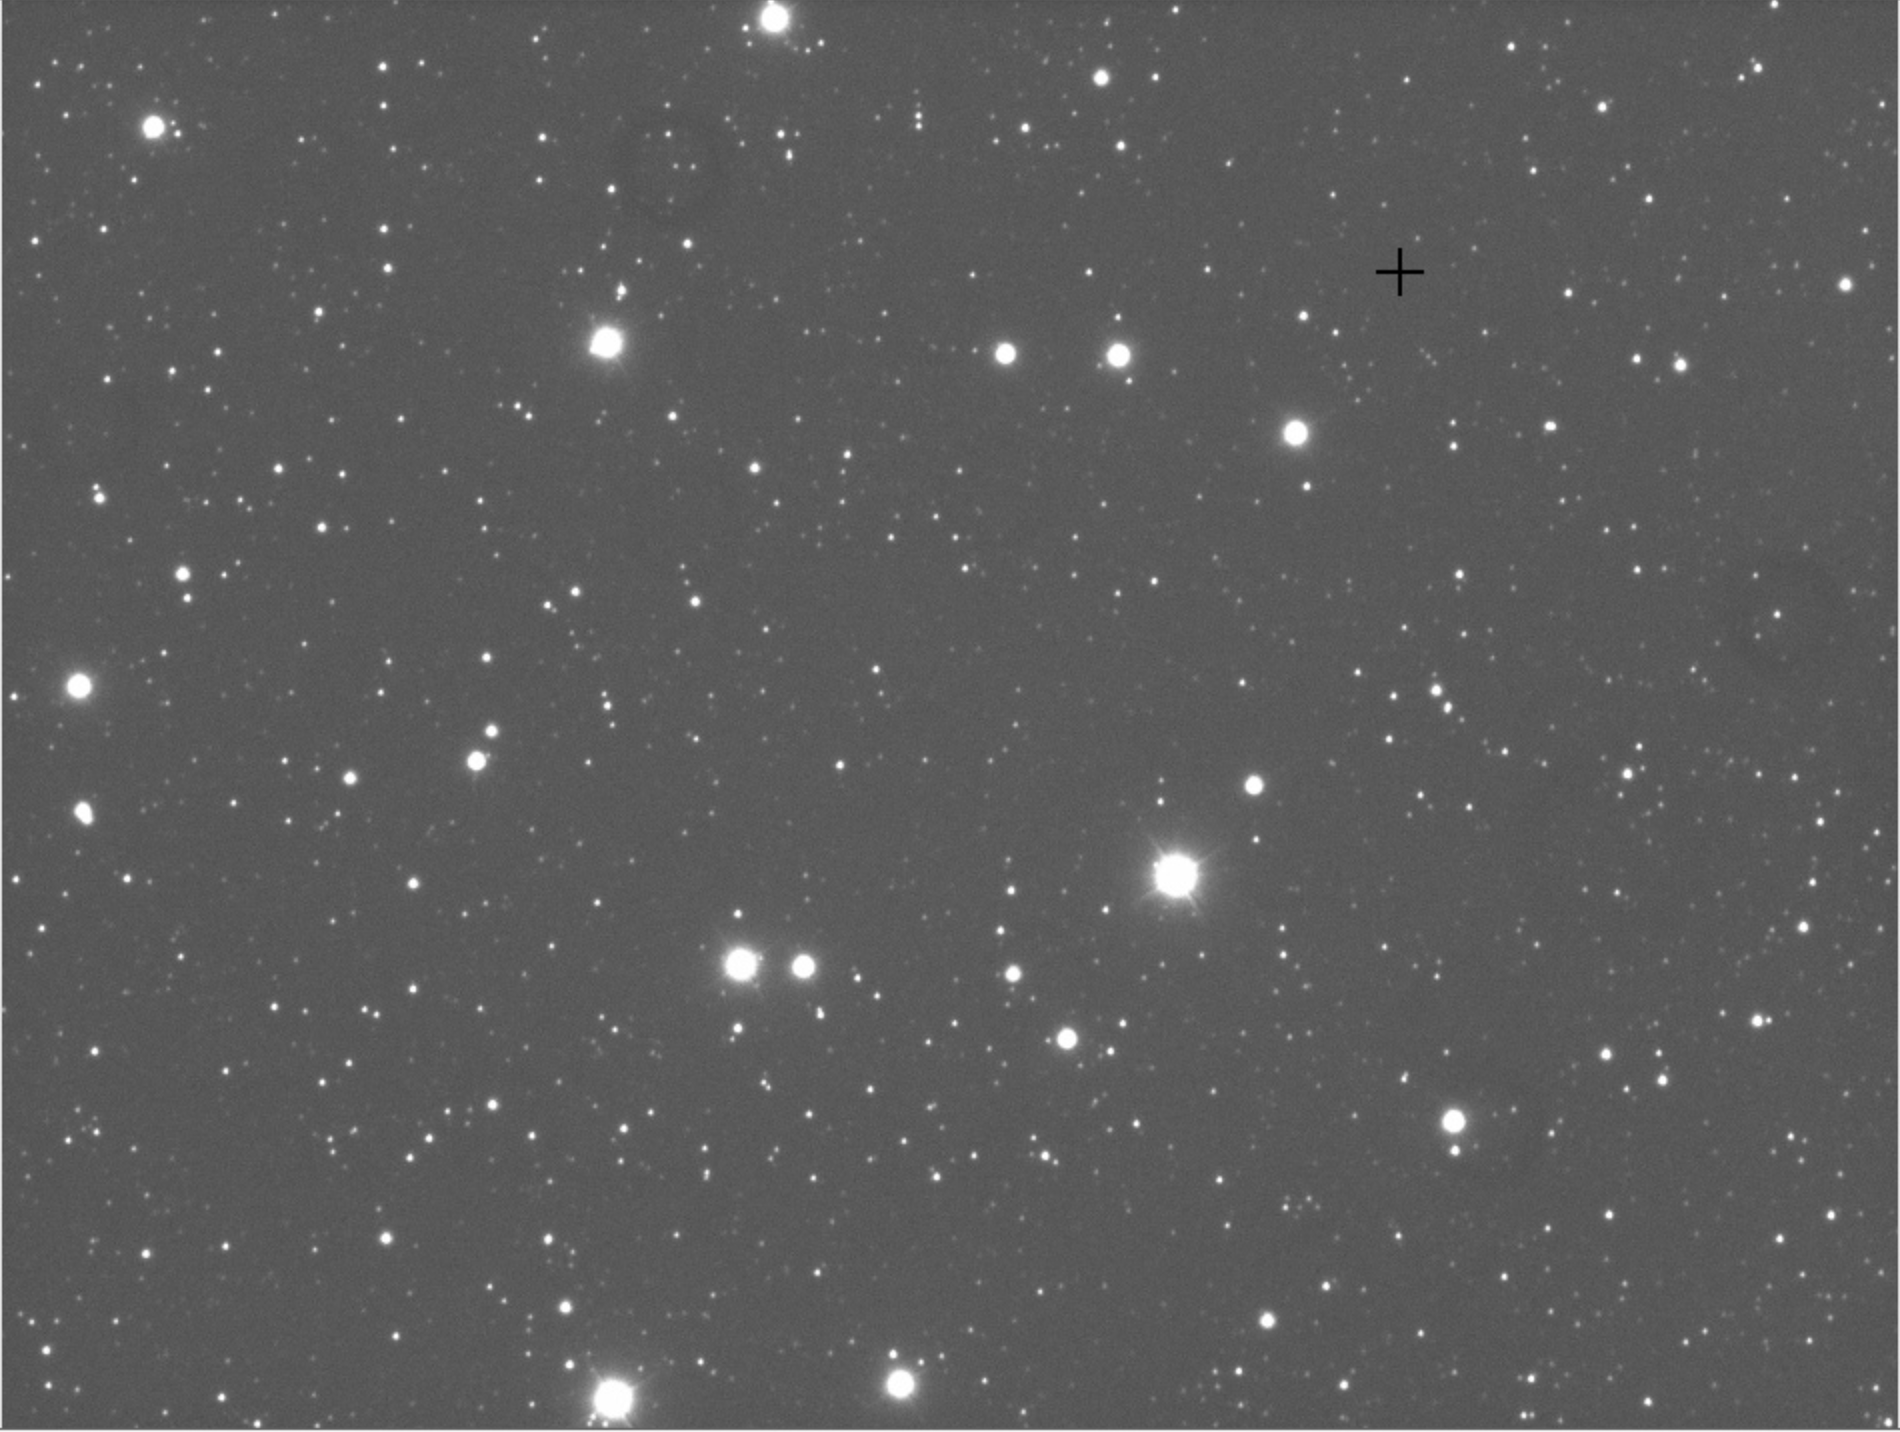
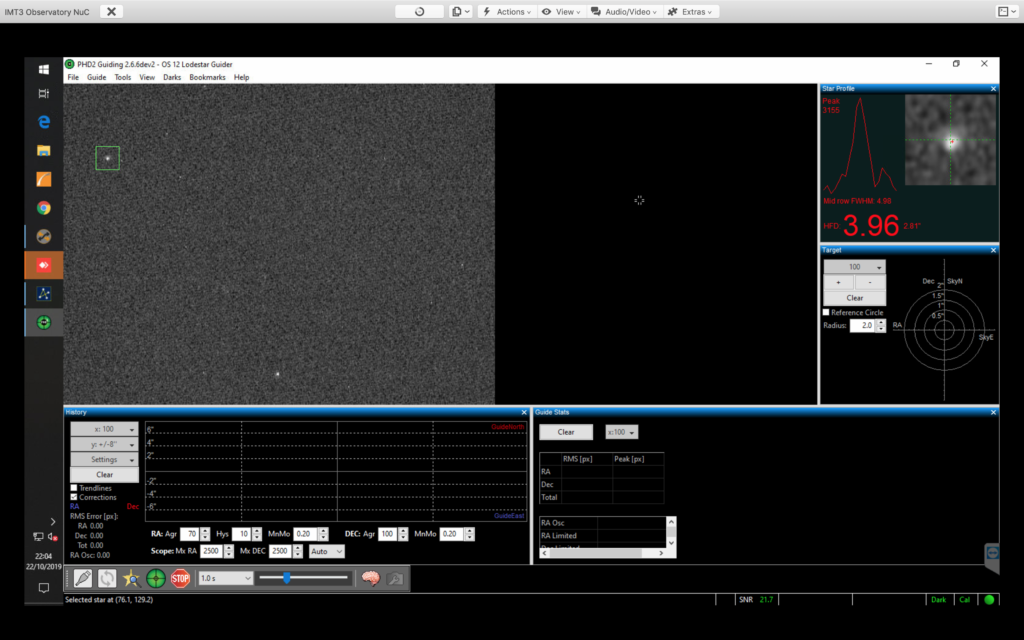
After entering with TSX connected to the ASI camera I started guiding and for setup reasons I have included the guide star here.
@00:45 I managed to do the manual meridian flip and then headed off to be after collecting another 2 hours of OIII data. I left the scope running for the rest of the night knowing that the dome would shut if the sky clouded up.
So I am now up at 7am and indeed the dome closed when the clouds rolled in. I have no real notification of when that occurred so I have now set the HitecWeather station software to log on the triggering of the relay to a file so I can see the time it closed.

Alerts now setup 
Logging setup for alerts
This will allow me to compare to the Keogram from the ASC and double check the dome is closing at the appropriate time.
Fortunately SGPro is connected to the weather station as a safety monitor and stops imaging if the dome closes. I can see the clouds started to roll in around 1:30am for a few minutes then just before 2pm there were more and by 2:43am after they covered the sky. The good thing is it looks like, although I cannot be sure, the dome would have closed at around 1:50am which is the time of the last image taken assuming the date stamp is the completion of the image.

I have now taken flats and darks and parked the scope and it is ready for it’s next outing, I also remembered to turn the dehumidifier back on this time. Both the dehumidifier and the flat panel need connecting to an Arduino to automate turning on and off.
All Sky Camera Experiment
At the IMT we were experiencing stability issues with the ZWO ASI120MC USB3 camera on the MAC/NUC so we decided to move it to it’s own Raspberry Pi4 (4GB) as a cheap experiment.
The Raspberry Pi4 has the advantage of improved networking and connectivity including USB3. One of the downsides of the RPi4 is the increased heat generated by the CPU which is mitigated by housing it in a FLiRC passive case to dissipate the heat and prevent thermal throttling.
Additionally in order to prevent SD card wear and improve the I/O throughput we configured the RPi4 just to boot off the SD card but serve the rest of the file systems from a SSD connected via USB3.
AllSky Camera Software
Using the open-source AllSky Camera project for ASI camera support we gain some advantages. The main advantage is that it’s open source (served via Git), provides an admin and public web portal which is addressed locally as http://allsky.local and the software can be set to start on system startup.
Admin Web Portal
The allskycam software can restart on system reboot but it can also be stopped/restarted via the web admin portal.
The configuration is simple and the mode/behaviour of the software can be controlled via the GUI or via a settings.json file from the command line.
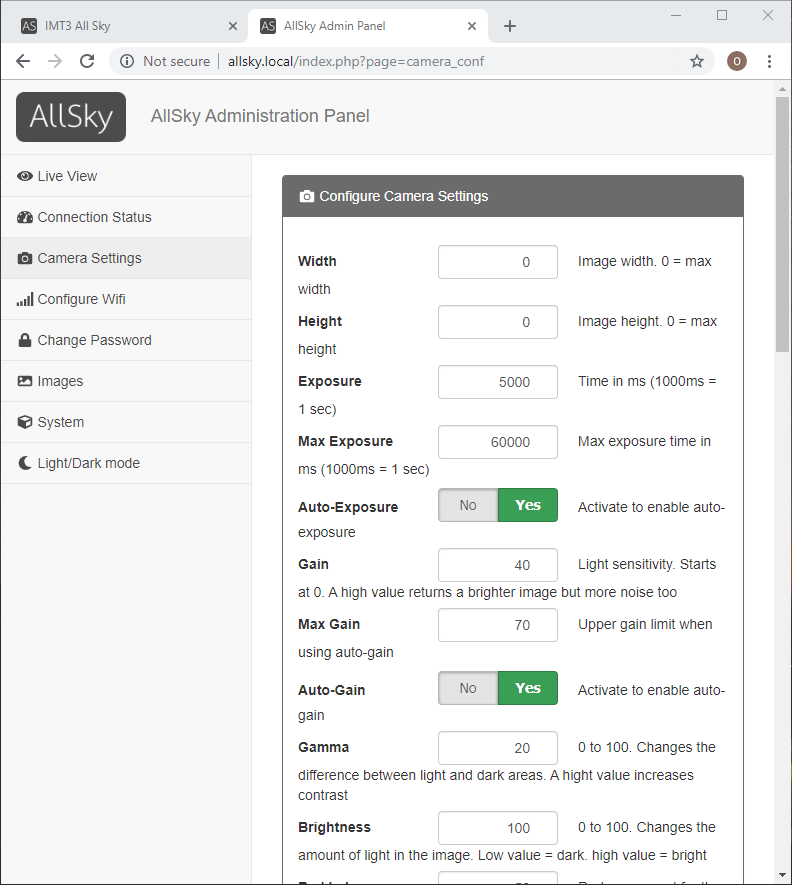
I recommend you take the time to create a dark reference image, again this is done via the GUI panel as long exposure frame will show extensive hot pixels.
Non Admin Web Portal
This is accessed via the address http://allsky.local/allsky-website and provides the latest captured image, a constellation overlay and the ability to view time-lapses and star trails.
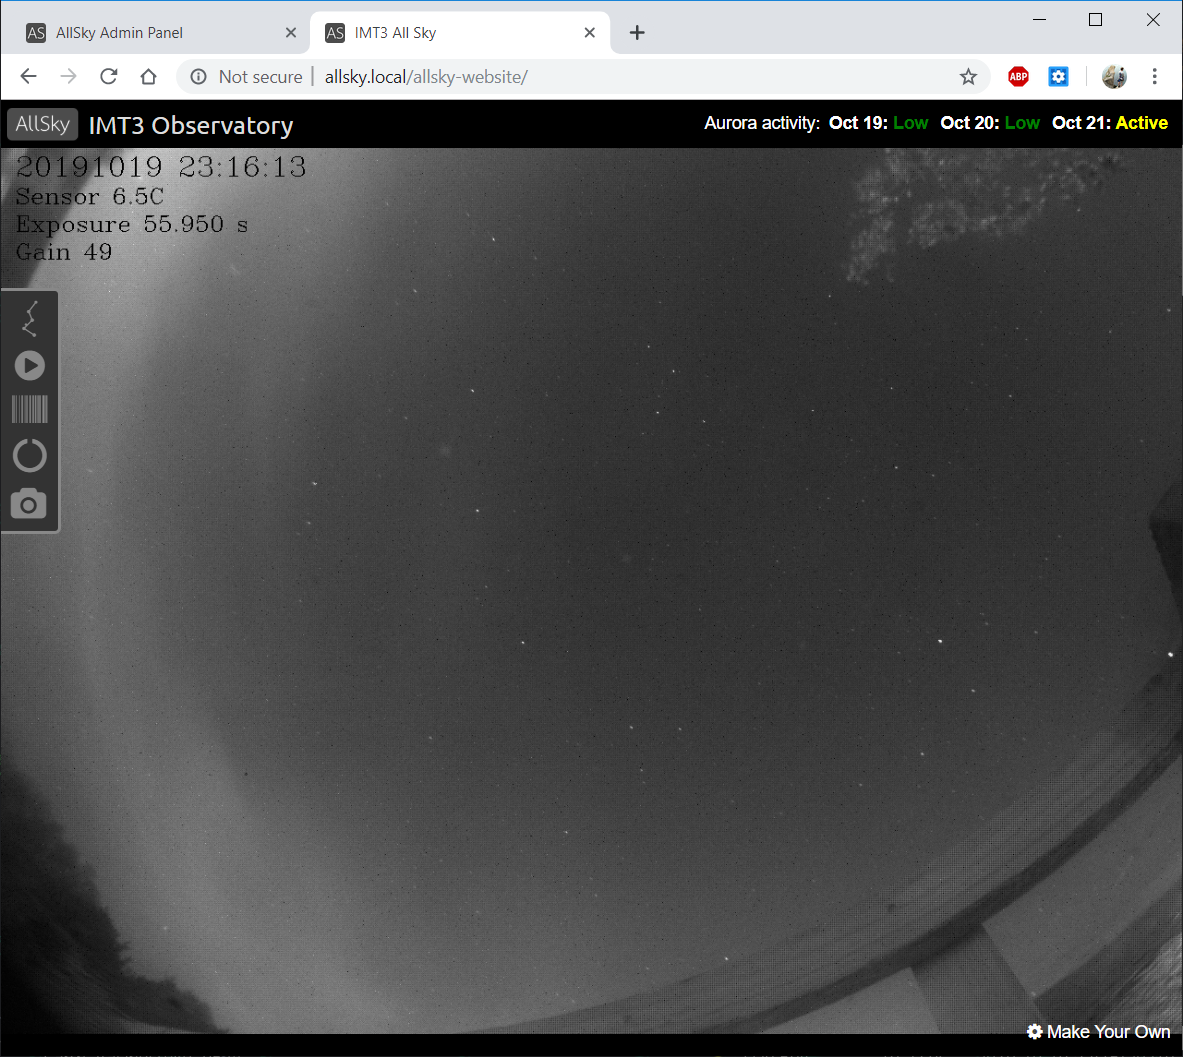
One of the nice features of the software is it’s ability to create a time-lapse of acquired images for the previous night. The following video shows the debayer issues as well as the dewing of the dome cover.
Bob is due to connect up the resistor ring he’s placed around the camera which hopefully should fix the dome dewing we encountered on the first night.
So it remains for us to fix and implement the following :
- Resolve the lack of colour images (RGB24)
- Image quality breakup
- Resolve dark daytime images
- Secure copy latest image/time-lapse to an external public website
- Scale VirtualSky constellation overlay (180 degrees) down to 150 degrees