
Viewing time period – 19:18 – 23:59
I have spend over 4 hours today reading about the Gain and Offset settings for the ZWO ASI1600mm Pro Cooled mono CMOS camera I have on the back of the 12″ Officina Stellare 305 RiDK f/7/9 telescope.

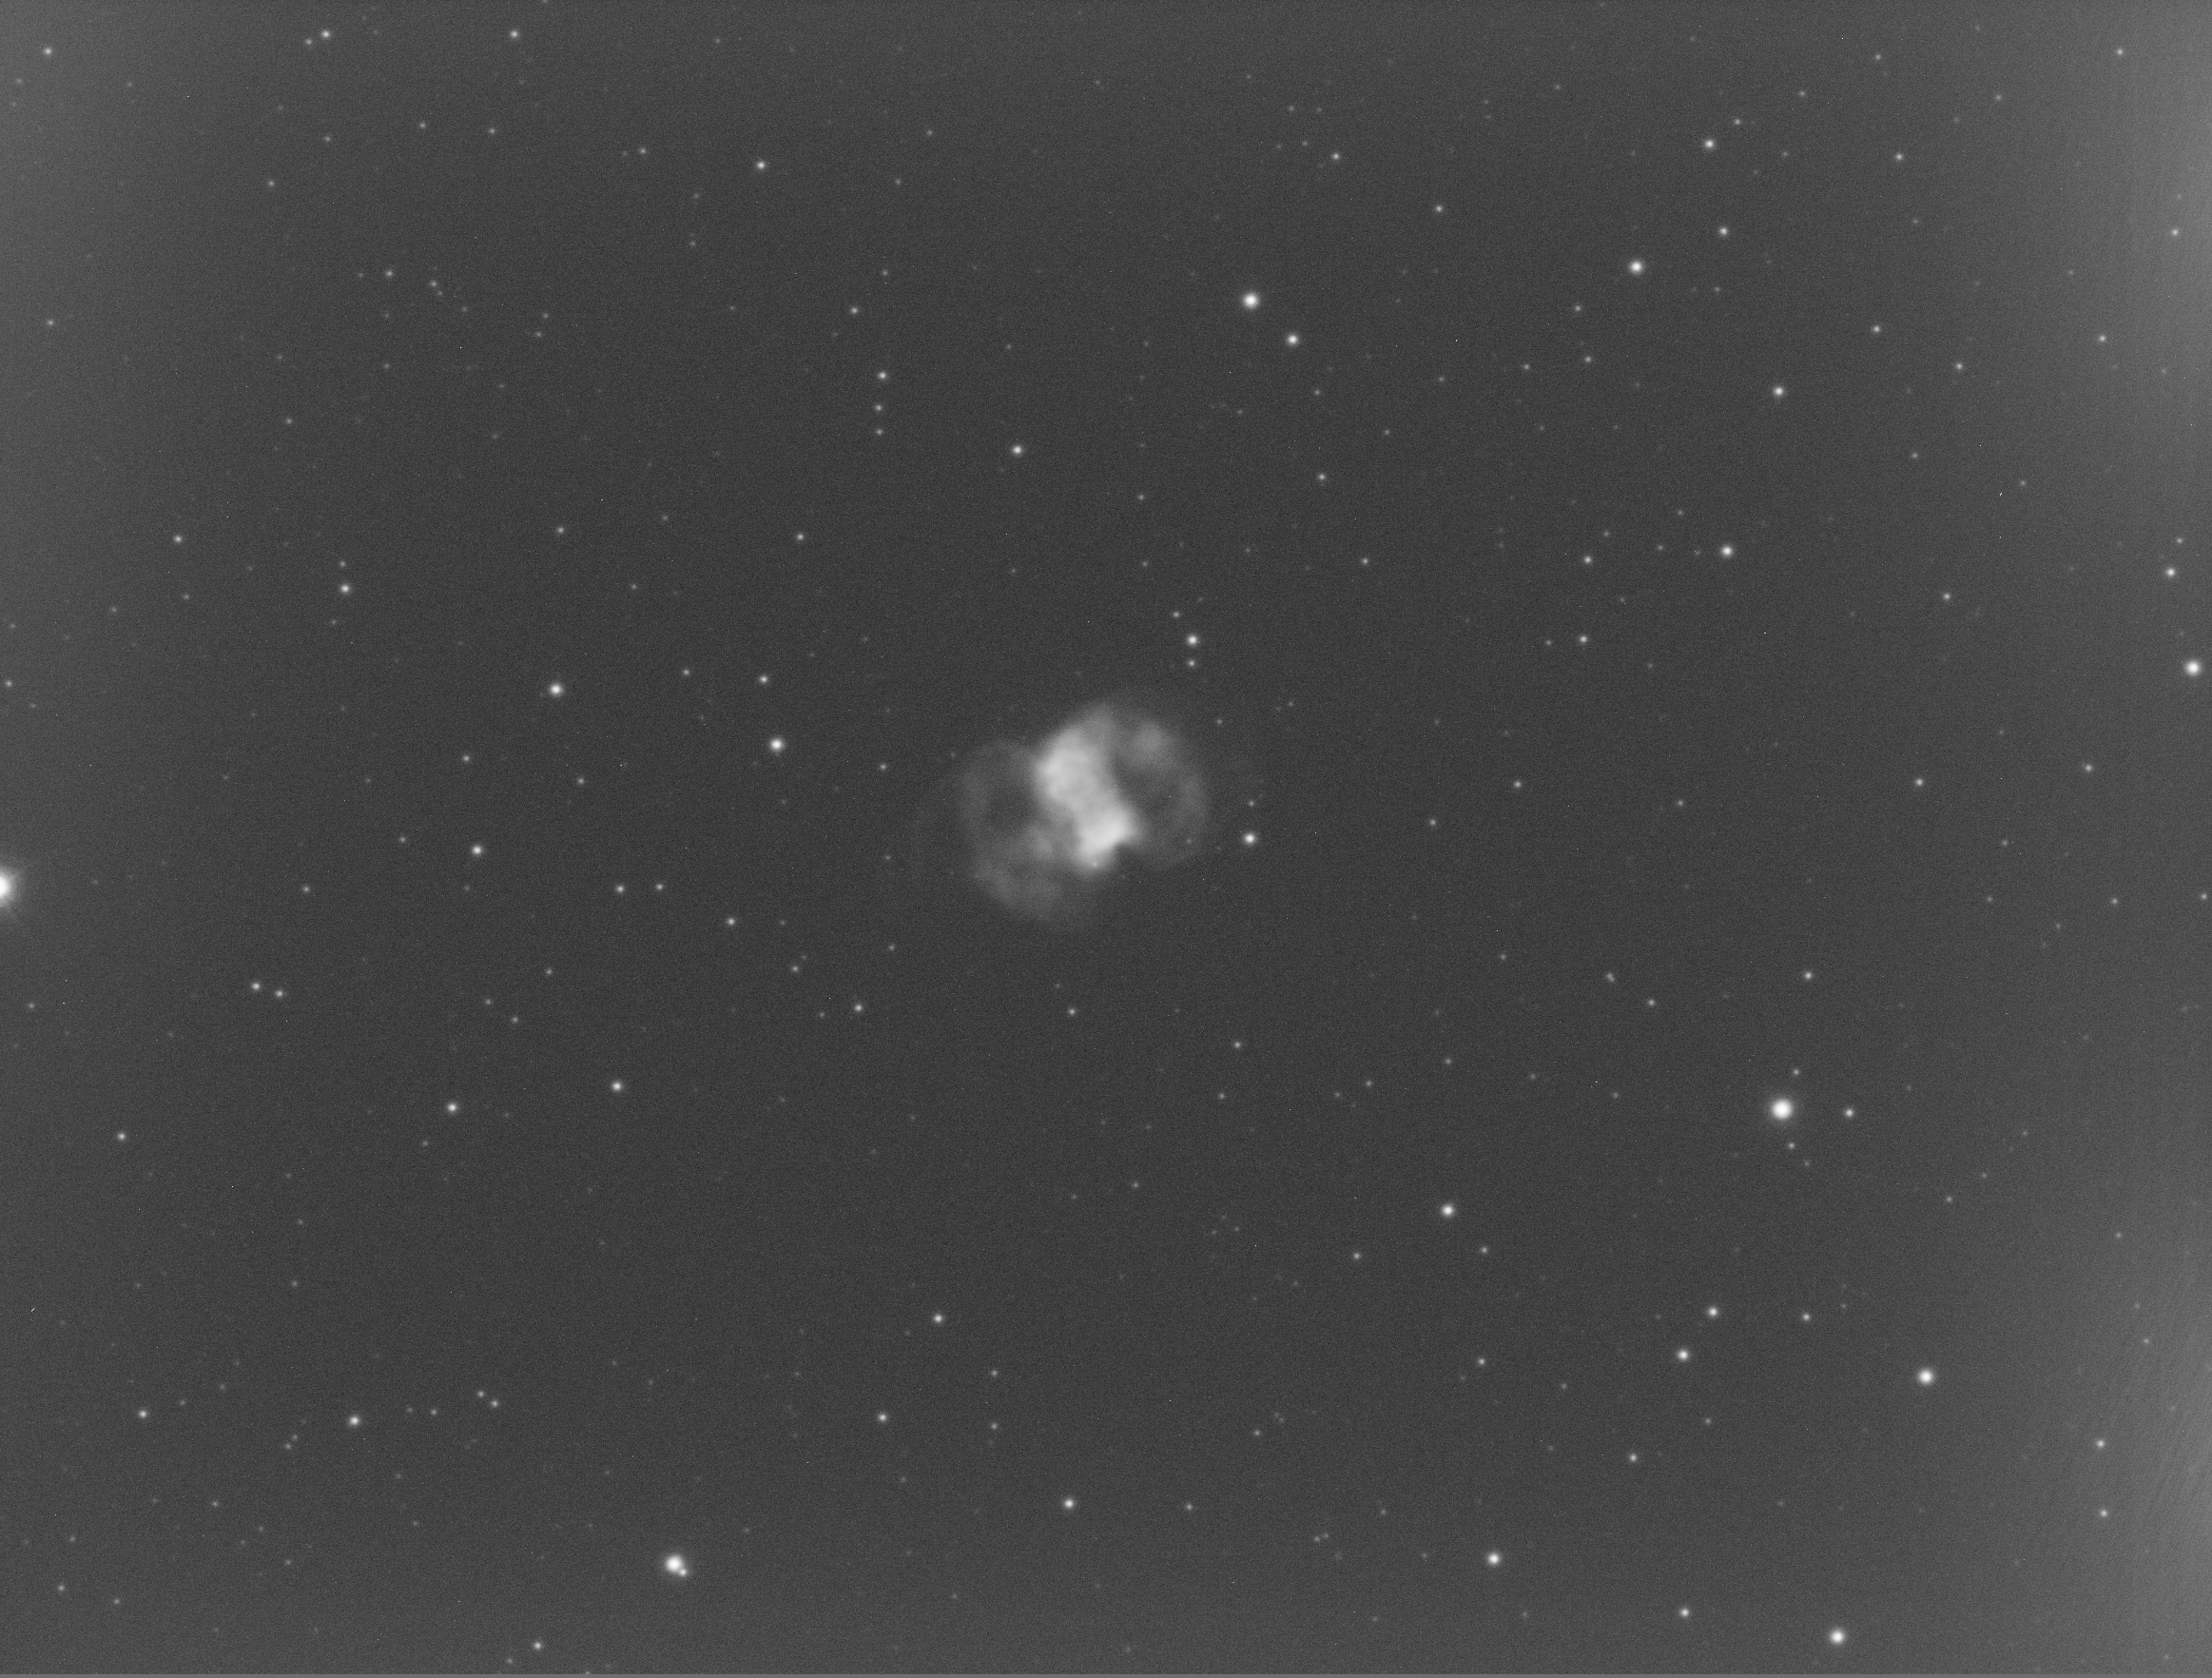
In particular the posts by Jon Rista and the images with a similar setup from Glen Newell have led me to a handful of setting I will now try from my location and on M76, the Little Dumbbell planetary nebula that I had started to image recently. I must also comment that Kayron Mercieca also had some useful information pertaining to testing your camera and OTA imaging train for exposure times. See link here

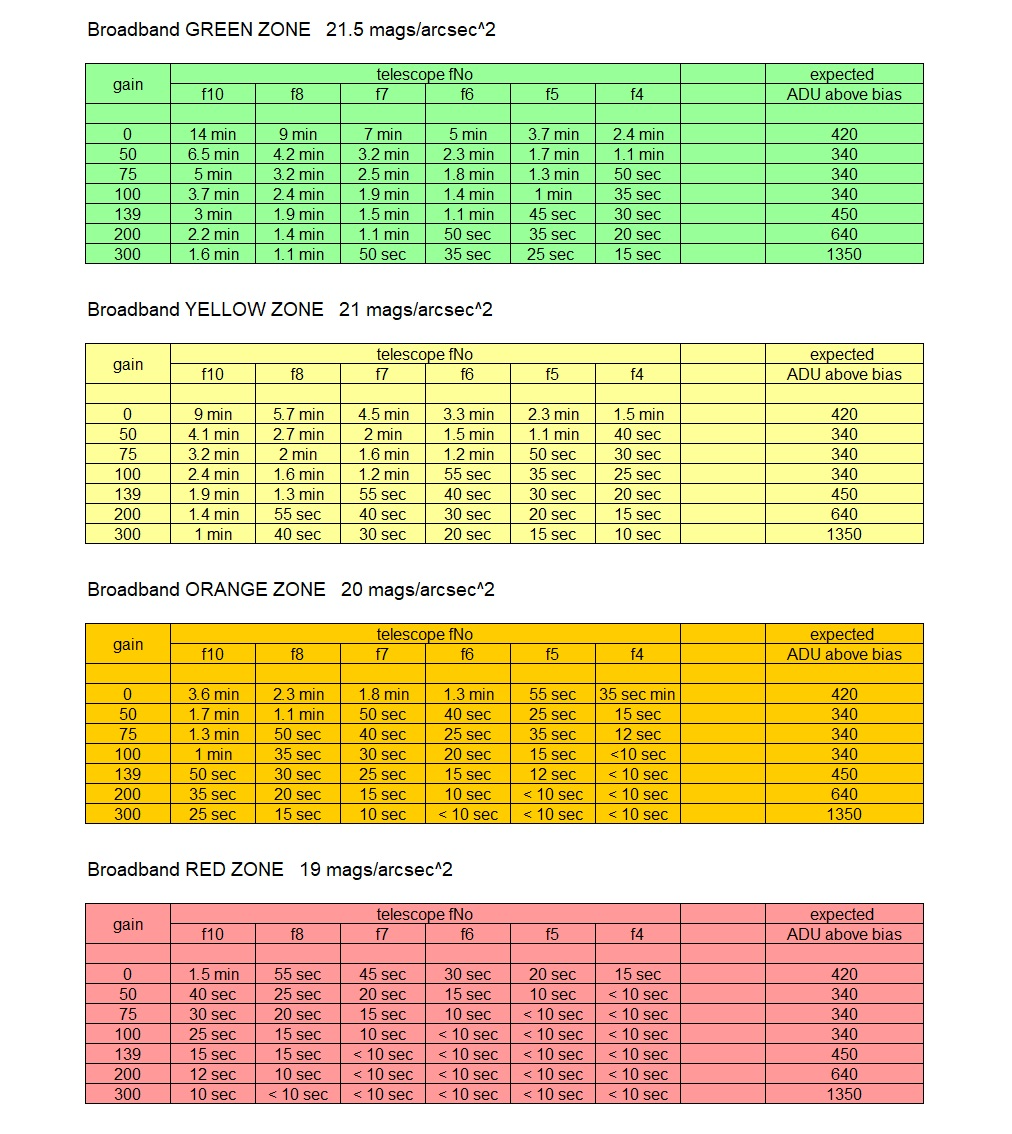
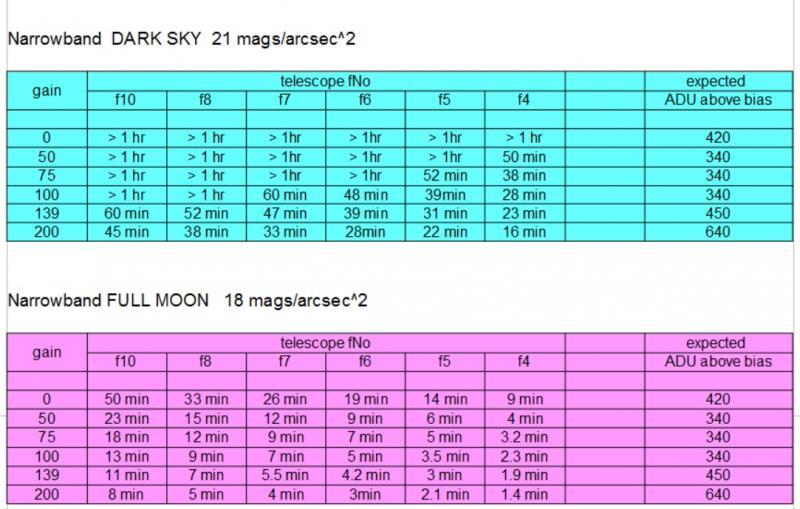
So I have already taken a set of images on the 8th October, 14 of them and they were at a Gain and Offset of 10 (I believe these settings are less than perfect) and an exposure of 1200s, so 20mins through an Astrodon OIII narrowband filter. My location is on a good night in the Orange Zone as per the charts borrowed from the forum discussions and when referring to broadband imaging. For narrow band as per my test here I am between the purple and blue zones.
Inspecting the original frames I took you can see slight amp glow from the right of the image, the background has a median of 10 ADU at 12bits. None of the stars are saturated or clipped. The brightest star is 1,854 ADU our of a dynamic range of 0-4,095 ADU. The faintest nebula I can see is 11 ADU so just above the background and the brightest part of the nebula is 77 ADU.
So I will attempt to take a set of images at the following settings across 4 exposure times of 300s, 600s, 900s and 1200s at or after astronomical night at 20:56 onwards if the clouds hold off.
- Gain 0 – Offset 10
- Gain 75 – Offset 12
- Gain 139 – Offset 21
- Gain 200 – Offset 50
- Gain 300 – Offset 50
- Gain 300 – Offset 65
So after several false starts of broken cloud disrupting my ability to keep the dome open, I managed to grab the first 6 frames of 300s as above. Here is an animated GIF of all the images in order of Gain lowest to highest. (Click the image to animate or right mouse click and download)

In my next blog I will look at the analysis of the first 6 frames whilst I take the other frames to compare.