Viewing Report 27th/28th October 2019 – IMT3 Observatory

Viewing time period – 19:01 – 00:05

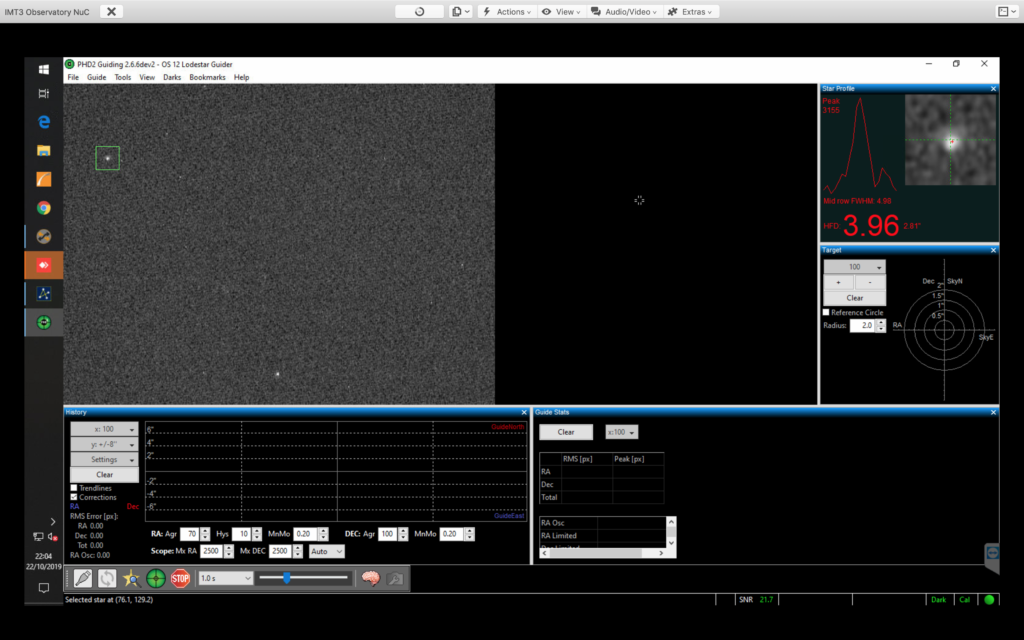
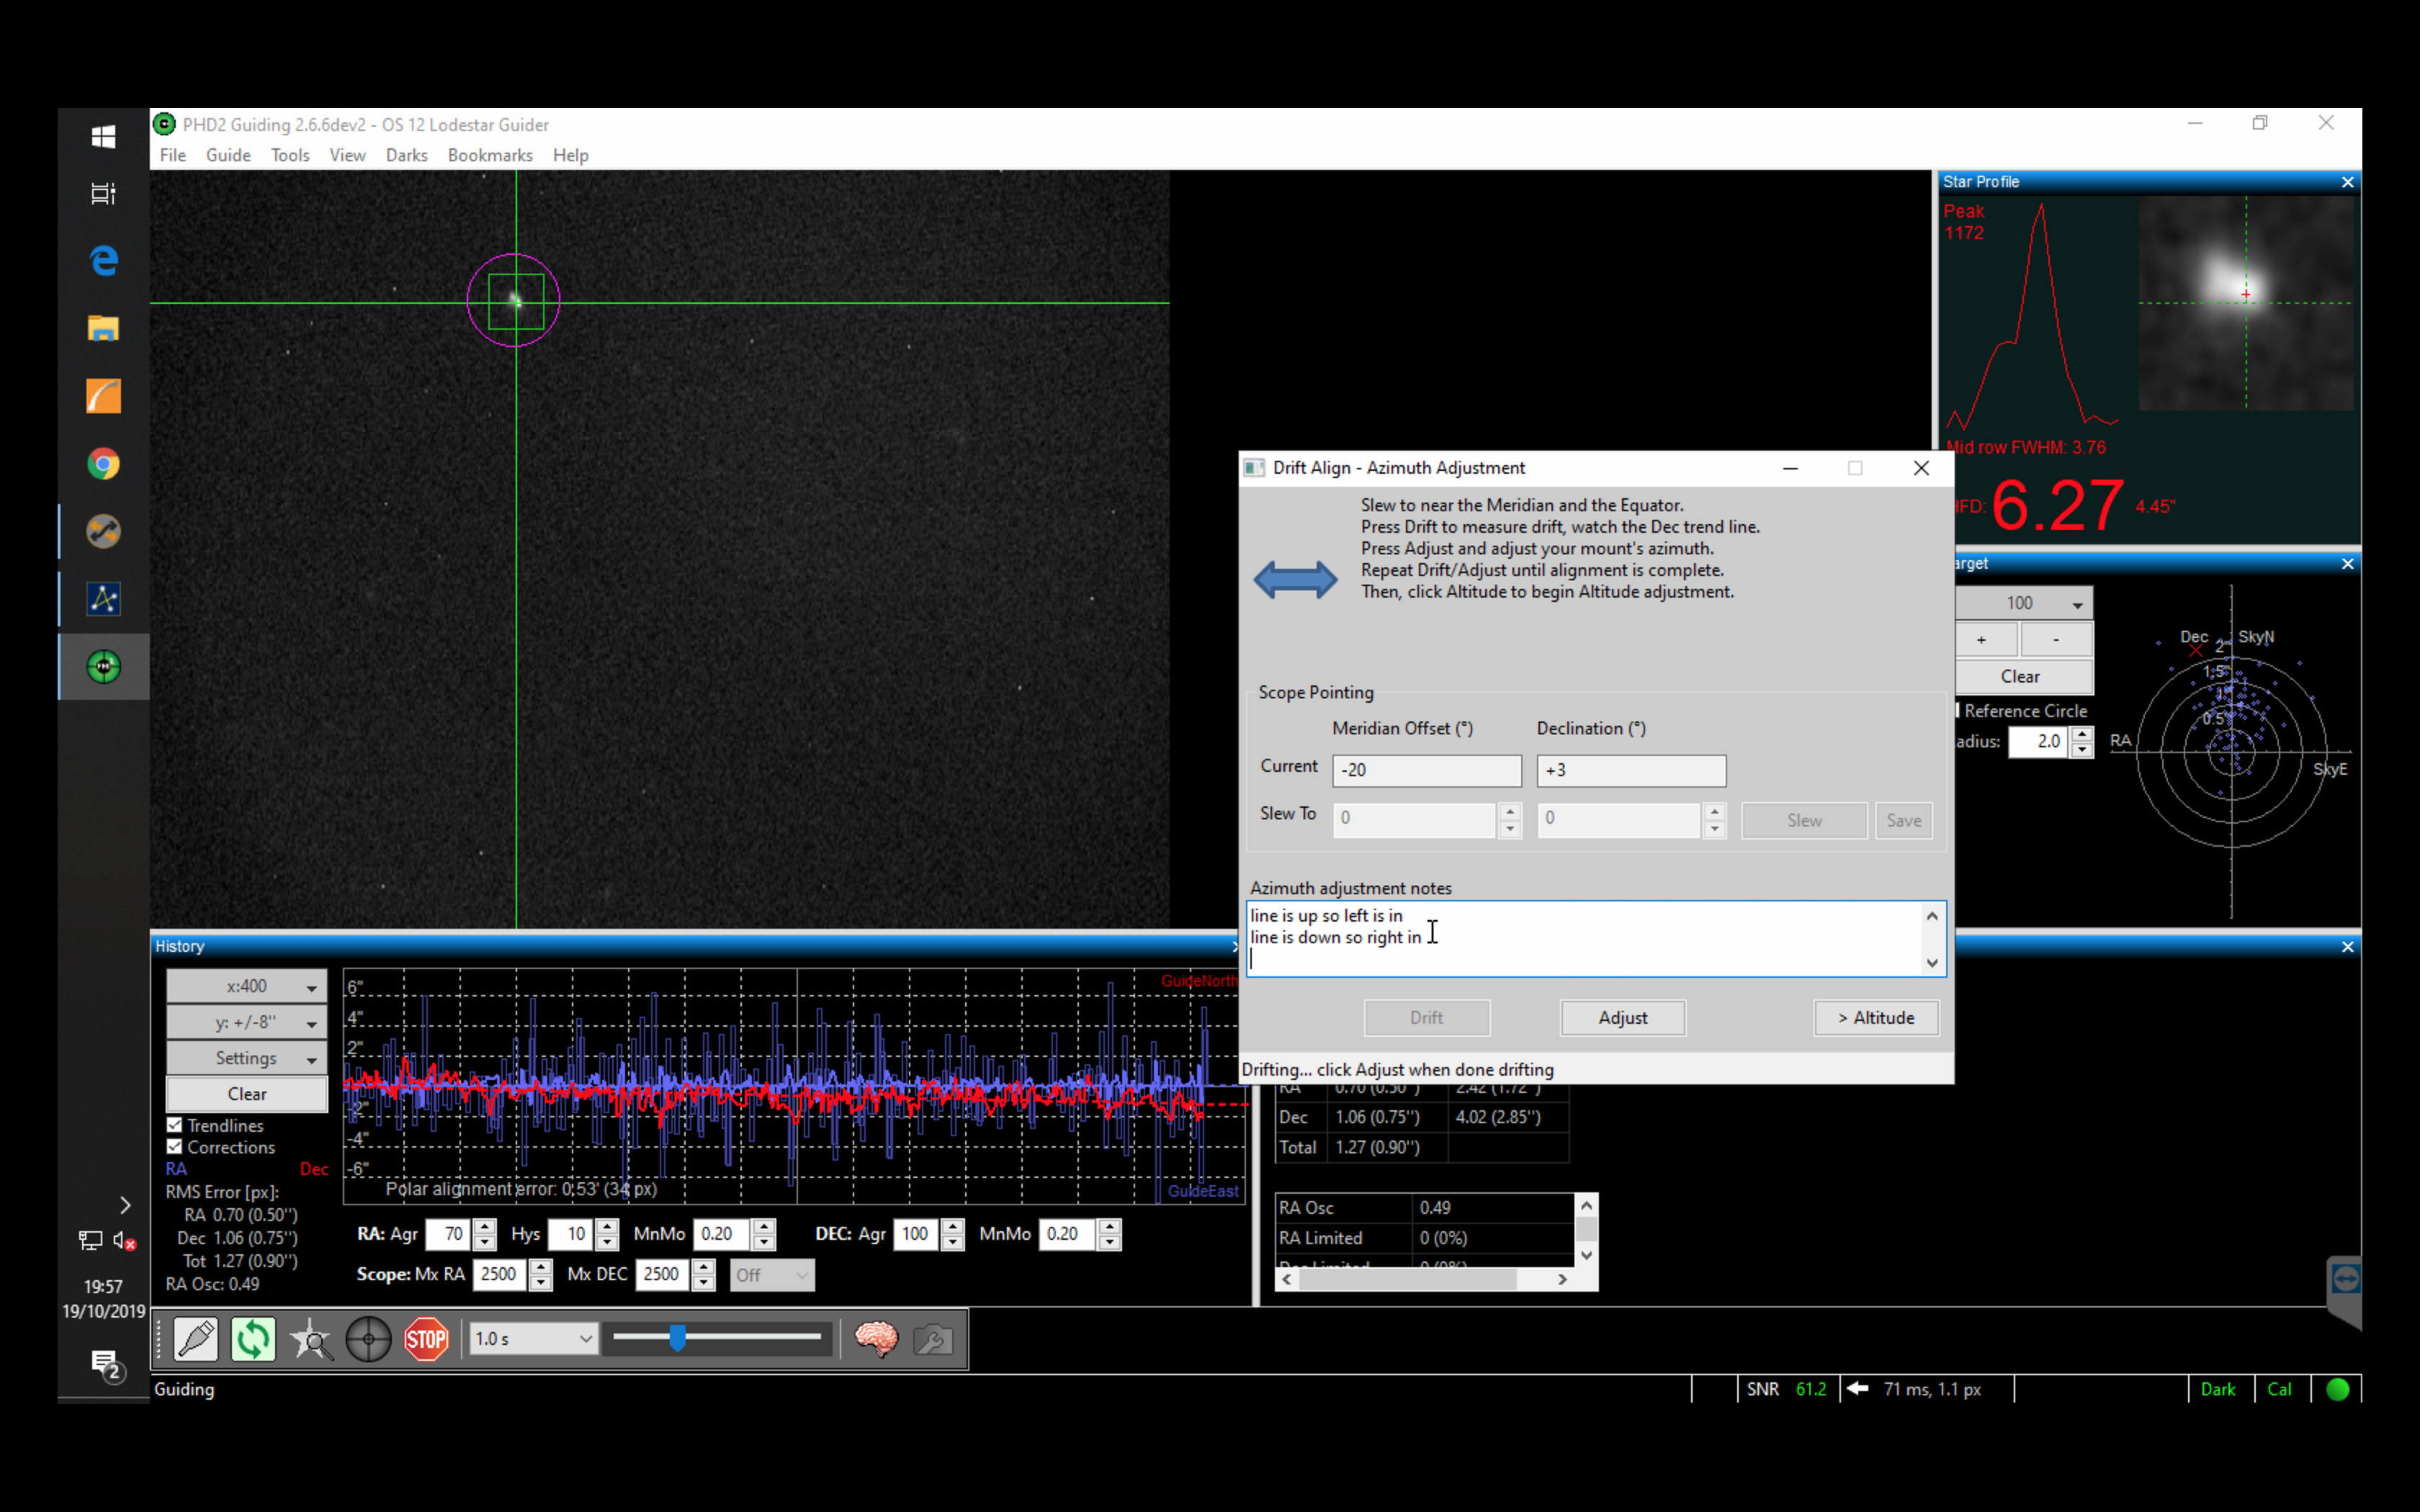
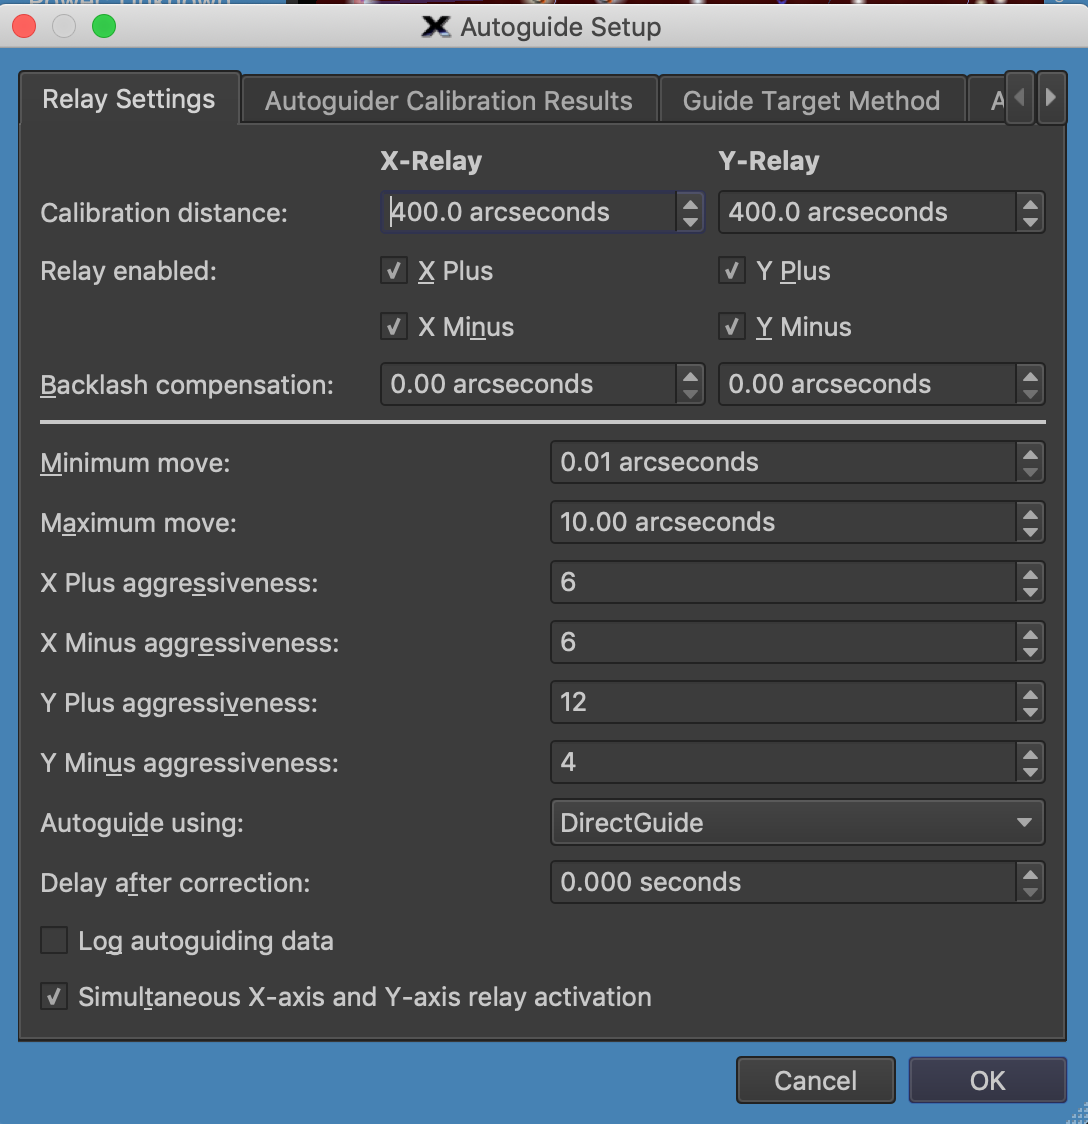
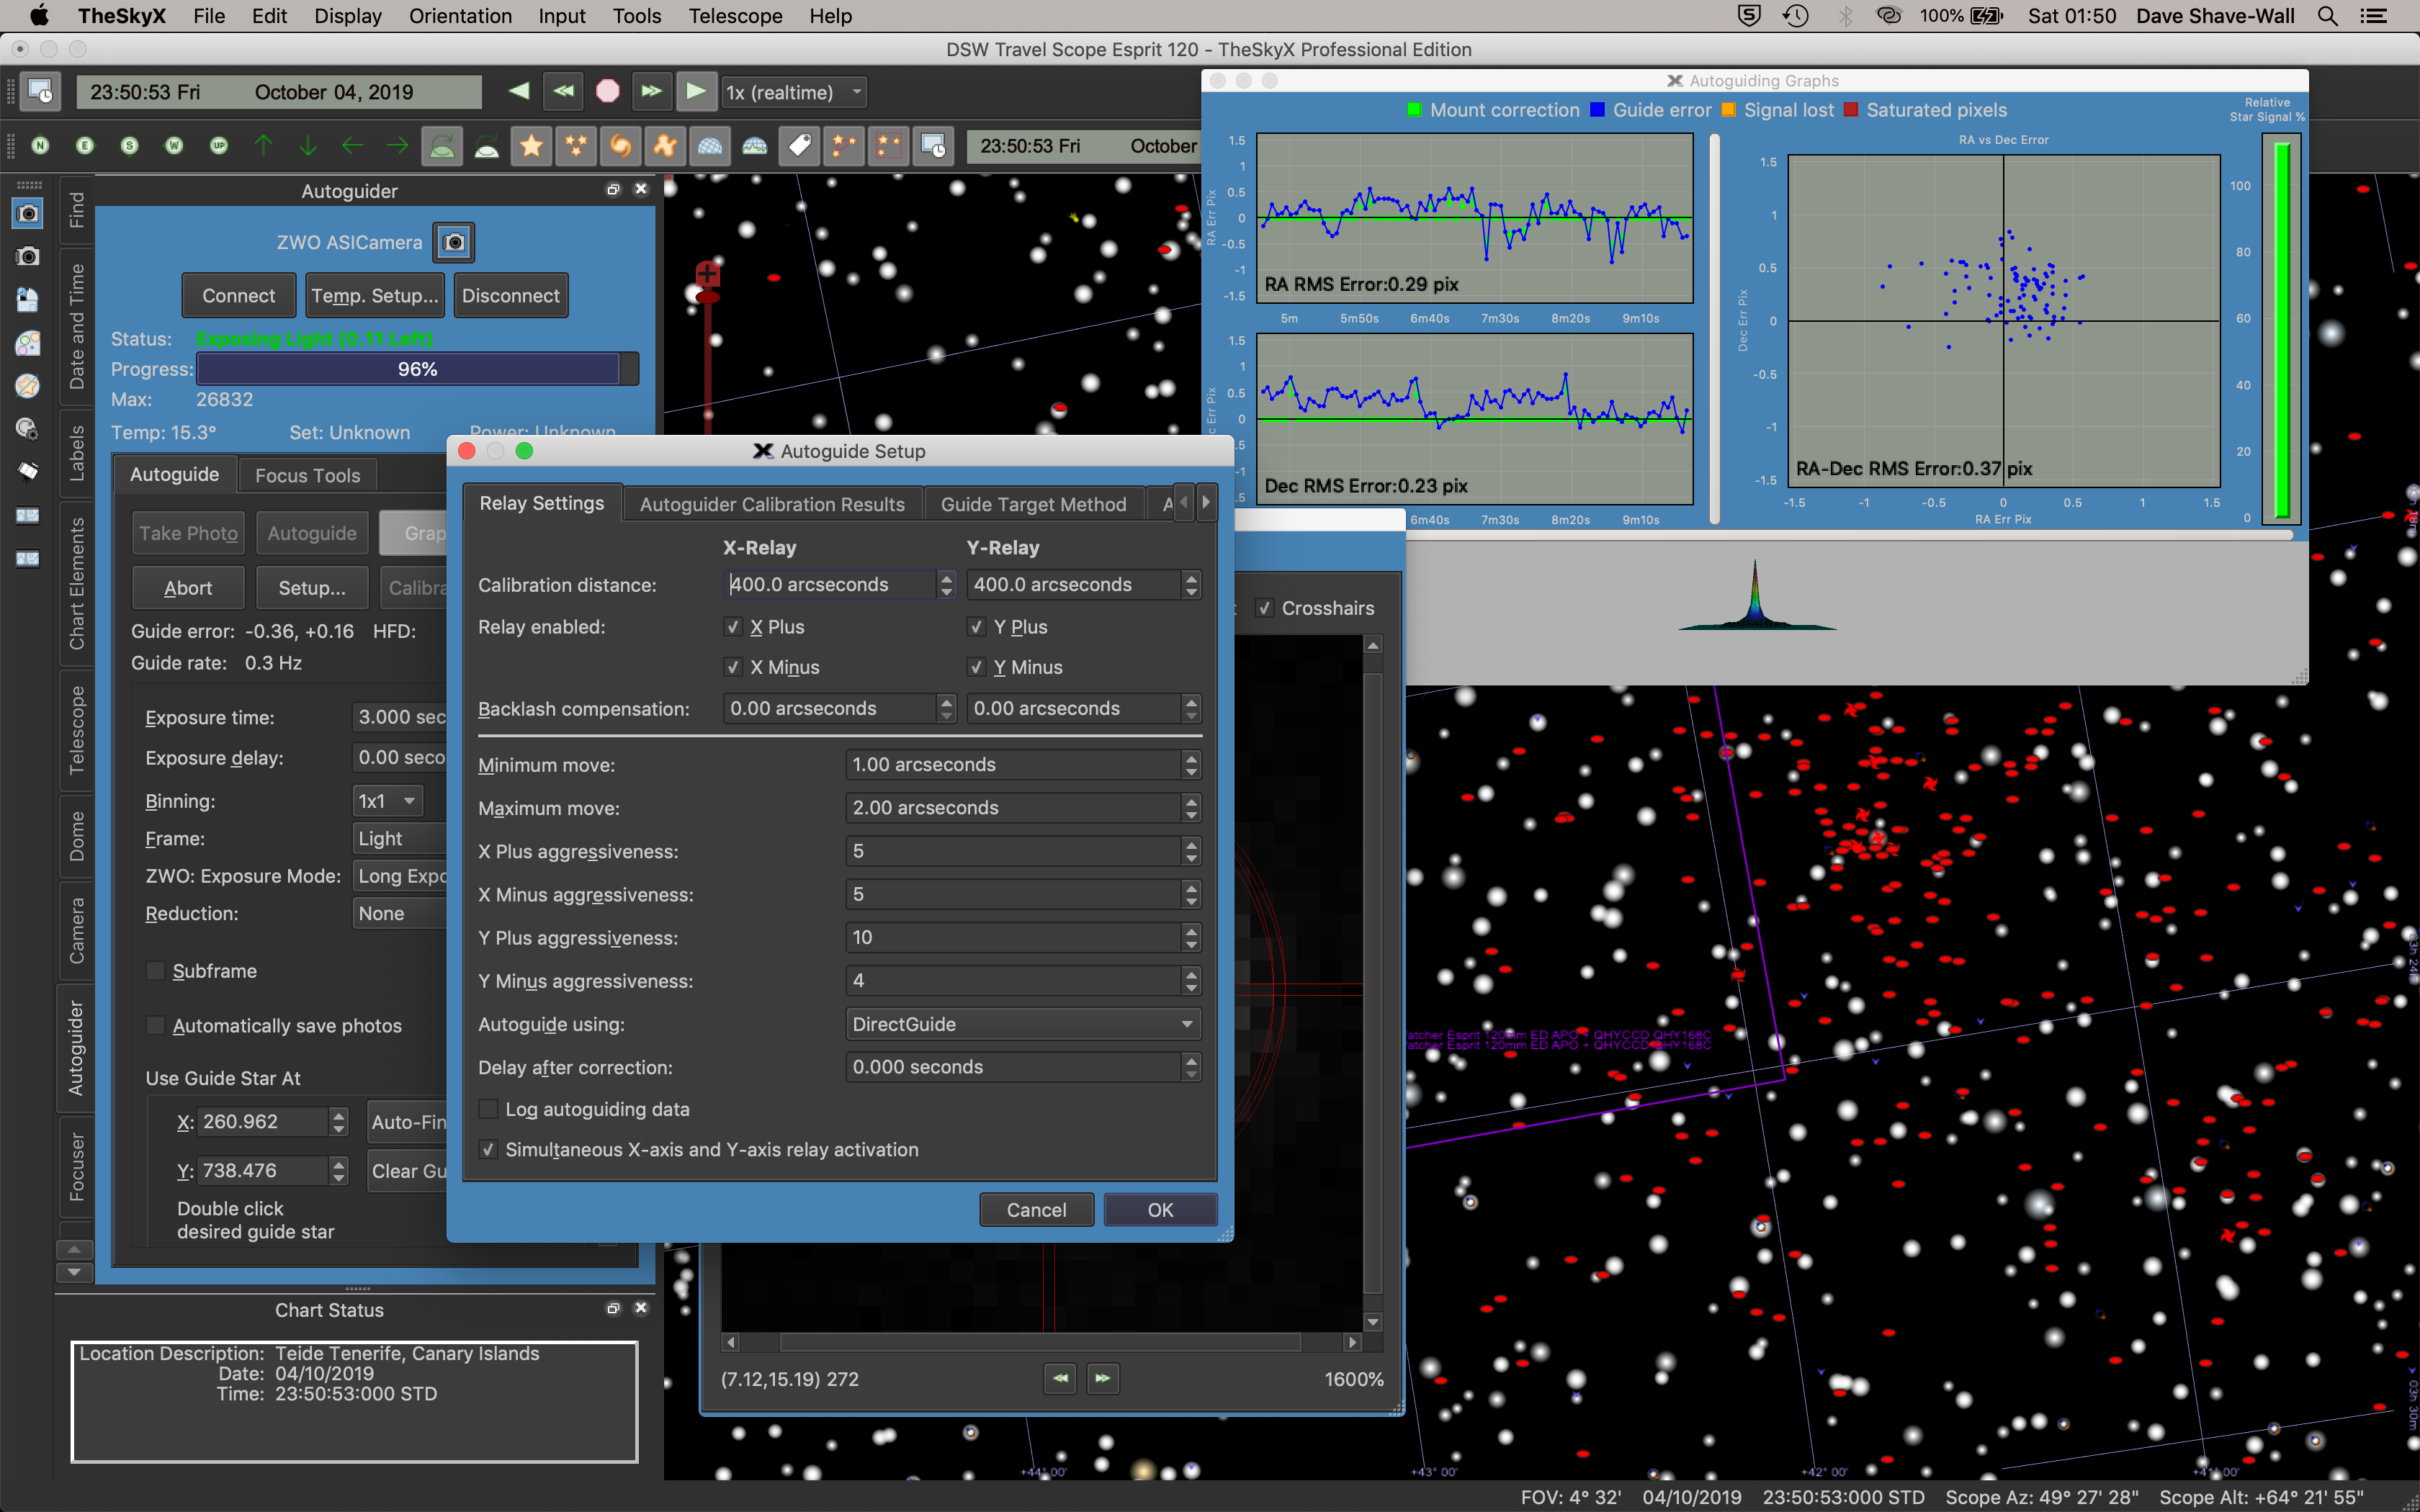
GingerGeek and I tried to sort a few things last night, namely PHD2 guiding on both sides of the mount without any recalibration, automated meridian flip within SGPro, focusing and plate solving. After nearly 2 hours we had not fixed any of these problems. So we need further research/reading to resolve.

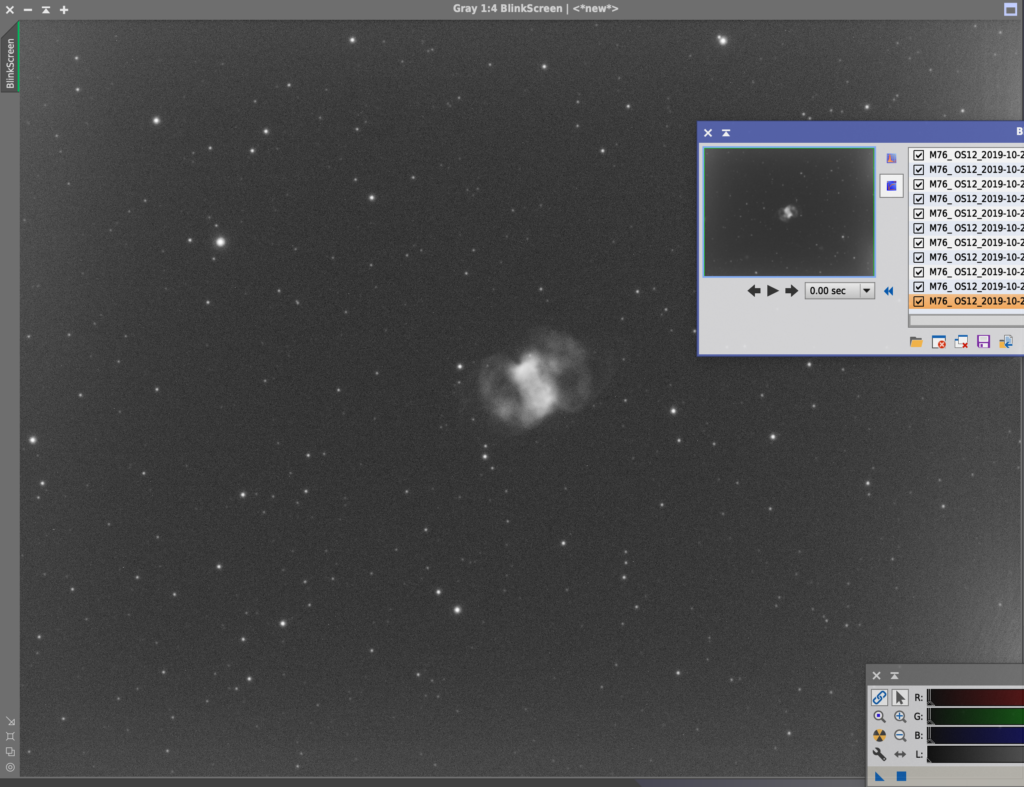
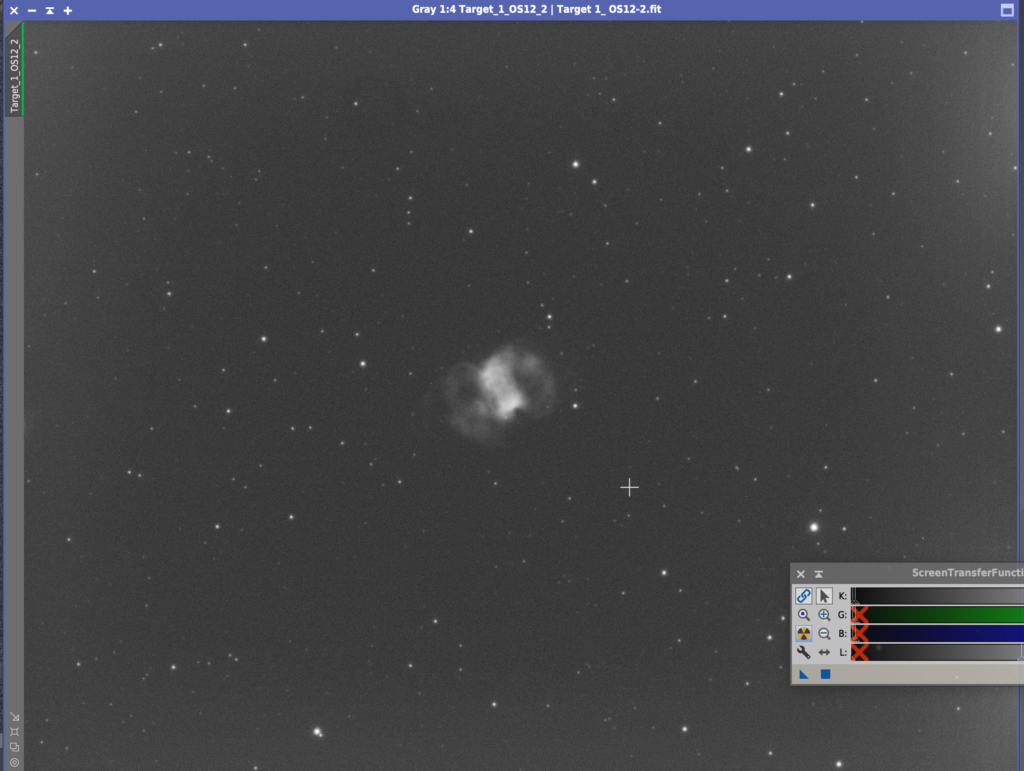
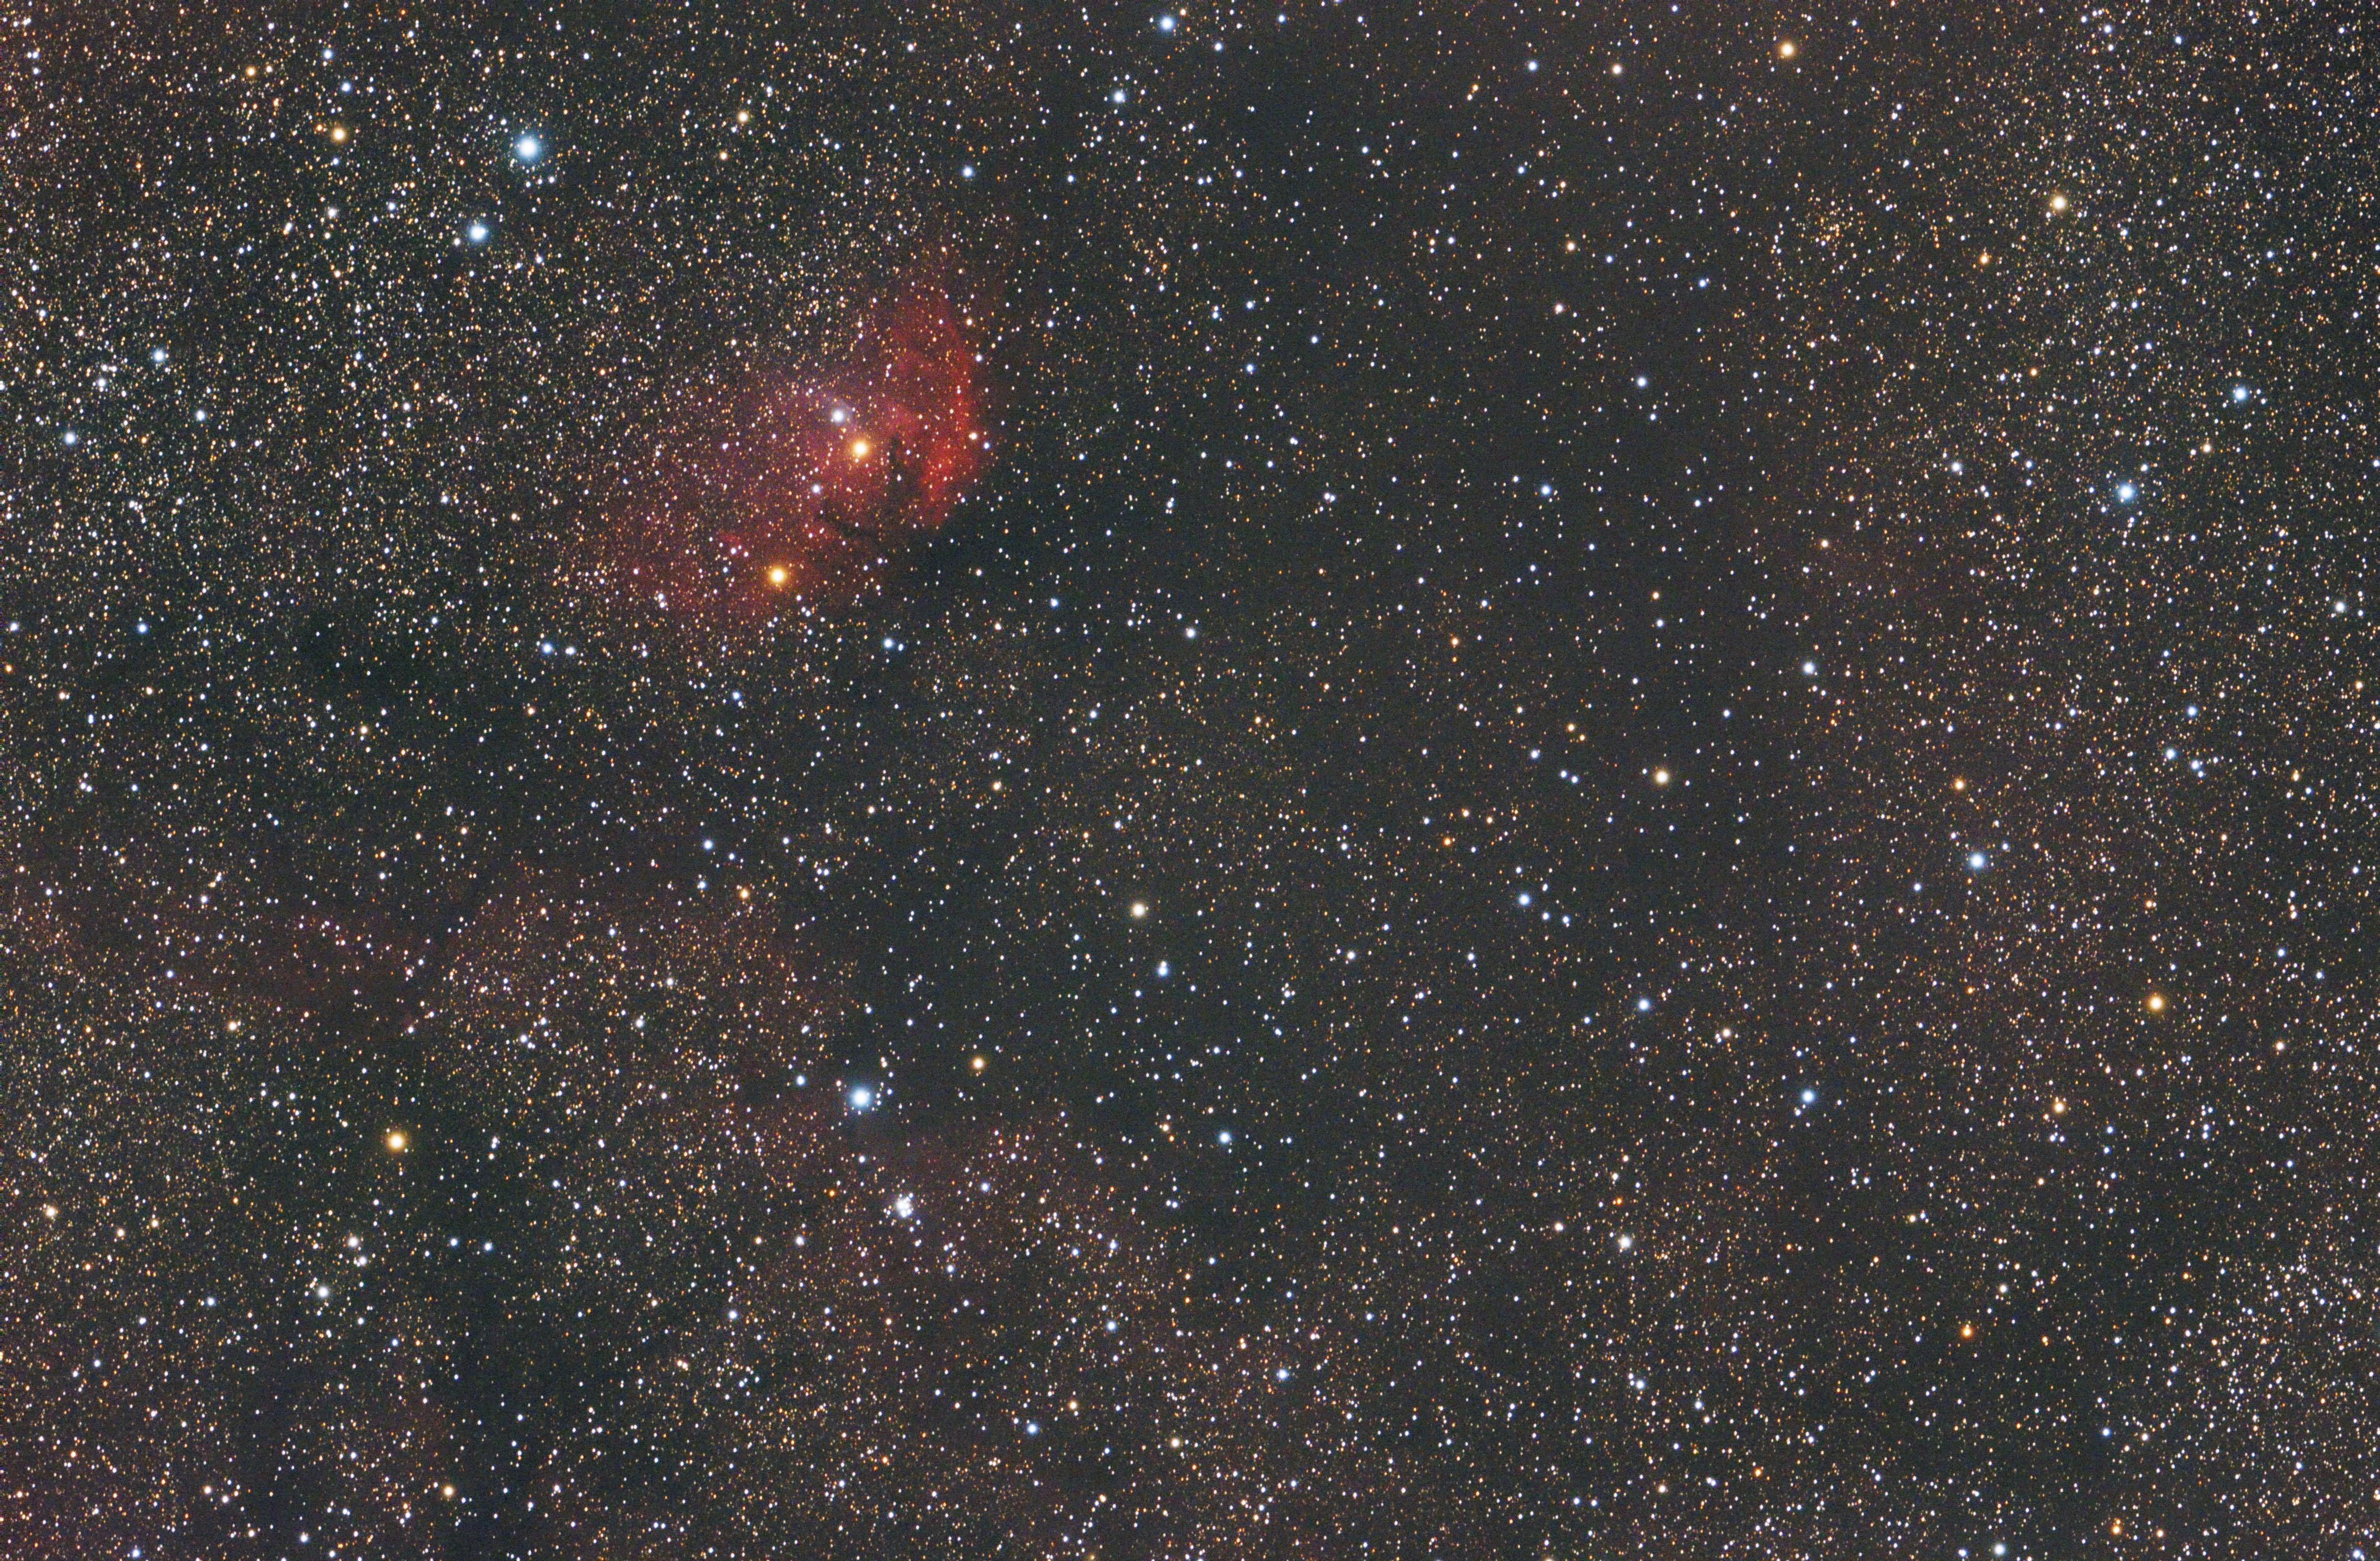
Instead @9pm I decided to take some more images of M76 since it was due to be fairly clear all night. What I found was this was quite simple to now setup and get working as long as I did not mind performing a manual flip at 11:30pm.

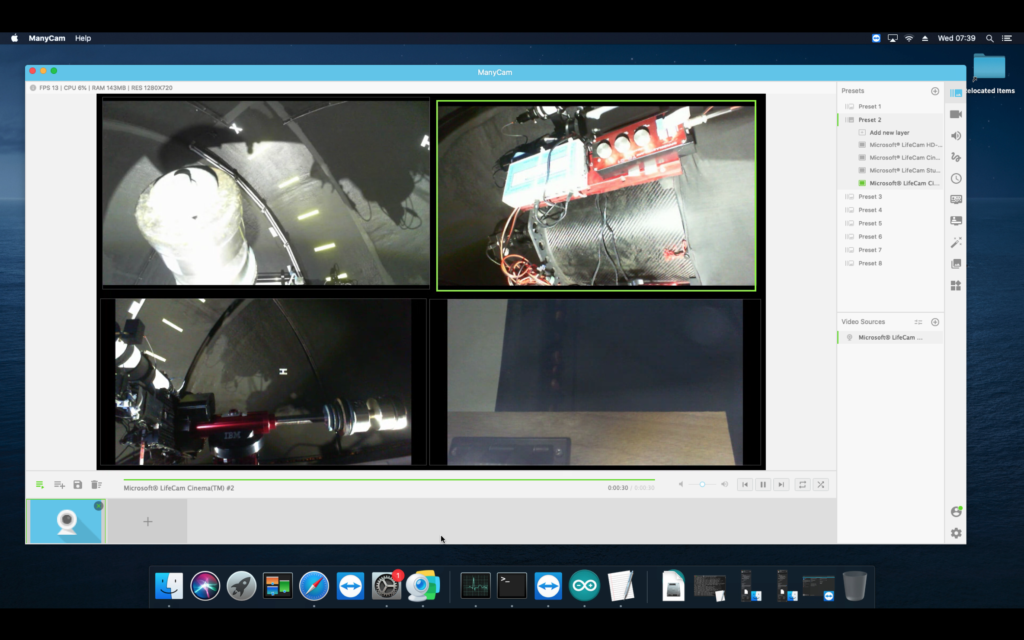
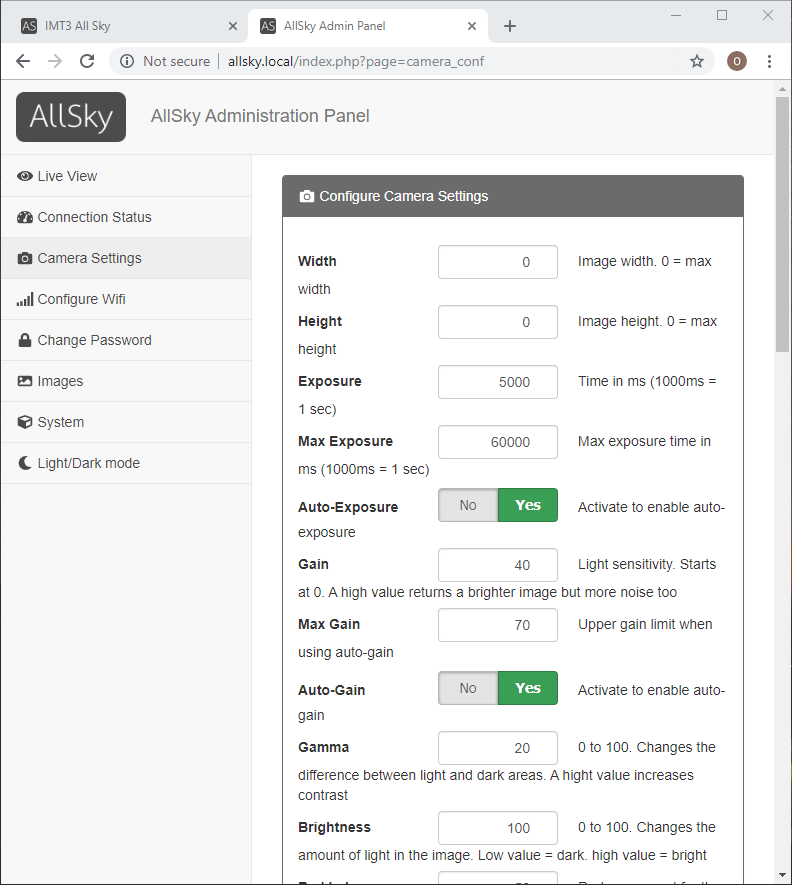
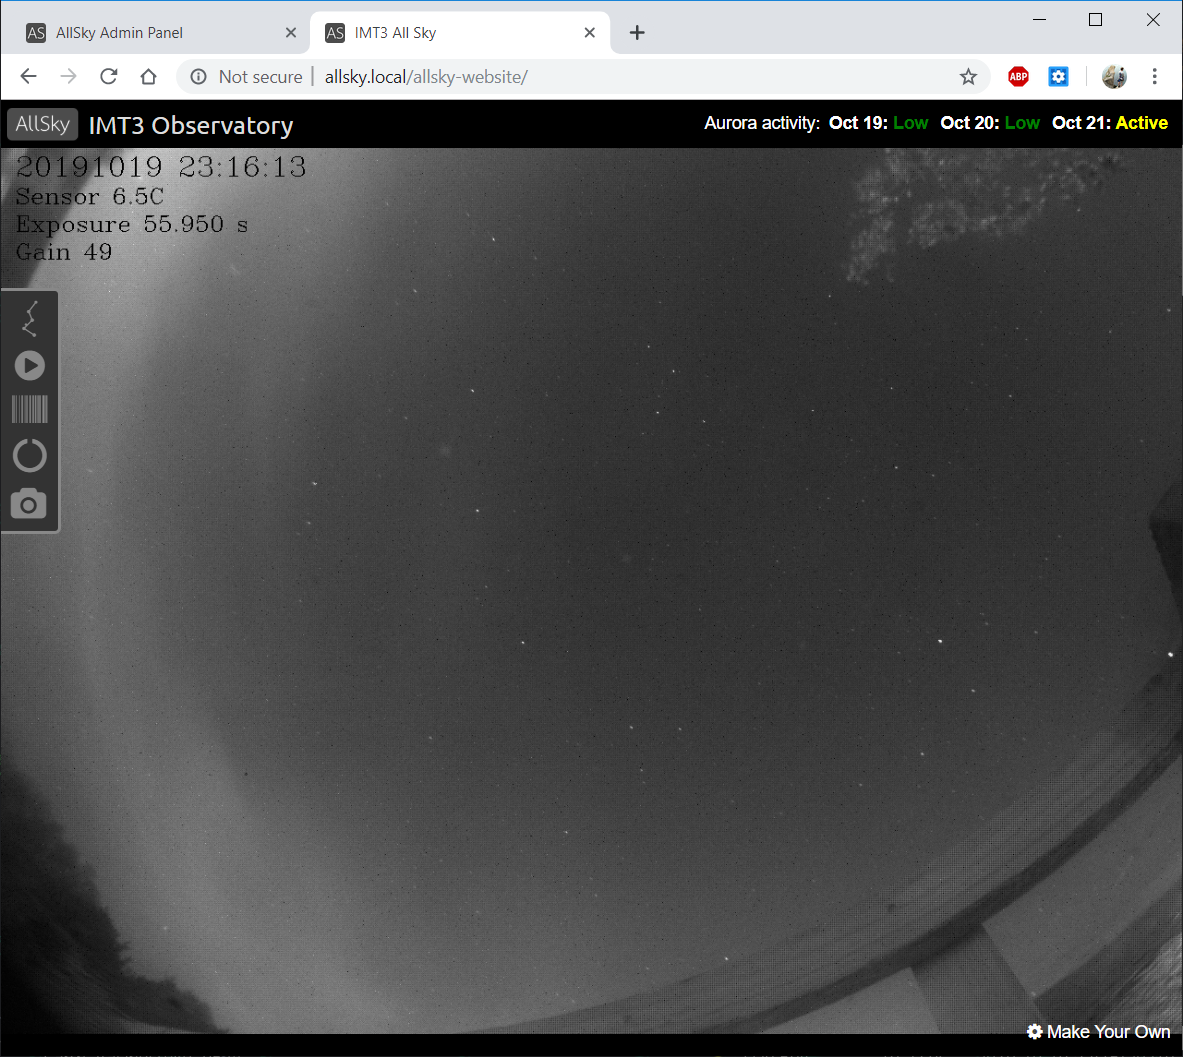
There was one other issue last night which was around the dome closing, it suddenly did this around 10pm, not sure why, I think (I now in the light of day cannot be sure) the relay went off. Looking at the Keogram and then the ASC movie for last night it does coincide with a set of cloud going over so maybe that is why it closed. It will be nice to then get it to reopen when clear, another thing to fix at some point.

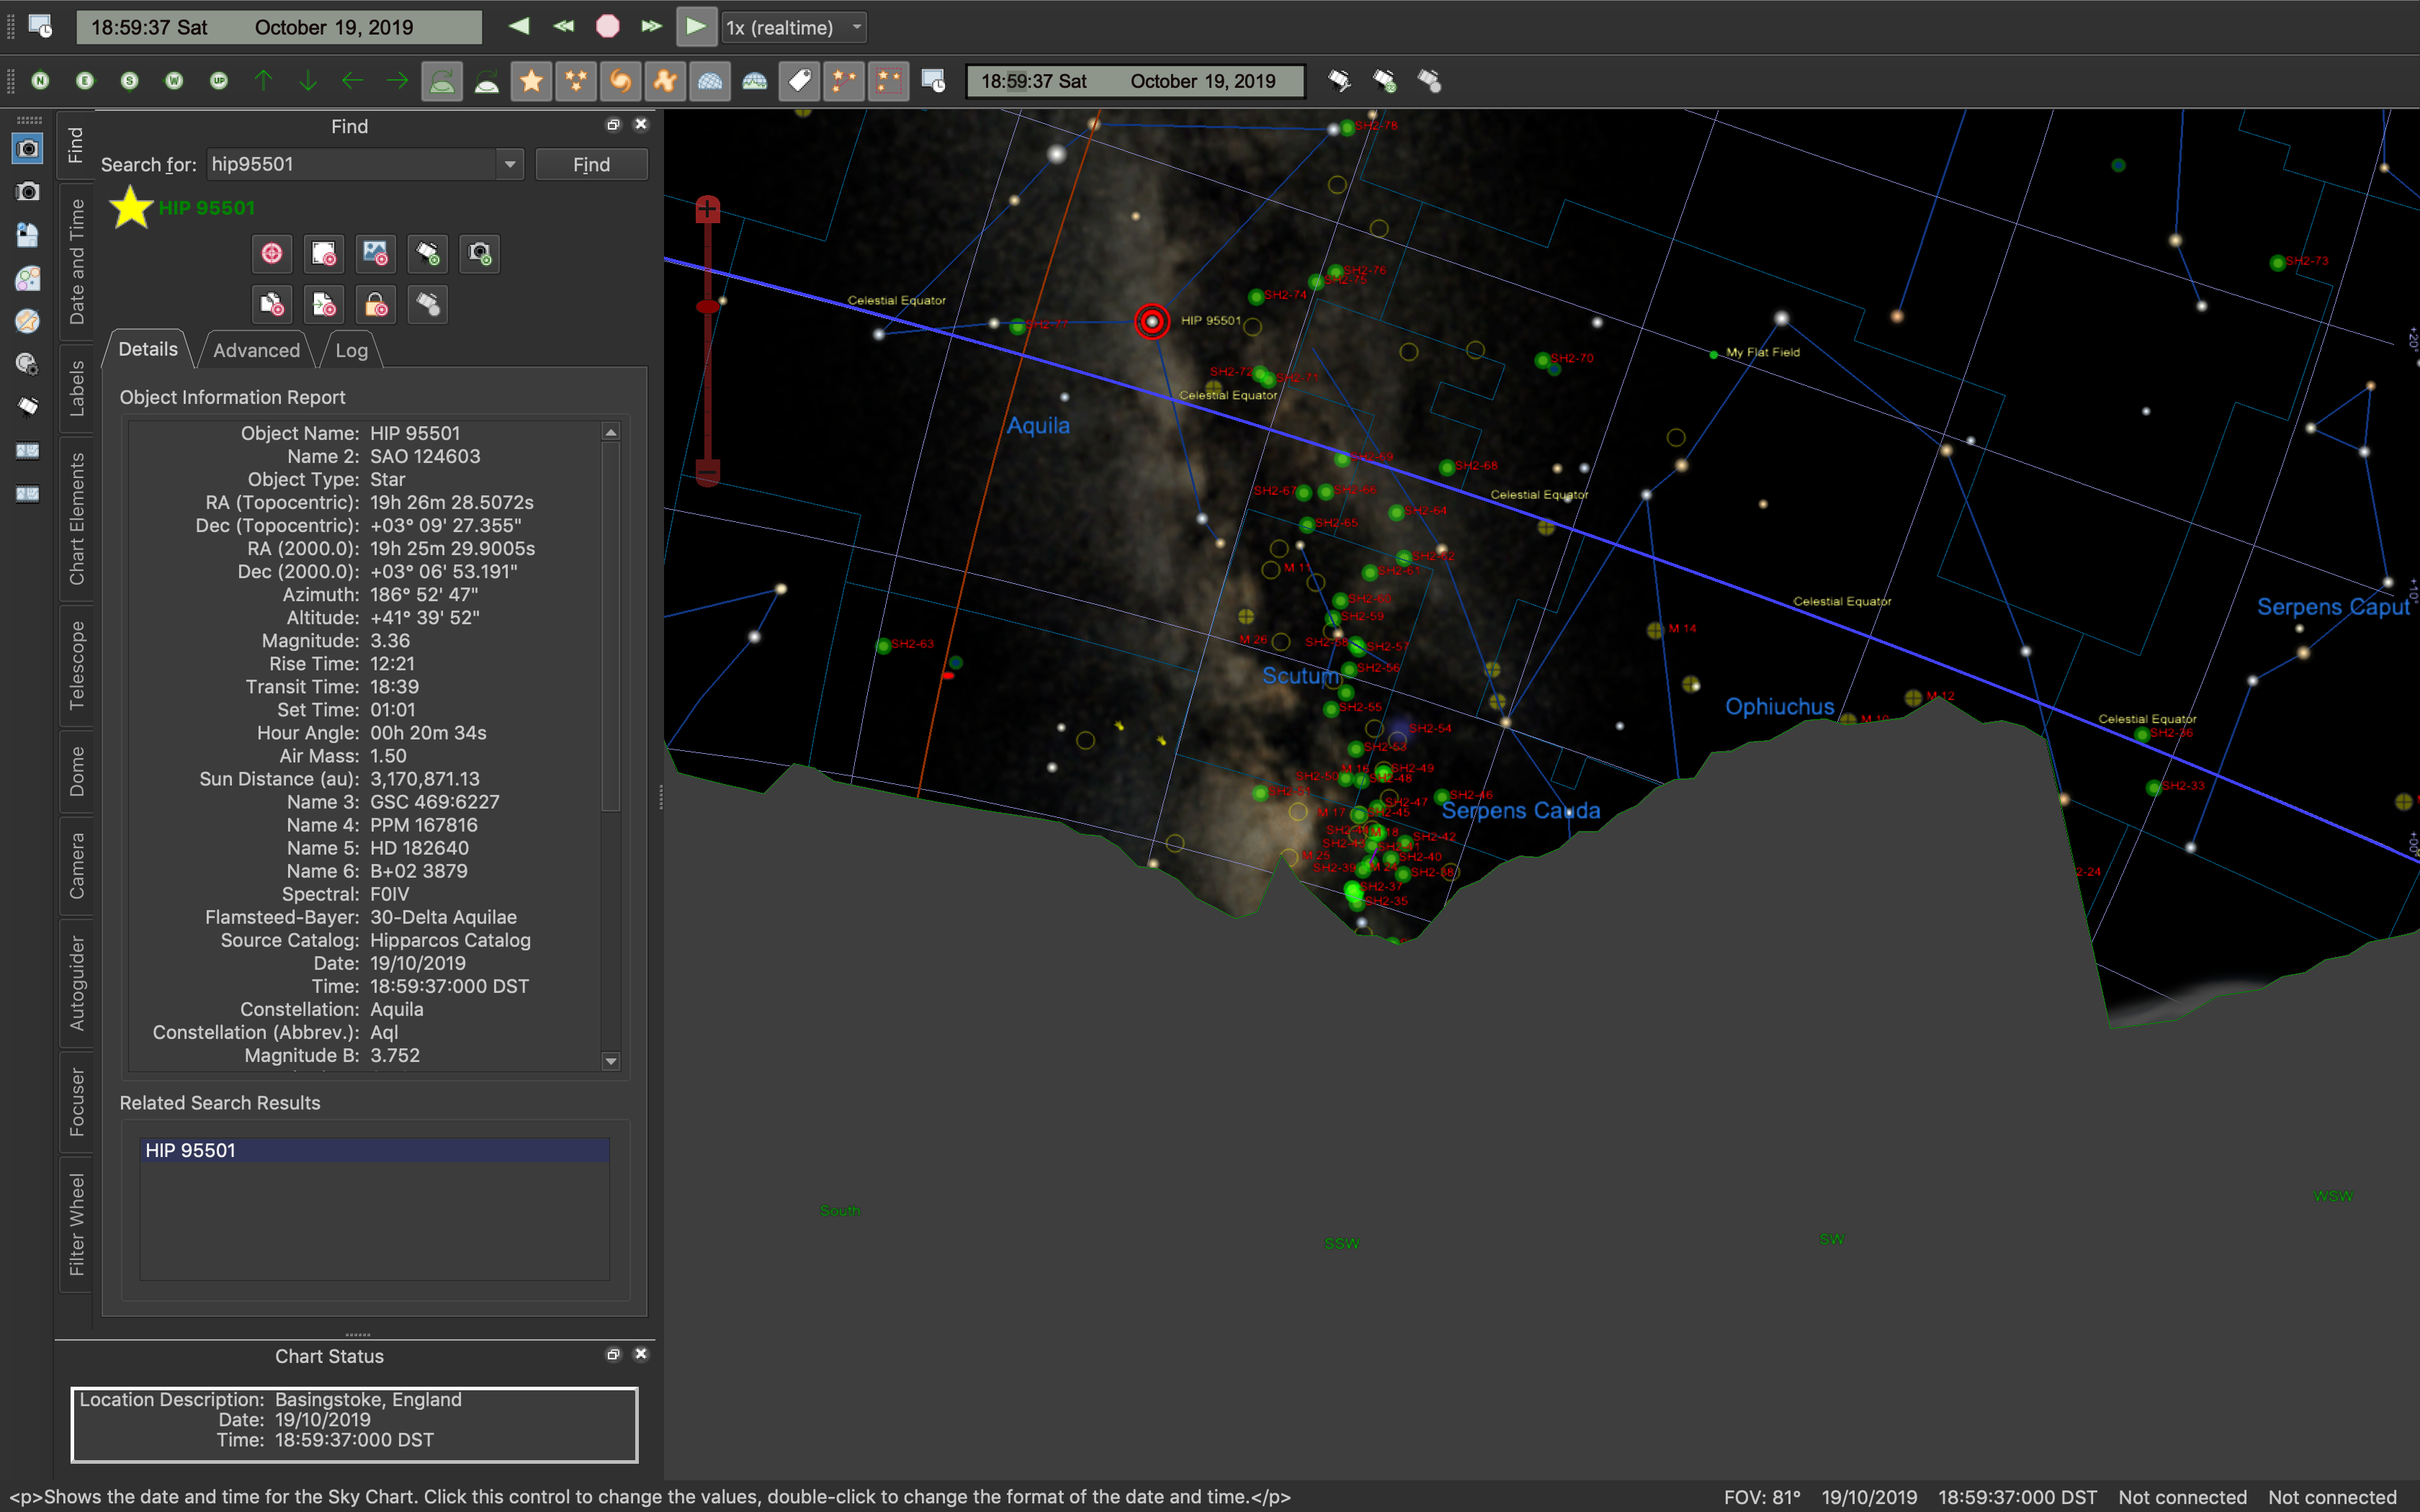
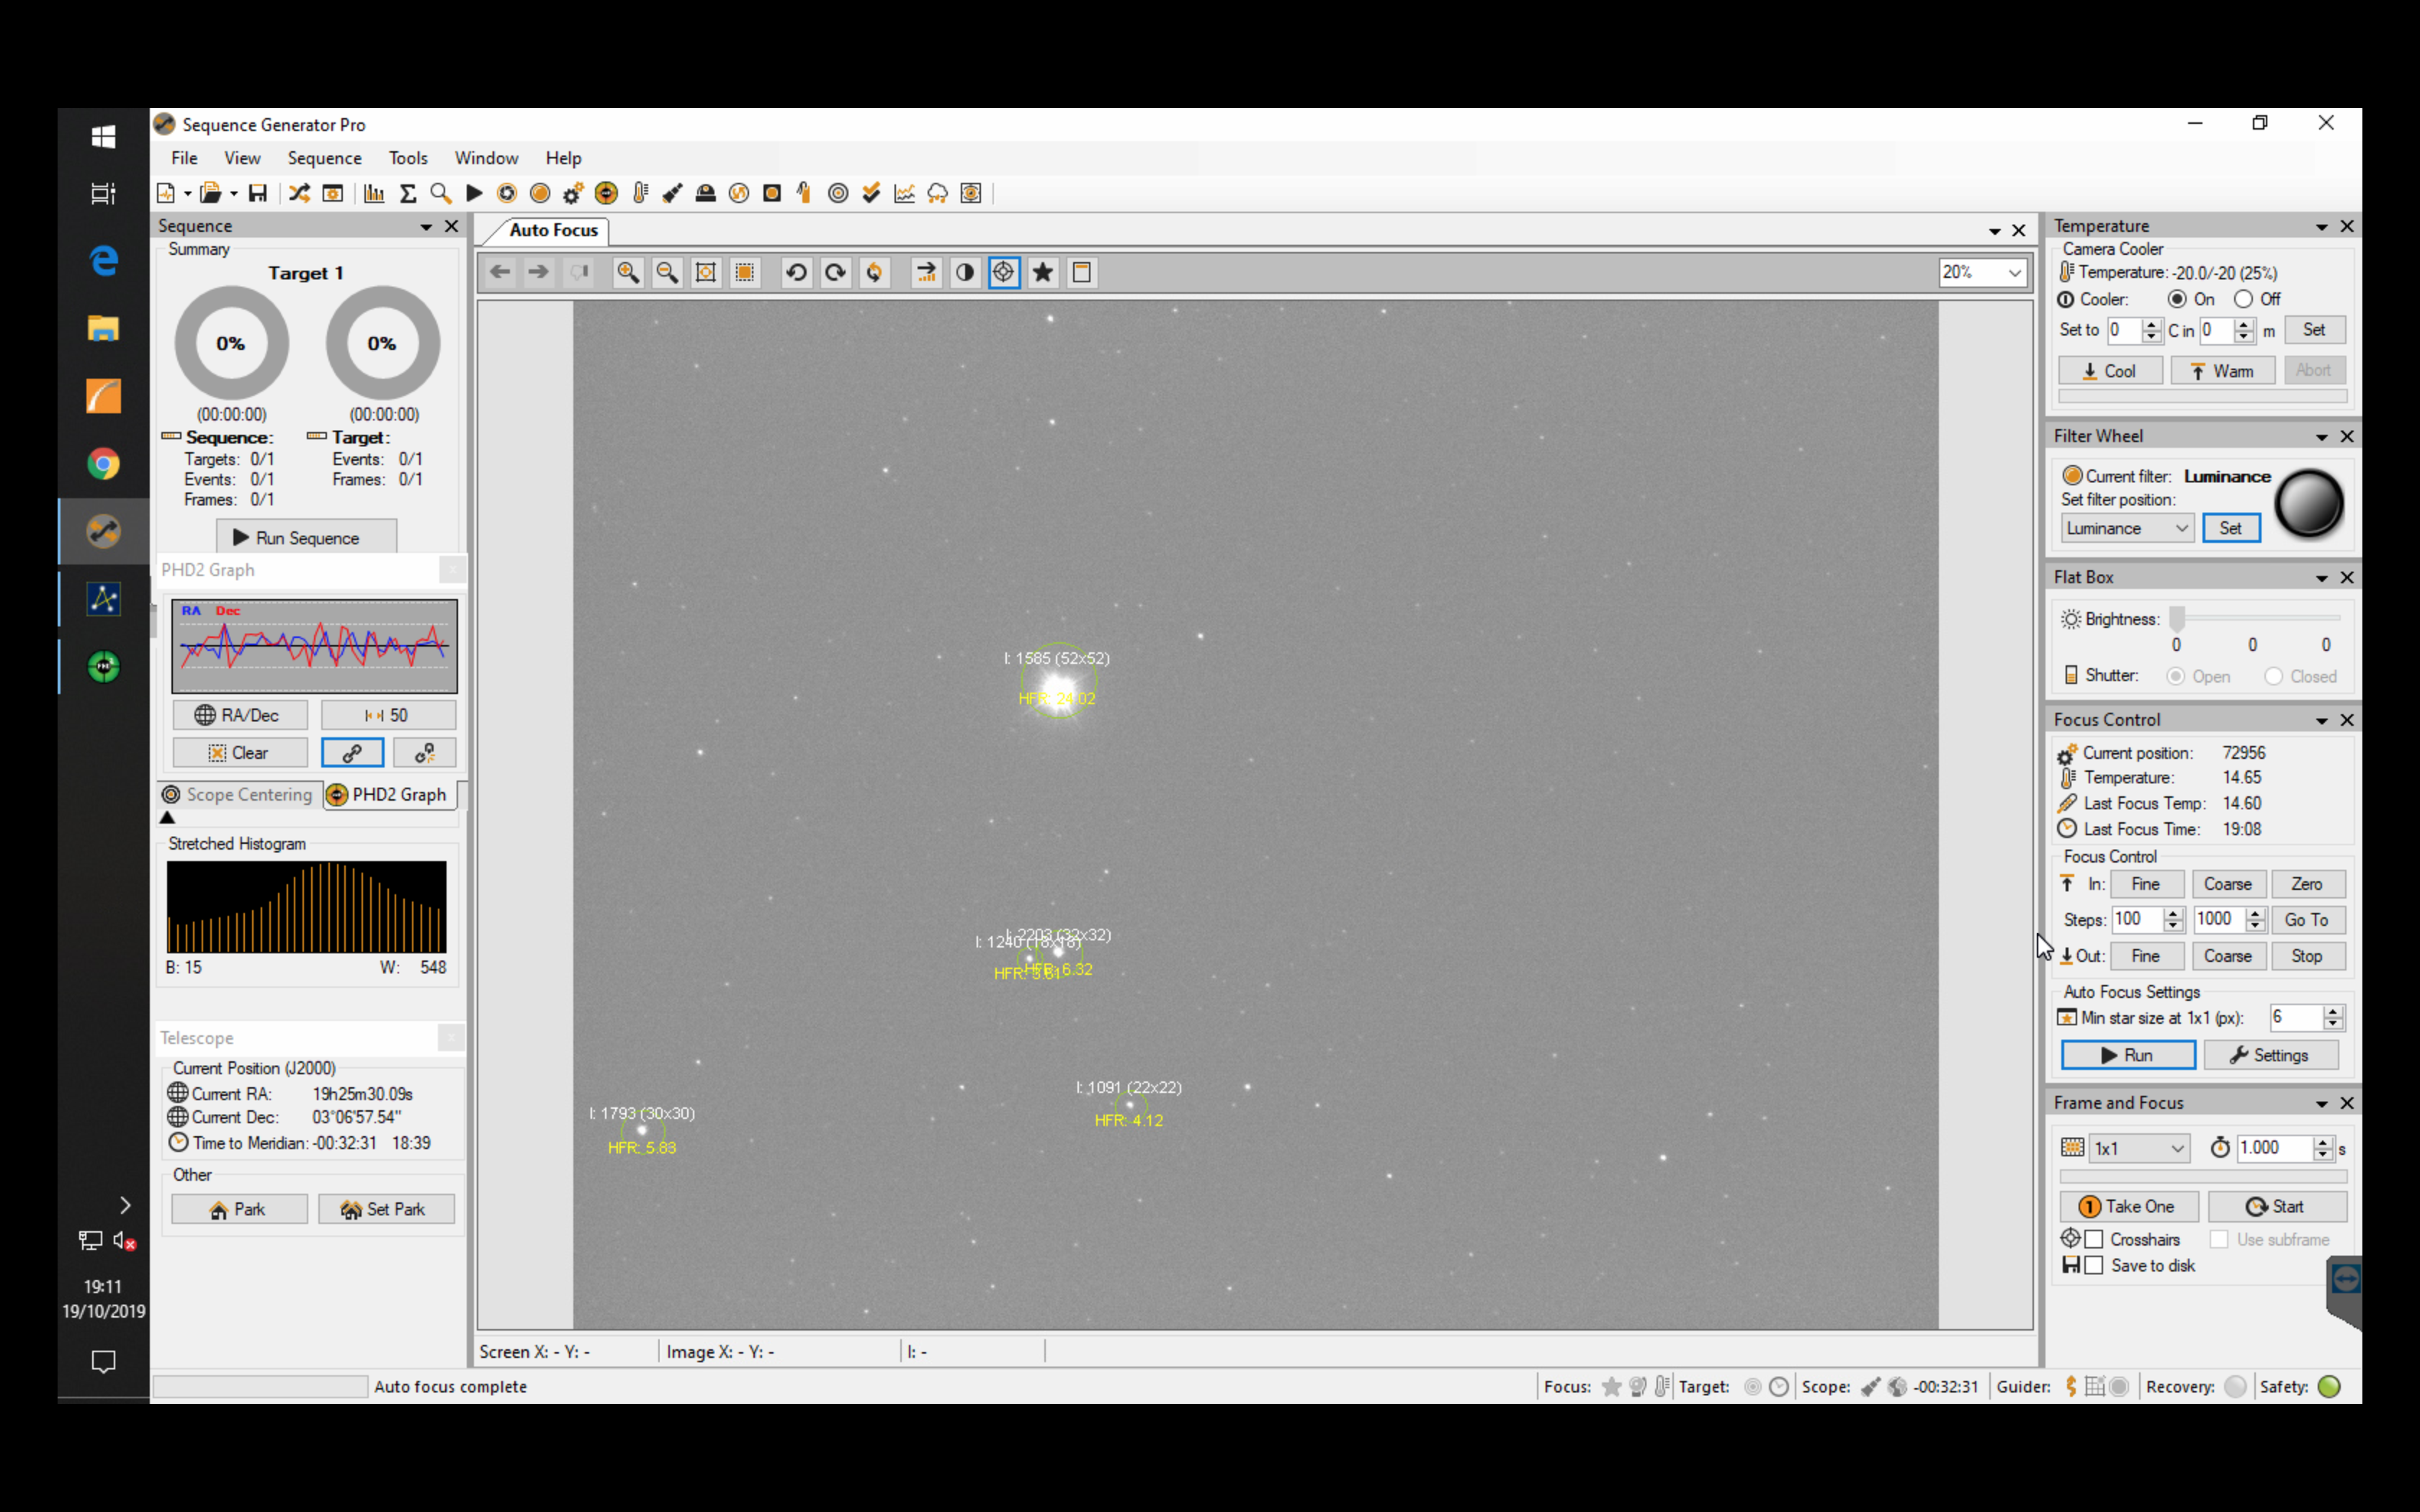
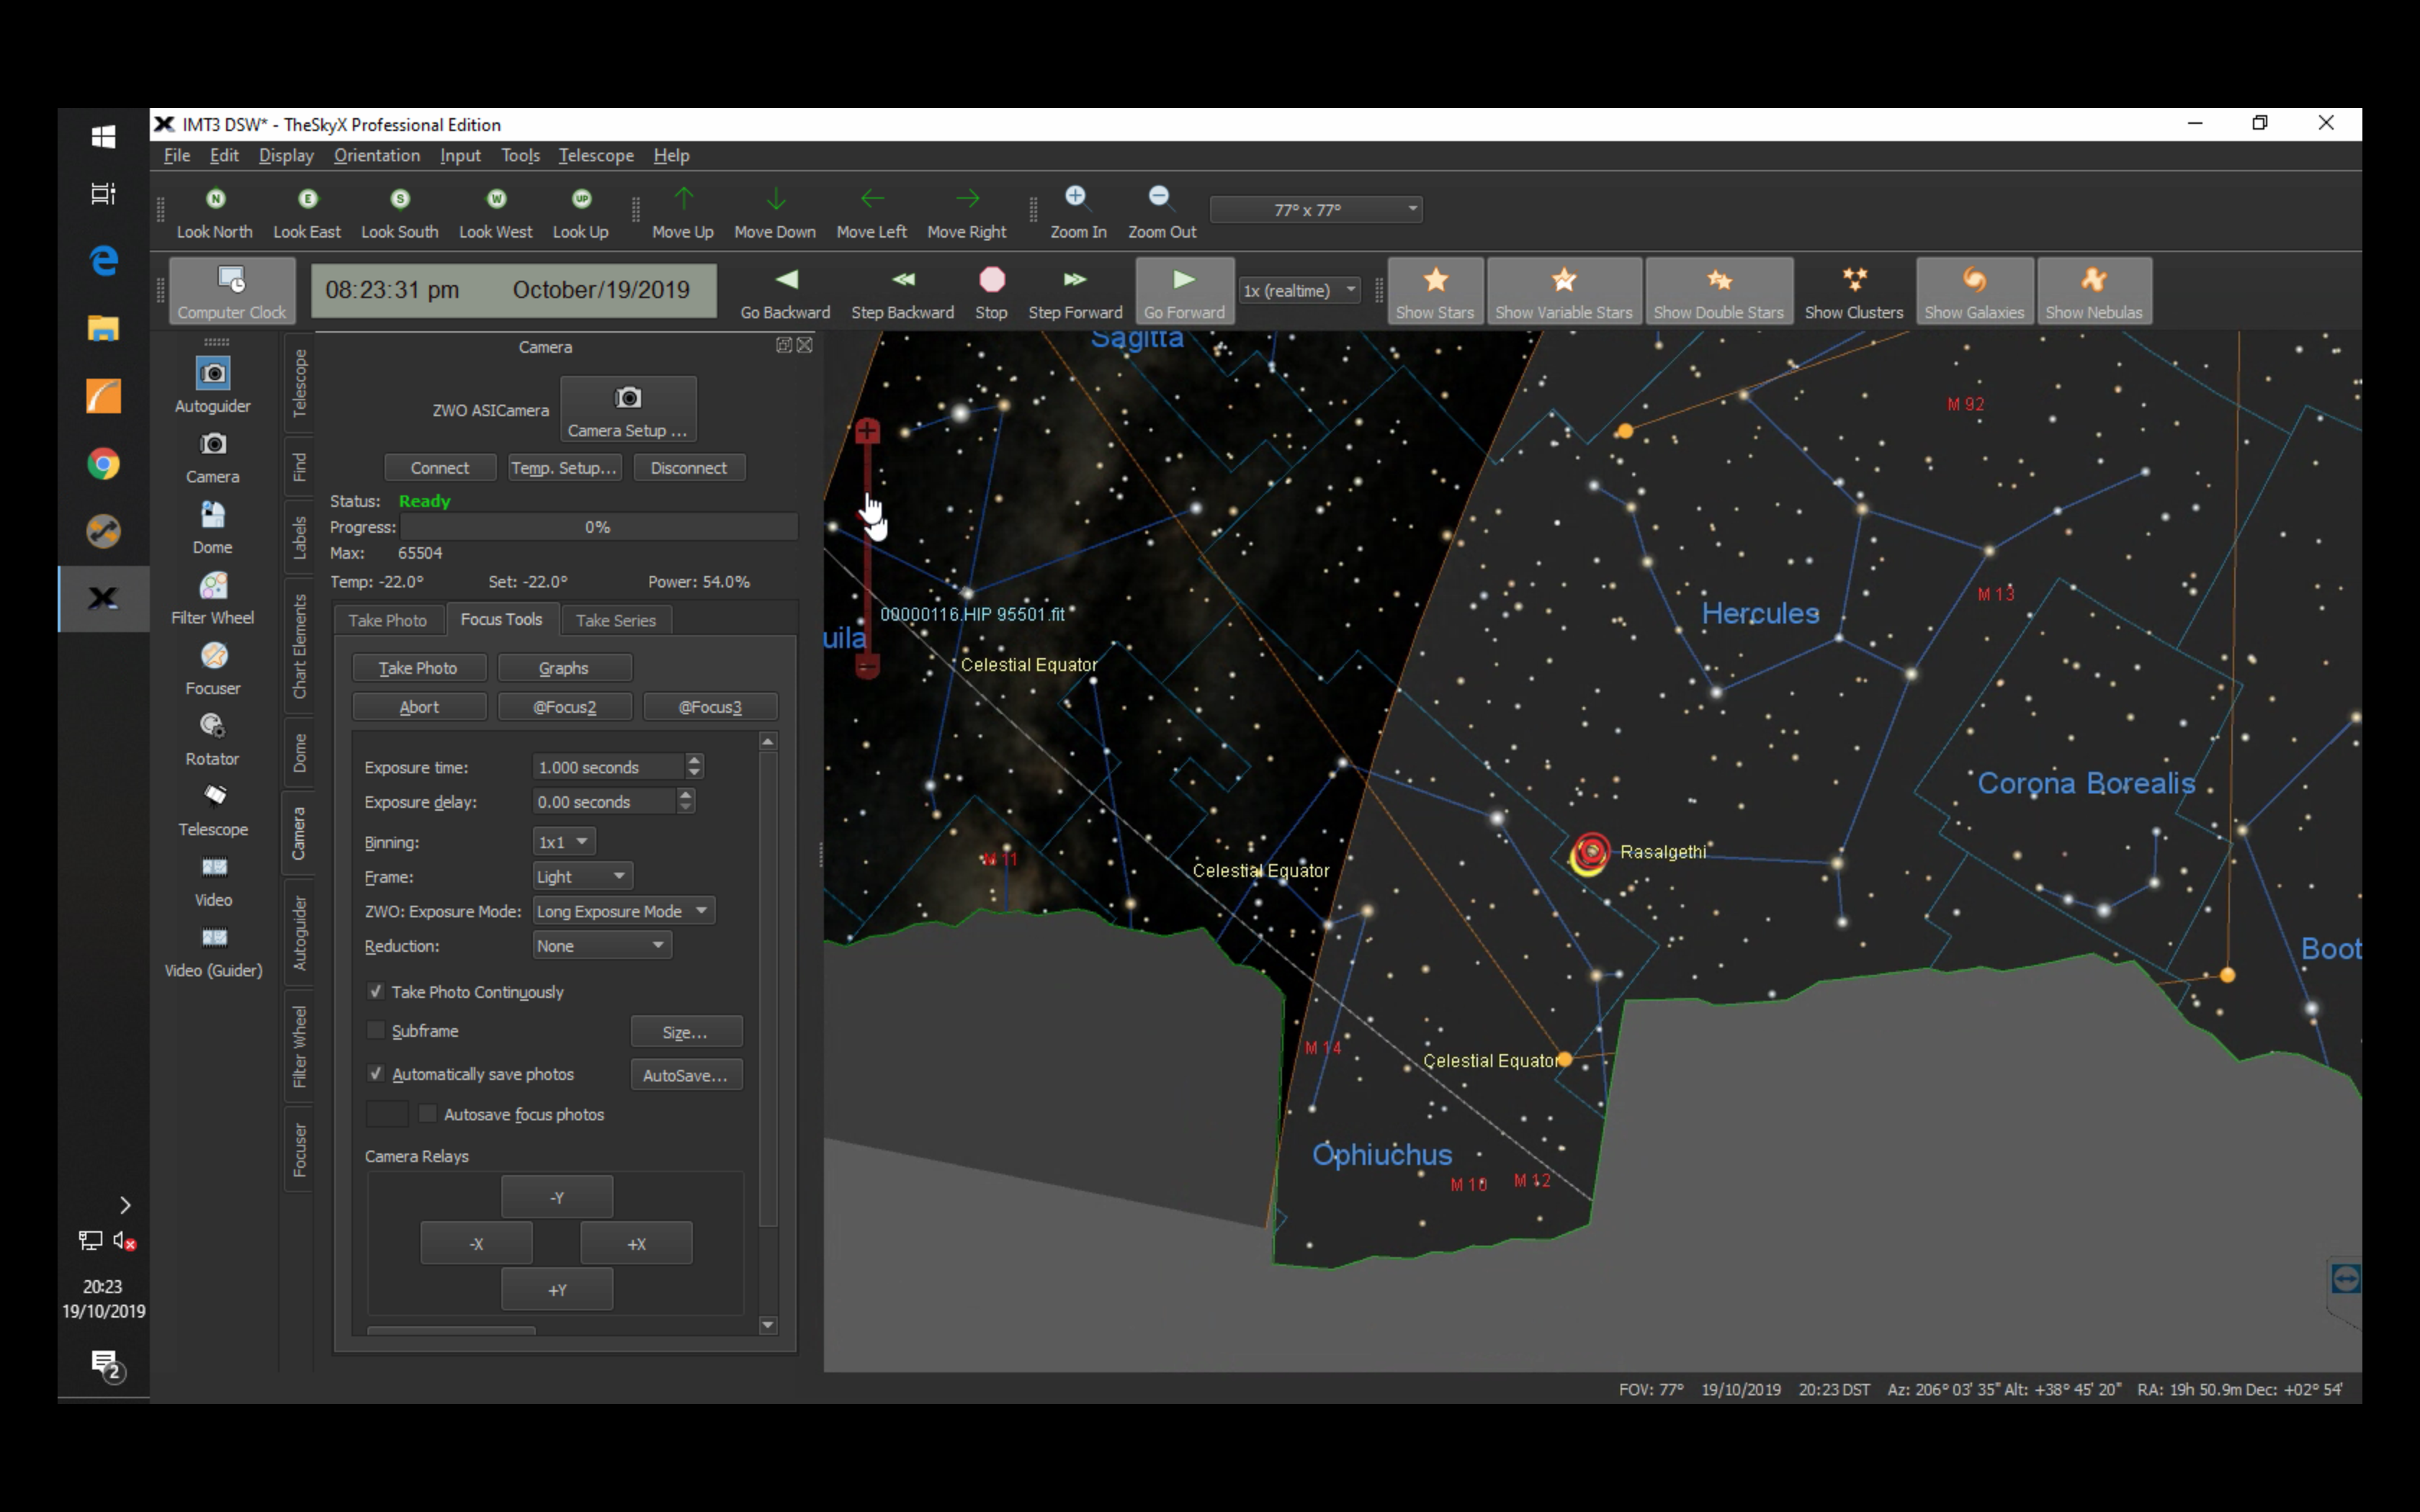
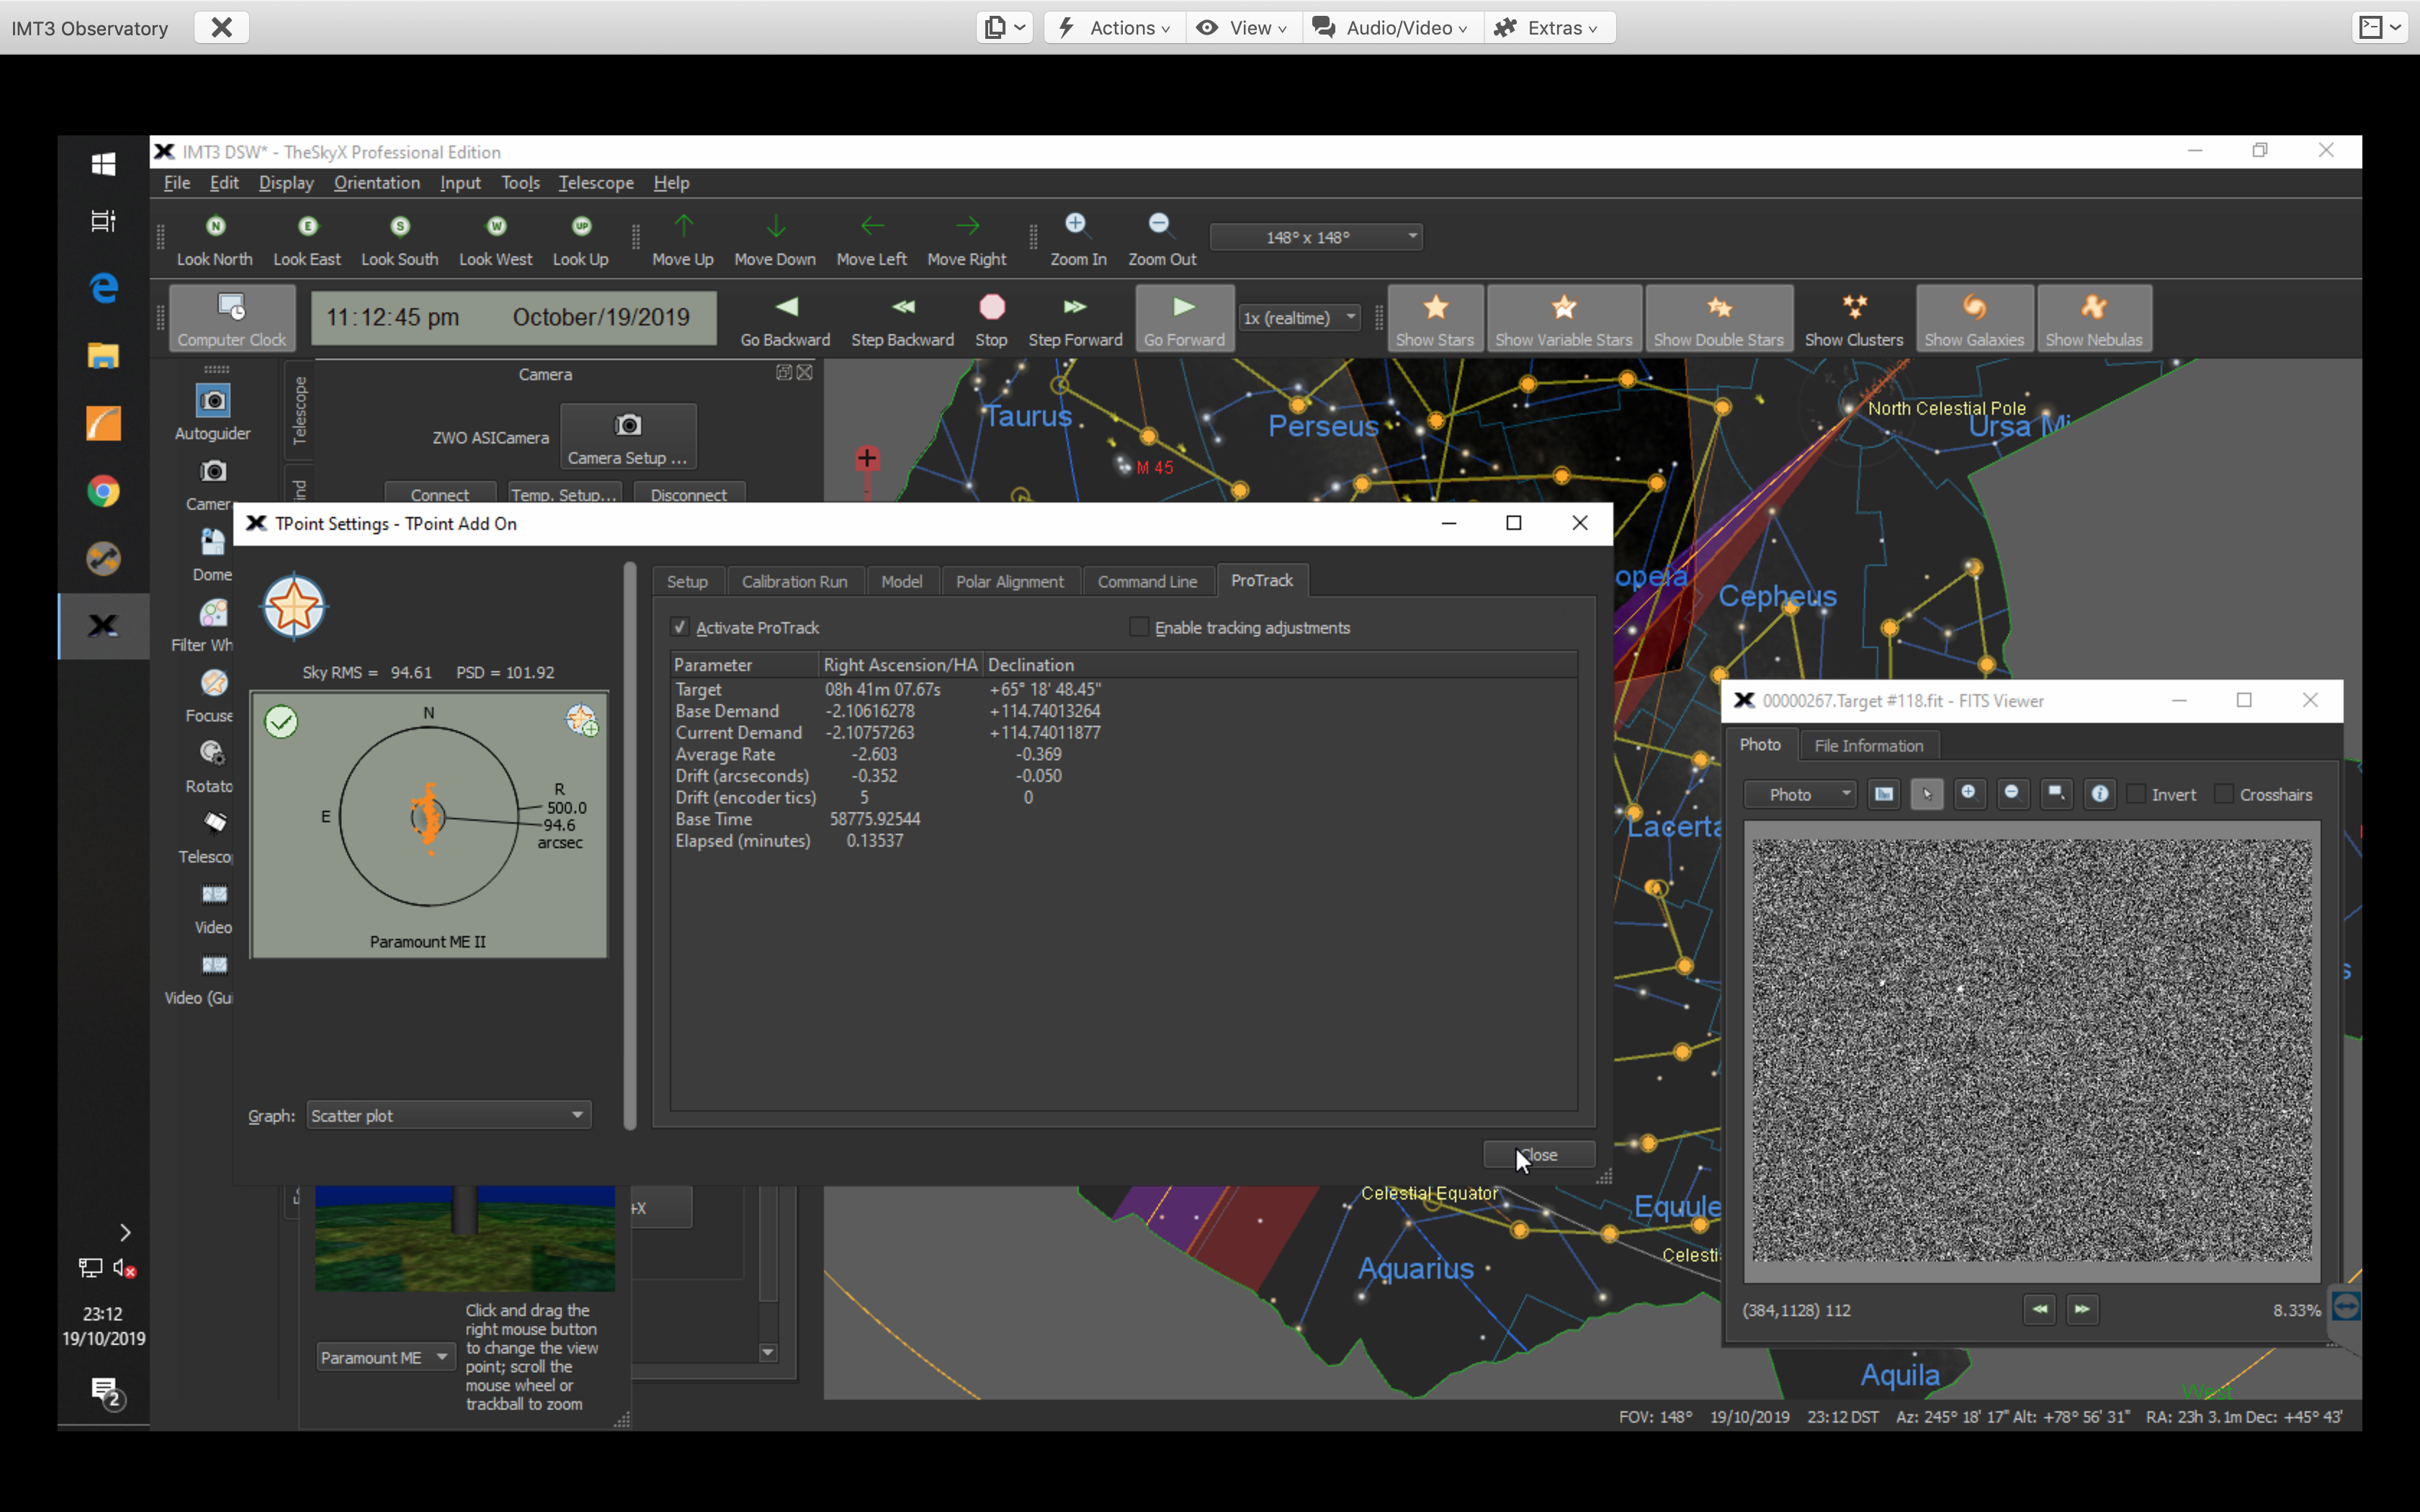
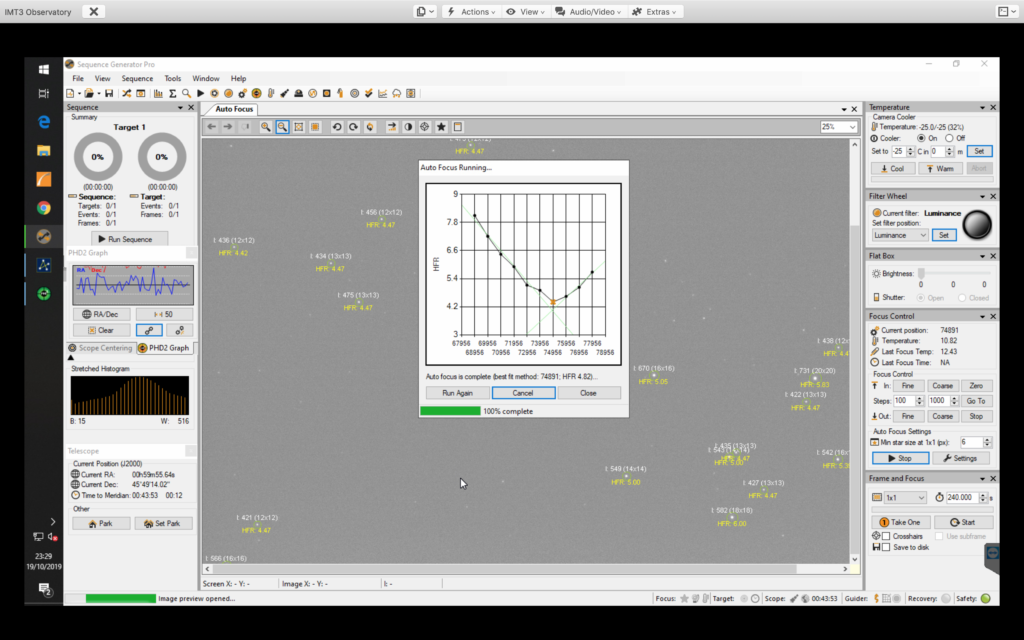
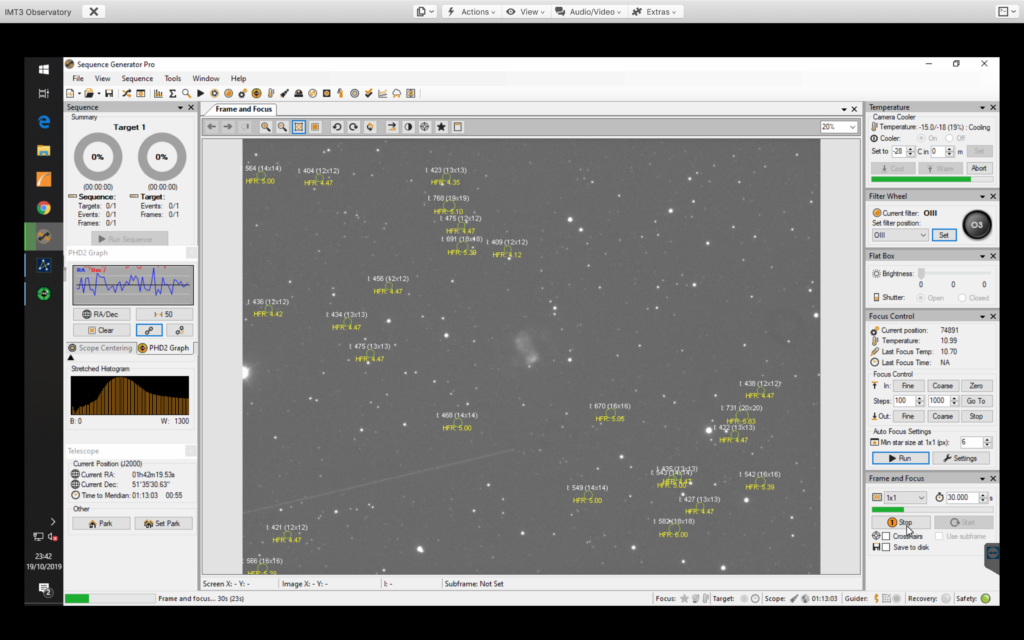
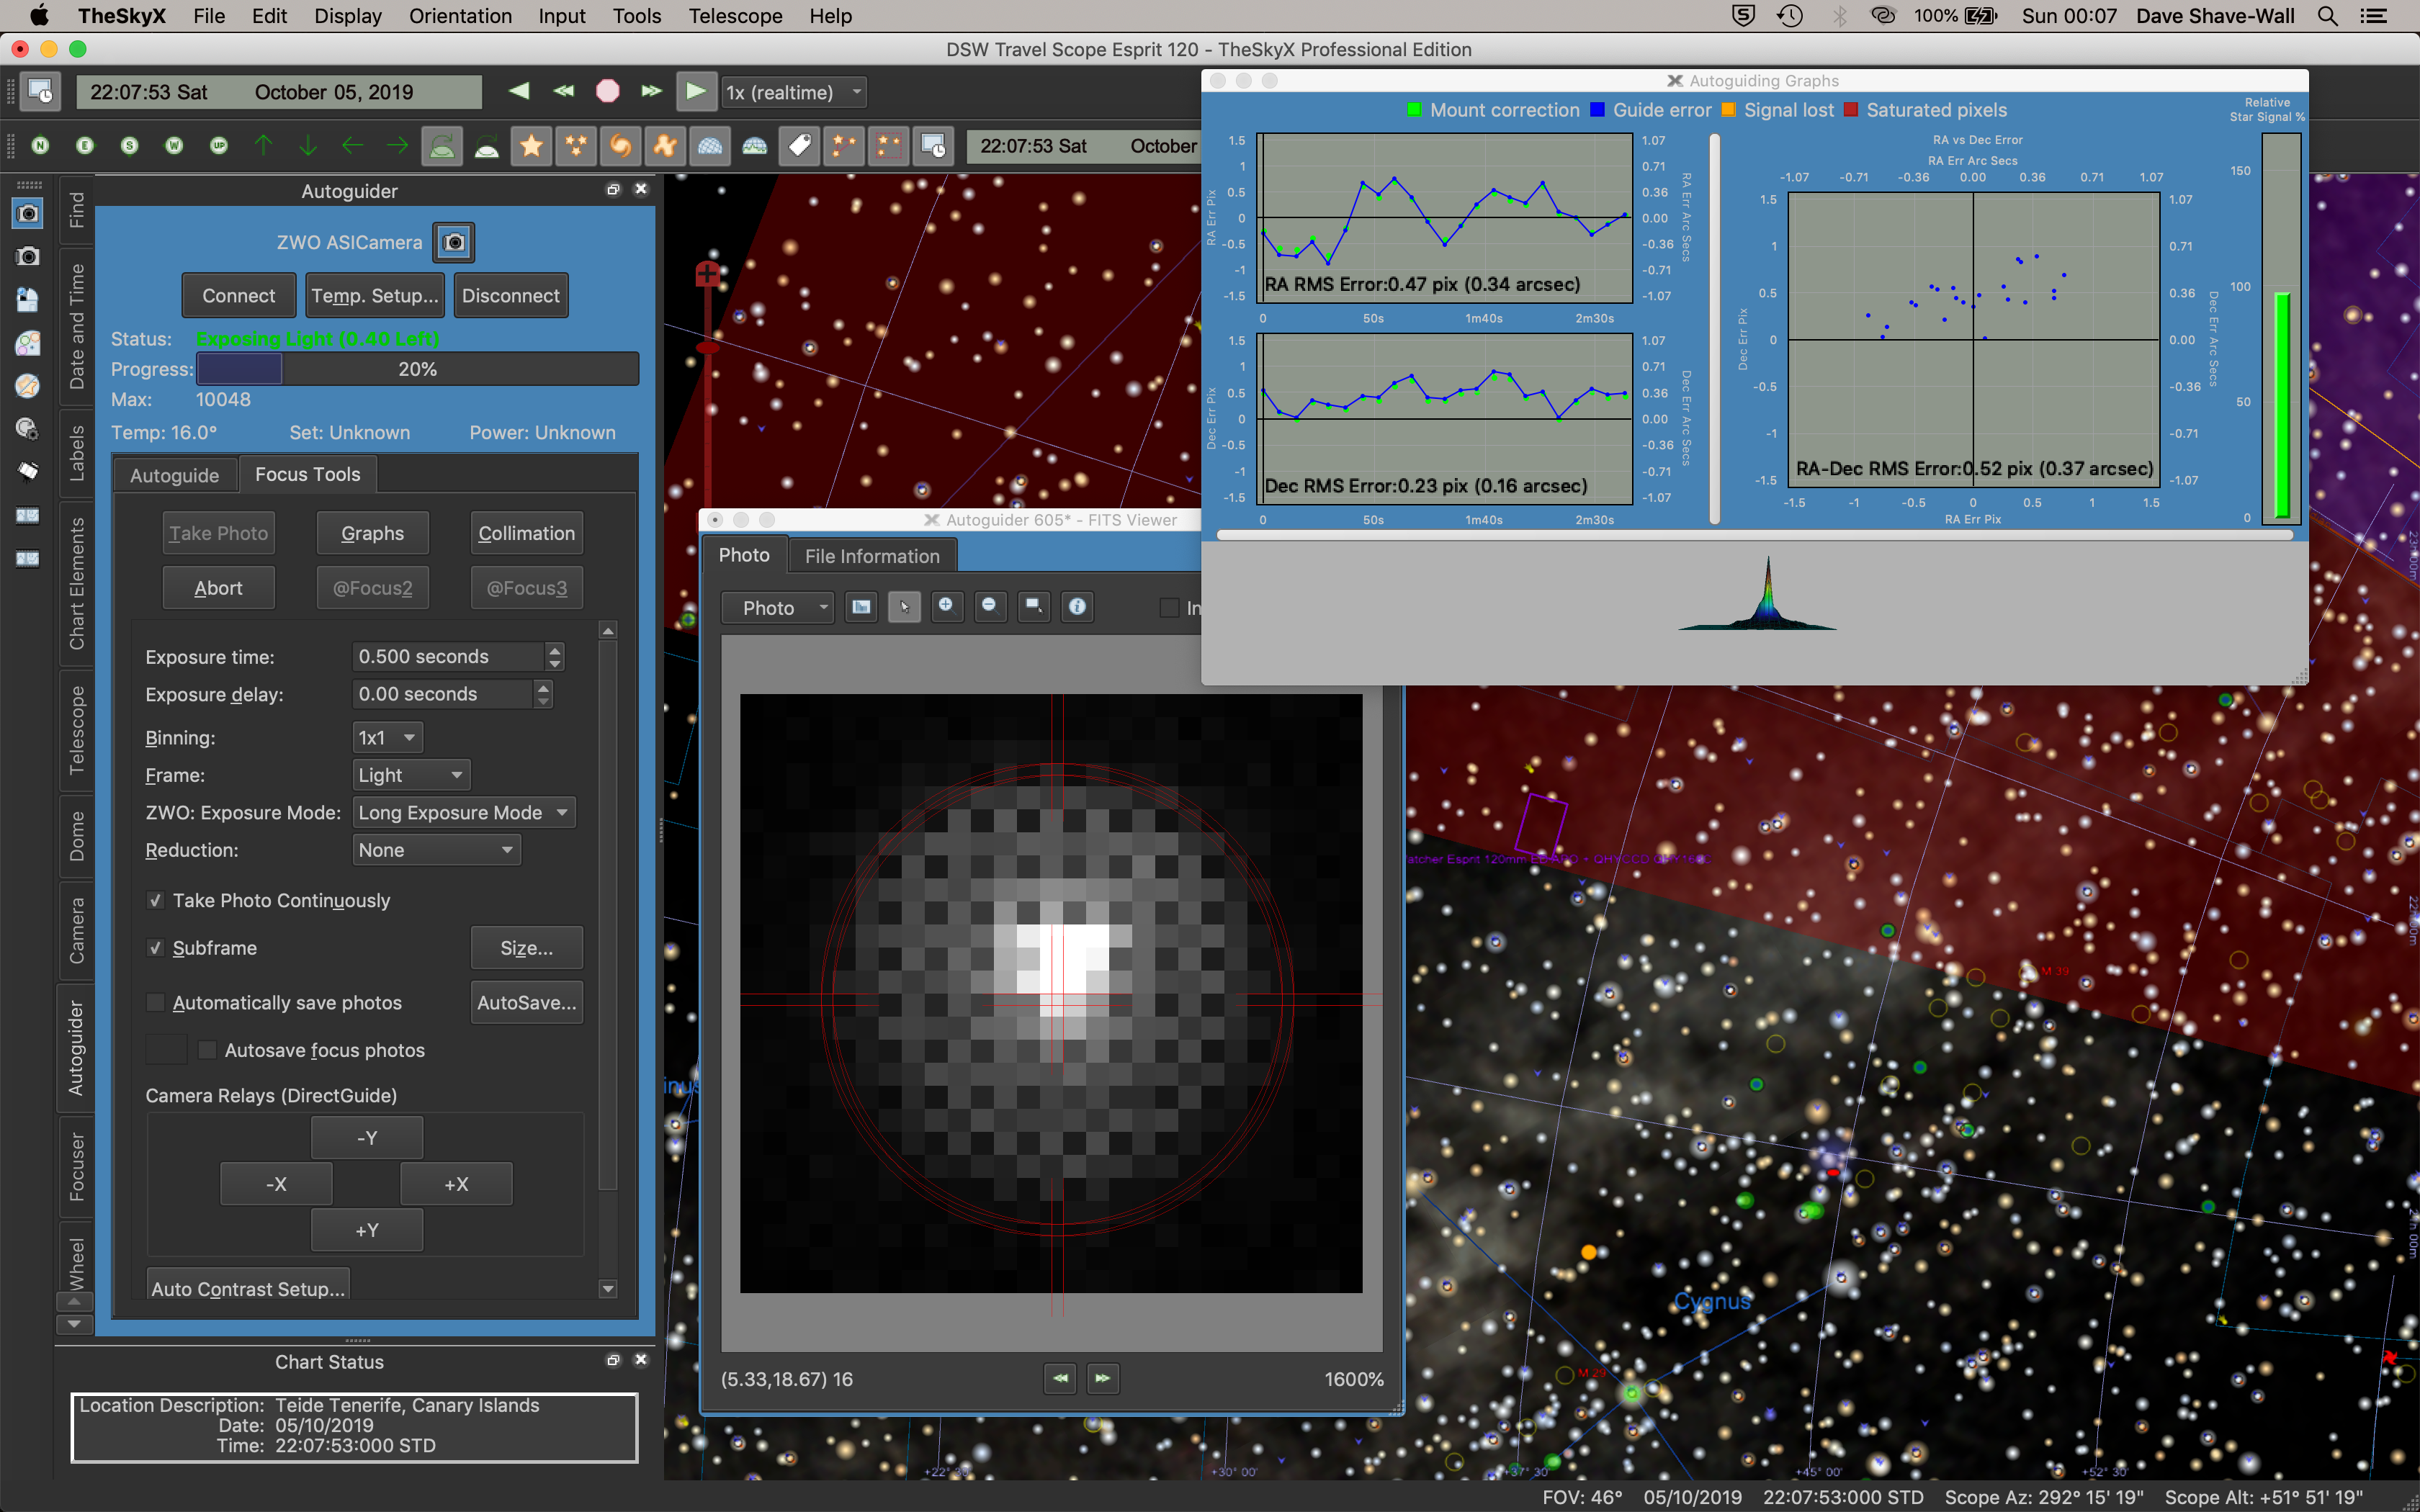
So as I say, setting up for the run was straightforward and I used TSX rather than SGPro to centre and platesolve M76 as normal. I then took a sample image of 60 seconds found that the focus was more or less spot on for OIII, despite earlier challenges with focus not working and all was ready to go.

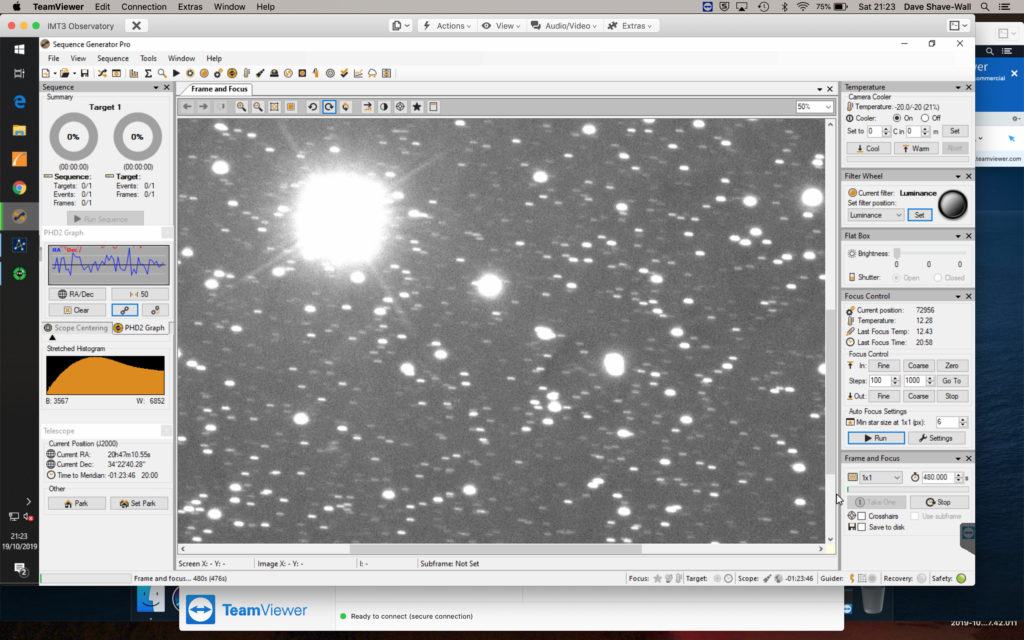
On the point of focus problems, we could not get an accurate V-Curve earlier in the evening, SGPro kept coming up with different focus points after each run and eventually we put this down to the dome and scope not having had time to cool given it only being 30 minutes or so. The outside temperature was around 3℃ whilst the inside was just shy of 9℃. Later in the evening the difference was much smaller (I should remember to record this). I can get the ambient temp for the outside the next day from the FITS header but I have no record of the inside ambient temp, something else to fix.

So I went off to bed just after the meridian flip around 11:30pm and after watching a few frames come down. This morning I took flats and darks and closed the dome which was still open with the first frost of the season having set in and frost was covering the inside of the dome.

Viewing Report 22nd/23rd October 2019 – IMT3 Observatory

Viewing time period – 21:38 – 01:50

Quick set of images this evening to take some more data of M76. I can image for 3 hours before a meridian flip. I need to get the automated flip working and thus the plate solving that seems to be having issues. For now I will open the dome and just set it running on OIII through the 12″.

After entering with TSX connected to the ASI camera I started guiding and for setup reasons I have included the guide star here.

Guide Star

@00:45 I managed to do the manual meridian flip and then headed off to be after collecting another 2 hours of OIII data. I left the scope running for the rest of the night knowing that the dome would shut if the sky clouded up.

Last image taken

So I am now up at 7am and indeed the dome closed when the clouds rolled in. I have no real notification of when that occurred so I have now set the HitecWeather station software to log on the triggering of the relay to a file so I can see the time it closed.

This will allow me to compare to the Keogram from the ASC and double check the dome is closing at the appropriate time.

Fortunately SGPro is connected to the weather station as a safety monitor and stops imaging if the dome closes. I can see the clouds started to roll in around 1:30am for a few minutes then just before 2pm there were more and by 2:43am after they covered the sky. The good thing is it looks like, although I cannot be sure, the dome would have closed at around 1:50am which is the time of the last image taken assuming the date stamp is the completion of the image.

Safety enabled

I have now taken flats and darks and parked the scope and it is ready for it’s next outing, I also remembered to turn the dehumidifier back on this time. Both the dehumidifier and the flat panel need connecting to an Arduino to automate turning on and off.

View from cameras when in position to flat panel on 12″

All Sky Camera Experiment

At the IMT we were experiencing stability issues with the ZWO ASI120MC USB3 camera on the MAC/NUC so we decided to move it to it’s own Raspberry Pi4 (4GB) as a cheap experiment.

The Raspberry Pi4 has the advantage of improved networking and connectivity including USB3. One of the downsides of the RPi4 is the increased heat generated by the CPU which is mitigated by housing it in a FLiRC passive case to dissipate the heat and prevent thermal throttling.

Additionally in order to prevent SD card wear and improve the I/O throughput we configured the RPi4 just to boot off the SD card but serve the rest of the file systems from a SSD connected via USB3.

AllSky Camera Software

Using the open-source AllSky Camera project for ASI camera support we gain some advantages. The main advantage is that it’s open source (served via Git), provides an admin and public web portal which is addressed locally as http://allsky.local and the software can be set to start on system startup.

Admin Web Portal

The allskycam software can restart on system reboot but it can also be stopped/restarted via the web admin portal.

The configuration is simple and the mode/behaviour of the software can be controlled via the GUI or via a settings.json file from the command line.

Admin Portal – Camera Settings

I recommend you take the time to create a dark reference image, again this is done via the GUI panel as long exposure frame will show extensive hot pixels.

RGB24 image hot pixels with no dark applied

Non Admin Web Portal

This is accessed via the address http://allsky.local/allsky-website and provides the latest captured image, a constellation overlay and the ability to view time-lapses and star trails.

Local network web site for non admin users

One of the nice features of the software is it’s ability to create a time-lapse of acquired images for the previous night. The following video shows the debayer issues as well as the dewing of the dome cover.

Time Lapse of evening showing dew issues/grayscale bayer

Bob is due to connect up the resistor ring he’s placed around the camera which hopefully should fix the dome dewing we encountered on the first night.

So it remains for us to fix and implement the following :

  • Resolve the lack of colour images (RGB24)
  • Image quality breakup
  • Resolve dark daytime images
  • Secure copy latest image/time-lapse to an external public website
  • Scale VirtualSky constellation overlay (180 degrees) down to 150 degrees

Viewing Report 19th/20th October 2019 – IMT3 Observatory

Viewing time period – 17:31 – 01:48

After nearly a month of not imaging from IMT due to a holiday in Tenerife, a week in New York with work and then Manchester and London along with a run of poor weather it was clear on a Saturday night! Another evening commissioning the observatory was needed, so tonight we will again further refine the polar alignment since the last major modification and distribution of weight where we changed the adjustment plate for Bob’s Tank FS 102 OTA. Again we plan to drift align with PHD.

First thing is to find a star near the celestial equator near the Meridian so that it would display the most movement and thus magnify the error of miss polar alignment. I should be able to find HP 95501 @8pm.

Star to drift align for Azimuth

Next I performed an autofocus using the Luminance filter. HIP 95501 is the star to choose for drift aligning the first part, a 1 second image within Frame and Focus in SGPro showed it just off centre which was fine.

Star to guide on

Next I moved the star to place in the Lodestar FoV. Now I can measure the azimuth polar error, ALWAYS ignoring the RA line. Looking at the Dec line I could see I was out by 2.43′ and 39px. I adjusted the thruster knobs on the MEII to move the star to the outset edge of the purple circle showing the error, in this case the right thrust in and left thrust out. I then drifted again and make sure the purple circle gets smaller and the DEC line a much shallower angle.

After first adjustment 0.53′ and 34px out

I adjusted again and got the azimuth error down to a respectable 0.08′ 5px error.

Azimuth error 0.08′ 5px

The graph on PHD2 should started to look fairly flat, and so I then attempted to fix the polar error for altitude. I selected a star in the West and near the celestial equator such as Rasalgethi in Hercules.

Rasalgethi used for Altitude adjustment

I watched the DEC line only and ignored the RA, the DEC line this time reflecting the error in altitude. Then I adjusted the mount using the altitude adjustment spanner moving the star again to the outside of the purple circle and then retested, finally getting the error down to a suitably small number after only 1 turn of 0.12′ 5px error.

Altitude adjusted to 0.12′ 5px error

Unfortunately at the extreme West I could only expose unguided for 1min on the 12″ at 2.5m focal length, the stars otherwise looked trailed.

Trailed stars at extreme due West

I then went to near the meridian and a 4 min exposure produced nice sound stars.

4 minute exposure near Meridian

I then went on to do an automated TPoint run, but the problem seemed to be that a large number of samples could not be solved. The resulting TPoint model of 118 samples of which only 90 were usable, was worse than the 60 point model I had before. I will therefore redo the TPoint model the next time it is clear.

TPoint model not as great at 60 points I did before

The whole 118 model took approximately 1.5 hours to complete which is so much better than a manual model.

Completed model 118 points

The good thing is the TPoint model told me the polar alignment is excellent!

Polar Alignment is excellent 🙂

It is now @23:30 so I went on to start imaging. First I needed to perform a focus run on Luminance which I did.

Good focus on luminance

I then slewed to M76 to start my image run, a 30s exposure showed stars in focus and little dumbbell prominent in OIII.

Focused stars and M76 centred

This time round I decided to set the Gain to 139 and the Offset accordingly to 21. I also decided on a 10min exposure rather than 20mins front the last set.

M76 1 x 10min Gain 139 Offset 21

Viewing Report 5th/6th October 2019 – Travel Scope – Tenerife

Viewing time period – 21:20 – 01:11

Moon and Saturn

This evening started with the Moon high in the sky and waxing its way to half. Next to it Saturn sat, close in fact, so close I pointed the scope at it, around 22:30 and both the Moon and Saturn fit in the same field of view 🙂

So I took a few exposures, worried that either the Moon would be overexposed or Saturn underexposed. I settled on 0.001s and took a bunch of shots. Below is my setup by the light of my rather bright head torch, turned on only for this photo I might add.

Esprit 120 and MyT

Next it was back to trying to resolve the guiding issues that had troubled me the night before. The good news was Tom from the Software Bisque website (not the Tom Bisque, another Tom) had come back with a few suggestions and questions that made me think. I had a good set of guide stars to choose from.

Hw many guide stars!

The autoguide Setup window is where I would spend most of my time I was sure, changing parameters.

Guider settings

I recalibrated the mount, this time using 100arcsec as the parameter. The previous calibration run produced a rather short cross.

Poor calibration ?

This gave me a better ‘cross’ and I think should improve the guiding, although I am still skeptical about just how quick it calibrates, some 4-5 seconds.

Better calibration

Back to guiding the mount was still all over the place, I am convinced it is overcorrecting, on the basis if I don’t guide I get better stars up to 45s or so. I added in a much longer settle period and this seemed to help, but still the graph is a long way from the sort of guiding I was getting before they updated the software.

Poor guiding

The wind was a bit gusty tonight as last night and for sure this was not helping, you can tell from a few exposures it was wind related jumps and drifting

I sat back after a while of changing different settings feeling that it was not improving, so I took a whole bunch of images, only 90s of the Sharpless object Trevor had mentioned, SH2-101 which is called the Tulip nebula. Trevor had produced a lovely image from his 14″ in the UK so I thought I would have a quick go, knowing most of the frames would be lost.

Final set of guider settings

So by 00:30 I decided to start to pack up, the wind had picked up, I was cold, the guiding was still a problem, so by just gone 1am I was heading down the mountain, some 1 hour and 20min drive! The final view from the bridge as it were was this.

View from TSX

The next day I processed the data for the Sharpless object and it was ok, given the short amount of data. One for the 12″ I think.

SH2-101 Tulip Nebula

Meanwhile I processed a single image of the Moon and Saturn and was pleased with the result as seen above. Here is a version with Saturn as an insert.

Viewing Report 4th/5th October 2019 – Travel Scope – Tenerife

Viewing time period – 23:58 – 03:38

So I have arrived in Tenerife and for a few nights only I am up at the MONS observatory, using the plateau (concrete platform with power) outside the dome.

It was dark when I arrived at 20:15 so I am setting up by head torch and given the tripod and mount and scope are all in bits it has taken some time to put it back together.

I setup in the corner where Bob normally sits as thee were a bunch of students using the scopes normally kept in the sheds outside. After setting up I panicked as I had forgot my UK to EU plug ! I asked the lady leading the student outreach and she let me in the MONS and I searched for a plug and found one, despite everything being emptied out due to the MONS having work done to it. However on testing the plug it did not work 🙁

A call to the operator did not produced anything. So I tore down the scope and packed in the car, very disheartened. As I was just about to head off the operator arrived with another plug ! I took my laptop and tried it, but it did not work either. It took a while to work out but of course the power had been turned off from the fuse box and flicking the RCD produced power and so reluctantly I emptied the car and went about setting back up 🙁

By this time it was approaching midnight and I had been at this for some 4 hours. I started the laptop, found I was pointing almost spot on to Polaris, so using my Polemaster it took a few minutes to adjust. I then set about slewing to a nearby object, syncing and then finding a guide star, at this point my troubles where just about to begin. It was now 1am.

So after setting the temperature of the camera to -25℃ and the gain to 7 and offset to 20 I found the scope would not guide. It was bouncing all over the place, some of it was the wind, but some of it was erratic behaviour of the mount, so it seemed like it was overcorrecting. I started to change some of the settings but t no avail. All I could do was to shortened the exposure to around 90 seconds and try and get some data, even if the stars were slightly trailed. I would try to take a longer look at the guiding tomorrow night.

Not so great guiding

So I slewed to one of the objects I was to target, a galaxy called NGC 891 in Andromeda and started collecting data. All in all I grabbed 44 images before the guider was causing so much of an issue even 90 seconds was too long (processed image below)

I then slewed to M45 in Taurus but still the guiding problems persisted. I took 4 x 90 second images and then decided to call it a night at around 3:30am.

Now for packing up the scope and the 1 hour 20 minute drive back down the mountain. How I miss observing from Hacienda on La Palma!