IMT3b – Build Part V

21st February 2021

Pier hole ready to go

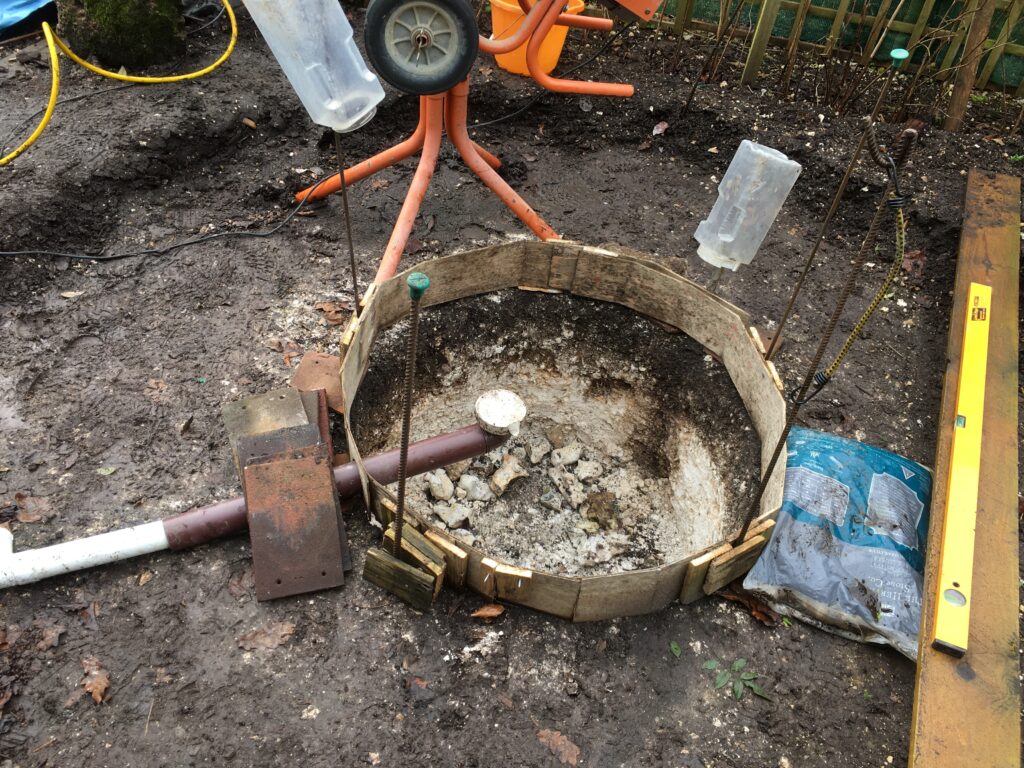
It’s been slow going since January. Lots of cold weather, rain and broken ribs had stopped me in my tracks from concreting the pier block. However on 21st February I finally had warm enough weather and a lot of help from Luke to start pouring.

6 buckets of ballast……

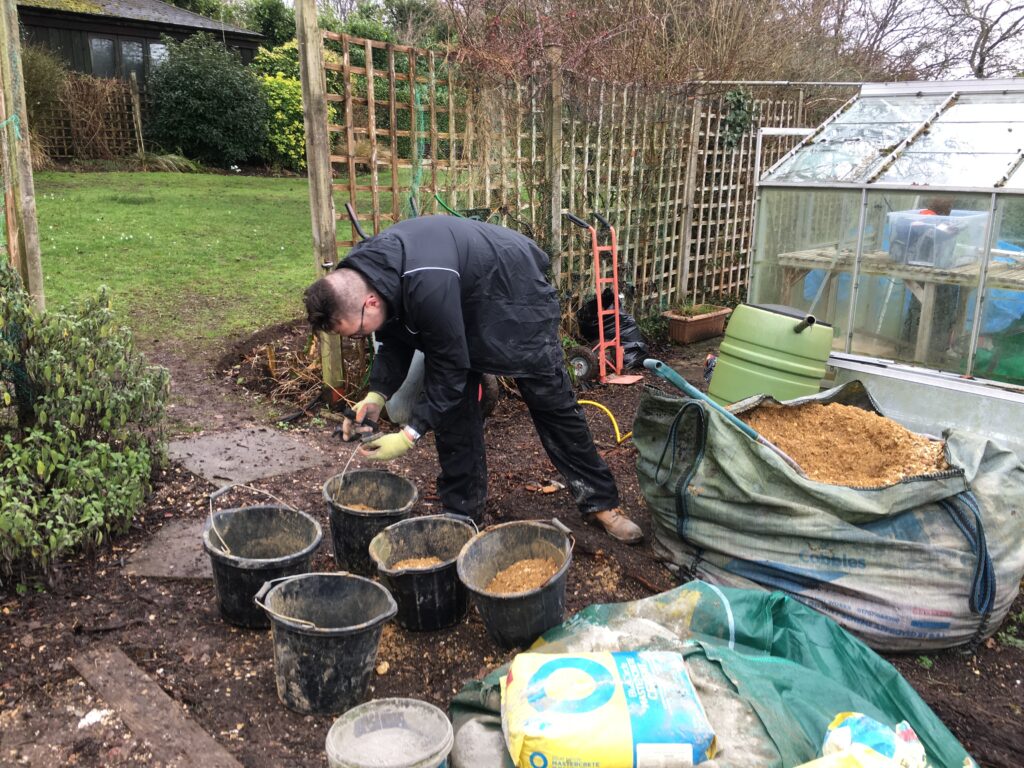
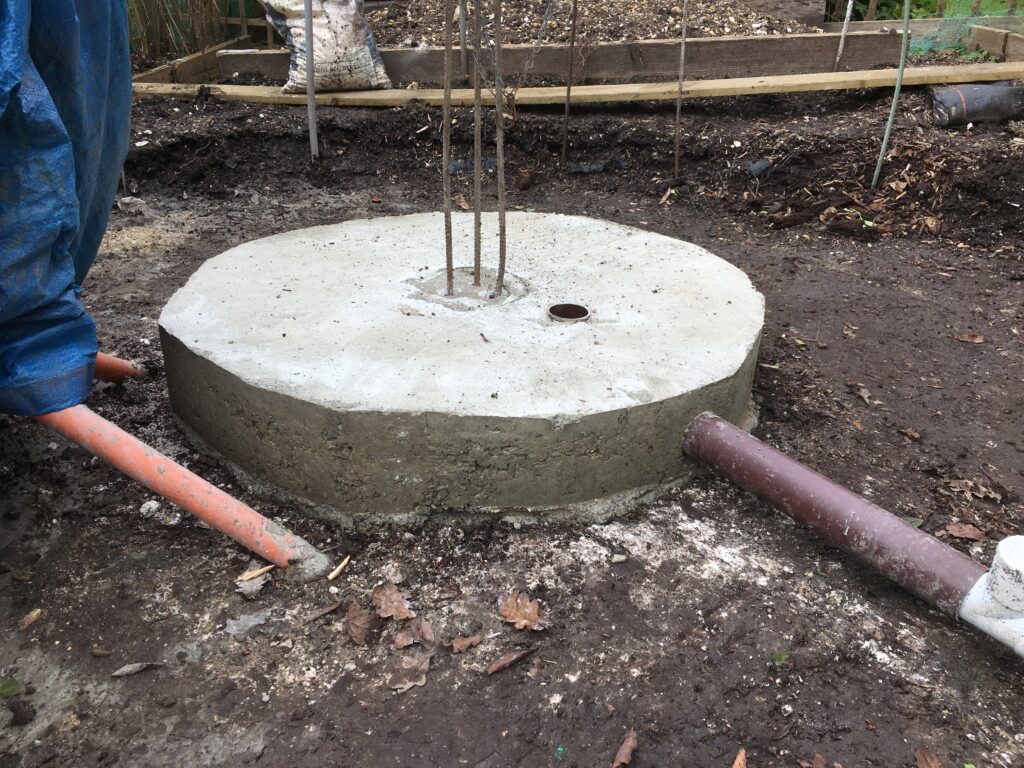
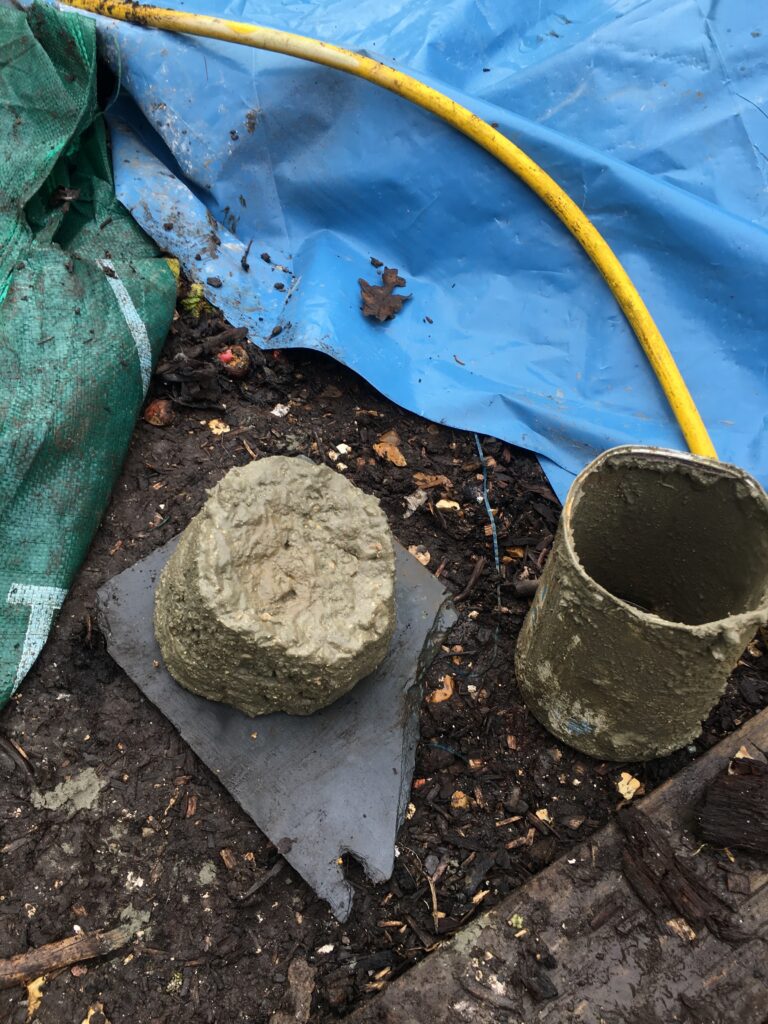
We placed some flint in the bottom of the hole to help reduce the amount of concrete needed and to push up against the chalk. We then started measuring the cement and ballast out. We used Bob’s notes from our last concreting party which was 6 x 10kg buckets of ballast to 2 x 6kg buckets of cement. The water we used a bucket with a marker pen line on and then heaved it into the cement mixer.

Good slump test

The first slump test was perfect. The first pour looked good too. 2 hours in and we were 2/3rds done and nearly up to the downpipes that is to be used for cabling.

2/3 of the way there

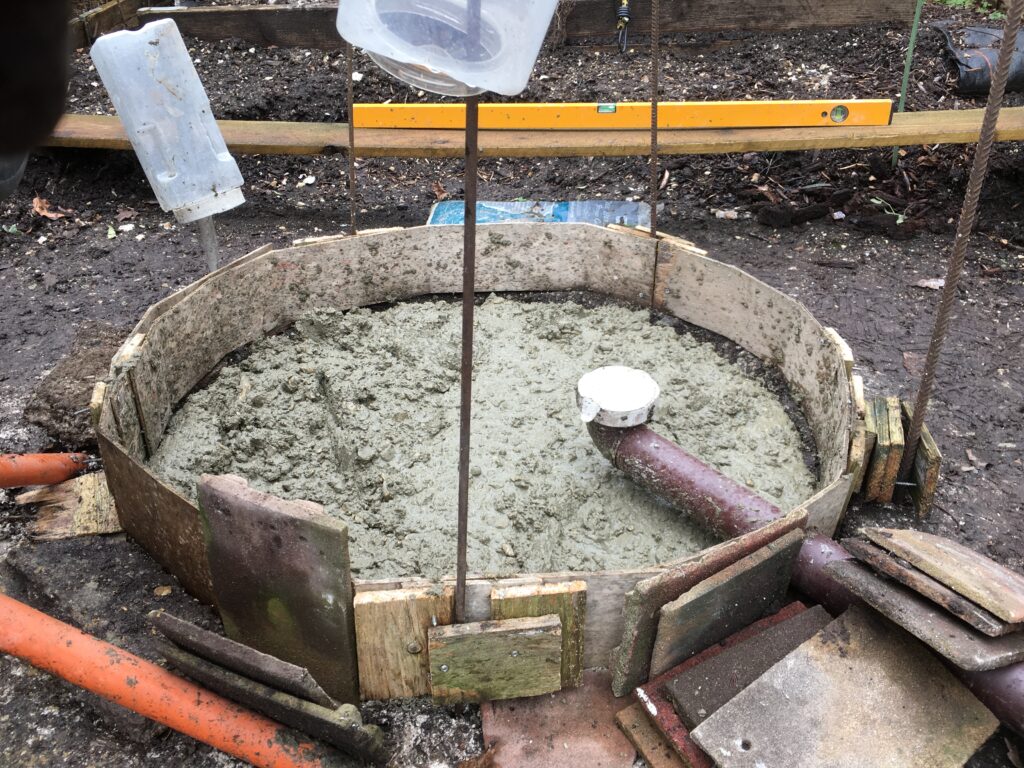
Before we started I made sure the wood former was level all the way around. This makes it super easy when pouring concrete, so as long as you pour to the top of the former it will be level as we proved on the final pour.

Luke does the final touches

We then took 3 pieces of rebar that were lying around the garden and placed them where the pier would go. We performed a test fit of the pier housing, some air-conditioning duck so make sure the pier was central to the block. I must at this point thank Ian Piper who’s idea it had been to put the concrete pier in. At a cost of around £50 for the material this would be far cheaper than the £1,000 pier I purchased in the past and the £500 not so great pier I purchased from Pulsar Observatories.

A job well done 🙂

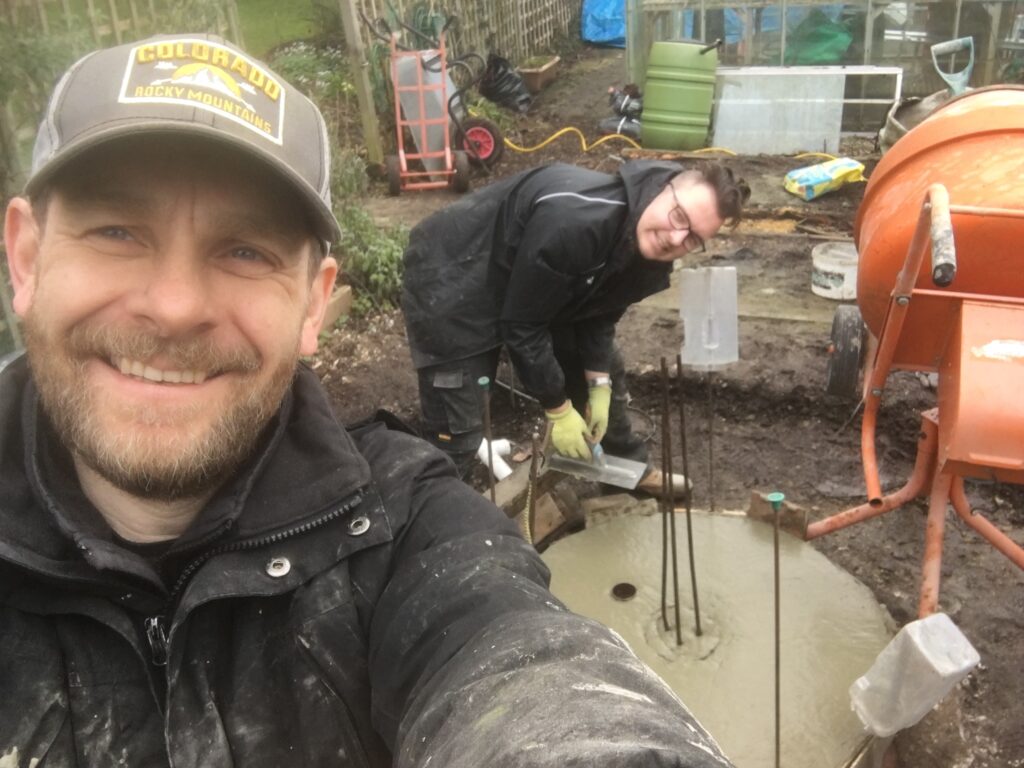
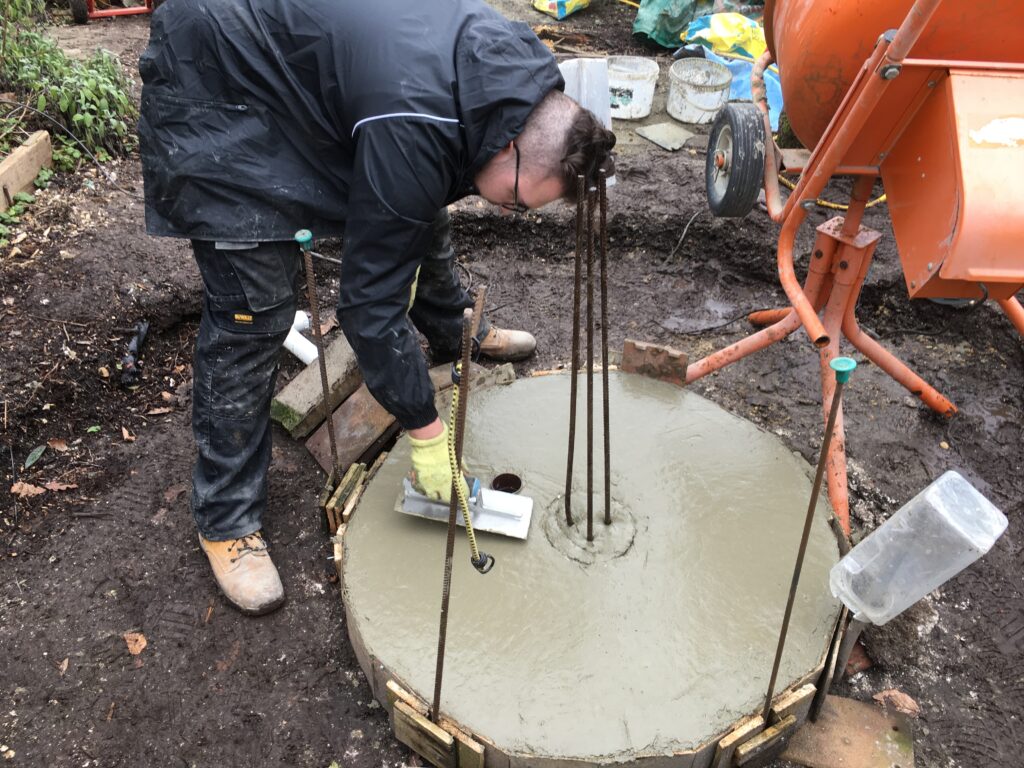
After just over 3.5 hours we had finished and that included the final brushing over the concrete to make it smooth. Thanks Ian for the pier suggestions, Bob for the mixer, Mark for the enthusiasm, Luke for the help, Nigel for the base design and of course Helen for putting up with me and my hobby. A good start, next stop was to concrete the dome base.

Next day dry and wood former removed

FSQ85 Flattener & QHY286C CMOS

I’ve taken the plunge and dipped my toe into the CMOS world. Since I didn’t have any OSC experience I chatted with DSW (has a QHY186c) and decided on the QHY286C. This I purchased from Bern at ModernAstronomy who has always provided excellent service.

The issue with APS-C sensors when coupled with the Takahashi FSQ85 is that the edges start to show signs of star elongation, I already see this on my Atik460. This can be corrected with the FSQ-85 flattener (ordered from FirstLightOptics) which has the effect of slightly increasing the focal length but also reduces the back focus from the native 197.5mm to 56mm.

Effective Focal Length455mm (f/5.4)
Image Circle Diameter44mm
Metal Back Focus56mm
FSQ-85 EDX with Flattener 1.01x

This means that I can’t use my existing Atik OAG->Atik EFW2 and Atik460 because it’s total distance is 59mm (22mm+24mm+13mm) so it’s out by 2mm even once you include the filter effect on the back focus. Note – This is also true for my Starlight Xpress configuration.

I do not understand why Atik could not have got to within the 55-56mm range by shaving off a mm here and there 🙁 I may need to replace all Atik gear when I convert to mono CMOS or replace the OAG with a guide scope.

So onto the QHY268C, the OSC CMOS unfortunately has a CAA tilt adapter instead of a direct thread connection. This wastes 11mm of precious back focus giving a total distance of 23.5mm whereas the recently released QHY286M CMOS has a 12.5mm back focus !!!!

Also the QHY268C does not have an IR/UV cut filter in place so you need to buy an additional filter and holder and add that to the cost and factor in the adapter and distance needed …. I’m starting to regret this purchase more and more !

Source – QHYCCD.com

Back to the Takahashi Flattener (TKA37852), the back focus is 56.2mm but we add on the filter thickness as it changes the light path (2mm/3=0.66mm) so ~57mm (56.9mm), the imaging train is as follows :


Adapter
Distance (mm)Accumulated Distance (mm)Connector
OU03122M54(M) -> M54(M)
QHY 02077046M54(F)
QHY Spacers14.420.4screw
QHY OAG-M1030.4screw
QHY 0200552.532.9screw
inc filter0.633.5
QHY CAA adapter639.5screw
QHY268C CMOS17.557screw
FSQ85 Flattener to QHY268C imaging train

The combined weight is 1365g so I may need to adjust the balance of the scope a little as it heavier than my Atik460/EFW2/OAG setup at 1080g.

Completed – Imaging train ready for first light

I may have to adjust the spacers a little but I won’t know until I have received a 2-inch Optolong L-Pro light pollution filter which is currently on back order from FLO.

Transmission chart for Optolong L-Pro

QHY268M

The recently released mono version of the QHY268 looks like it has a proper screw face plate with a more acceptable back focus of 12.5mm. This is more reasonable and would allow me to couple a filter wheel and OAG as well not requiring a IR/UV cut filter.

Like SyedT on StarGazersLounge I could go back to using a guide scope and ditch the OAG and then the imaging train could incorporate a rotator :

ComponentDistance (mm)
QHY268M CMOS12.5
QHYCFW3M-US17.5
M54 (M) to M54 (M) adapter2
Pegasus Falcon Rotator18
M54 extension ring5
M54 (M) to M54 (M)2
Total57
FSQ85 Flattener/QHY268M Imaging Train – Credit SyedT

I was thinking of a rotator for the remote Esprit120 which has a generous back focus of 76mm so I should have no problems there but that will be another adventure for the future !

Viewing Report 12th February 2021 – Travel Setup

18:45 – 00:32

Holiday time! Well at least a week off work. It’s been a cold and cloudy Winter so far. So a night where I can get out the travel telescope and setup in the vegetable patch, the construction site of IMT3b is a good thing. The challenge I have is my ribs still hurt somewhat from being broken after an unfortunate accident 4 weeks ago. So I will go careful.

Earlier in the day I had Luke help me setup the equipment in the garden. First the binos to have a good look round.

Altair Astro 100mm Binoculars and APM Mount

Then we setup the Skywatcher Esprit 120 ED on the Paramount MyT.

Travel scope with QHY168C camera

Lastly we setup a “warm room” temporary in nature and fairly cold I would later find out 🥶 in the greenhouse.

Lovely new table with my cool astronomy chair and MacBook Pro

So the night came and after Pizza with my wife I set off out to the garden to start imaging.

Imaging M42 Orion Nebula

I connected the Polestar camera first to see what my alignment was like after placing the tripod down in a fashion I though condusive to being polar aligned.

This is where polaris landed up which is not bad.

I then set about measuring the difference in Polaris to determine how much I would need to move the scope to align it.

White cross is where it needs to be

I then fiddled with the altitude and azimuth knobs to align the scope.

Perfect alignment

Next I slewed to the first object for the evening which was M45, the Pleiades, the Seven Sisters. I started EZCap and look at the focus which was not far off from the last time I was out a few weeks and it is good enough.

EZCap focus control

I then took an image of M45 to make sure it was in the field of view. I also setup the Planner in EZCap to with the sequence for capturing the data. I set the camera to Gain 7 and Offset 20 with a temperature of -30℃.

EZCap Planner

I set PHD running and that was when I hit a problem. To cut a long story short, I had forgotten to plug in the ST4 guider cable into the ZWOASI290 camera and then into the Versa plate of the Paramount MyT. Without this there is no successful calibration within PHD. It took me 1 hour to work out I needed a cable and a further 45mins to find it since the move of house. Your IQ really does drop when it is dark and cold!

Guiding started, but gusts of wind!

Eventually the calibration completed once the cable was fitted and I could start to see the gusts of wind in the data. I set a sequence running for M45 and was impressed with the results. I took 10 x 90s and 10 x 180s.

M45

I then switched targets and headed over to M42 and M43 along with the Running Man nebula, also known as SH2-279 and NGC 1977. I took 30 x 60s, 30 x 30s and 10 x 180s.

M42

Next and what would be last on my list tonight was M35 along with NGC 2158. I took 10 x 90s and 10 x 60s starting around 23:45.

M35

Now the clouds at a high level started to roll in. So I decided to take some Flats and then take the darks tomorrow morning.

Flats

So I packed up and had one last look up at the night sky.

M45

CPRE Star Count 2021

The Campaign for the Protection of Rural England (CPRE) was running it’s annual star count for 2021 from 6th – 14th February.

Basically in order to assess the effect that unnecessary man-made light pollution has on the quality of our life’s the CPRE want people to count the stars they can see within a box formed by the brightest stars in the constellation of Orion (not including the four main stars that form the box) and submit their observations.

Credit – https://cpre.org.uk

A couple of us arranged to get together remotely and count the stars we could see at 8pm on 10/2/2021 when Orion was near it’s highest point in the South. Of course at this time of night the light pollution is also fairly high 🙁

Suburban Sites

ObserverStar Count
Jim9
GeekBoy10
GeekGirl11
Neil 12
Observation – 20:00 10/2/2021

The SQM (Sky Quality Monitor) reading for our (GeekBoy/GeekGirl) location at that time was 19.92 mags/arcsec2 which places it around a Bortle class 5 sky (NELM 5.6-6.0). Of course later on during the night, once the causes of light pollution subside I normally get a reading of 20.6 mags/arcsec2.

ObserverStar Count
Giles9
Stephen et al13
Observation – 20:00 12/02/2021

Rural Dark Site

Dave got out with his family to star count from his rural dark site and the comparison is stark ! There may be an age effect on the eye sight here as they are from the same time/location but either way it’s shows what can be seen in the absence of excessive light ingress.

ObserverStar Count
Dave23
Daughter & Boyfriend27
Observation – 21:40 10/02/2021

Well that was a bit of fun and a welcome distraction in the current never ending lockdown – thank you guys !