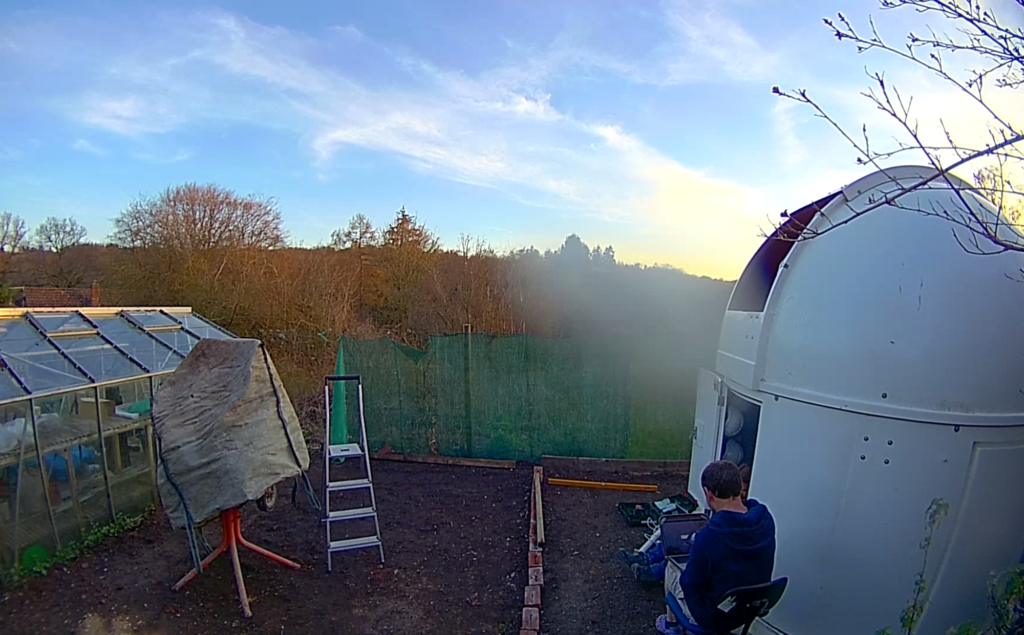
Opened dome early to cool down, we then had some cloud and it closed, so reopen around 8pm.
As it has been a very warm day, some 28℃ and is still 20℃s, I will set the camera temp to -20℃ and image a different object to avoid several sets of flats, darks and flat darks. I settled on M56 as I had not imaged this for my Messier catalogue yet.
Loads of problems, mount kept saying it was not unpacked, guider would not connect, so rebooted and all fine.
Imaging at 22:10
Gain 75 Offset 12
Rotation angle 29.420
Temp -22 (need correct Flats/Darks and Dark Flats)
When I rebooted I noticed the PHD2 setting are wrong for the guider so need to change the profile to include DirectGuide not Pulse Guide. Also need to change SGPro so that it does not autofocus at the start of a run, also so it does not set the temp to -15.
Off to bed at 22:15 and left it running.
Everything went well, the dome shut at sunrise and the images look ok, maybe slightly soft focus but only when I process will I be able to tell.
LRGB taken, the first set were fine then the dome closed but SGPro kept on imaging as I forgot to set the safety, so I will need to dispose of a number of images.
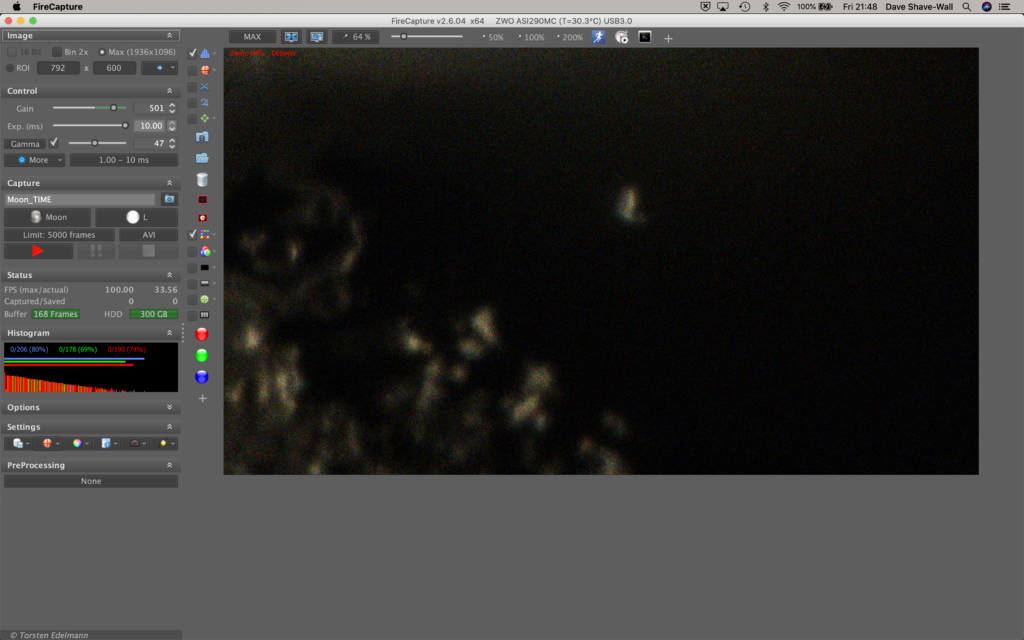
Quick look at the Bat nebula given there is a break in the clouds. I had trouble with a guide star due to as hot pixel so I had to move the scope slightly to move the guide star. I need to take a some new darks for the off axis guider.
I tried 2 regions within the Bat nebula given its size, but neither showed any signs of nebula on a single 10min exposure.
I then tried Lynds Dark Nebula, LDN 1082 The Seahorse. |However again due to the expanse of this object a small portion was only available in the 12″ so again this will be more suited to the Esprit.
I then went for Palomar 10, a Globular cluster in Sagtta.
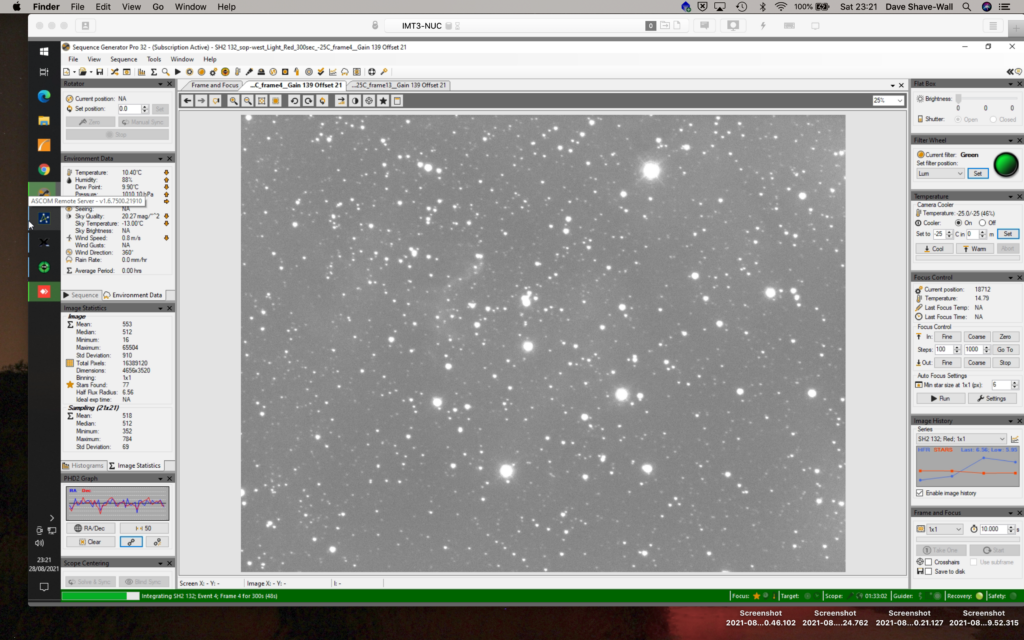
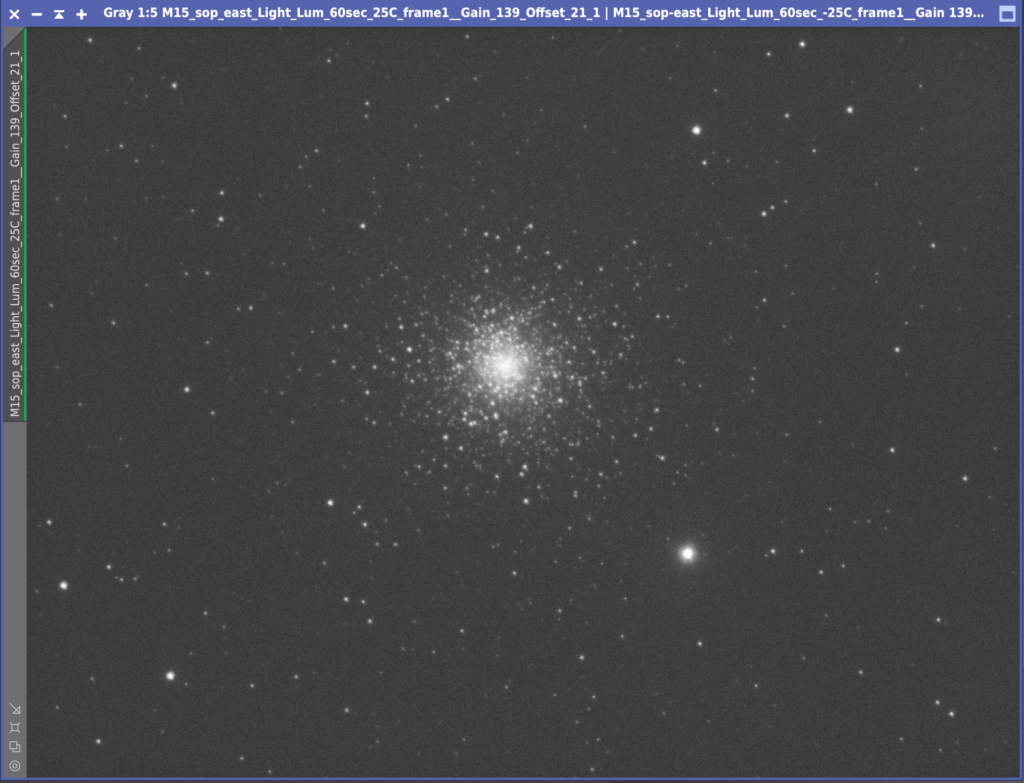
After a long day of building the new astronomy building with a few friends, I opened the dome on this clear night and start off by imaging SH2 132 until midnight for which I grabbed 18 x 600s Ha images at Gain 139 Offset 21 and temp of -25℃. I then switched to SH2 183 and went to bed.
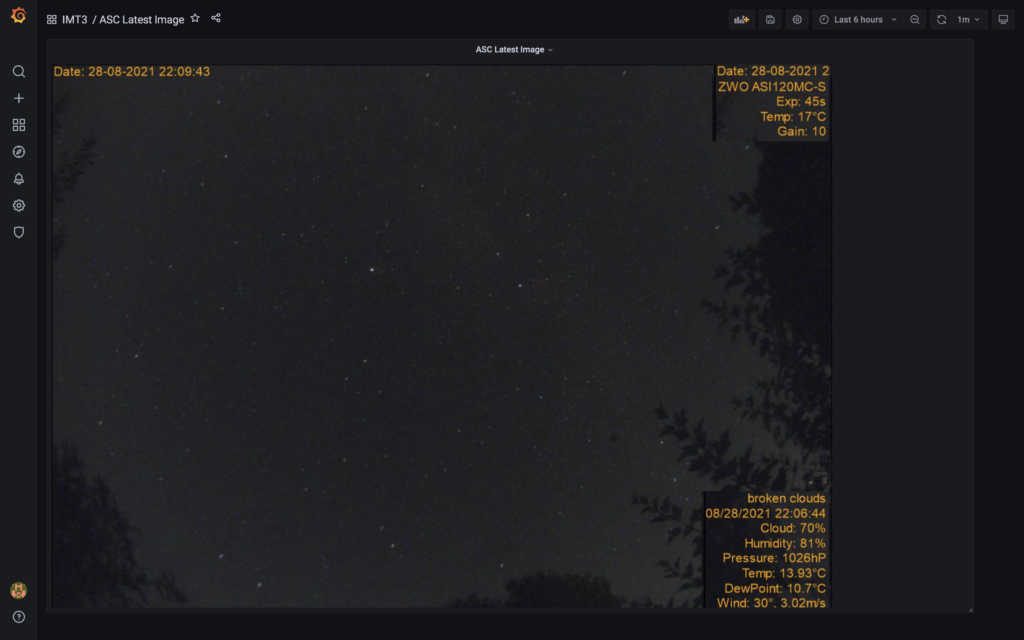
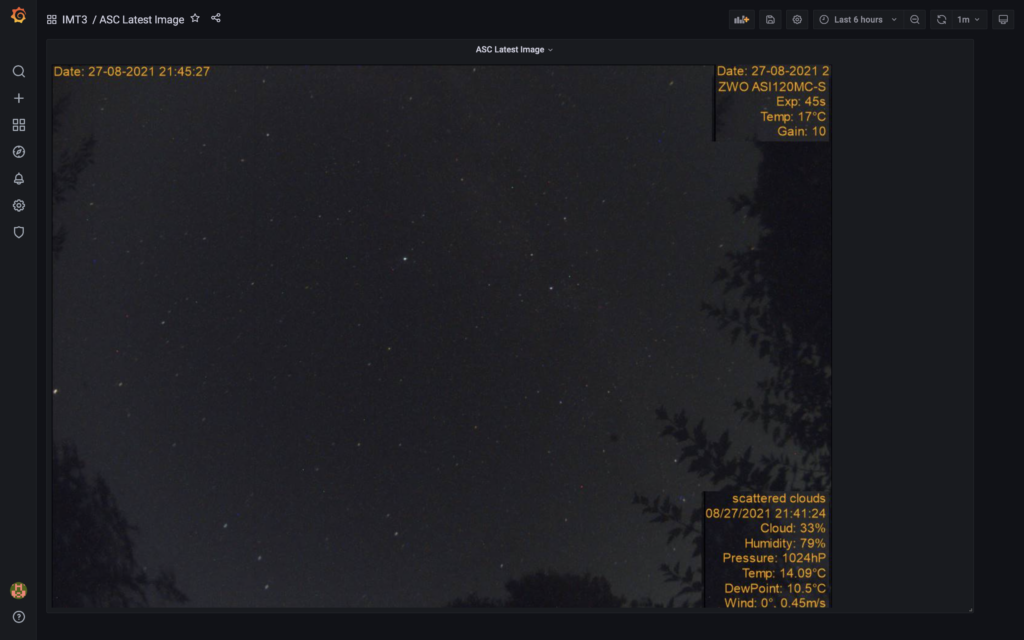
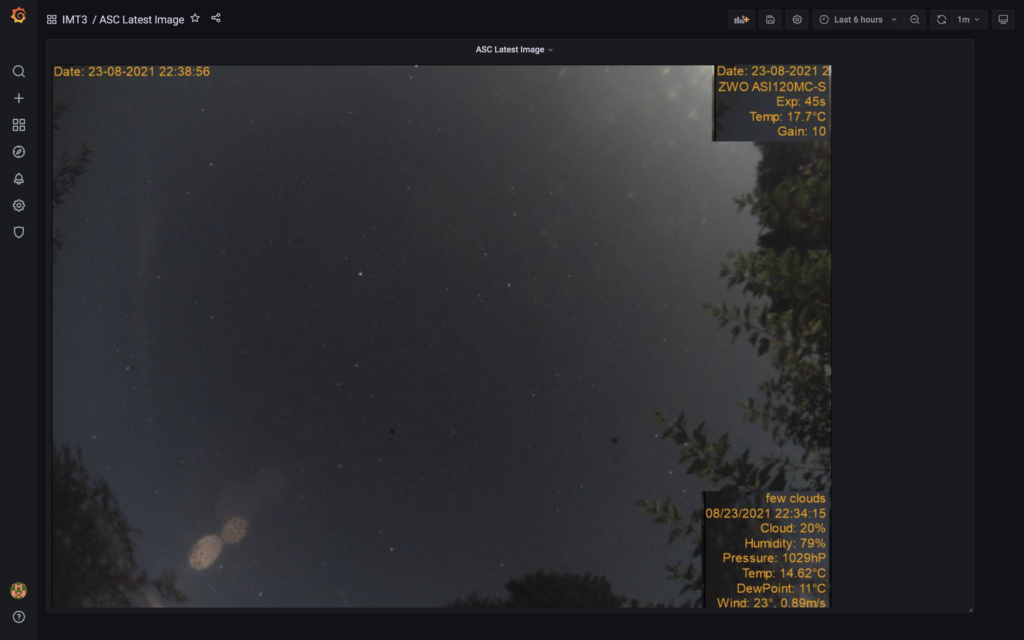
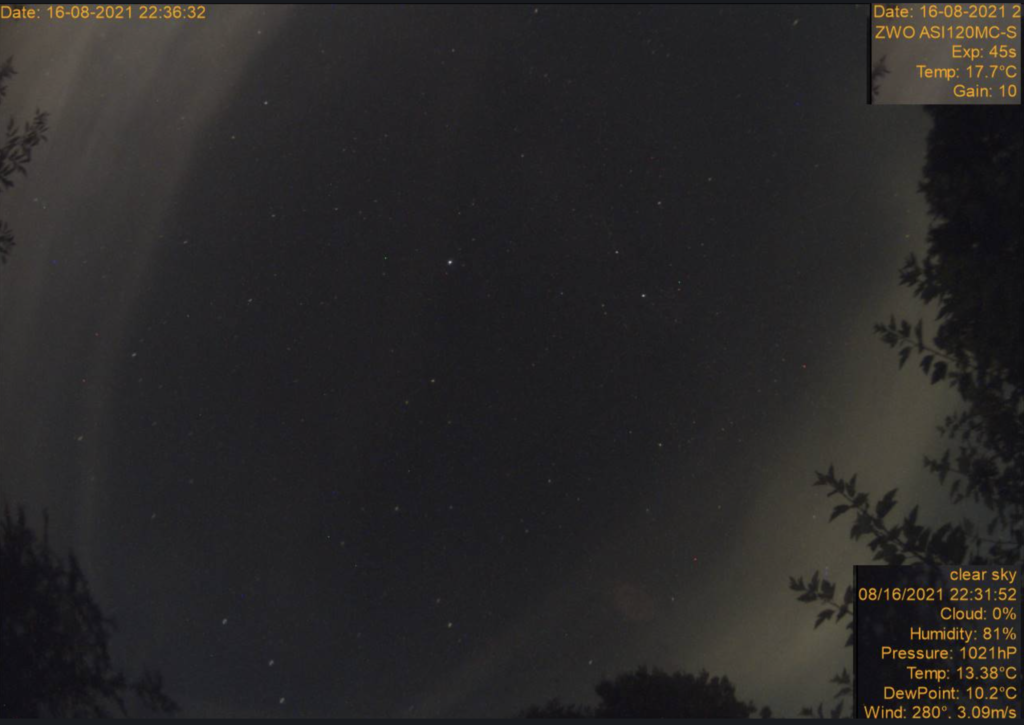
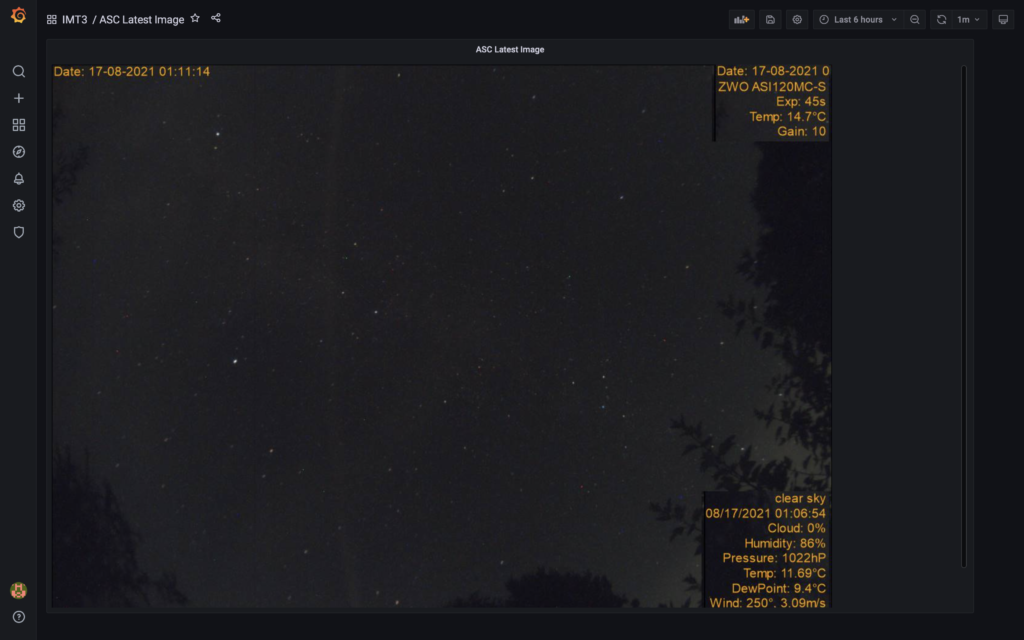
All Sky Camera
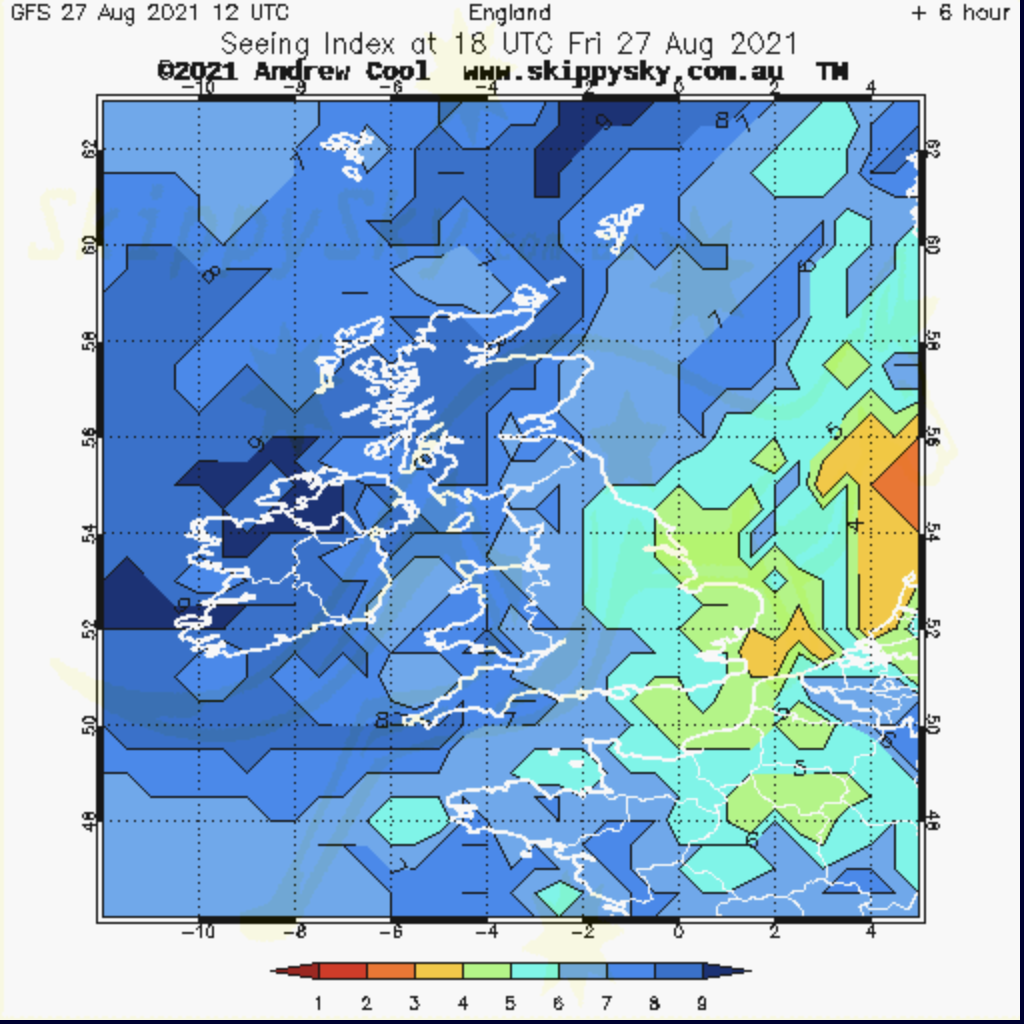
On waking this morning I realised I got 22 x 600s Ha images at Gain 139 Offset 21 and temp -25℃ before the clouds rolled in ands the dome shut around 4am. The seeing was particularly good as can be seen from the satellite image from skippy sky.com
Grafana dashboard was not reporting anything from AAG, this turned out to be a bug in the code from Gingergeek which he will fix. First image from the camera came out blank from SGPro, restarted a new image and problem went away. Started imaging SH2 132 but clouds rolled in.
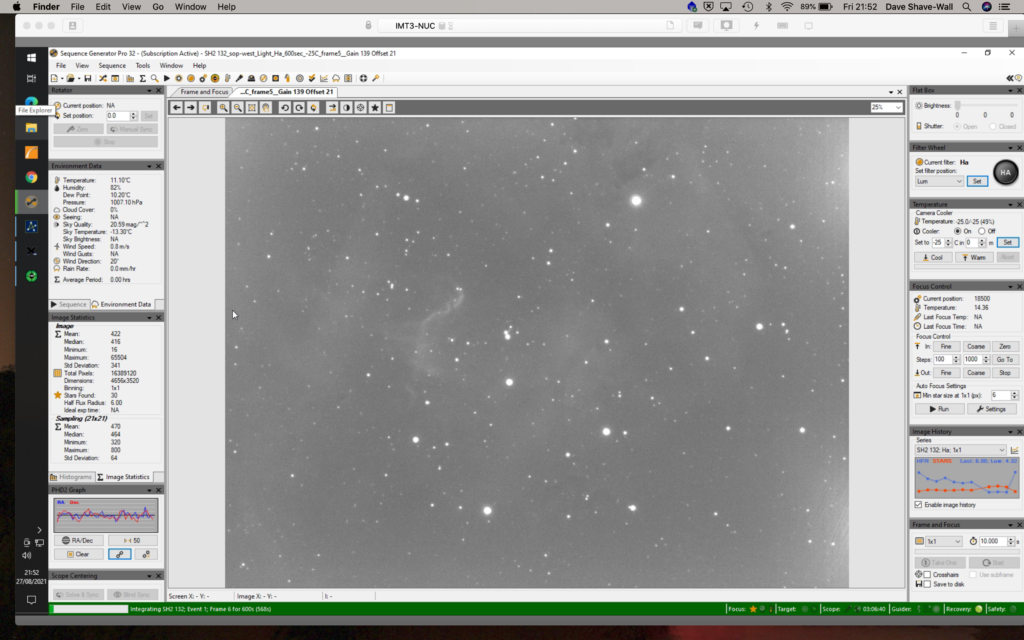
Another clear night whilst I am on holiday and after a long day of building the new warm room for my astronomy hobby. I finally got the camera imaging some more 600s Ha frames of the Sharpless 132 emission nebula in Cepheus (11 subs). The challenge was SGPro misbehaving and not plate solving. I used Gingergeek to look at it but he could not work out the problem either. So I used TSX to slew and solve instead before heading back into SGPro to start capturing data. I ran a set of Ha Flats before I moved to the next object at Rotator Angle 256.020, focus position 18500.
I then moved to SH2 183 another emission nebula in Cepheus. I let this running for the rest of the night whilst I went to bed at 00:47 during which time it took 19 images until more cloud lost the guide star which I need to fix so it restarts automatically.
I also worked out that plate solving was an SGPro bug as restarting SGPro allowed the plate solving to start working again, so useful for next time.
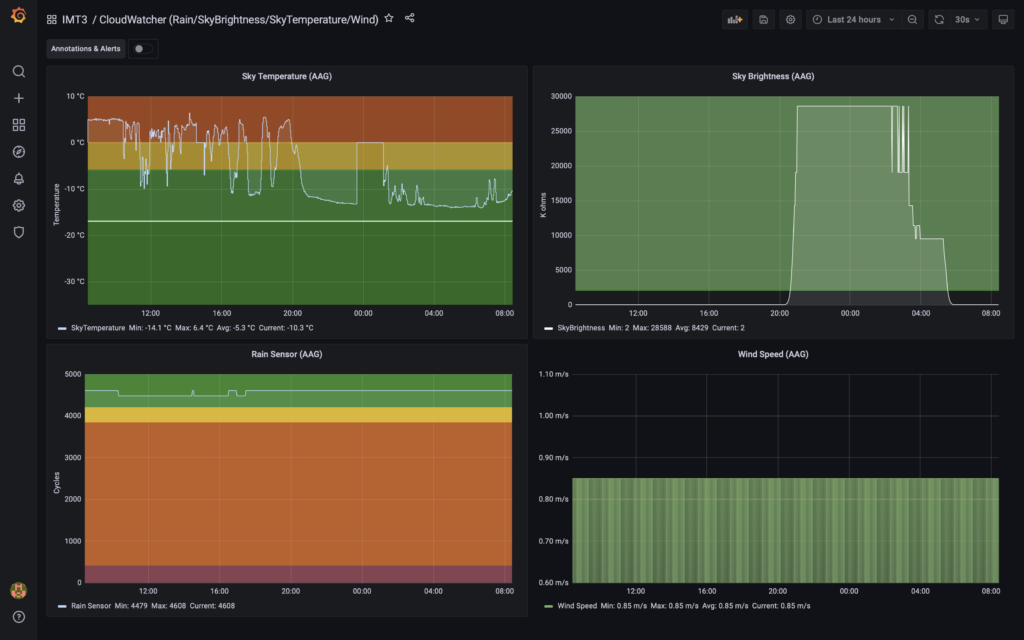
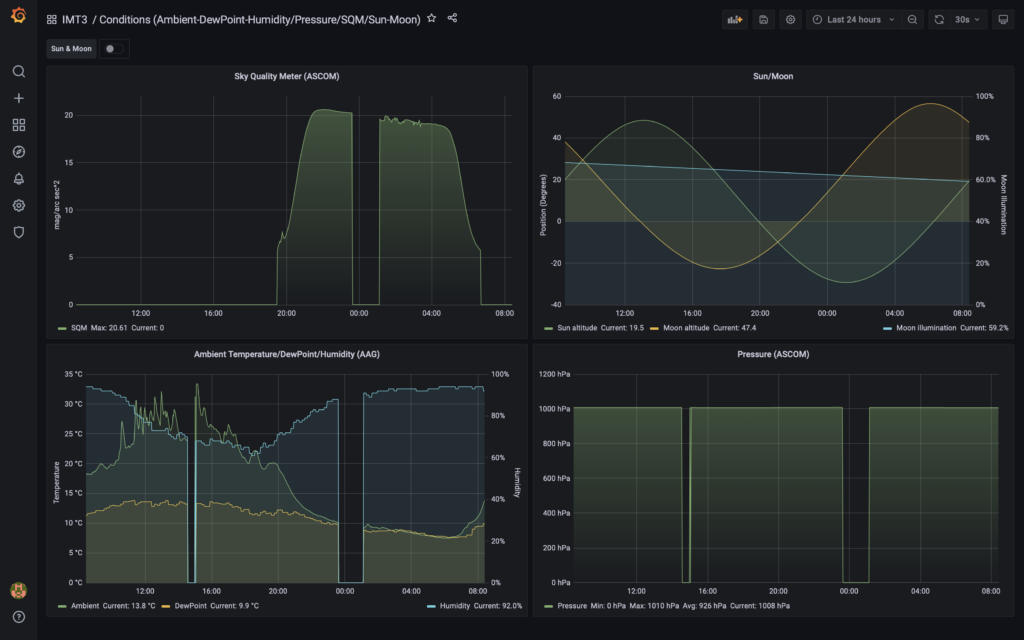
Observing conditions check. This morning I reviewed the environmental data and the conditions were fairly poor so I will redo the data. The Moon was just past full. The ASC video shows wispy cloud all night. The sky temperature was bumping around -13-14 degrees all night where -18 degrees is considered clear.
So I had planned to sit in on the Exoclock Annual meeting all day for both days but in the end I could only attend for the pre-lunch meetings as I had promised Dave that I would assist at the IMT3b observatory. So I will catch up on the afternoon talks when they are made available online.
The talks were varied and included experts from the Ariel Mission, Twinkle Mission, JPL, Telescope Live, BAA , members of the Exoclock project followed by workshops of which again I really wanted to be present to participate in the CMOS workshop but I couldn’t.
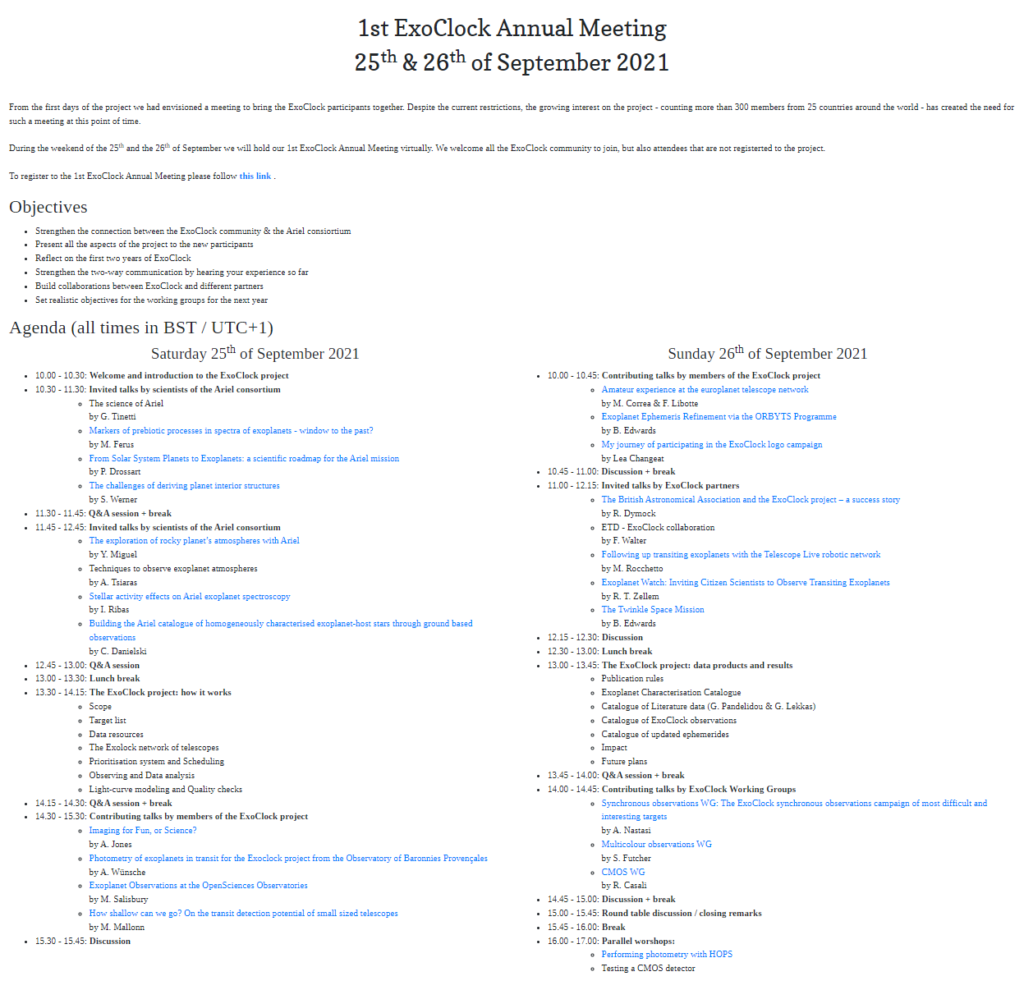
1st Exoclock Annual Meeting Agenda
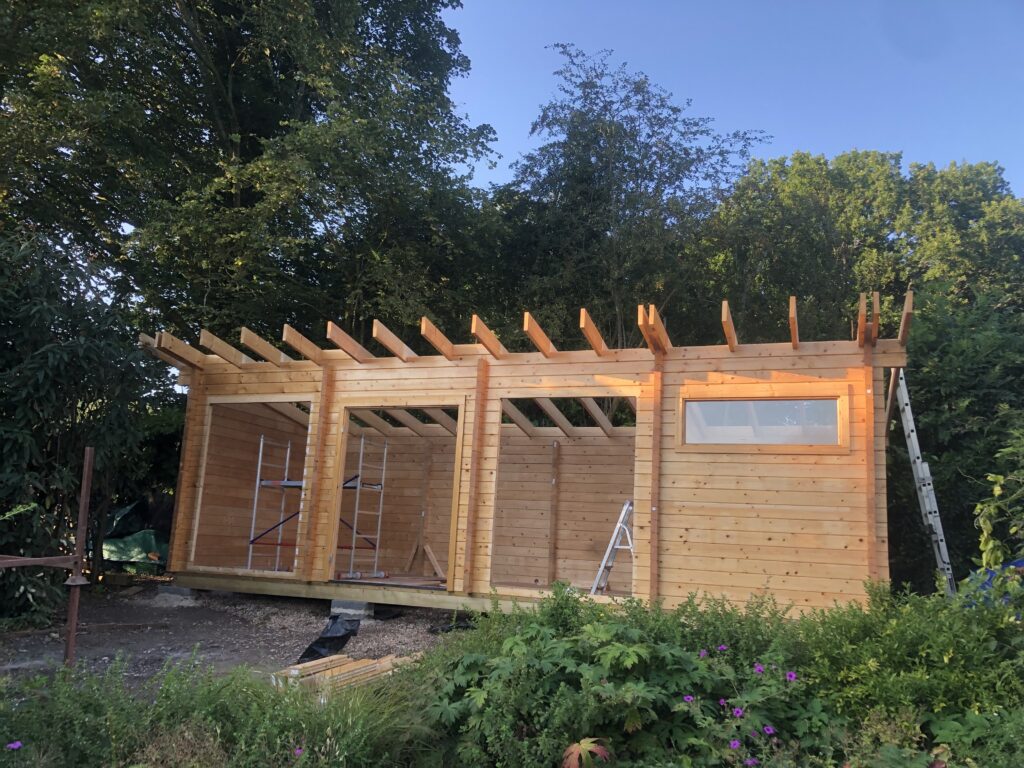
25/09 PM – IMT3b Warm Room & Donkey Work
We shutdown the dome computers, network and whilst Bob started on the warm room electrics Dave and I proceeded to 1 ton of scalpings from the front of the house into wheelbarrows and then push them up the garden to be stored ready for the warm room patio construction. It was a very humid day and we were both sweating heavily by the end of it.
The dome computers were repowered and outstanding software updates applied (BIOS, Windows updates, windows software and RPi4 OS & software) before the Autumn imaging sessions begin in earnest.
The day was rounded off by relaxing with a glass of red wine and dinner with Bob, Dave and the family. As the evening turned out to be cloudy there would be no imaging so it was an early night ready for the hard graft on the following afternoon.
26/09 AM – Exoclock Video Conference Day 2
Another set of fine talks and I especially thought it was a nice touch that an artist Lea who won the new Exoclock Logo Competition was awarded some imaging time on Telescope Live.
Lea took a bit a time explaining her background and how she formulated the design for the new logo.
New logo courtesy of Lea Changeat
It was even better that not being an astronomer she was persuaded to undertake some Exoplanet observations and report on her experience.
26/09 PM – IMT3b Warm Room Windows
The 7ft double glazed windows were put by Dave, Luke and Tim and myself. It was nerve racking as we manhandled the two panes from near the side of the main house up steps and along the garden with the Tim and Luke taking the awkward window corners whilst Dave and I used floor tile clamps on the glass.
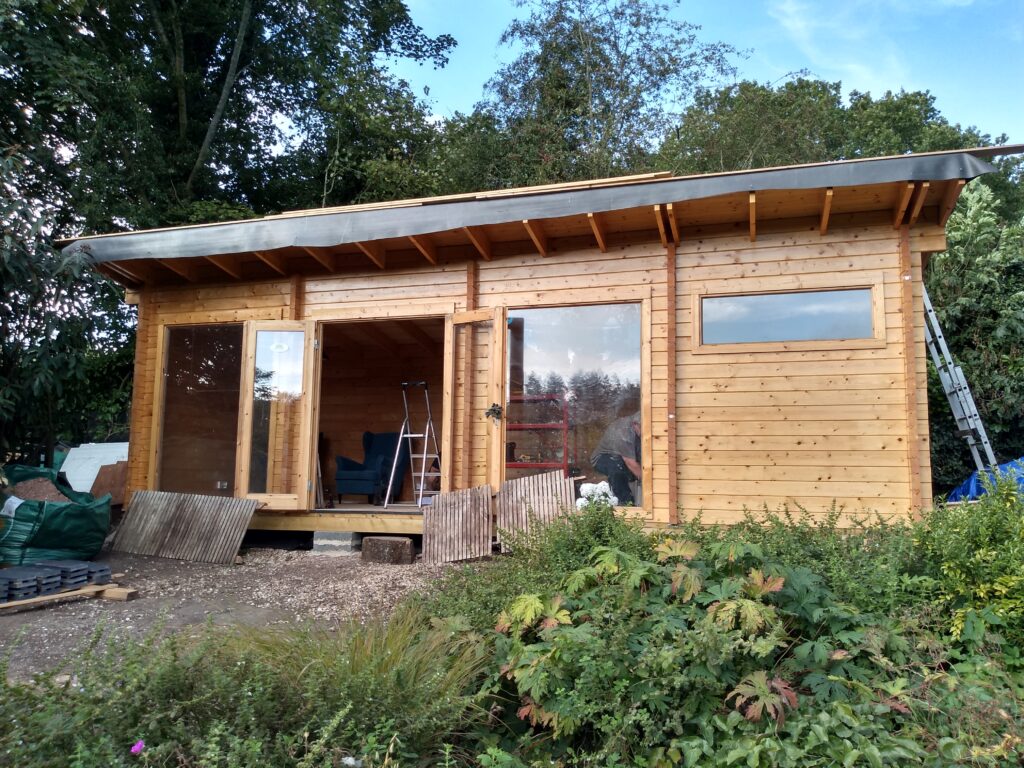
The warm room aka “Wooden GreenHouse”
Bob came over to complete the electrics for the warm room and I left when Dave started stretching on tiptoes to put in the red & white light fittings. I figured I could complete the remaining software updates remotely.
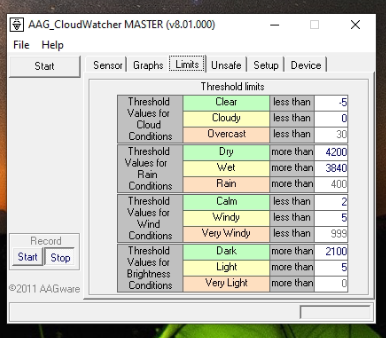
The AAG software was updated to 9.1.4 from the old 8.1.0 version, we still need to investigate the wind sensor reading with Jamie from AAG.
AAG 8.1.0 sensor limits
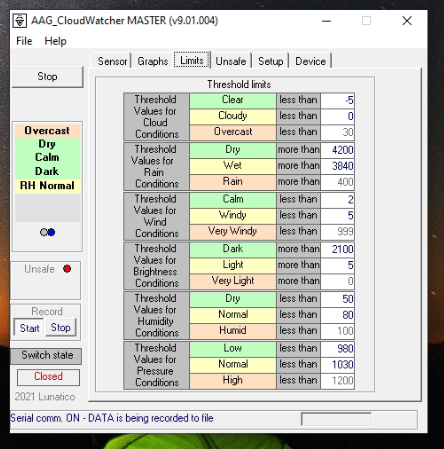
AAG 9.1.4 sensor limits and new sensors
So we now access to the Humidity sensor settings and the appropriate alert levels. Previously I had to rely on both ASCOM local conditions and internal dome humidity via ASCOM (BlueAstro StickStation) but I wonder if we want to trigger an unsafe state by including the humidity thresholds.
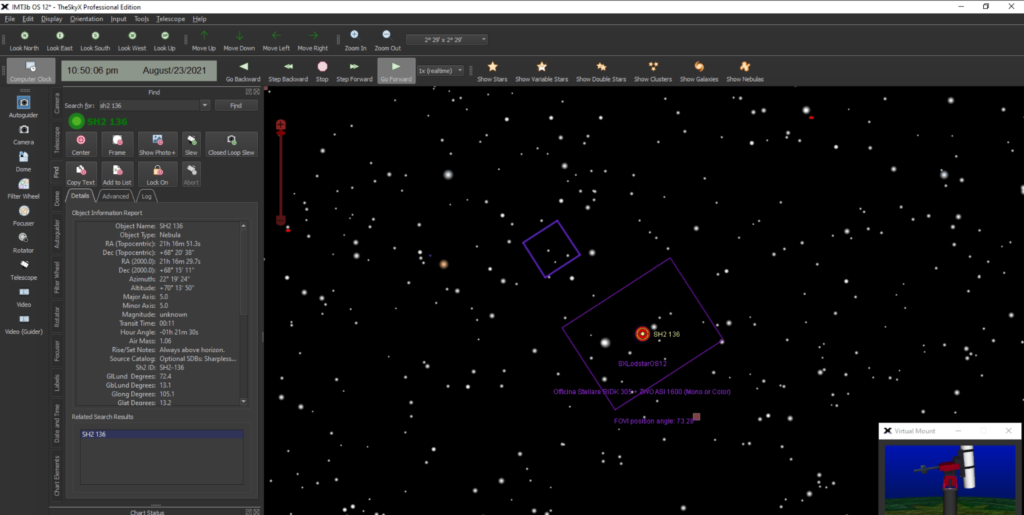
With a near on full Moon, the choices for deep sky were limited so I set about looking for Sharpless emission nebula. First on my list was SH2 136 in Cepheus. I slewed, aligned, selected the Ha filter, rotated the camera to find a guide star, tried to run autofocus which failed (I set the focus point to 18500 for Ha manually) and then imaged a few subs at 600s, which is when I realised the problem.
FoV from TSX for SH2 136
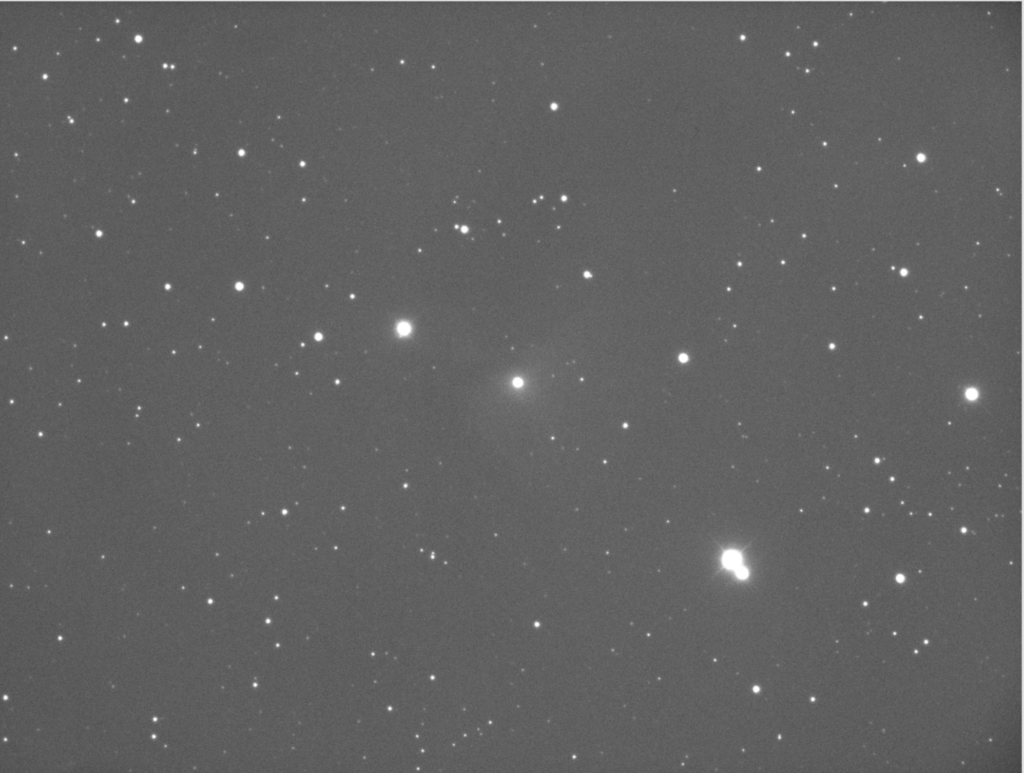
Nothing but stars….. I googled around and it transpires that some fo the Sharpless catalogue is emission and the rest is reflection! Now I know this useful fact I will double check each image I go after.
SH2 136 Emission nebula in Cepheus 300s Luminance
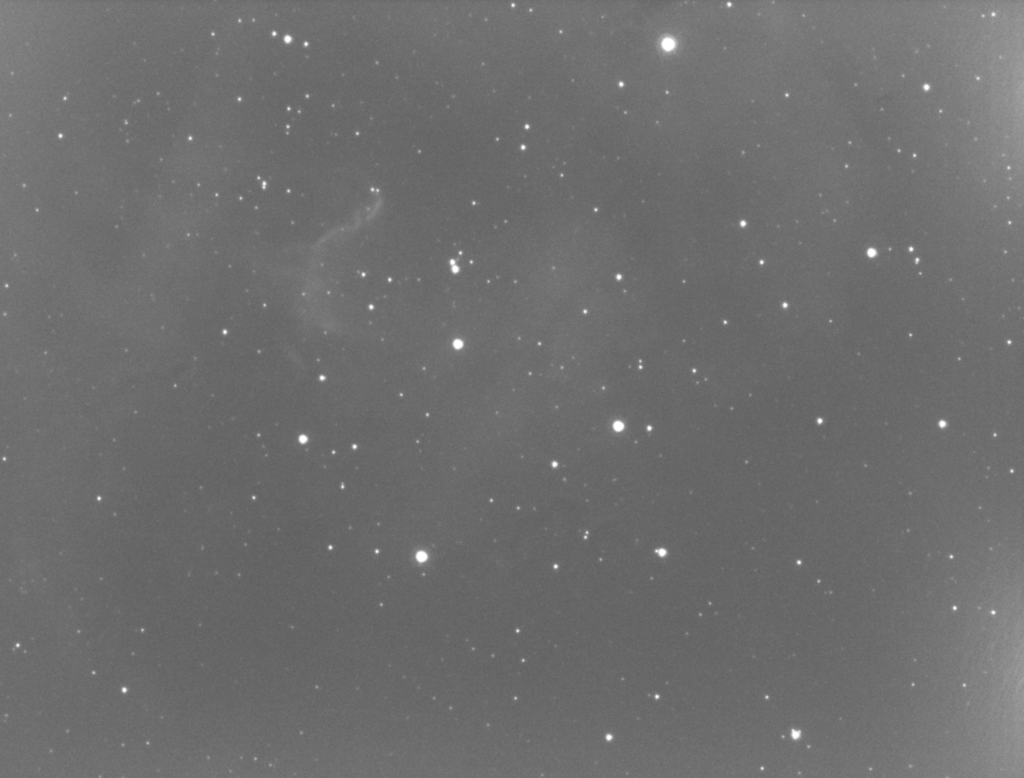
Before I moved on I took a single 300s luminance frame just to see if I could see anything at all. The answer was not a lot, so I moved on. This time I choose an emission nebula, much larger than my FoV but still it should be a pleasing object, SH2 132, an emission nebula also in Cepheus.
SH2 132 Emission nebula in Cepheus 600s Ha
I set about imaging 14 x 600s in Ha and then went to bed at 23:48 leaving the system running for another 2 hours before hitting the meridian, as I have not setup the scope to flip yet.
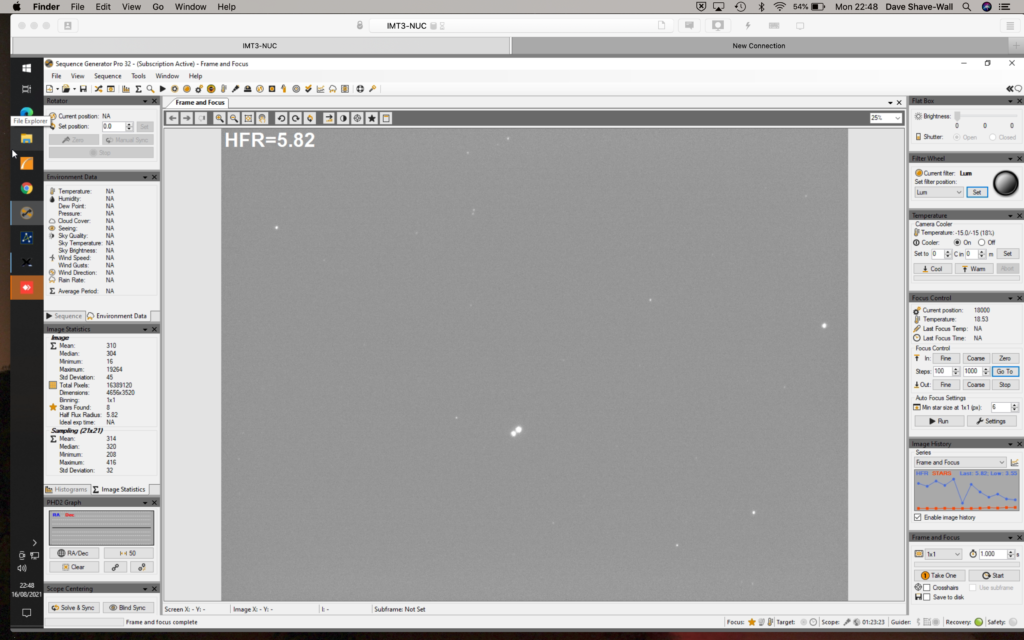
It’s been a while again due to work and the weather. A quick look around the sky this evening and make sure I still know how too use the telescope. So after getting focus
Focus achieved at 17,000 (18,000 here was incorrect)
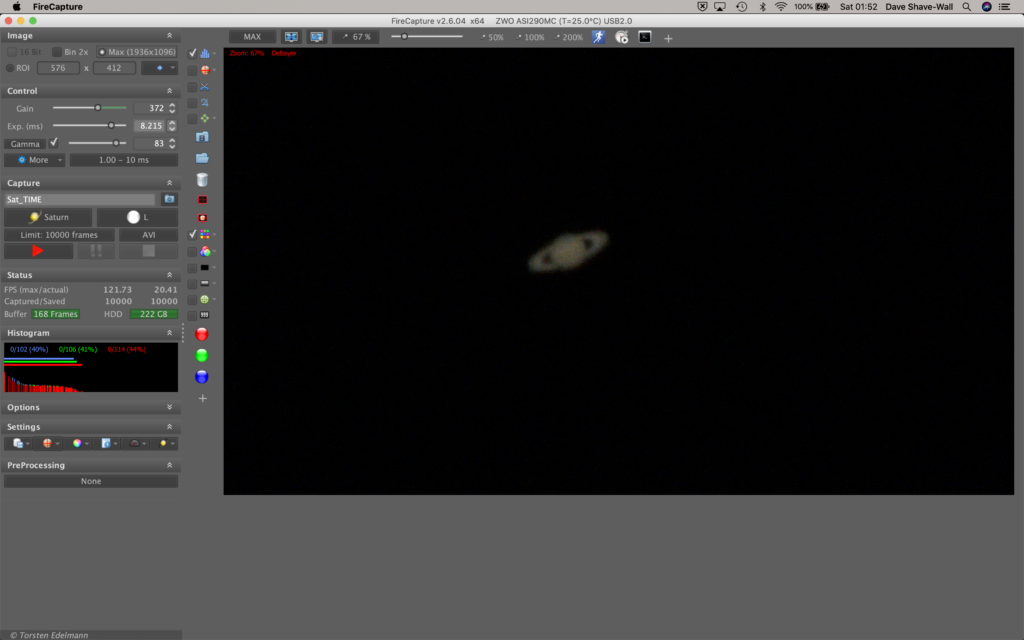
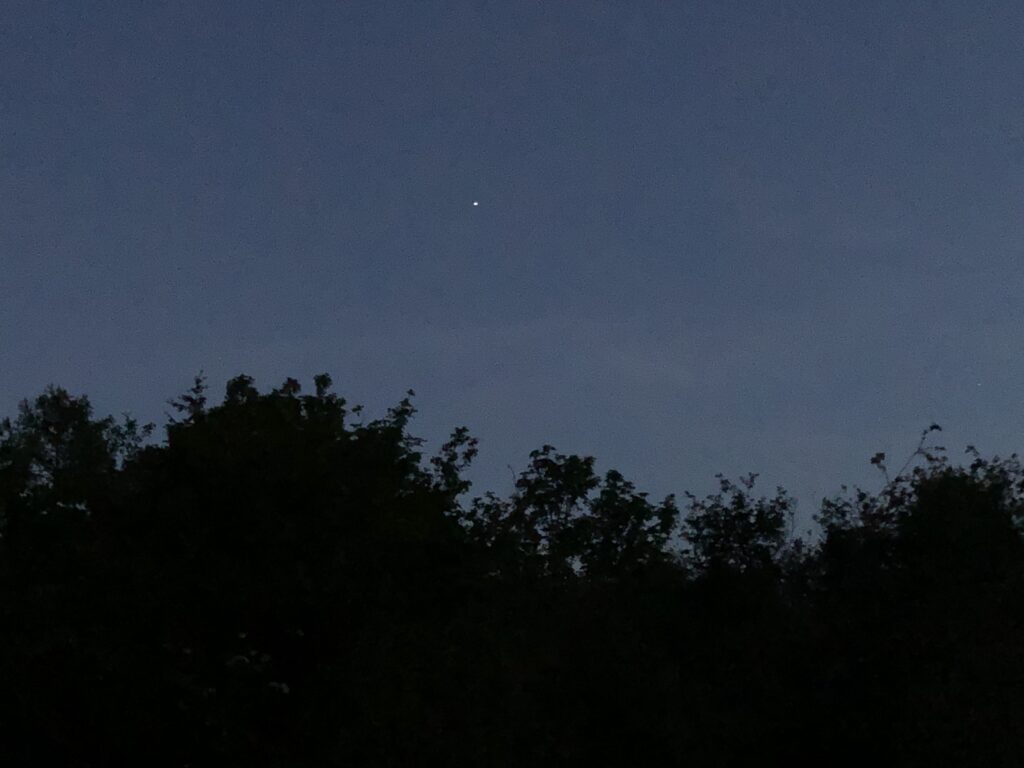
I slewed to Saturn as it was up and as expected it was very small.
Small Saturn
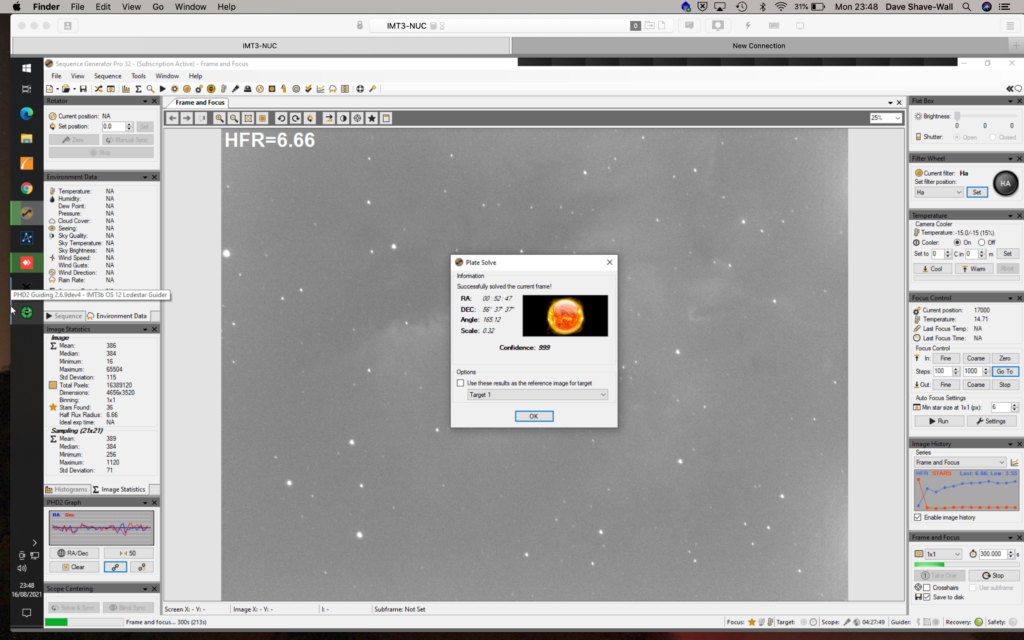
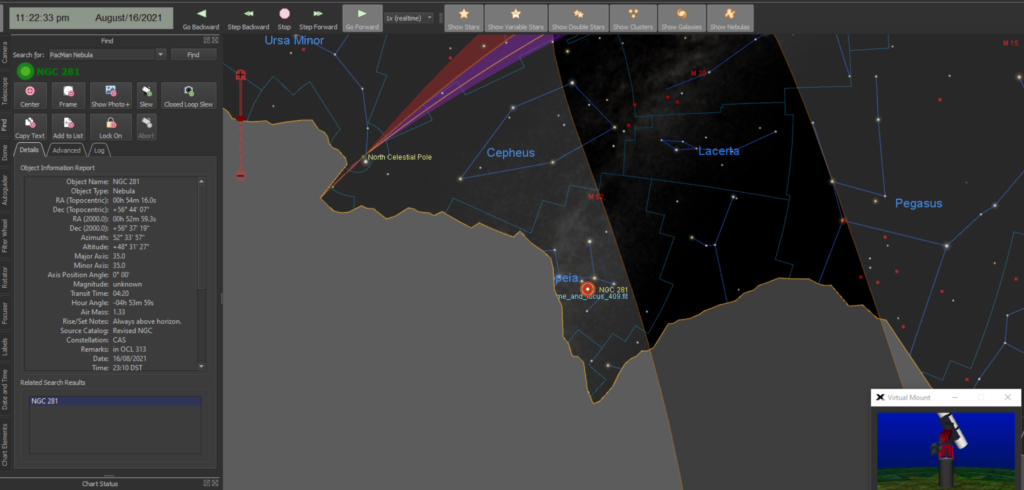
I then slewed to the Pacman nebula, NGC 284 also known as Sharpless SH2-128. I switched to narrow band and the Ha filter. I plate solved, centred
Solved
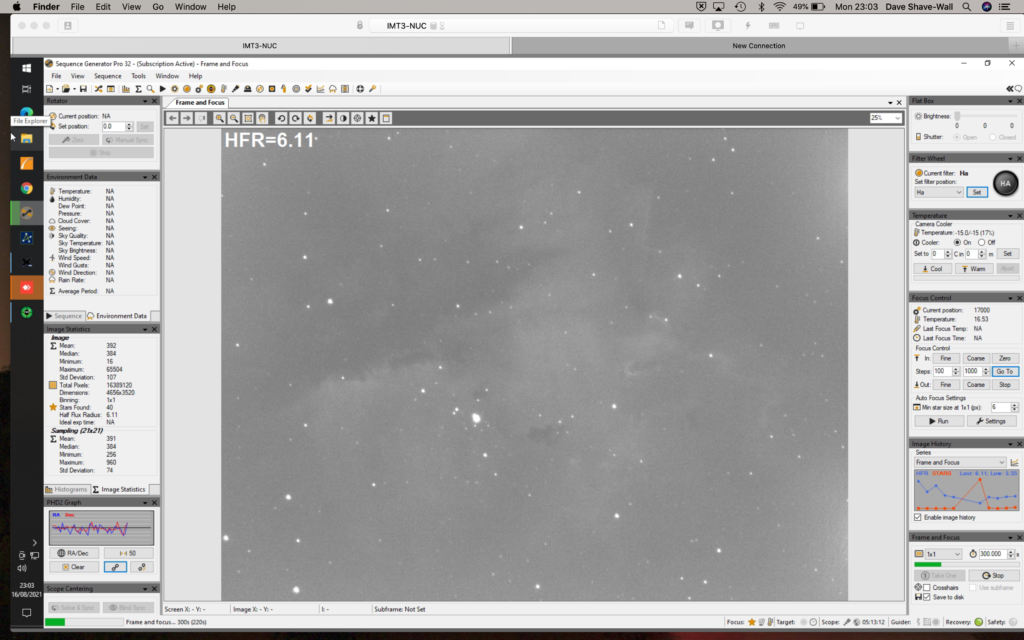
and then proceeded to take 300s shots.
NGC 284
The camera was called to -15℃, the outside temp was 16.2℃. The focus position was at 18,000. The camera itself was set to Gain 139 and Offset 10, the rotator at 345.560°.
TSX
I took 75 x 300s images until I closed the dome, by which time it was very light. I went to bed in-between the start and end of the imaging run, but then realised the dome safety does not work due to the cable from the ASC being severed due to a Stanley blade incident with weed matting.
The good thing is GingerGeek and I managed to focus the ASC during the day on some trees in the forest across the valley and we managed to get it in focus.
Focused ASC
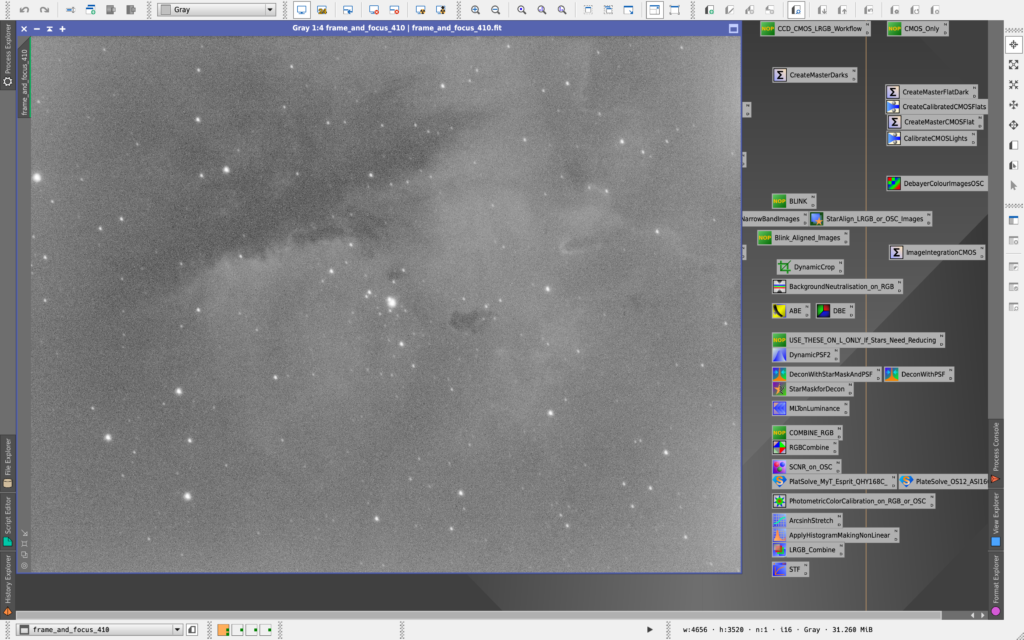
I will process the data last some point and see what it looks like.
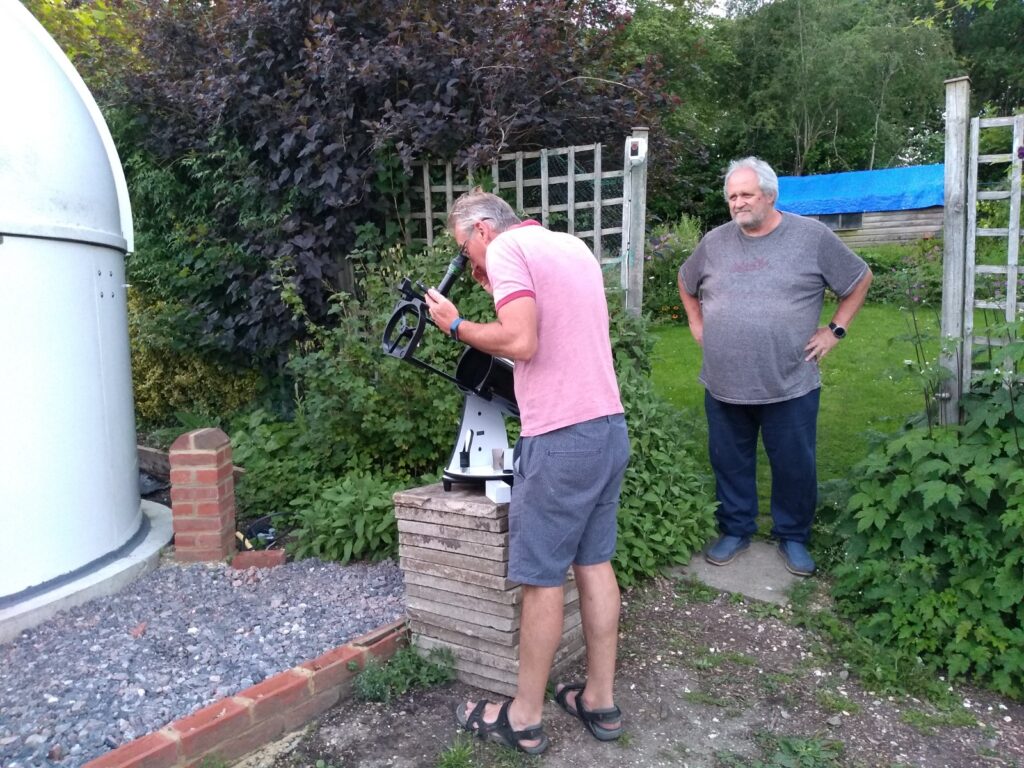
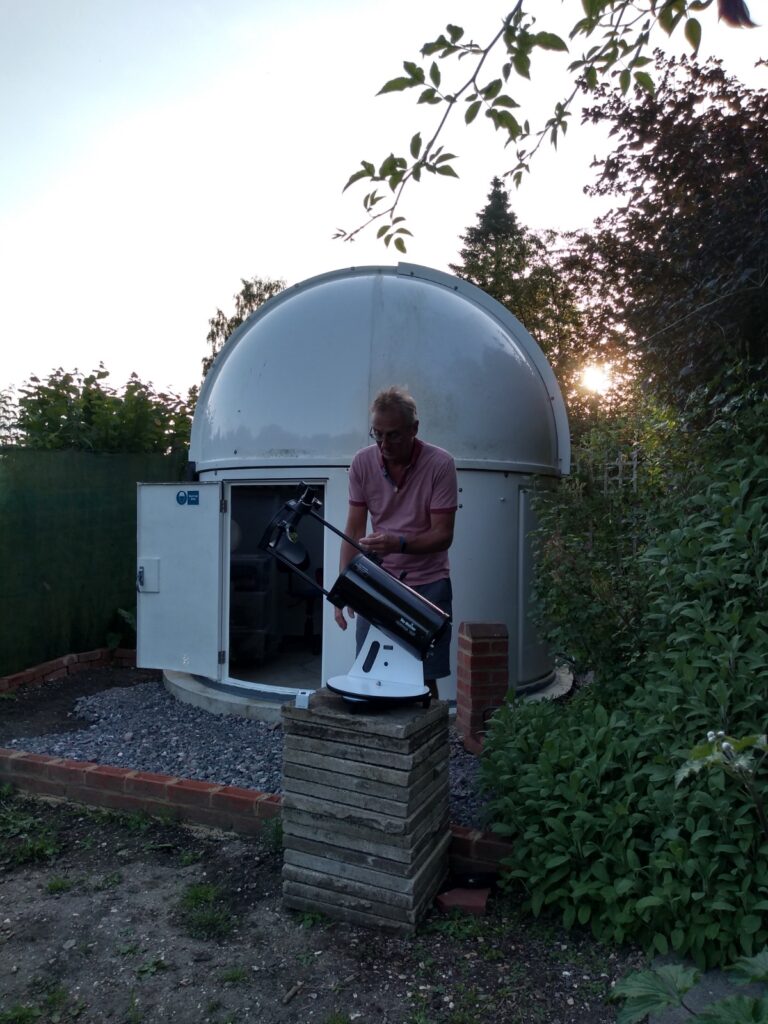
GingerGeek, Alan and Bob came over. GingerGeek brought over his 4″ dob and set it up on the patio slab tower. Alan Lorrain then went about aligning it on the Moon.
Alan finds the Moon with Bob watchingTarget acquiredMoon through Dob
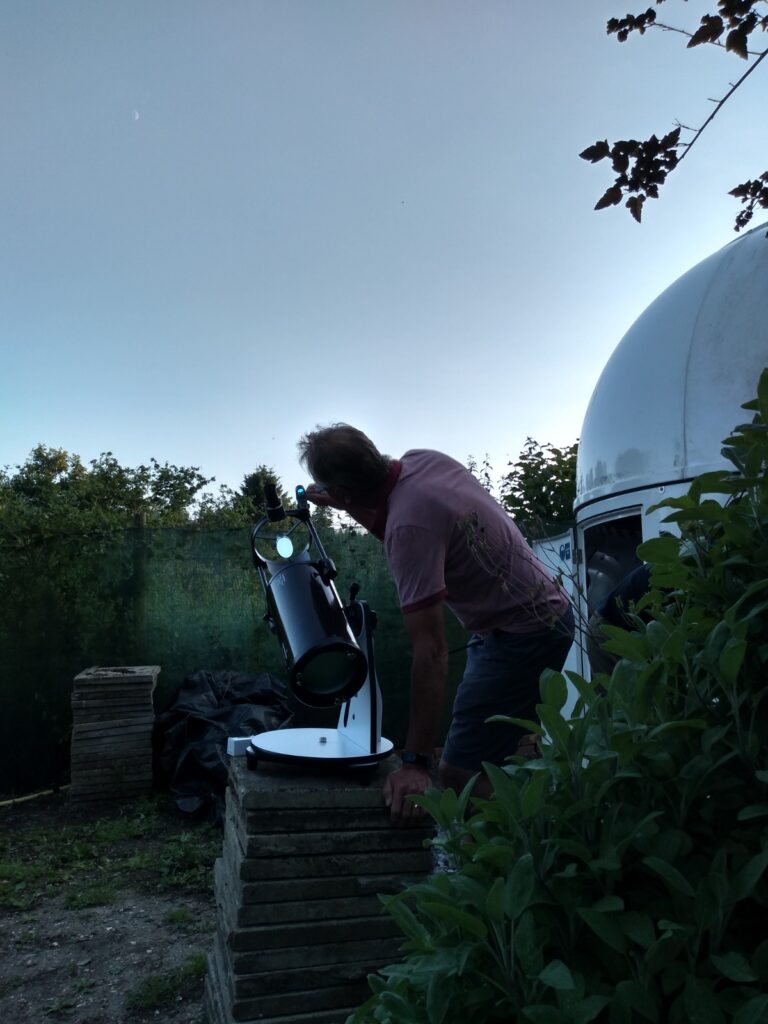
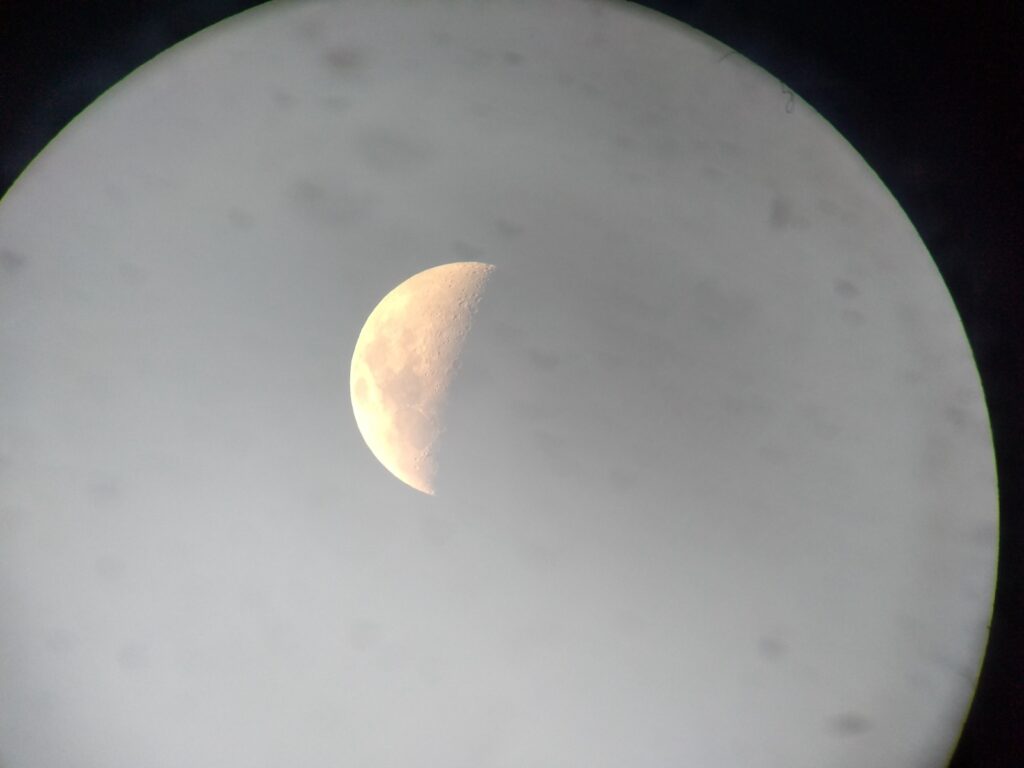
So with the Moon successfully acquired and whilst GingerGeek started looking at other targets through the scope, I opened the dome and slewed the 12″ to the Moon too.
Moon through 12″
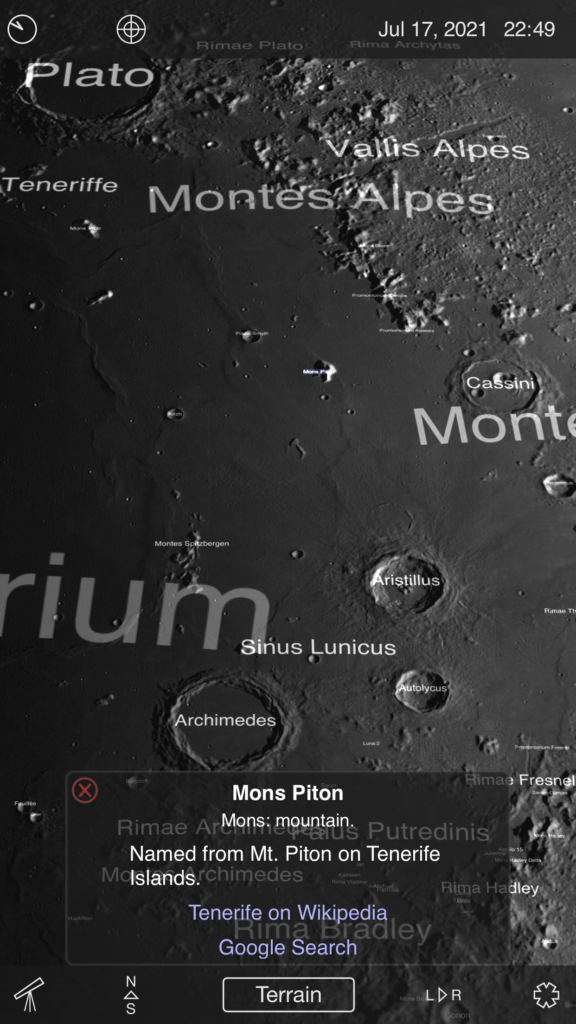
Alan, Bob and GingerGeek found a small bright mountain inside the terminator. We decided to try and find it through the 12″. When we did find it we then tried to work out what it was.
Mountain inside the terminatorIt looks like the island of La Palma!
It transpired to be Mons Piton, named after the top of mount Teide on the island of Tenerife. We would need to view it the news night to see it in full daylight.
Sky Safari
Next up was a quick look at the Ring Nebula M57.
M57
We then wanted to seed if we could make out the central white dwarf.
M57 Red
However through the Red and Blue filters and the Luminance filter we could not see it. Finally through the Green filter it stood out very well.
M57 Green
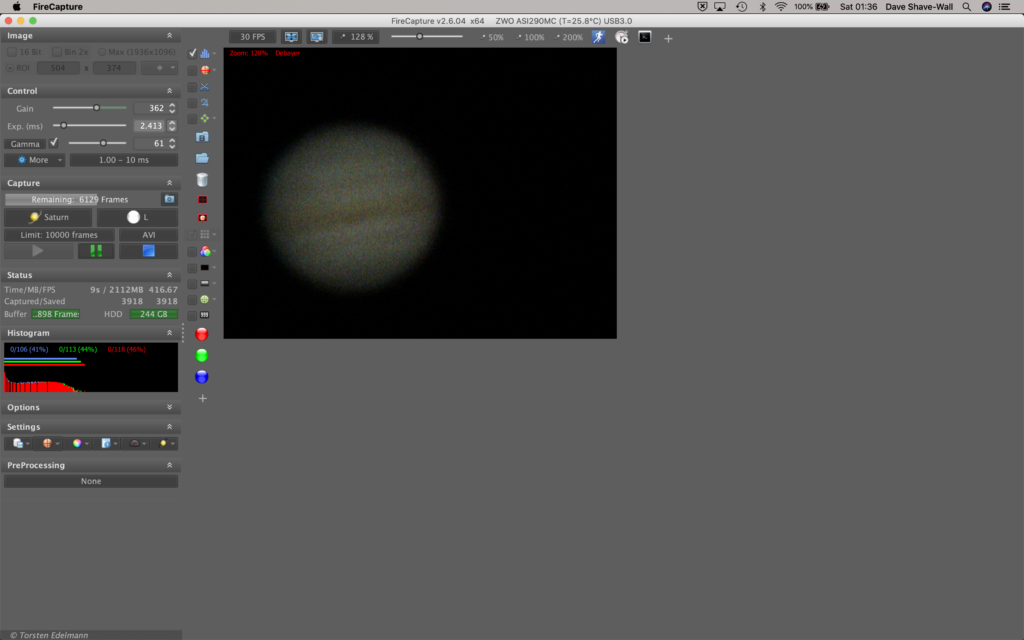
Whilst slewing around with the 12″ in the dome, I had also setup the travel scope with the Mak 180 on top. I wanted to grab some data on Jupiter in particular and Saturn just as it was nearby,.
Jupiter being imaged with Mak 180Saturn through Mak 180
I took a whole bunch of data for the next hour or so which I will process at a later time.
Slight clear spell and no work tomorrow 🙂 so I am opening dome to see if my scope is now repeatable, so can I open, get object in FoV and then image whilst guiding.
Of course as soon as I opened up the dome it became cloudy. Fortunately not for long, so I waited it out then noticed next to the Home position a galaxy, so I went to image that, NGC 4437, which is a pencil thin galaxy in Virgo.
NGC 4437
Unfortunately there was no decent guide star, even with the rotator I could not find one. So instead I took a bunch of 90s images, just short enough not to trail. I actually took 20 x 90s Lum and then 10 x 60s RGB all at Gain 10 Offset 10 and -25℃.
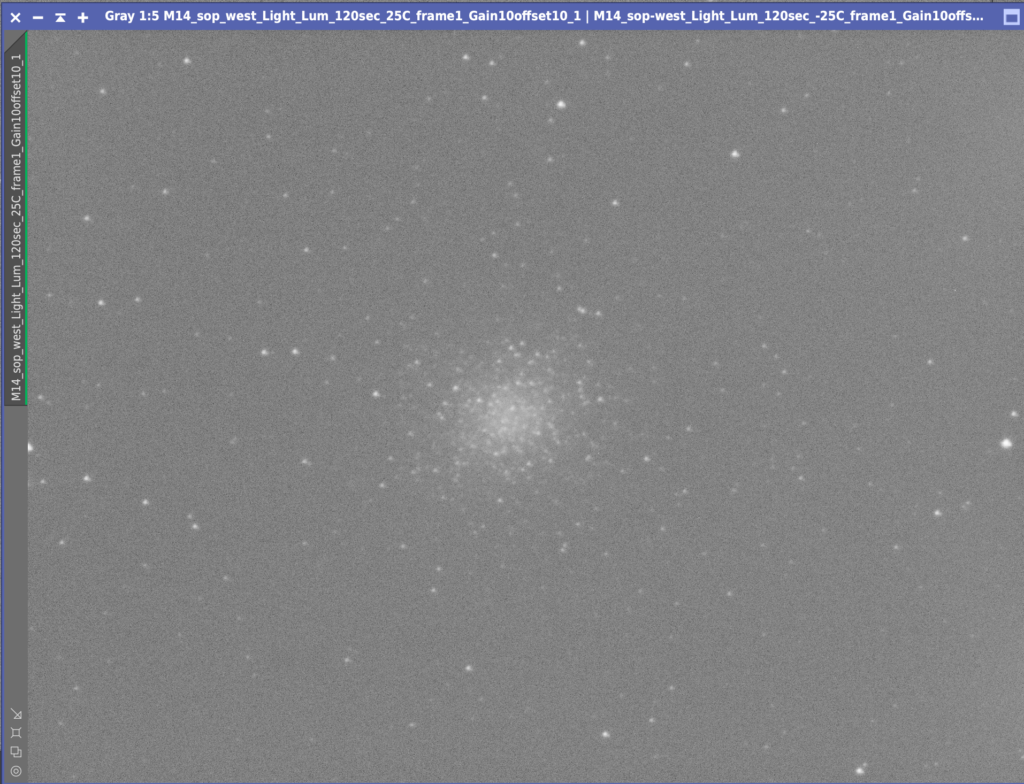
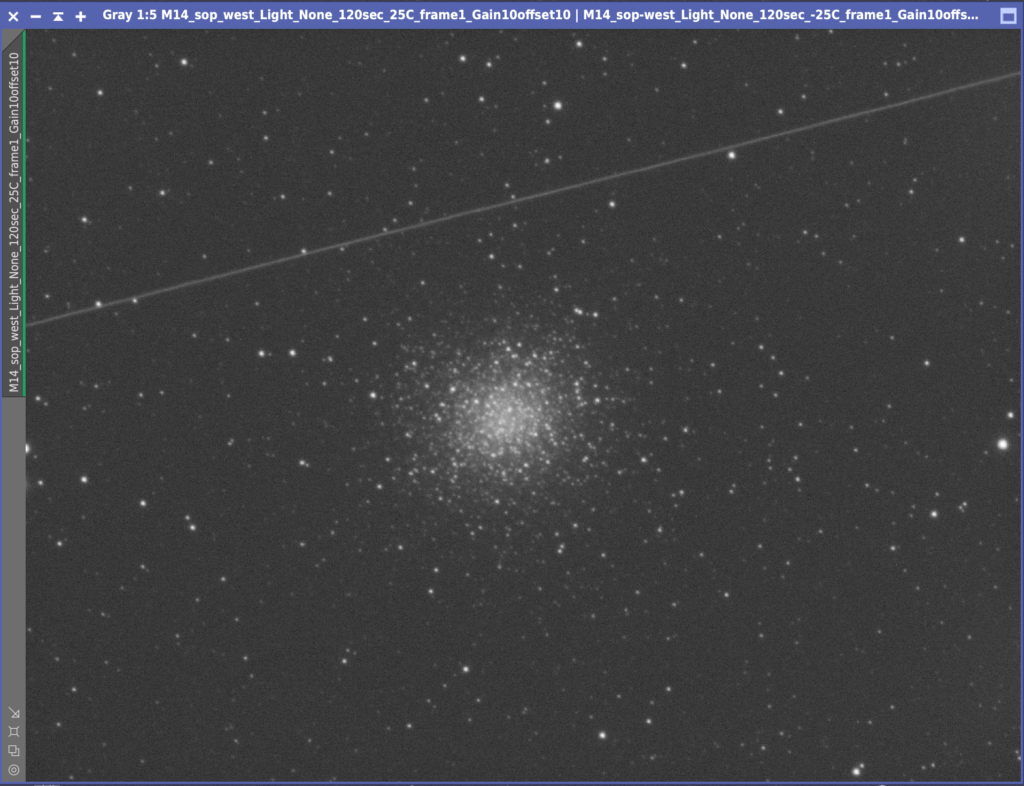
I then turned my attention back to M14, slewed and set the imaging running. Unfortunately I was only 1 frame in when I had to stop at 1:18am as the clouds had returned, so this time I packed up for the night.
M14
Learning tonight was don’t forget to focus and take some darks for the off axis guider.
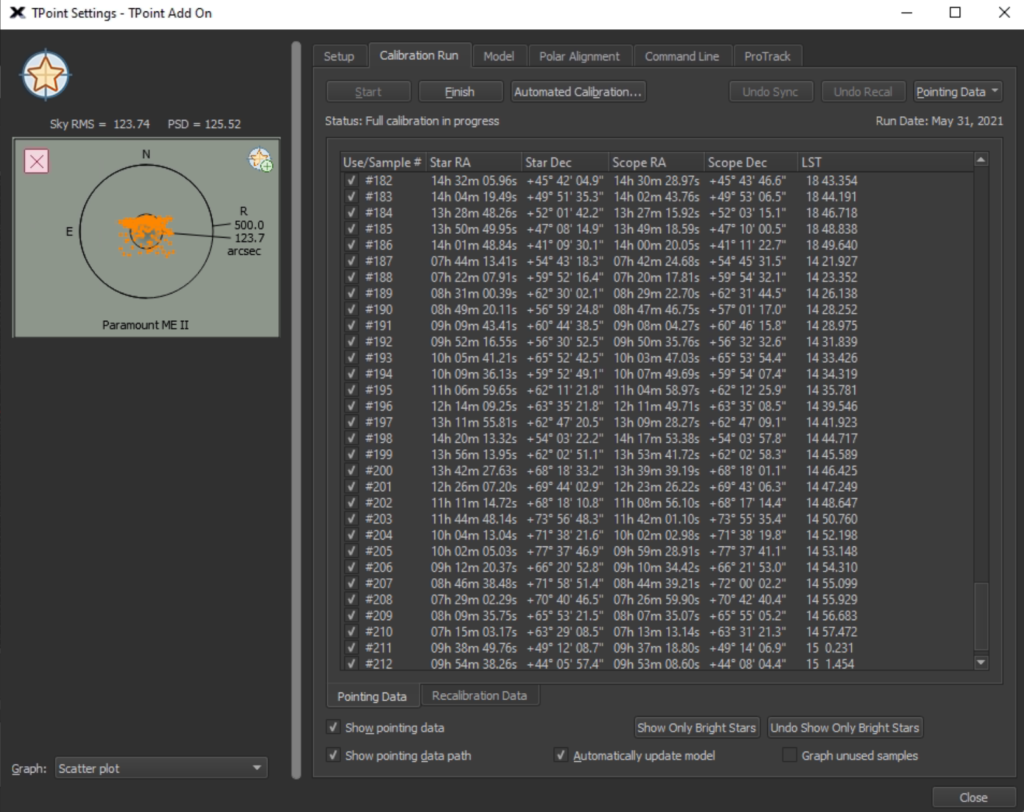
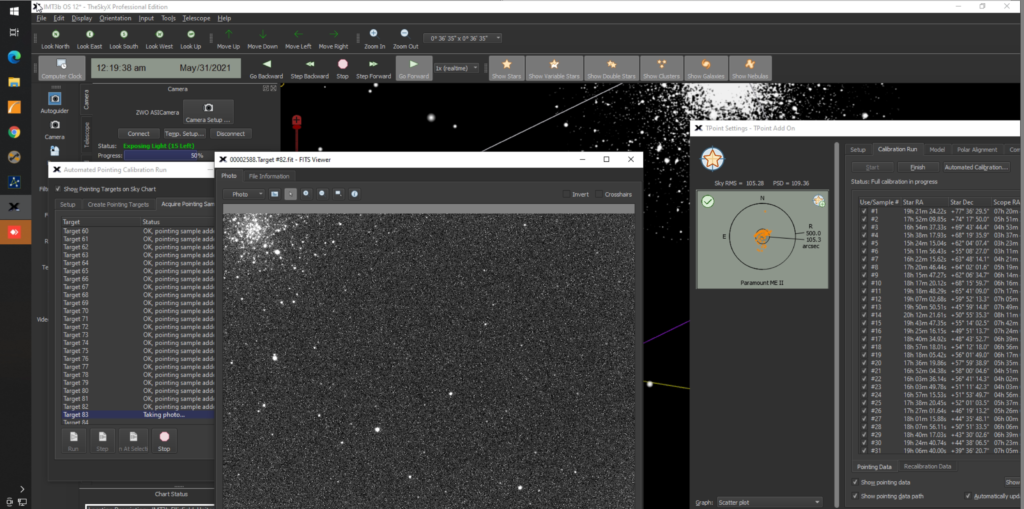
I will start by completing the TPoint run tonight before moving on to calibrate the guider and make sure I can get and image. So by 10:30pm it was just on the border of being dark enough to take and plate solve the first image and continue the TPoint session.
So by 11:30pm I had finished the 212 TPoint model.
212 TPoints
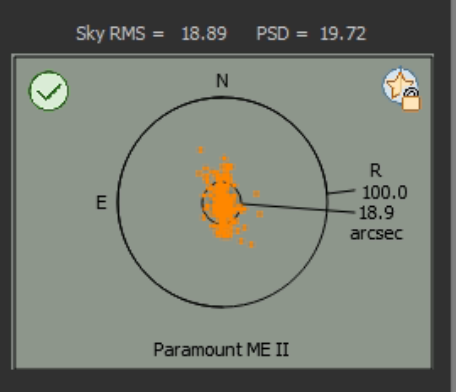
The next thing was to do a Supermodel on the data. This reduced the error pointing from 500 & 23.7 arcsecs to 100 & 19.
Model
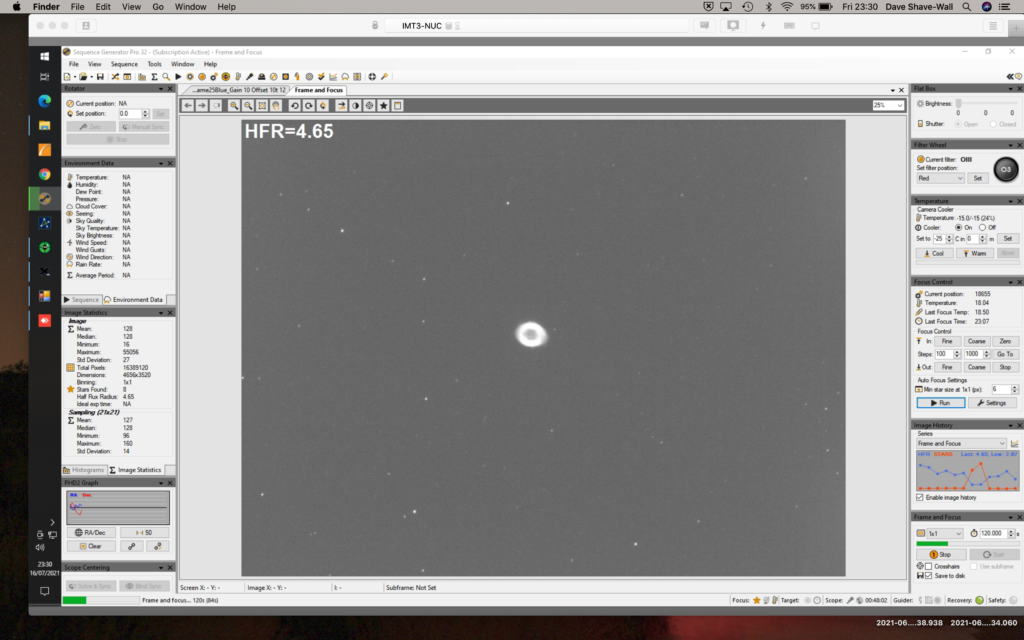
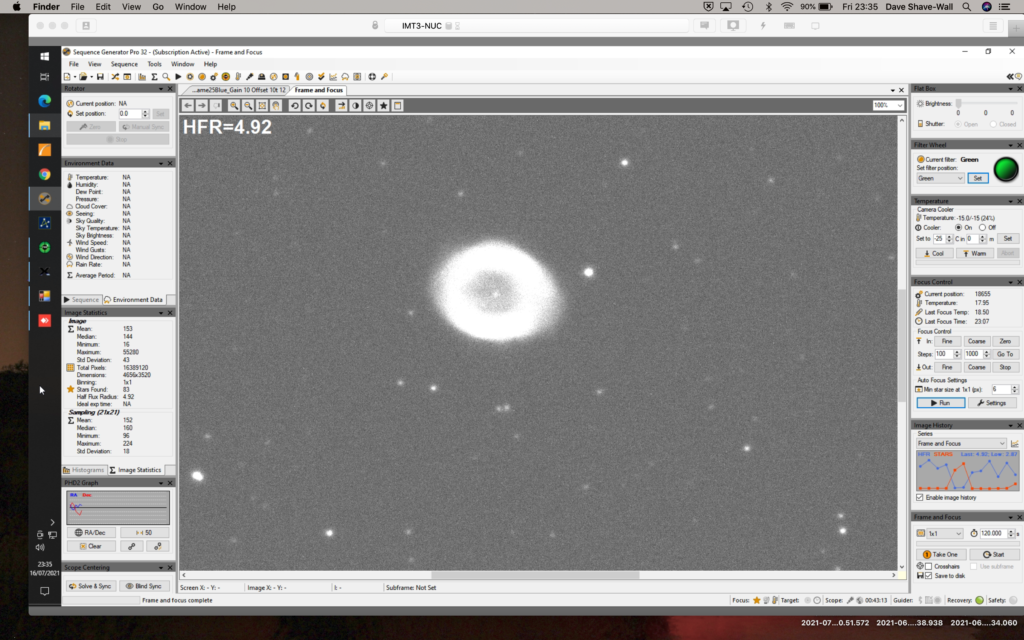
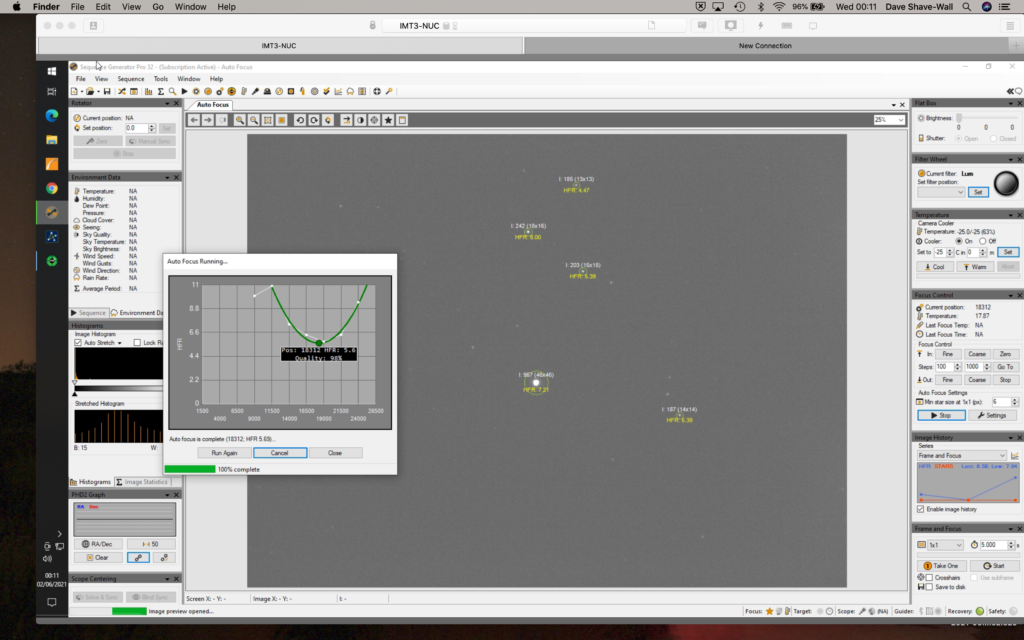
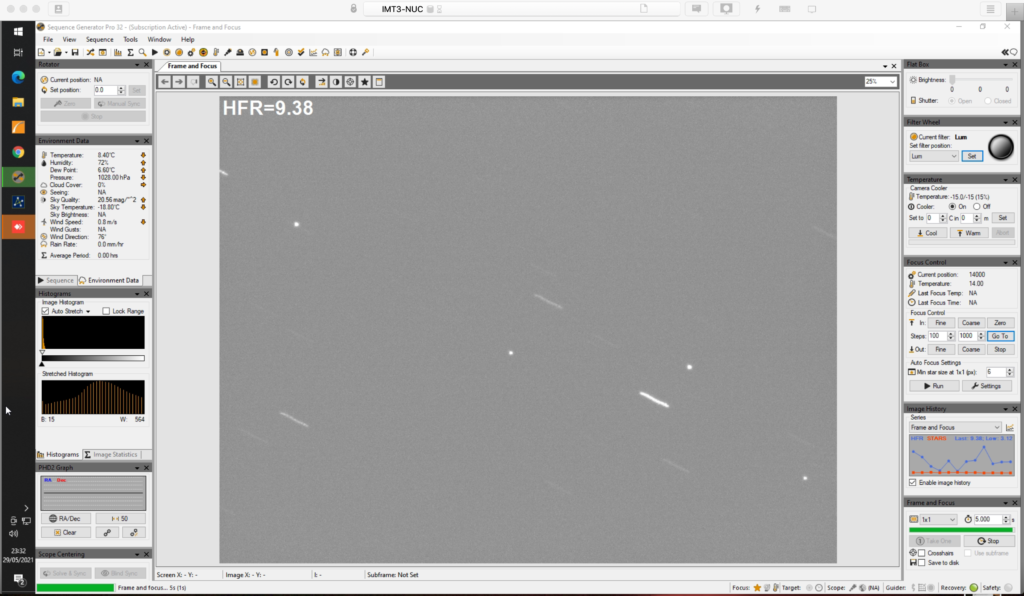
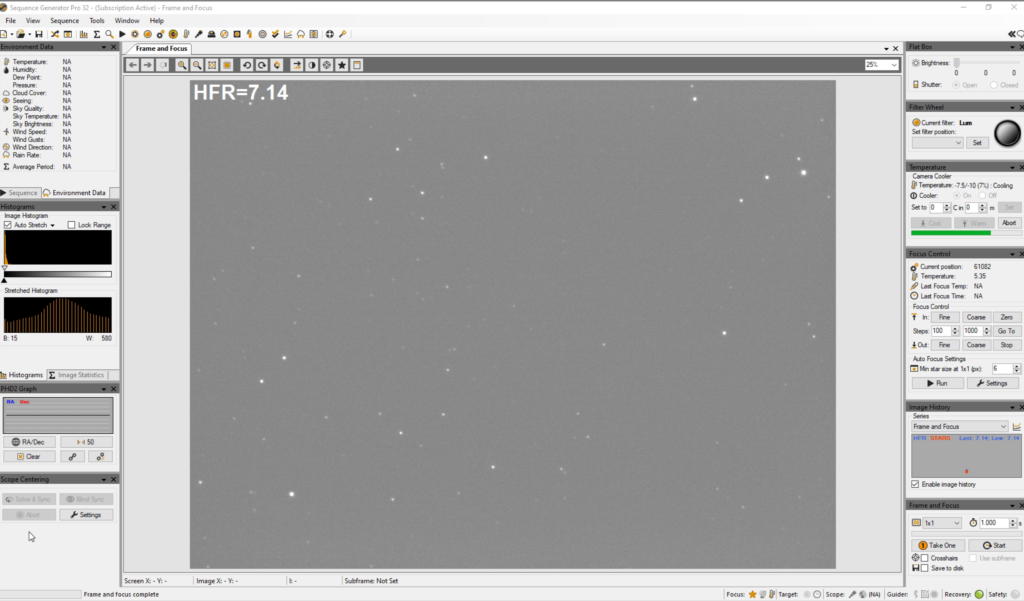
Now connected camera to SGP and running autofocus on a mag 6 star, new focus position for Luminance is 18,312 at 00:13
New focus position
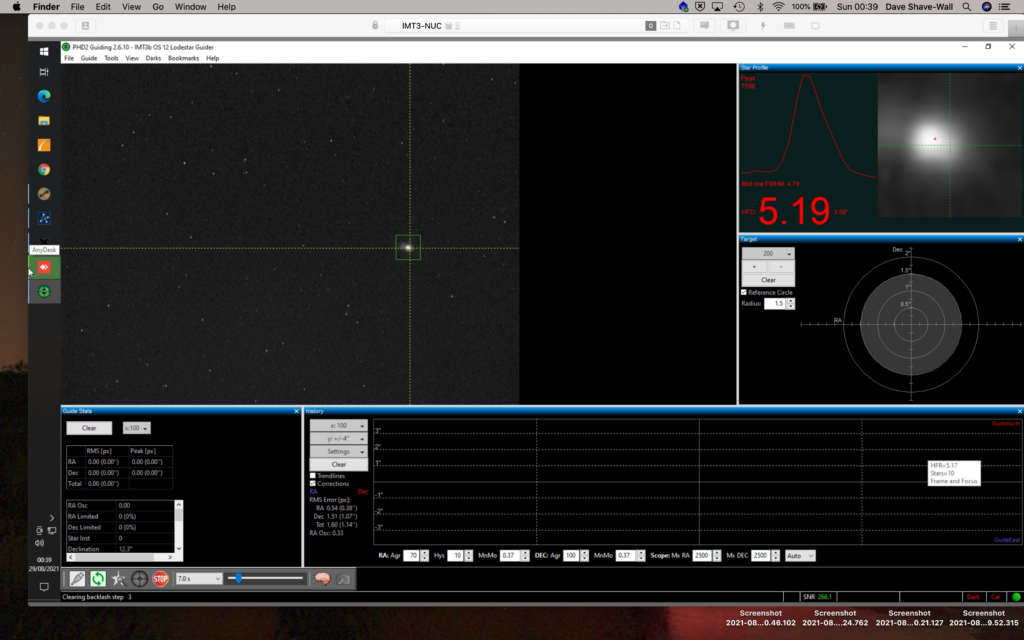
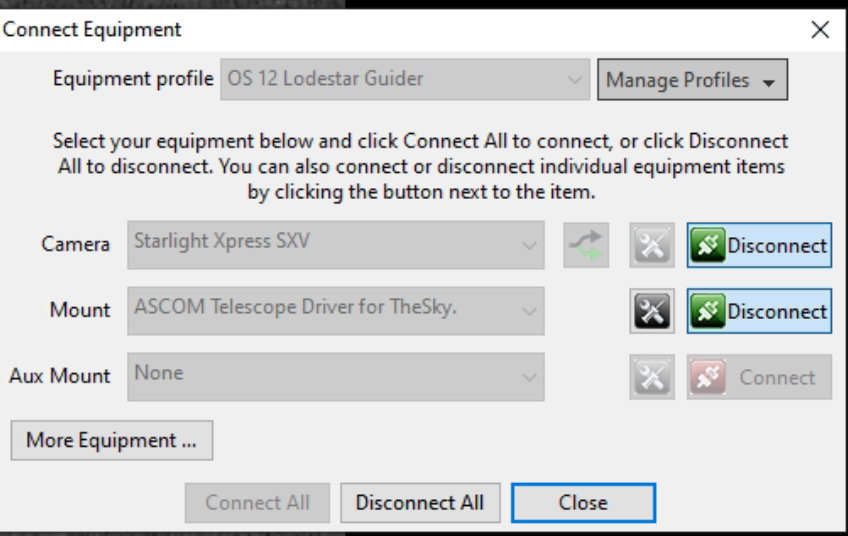
I then setup OpenPHD2 to guide and here I hit a problem. The guider did not move the mount. I have not got a guider cable attached as I do not want to do Pulse Guiding. Instead I always do Direct Guiding. So I looked at the settings in PHD2 and the mount was not set. So I went and searched my blog and I need to select the ASCOM Telescope Driver for TheySky. However it is not in the dropdown list.
ASCOM Telescope Driver for TheSky
Finally after a lot of head scratching I remember GingerGeek removed ASCOM and upgraded when I moved house. He had inadvertently removed the said driver and forgot to reinstall. I went to the ASCOM webpage, found the driver which took me to the Bisque website and downloaded. I then installed, restarted TheSkyX using PHD2 after I had restarted PHD2, I selected the said driver in the Mount dropdown and connected. This then moves the mount when I calibrate and subsequently guide. Fortunately I found all these answers on my blog posts from last year when I had setup the guiding originally.
Finally guiding
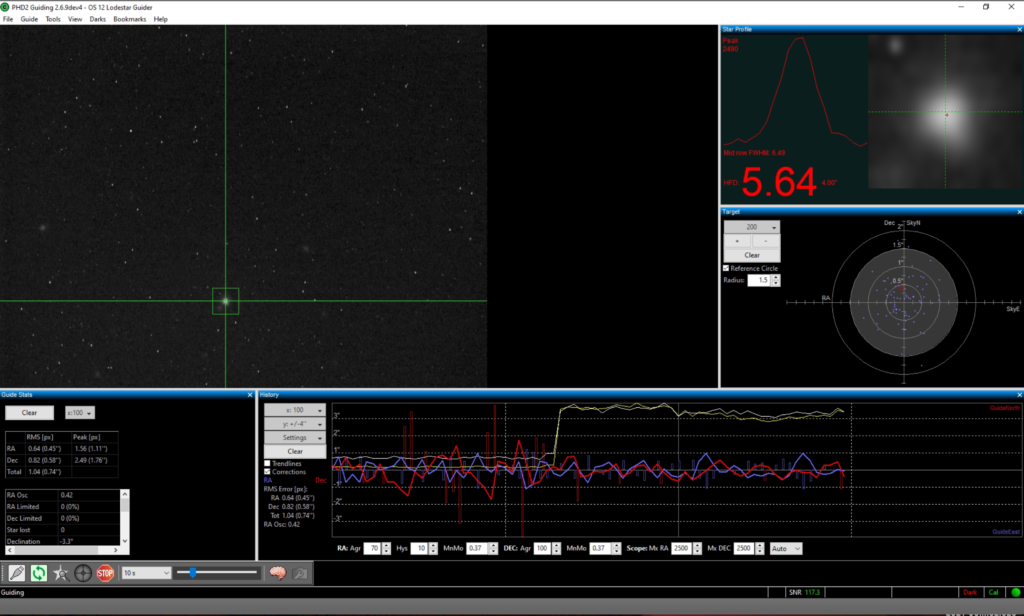
Now all of this is working it is rapidly approaching the time when the sky brightens, so it is already after 1am. I slewed to M14 using TSX, performed a Closed Loop Slew with the camera connected to TSX initially. Once I confirmed the object was in the centre of the FoV, I then disconnected the camera from TSX and reconnected to SGP.
M14
Guiding started, all started to work well. A couple of snags, focus position was wrong in the filter setup so I need to change. Tries to autofocus on start of sequence so I need to change that. I then decided to grab 1, 2 and 5 min subs of LRGB to determine the best exposure. However half way through and some localised cloud rolled in and stopped the session.
Clouds
The good thing its the closed loop slew is working well in TSX.
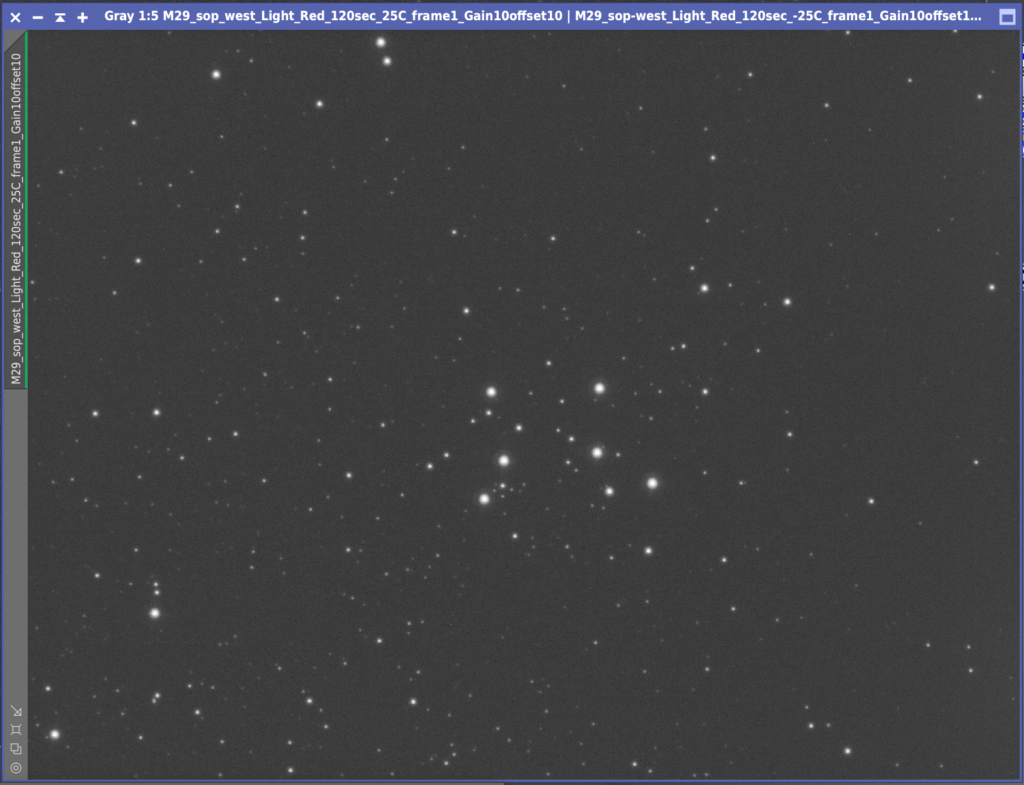
So with the local cloud still causing issues to the South, I slewed North East to another Messier target on my list, M29. Once again I setup 1,2 and 5 min exposures across LRGB to see which would be best. All the imaging tonight for Globular Clusters and Open Clusters was done at Gain 10 Offset 10.
M29 test 2mins Red
I manage to get frames and then I was afflicted by the same cloud. So instead I packed up and called it a night.
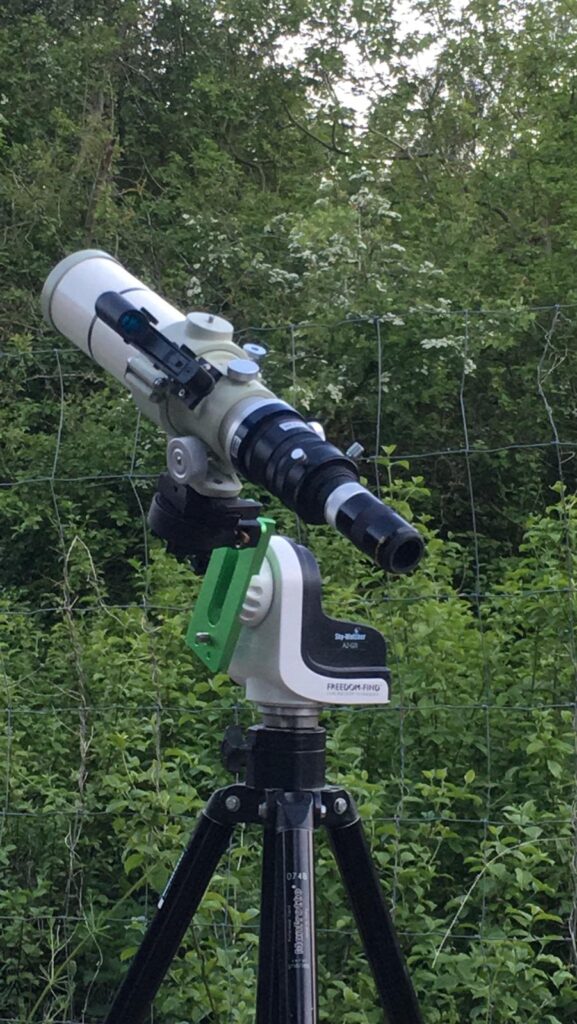
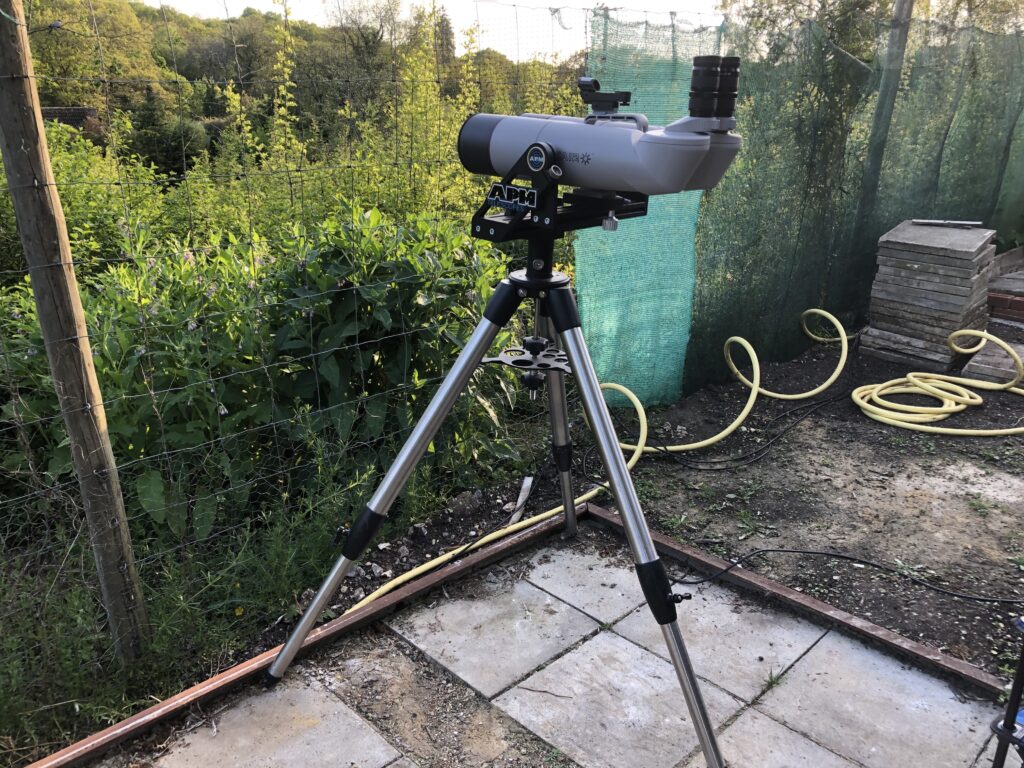
Bob came over again tonight which is great company. He setup his Skywatcher AZ-GTI portable mount with his Tak FS60 on it so we could do visual throughout the night on a goto mount along with my star hoping through the 100mm binos.
Skywatcher AZ-GTI
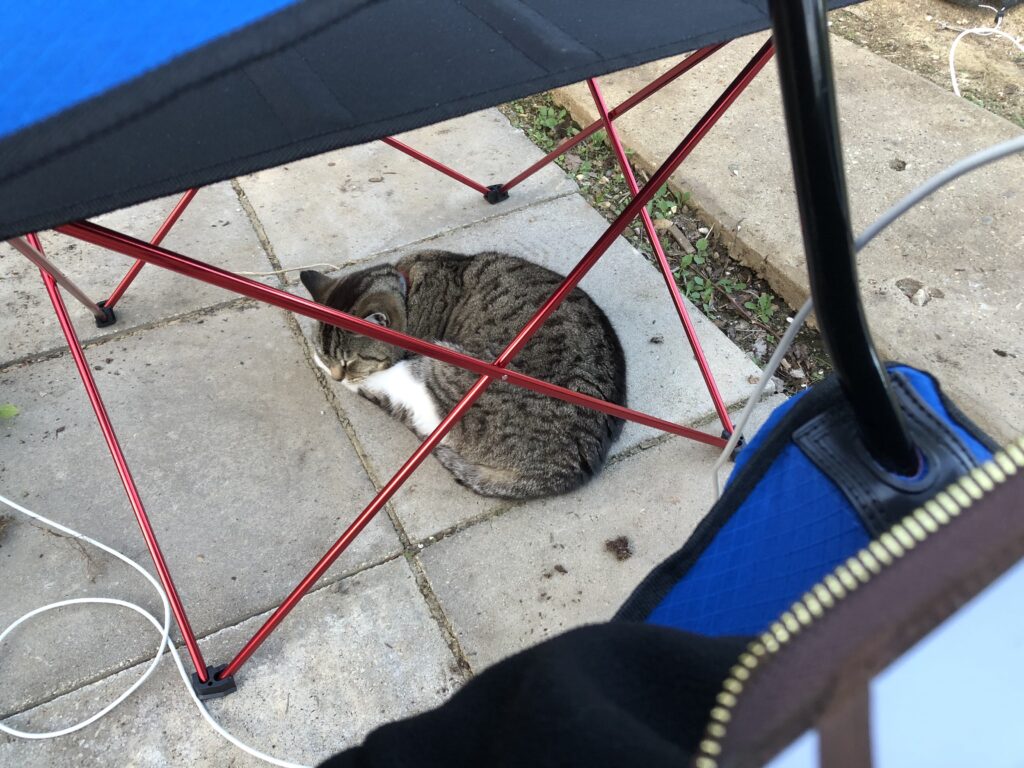
I started the evening whilst light, measuring for the replacement T2 (M42) adapter for the camera train. Given the 0.083 microns per movement of the FLI Atlas focuser I need to reduce the image train length by 3mm. So the new adapter needs to be 31mm, current M42 adapter is 35mm. Meanwhile my AstroCat Fluffy decided to get some more sleep before dark.
Fluffy taking a hard earned nap
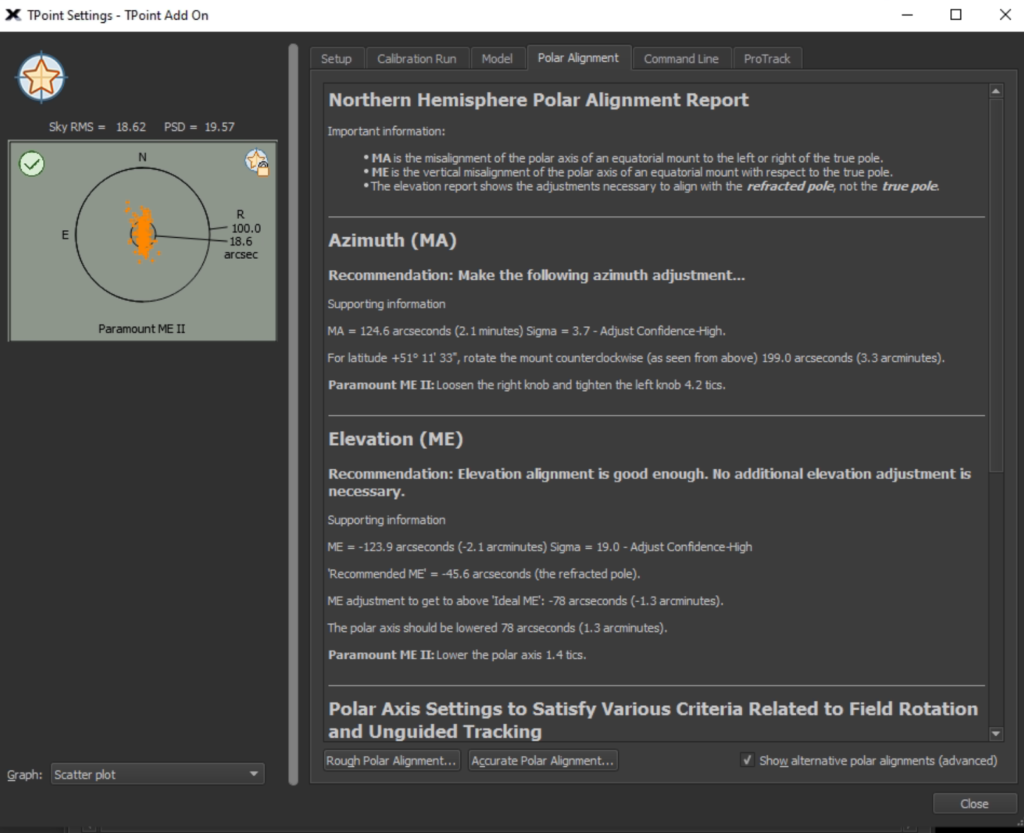
Next up was writing the Lat Long on the dome so I can give it to anyone that visits. With that done I started testing the rotation of the dome to make sure the dome no longer slips since I put the anti-slip tape around the edge. After spending some 15mins rotating the dome it seemed ok, it would be fully tested later when I redo the Tpoint model. This is due to the 2.1 arc minutes of error in my azimuth polar alignment that needs adjusting by 4.2 tics.
I adjusted the mount as above and ran a 20 point model. This told me the error int he azimuth was less than 1 arc min and that there was no need to adjust the mount any further, however it had low confidence. So now I will run a full 212 Tpoint model to see what it reports.
212 TPoint Model map
On starting the run I hit another problem, the mount hung and beeped. This was due to a balance problem on the tube which is weird as I thought it was fine. However maybe I had not rebalanced since adding the rotator properly. I removed a little weight at the front of the OTA and shifted it backward. I then tried again but again it hung and beeped. It transpired to be the same loose cale I had before, the focuser cable which had come loose. I applied some more white electrical tape to hold it in until I get round to changing the 2.1mm adapter.
At 23:40 I started a new TPoint run and am now 7 stars in and all is well. That did not last for long, around 47 Tpoints and I kept getting blank images. It seems the dome had lost its position. The Home sensor does not seem to be registering. I slewed the dome manually to Home at 123 degrees and synced that back into the dome controller. Starting the TPoint again resumed stars being seen.
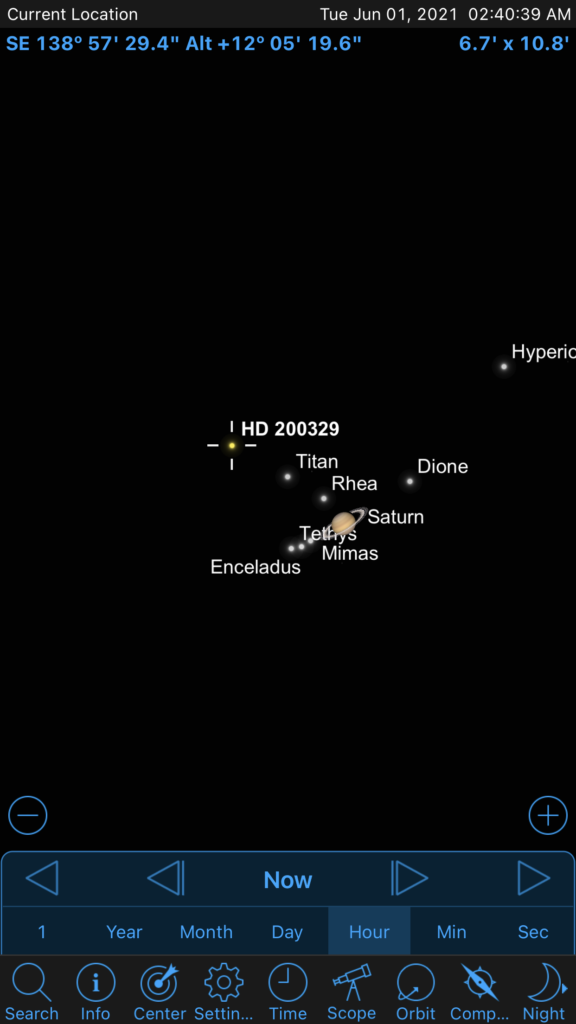
Meanwhile Bob was moving from object to object without the AZ-GTI mount. M5, M57, M10, M12 along the way. We easily split Albeiro although Bob was slightly worried about my eyesight as I initially struggled. We saw the head of Scorpius pop up above the tree line but we didn’t get M4 from the IMT Plateau and Antares only just made it above the tree line. So I decided to relocate my bins to another spot in the garden by the Sun Plateau so we got M4 through them. M17 was seen through he 100mm binos also, looking remarkably like a Swan! Finally as it got light just after 3am we nabbed Saturn, Jupiter and the Moon.
We could see the star HD 200329 and Titan along with Saturn
By the end of the night I was at 187 TPoints so not enough for me to be confident the whole sky was mapped, nor enough to fix the model and have Protrack running. I will continue the mapping when dark tomorrow night.
Just watched the ISS go over, first time for GingerGeek. Videoed it using the iPhone 8 and it came out great. Also have the lovely noise of an owl in the background.
ISS passes overhead
Started Tpoint at 11pm. Used 30 second exposures and image scale of 0.33 arc/pix. I am performing a 212 point Tpoint model.
Tpointing near a globular cluster
Well TPoint model complete, of course I forgot to initially do around 25 TPoints, adjust the polar alignment which is our in Azimuth by 2.1 arcmins and then rerun.
TPoint results
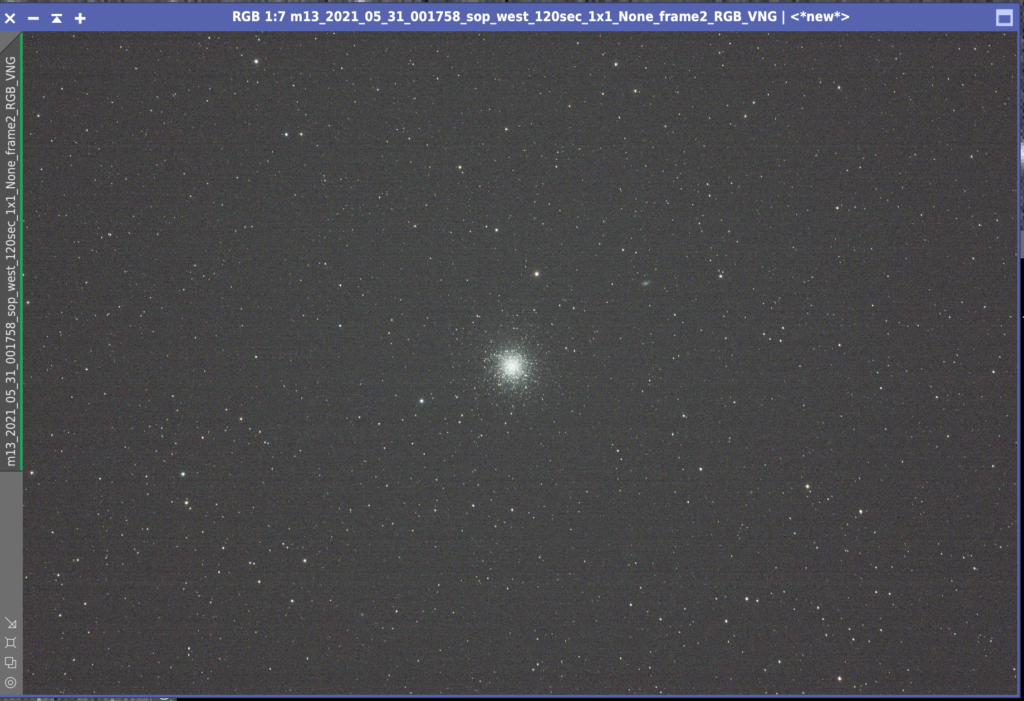
Meanwhile before we finished I ran one of GingerGeeks M13 images through PI as a single frame from his new camera.
M13 from GingerGeek (60 seconds, Mode0, Gain 0, Offset 30)
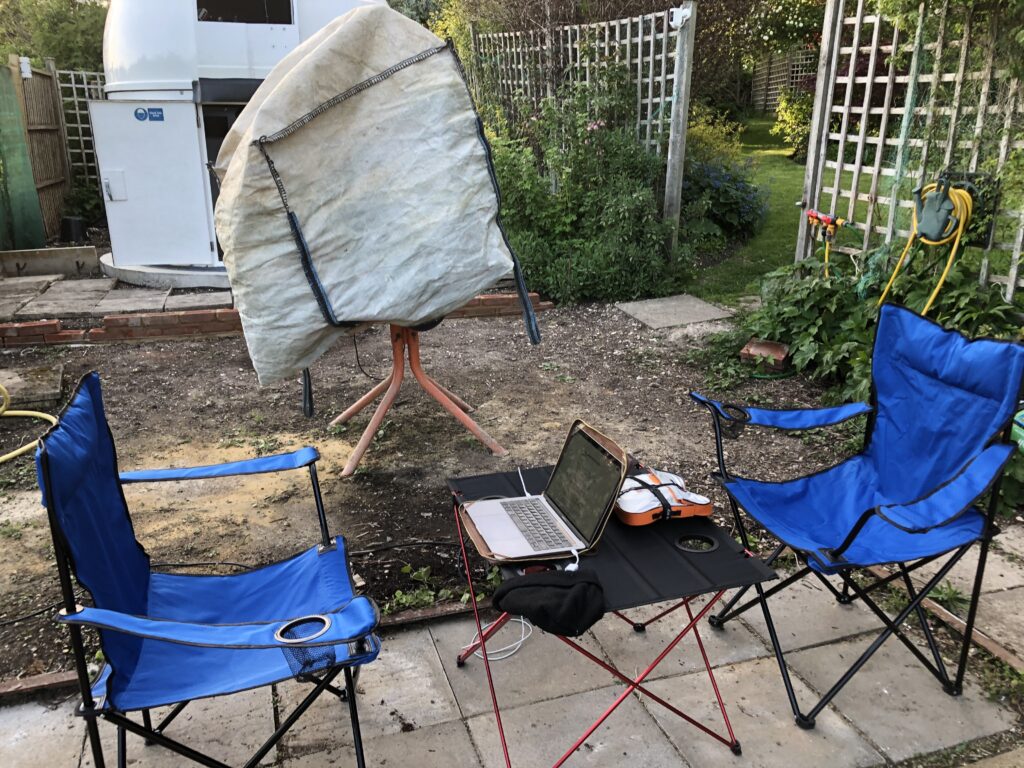
Another long pause between observations, after what seems like 3-4 weeks if not 1-2 months of storms, gales force winds and rain. However, tonight Bob came over and now that I have the new rotator installed with the new adapters I could use the 12″.
Ready for darkness
We setup under clear, warm and light skies. For the first time we put a couple of chairs and table down by the IMT3b. Bob helped setup the 6″ dob and the 100mm binos. We opened the dome and awaited darkness.
100mm Binos
I wanted to make sure that the rotator worked well, that the Field of View, FoV, worked within TSX and that I setup a small amount of Points on the scope. We also decided to see if we could visually see the Intellsat satellites and that I could track on them with the 12″.
Whilst waiting for darkness, Bob found what looked like a planet rising in the East, however it turned out to be Vega. We noticed in the corner of the IMT area by the IMT shed that you could see not only Polaris, now the Sycamore had been removed, but also low in the East and thus Vega at +11° altitude.
Bob then spotted Polaris first! Amazing! I normally find stars first, especially Polaris. However given Bob was in my garden and unfamiliar with the his bearings it was astounding he found Polaris so quickly. Well done keen eyed Bob 🙂
Soon darkness fell and we pointed the binos and scopes towards Intelsat. It became apparent quickly that we were not going to be able to eyeball it due to not having a good enough understanding of the surrounding star field. Meanwhile on the 12″ we slewed and quickly found the satellites. We then use the rotator to move the FoV so that we could fit 4 satellites on the chip which was pretty cool.
Intelsat and Thor satellites
We then star hopped to M5 with the bins, then with the 6″ and finally with the 12″. The view through he 100mm binos was of course fantastic, fair superior to the 6″ dob. The image through the 12″ showed a dense star field.
I then set about collecting a half dozen Tpoints just to make sure that objects we in the FoV, however the first slew proved the polar alignment was good enough to do this. I produced a small TPoint model and stuck to that for now. I will need to go out later this week and perform a much longer automated TPoint. For that I need to fix the dome this is currently jamming.
We then sorted the rotator out, making sure the angle and FoV represented in TSX was correct. After changing the x and y values for the FoV indicator it worked perfectly.
About midnight we saw the best fireball ever cross in towards South East just below Arcturus. It was very orange and stunning.
After then slewing the 12″ to M81 to make sure the rotator reflected what we actually wanted to see, Bob and I called it a night. The Moon was due to rise shortly.
A good night for us and welcome after the rain and a harsh Covid-19 lockdown.
A lot of progress since my last blog. I have gone from an empty shell of a dome to an observatory able to take a first light photo!
The first challenge was the dome rotation. It was binding. I quickly found out, with the help and advice of Dave Boddington, that in fact the dome was not circular and in fact it was oval in one axis by around 2cm. This was enough to pull the walls in causing the dome to bind. So a quick look around and I found the culprit. Where the concrete on one part of the dome base had settled unevenly there was a 1cm drop and as I had tightened the dome bolts to it, it pulled the walls inwards.
To resolve I unbolted the walls, put my foot on the offending side pushing it back in by 2cm and had Luke drill and bolt new holes. We then found some slate shims and shimmed up the part of the dome where the gap was. This fixed the problem and I now have a round rather than oval dome 😎
Slate Shims
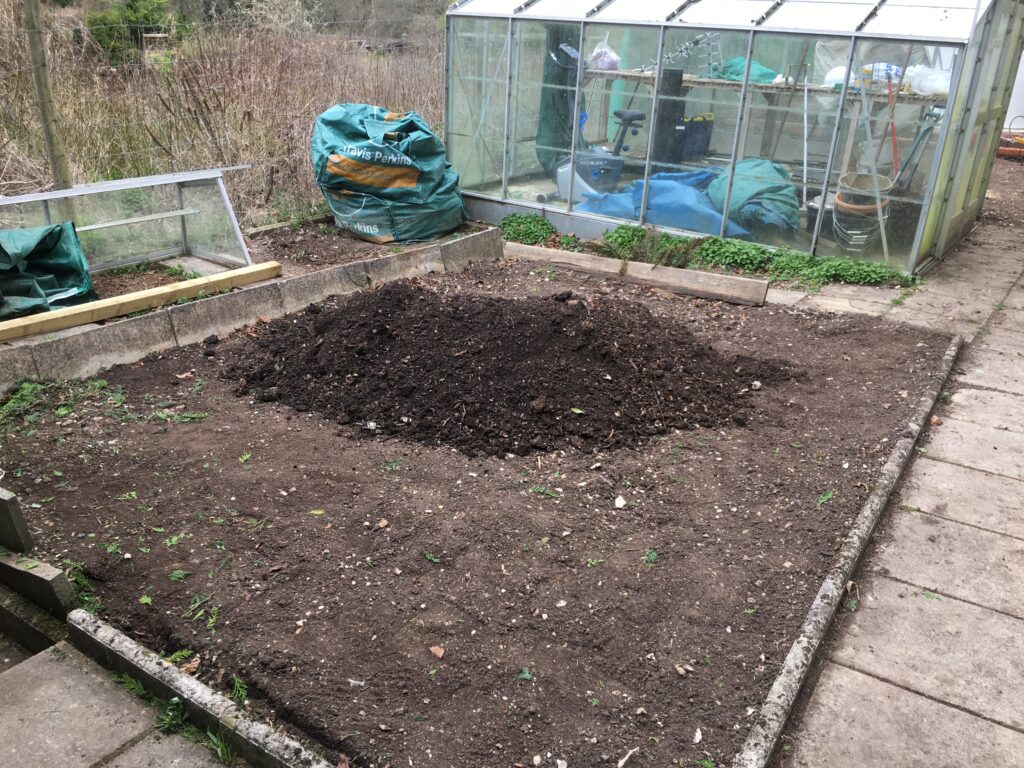
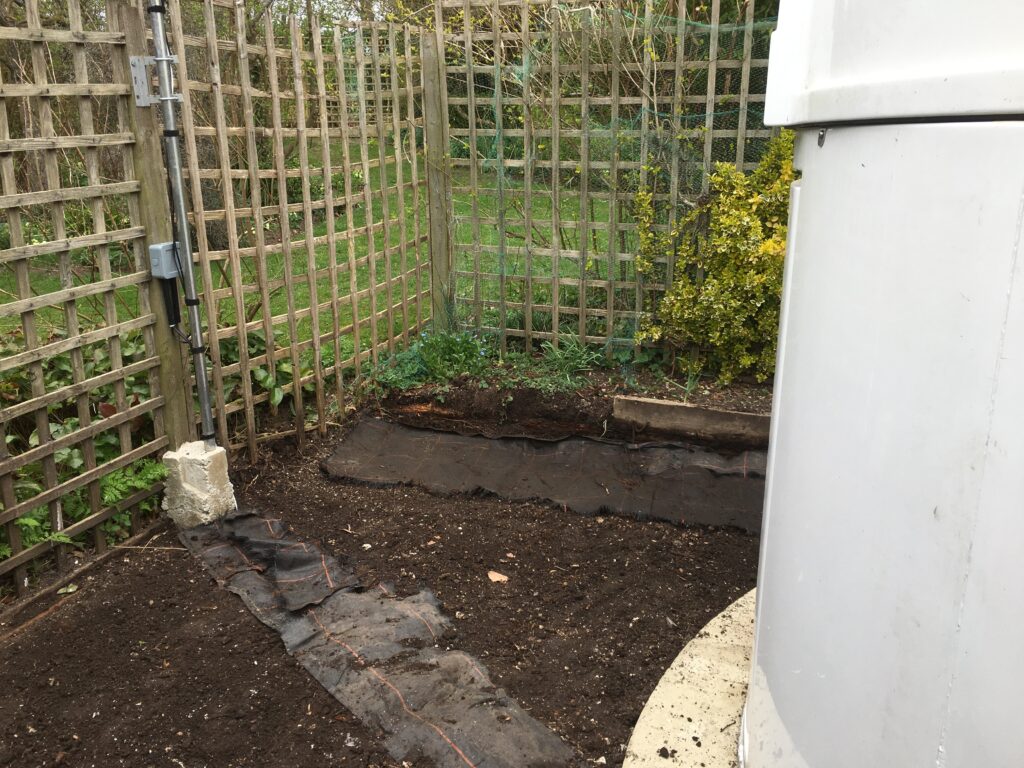
Next up was digging out the surrounding ground around the dome, as you can see here, the ground level on one side is around 4″ higher than the other. This would take some serious digging and many, many wheelbarrow loads of soil to moved.
More soil!
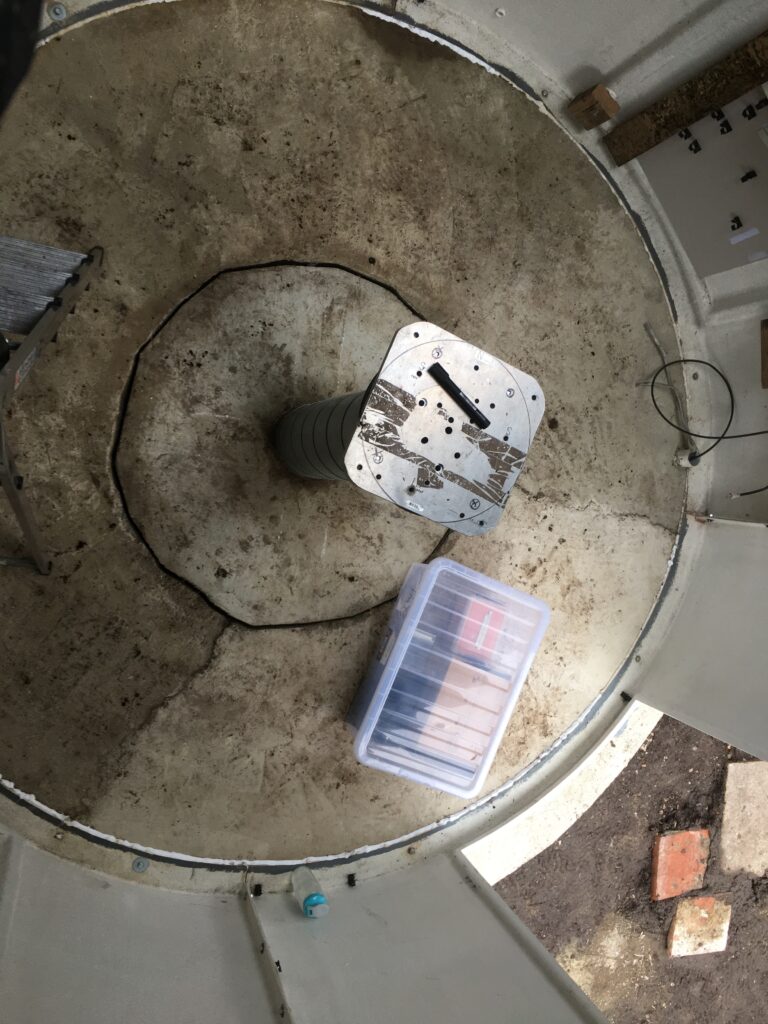
Now was there time for rebuilding inside the dome. I found the control wood board and fitted it back in place. We fed through the electrical wire from outside to both the inside wall and the pier.
Cabling
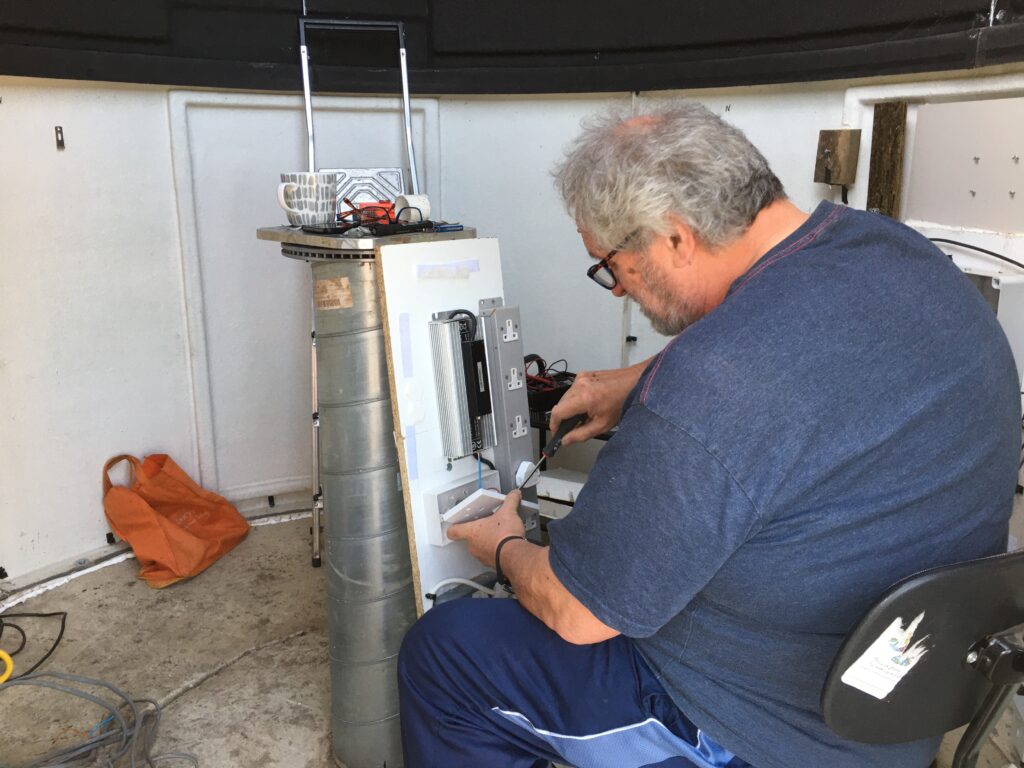
Bob then came round and did the honours of wiring the switches up, thanks Bob!
Bob the fixer!
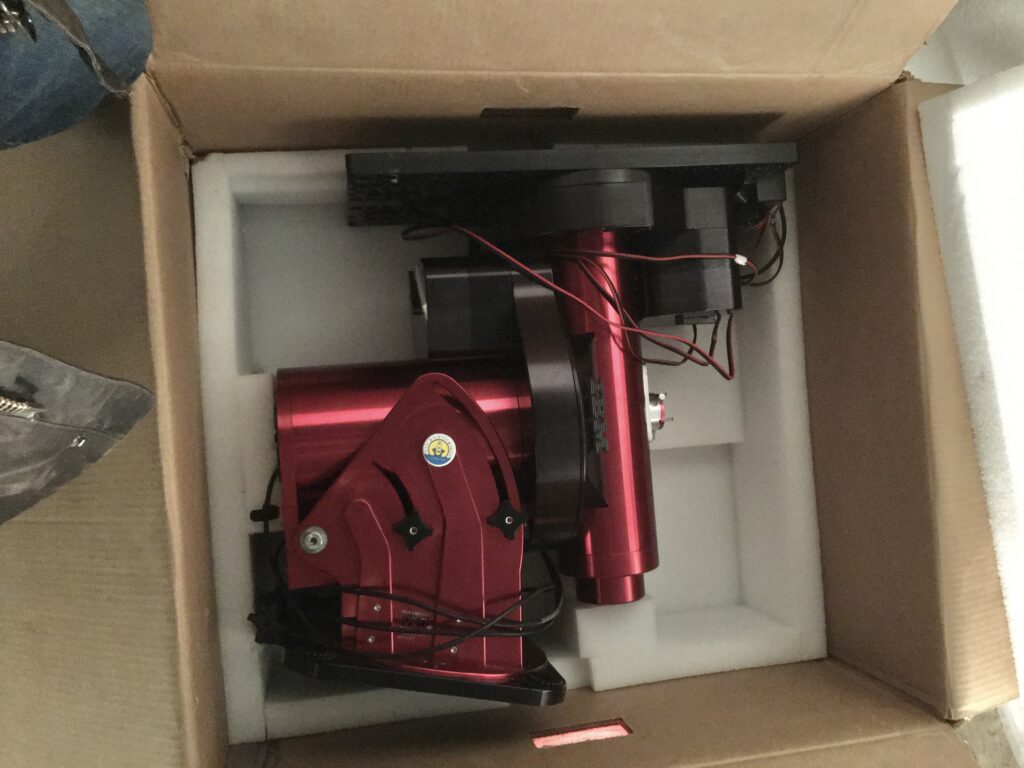
Now it was mount fitting time. 🥳
MEII
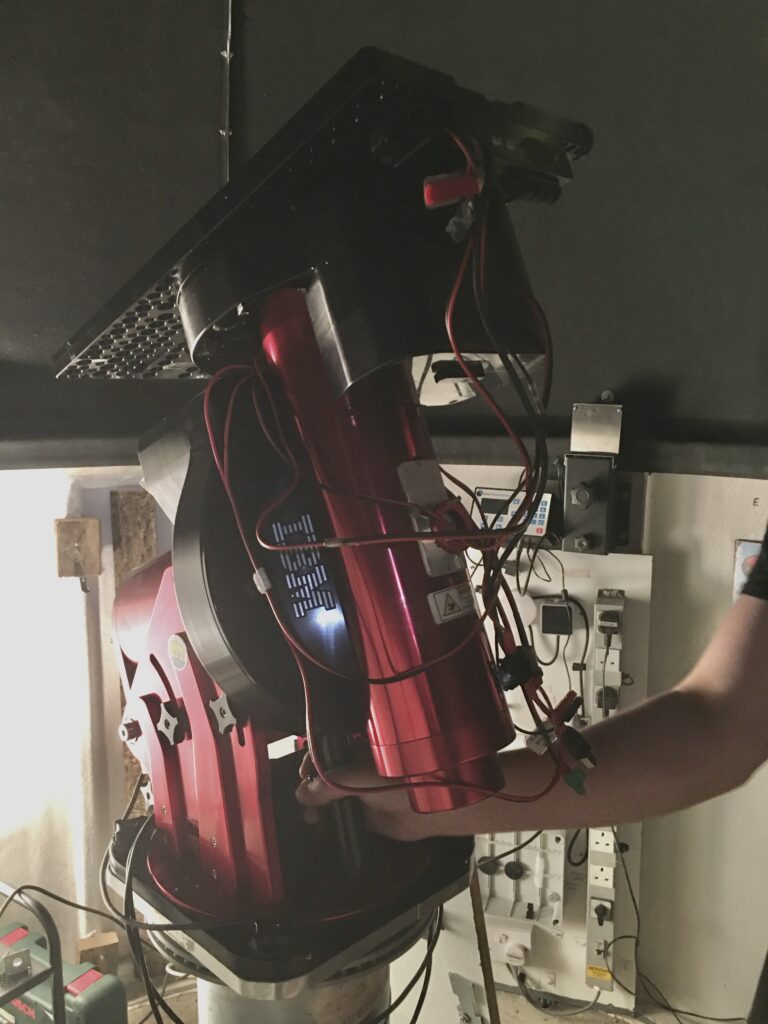
A few days later Luke and I performed the first fit, then I realised we had put it round the wrong way just as my friend Lawerence had done the day before at his 😳 so off it came again and we lifted it back on the right way round. That night was the test of how aligned were we to Polaris. Well it turned out not well enough. 🥺 I was off by about a degree. The MEII was at the end of its travel so I would have to redrill the mounting plate.
Installed
Another day, another task. The mounting plate came off, Bob and I drilled and tapped new holes to match where it needed to be and then refitted to the disc brake on the pier. We then hefted the mount into place and bolted down. That evening a quick test at night and the mount was roughly aligned very easily👍
Polaris 🙂
Meanwhile I brought the ethernet cable in from outside through the conduit in the floor and fitted to the internal ethernet plate on the wall.
Ethernet installed
Next we fitted the SQM to the new fence post previously installed.
SQM
Followed by the All Sky Camera (ASC) and the weather station (AAG).
ASC & AAG
We then dug trenches for the cables and used some spare guttering to cover and backfilled with shingle overlaid with weed matting. Later we will place further weed matting down and add more shingle.
Backfilled with shingle and covered
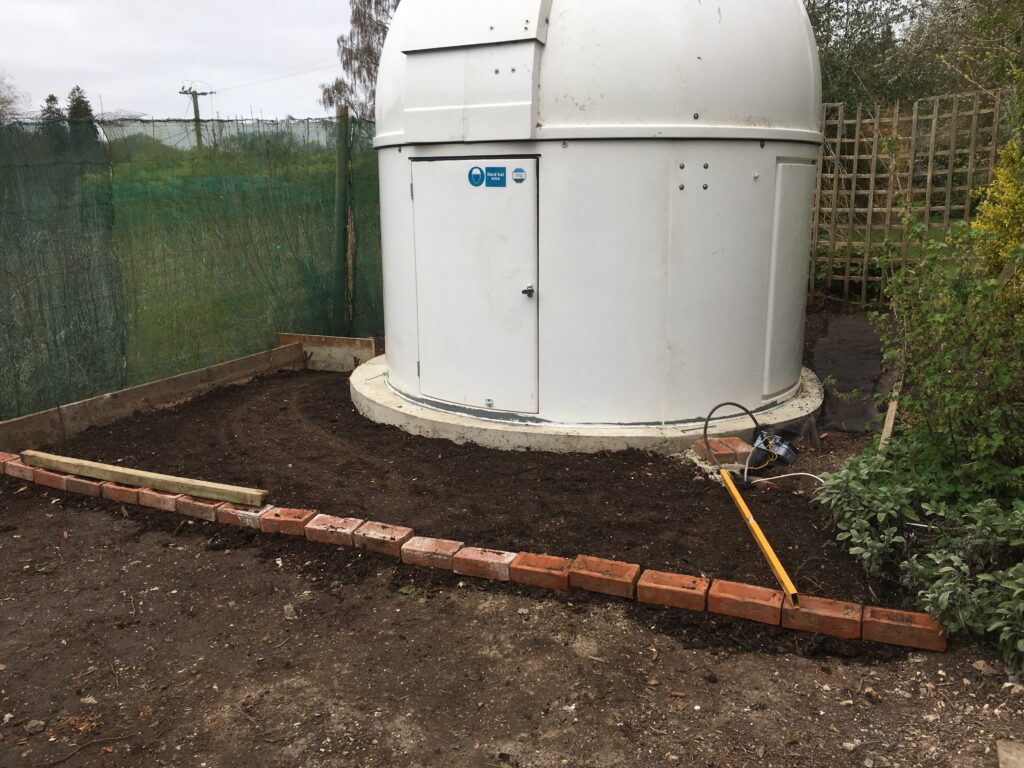
We then dug out some more of the soil to the side of the observatory and placed it at the front with a line of bricks to show where the step for the new patio would go.
Step location
The following day we brought in the 12″ OTA ready for fitting.
Officina Stellare 305 RiDK
It was the next day after bringing this in that we noticed the water pouring off the inside of the dome and poling on the dome edge. The MEII was stoked and the OTA 😱
Water 😱😱😱
The dehumidifier was retired from the IMT3b cupboard in the workshop and installed! I also put a small heater supplied by Bob in the dome to keep the dew point down. Luke then helped me fit the OTA.
Tapped holes
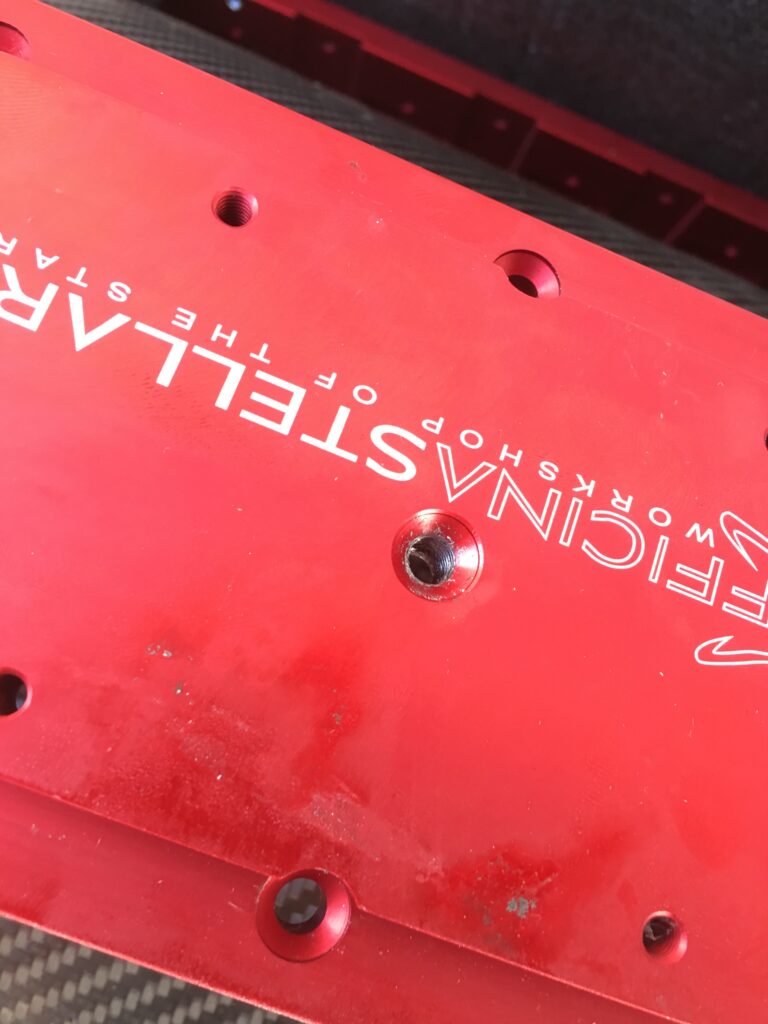
Like with all things the first fitting was wrong, I had forgot to reinstate the long 16″ Meade losmandy plate to allow the OTA to be gripped by all 4 thruster pins on the MEII Versa plate, so off it came again and then we had to find the bag of screws that fitted the taped holes.
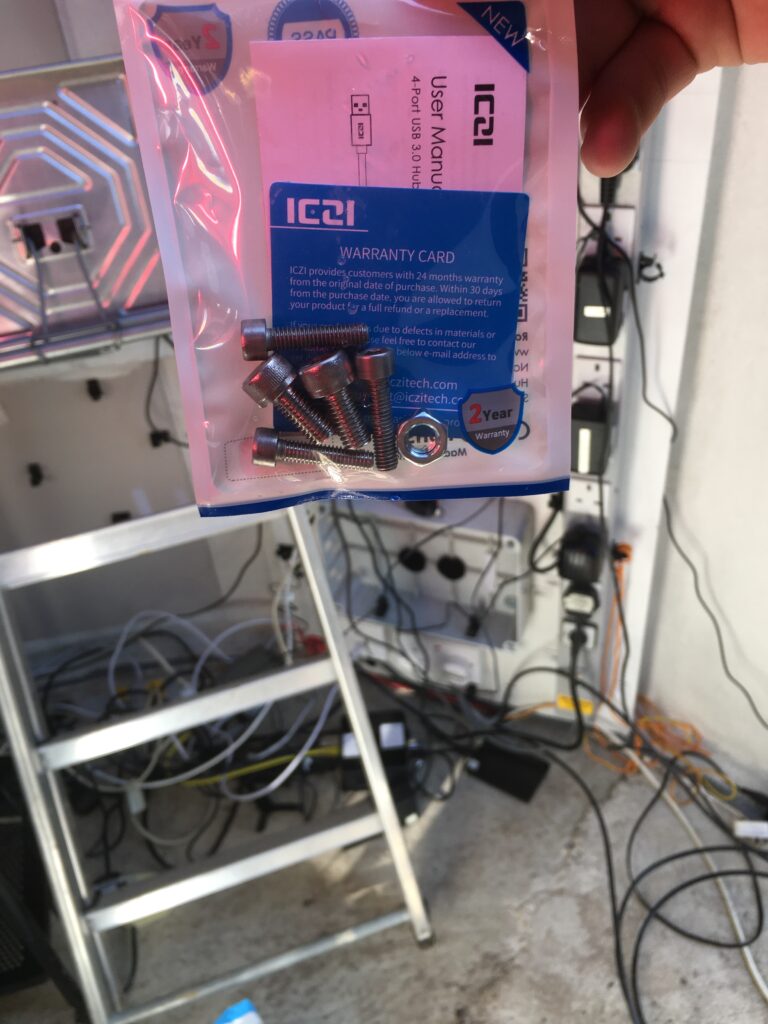
Screws
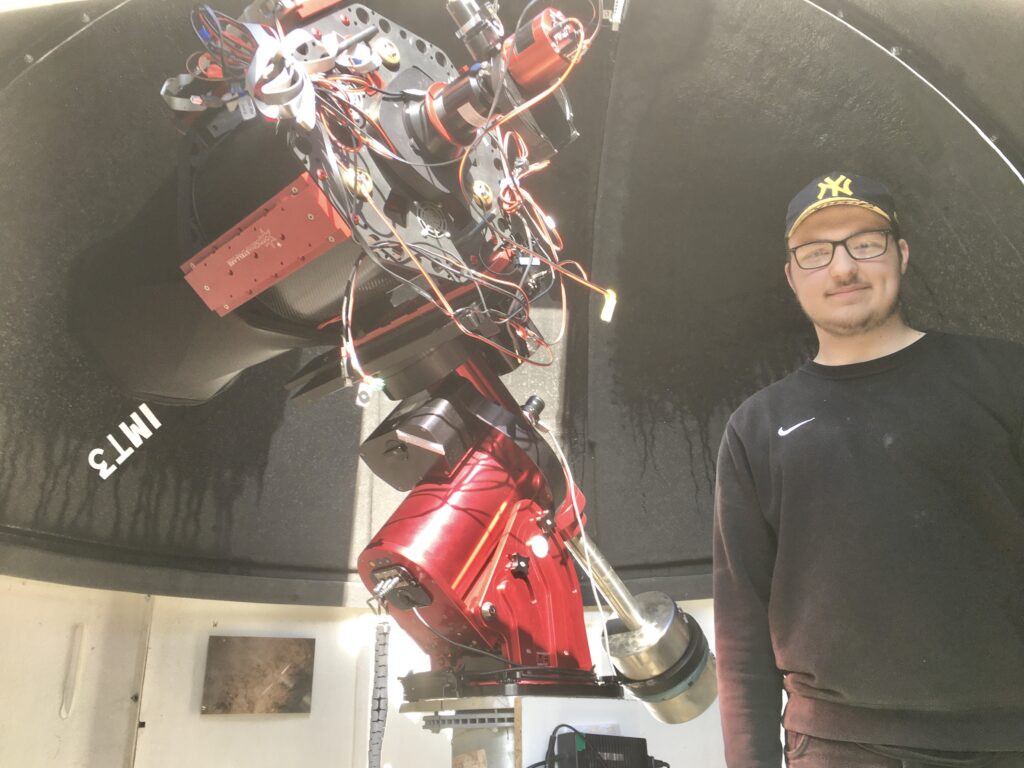
Once found we refitted the OTA, placed the imaging train on, installed the Officina Stellare TC-04 controller for the OTA, fitted the Hi-Tec astro hub and balanced the scope. 28KG of weights were added and the telescope was installed.
Luke and IMT3b
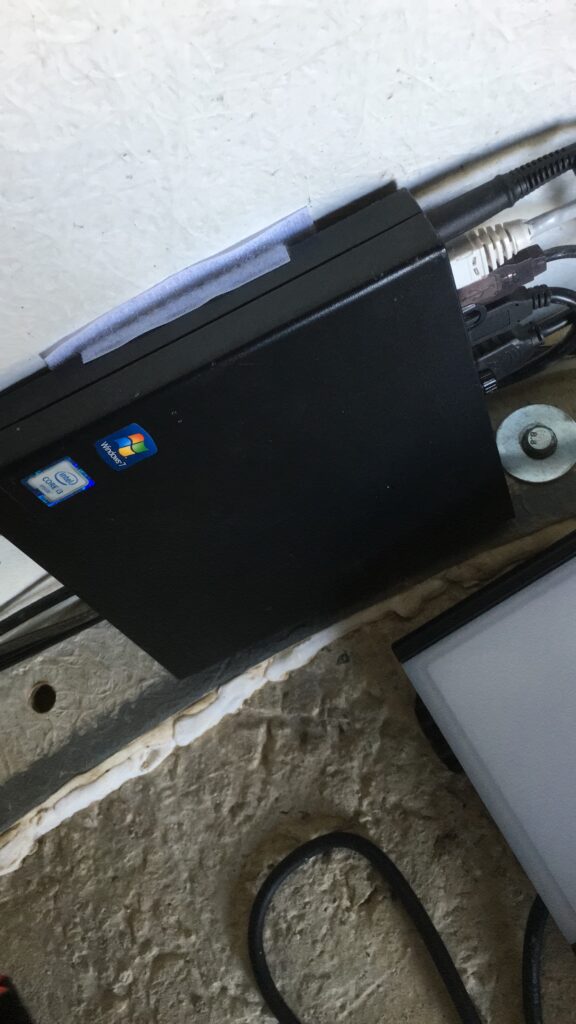
Another day past and my other friend came over and helped install the Nuc, Mac, Raspberry Pi and the Intel Windows PC all to control the dome, telescope and various cameras and weather station devices.
One of the computers
Now the dome could be remotely controlled from outside 😉
Remote control
Last but not least I installed the power for the mount after heading indoors to find the mount was not connecting.
Power control
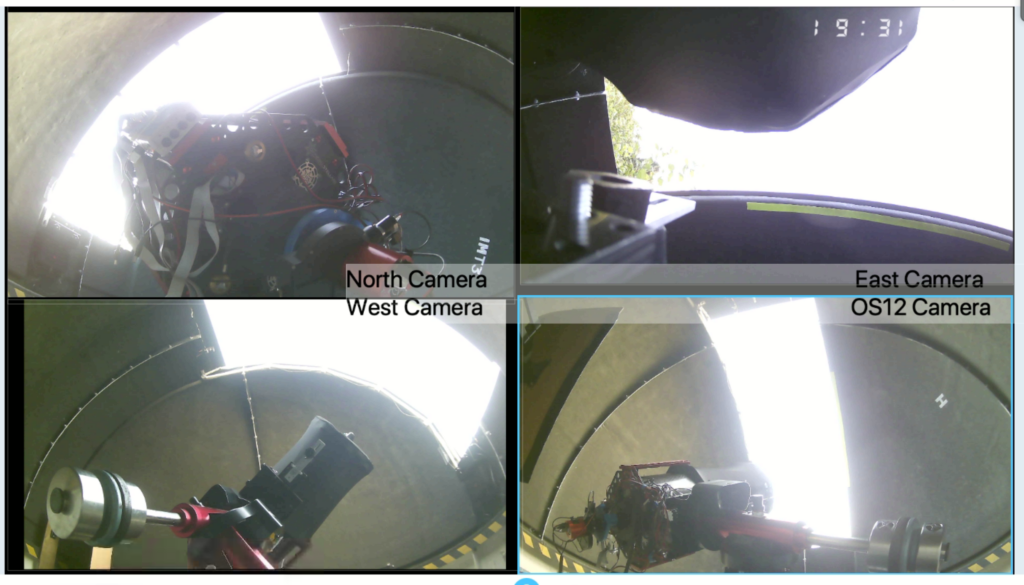
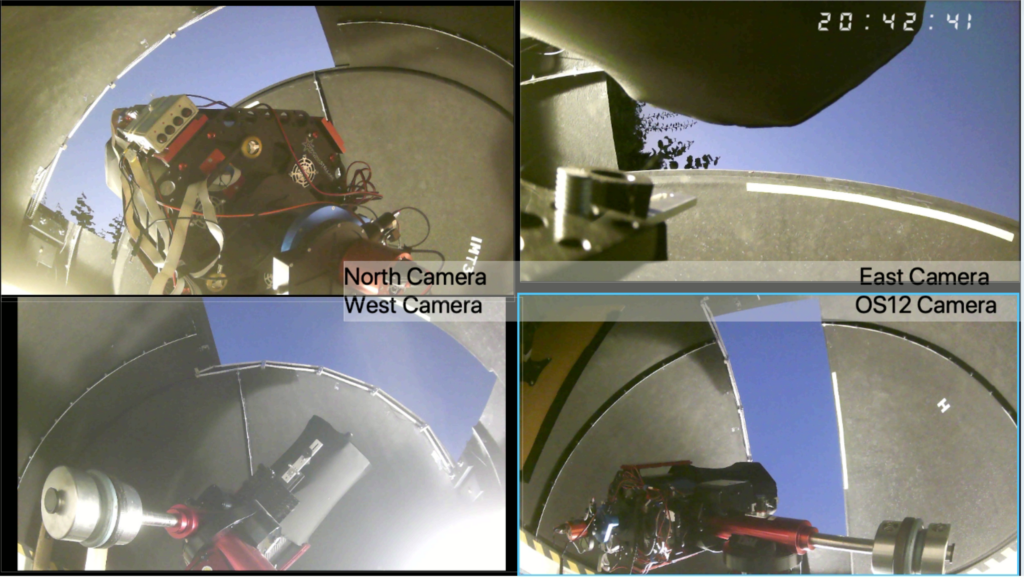
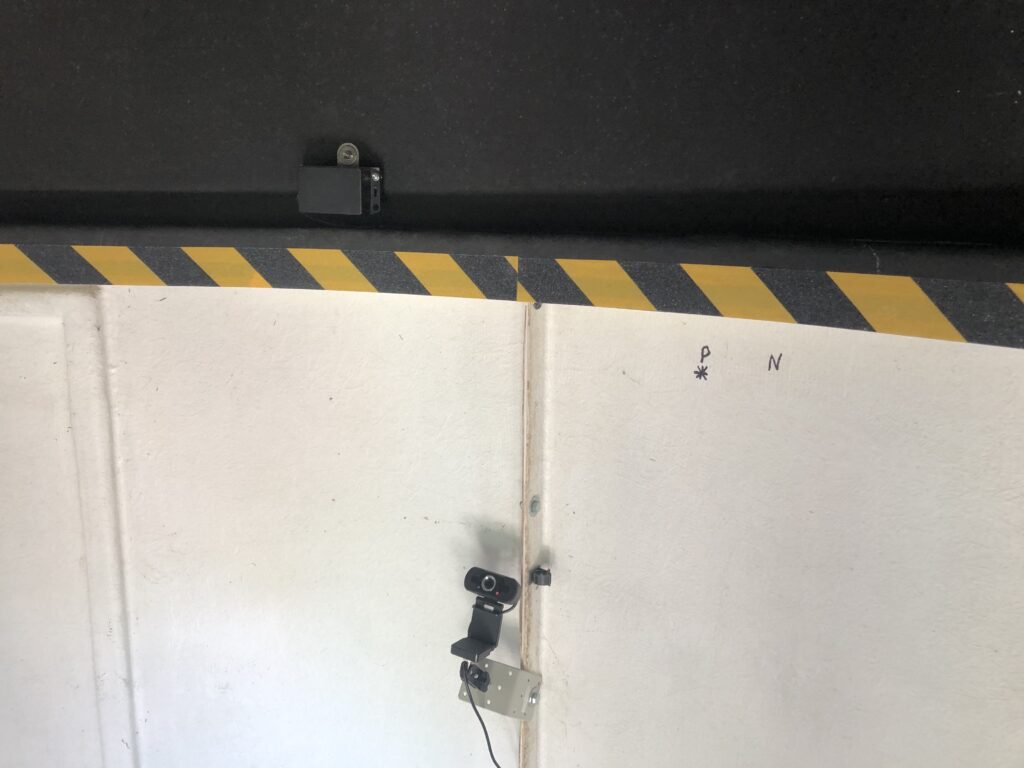
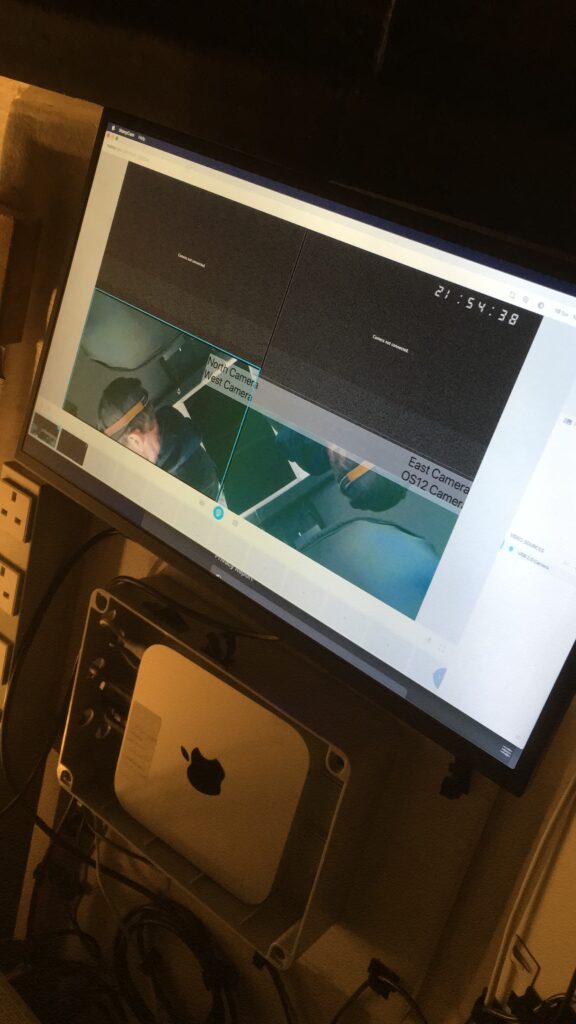
I also installed the cameras for the North East and West positions in the dome to view the OTA in action and one on the end of the 12″ OTA to see where the slit is.
Cameras
Then this morning I painted around the edge of the dome with fibreglass sealant.
Sealant
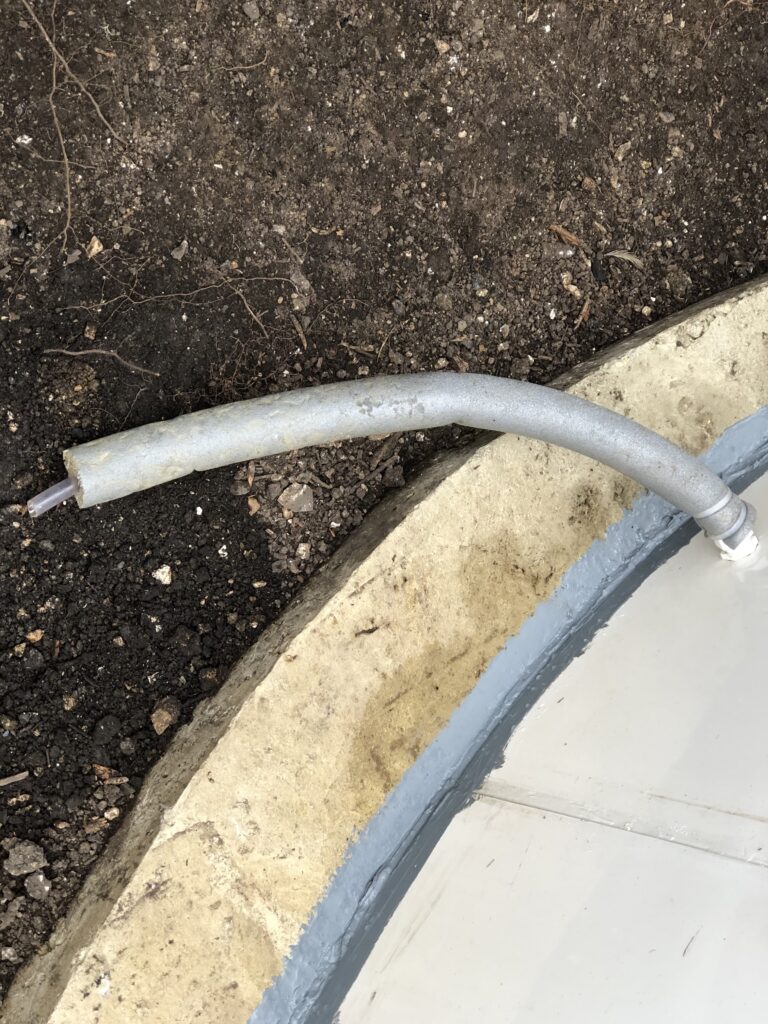
I also noted the dehumidifier was working and nicely draining the water outside the dome.
Dehumidifier pipe
Next up is commissioning the scope to get a T-Point, but here is my very blurry, not entirely correctly pointing first light image of an area of sky in Orion.
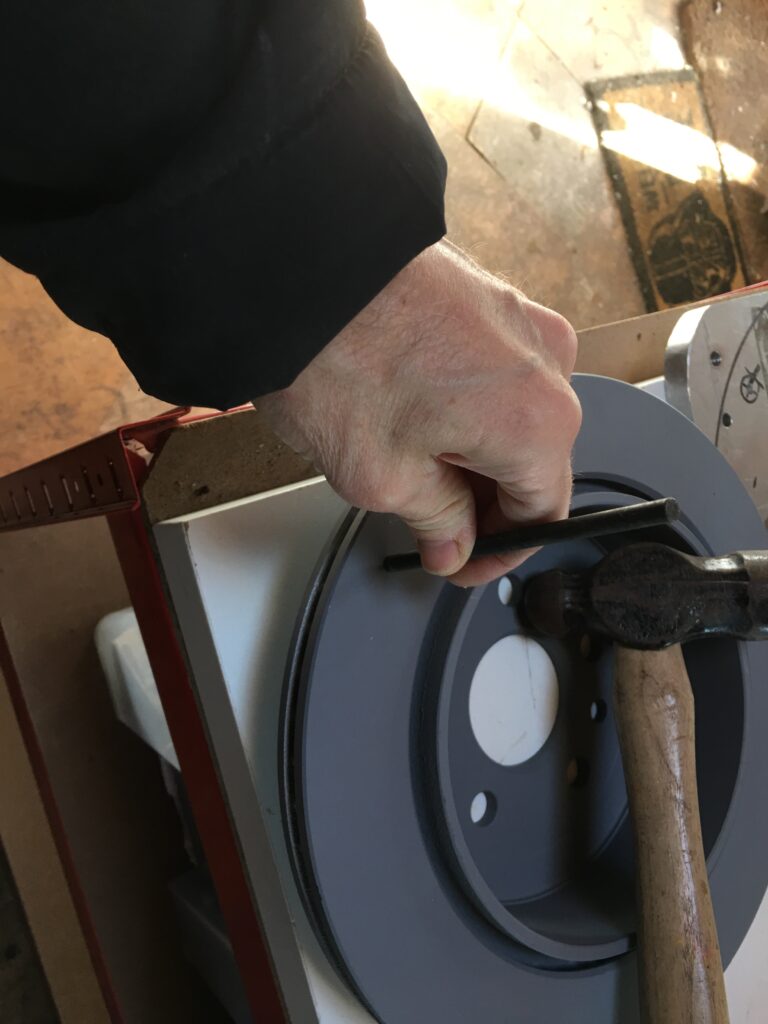
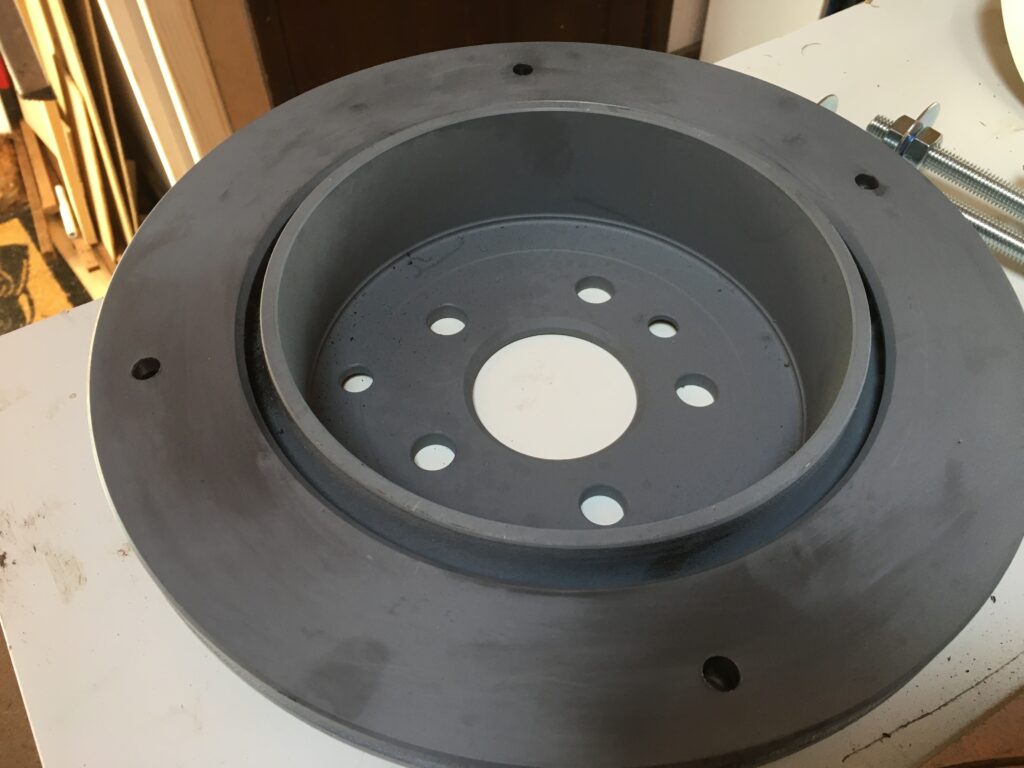
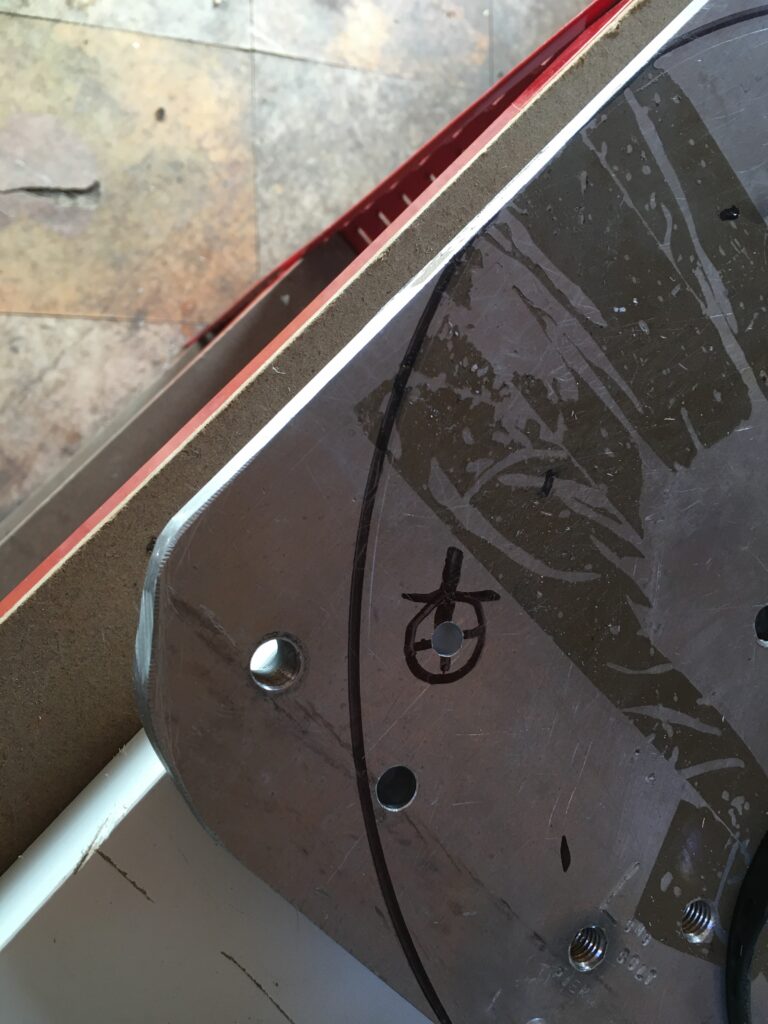
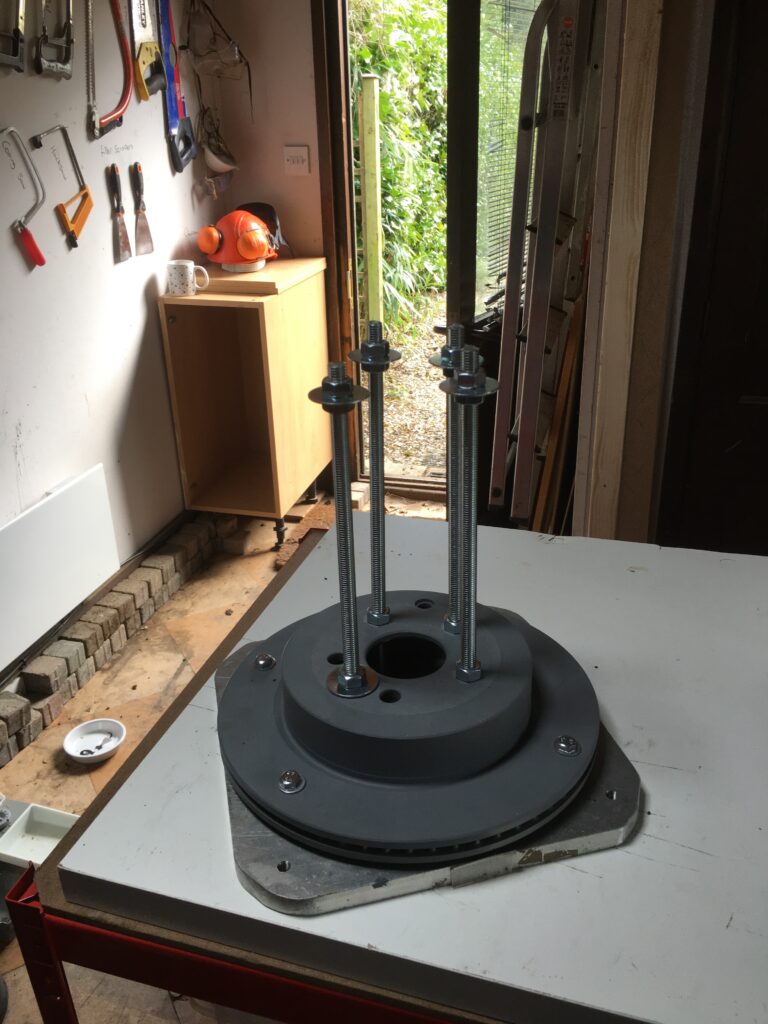
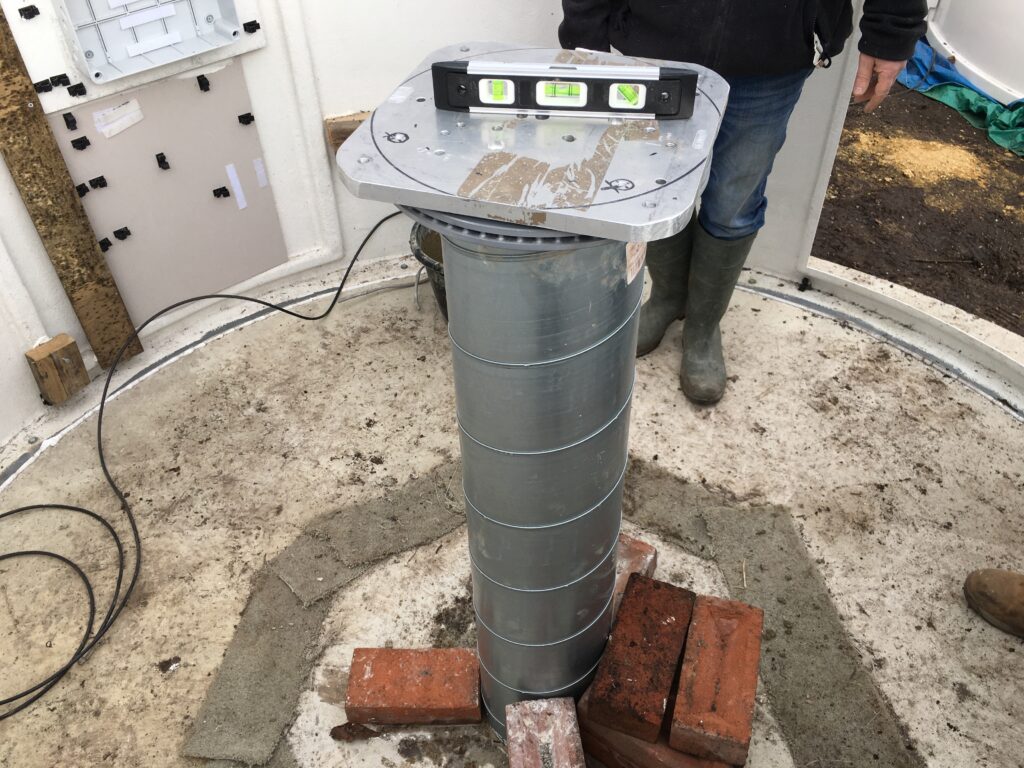
Today was a big day. Not only was the plan to finish the concreting within the dome, in this case the pier, but also to bolt together the dome itself and get it fitted. The first port of call however, was to grab the newly purchased Land Rover disc brake that had been sprayed with 4 coats of primer by Luke and cut and fit threaded bar to it with washers and nuts to hold it in place inside the concrete pier.
Marking the holes on the disc brakeDrilled and ready for bars
We then drilled and taped holes in the MEII adapter plate that had served mew well sine 2008 when it was installed for the original ME.
Drilling and taping MEII plateCompleted
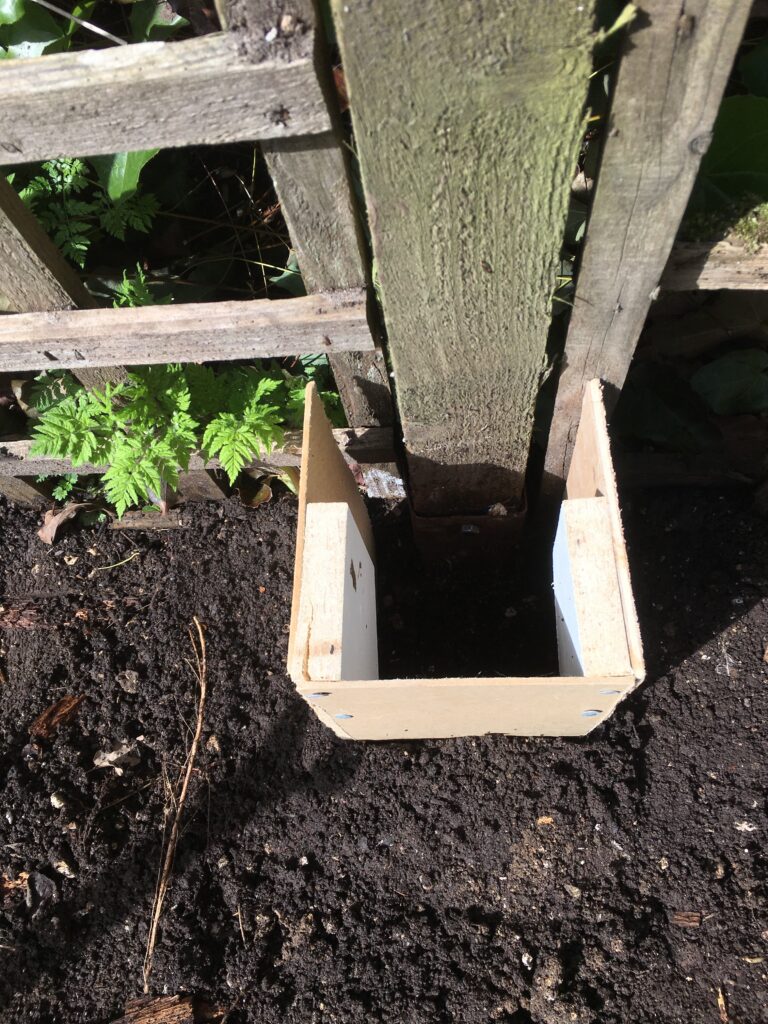
Next we created a former for the slightly wobbly post next to the observatory where the weather station pole was to be installed..
repairing the fence post for the weather station
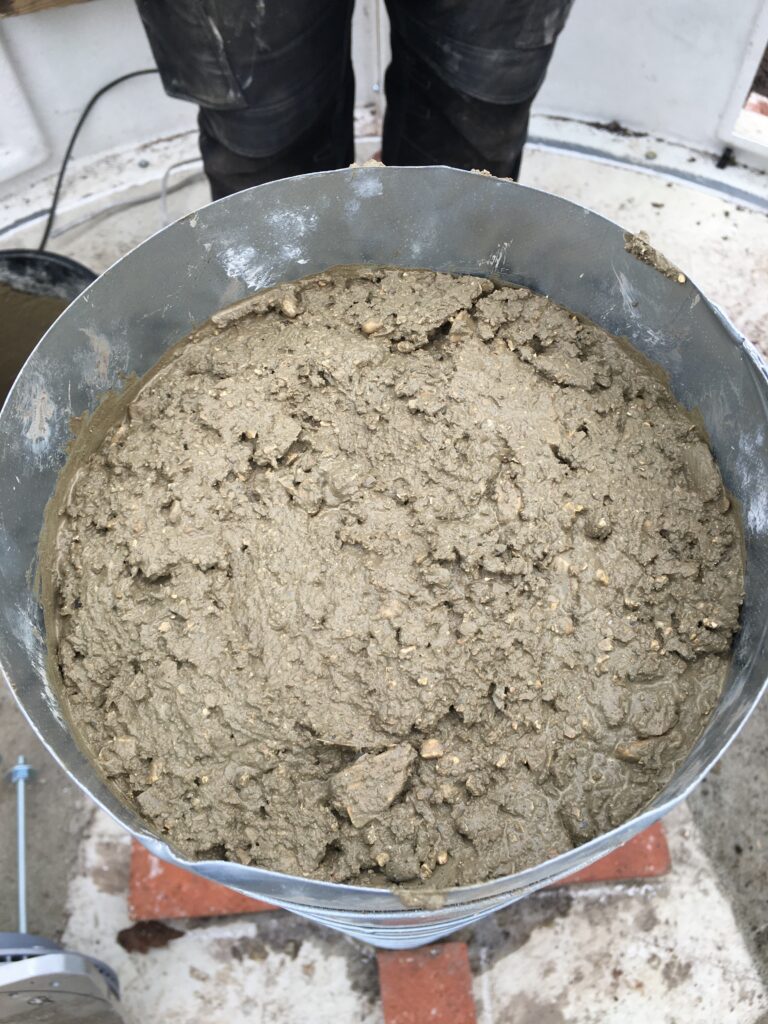
Then we started to concrete the pier. After 1 load the pier was looking a little more full.
1st load
Then after 2 loads it was nearly there. With 1 more bucket of concrete it was ready for the disc brake to be fitted with the MEII adapter plate.
Filled to the top
It sunk in very nicely and we aligned just West of North to account for Polaris. We moved the pier slightly to make sure the top plate was level.
MEII plate level on new pier
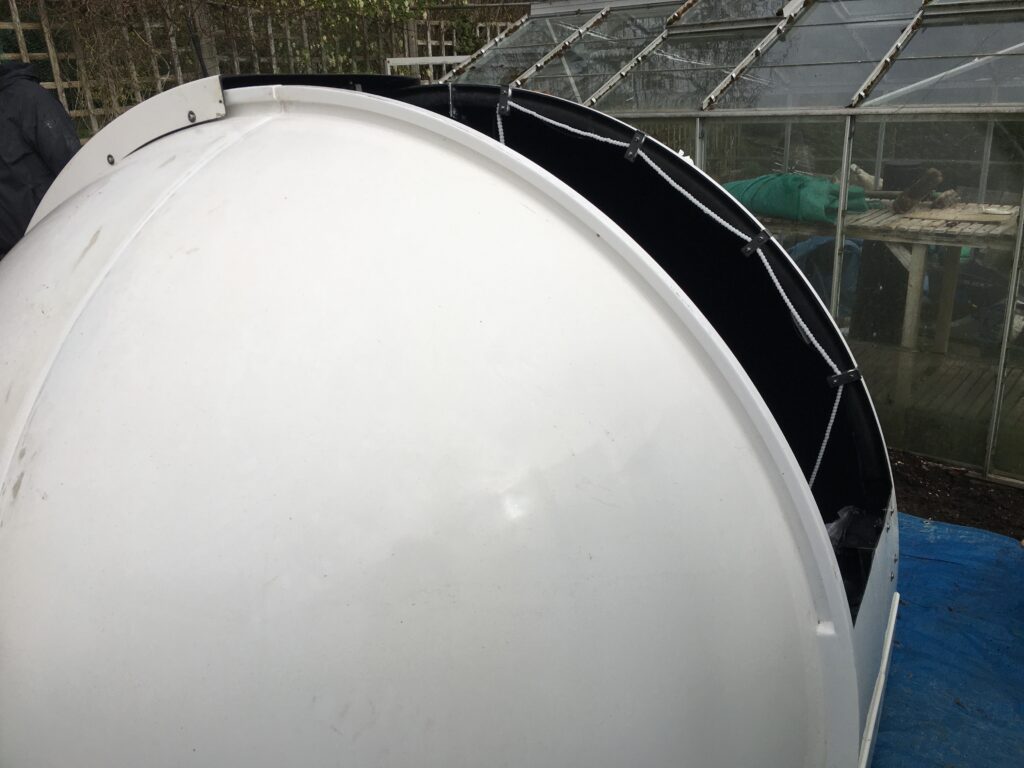
Next the dome segments were prepared in the same fashion as the walls with electric sanding and then using mastic and bolting together.
dome prepared
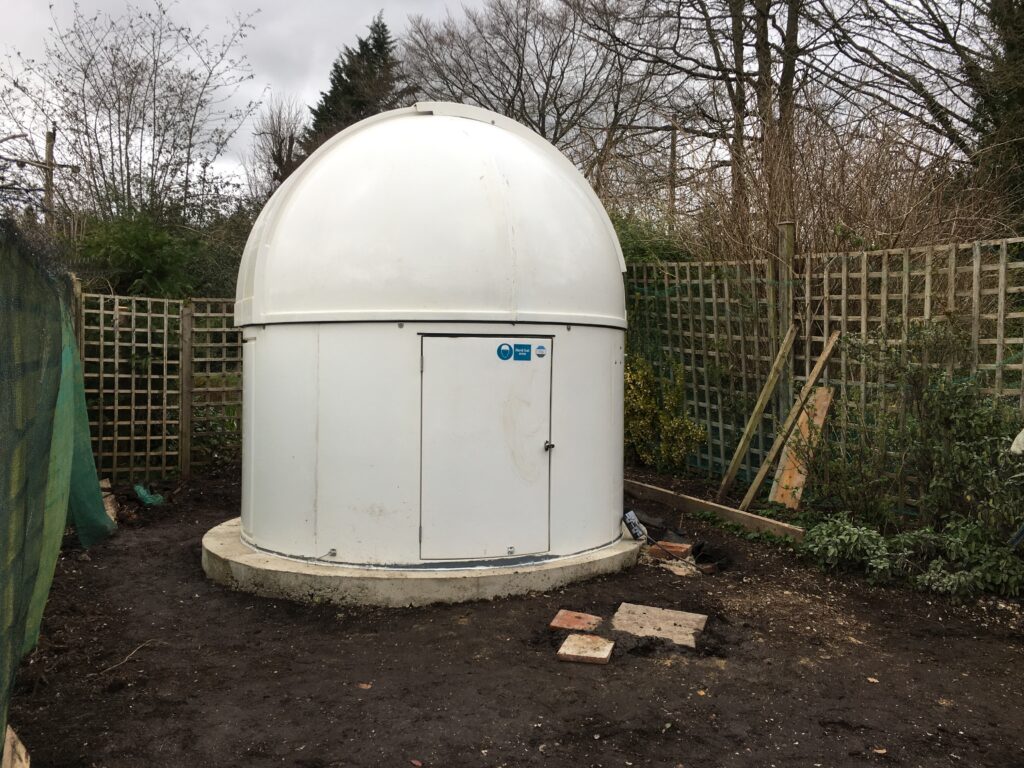
Next Helen, Luke, Ezri and I lifted the dome onto the observatory base. Job complete!
IMT3b 😎
Well almost, well not at all, there is still loads to do. Not only does the dome not rotate fully, due to the walls not being perfectly round (I need to resolve) but also the shutter drive needs fitting and the dome rotation drive and all the electrics and……. well you get the picture 🙂