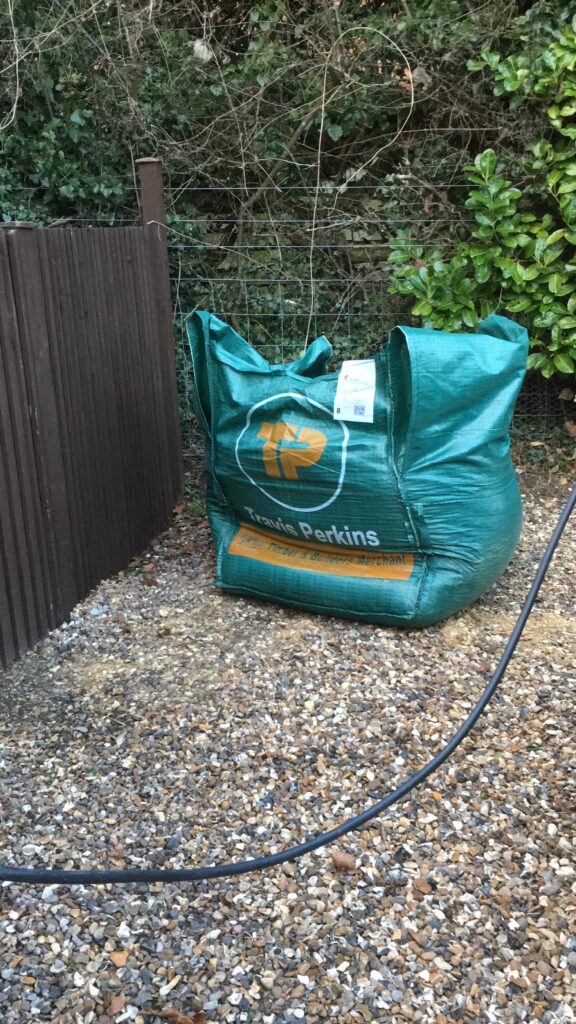
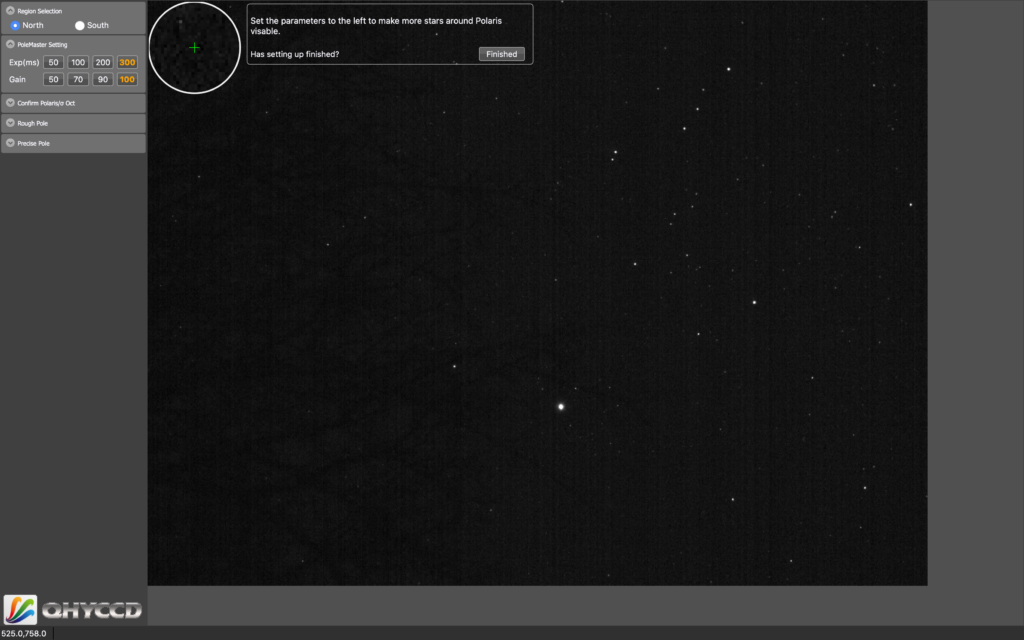
Another weekend, another day of concreting. Once done, there are 3 patios to fit, another observatory, rolloff, a Summerhouse and a workshop! That’s a lot of concrete and cement mixing!!! So you guessed it, more ballast!
More ballast!
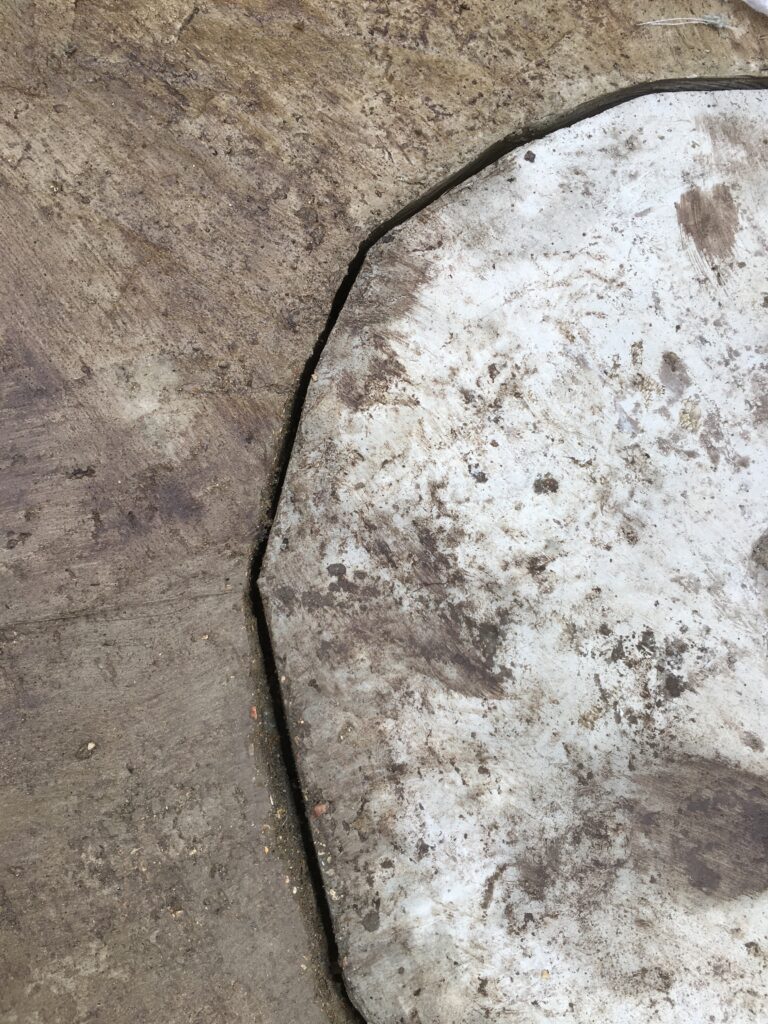
Similar time as before 8:41 am and Luke and I removed the carpet from the old concreting which separated the block from the observatory base. This was carpet and plastic. We worked out that removing it was hard so the next time we would remove after 4-8 hours, time for the concrete to set and not slump but not so hard you have to use a cold chisel and lump hammer to remove.
Mind the gap!
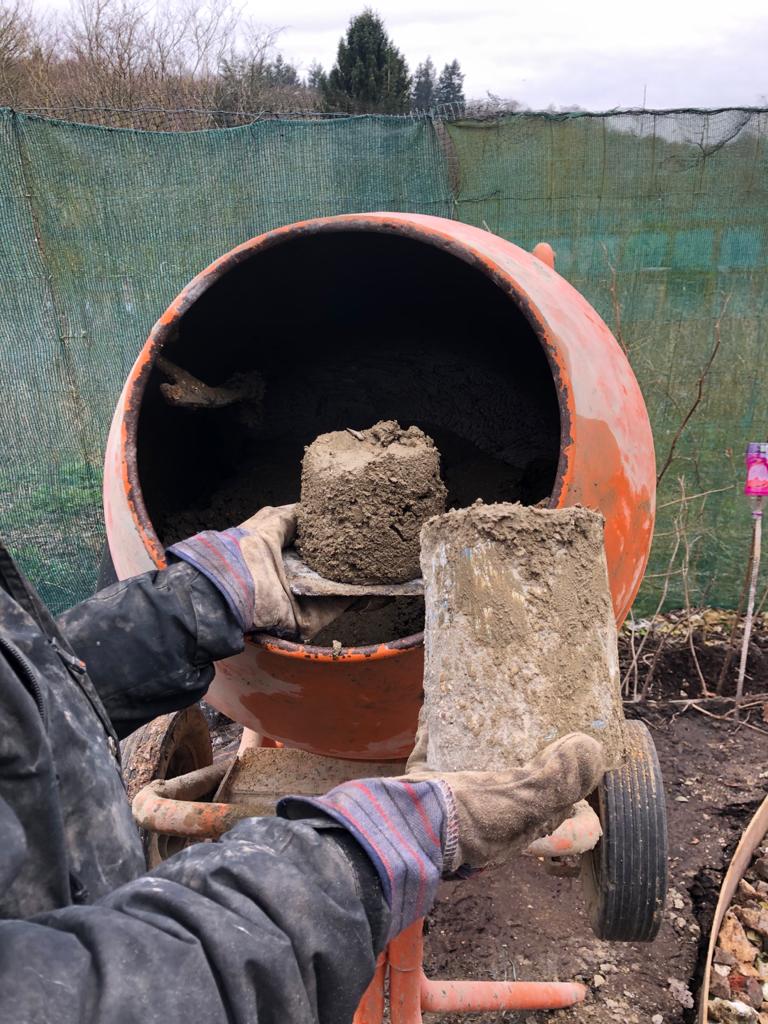
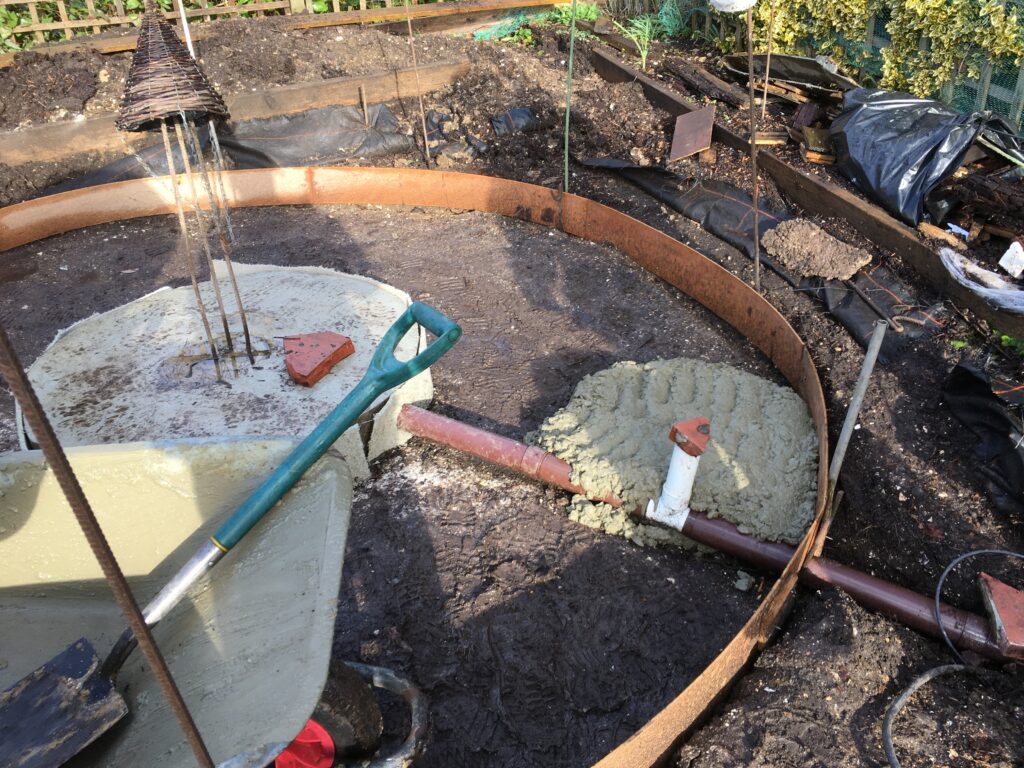
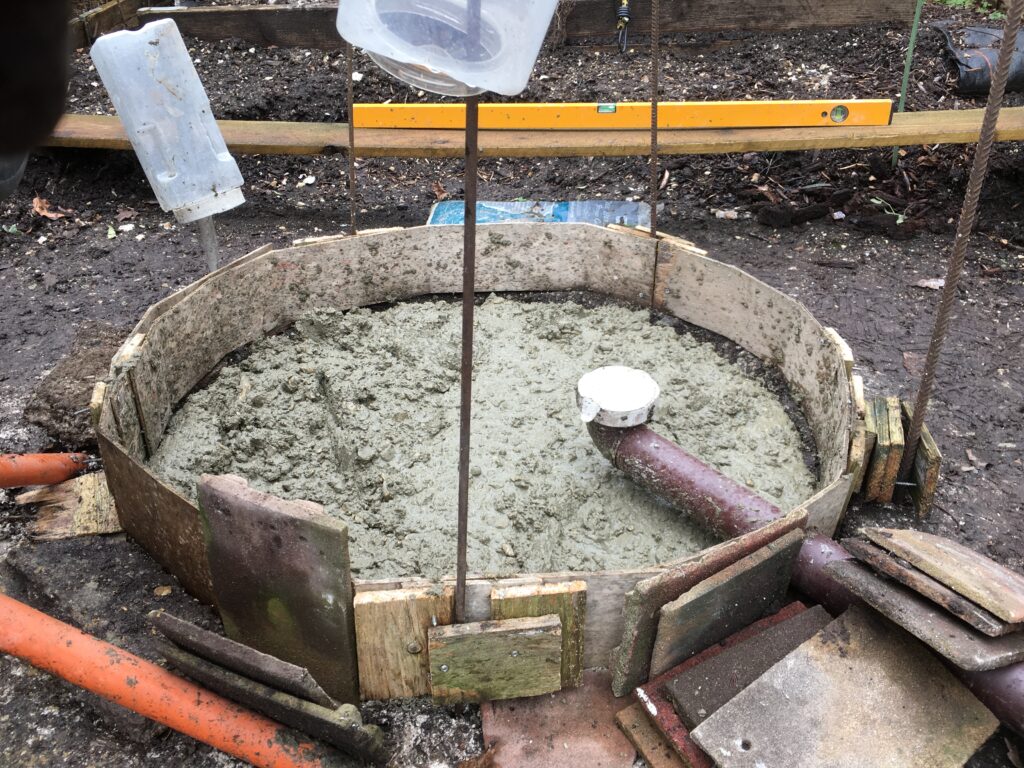
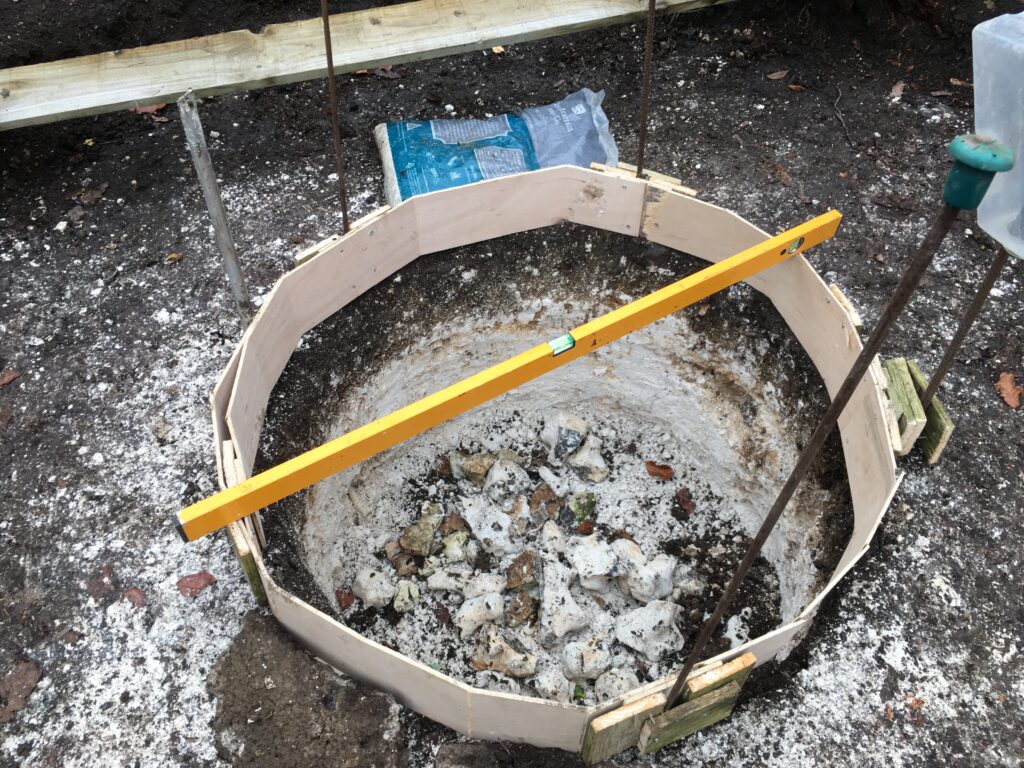
Given the depth of the South side of the observatory base, we decided to place a lot of flint material on the base, this again would reduce the need for so much concrete. Another slump test and another successful mix.
Slump test
By 10:40, some 2 hours later we were done. The join was a bit rough but we could chisel that down later if needed.
Finished observatory base
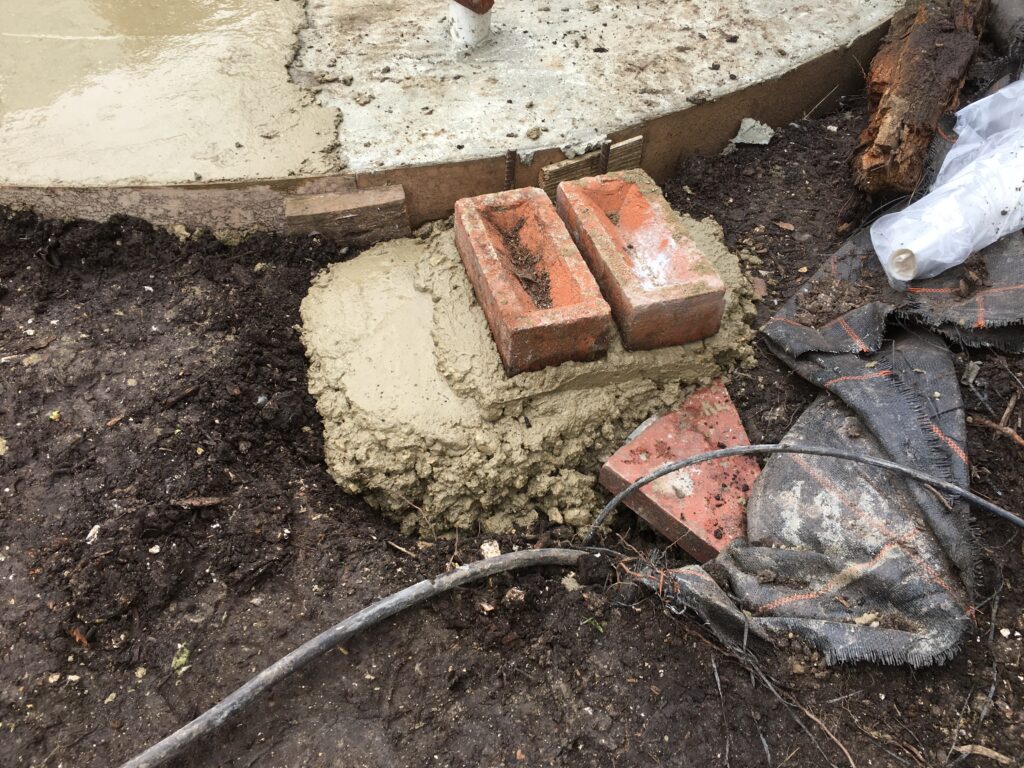
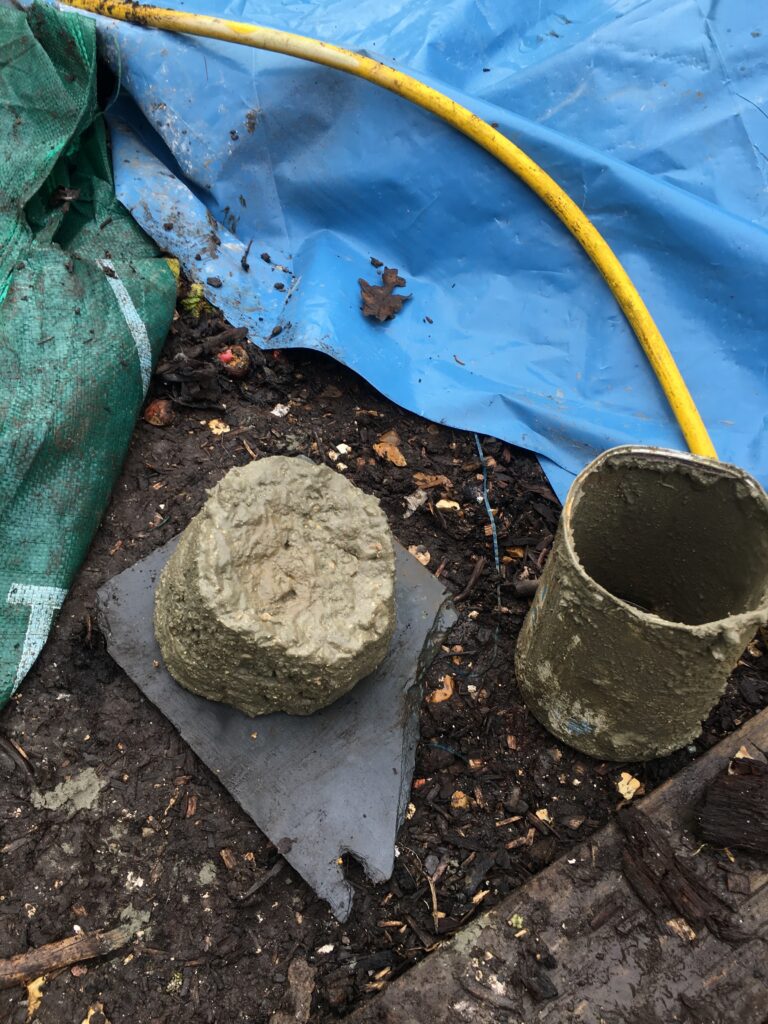
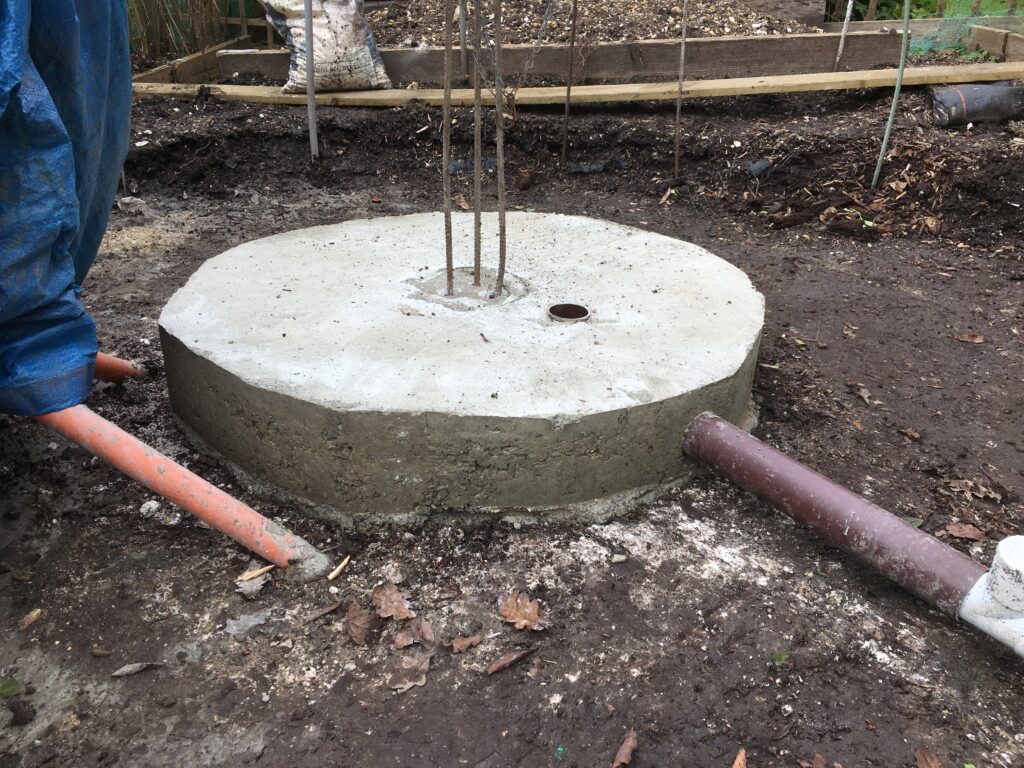
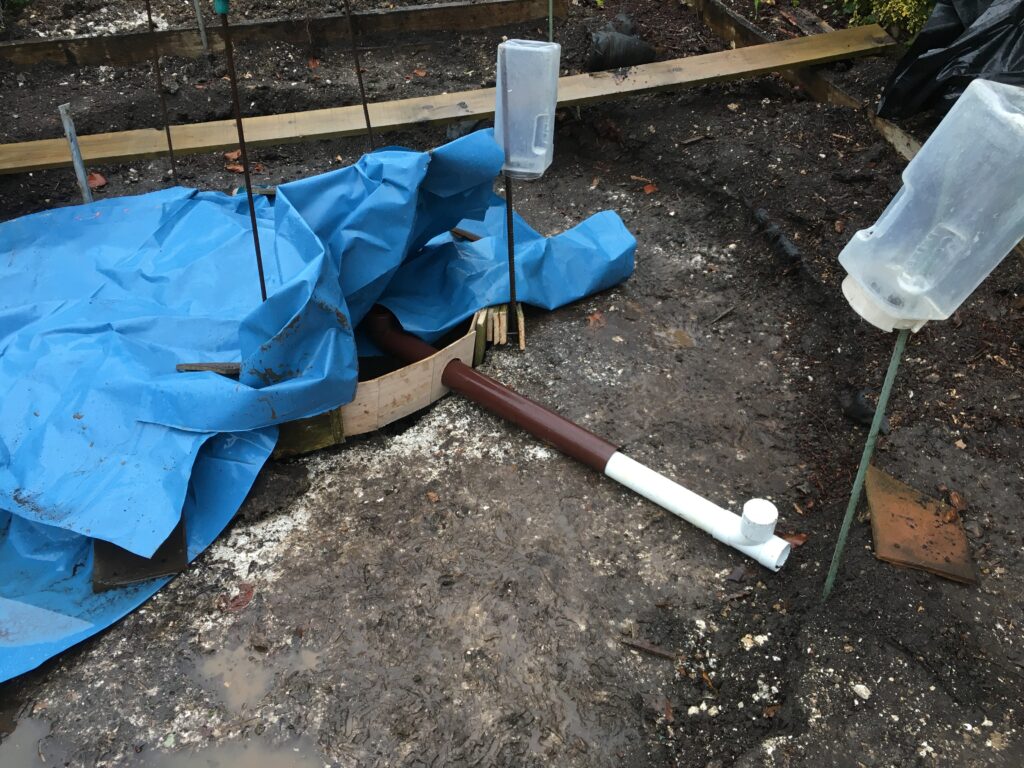
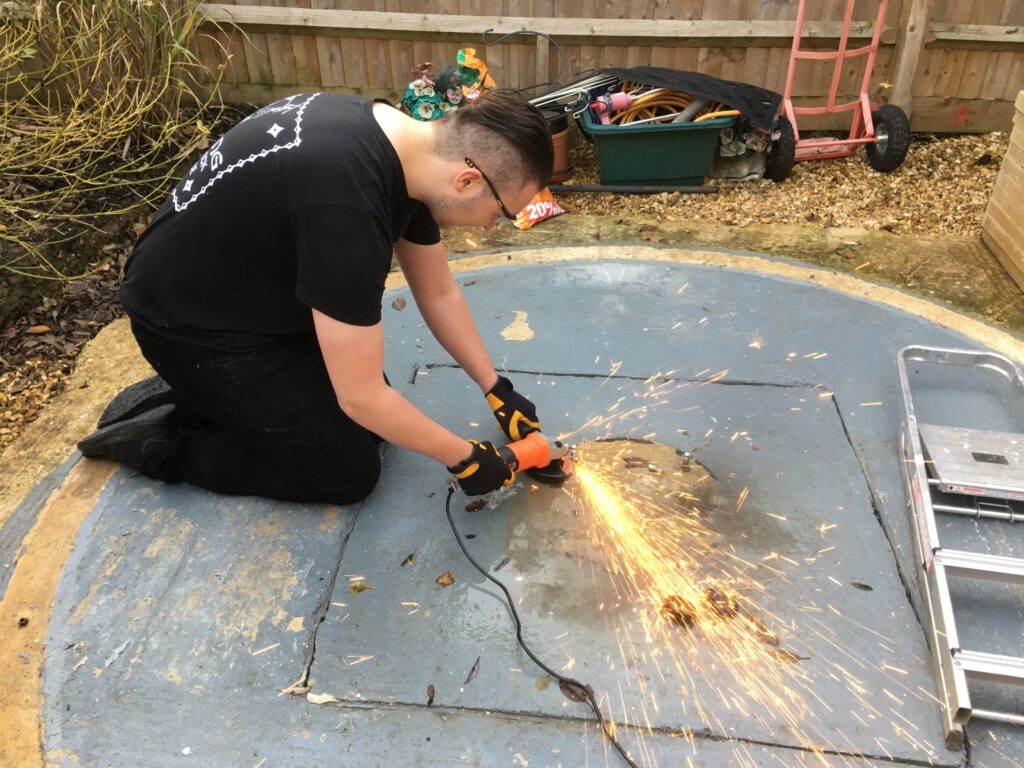
The spare cement was used to concrete in a manhole cover that was not concerted in by my house, also I used some to start the base of the small brick pillar nicknames Fraggle Rock by Gingergeek and 2 bricks for the electric to be fixed onto later.
Fraggle Rock
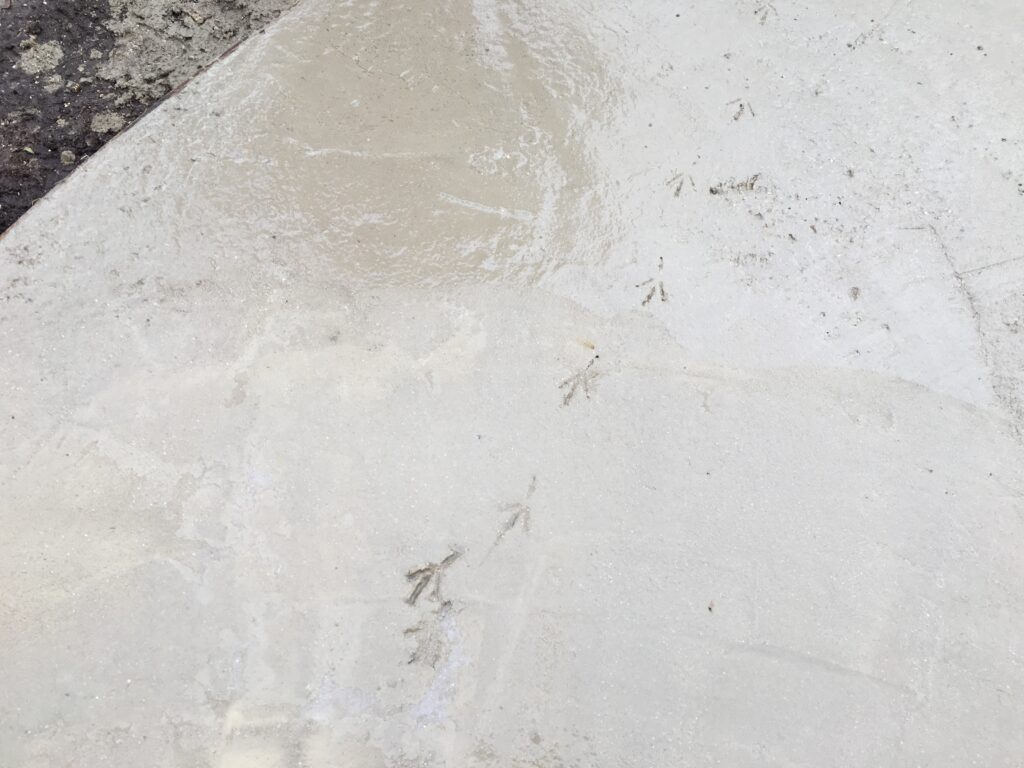
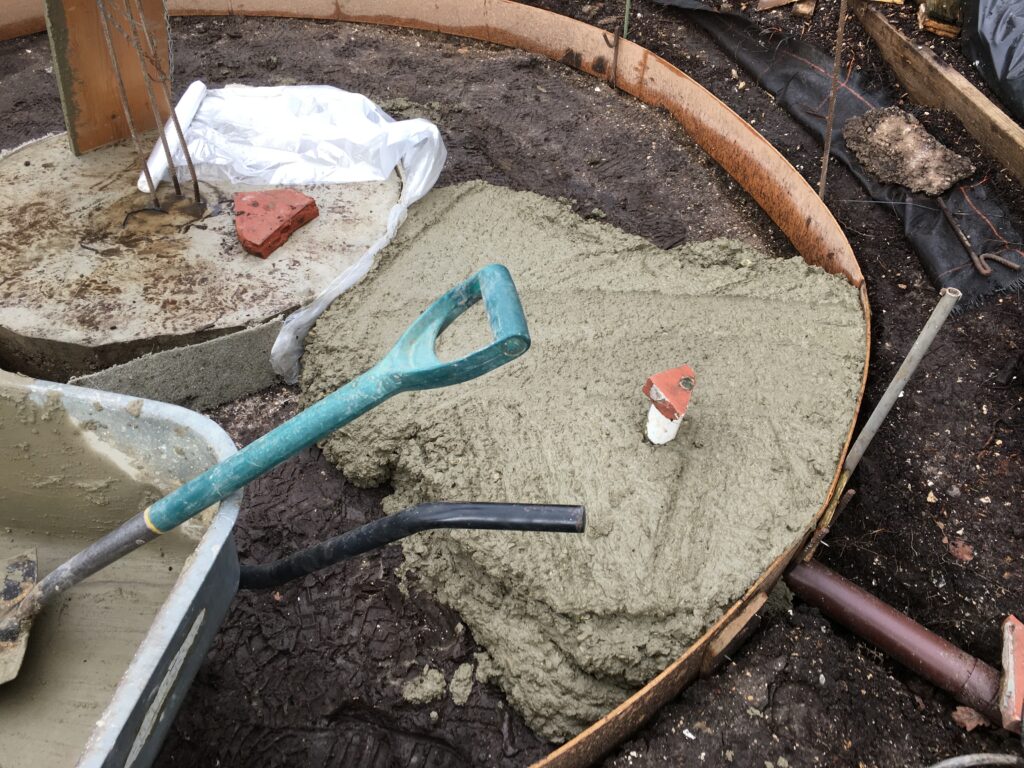
Just before evening set in I went to inspect the concrete and cover before it got cold, I noticed a bird had clearly walked across it, that will now be some heavy bird I guess 🙂
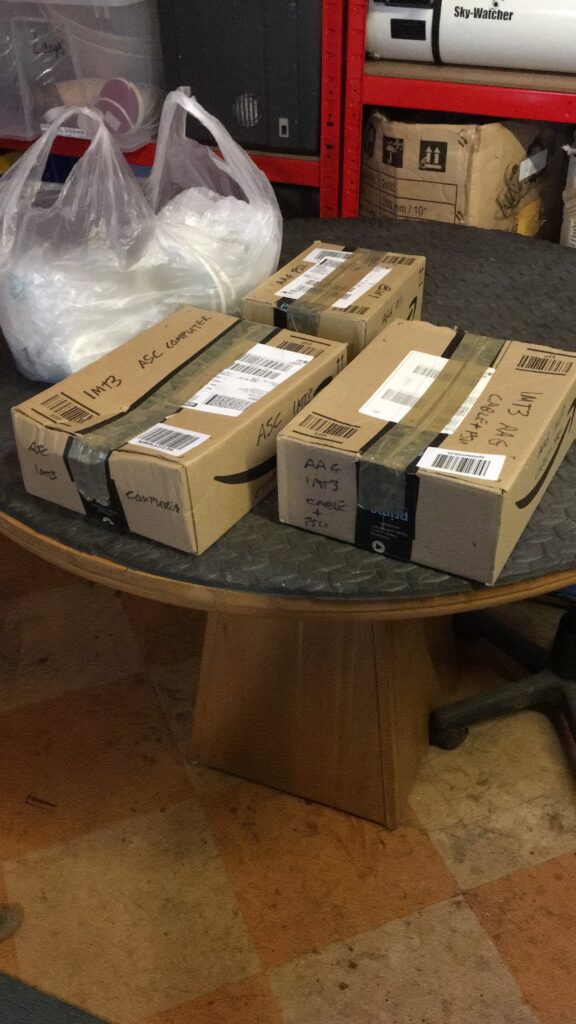
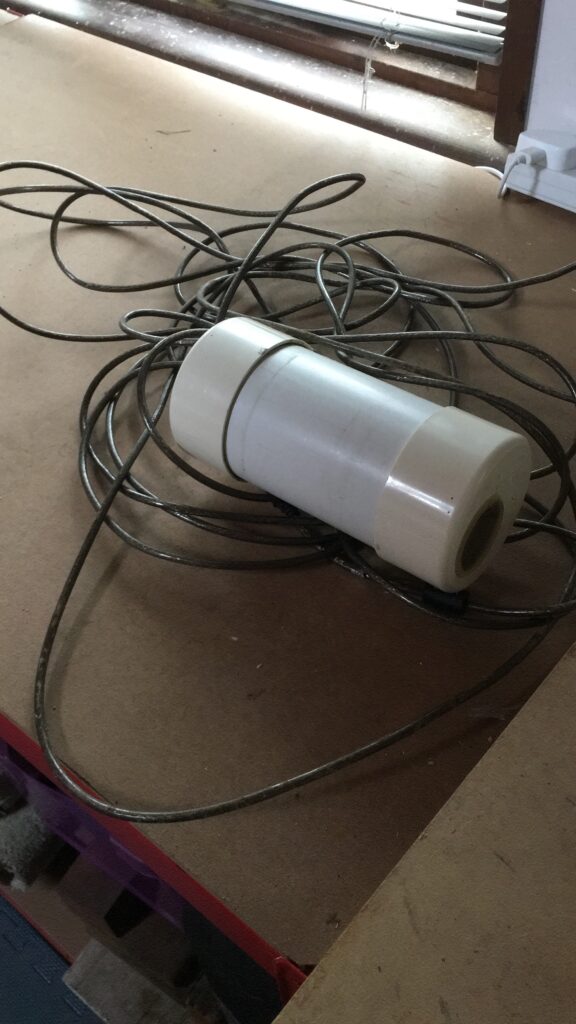
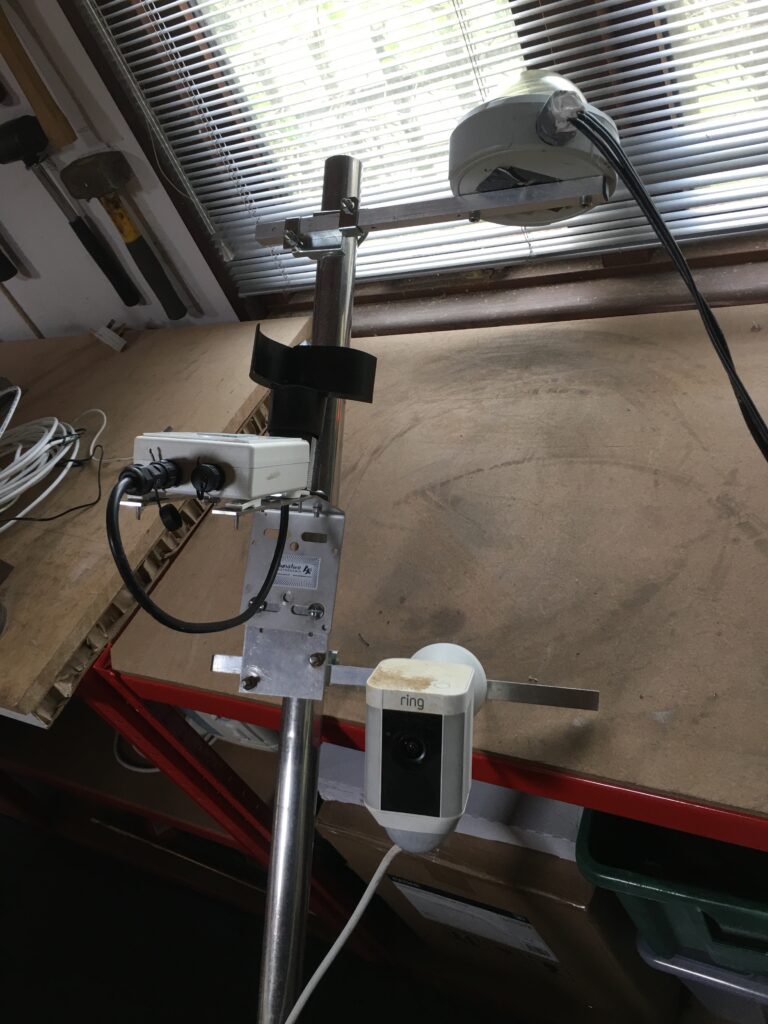
During the week whilst waiting for the ballast to arrive for completing the observatory base, I took the opportunity to unpack the weather station, all sky camera (ASC) and Ring camera that would go on the aluminium pole in the garden.
Pole needing some modifications
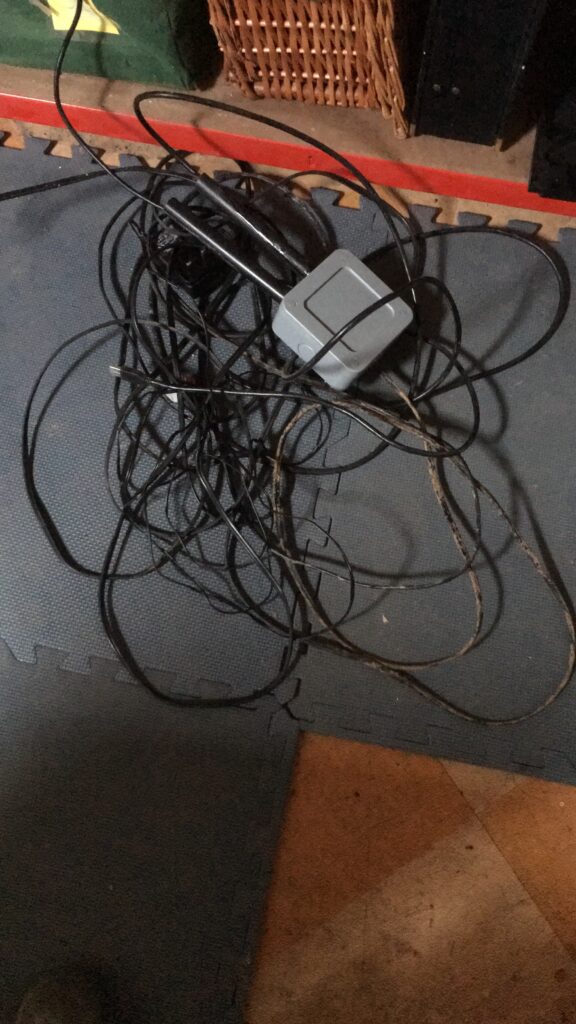
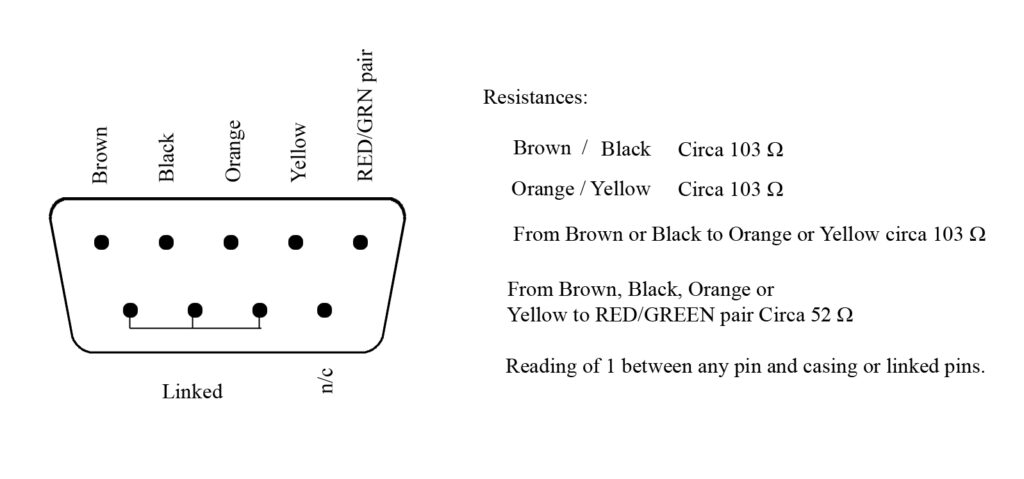
I’d forgot how many wires there were for all of this given the ASC has a due heater built in, another set of wires and we had a secondary rain sensor connected. This was never commissioned at the IMT3 location so we removed from the setup and simplified the wiring, I must remember to give it back to Bob who kindly provided it.
Some of the cables
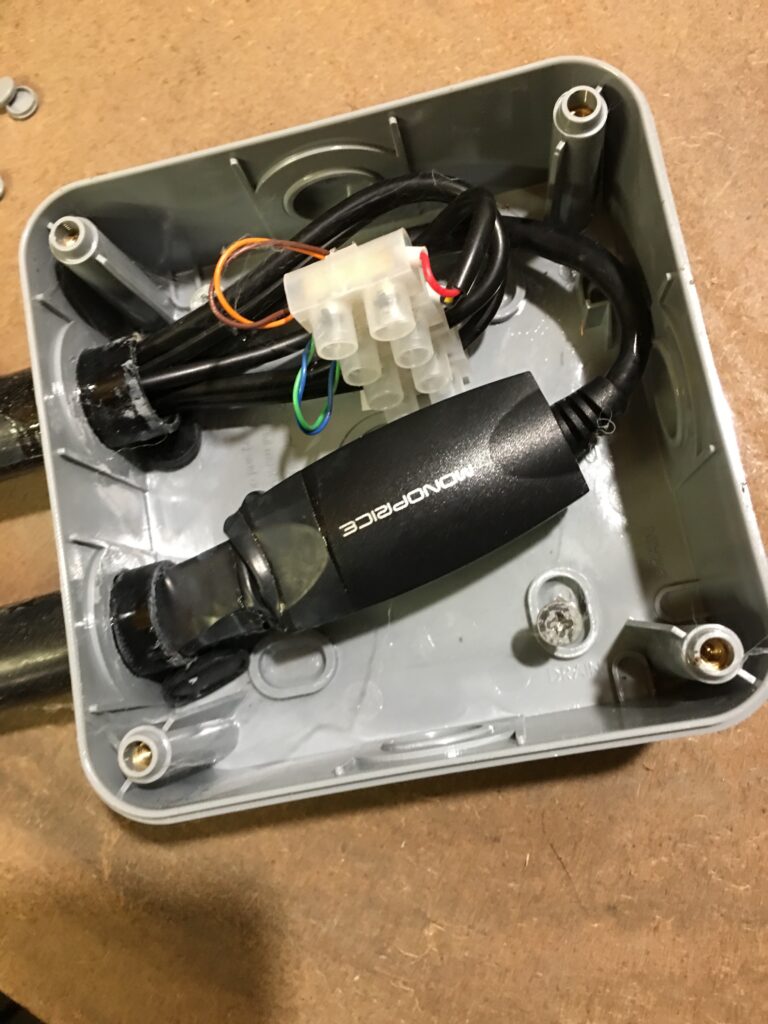
The USB connection was in a waterproof box, this was for the ASC and the heater connections were here too. Gingergeek and I cleared out the spiders that had nested in there, filled the holes where they got in and did the same inside the ASC itself.
USB and heating element connections
The Unihedron SQM was also unpacked and we have decided this would go on a separate post.
SQM
Meanwhile we unpacked the anemometer and repositioned it on the pole and allowed the ASC to positioned at the top to give an unobstructed view.
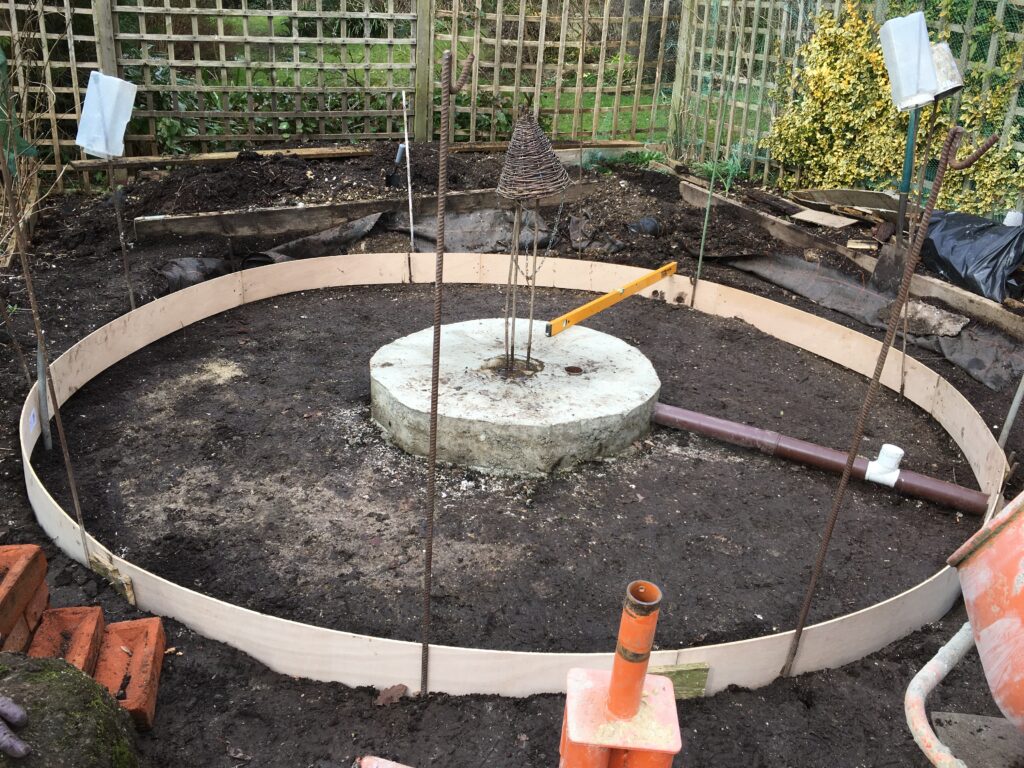
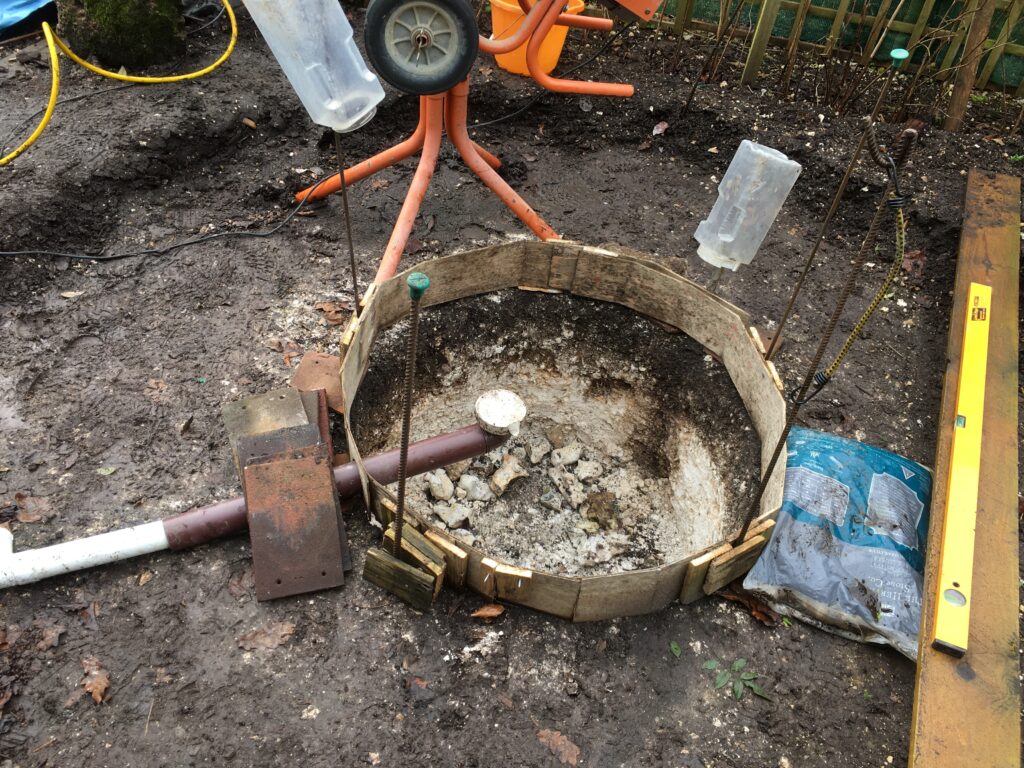
So continuing my writeup of progress on the dome build. With the pier block complete, now it was time to make the former for the base and start the concreting. The former was made from 5mm ply that I purchased from Homebase as they cut large sheets on site which is very hand for transport. When home I then cut the material further and then secured the strips together with some scrap wood I found.
Wood former in place
With some rebar stakes found in the flow borders I kept the wood former in place. Again I cut a hole in the wood seen to the right of the photo above for the electrical pipe. The height of the block above the ground can be clearly seen.
With the ability to meet 1 person outside, one of my friends came over to help. I had already prepared some days earlier the wood former which was looking good. I noticed that to get the depth required the height of the observatory base to the North was significantly less than to the South due to the slope of my land. So I needed more ballast.
Well reversed 👍
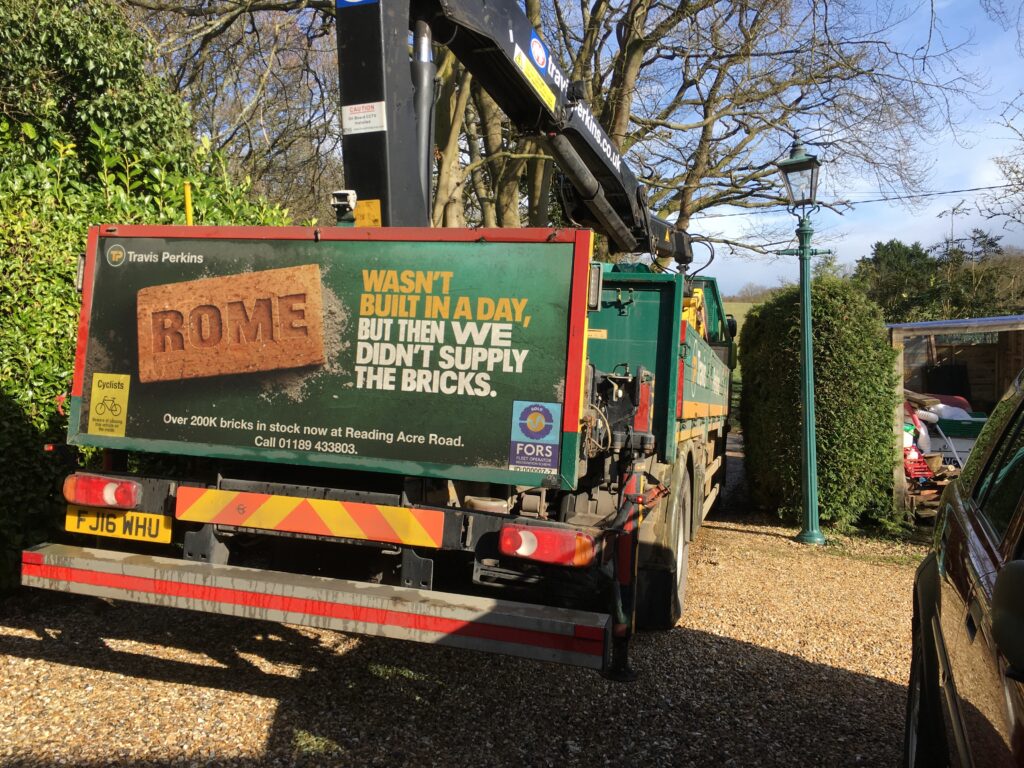
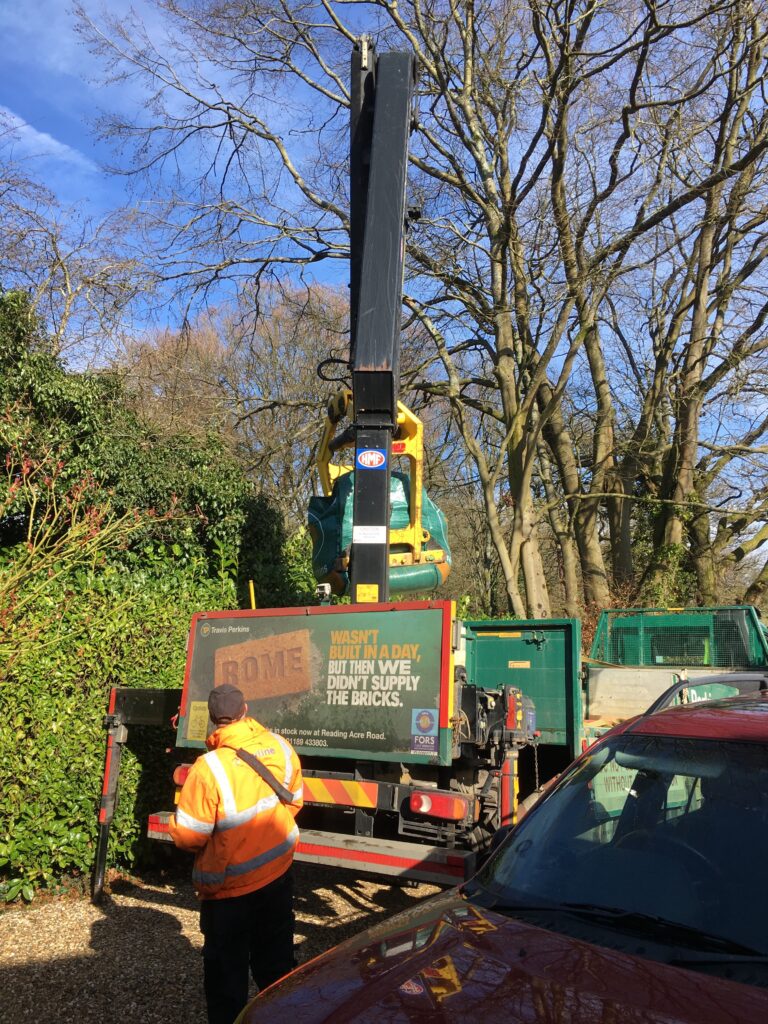
Travis Perkins was the cheapest for ballast locally and had delivered before. The driveway is rather tight at the property, however the drive did his usual finesse and reversed up first time. He then set about manipulating the fantastically well engineered crane are to move the bag to the rear of the vehicle without hitting my lamppost 🙂 Well done Mr TP Driver.
Don’t you just love big toys 😎
In hindsight I should have made the overall depth much less including that of the pier. I could drive a car on the base or build a house it was so thick, This in part was because we decided not to dig any further into the chalk for the pier block and instead have the block higher to make sure it was still thick enough.
First pour
Again the level of the wood was checked across the former to the pier block to make sure the level was correct. By 8:40am we had poured our first load and the long process began.
Many pours later
It was clear after around 5 pours that this was going to take some time and a lot of ballast! After 2 hours it was obvious that we did not have enough ballast and the empty bag stopped us progressing any further. It would be another week before we would have another opportunity to complete the base.
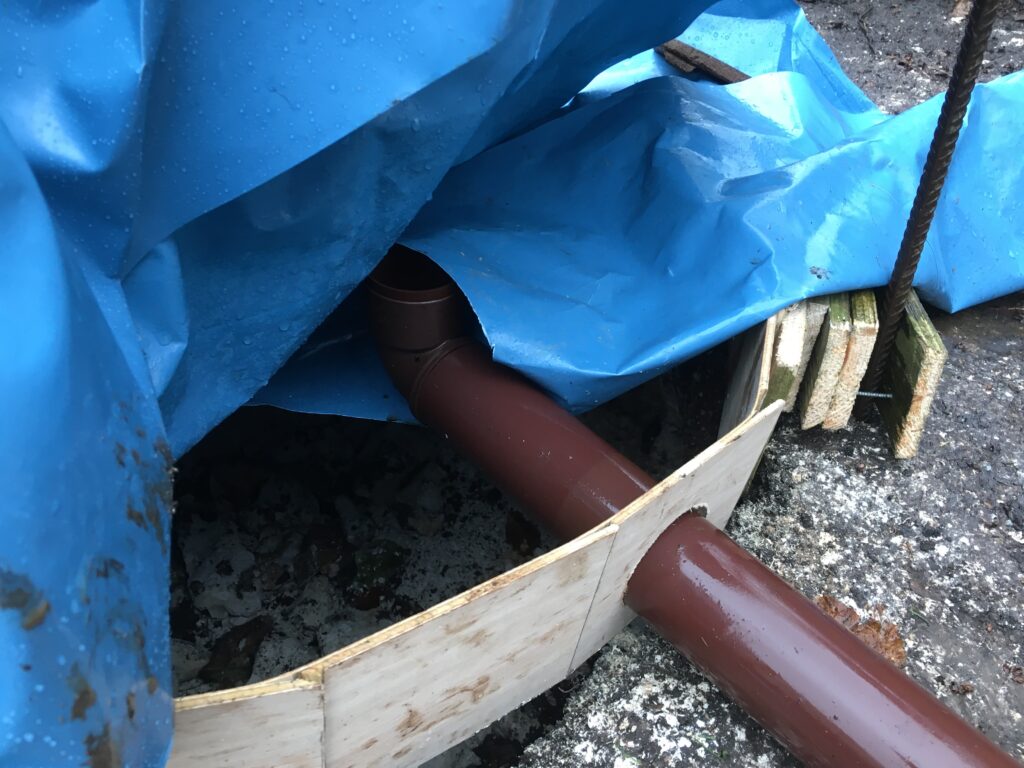
Later that night I found some rebar in the garden and Luke and I hammered it into the concrete to give the next pour in a weeks time something to anchor too Carpet and plastic was used to separate the pier block from the observatory slab.
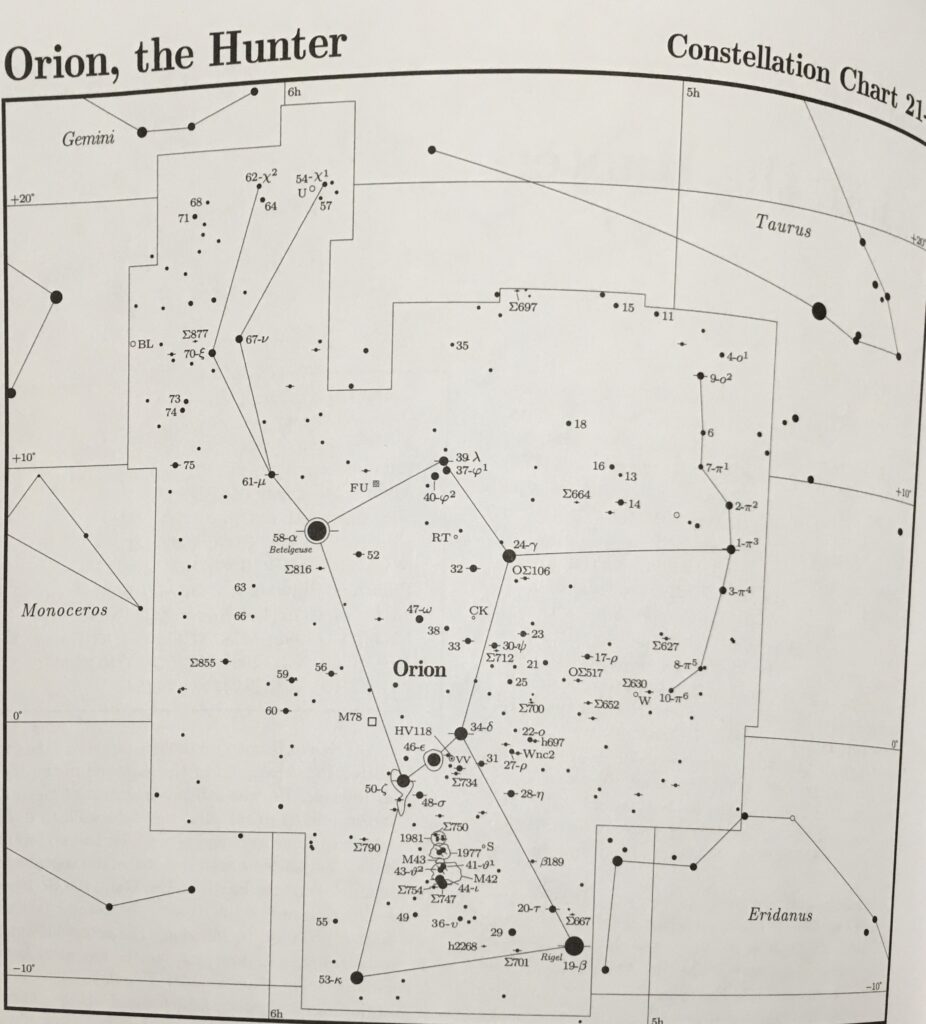
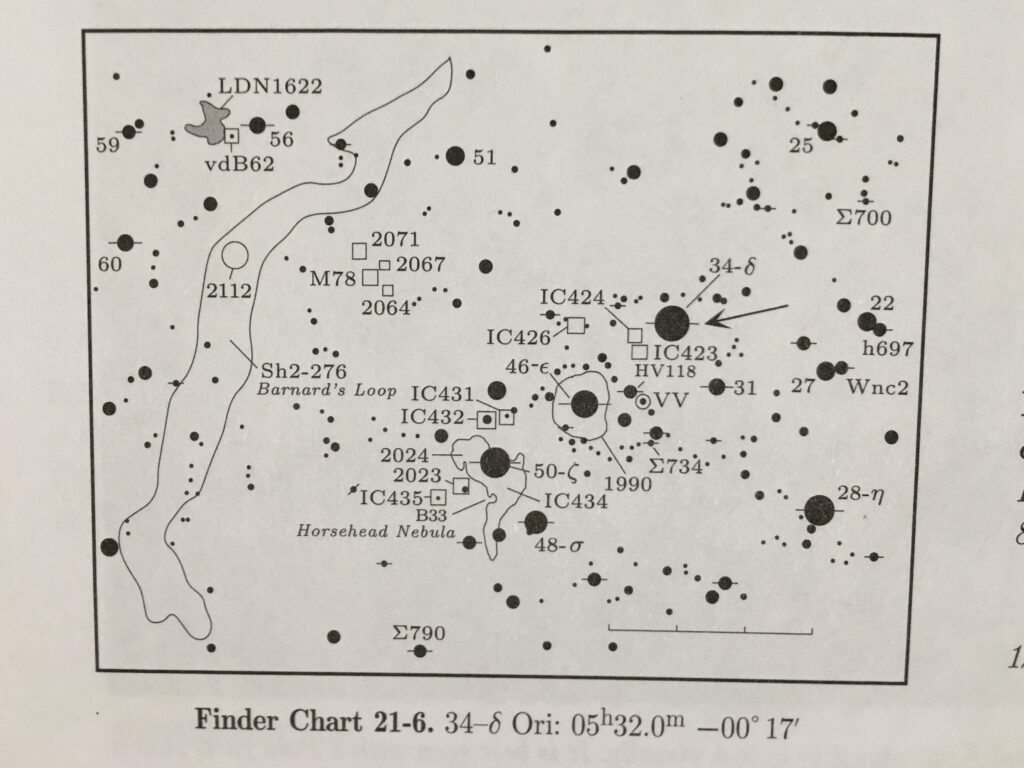
A short trip out tonight and only with the binoculars. I wanted to start my journey through Orion star hopping using the Night Sky Obervers Guide as my bible.
With the tagging of objects as follows I setup the binos and went about looking up
Sp – Showpiece
Bs – Binocular Sky
Bo – Binocular Objects
34 Delta Ori (Bo) – The first object for tonight. Given the time I started and taking Orion’s belt as a reference, the middle star called Alnilam or 46 Epsilon Orionis was at an altitude of +09 vs if I had gone out earlier at say 7pm of +37 so this was a challenge before I started.
Belt stars Finder Chart from NSOG
I did however see 34 Delta Ori (Mintaka) at Mag 2.2 and instantly knew it was right as I could see its double star companion around 1’oclock shining at Mag 6.8. It was a lovely sight seeing this visually tiny companion next to this larger and brighter star. Was very pleased I had started observing visually again.
34 Delta Orionis
41 Theta Ori (Bo) – Not seen as set
42 Theta Ori (Bo) – Not seen as set
43 Theta Ori (Bo) – Not seen as set
41 Iota Ori (Sp) – Not seen as set
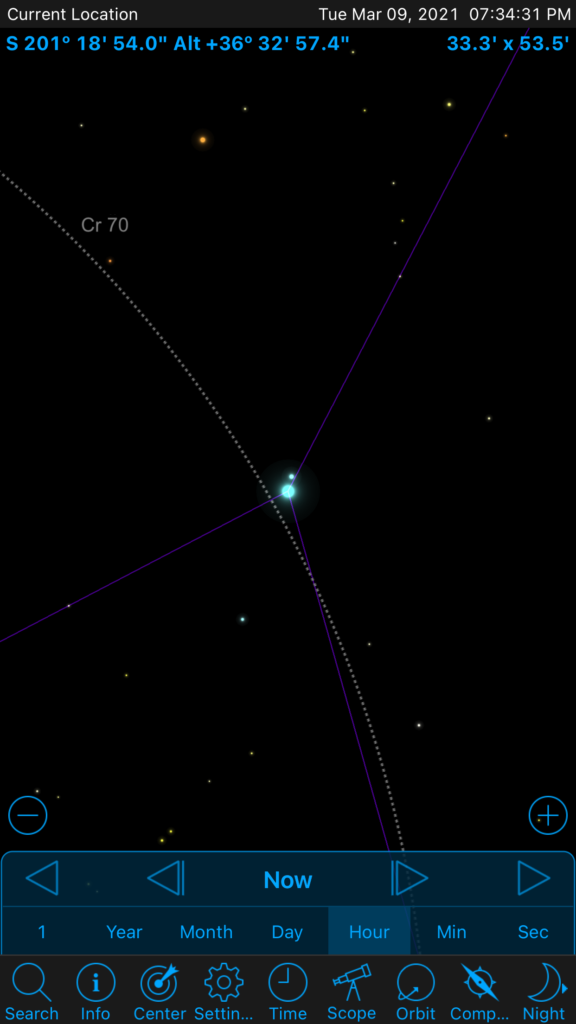
48 Sigma Ori (Bs) – Another lovely little double star, just South West of the first of the belt stars from the left, Alnitak, 48 Sigma Orionis is a Mag 3.8 star and I could clearly make out the Mag 6.7 at around 10 o’clock.
48 Sigma Orionis
B 35 – Not seen as expected due to lack of aperture
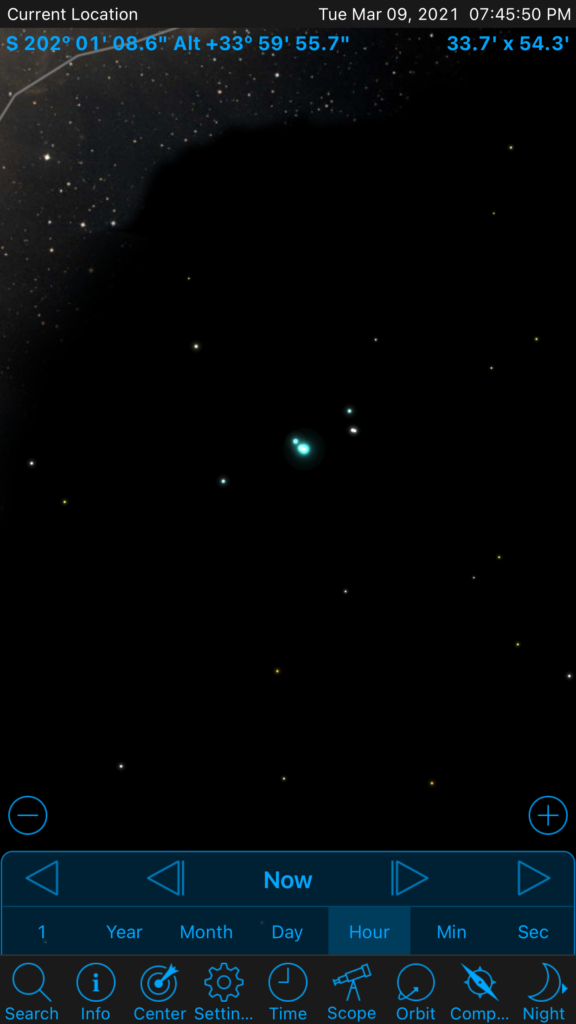
Basel 11B – This is a really tiny open cluster of stars, I knew it was there as I star hopped from Mu Gemini that I could see clearly at Mag 2.9. I could see Chi1 Orionis and Chi2 Orionis that form the upper stars in Orion’s club but it was easier to star hop from Mu Gem.
Finder chart for just North of Orion
Basel 11B sits just North West of the club and reportedly has 12 stars, I could only see it with averted vision due to the aperture of the 100mm binos, however I would say 3-4 were visible, given they are Mag 10+ so pretty faint for this instrument.
Basel 11B
Berkeley 21 – I was really not sure if I could see this, even with averted vision. The cluster is about Mag 11 so right on the limit of my instrument. I kept going back and forth, I was in the right area as it is fairly next door to Basel 11B. I jiggled the binos about but I could not be certain. I will have another go when Orion is higher earlier in the night.
Berkerly 21
So that was it for me, Orion was setting so it was time for bed.ß
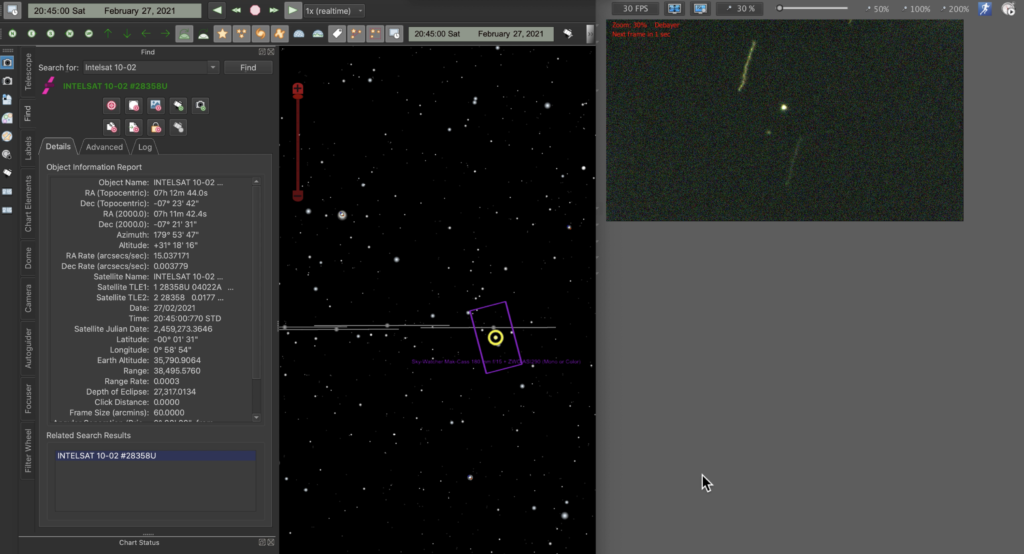
Out this evening to find MEV-2 and Intelsat 10-02. Whilst some of the society is providing images to DSTL (MOD) within the UK on the MEV2 satellite, I thought I would have a quick go and capturing. Unfortunately due to the small chip the FoV was not large enough to capture useful images so instead I thought I would capture a movie. Gingergeek joined me by Zoom.
MEV-2 and Intelsat 10-02
So after polar aligning I slewed to Intelsat 10-02 and with a small nudge of the mount the 2 satellites popped into view. The above image shows The Sky X I used to track the satellites on the left and on the right the capture software, firecap, of the individual frames.
I captured a fair amount and will publish a video from it shortly. Gingergeek and I then slewed to the Moon and took a leisurely stroll around the surface. It did to be fair, take us a while to work out the FoV indicator in The Sky X and set it correctly so we could then move to the areas of the Moon we wanted.
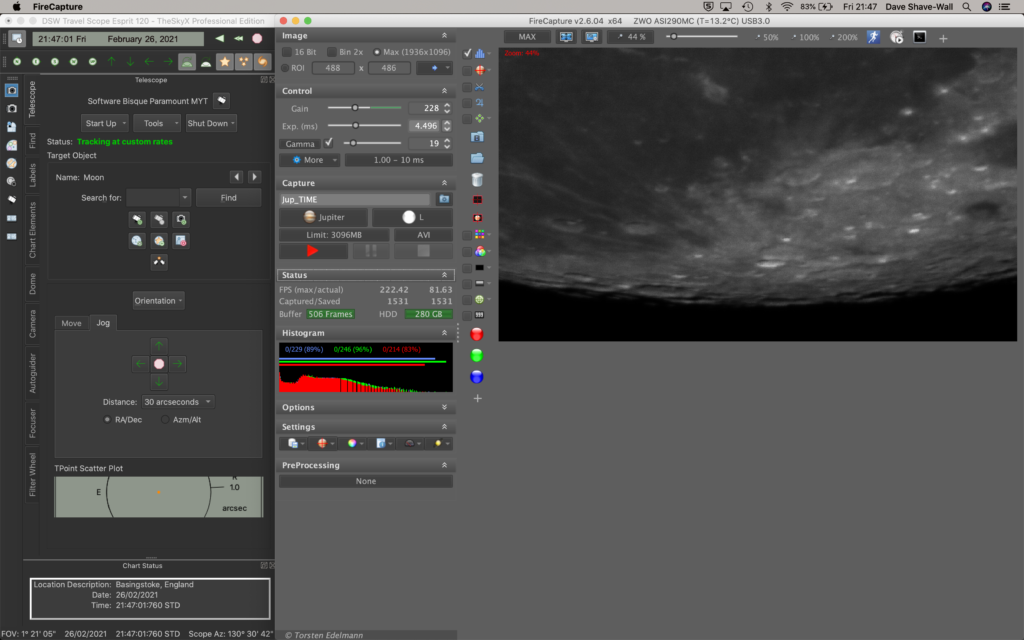
I pulled out the Mak180 tonight to see if I could image the Moon. After setting up I did not bother with polar alignment due to it really only being the planets which are less picky about tracking. However pointing is another matter.
I have decided I really must get a decent flip mirror. At the moment with the polar alignment not being completed and the chip on the ZWO ASI290MC being so small, I have to take the camera out to then eyeball the planet before putting the camera back in so that its light lands on the chip. Now with the Moon that is not a problem so tonight I did not have to worry.
View from the bridge
Given the short imaging session this evening and the realisation that I had not gotten rid of all the dust from last years dust intrusion I took a single video run of a yet to be identified piece of the Moon.
Raw video footage
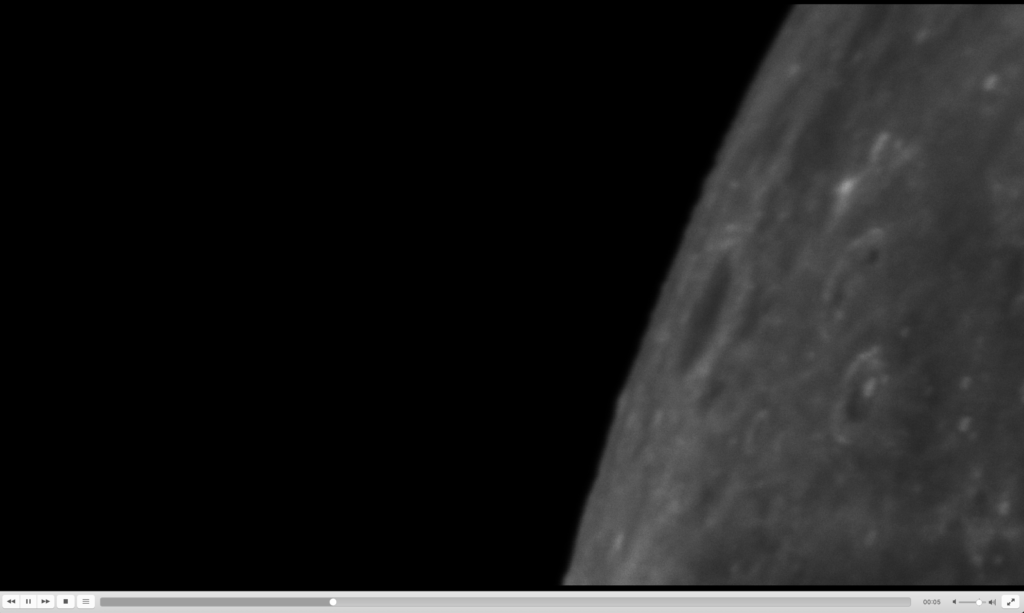
I then moved decided to take some video footage of various parts of the Moon to also discover how much dust I had and how much of a problem it was going to be. Also I just like roving around the surface of the Moon.
Raw video of Clavius
I must also buy another ASI290MC as the one I have had its chip cover fall off and I have been unable to remove the dust from Coombe Gibit, so for guiding this is not an issue but for Moon and planets it is. Given I currently take the camera off the Skywatcher Esprit setup where it is used as a guider I might as well have another and then I won’t ever get dust in the new one which I would use on the Mak. As I’ve said before and will say again, Brendan would say it is cheaper to burn £50 notes than get into astronomy! How true indeed.
It’s been slow going since January. Lots of cold weather, rain and broken ribs had stopped me in my tracks from concreting the pier block. However on 21st February I finally had warm enough weather and a lot of help from Luke to start pouring.
6 buckets of ballast……
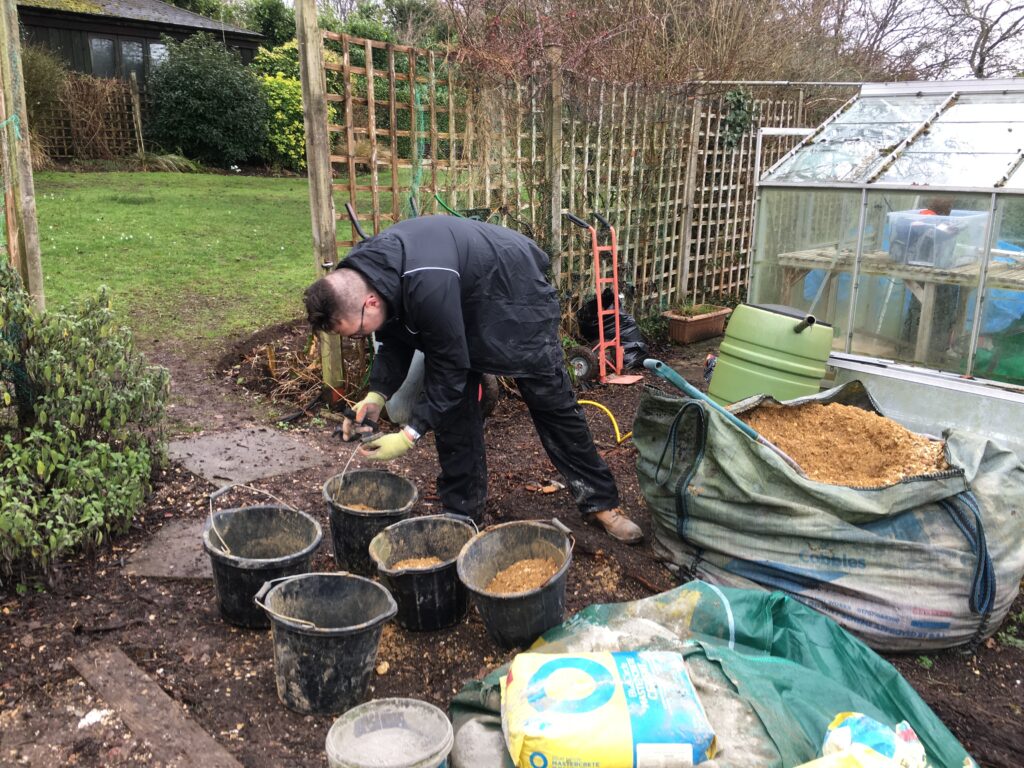
We placed some flint in the bottom of the hole to help reduce the amount of concrete needed and to push up against the chalk. We then started measuring the cement and ballast out. We used Bob’s notes from our last concreting party which was 6 x 10kg buckets of ballast to 2 x 6kg buckets of cement. The water we used a bucket with a marker pen line on and then heaved it into the cement mixer.
Good slump test
The first slump test was perfect. The first pour looked good too. 2 hours in and we were 2/3rds done and nearly up to the downpipes that is to be used for cabling.
2/3 of the way there
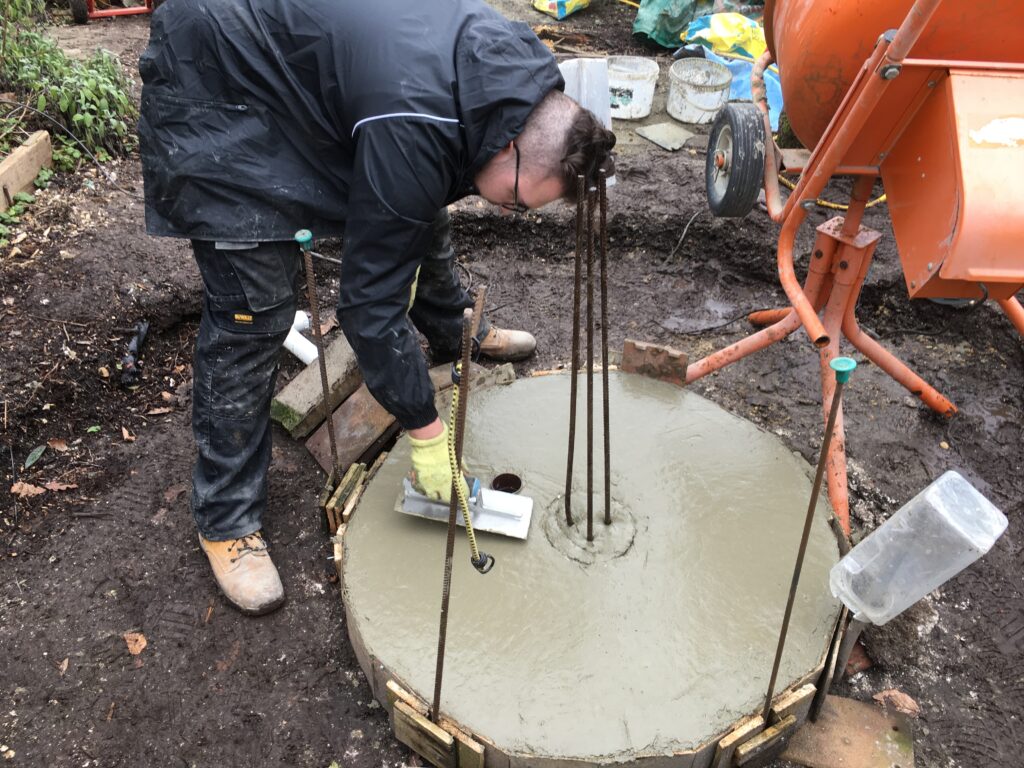
Before we started I made sure the wood former was level all the way around. This makes it super easy when pouring concrete, so as long as you pour to the top of the former it will be level as we proved on the final pour.
Luke does the final touches
We then took 3 pieces of rebar that were lying around the garden and placed them where the pier would go. We performed a test fit of the pier housing, some air-conditioning duck so make sure the pier was central to the block. I must at this point thank Ian Piper who’s idea it had been to put the concrete pier in. At a cost of around £50 for the material this would be far cheaper than the £1,000 pier I purchased in the past and the £500 not so great pier I purchased from Pulsar Observatories.
A job well done 🙂
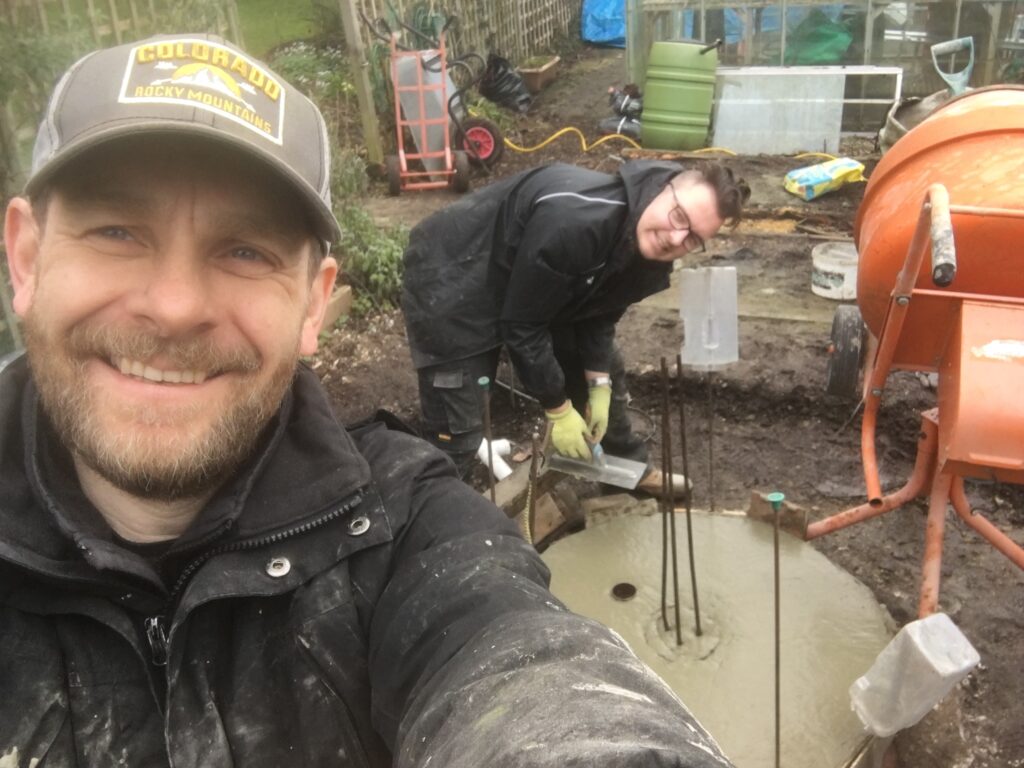
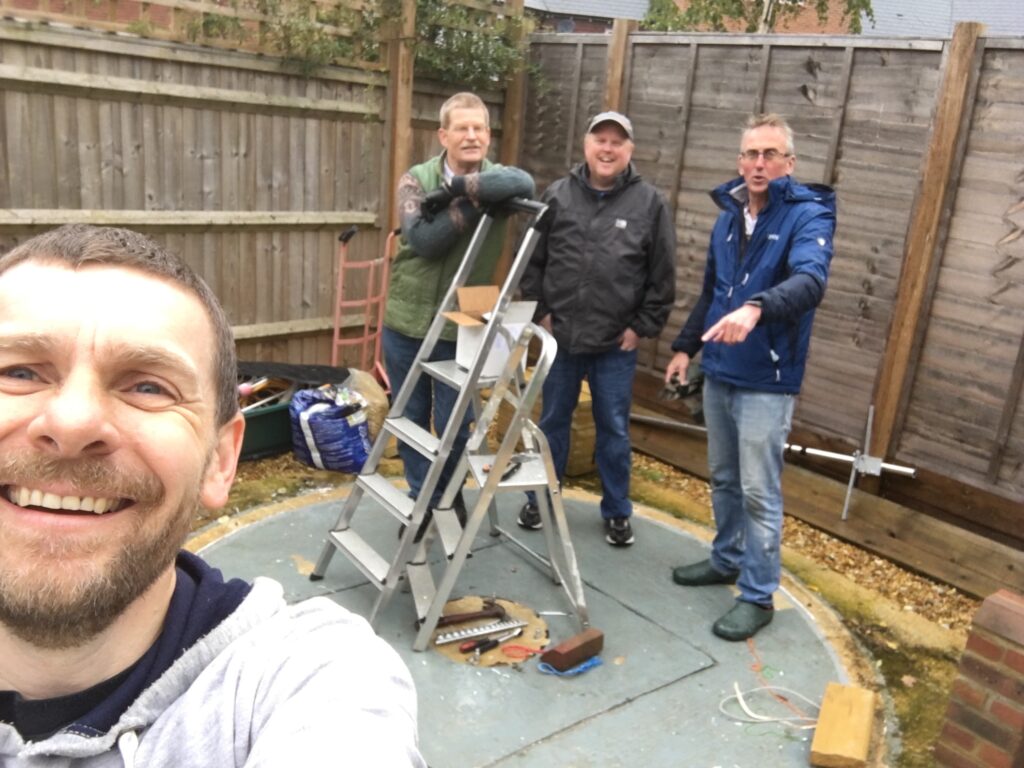
After just over 3.5 hours we had finished and that included the final brushing over the concrete to make it smooth. Thanks Ian for the pier suggestions, Bob for the mixer, Mark for the enthusiasm, Luke for the help, Nigel for the base design and of course Helen for putting up with me and my hobby. A good start, next stop was to concrete the dome base.
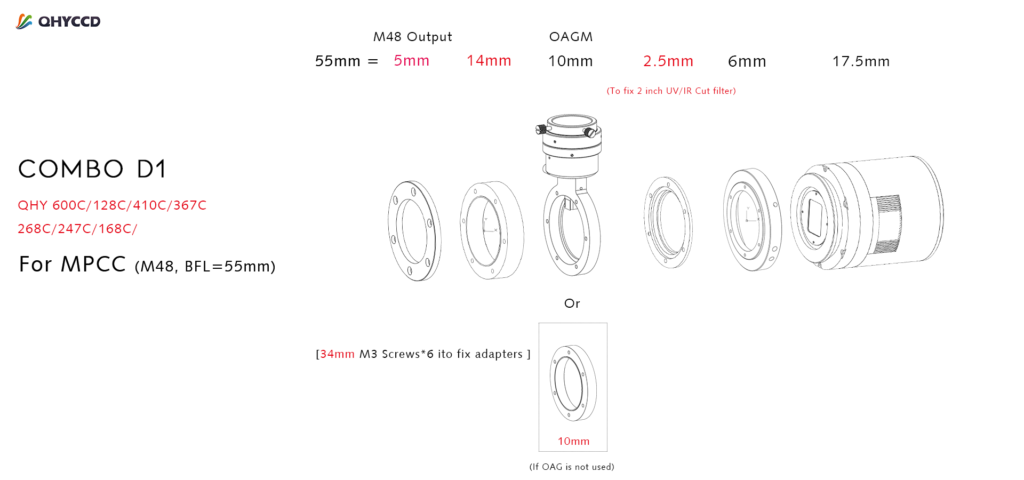
I’ve taken the plunge and dipped my toe into the CMOS world. Since I didn’t have any OSC experience I chatted with DSW (has a QHY186c) and decided on the QHY286C. This I purchased from Bern at ModernAstronomy who has always provided excellent service.
The issue with APS-C sensors when coupled with the Takahashi FSQ85 is that the edges start to show signs of star elongation, I already see this on my Atik460. This can be corrected with the FSQ-85 flattener (ordered from FirstLightOptics) which has the effect of slightly increasing the focal length but also reduces the back focus from the native 197.5mm to 56mm.
Effective Focal Length
455mm (f/5.4)
Image Circle Diameter
44mm
Metal Back Focus
56mm
FSQ-85 EDX with Flattener 1.01x
This means that I can’t use my existing Atik OAG->Atik EFW2 and Atik460 because it’s total distance is 59mm (22mm+24mm+13mm) so it’s out by 2mm even once you include the filter effect on the back focus. Note – This is also true for my Starlight Xpress configuration.
I do not understand why Atik could not have got to within the 55-56mm range by shaving off a mm here and there 🙁 I may need to replace all Atik gear when I convert to mono CMOS or replace the OAG with a guide scope.
So onto the QHY268C, the OSC CMOS unfortunately has a CAA tilt adapter instead of a direct thread connection. This wastes 11mm of precious back focus giving a total distance of 23.5mm whereas the recently released QHY286M CMOS has a 12.5mm back focus !!!!
Also the QHY268C does not have an IR/UV cut filter in place so you need to buy an additional filter and holder and add that to the cost and factor in the adapter and distance needed …. I’m starting to regret this purchase more and more !
Source – QHYCCD.com
Back to the Takahashi Flattener (TKA37852), the back focus is 56.2mm but we add on the filter thickness as it changes the light path (2mm/3=0.66mm) so ~57mm (56.9mm), the imaging train is as follows :
Adapter
Distance (mm)
Accumulated Distance (mm)
Connector
OU031
2
2
M54(M) -> M54(M)
QHY 020770
4
6
M54(F)
QHY Spacers
14.4
20.4
screw
QHY OAG-M
10
30.4
screw
QHY 020055
2.5
32.9
screw
inc filter
0.6
33.5
–
QHY CAA adapter
6
39.5
screw
QHY268C CMOS
17.5
57
screw
FSQ85 Flattener to QHY268C imaging train
The combined weight is 1365g so I may need to adjust the balance of the scope a little as it heavier than my Atik460/EFW2/OAG setup at 1080g.
Completed – Imaging train ready for first light
I may have to adjust the spacers a little but I won’t know until I have received a 2-inch Optolong L-Pro light pollution filter which is currently on back order from FLO.
Transmission chart for Optolong L-Pro
QHY268M
The recently released mono version of the QHY268 looks like it has a proper screw face plate with a more acceptable back focus of 12.5mm. This is more reasonable and would allow me to couple a filter wheel and OAG as well not requiring a IR/UV cut filter.
Like SyedT on StarGazersLounge I could go back to using a guide scope and ditch the OAG and then the imaging train could incorporate a rotator :
I was thinking of a rotator for the remote Esprit120 which has a generous back focus of 76mm so I should have no problems there but that will be another adventure for the future !
Holiday time! Well at least a week off work. It’s been a cold and cloudy Winter so far. So a night where I can get out the travel telescope and setup in the vegetable patch, the construction site of IMT3b is a good thing. The challenge I have is my ribs still hurt somewhat from being broken after an unfortunate accident 4 weeks ago. So I will go careful.
Earlier in the day I had Luke help me setup the equipment in the garden. First the binos to have a good look round.
Altair Astro 100mm Binoculars and APM Mount
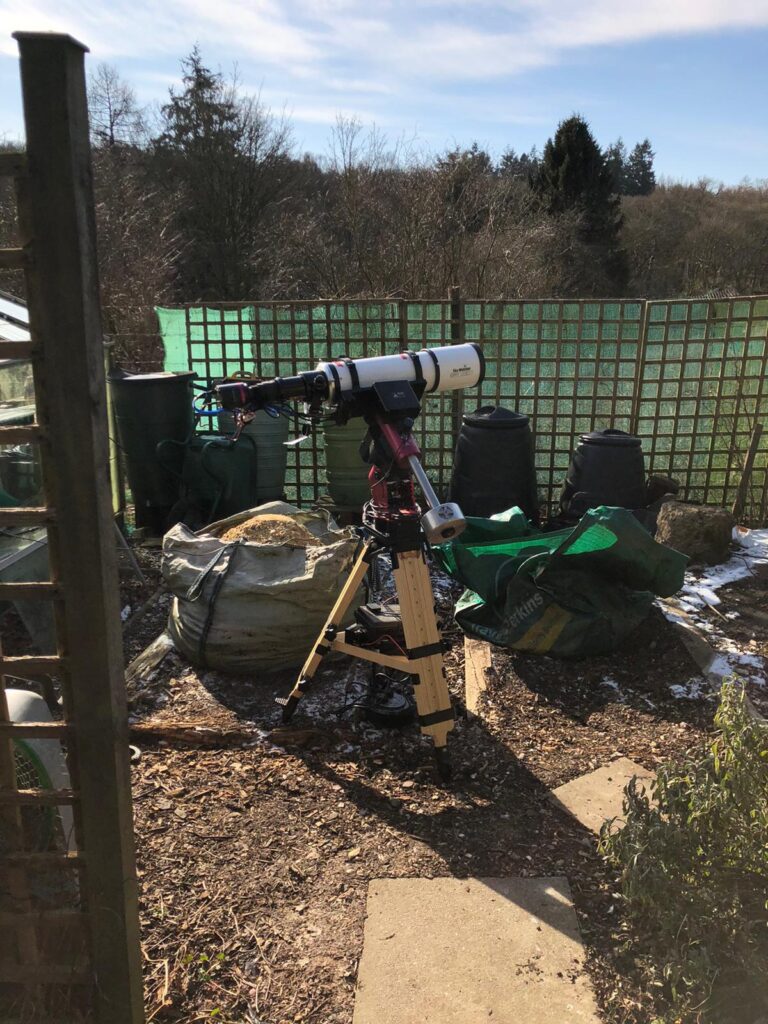
Then we setup the Skywatcher Esprit 120 ED on the Paramount MyT.
Travel scope with QHY168C camera
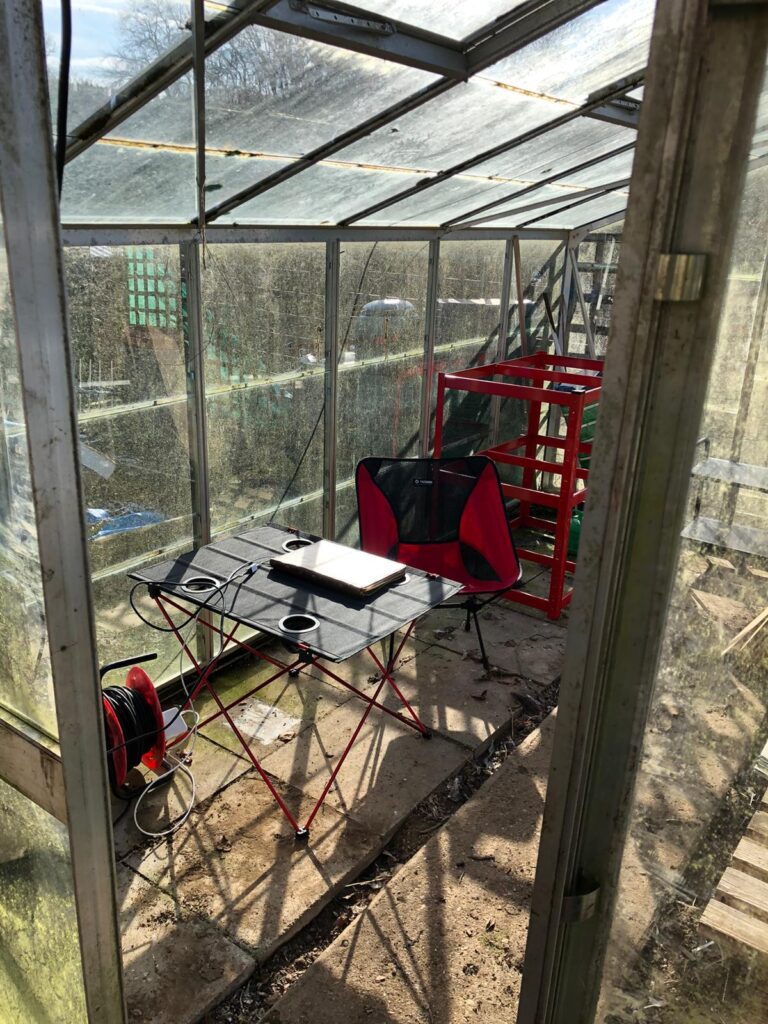
Lastly we setup a “warm room” temporary in nature and fairly cold I would later find out 🥶 in the greenhouse.
Lovely new table with my cool astronomy chair and MacBook Pro
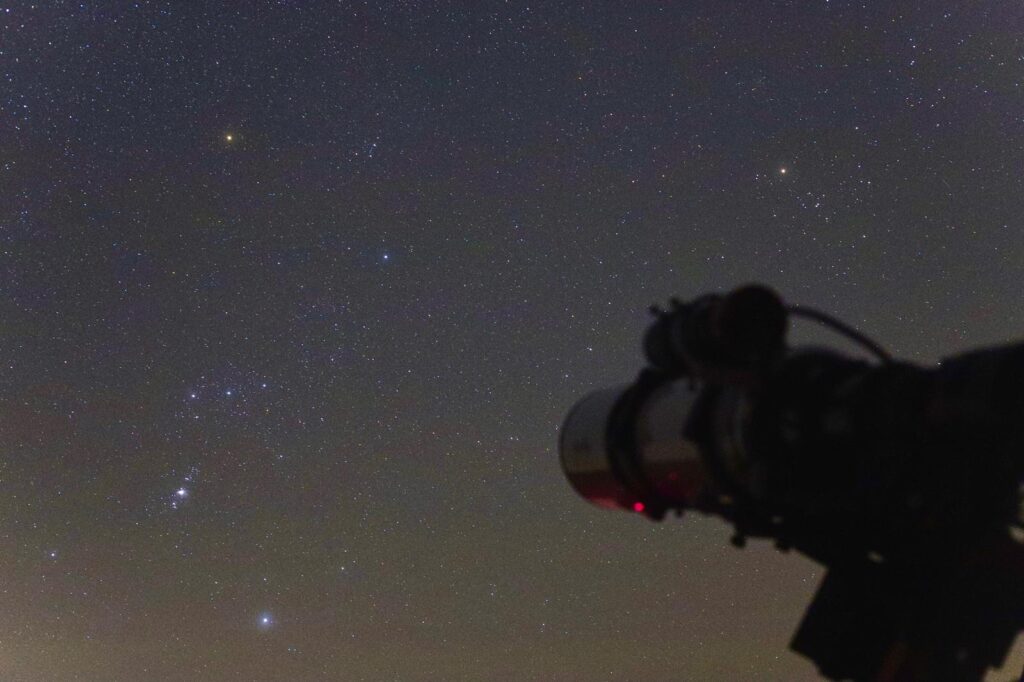
So the night came and after Pizza with my wife I set off out to the garden to start imaging.
Imaging M42 Orion Nebula
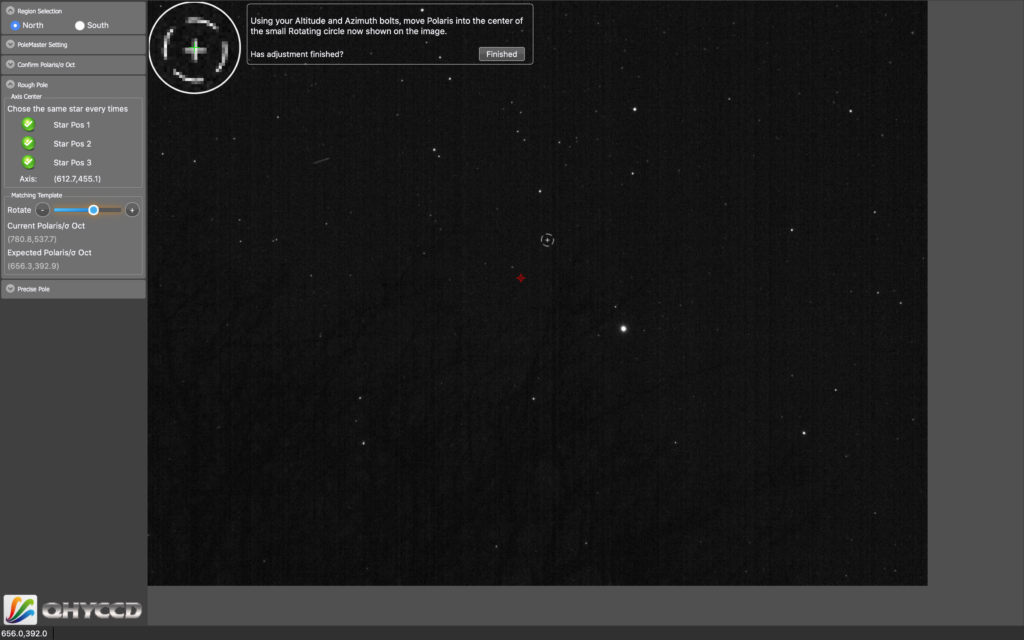
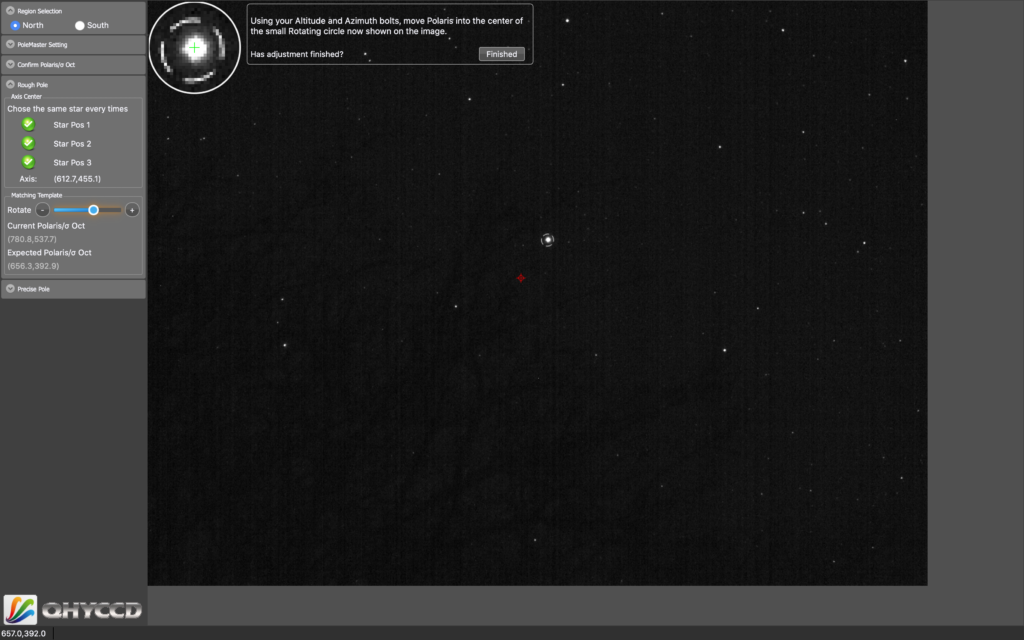
I connected the Polestar camera first to see what my alignment was like after placing the tripod down in a fashion I though condusive to being polar aligned.
This is where polaris landed up which is not bad.
I then set about measuring the difference in Polaris to determine how much I would need to move the scope to align it.
White cross is where it needs to be
I then fiddled with the altitude and azimuth knobs to align the scope.
Perfect alignment
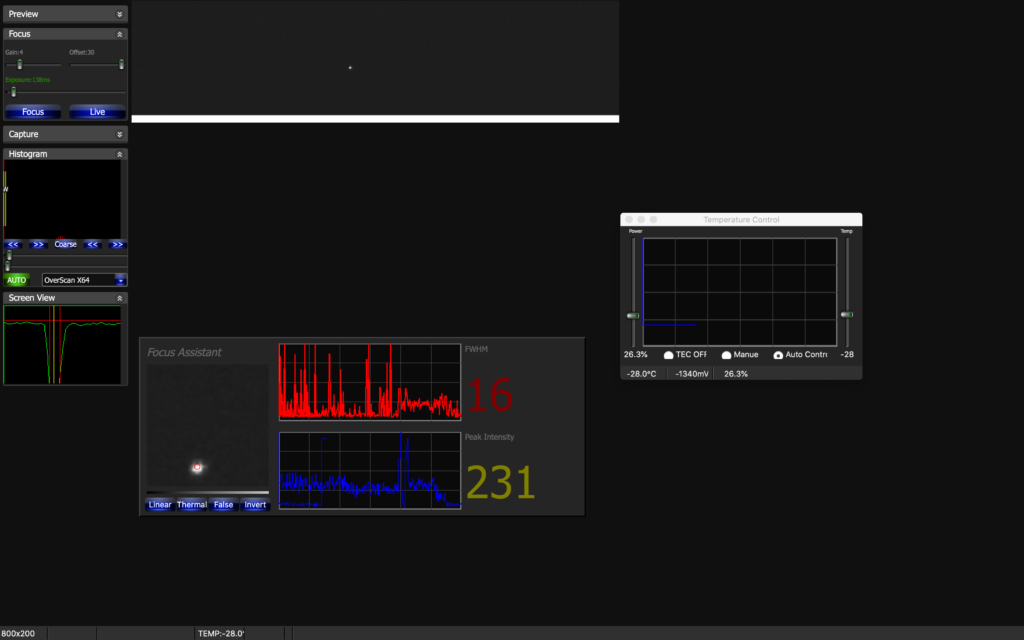
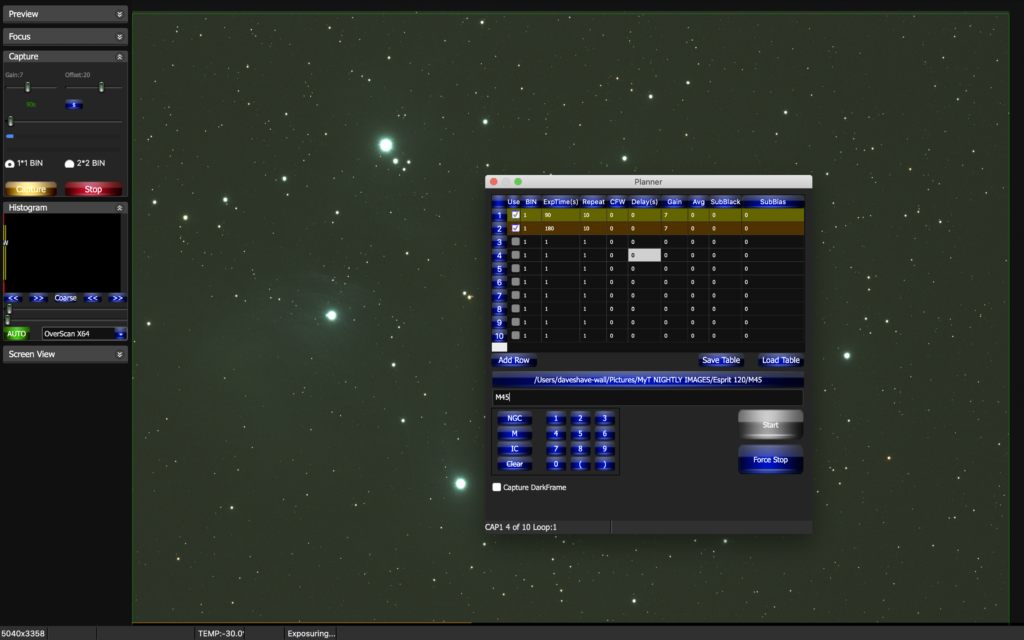
Next I slewed to the first object for the evening which was M45, the Pleiades, the Seven Sisters. I started EZCap and look at the focus which was not far off from the last time I was out a few weeks and it is good enough.
EZCap focus control
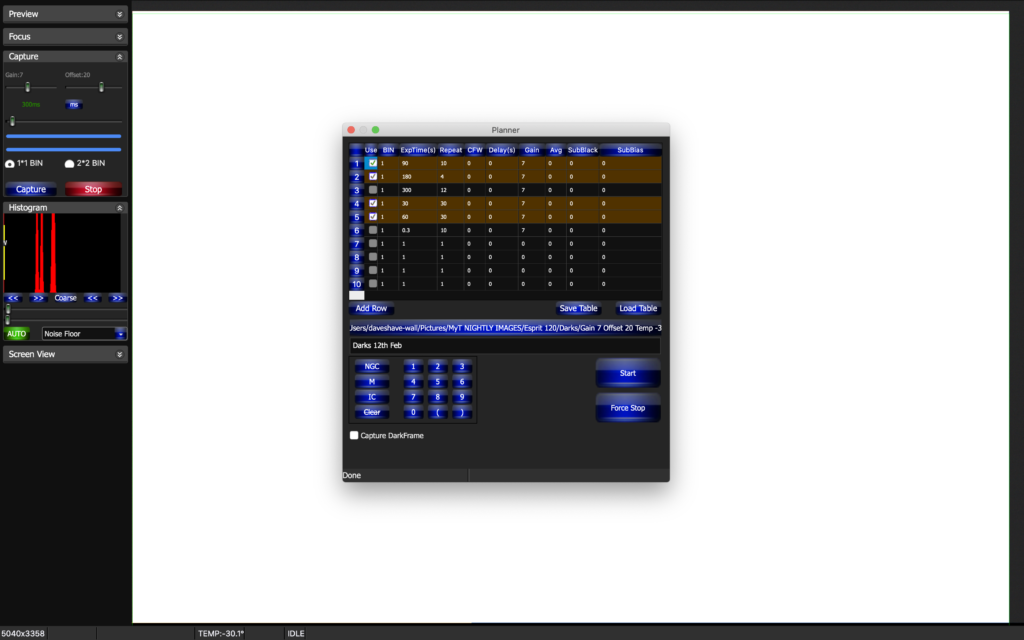
I then took an image of M45 to make sure it was in the field of view. I also setup the Planner in EZCap to with the sequence for capturing the data. I set the camera to Gain 7 and Offset 20 with a temperature of -30℃.
EZCap Planner
I set PHD running and that was when I hit a problem. To cut a long story short, I had forgotten to plug in the ST4 guider cable into the ZWOASI290 camera and then into the Versa plate of the Paramount MyT. Without this there is no successful calibration within PHD. It took me 1 hour to work out I needed a cable and a further 45mins to find it since the move of house. Your IQ really does drop when it is dark and cold!
Guiding started, but gusts of wind!
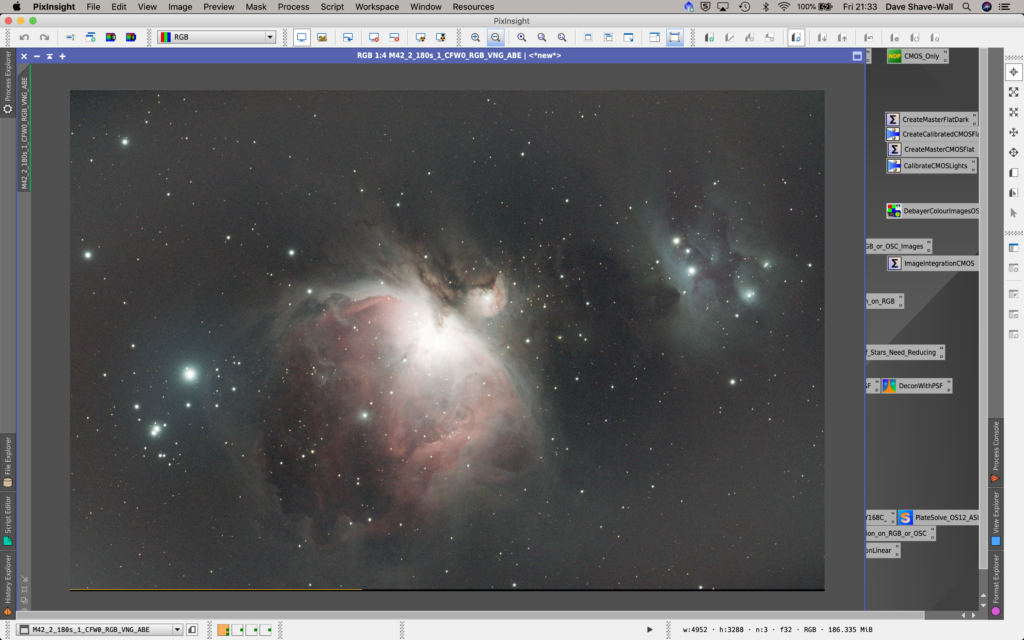
Eventually the calibration completed once the cable was fitted and I could start to see the gusts of wind in the data. I set a sequence running for M45 and was impressed with the results. I took 10 x 90s and 10 x 180s.
M45
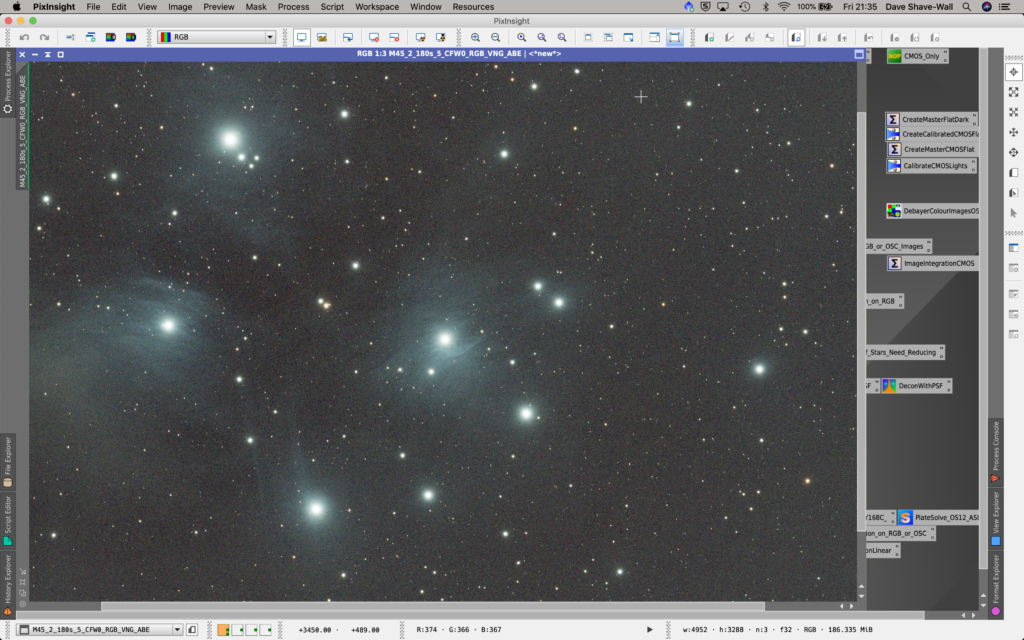
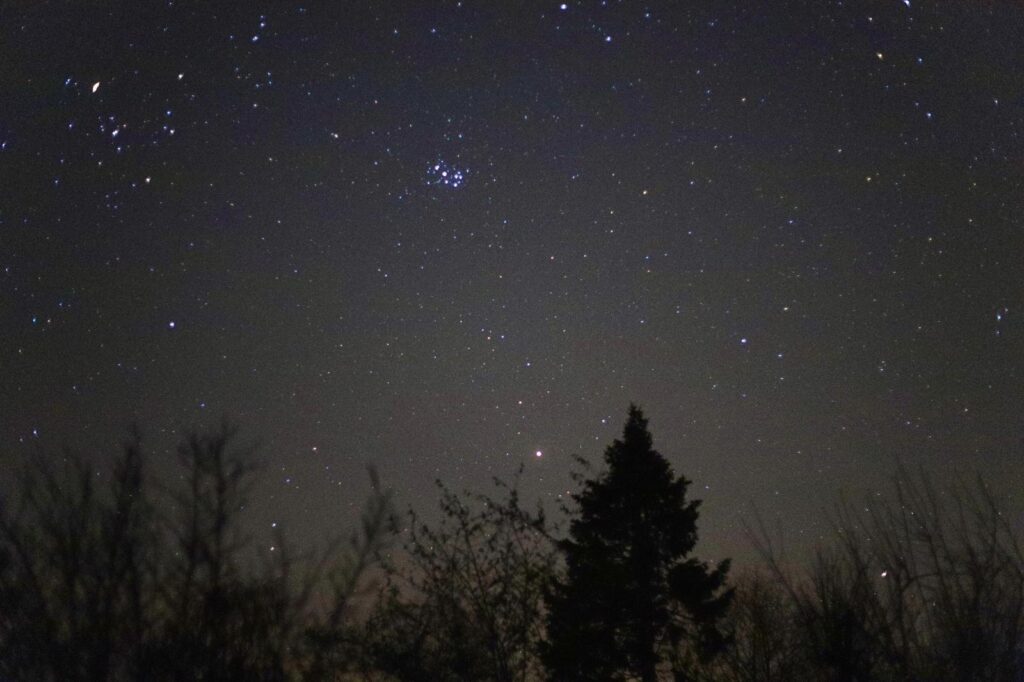
I then switched targets and headed over to M42 and M43 along with the Running Man nebula, also known as SH2-279 and NGC 1977. I took 30 x 60s, 30 x 30s and 10 x 180s.
M42
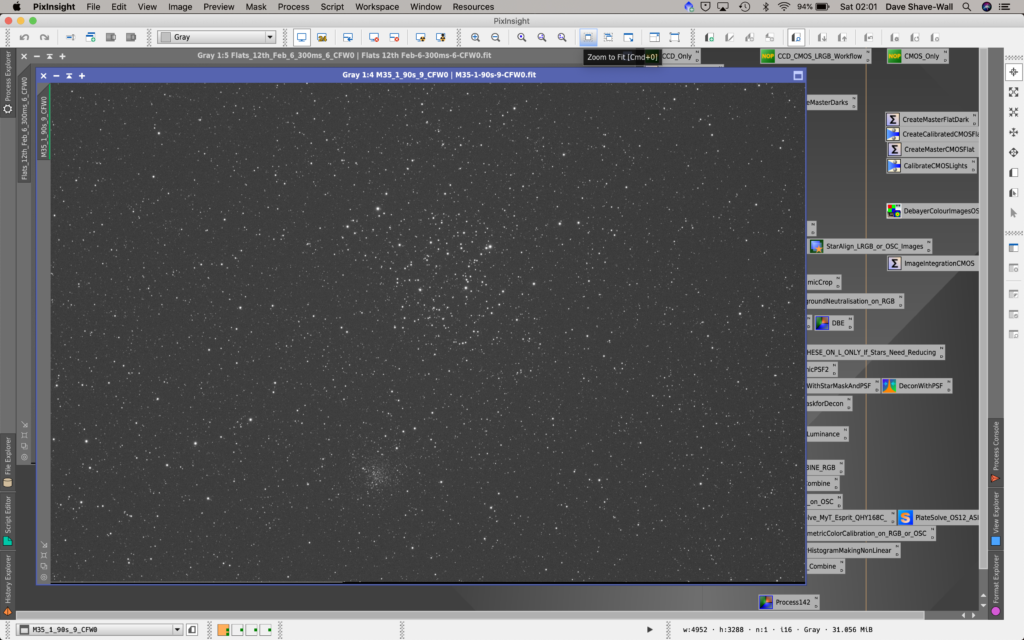
Next and what would be last on my list tonight was M35 along with NGC 2158. I took 10 x 90s and 10 x 60s starting around 23:45.
M35
Now the clouds at a high level started to roll in. So I decided to take some Flats and then take the darks tomorrow morning.
Flats
So I packed up and had one last look up at the night sky.
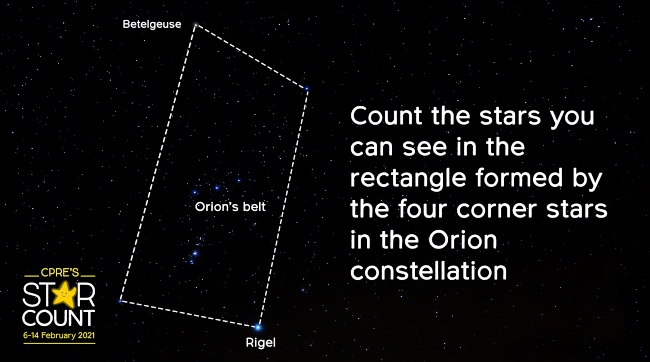
The Campaign for the Protection of Rural England (CPRE) was running it’s annual star count for 2021 from 6th – 14th February.
Basically in order to assess the effect that unnecessary man-made light pollution has on the quality of our life’s the CPRE want people to count the stars they can see within a box formed by the brightest stars in the constellation of Orion (not including the four main stars that form the box) and submit their observations.
Credit – https://cpre.org.uk
A couple of us arranged to get together remotely and count the stars we could see at 8pm on 10/2/2021 when Orion was near it’s highest point in the South. Of course at this time of night the light pollution is also fairly high 🙁
Suburban Sites
Observer
Star Count
Jim
9
GeekBoy
10
GeekGirl
11
Neil
12
Observation – 20:00 10/2/2021
The SQM (Sky Quality Monitor) reading for our (GeekBoy/GeekGirl) location at that time was 19.92 mags/arcsec2 which places it around a Bortle class 5 sky (NELM 5.6-6.0). Of course later on during the night, once the causes of light pollution subside I normally get a reading of 20.6 mags/arcsec2.
Observer
Star Count
Giles
9
Stephen et al
13
Observation – 20:00 12/02/2021
Rural Dark Site
Dave got out with his family to star count from his rural dark site and the comparison is stark ! There may be an age effect on the eye sight here as they are from the same time/location but either way it’s shows what can be seen in the absence of excessive light ingress.
Observer
Star Count
Dave
23
Daughter & Boyfriend
27
Observation – 21:40 10/02/2021
Well that was a bit of fun and a welcome distraction in the current never ending lockdown – thank you guys !
So whilst Dave was in his garden using the binoculars and failing down holes in the process I was setting up to relearn how to take images ….. it’s been that long and the weather hasn’t helped.
So all was going well except that the Moon was bright and right near the winter nebulas. Even how bright the moon was I decided to use the time and practice using the Monkey Head Nebula as my target.
The tripod was levelled and the iOptron CEM60 polar aligned, the scope was balanced, the Atik460 CCD was cooled (-25℃), OpenPHD calibrated, the plate solver completed and the successfully sync’d and . The first step was to autofocus on a decent bright set of stars before the imaging run.
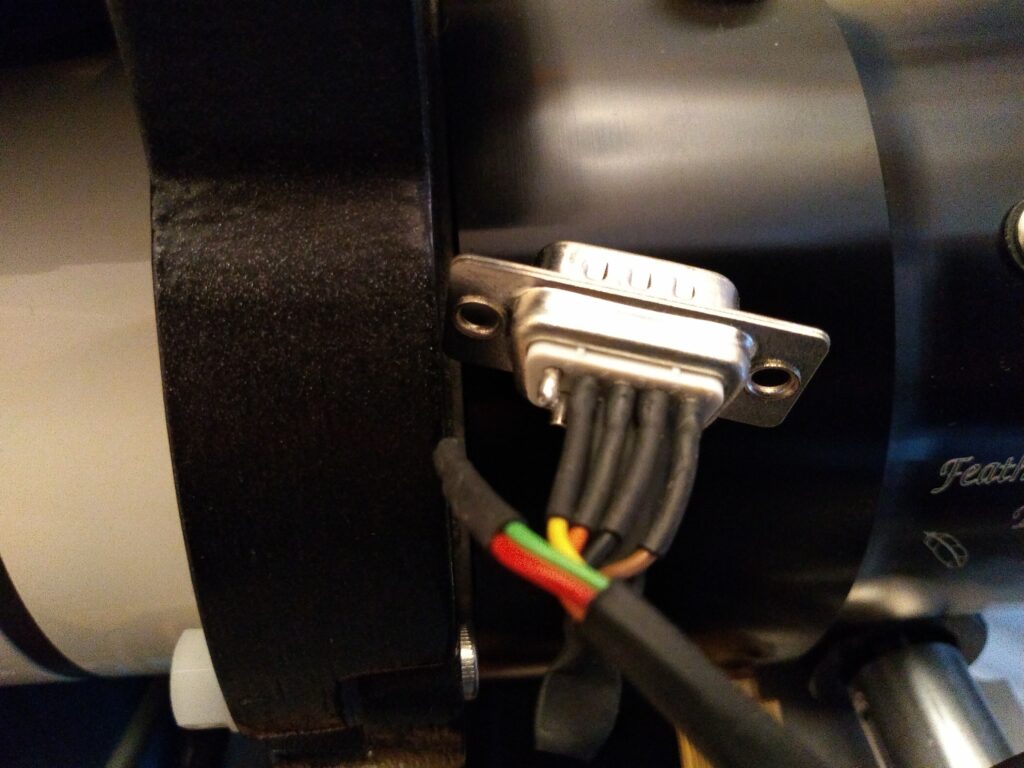
That was when the night was over ! SGPro set about running it’s autofocus but strange things were happening. SGPro was reporting that the LakeSide Astro focuser position was changing but the star HFR profile was not changing and the V curve remained flat. Since the focuser position was “changing” I did not think to go out into the garden with a red torch for an hour.
Upon inspection it was fairly obvious why it wasn’t working and inside the issue was proved to be a disconnected wire on the motor port.
Hmm …. I wonder what the issue could be !
I thought it would be prudent to double check which of the two spare connectors the wire came from and indeed it is the top one.
Removing the heat shrink outer and you can see that there is barely any wire left since the majority of it was left in the solder when it broke off. This will require a wire extension and the old solder with the remains of the wire removed first before new solder being reapplied.
View of full cup connector with solder and empty cup connector
So since I’m really bad at soldering and I was worried about having to replace the whole unit (£90) I asked a friend who is fairly handy at this to perform the fix for me.
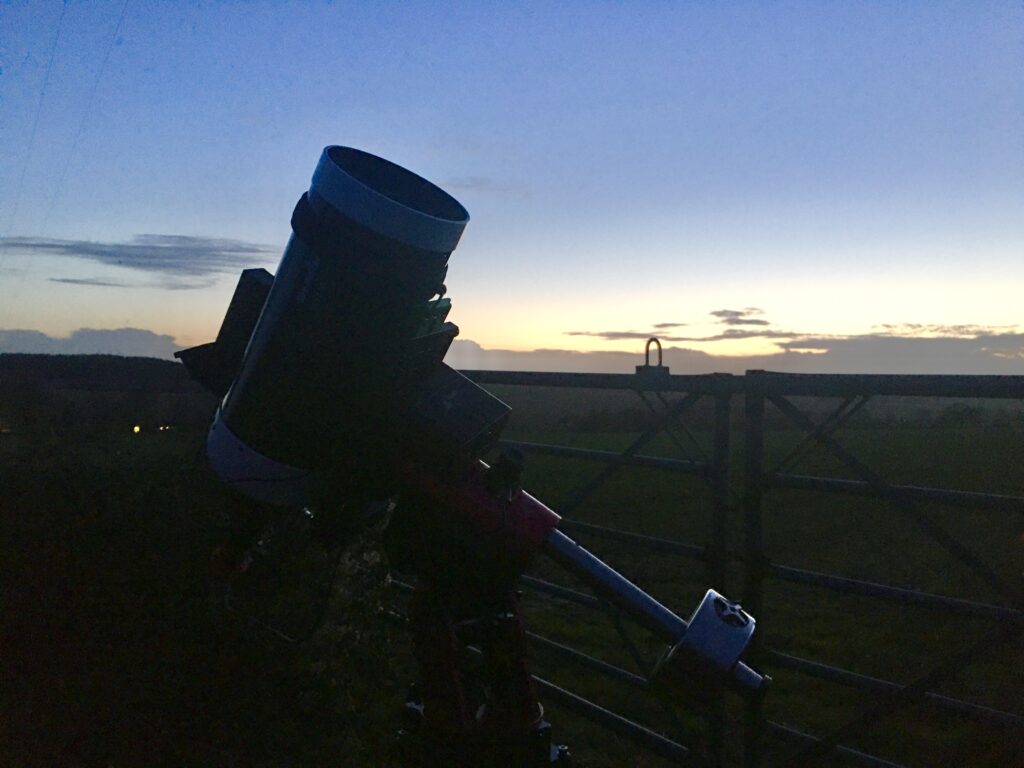
It is clear! It has been some time, at least for me, when it is clear at a weekend. It is cold. Skippysky.au/europe tells me it is good seeing, the transparency is excellent and the Jet Stream is way South of the UK. The Moon is around 70% and the local temperature is -2 degrees C with a slight frost already. I have come out with my 100mm binoculars to star hope around.
Binos ready and waiting
I had just finished a call with the BASEG society, most whom I had not seen in some time as we are still in lockdown. I came out to a Moonlit garden with a carpet of ice twinkling and crunching as I walked. It is nice to see this new garden at night and get a feel for where I may observe in the future.
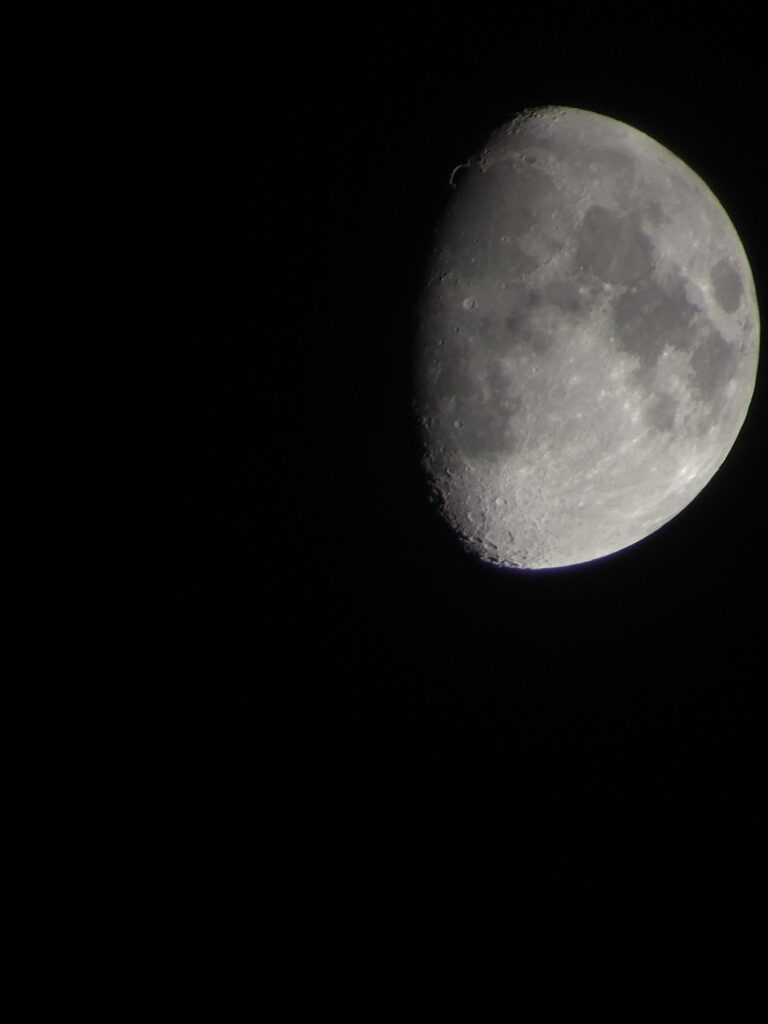
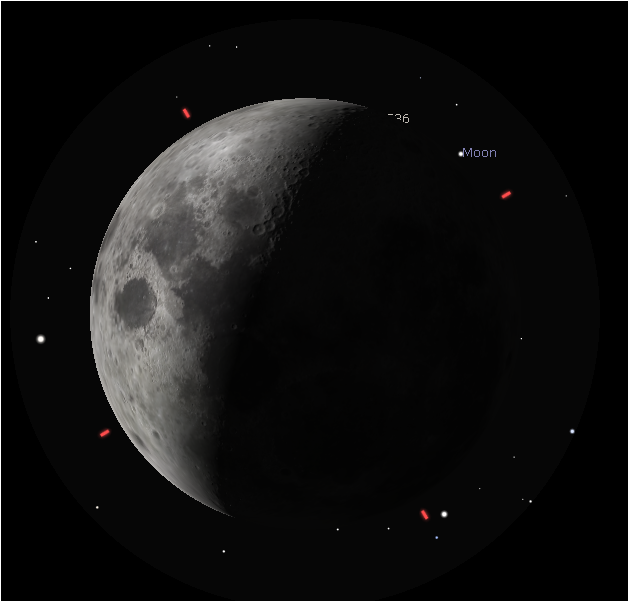
I setup the binos in the vegetable patch next to the building works for IMT3b. Not one but twice I stumbled down the trench dug for the cables, so I must be more careful. I then pointed the binos at the Moon and took a look.
afocal Moon
The view was splendid. There is something wonderful about seeing the Moon through binoculars and seeing just how deep you can go. Clavious was crips and easy to spot as was Tyco. I spent some time here and then Luke came out to view. We looked at the Moon first then I moved to M42 which, whilst washed out by the Moon, was still bright enough to see the distinct wings. The trapezium was also very clear indeed.
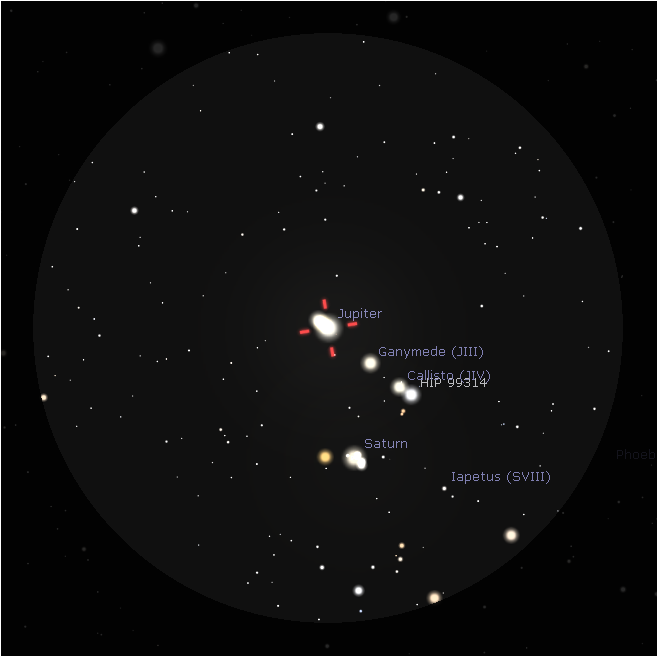
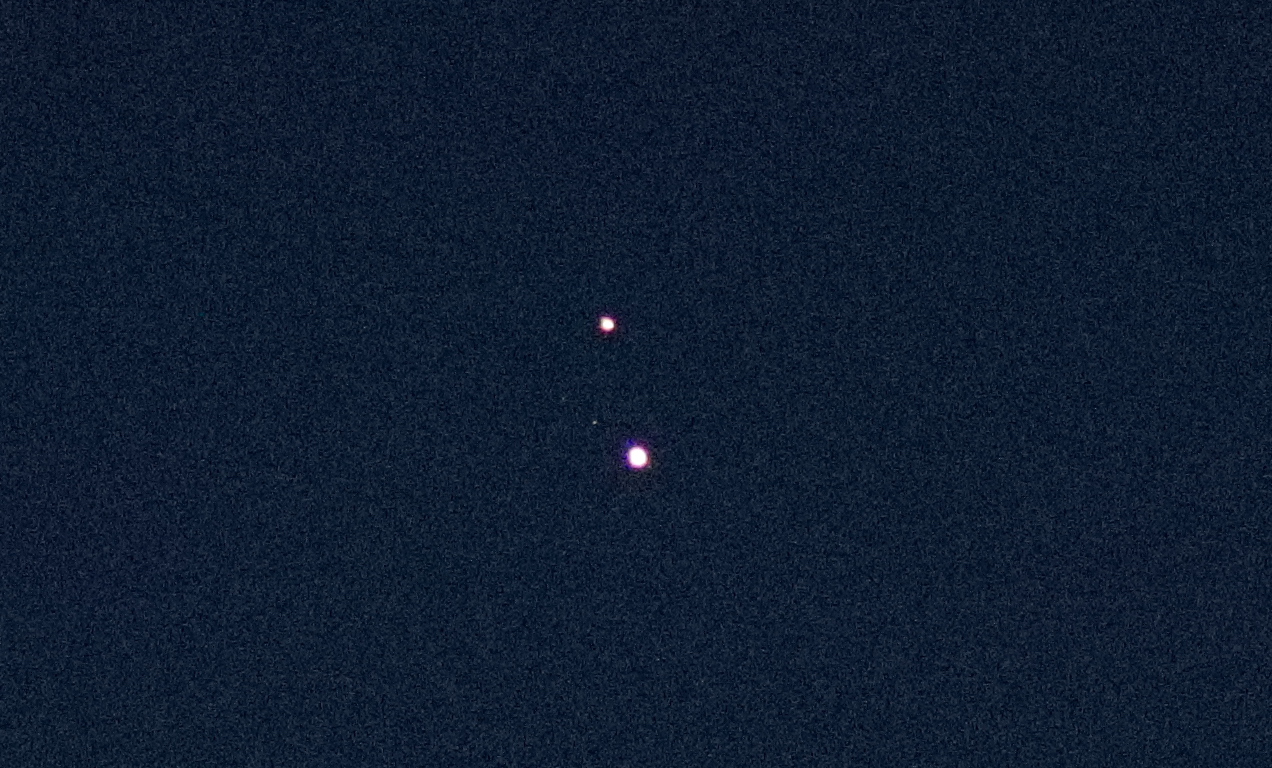
After a call to Gingergeek, who incidentally was having problems with a disconnected wire in his focuser, I moved onto M45 Pleiades to identify each of the 11 major stars fro Atlas in the West to 18 Tau in the East. Electra, Merope and Alcyone were all rather bright. I then swooped across to Aldebaran before moving across to Mars, the bright planet a small circle in the binos. I then star hopped to M33 to find the surrounding stars without being able to see the galaxy itself.
Mark Radice then called and we chatted about his C11 and the Sinus Iridum mosaic he was imaging tonight whilst sitting in his warm room. We spoke about things to look at and Mark remotely star hoped me to the double cluster, which surprisingly could be seen naked eye, even on this bright Moon night. He then guided me to Uranus which I found in a pattern with 2 other stars making up an isosceles triangle with Uranus being distinctly blue to the bottom right. I was then fairly cold so bid farewell to Mark and headed off indoors to warm up.
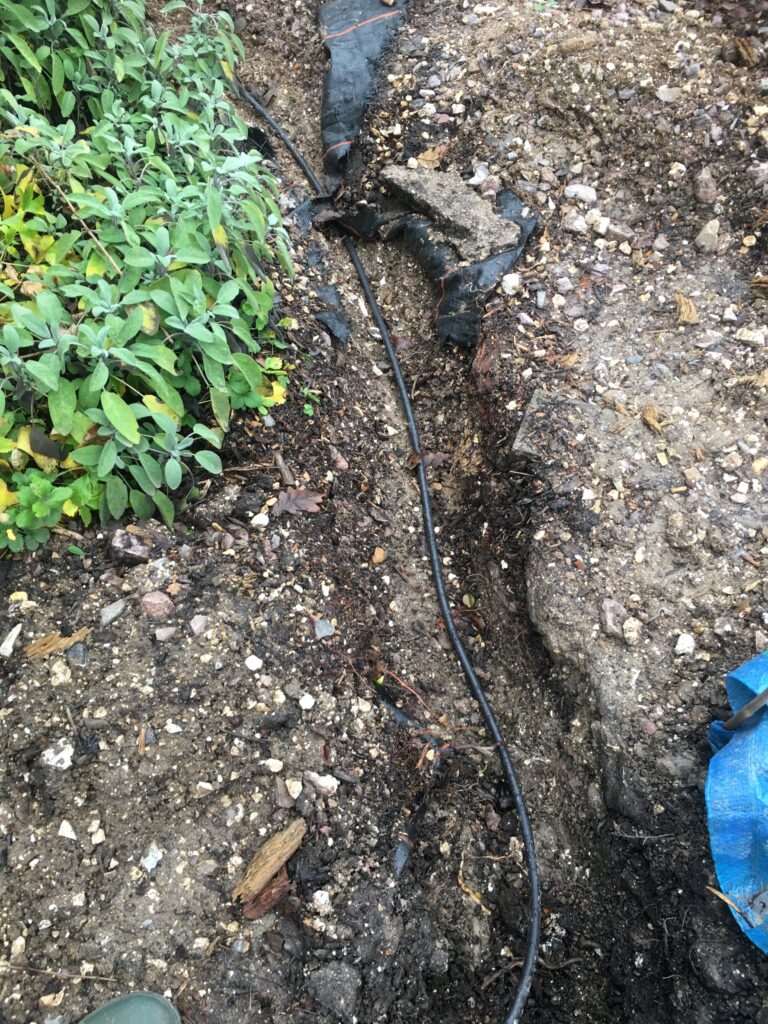
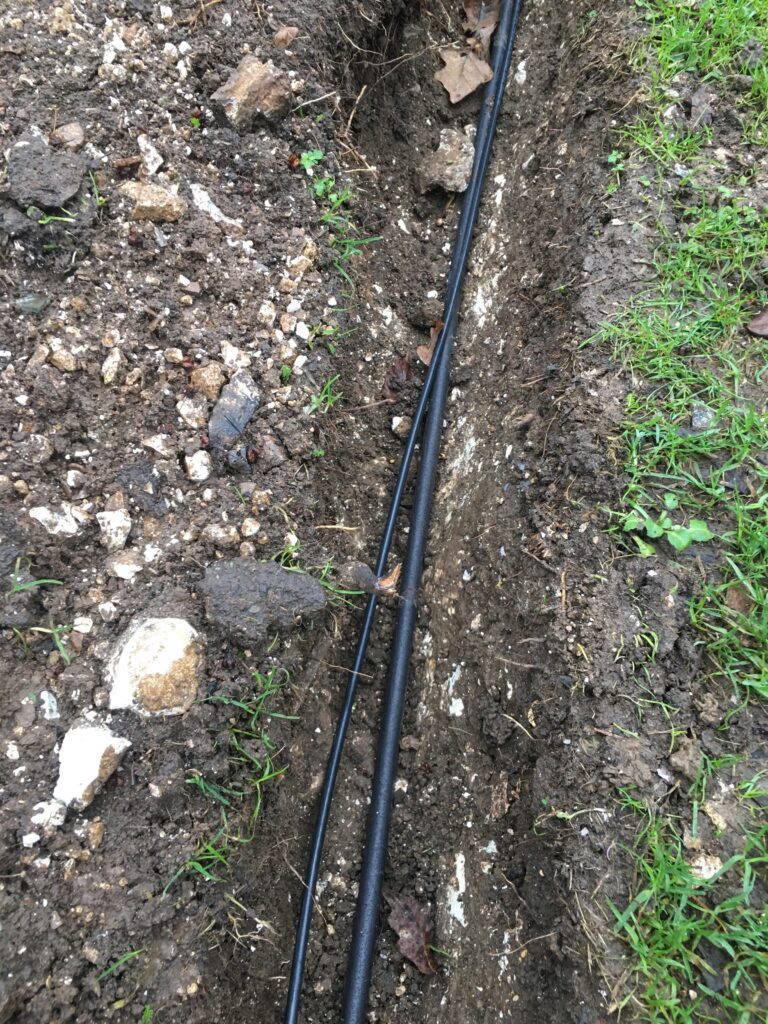
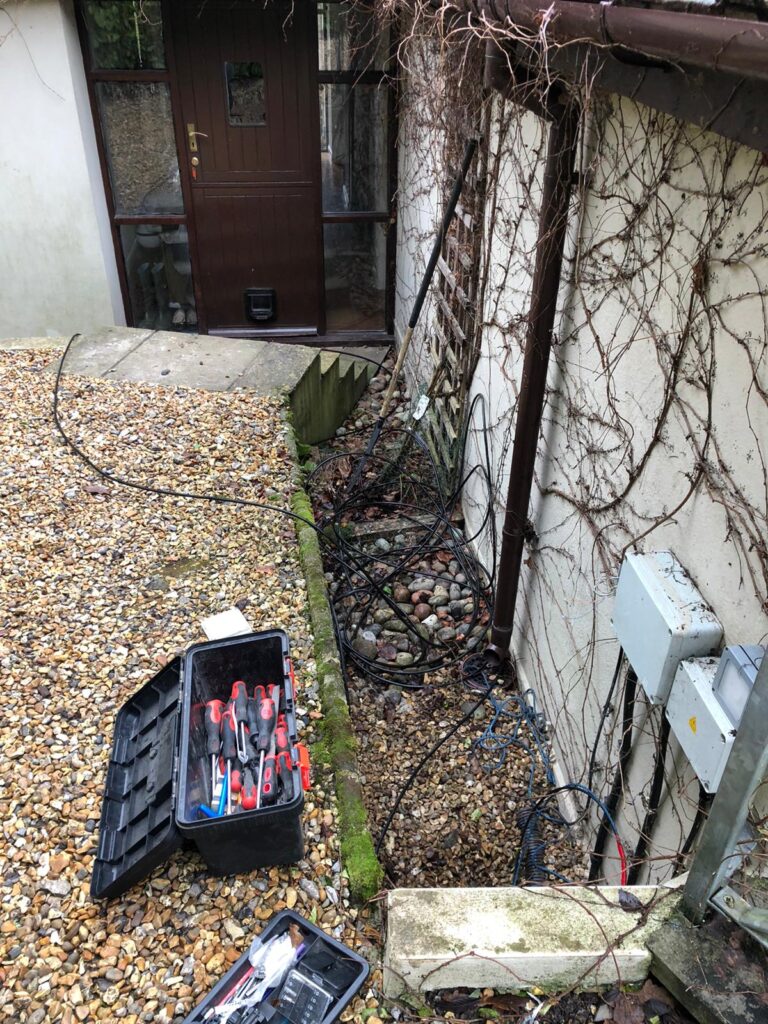
So the cable is installed in the trench visible here before I laid the ethernet.
Power cable
It runs all the way across the garden to the observatory very neatly.
Power cable across the lawn
When it reaches the observatory, enough cable is left to feed through there pipe later and the end is terminated in an outside socket. This will be later daisy chained to several internal plug to the observatory and the outside power fixed to a new brick pier that I will build.
Observatory end
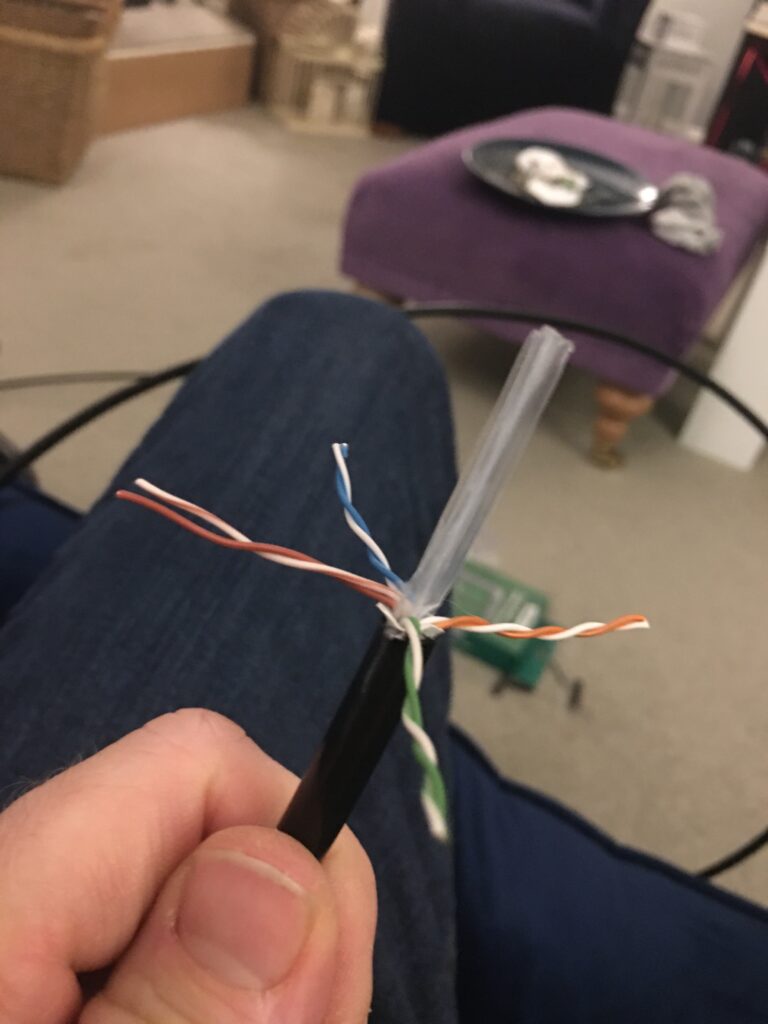
The next job was running the ethernet from the house. I purchased Cat6E as I also wanted to run cable to several places around the house that would require PoE (Power over Ethernet) which allows one to fix an access point without the need for an additional power supply. I started by preparing one end of the cable to be spliced and crimped given I had not done this for a few decades. I purchased the crimping and test equipment online and it seems to have worked well.
Cat6E prep
Then I laid out the wires in the correct colour format. The tricky part is getting all the wires to stay flat after twisting round each other to get them in the right order. Then to make matters worse you cut them short to much the connector on and the cables self align in slots.
Cat6E
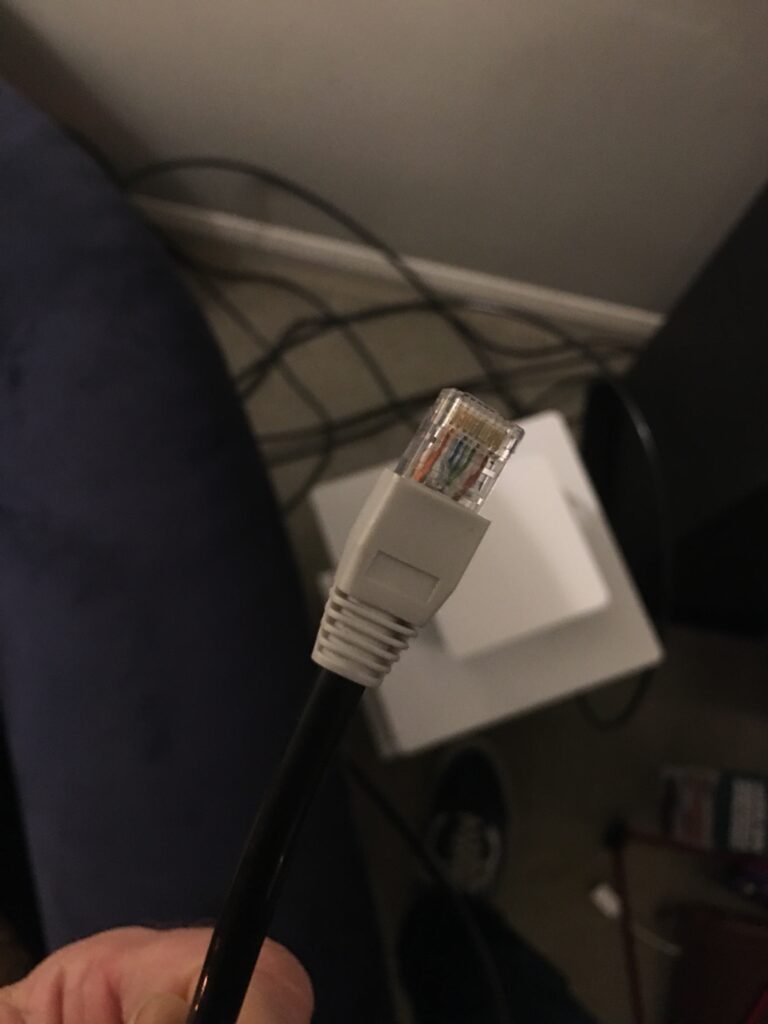
The final end looks like this.
Crimped Cat6E
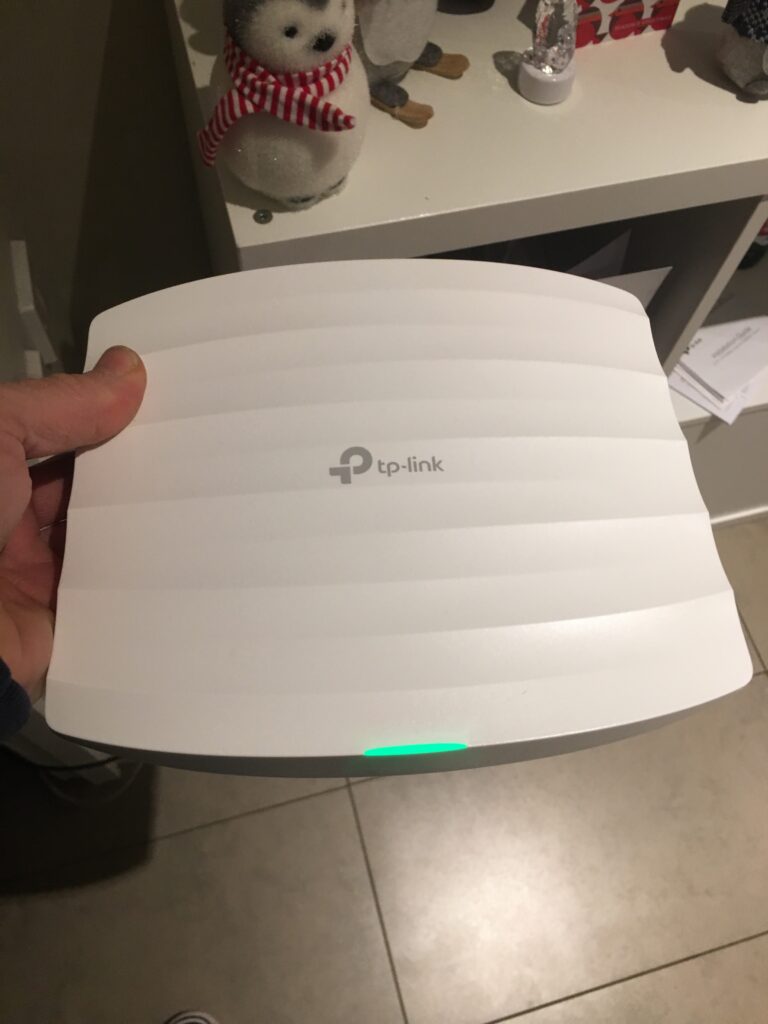
Out of interest I have posted here the access point I purchased that is PoE, I simply love it, although nothing to do with the observatory per say apart from going into the kitchen in this instance at the same time as running the cable to the observatory.
PoE AP
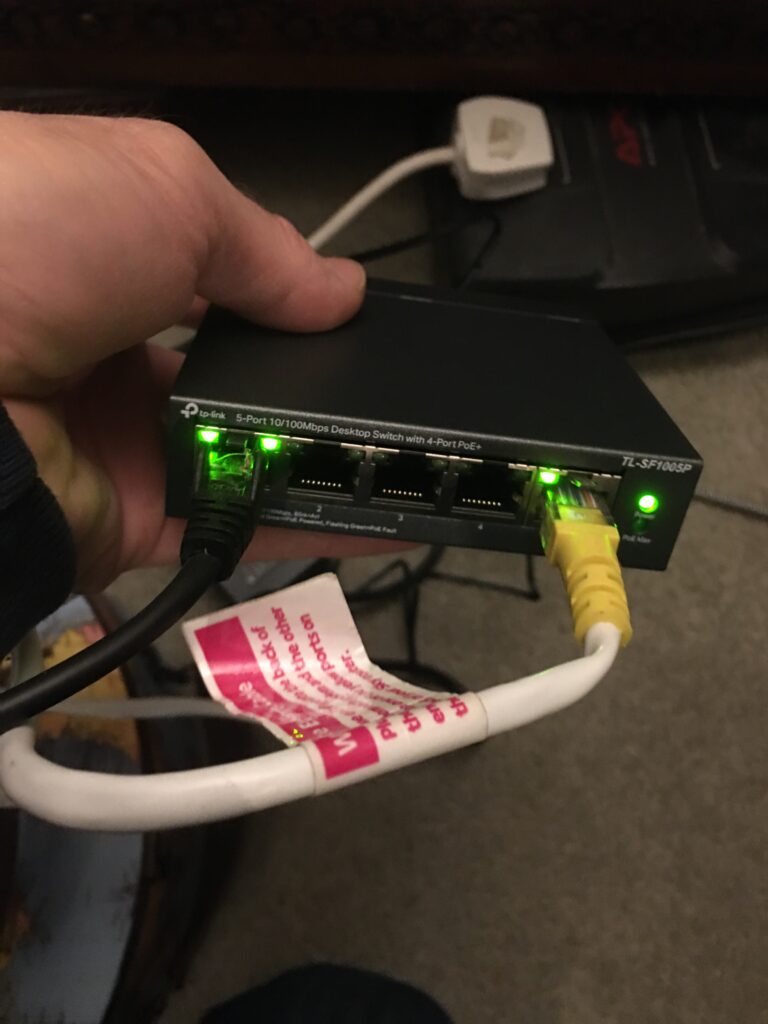
The AP does require a switch or hub or router that supports PoE, unfortunately none of the hubs that come from the major broadband suppliers ship any so I purchased the TP-Link switch that does.
TP-Link PoE switch
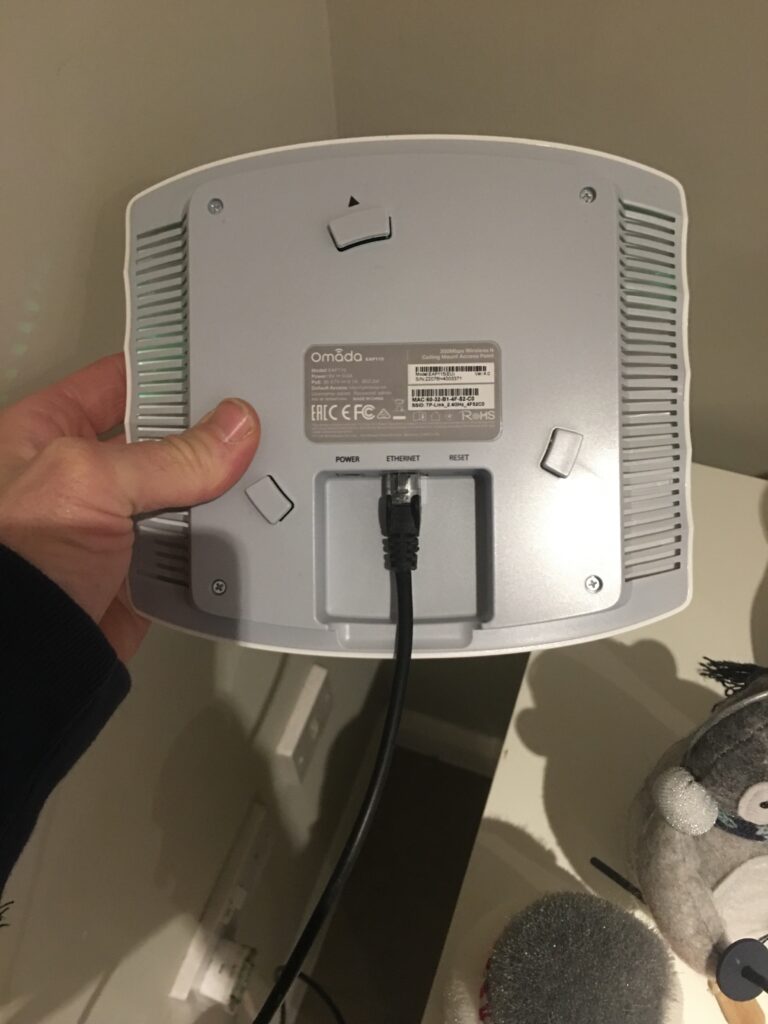
To conclude this part here is the single Cat6E cable going into the AP.
Back of access point
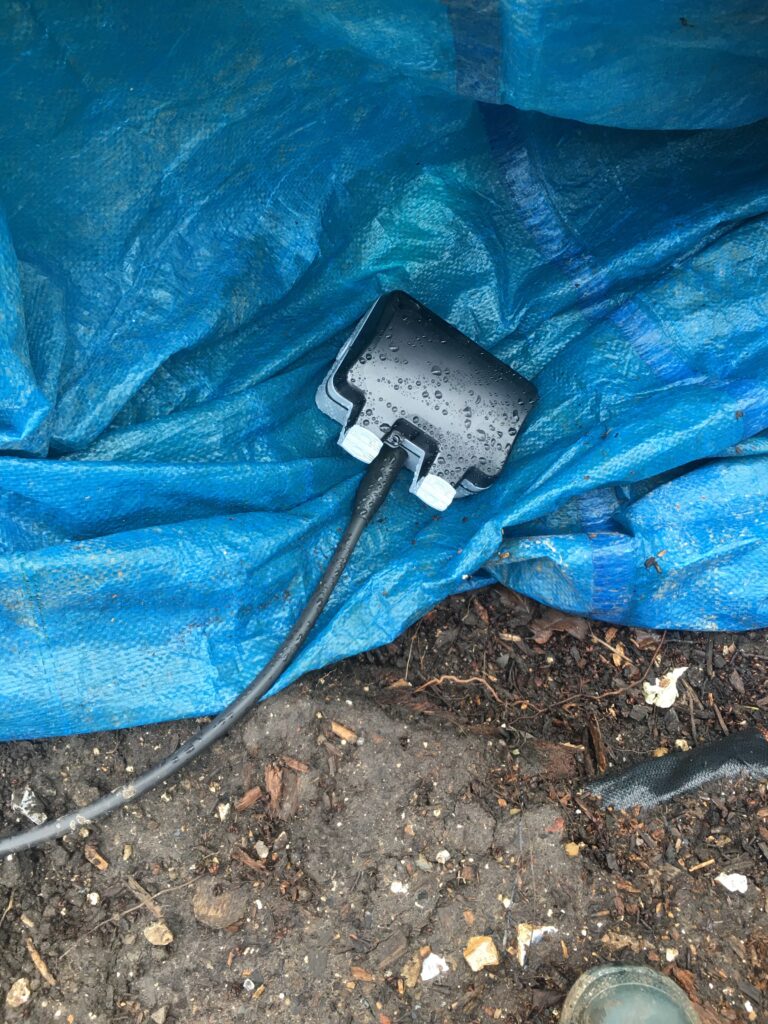
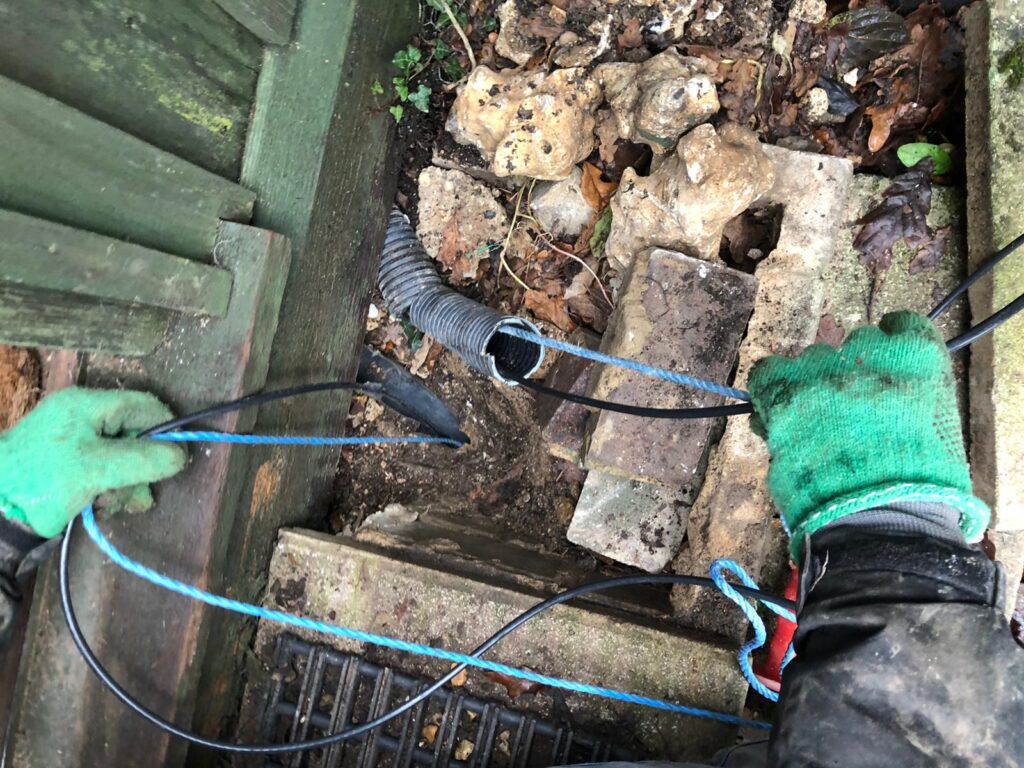
So then I set about running the cable from the observatory site across the garden with an RJ45 connector ready and waiting under the tarpaulin at the vegetable patch.
Ethernet CAT6E cable installed long with power.
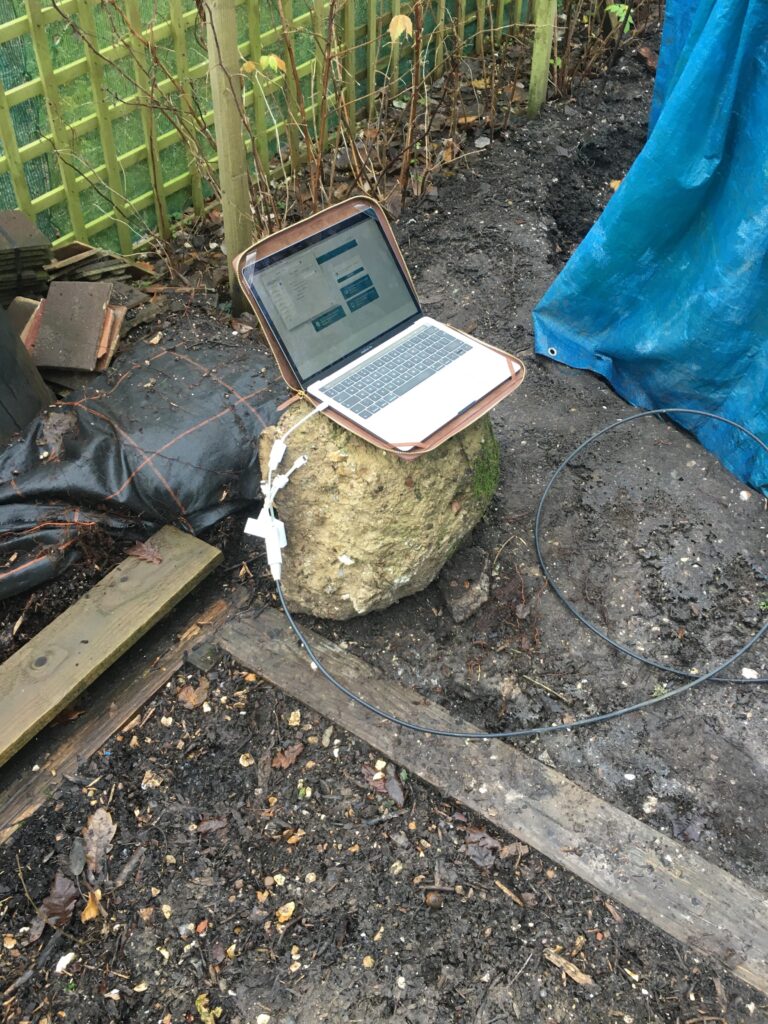
I then terminated the first leg of the cables journey in the woodshed where the power is connected (I plane to spur a connection to the planned Summerhouse from here in the Spring) and setup my laptop in the vegetable patch to test the connection which worked!
Testing the connection
Before I get to the final piece of ethernet running from the woodshed to the workshop, I wanted to run the large length of cable from the workshop to the Snug. I am fortunate that a BT cable had been run back in the 90’s to the workshop when it was used as a business office. Given I had no need for a landline in the workshop I decided to use the BT cable to pull through the ethernet down the length of the underground pipe between the workshop and the house, again I am very lucky it was there!
Old BT cable and duct comes in handy 🙂
I started to feed the cable through along with a new piece of rope I found in another duct! But I quickly found a break in the pipe located under the steps leading into the workshop.
Duct broken just outside 🙁
After hours of pulling and pulling back the other way, then more pulling, my daughters boyfriend Luke (small mercies for Lockdown he currently lives with us) retrieves the ethernet cable taped to the BT cable some 100ft away.
Ethernet comes through 🙂
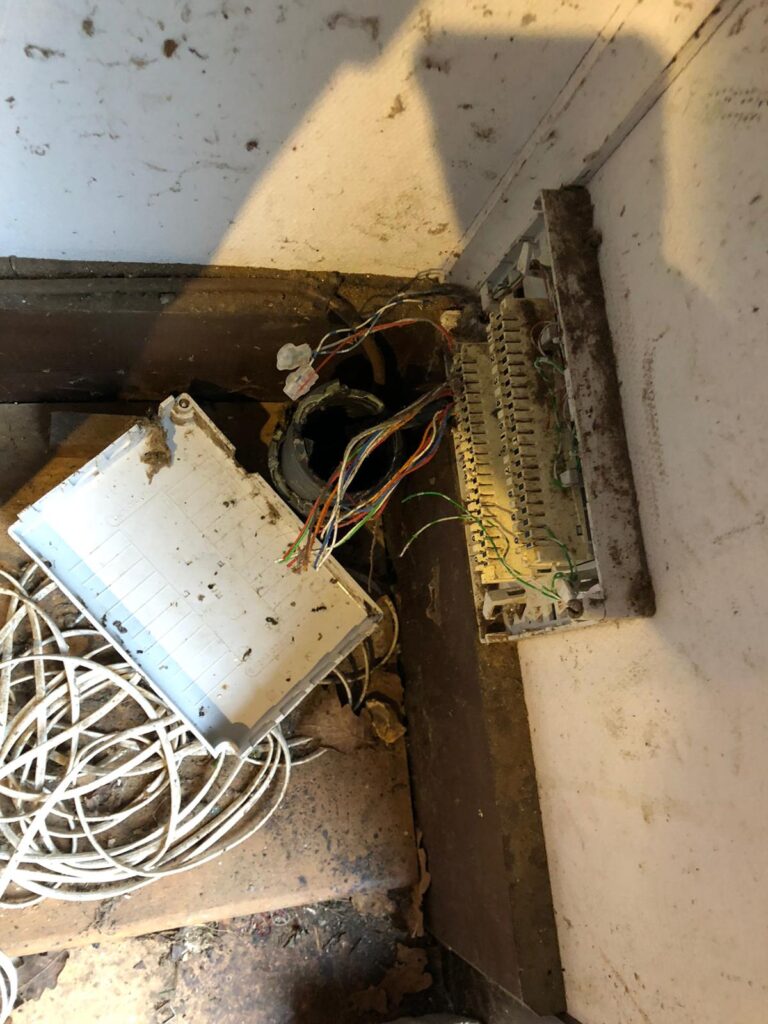
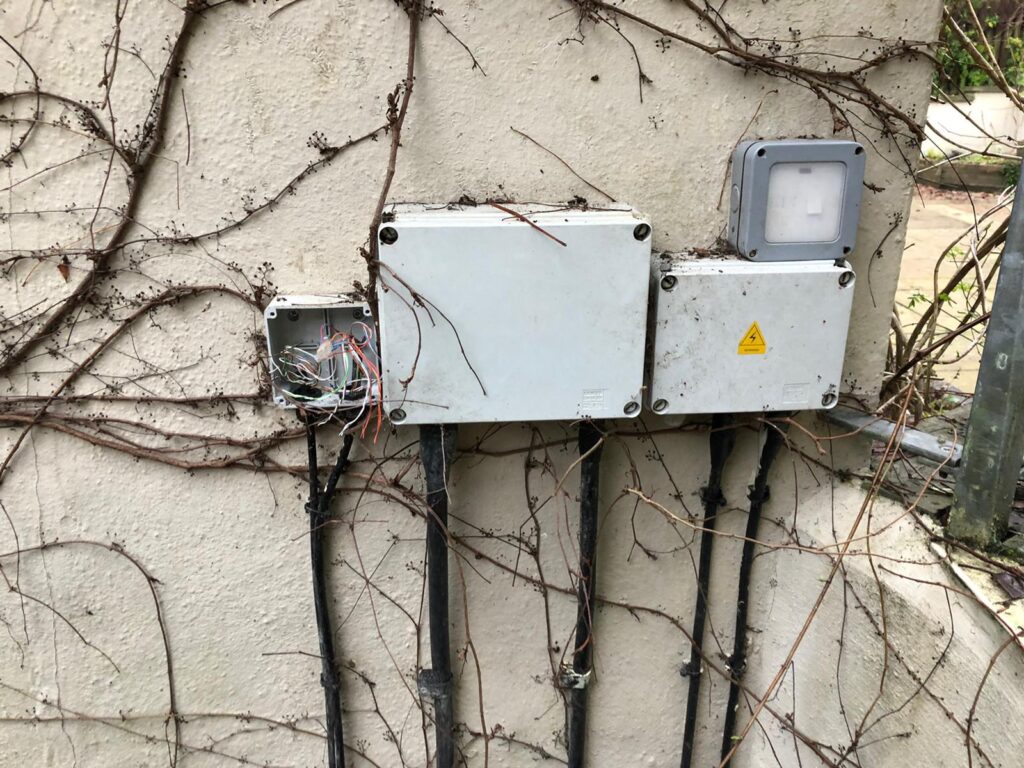
This is the BT connection rats nest at the back of the house who’s cable I repurposed then removed, next to a bunch of electric connection boxes for outside stuff!
The saga for ethernet does not stop there, but nearly! We pulled through the rest of the cable and tacked it up the wall on the right and then along to the door where we spend hours drilling and hunting for the cable in the loft………..
Cable ready to go into the house
Darkness falls as we finally pull the cable through into the house and into the Snug.
Ethernet cable into the loft and the house.
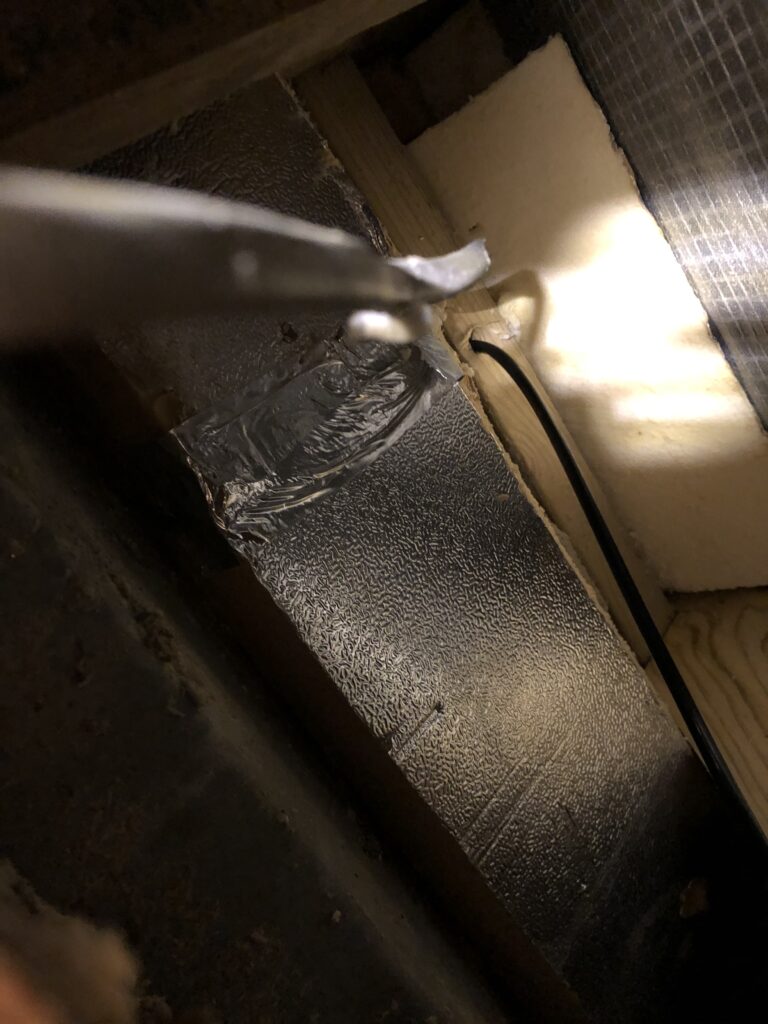
Here is the tight loft space where the cable runs through.
Loft eaves and ethernet cable
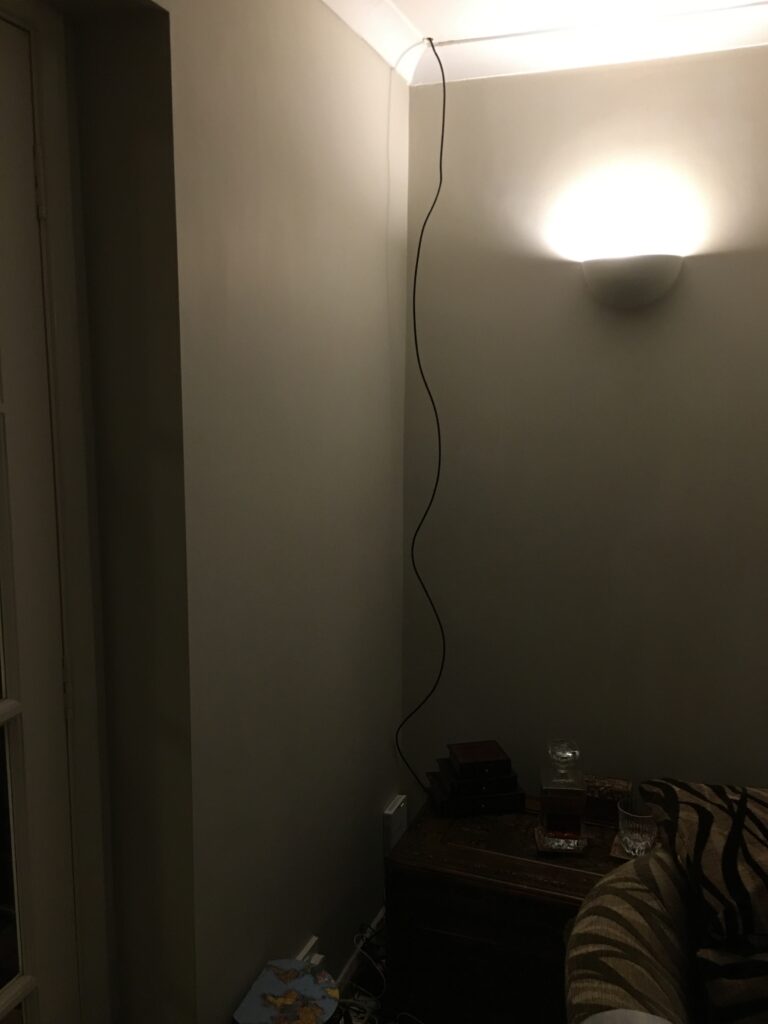
The final leg was dropping the cable into the Snug where the fibre terminates in the house from the loft. It snakes it’s way around the perimeter of the house inside the loft (I have a chalet bungalow) which took about 2 hours!
Main ethernet connection to observatory!
Fortunately I have the most understanding wife in the world who is very supportive to have her husband spend hours in the loft with a cable.
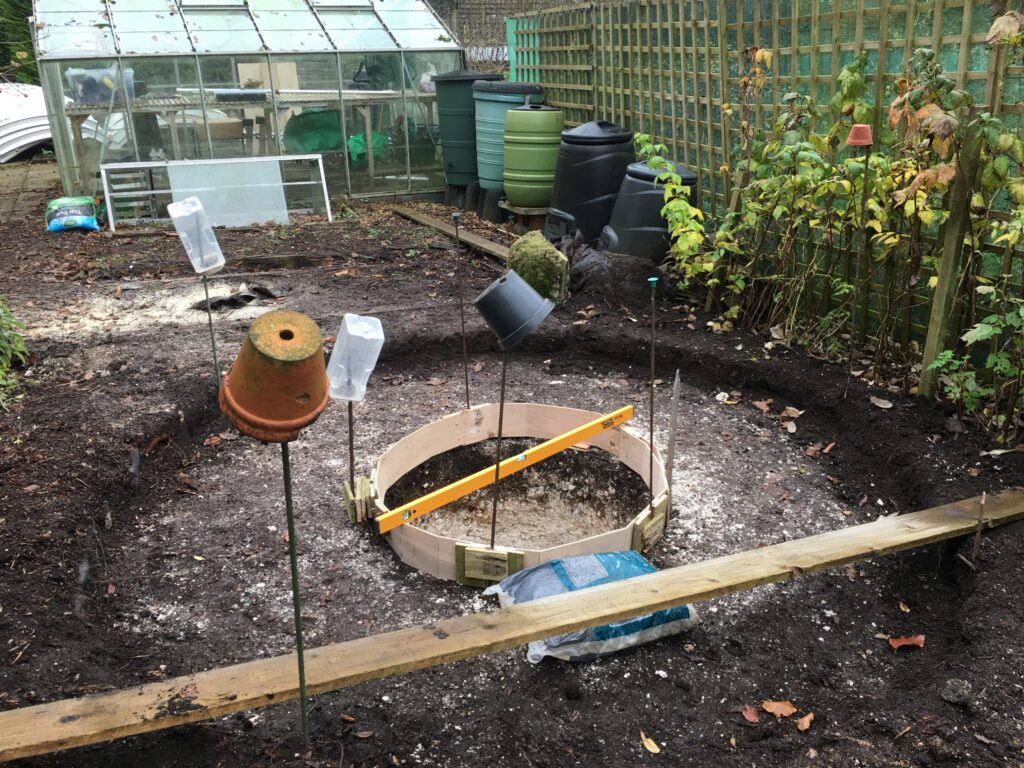
So with the site prepared I had one last check of the levels as the ground slopes away to the right thus meaning I needed to adjust the former for the central block. The dome segments can be seen resting in the background. I also used a large bag of stones to hold the former in place.
Slopping site
Next I cut a hole in the former for the pipework that will take the electric cable and ethernet from the house. I used some old downpipes and kitchen waste pipe I found lying around in the garden.
Pipework for cables
Here is a closer shot of the pipework that shows a 90 degree angle that all be flush with the finished floor.
Closeup of pipes
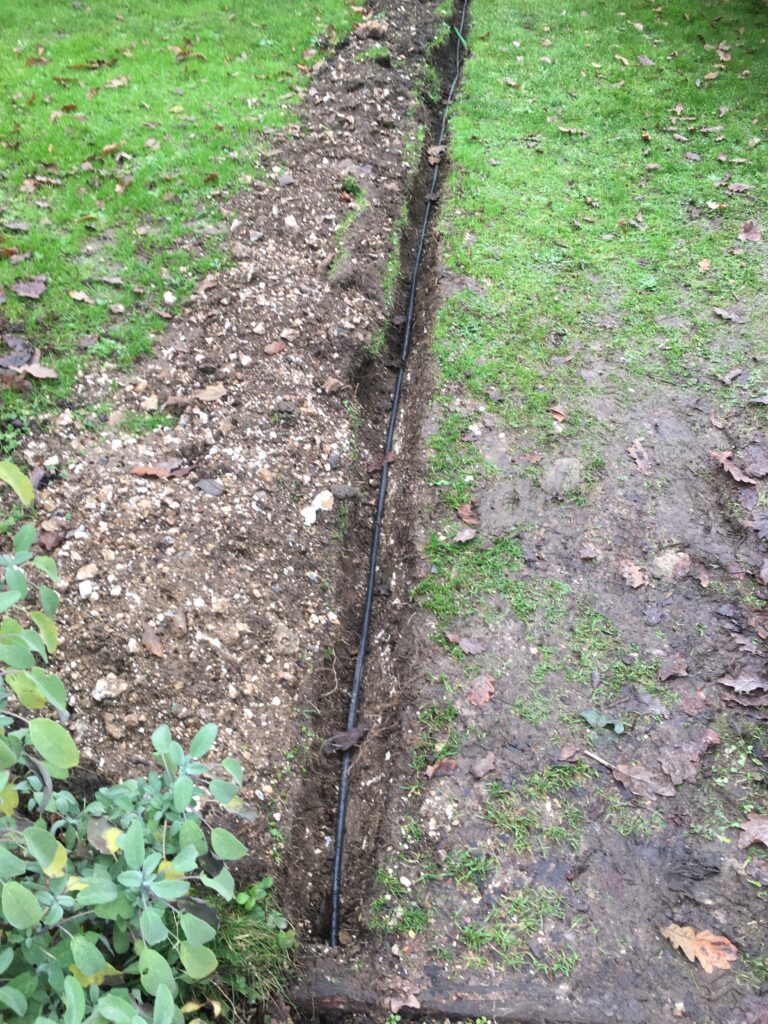
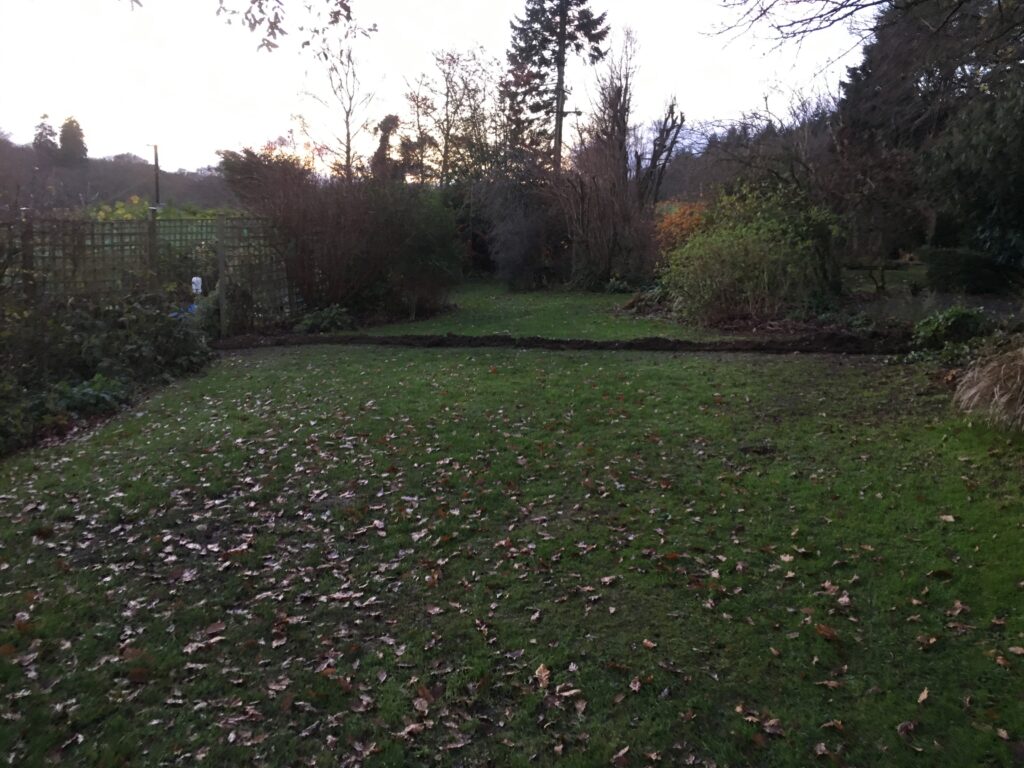
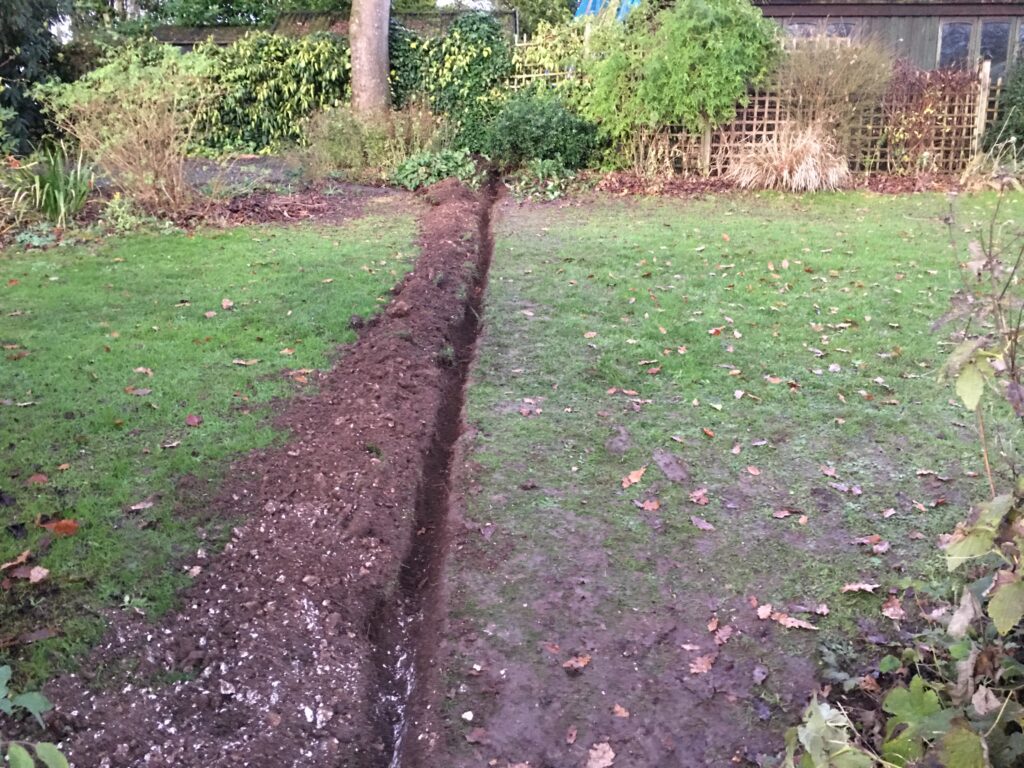
Now I had to prepare a trench for the cable running from the observatory to one of the sheds across the garden. So GingerGeek and I set about digging 6″ down where the cables would lay, eventually to be covered by a slabbed path. The digging took hours, hitting rubble including glass in the ground and offending chunks of flint.
About 70 feet trench across part of the garden
Down to the left as the ground slopes away and towards the observatory location, we dug the trench round the corner. The cable would have to run under large rotes and as we found out a large sleeper buried in the ground across the opening to the vegetable patch.
Entrance to observatory area
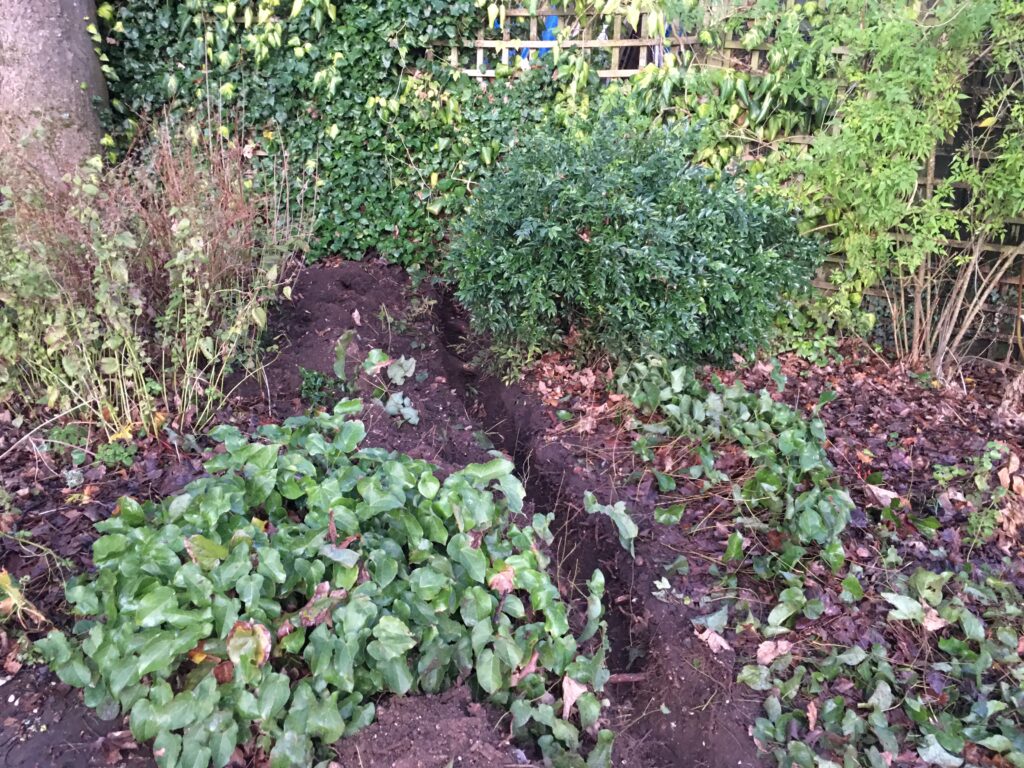
Turning around standing with your back to the vegetable patch where the observatory will be sited, you can see the trench running off towards some outbuildings/sheds and a planted area that I would have to tackle next as GingerGeek had to go do some chores at home.
Planting area to be dug through!
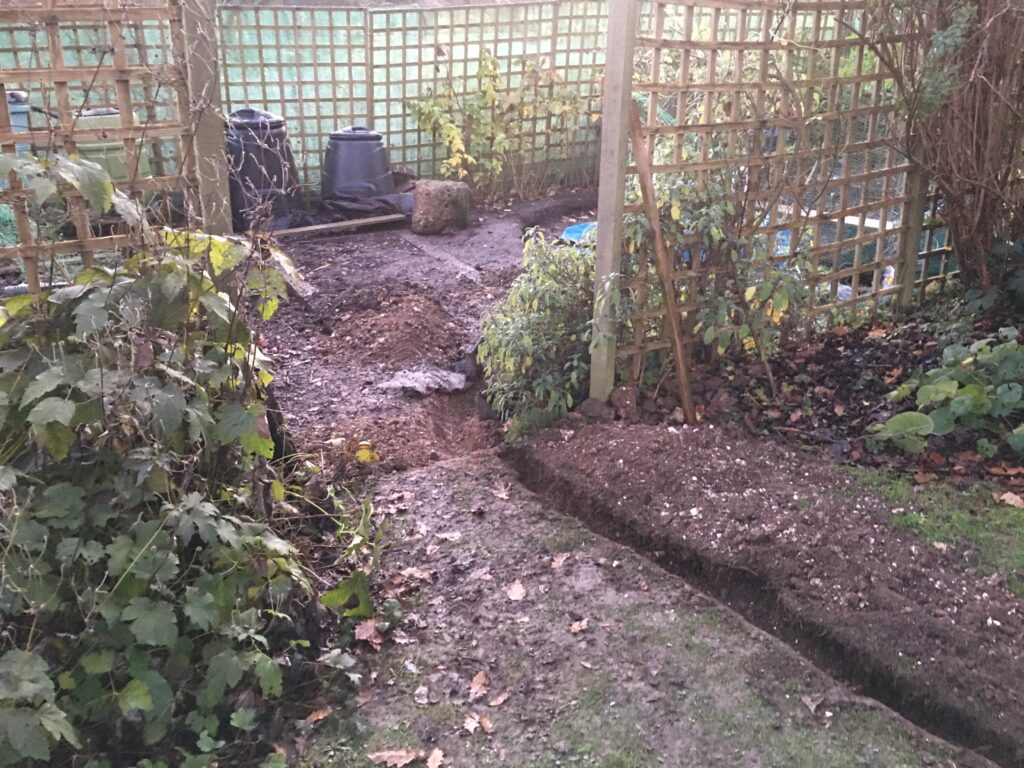
So it took almost as much time digging this section out as it did getting across the expanse of lawn. Routes from the Sycamore (left) and countless plants made this hard work. I then managed to get to the trellis separating the planting from the 3 sheds on this side of the garden, which I would need to go under.
Trench within boarder
Around the other side of the trellis it was very cosy to work in the tight space, old wood still awaiting collection by the previous owner meant digging was difficult, also the land raises up quite a bit this side so I had to dig the trench deeper. The hole I managed to create is shown by the red arrow. Again lots of building rubble had to be removed and I landed up on my hands and knees in the trench digging with a trowel.
Hole to the other side!
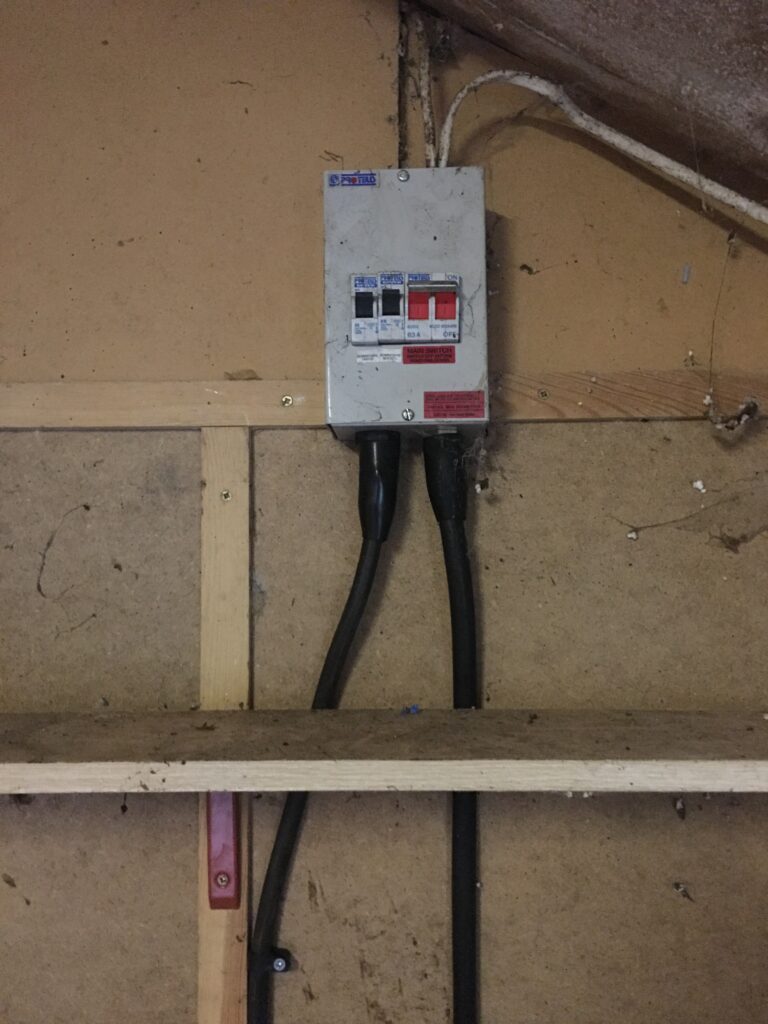
So I had made it to the shed. Now it was dark and I had to wait another month before Steve the electrician would be able to fit me in. When he arrived and the armoured cable was laid and fed under all the roots, he made the connection in the existing fusebox in the shed.
Observatory connection left.
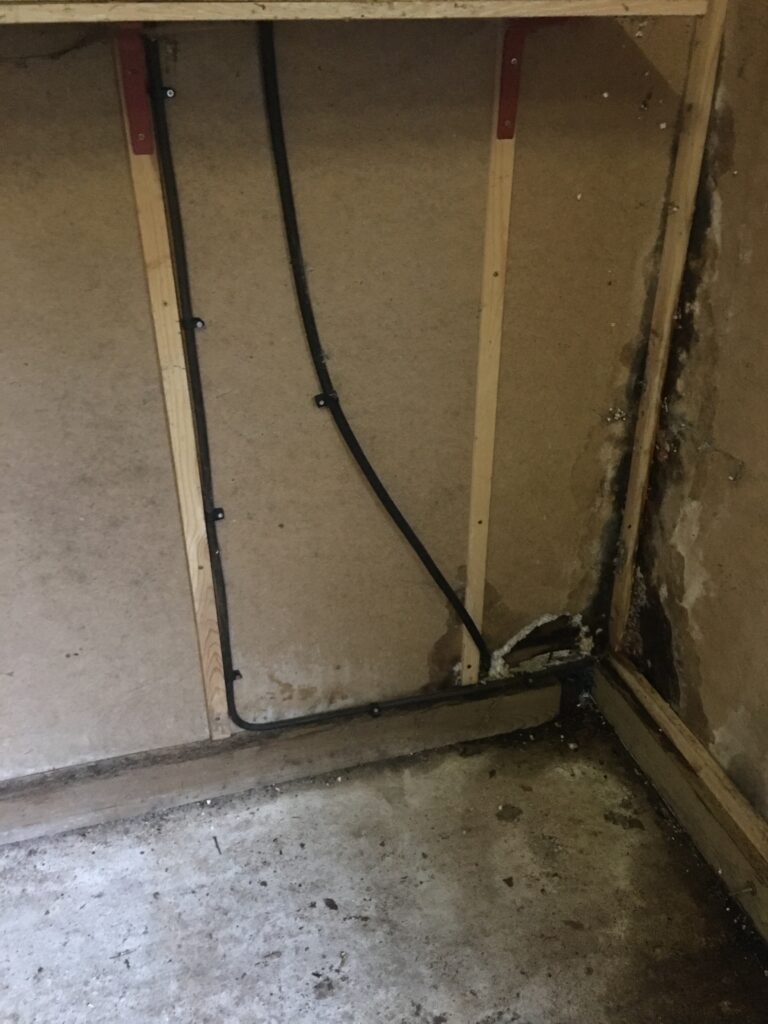
Then it ran down the wall and out through a hole that was serving the existing power feed from the workshop. The woodshed is in a dire state and needs replacing, but will serve as a hub for equipment until such time I get around to it.
Cable out of the very unloved woodshed.
Next I will share where the power and ethernet cable runs and how I installed.
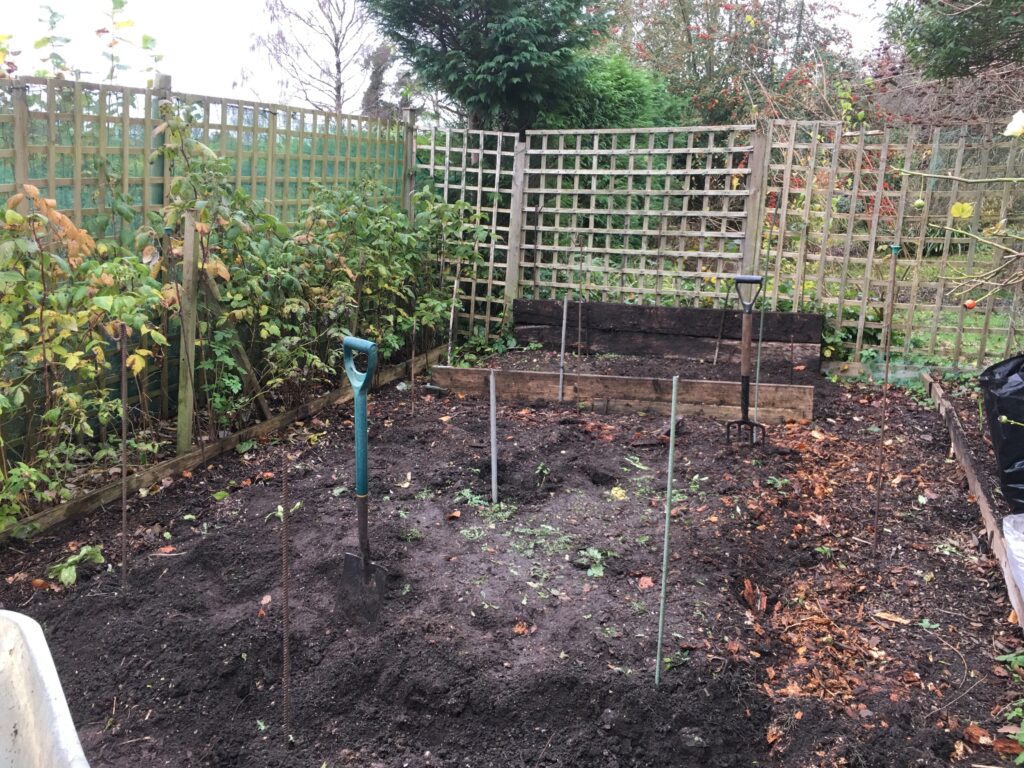
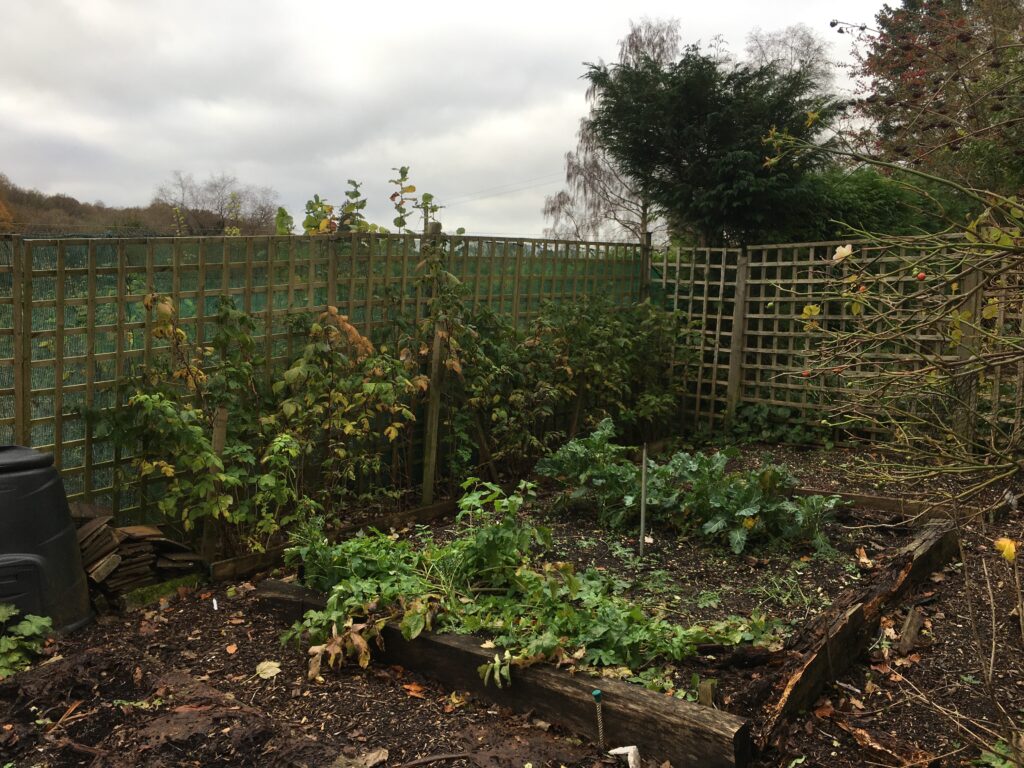
So now the work begins. How to turn a vegetable patch into an observatory. The first thing any good person does when moving into a house is perform a harvest! So we set about harvesting and found some rather large parsnips (which we have been having every Sunday lunchtime since) 🙂
Luke with one of the smaller parsnips
Once done, we removed the edging boards and marked out the dome diameter using the stakes we found in the garden.
The footprint of the 2.7m IMT3b
Once done I left Luke to dig the rest of the dome base out with a little help from my daughter and as you can see digging in a vegetable patch is rather easier to start with than hard ground due to years of using the land.
Dome base dug out….but what about the pier hole?
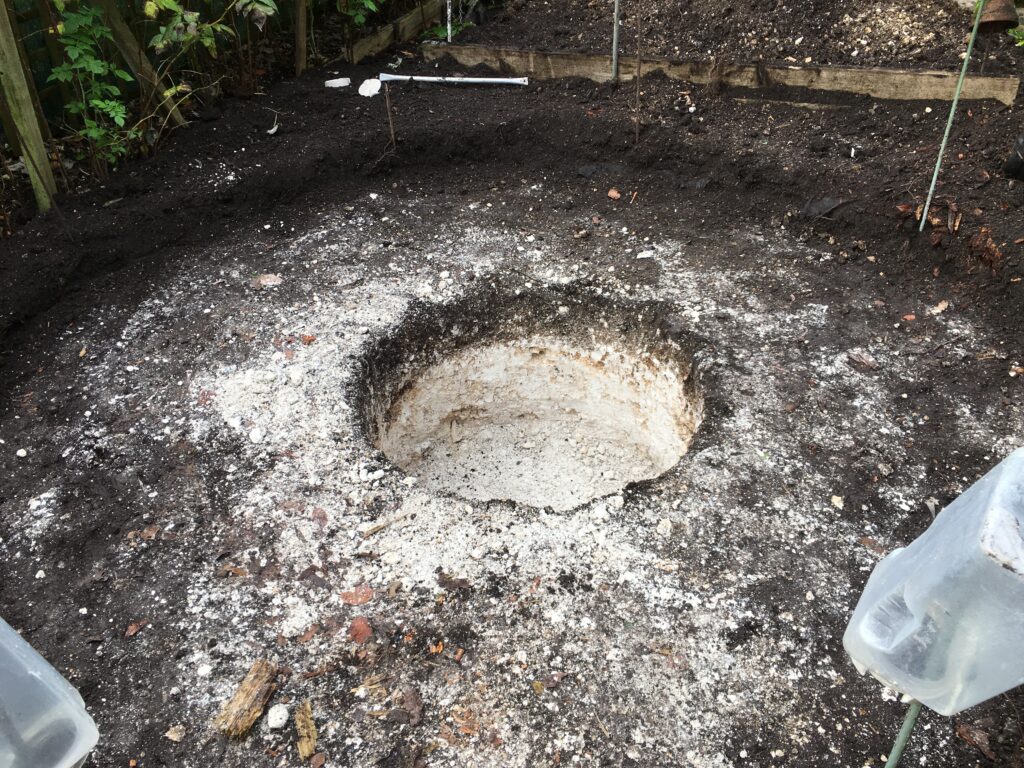
Okay, so that’s the dome base which is a nice 6″ deep. Next, which was a slightly bit more problematic was to dig out the pier base through chalk to a depth of 65cm x 1m wide. Yes I know I am mixing my scales but that is because I can 🙂
Pier base
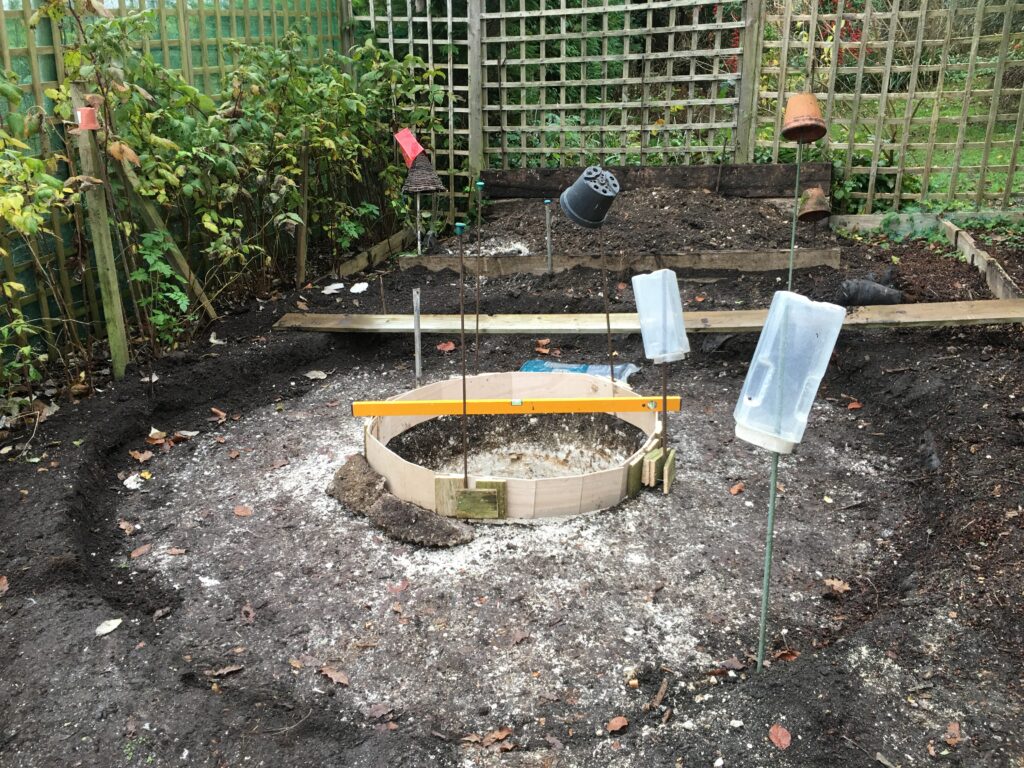
I then had to wait several weeks for the weather to improve before I could start creating the former for the hole.
Plywood former for the pier base
I must add at this point, that despite building and installing many domes before, I sought out the experience as one should, of another astronomer and friend, Nigel, who sent me a well prepared document of contracting a concrete base, that I have used as extra guidance on this dome build.
View from above with locally sourced (in my ground) flint to be used as sub base
Next up will be more preparation for the foundations and connecting the electric and ethernet from the house some 100m away the way I have to run the cables!
So after the shortest time in a house, I have now moved to a much better astronomy home, surrounded by fields and forests, ancient woodland and with some of the darkest skies in the North Hampshire Downs. I am fortunate in my location, however less fortunate that the build of this observatory, unlike my other observatories is happening in the middle of a pandemic of Covid-19. This as you will see makes it extremely hard when you can’t have astronomer friends over to help with the preparation and installation.
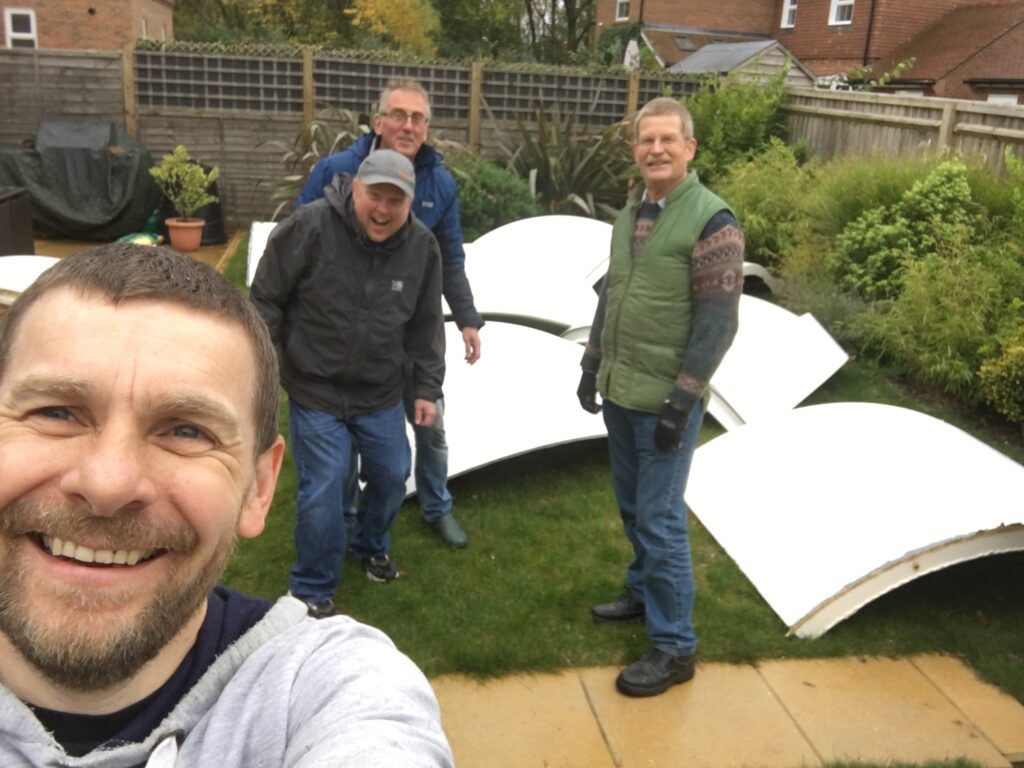
The move started to with the dismantling of IMT3 and in the final days at the previous house we dismantled the dome, at least at the time I could have some friends over to the garden to help with Mil Dave, Alan and Shane lending a much needed hand.
Dome has gone!
So on a quick dismantling, which was much quicker than constructing the astronomers put the dome segments on the lawn 🙂
Oh there it is 🙂
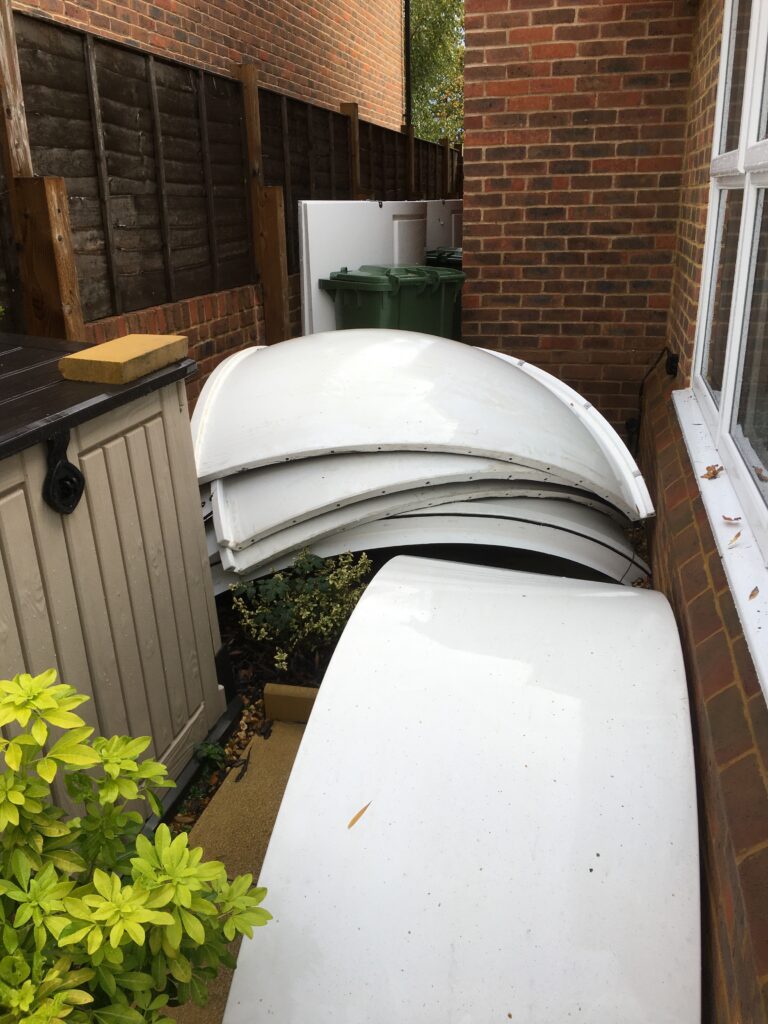
However as I found that night when a storm front came through, which caused me and my daughters boyfriend to get up after midnight to secure the dome segments in a more wind resistance piece of the premises.
Wind resistent place
The following day Luke has had his first angle grinding lesson to take out the remains of the bolts and plugs which to be honest I think he really enjoyed.
Luke’s lesson
Then the moving day came and I put all the important scientific astronomy equipment in my old Landy to make sure it got there safely.
12 Inch Officina Stellarie
whilst the rest of the observatory went in a further truck kindly supplied for free by our removal company who are the best removal company ever! Thanks Camberley Removals!
IMT3 tucked up and ready for shipping
By mid November, some 4 months after we accepted an offer on the house I landed up with my new more astro friendly observing location surrounded by fields.
IMT3b Location is a vegetable patch
Next up is removal of the local vegetation and preparing the ground for concreting.
The most funny thing about moving to a new house is assuming you have understood your horizons correctly, well at least I found it funny when I got it wrong. After several attempts to catch the conjunction, traveling out to a nearby field with low horizons, Christmas Eve was no difference. I had set off, this time with the Esprit 120 and QHY168C and on arriving at the location realising that the weather was too cloudy to grab the conjunction.
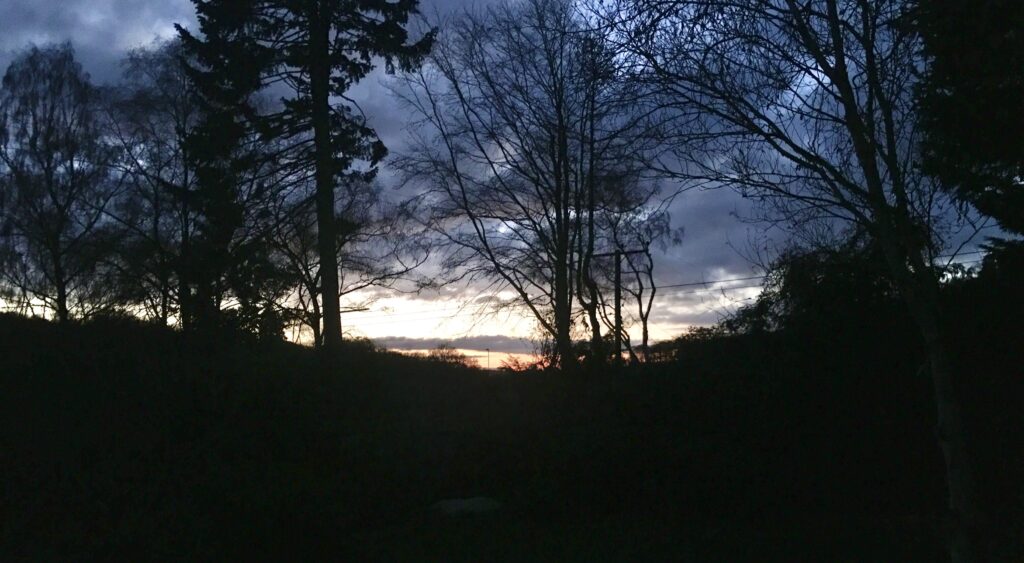
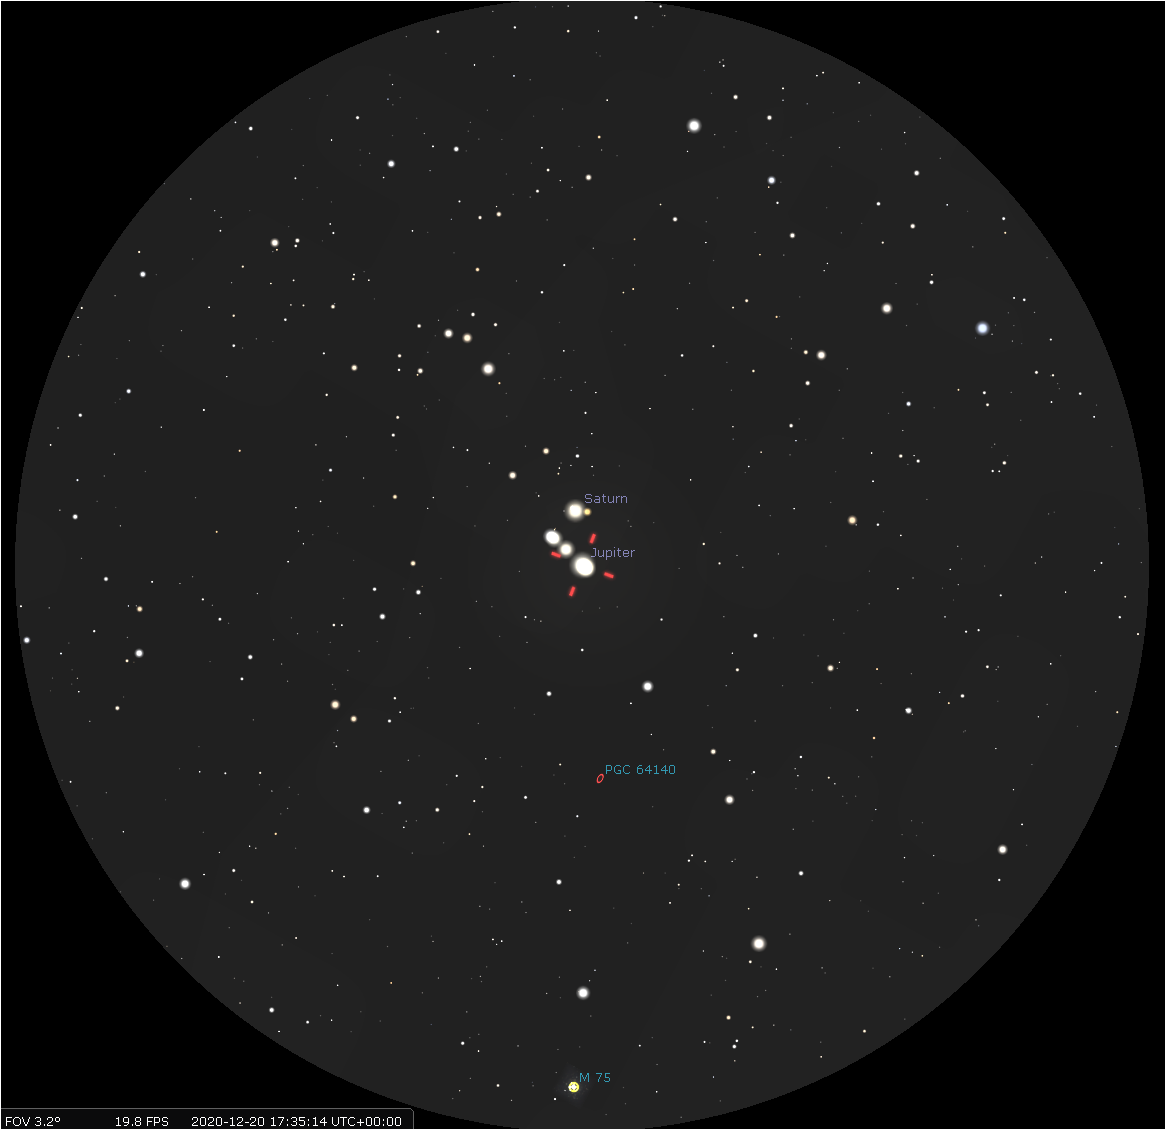
So off I went back home. I decided to wonder up the garden to see if the weather had cleared when I returned, to find that not only was there a gap on the clouds, but also I could see Jupiter !!! This meant only one thing, that my South West horizon was not +15 degrees but actually +4 degrees! Wow that is good and lucky.
View South West , observatory is going to be in front of the foreground trees
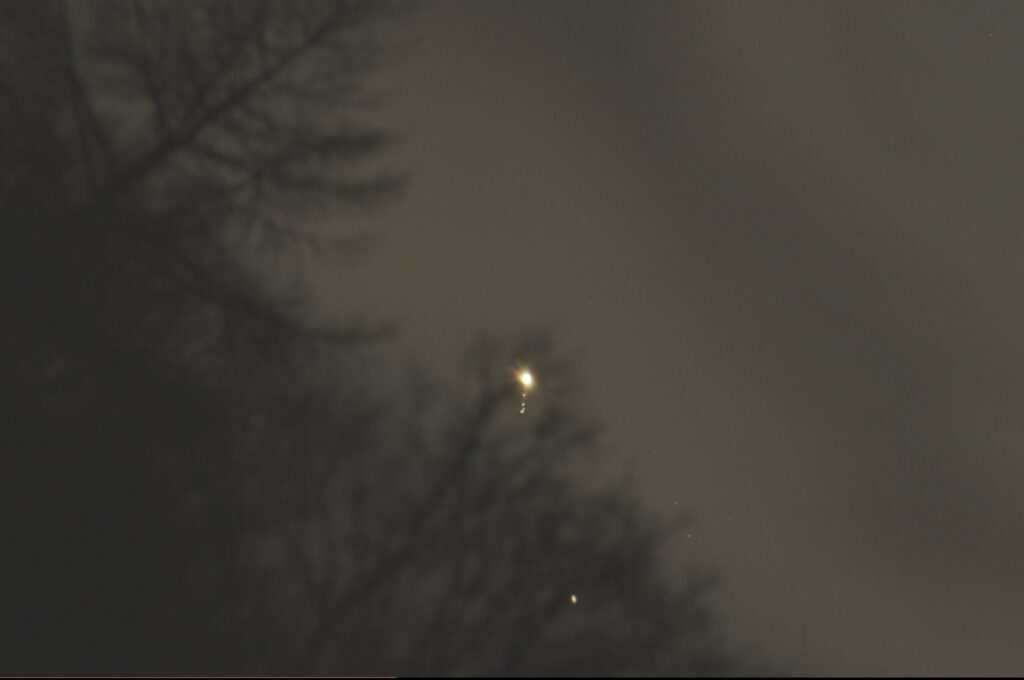
I ran back to the car and started hauling the travel scope to the building site of IMT3b which is currently a vegetable patch, this is around 200 feet away from the car part way down the garden. It took 5 trips to move all the equipment, good for my Apple watch exercise rings, not so good for the setting of the conjunction of Jupiter and Saturn. By the time I setup and slewed the telescope round the pair were setting behind the ancient forest in the distance but I managed to snap a single image! Perfect.
Jupiter and Galilean Moons with Saturn below – 120 Esprit and QHY168CCropped
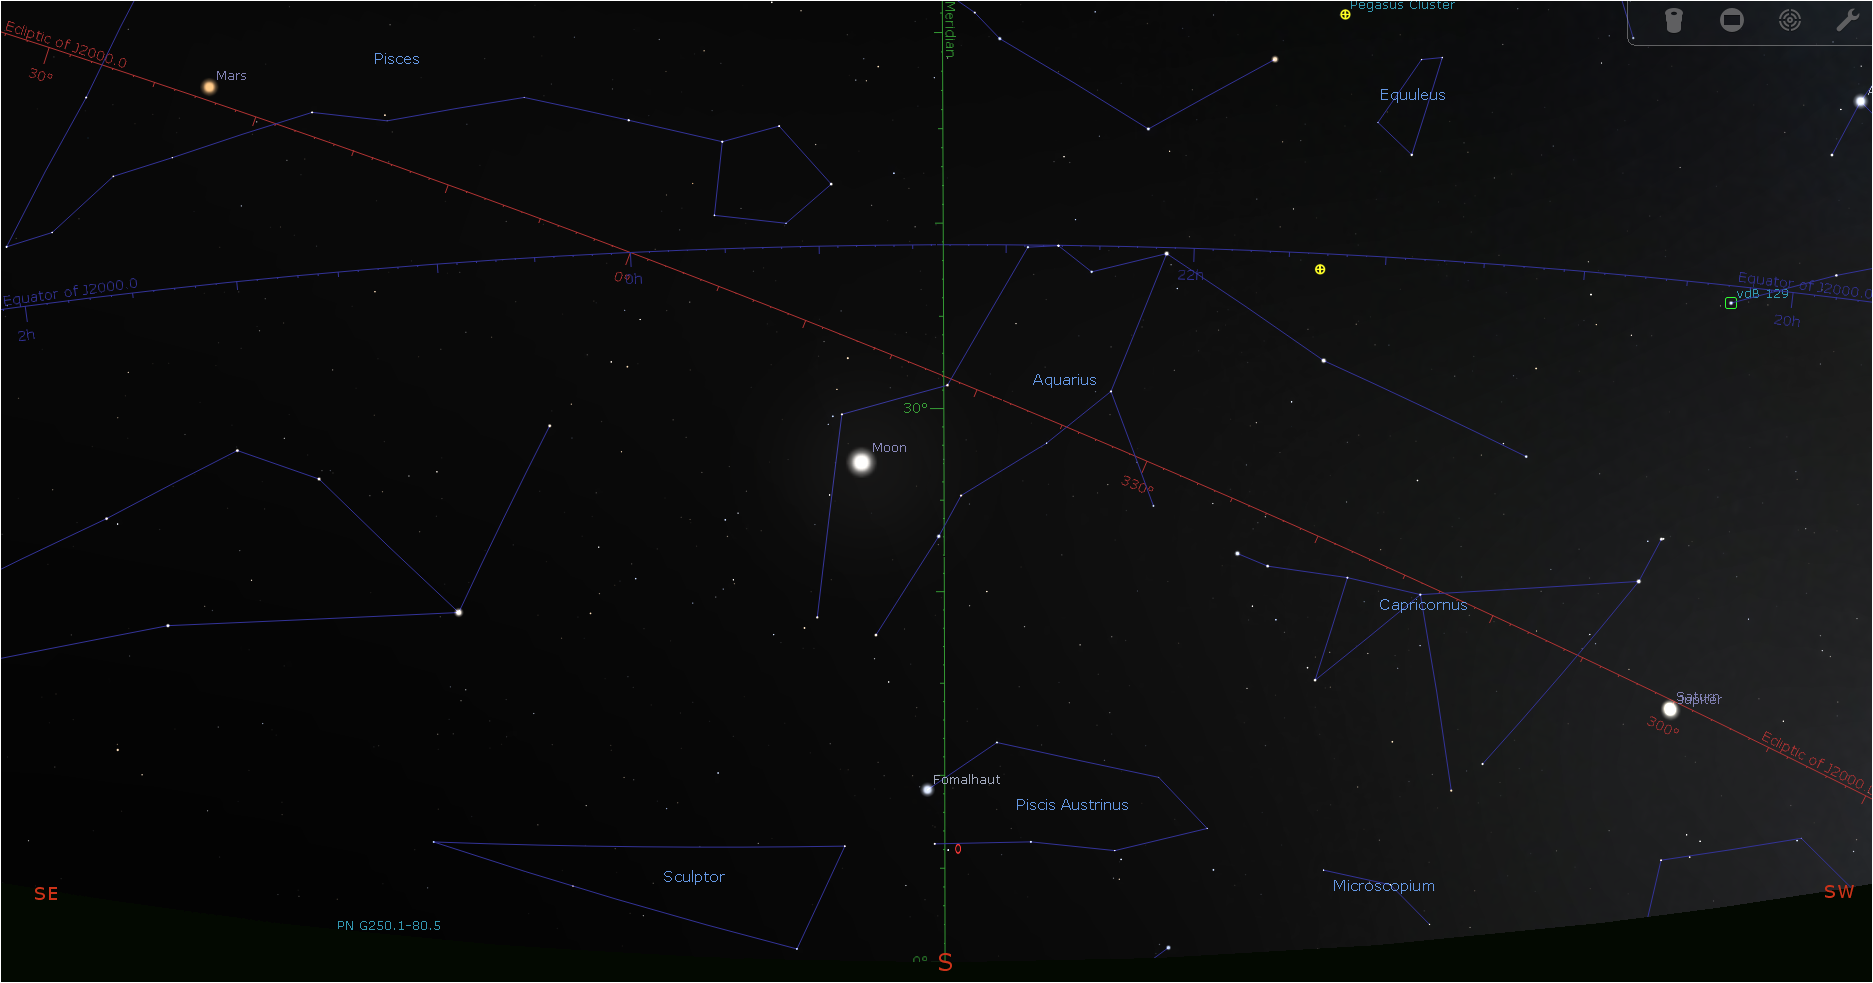
The weather forecast suggested that this was the only clear night for some time and the planets were low in the sky. So GeekGirl and I wondered if Jupiter/Saturn were visible from the front of the house to the South-West or if we were going to have to traipse over to the muddy farm fields to view the conjunction.
Conjunction View Facing South – Credit stellarium.org
Luckily for us even though they were less than 10º altitude we could see them both between two houses from the front drive. We quickly got some warm gear on and setup the binoculars and the kiddy scope (Sky-Watcher Heritage 150P Dobsonian) on a camping table.
We quickly got Jupiter/Saturn in GeekGirl’s binoculars (Celestron 20×80 SkyMaster). The pairing although not as close as they would be on the 21st still looked nice. The rings of Saturn were discernible and the four Galilean moons were visible in this modest setup and I’m sure the view would be have been better in Dave’s monster binoculars due to the aperature.
Approximate view through 20×80 Binoculars – Credit stellarium.org
In order to get the focus for the planets I used the Heritage 150P on the near half Moon (47%). The views of the craters on the terminator along with the shadows were amazing, we could see the centre peaks of many of the craters.
View via Heritage150P/Super10 eyepiece – Credit stellarium.org
I wonder what they looked like in Dave’s Sky-Watcher SkyMax 180 Pro ?
Our next-door neighbour popped out and we invited him to view the planets and the Moon. I think he was impressed but everyone reacts differently to the experience.
Once we had both wondered over the Moon, checking out the mountain ranges and the changing shades of grey for the Mares we turned to viewing the conjunction in the 150P using the standard eyepieces (SW Super25 & Super10) that came with the scope.
View of Conjunction through Heritage150P – Credit stellarium.org
We could see all four Galilean moons with Io being placed close to Jupiter’s limb. The division in Saturn rings was visible and GeekGirl could glimpse Titan so she was happy. All in all a pleasant experience, which is rare in the current human malware situation. I finished off the evening with a Brewdog IPA ….. bliss !
Dave Shave-Wall viewing
Start time 3pm – End time 6pm
After deciding that I could not get the conjunction of Saturn and Jupiter at the new house, I spent the best part of 40 minutes packing up the travel scope to travel locally to view the conjunction. I set off to view about 1 mile away across a field with allow horizon. I took my Mak180 without the Barlow and the ZWO290MC on the Paramount MyT with the Berlebach tripod. On arriving at the side of the road on the narrow country lane in North Hampshire, I was just about to setup when I realised not only had I forgot the travel car battery, but also the laptop. After a few expletives and a good old English, “I cannot possibly believe I did this, oh well carry on”, I jumped back on the Landrover and set off back home to retrieve the important parts. On arriving back home I ran up the garden to the shed for the battery, grabbed the laptop and jumped back in the car as time was against me for capturing the pairing before they set below the local horizon about 6pm. It was not 4pm.
I arrived back at the field and quickly set about fitting together the mobile setup for the 2nd time!
Field with a view
This time I settled the tripod and mount up in quick time, slide the Mak180 with its imaging train into the Losmandy Versa plate and connected the Mac. I manually aligned on Jupiter which by this time I could see with my naked eye, synced the scope and started the imaging software. After a few back fourths I found Jupiter, however Saturn was nowhere to be seen. It soon became apparent that my field of view FoV indicator on Sky Safari 4 was not accurate and indeed both planes on this particular day would not fit in! So rather than waste the occasion I shot some view of Jupiter and then slewed to Saturn for the same.
Mak180 ready to slew
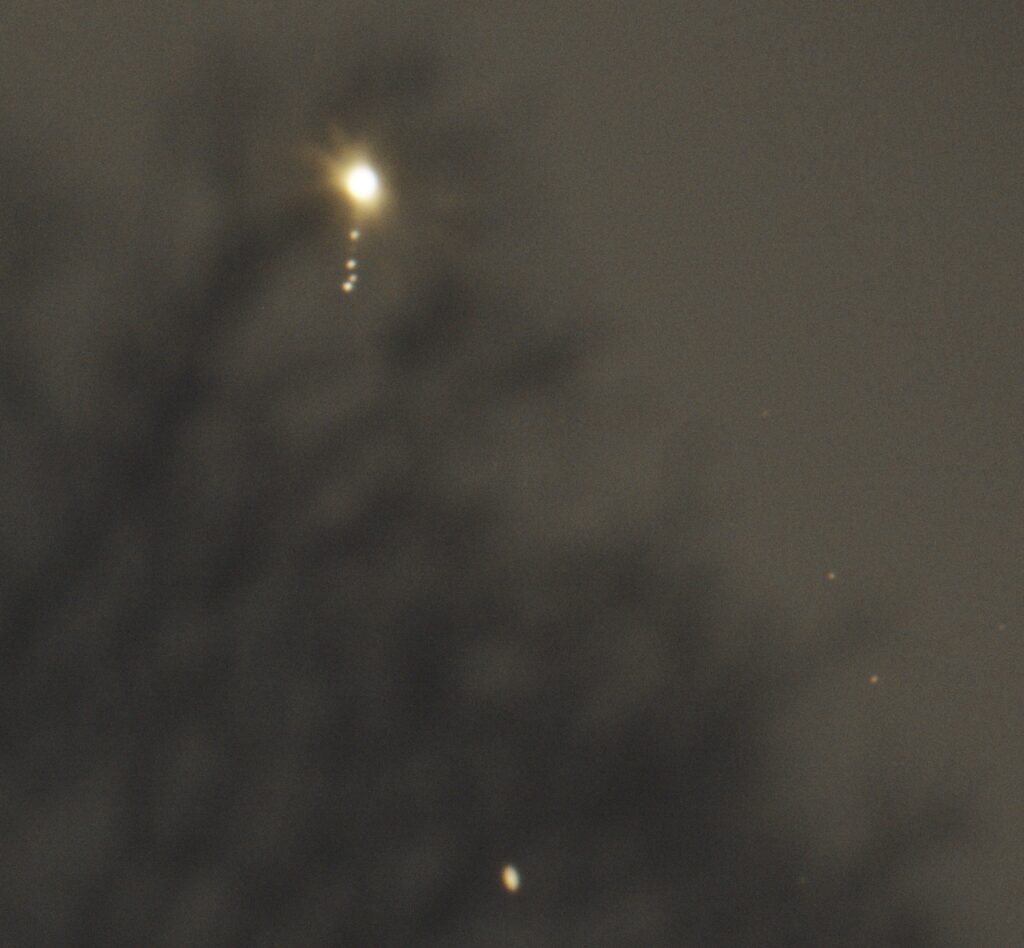
I then packed the setup away, but before heading off grabbed the Canon 6D with the 100-300mm lens and grabbed a few exposures. My first attempts were not good, having not used the camera for some time and forgetting how to set the correct exposure. After a while I grabbed a single good frame, over exposed to see the Galilean satellites.
Jupiter and Saturn near conjunction Canon 6D 100mmJupiter and Saturn near conjunction Canon 6D 300mmJupiter and Saturn near conjunction Canon 6D 300mm Cropped
I would attempt another go with the larger FoV Esprit 120 a few nights later.
So during the ongoing Human Malware situation we have been concentrating on imaging asteroids, comets and more recently performing exoplanet measurements on the 12inch RC than long exposure deep sky astrophotography.
Astronomy is one those hobbies that is for most part is sole activity for the dark early hours of the morning and these days is usually done remotely. It was therefore disappointing that when one of the team went to use the Sky-Watcher Esprit 120ED for a night of astrophotography and found that he was unable to open the Optec Alnitak Flip-Flat. As the lockdown and travel restrictions progressed due to the initial wave of the human malware situation the issue was soon forgotten as we continued our focus to performing exoplanet observations on the 12inch RC for the ESA Ariel Mission.
Now that IMT3 has been decommissioned ready for it to be reborn as IMT3b at it’s new rural darker sky site I decided to take the opportunity to retrieve the FlipFlat and diagnose the issue at home on my desk.
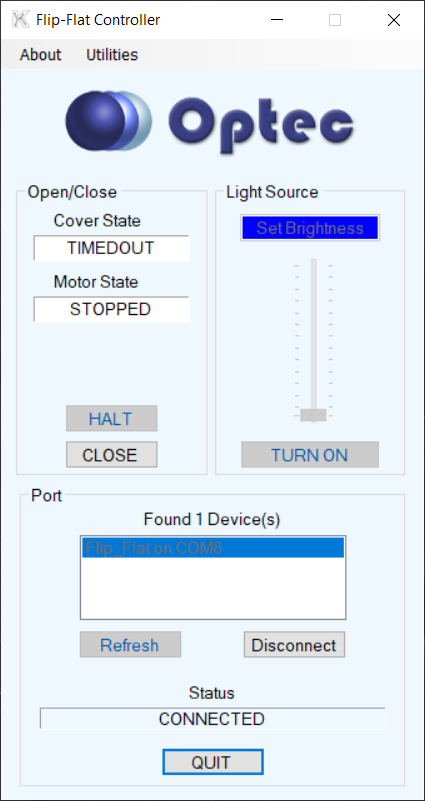
Using the Alnitak controller software, I could hear the motor running but it never seemed to complete the close or open. All it continued to display was the TIMEDOUT message as shown below.
Timing out !
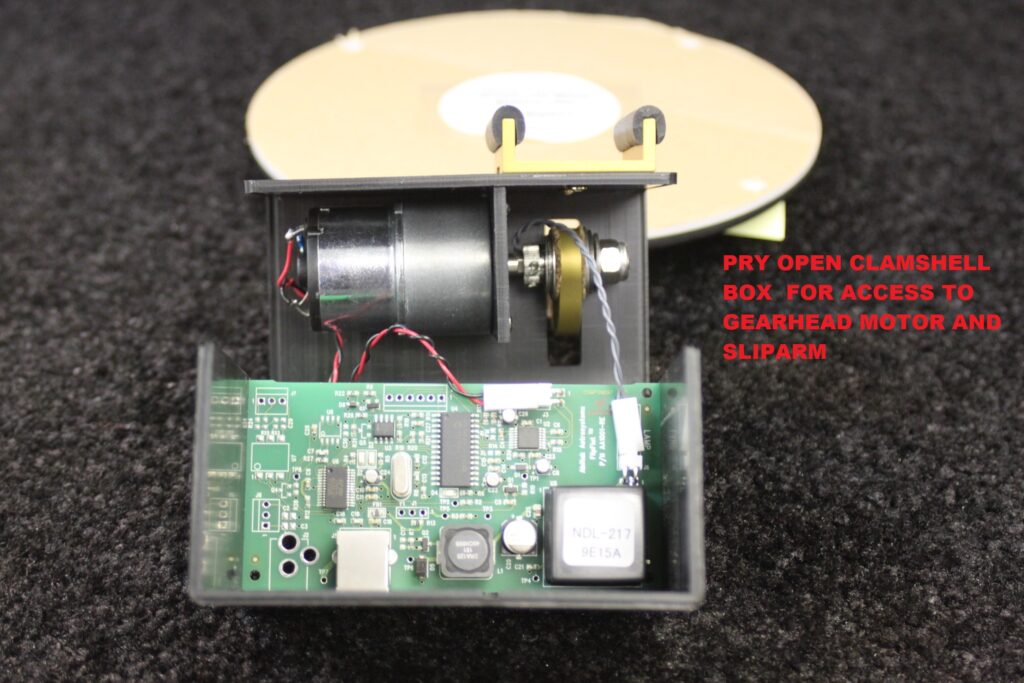
I sent an email off to the vendor I purchased it from but after a month I got no reply. In the hope I would not be left with an expensive paperweight I reached out to Optec. After quite a few weeks of getting no reply I was pleasantly surprised to receive a message from Jeff Dickerman (President) of Optec. Jeff apologised for not responding earlier and offered to help resolving the issue. The error message seemed to be a known issue and it was generally an easy resolution which required taking the box apart. Jeff sent me instructions on how to take the unit apart and fix the problem.
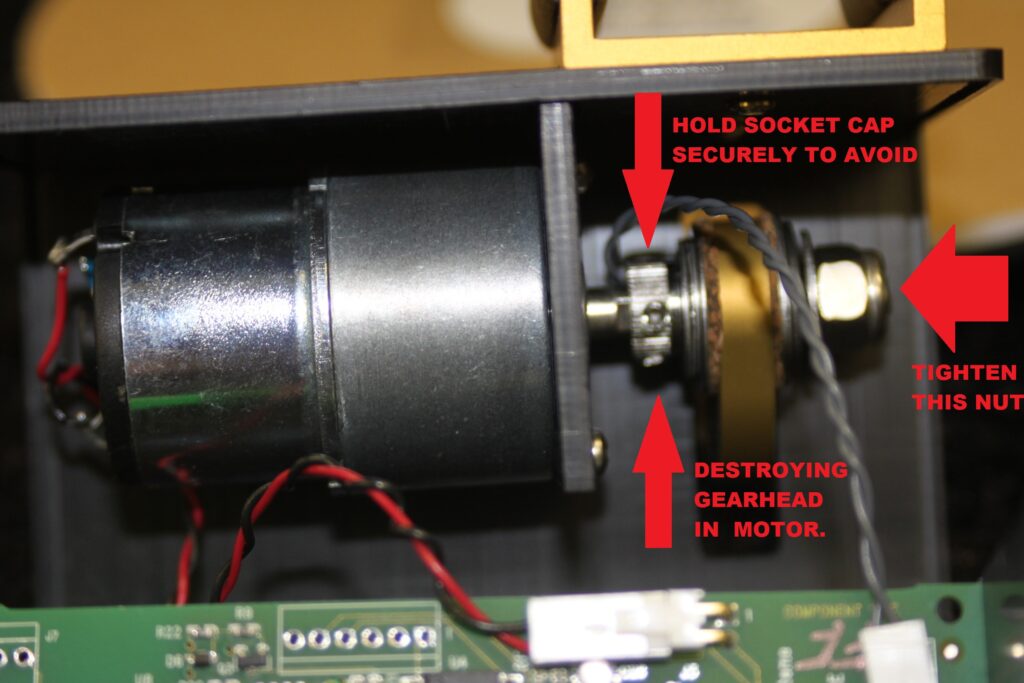
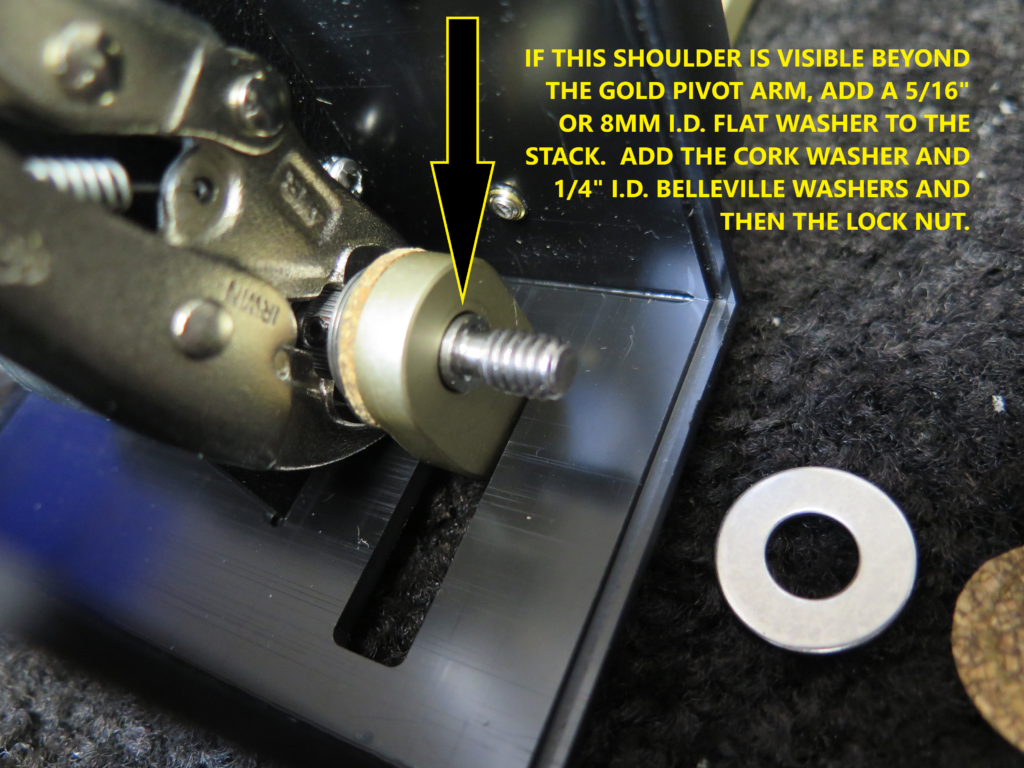
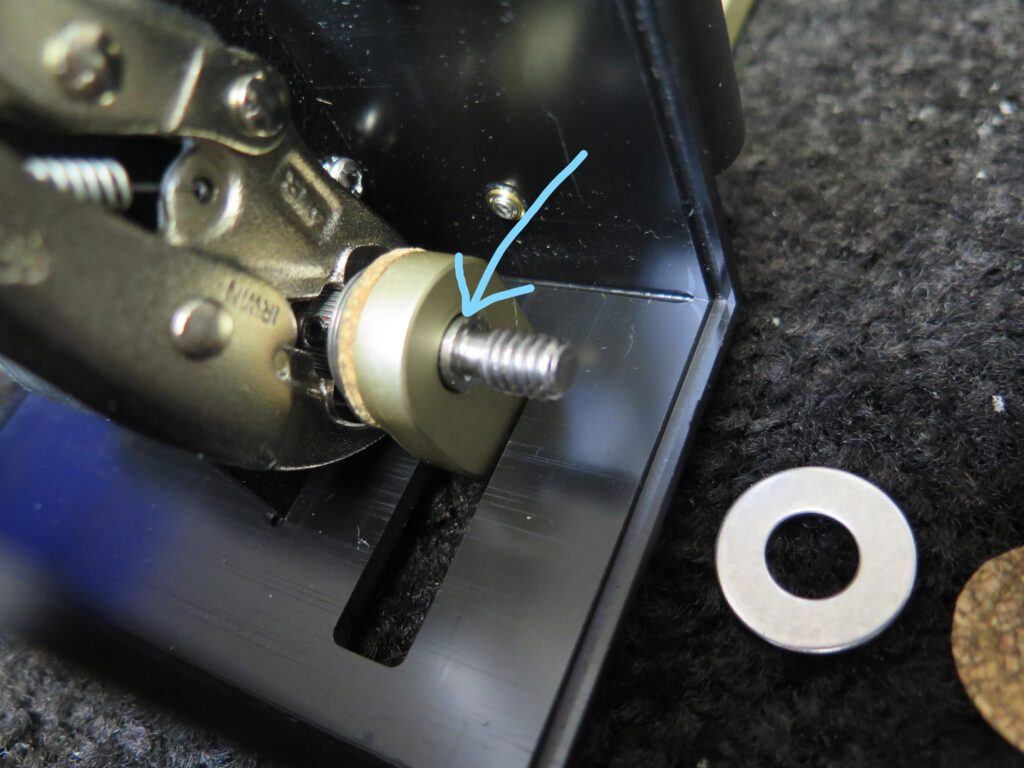
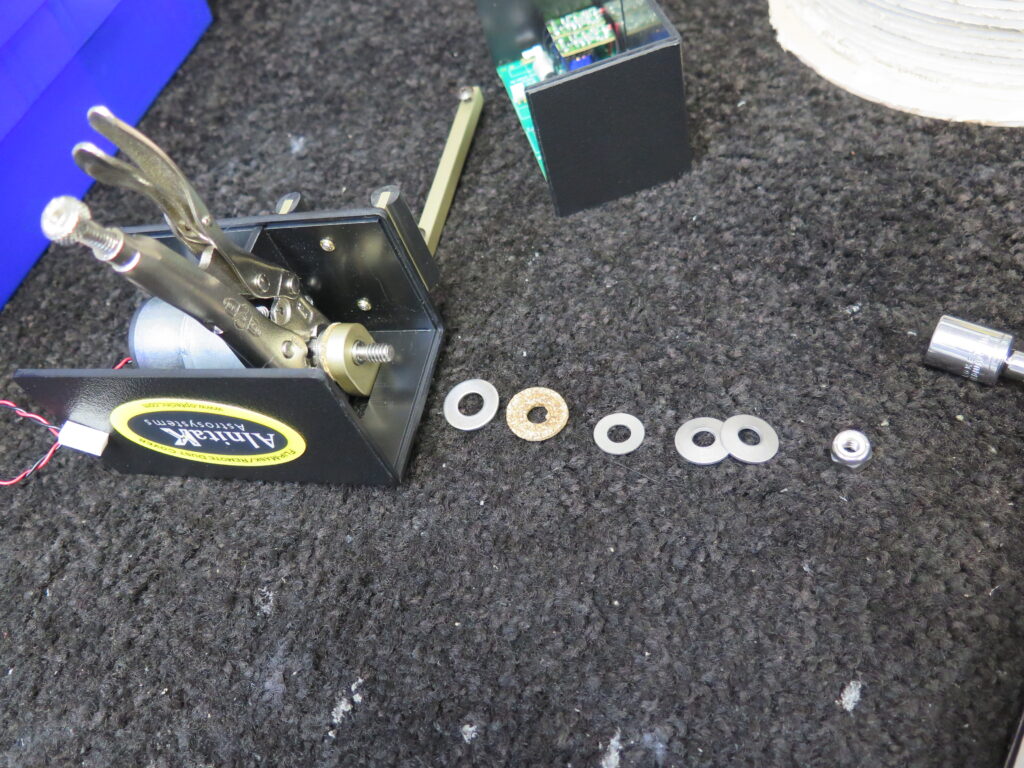
You’ll see the motor is attached to an internal wall with a modified shoulder screw and stack of Belleville washers. These spring washers are used to allow the arm to slip when someone grabs the lamp and physically tries to force the cover closed. Unfortunately they can also allow the arm to slip during an open or close operation which leads to that dreaded “TIMED OUT” message. Optec have redesigned the stack a bit to eliminate this issue going forward.
To correct, you might be able to adjust the washer stack by removing the lock nut and sliding off the washer stack to the pivot arm. Check carefully to see if the shoulder screw protrudes beyond the pivot arm. If so, rather than installing the cork washer next, install a 5/16” ID washer first to cover the exposed shoulder. Next add the cork washer and stack of Belleville washers. Finally screw the lock nut back in place and tighten while holding the shoulder screw near the motor (this is important to avoid breaking the internal motor gears).
Step 1 – Pry open clamshell
Step 2 – Shows what to secure
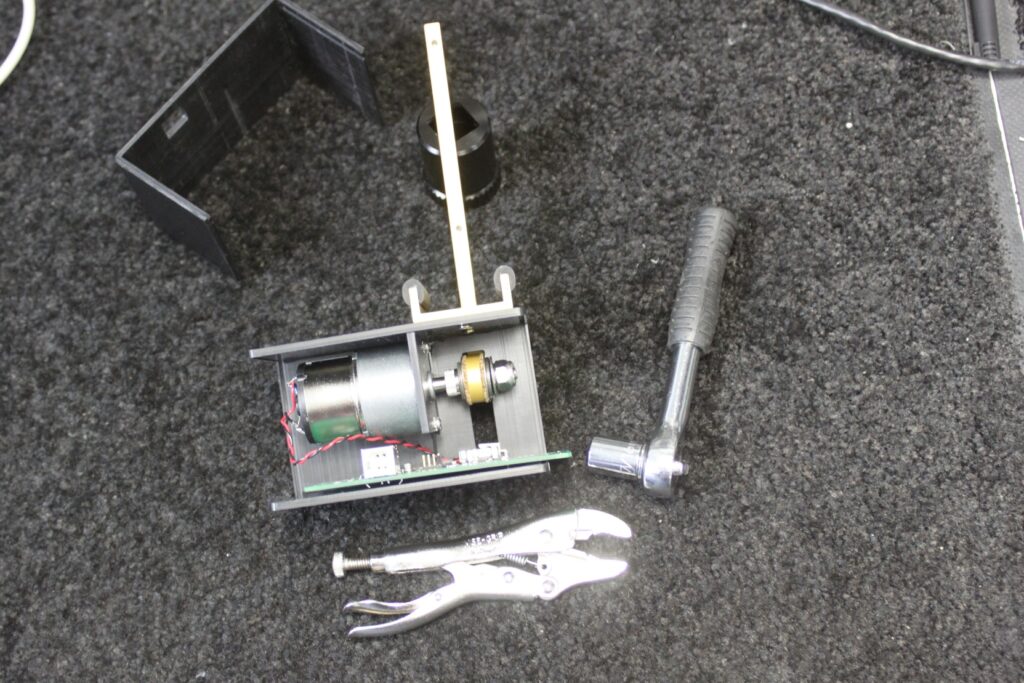
Step 3 – Tools needed
Step 4 –
Step 5 – Check shoulder visibility
Step 5a – Shoulder
Step 6 – Washer Stack
In the end I decided to courier the unit back to Optec for repair as I did not want to render my unit completely useless in case I made a mistake.
I’m extremely grateful to Jeff, Tina and the team at Optec for all there help, patience and understanding. I’m a very happy customer and the flip-flat will be rejoining the Esprit120 when the IMT relocation is complete at it’s new rural location. I can then do a Homer Simpson and annoy Dave with “Flap goes open, flap goes shut, flap goes open ……”